
Has anyone built wood block jacks aka "cribbing blocks"

 03-18-2012, 12:03 AM
#23
Teching In
Thread Starter
Join Date: Nov 2010
Location: Bethlehem, PA
Posts: 24
Likes: 0
Received 0 Likes
on
0 Posts
Cool appreciate the pics. I might just end up doing this and stack wood instead of assembling it all together. I can see why you said to go alittle longer then 12'' that 3rd picture looks like it's cutting it pretty close lol.
03-18-2012, 11:19 AM
#24
TECH Resident
iTrader: (1)

Join Date: Mar 2009
Location: Knoxville, TN
Posts: 818
Likes: 0
Received 0 Likes
on
0 Posts

I didn't fasten them together for a few reasons:
1.) I would have to spend a lot of time to fasten them all together and not expose any hardware.
2.) Lifting a corner of the car that high at once would be unsafe. I went around and did 1-2 boards at a time. I could see the wheels moving some as I would lift one corner at a time, so for safety I only did 2-3" at a time.
3.) Storage space.
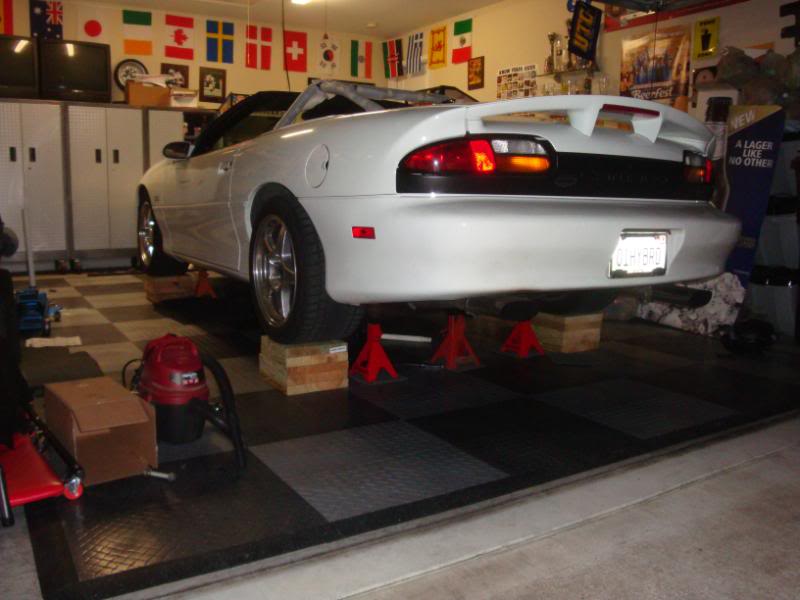
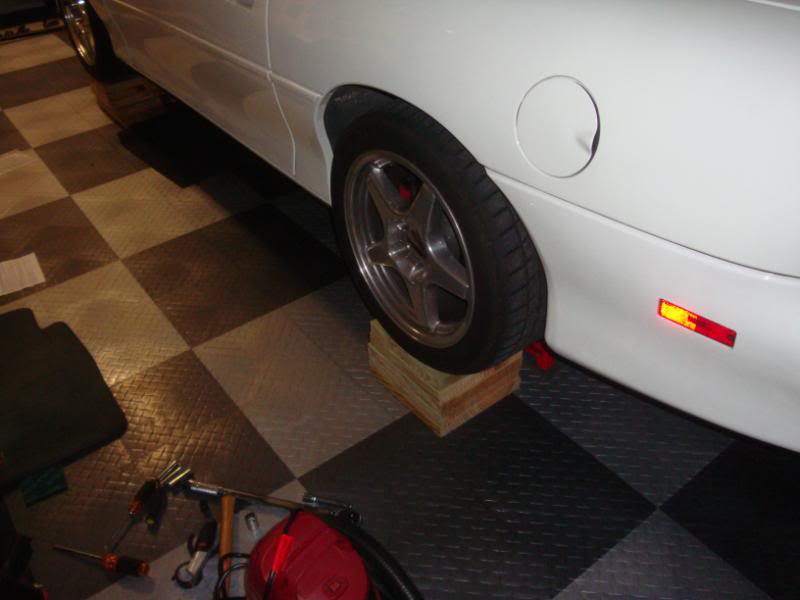
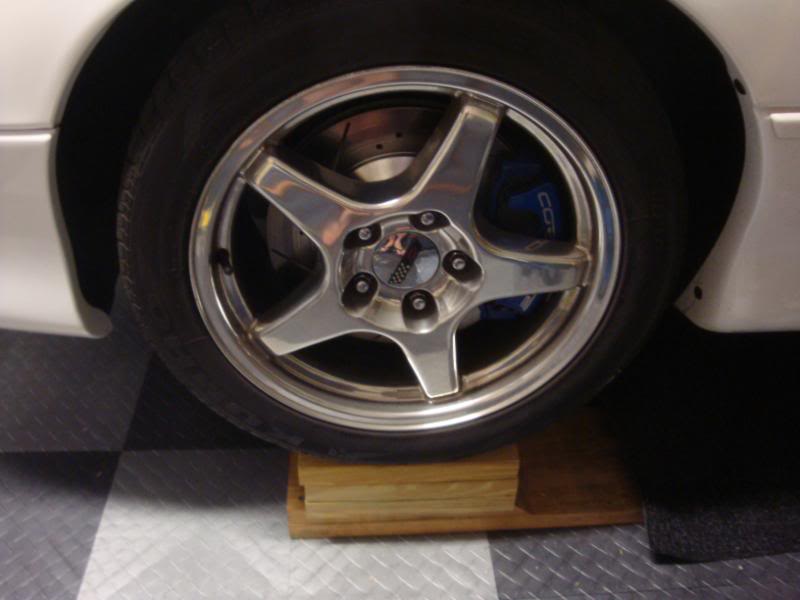
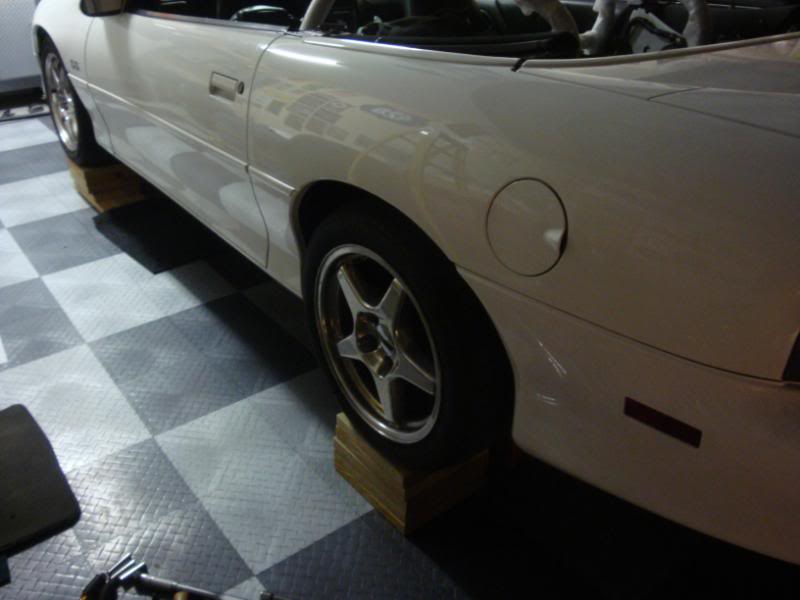
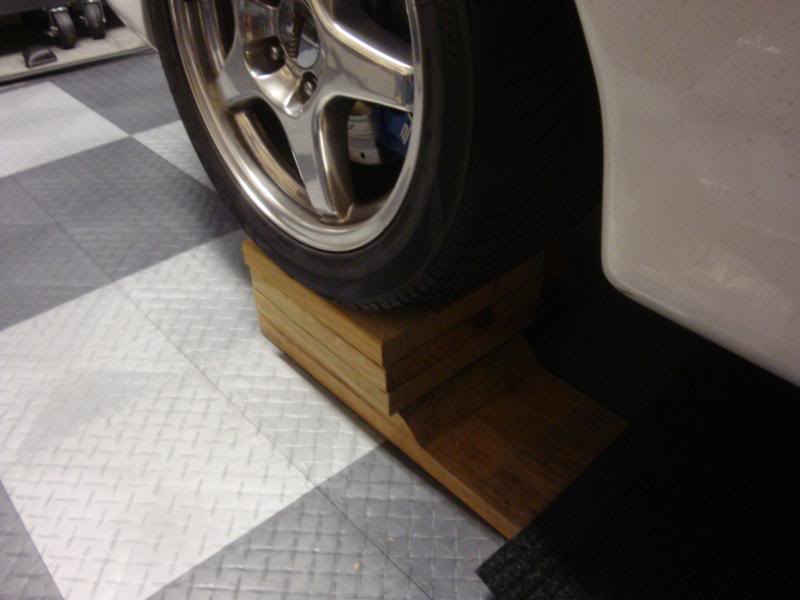
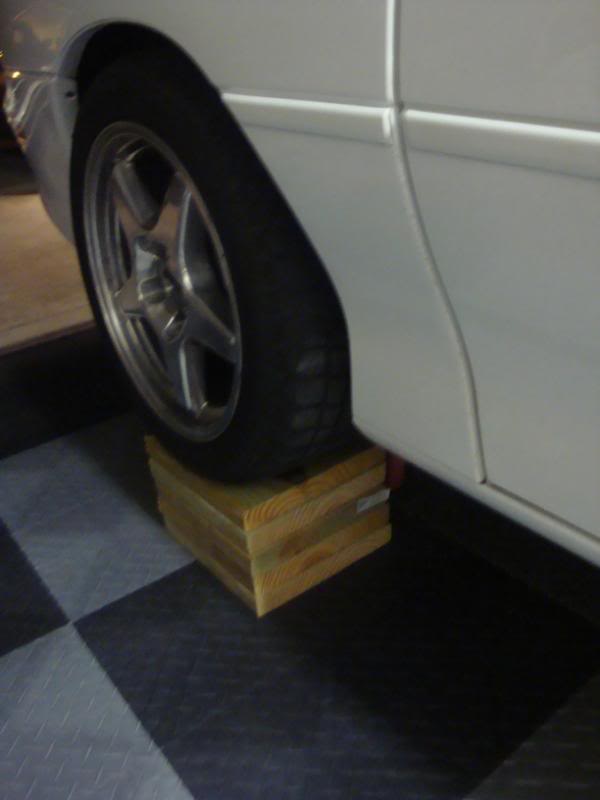
Note, the front onces are a ramp of two pieces at the bottome - this is the only way for me to get a jack under the car sicne it sits so low. I use these all the time. To get the car this high, I added 3 additional pieces to the front, 5 for the rears - which is what I just added this past month. I keep one of these ramps in the trunk at all times in case of a flat. Also note - all the jackstands you see are not under load - only the wood it. It works and between buying the wood, driving home, and jacking up the car, I got under 90 minutes in the whole thing.
1.) I would have to spend a lot of time to fasten them all together and not expose any hardware.
2.) Lifting a corner of the car that high at once would be unsafe. I went around and did 1-2 boards at a time. I could see the wheels moving some as I would lift one corner at a time, so for safety I only did 2-3" at a time.
3.) Storage space.
Note, the front onces are a ramp of two pieces at the bottome - this is the only way for me to get a jack under the car sicne it sits so low. I use these all the time. To get the car this high, I added 3 additional pieces to the front, 5 for the rears - which is what I just added this past month. I keep one of these ramps in the trunk at all times in case of a flat. Also note - all the jackstands you see are not under load - only the wood it. It works and between buying the wood, driving home, and jacking up the car, I got under 90 minutes in the whole thing.
03-23-2012, 09:24 PM
#25
TECH Resident
iTrader: (16)
Join Date: Dec 2011
Location: albany ny
Posts: 918
Likes: 0
Received 0 Likes
on
0 Posts
I didn't fasten them together for a few reasons:
1.) I would have to spend a lot of time to fasten them all together and not expose any hardware.
2.) Lifting a corner of the car that high at once would be unsafe. I went around and did 1-2 boards at a time. I could see the wheels moving some as I would lift one corner at a time, so for safety I only did 2-3" at a time.
3.) Storage space.
Note, the front onces are a ramp of two pieces at the bottome - this is the only way for me to get a jack under the car sicne it sits so low. I use these all the time. To get the car this high, I added 3 additional pieces to the front, 5 for the rears - which is what I just added this past month. I keep one of these ramps in the trunk at all times in case of a flat. Also note - all the jackstands you see are not under load - only the wood it. It works and between buying the wood, driving home, and jacking up the car, I got under 90 minutes in the whole thing.
03-24-2012, 01:33 PM
#26
TECH Resident
iTrader: (1)
Join Date: Mar 2009
Location: Knoxville, TN
Posts: 818
Likes: 0
Received 0 Likes
on
0 Posts
Fastening would create #3 for me - storage issues. Being individual is easier for me.
As for lifting, I think lifting 1-4 " at a time is safer than 8." When lifting, I could SEE the wheels moving on the other corners. If I built these boards 2' in length, then no worry, but with only a few inches to spare per side, rolling was nothing something I was comfortable with. Thus I jacked one end up a few inches, moved to the next corner, and repeated will all wheels had 5 board under them.
I also didn't mount them all together since I want some adjustability in my height without it being a hassle. It fits me and I have less than 2 hours in the set-up, so I'm happy.
04-01-2012, 07:41 PM
#27
TECH Resident
iTrader: (16)
Join Date: Dec 2011
Location: albany ny
Posts: 918
Likes: 0
Received 0 Likes
on
0 Posts
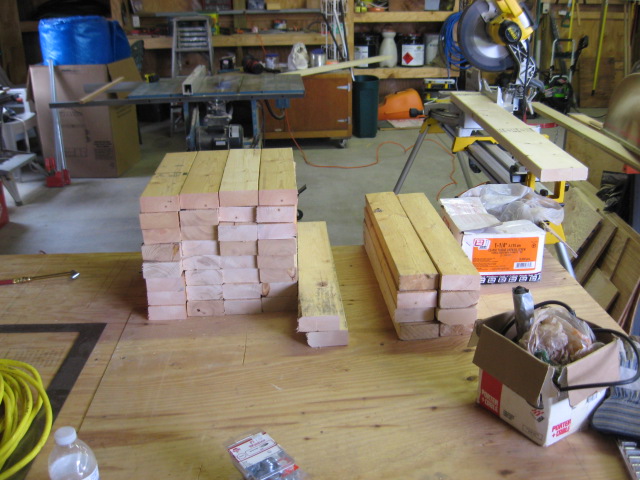
alright well i got mine all finished up today and i added extra supports since i used reg "softwood" lumber from home depot. just cheap framing 2x4s out of pine. i have about 15 pics to show each step. i wood glued everything and pre drilled every hole before scrweing them together. they did not have 2x16s and even if they did it wouldnt be a true 16" wide board anyways so i bought a 2x12@16ft and a 2x6@16ft, ripped the 2x6 down to 5 inches on my table saw, and that gave me the perfect size for the top i needed.
04-01-2012, 07:52 PM
#28
TECH Resident
iTrader: (16)
Join Date: Dec 2011
Location: albany ny
Posts: 918
Likes: 0
Received 0 Likes
on
0 Posts
let the pics begin.
let the cutting begin.
building the bases.
attaching the 2x12 on the base.
with the 2x12 and 2x6 on base.
adding the extra supports in the middle of the bases.
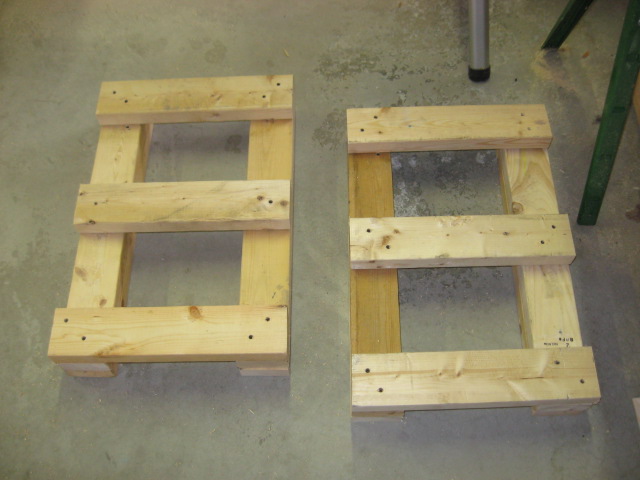
all of the completed bases with extra supports.
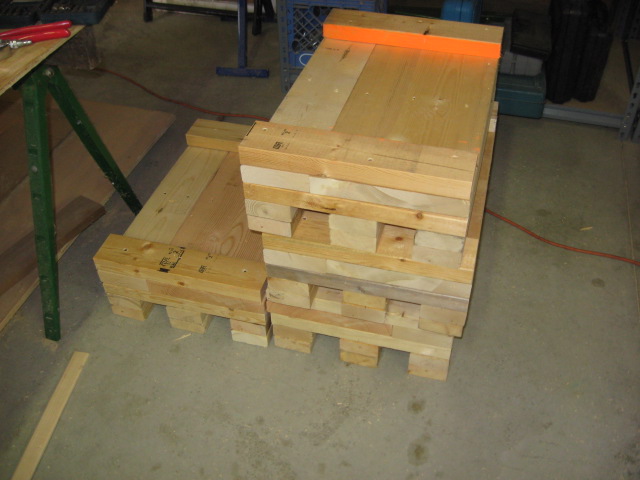
finished view of the bottom bases with supports for top pieces.
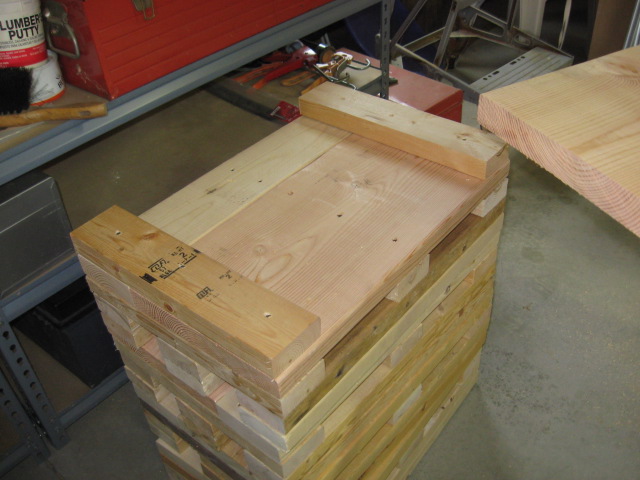
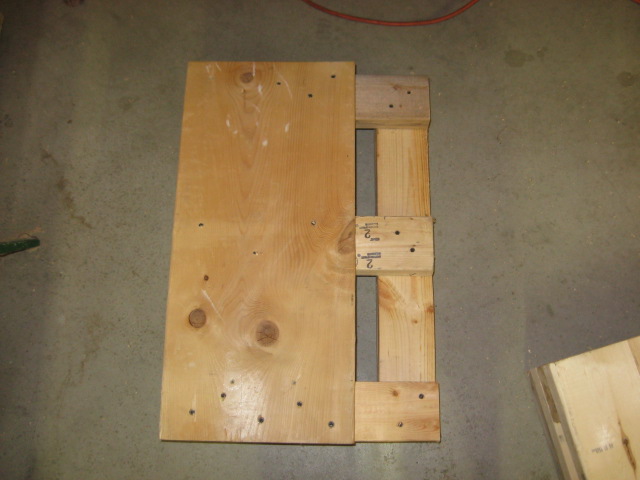
bottom view of the top piece.

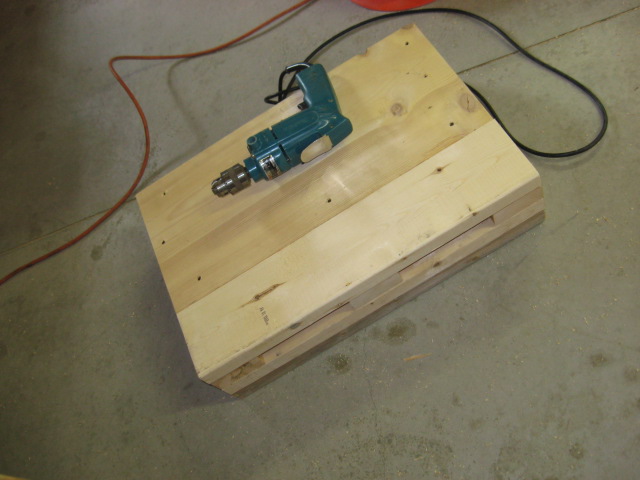
here is what one complete top and bottom looks like.
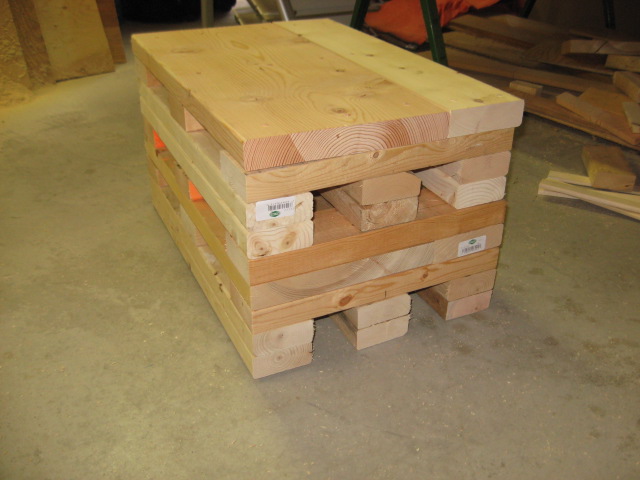
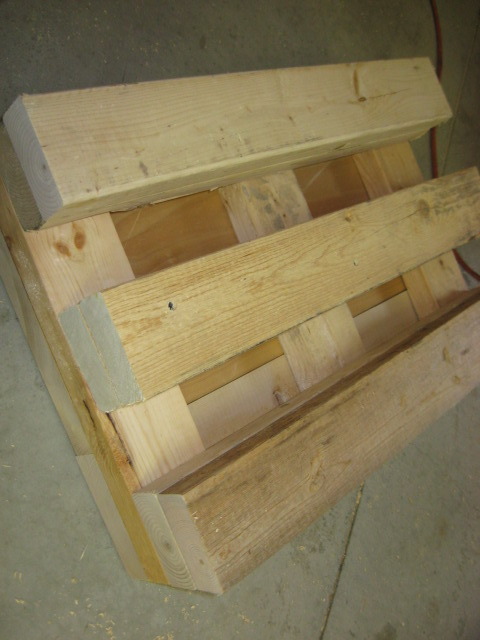
and all 4 completed!!

let the cutting begin.
building the bases.
attaching the 2x12 on the base.
with the 2x12 and 2x6 on base.
adding the extra supports in the middle of the bases.
all of the completed bases with extra supports.
finished view of the bottom bases with supports for top pieces.
bottom view of the top piece.
here is what one complete top and bottom looks like.
and all 4 completed!!
04-20-2012, 10:14 AM
#30
TECH Resident
iTrader: (16)
Join Date: Dec 2011
Location: albany ny
Posts: 918
Likes: 0
Received 0 Likes
on
0 Posts
04-20-2012, 12:41 PM
#31
lol do it, ive been preaching on here non stop how amazing these are and how much they helped me out. sooooo much room under the car, check out this post of my projects i did last week https://ls1tech.com/forums/suspensio...y-tomorow.html