Read this if you need to saw out your front lower arm bushing!
 06-29-2013, 05:13 PM
#1
On The Tree
Thread Starter
iTrader: (1)

Join Date: Jun 2011
Location: Amherst, NH
Posts: 191
Likes: 0
Received 0 Likes
on
0 Posts
I, like many other people, have had the nasty problem of the vertical bushing in the front lower a-arm become seized solid inside the bushing, and no amount of hammering, deep creep, heat, or pressure will pop the bolt through. You're left with one choice: Cut it out.
Okay! After extensive trial and error with this, I have concluded the following:
If you are going to sawzall the bushings, USE A DIAMOND GRIT BLADE. It's made for cast iron, but it chews through the bushing and bolt SIGNIFICANTLY faster than ANY premium metal blade I tried. Lenox Gold Lazer, Milwaukee Torch, Dewalt, etc. all round off very quick, even when using cutting oil. You'll go through $50 of these blades to do the job of two $15 diamond blades, and spend three or four times the duration to do it.
I used the Lenox brand diamond grit blade. It's available at Lowe's. Keeping the blade cooled will prolong its life. Cutting oil (found in the plumbing section in a lot of places, for some reason) and breaks every so often to re-oil and let the blade cool helps.
I made my cuts on the inside of the top of the bushing (at it's narrowest) and then through the bolt only at the bottom (you gain play after the top cut). My K-Member was unharmed, save for a little bit of knock from the tip of the blade.
Why didn't I use a cutting torch?
I had no access to one, nor the experience to cut in there without damaging the k-member bracket which contacts on the outside of the top and bottom of the bushing. Damage the K-Member and you're doing a MUCH larger job of replacing or repairing it.
I hope this helps anyone looking at this job in the future. I wish I had known what I know now, it would have saved me a lot of time, travel, and frustration.
Tools you will need, or have handy:
Sawzall (Reciprocating saw)
LENOX diamond grit cast-iron sawzall blade x2 (or x4 for both sides, best to be prepared)
Cutting oil
Crowbar to pry with
Hammer and a chisel edge to knock parts apart.
A light source
(and everything in the wheel well removed out of the way so you can get a clear shot. I recommend removing the ABS sensor wiring entirely from the lower arm.)
Last edited by szalkerous; 06-30-2013 at 03:48 PM.
 06-30-2013, 03:44 PM
#2
On The Tree
Thread Starter
iTrader: (1)
Join Date: Jun 2011
Location: Amherst, NH
Posts: 191
Likes: 0
Received 0 Likes
on
0 Posts
I wanted to add some photos of the finished cuts, just for anyone's reference:
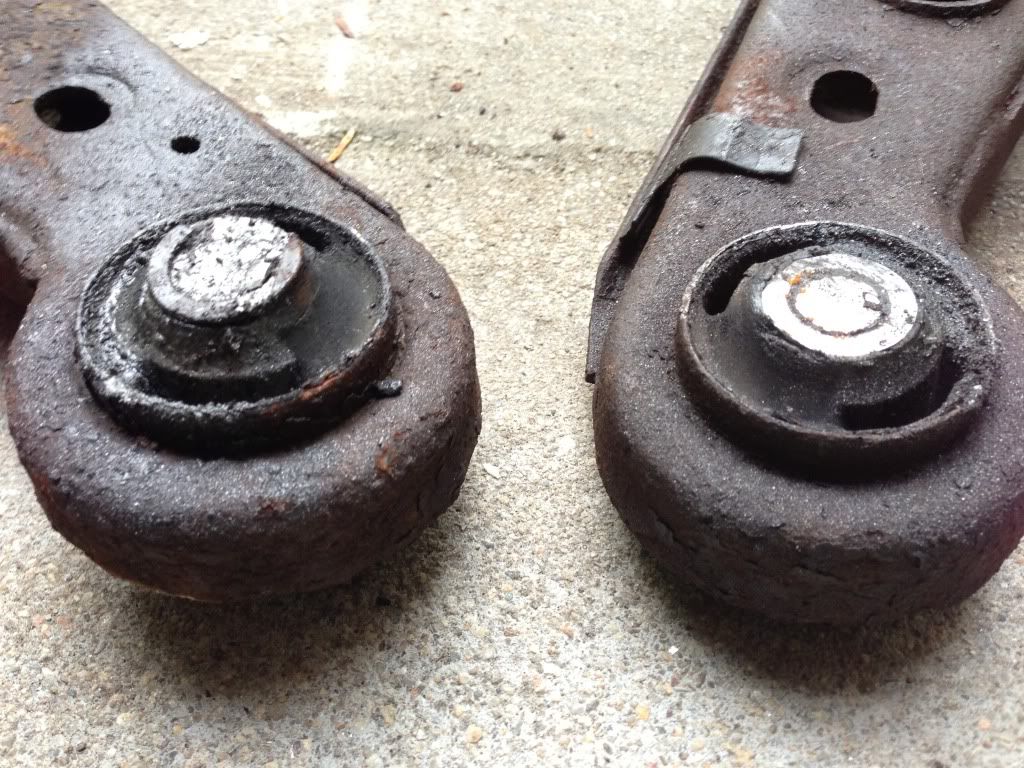
Up close of both cuts. You can see the amount of hardened steel material you need to cut.
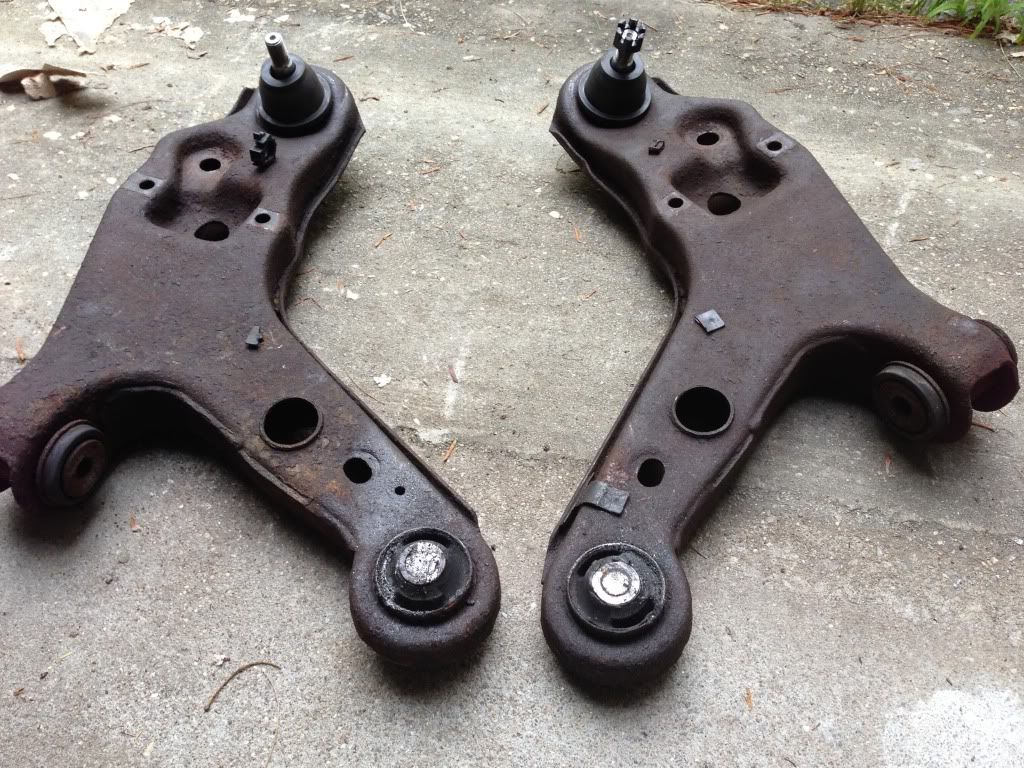
A long shot of both a-arms, from the top
It took two and a half Lenox diamond blades to complete each side. Since they are long, you cut the top with one portion of the blade, then reuse a different section of blade material to cut just the bolt on the bottom. You will know the blade has dulled it's cutting edge when the progress stops, and the blade edge is shiny. Using cutting oil and force is mandatory. Careful not to cut into the K-Member.
Up close of both cuts. You can see the amount of hardened steel material you need to cut.
A long shot of both a-arms, from the top
It took two and a half Lenox diamond blades to complete each side. Since they are long, you cut the top with one portion of the blade, then reuse a different section of blade material to cut just the bolt on the bottom. You will know the blade has dulled it's cutting edge when the progress stops, and the blade edge is shiny. Using cutting oil and force is mandatory. Careful not to cut into the K-Member.
07-03-2013, 05:12 AM
#3
Staging Lane

Join Date: Apr 2013
Posts: 65
Likes: 0
Received 0 Likes
on
0 Posts
I haven't had to do anything with this yet... So idk how these attach. But is there going to still be a threaded portion that's in the subframe? Or does the part in the subfram just through-bolt and use a nut under the control arm?
07-03-2013, 08:48 AM
#4
On The Tree
iTrader: (8)

Join Date: Mar 2011
Location: Maplewood, MN
Posts: 149
Likes: 0
Received 0 Likes
on
0 Posts
Hey sorry to thread jack, was going to start a thread but you have the control arms out and I need a measurement if you could do so. I assume those are out of your 99 Camaro. Can you measure from ball joint center to rear control arm bolt center. I have BMR lower control arms and in the directions it says to measure old arms, well its kinda hard when you sell the stuff before you get these. It has an adjustable rod end which is why I need the measurement. If anyone else has access and wants to measure that would be helpful. Thanks
[IMG]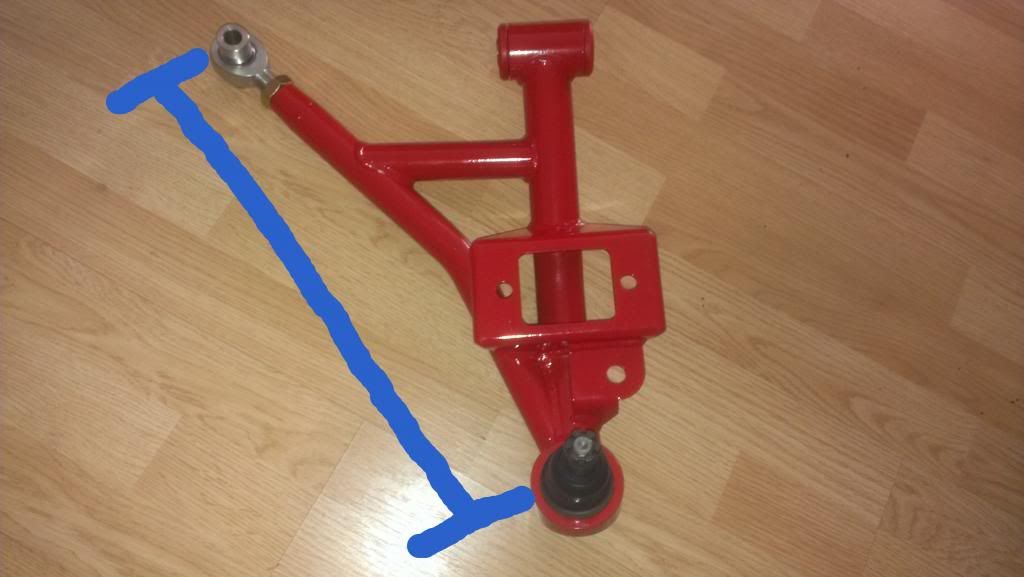 [/IMG]
[IMG]
 [/IMG]
07-05-2013, 11:05 AM
[/IMG]
07-05-2013, 11:05 AM
#6
TECH Junkie
iTrader: (17)
Join Date: Aug 2006
Location: Rapid City, SD
Posts: 3,161
Likes: 0
Received 0 Likes
on
0 Posts

I got pretty lucky with mine. I just replaced my control arm bushings a couple months ago, when my car was about 120k miles. The bolts came right out easily, getting the bushing out of the control arm was much more difficult that required a lot of work with an air chisel.
03-22-2022, 08:13 PM
#7
Registered User

Join Date: Mar 2022
Posts: 1
Likes: 0
Received 0 Likes
on
0 Posts
I, like many other people, have had the nasty problem of the vertical bushing in the front lower a-arm become seized solid inside the bushing, and no amount of hammering, deep creep, heat, or pressure will pop the bolt through. You're left with one choice: Cut it out.
Okay! After extensive trial and error with this, I have concluded the following:
If you are going to sawzall the bushings, USE A DIAMOND GRIT BLADE. It's made for cast iron, but it chews through the bushing and bolt SIGNIFICANTLY faster than ANY premium metal blade I tried. Lenox Gold Lazer, Milwaukee Torch, Dewalt, etc. all round off very quick, even when using cutting oil. You'll go through $50 of these blades to do the job of two $15 diamond blades, and spend three or four times the duration to do it.
I used the Lenox brand diamond grit blade. It's available at Lowe's. Keeping the blade cooled will prolong its life. Cutting oil (found in the plumbing section in a lot of places, for some reason) and breaks every so often to re-oil and let the blade cool helps.
I made my cuts on the inside of the top of the bushing (at it's narrowest) and then through the bolt only at the bottom (you gain play after the top cut). My K-Member was unharmed, save for a little bit of knock from the tip of the blade.
Why didn't I use a cutting torch?
I had no access to one, nor the experience to cut in there without damaging the k-member bracket which contacts on the outside of the top and bottom of the bushing. Damage the K-Member and you're doing a MUCH larger job of replacing or repairing it.
I hope this helps anyone looking at this job in the future. I wish I had known what I know now, it would have saved me a lot of time, travel, and frustration.
Tools you will need, or have handy:
Sawzall (Reciprocating saw)
LENOX diamond grit cast-iron sawzall blade x2 (or x4 for both sides, best to be prepared)
Cutting oil
Crowbar to pry with
Hammer and a chisel edge to knock parts apart.
A light source
(and everything in the wheel well removed out of the way so you can get a clear shot. I recommend removing the ABS sensor wiring entirely from the lower arm.)
Okay! After extensive trial and error with this, I have concluded the following:
If you are going to sawzall the bushings, USE A DIAMOND GRIT BLADE. It's made for cast iron, but it chews through the bushing and bolt SIGNIFICANTLY faster than ANY premium metal blade I tried. Lenox Gold Lazer, Milwaukee Torch, Dewalt, etc. all round off very quick, even when using cutting oil. You'll go through $50 of these blades to do the job of two $15 diamond blades, and spend three or four times the duration to do it.
I used the Lenox brand diamond grit blade. It's available at Lowe's. Keeping the blade cooled will prolong its life. Cutting oil (found in the plumbing section in a lot of places, for some reason) and breaks every so often to re-oil and let the blade cool helps.
I made my cuts on the inside of the top of the bushing (at it's narrowest) and then through the bolt only at the bottom (you gain play after the top cut). My K-Member was unharmed, save for a little bit of knock from the tip of the blade.
Why didn't I use a cutting torch?
I had no access to one, nor the experience to cut in there without damaging the k-member bracket which contacts on the outside of the top and bottom of the bushing. Damage the K-Member and you're doing a MUCH larger job of replacing or repairing it.
I hope this helps anyone looking at this job in the future. I wish I had known what I know now, it would have saved me a lot of time, travel, and frustration.
Tools you will need, or have handy:
Sawzall (Reciprocating saw)
LENOX diamond grit cast-iron sawzall blade x2 (or x4 for both sides, best to be prepared)
Cutting oil
Crowbar to pry with
Hammer and a chisel edge to knock parts apart.
A light source
(and everything in the wheel well removed out of the way so you can get a clear shot. I recommend removing the ABS sensor wiring entirely from the lower arm.)
Thanks again
Trending Topics
04-19-2023, 10:40 AM
#8
Registered User

Join Date: Apr 2023
Posts: 1
Likes: 0
Received 0 Likes
on
0 Posts
I, like many other people, have had the nasty problem of the vertical bushing in the front lower a-arm become seized solid inside the bushing, and no amount of hammering, deep creep, heat, or pressure will pop the bolt through. You're left with one choice: Cut it out.
Okay! After extensive trial and error with this, I have concluded the following:
If you are going to sawzall the bushings, USE A DIAMOND GRIT BLADE. It's made for cast iron, but it chews through the bushing and bolt SIGNIFICANTLY faster than ANY premium metal blade I tried. Lenox Gold Lazer, Milwaukee Torch, Dewalt, etc. all round off very quick, even when using cutting oil. You'll go through $50 of these blades to do the job of two $15 diamond blades, and spend three or four times the duration to do it.
I used the Lenox brand diamond grit blade. It's available at Lowe's. Keeping the blade cooled will prolong its life. Cutting oil (found in the plumbing section in a lot of places, for some reason) and breaks every so often to re-oil and let the blade cool helps.
I made my cuts on the inside of the top of the bushing (at it's narrowest) and then through the bolt only at the bottom (you gain play after the top cut). My K-Member was unharmed, save for a little bit of knock from the tip of the blade.
Why didn't I use a cutting torch?
I had no access to one, nor the experience to cut in there without damaging the k-member bracket which contacts on the outside of the top and bottom of the bushing. Damage the K-Member and you're doing a MUCH larger job of replacing or repairing it.
I hope this helps anyone looking at this job in the future. I wish I had known what I know now, it would have saved me a lot of time, travel, and frustration.
Tools you will need, or have handy:
Sawzall (Reciprocating saw)
LENOX diamond grit cast-iron sawzall blade x2 (or x4 for both sides, best to be prepared)
Cutting oil
Crowbar to pry with
Hammer and a chisel edge to knock parts apart.
A light source
(and everything in the wheel well removed out of the way so you can get a clear shot. I recommend removing the ABS sensor wiring entirely from the lower arm.)
Okay! After extensive trial and error with this, I have concluded the following:
If you are going to sawzall the bushings, USE A DIAMOND GRIT BLADE. It's made for cast iron, but it chews through the bushing and bolt SIGNIFICANTLY faster than ANY premium metal blade I tried. Lenox Gold Lazer, Milwaukee Torch, Dewalt, etc. all round off very quick, even when using cutting oil. You'll go through $50 of these blades to do the job of two $15 diamond blades, and spend three or four times the duration to do it.
I used the Lenox brand diamond grit blade. It's available at Lowe's. Keeping the blade cooled will prolong its life. Cutting oil (found in the plumbing section in a lot of places, for some reason) and breaks every so often to re-oil and let the blade cool helps.
I made my cuts on the inside of the top of the bushing (at it's narrowest) and then through the bolt only at the bottom (you gain play after the top cut). My K-Member was unharmed, save for a little bit of knock from the tip of the blade.
Why didn't I use a cutting torch?
I had no access to one, nor the experience to cut in there without damaging the k-member bracket which contacts on the outside of the top and bottom of the bushing. Damage the K-Member and you're doing a MUCH larger job of replacing or repairing it.
I hope this helps anyone looking at this job in the future. I wish I had known what I know now, it would have saved me a lot of time, travel, and frustration.
Tools you will need, or have handy:
Sawzall (Reciprocating saw)
LENOX diamond grit cast-iron sawzall blade x2 (or x4 for both sides, best to be prepared)
Cutting oil
Crowbar to pry with
Hammer and a chisel edge to knock parts apart.
A light source
(and everything in the wheel well removed out of the way so you can get a clear shot. I recommend removing the ABS sensor wiring entirely from the lower arm.)
Thank you for posting! Very helpful.
How much time did you spent cutting one side, please?