F-Body Rear Suspension Build
 09-04-2013, 08:08 PM
#1
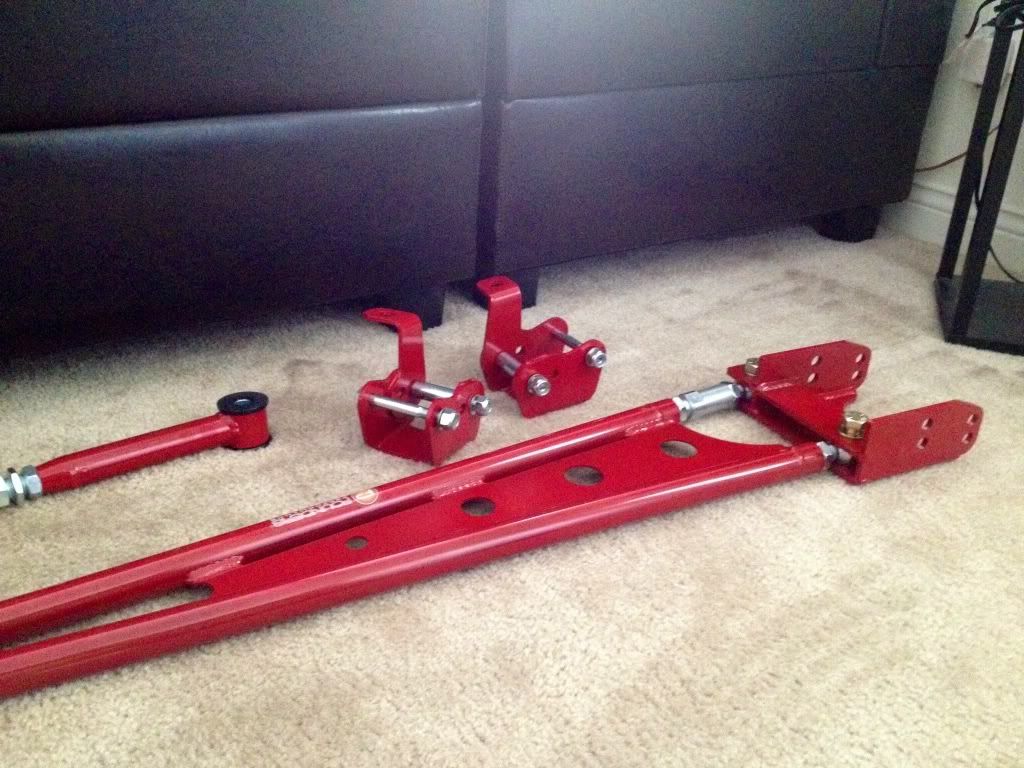
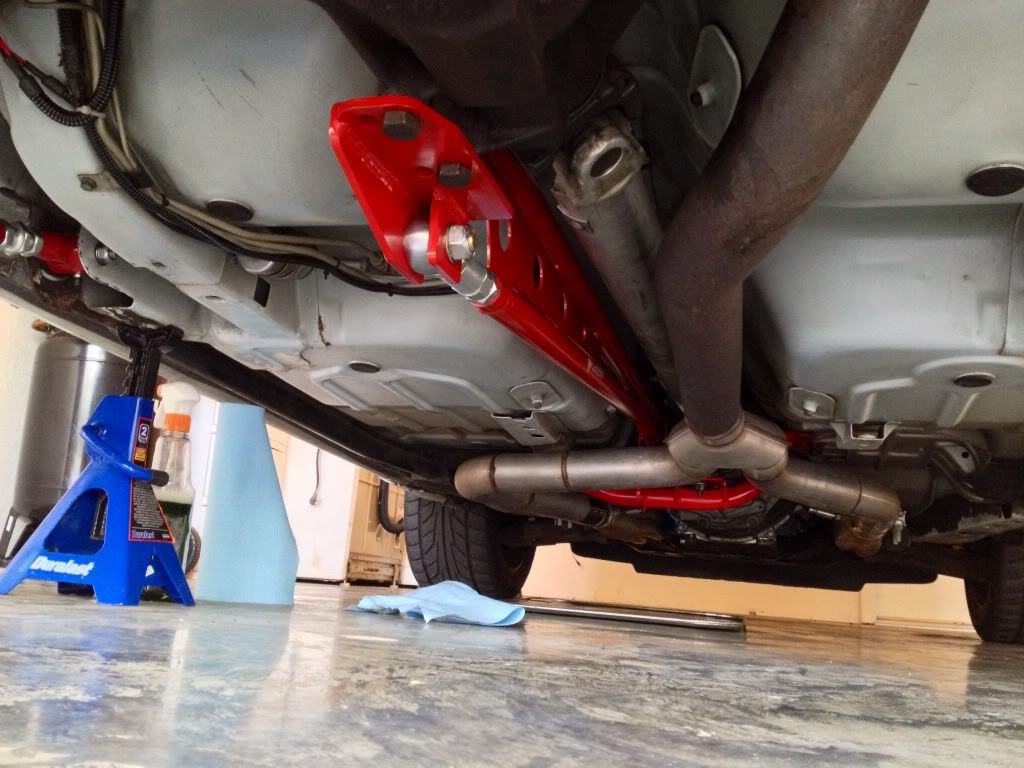
Almost done with my rear suspension build!
Already on the car:
1LE Sway Bars
Bilstein HD Shocks
Eibach Pro-Kit Springs
BMR Black Weld-On Sub Frame Connectors
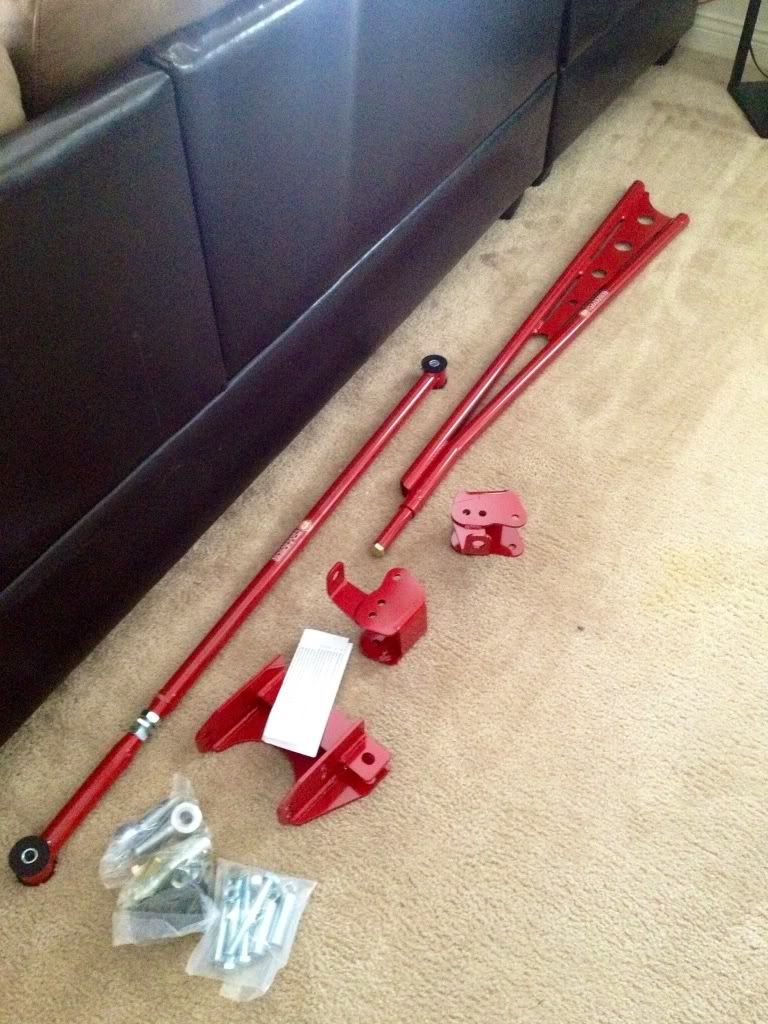
Here's what I added:
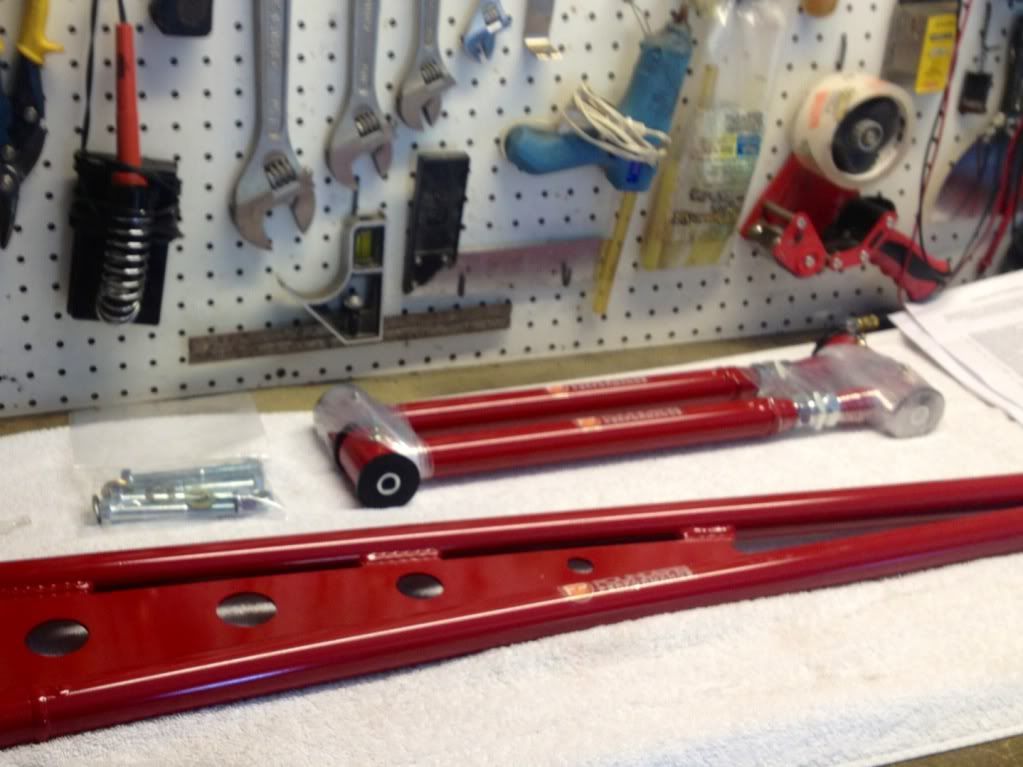
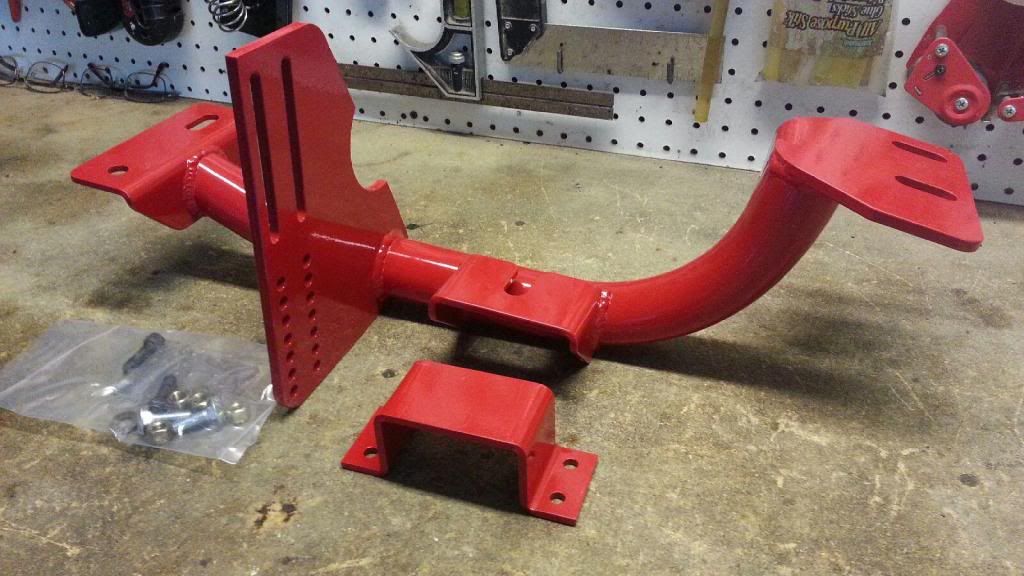
Founder's Performance On-Car Adjustable Torque Arm
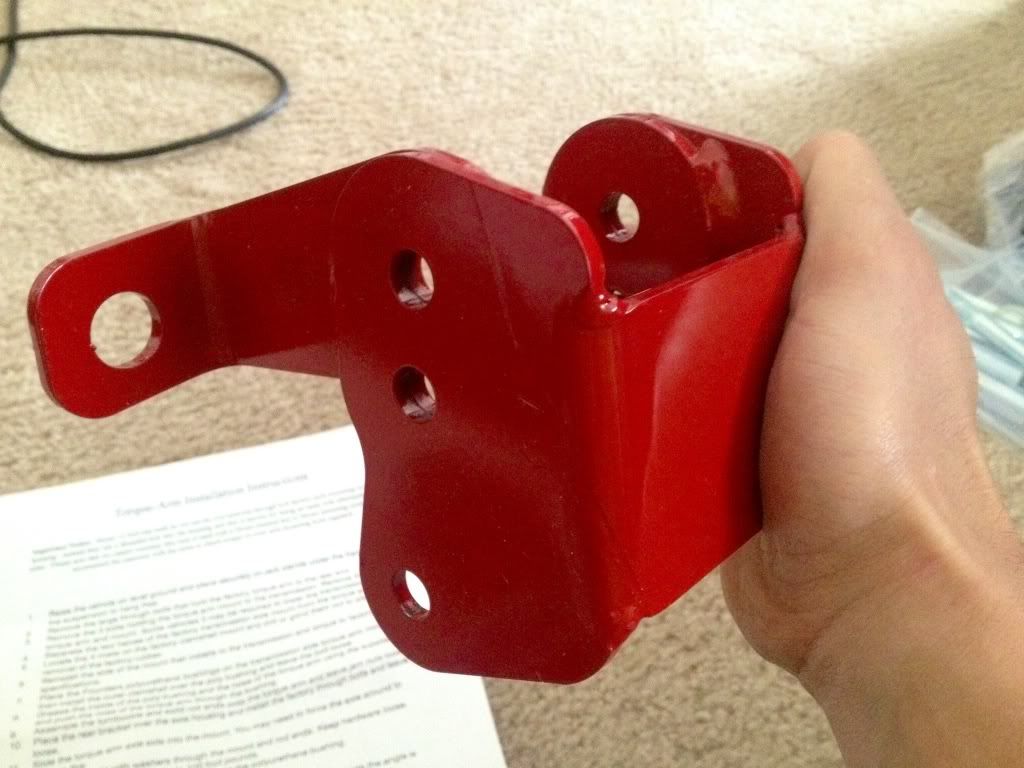
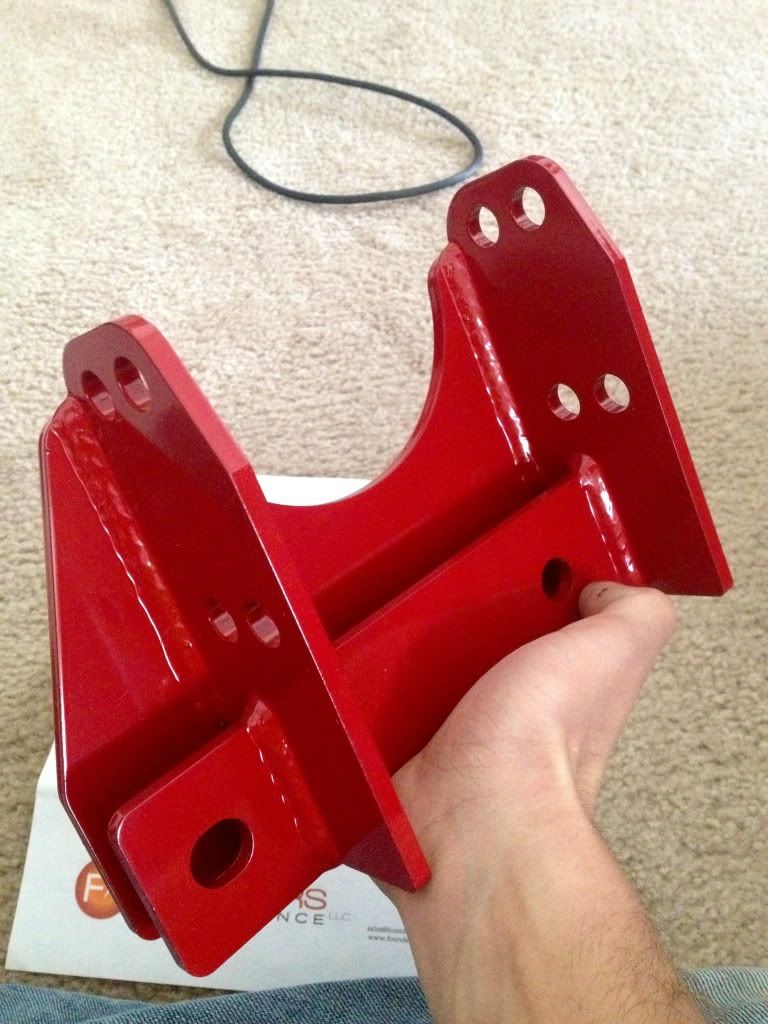
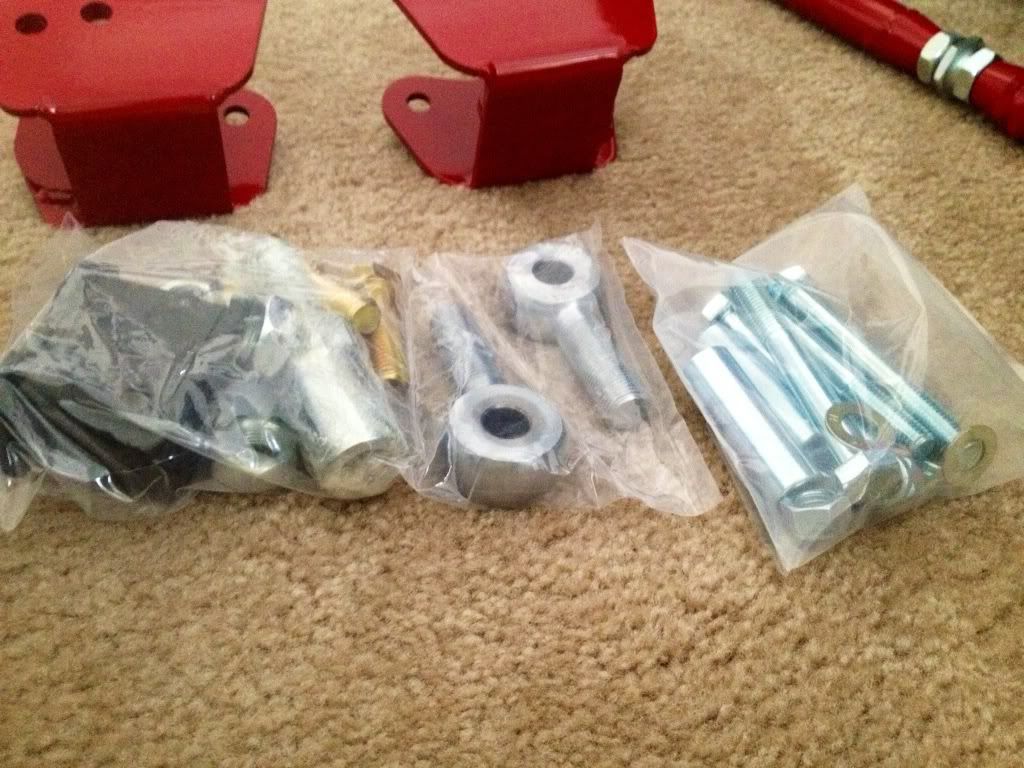
Founder's Performance Lower Control Arm Relocation Brackets
Founder's Performance On-Car Adjustable Panhard Bar with Poly/Poly Bushings
Founder's Performance On-Car Adjustable Lower Control Arms with Poly/Poly Bushings
BMR Chromoly Torque Arm Relocation Crossmember
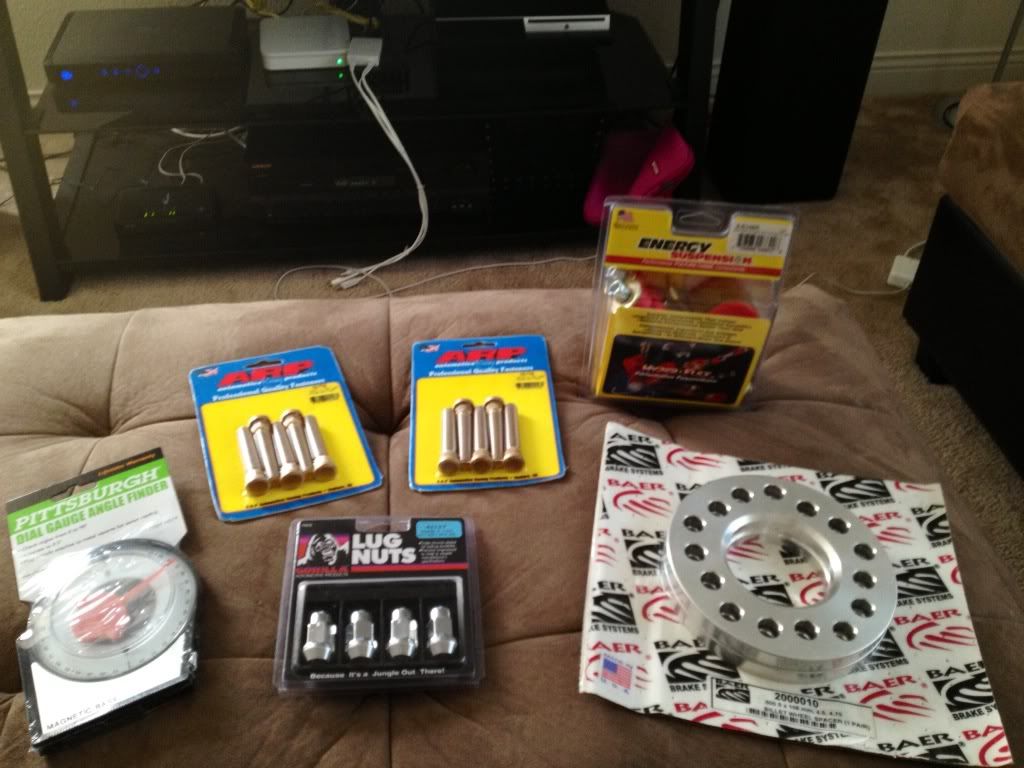
Energy Suspension Sway Bar Mounts/End Links
ARP 2-1/2" Lug Studs
Baer Brakes Billet 1/2" Wheel Spacers
Gorilla M12X1.5 Lug Nuts
Magnetic Angle Finder
Custom Alignment
Specs of the custom alignment:
Front -
Caster = +5.4*
Camber = -0.8*
Toe = 0*
Rear -
Caster = 0*
Camber = 0*
Toe = 0*
Thrust Angle = 0*
Pics:


Installed pictures are coming soon.
Already on the car:
1LE Sway Bars
Bilstein HD Shocks
Eibach Pro-Kit Springs
BMR Black Weld-On Sub Frame Connectors
Here's what I added:
Founder's Performance On-Car Adjustable Torque Arm
Founder's Performance Lower Control Arm Relocation Brackets
Founder's Performance On-Car Adjustable Panhard Bar with Poly/Poly Bushings
Founder's Performance On-Car Adjustable Lower Control Arms with Poly/Poly Bushings
BMR Chromoly Torque Arm Relocation Crossmember
Energy Suspension Sway Bar Mounts/End Links
ARP 2-1/2" Lug Studs
Baer Brakes Billet 1/2" Wheel Spacers
Gorilla M12X1.5 Lug Nuts
Magnetic Angle Finder
Custom Alignment
Specs of the custom alignment:
Front -
Caster = +5.4*
Camber = -0.8*
Toe = 0*
Rear -
Caster = 0*
Camber = 0*
Toe = 0*
Thrust Angle = 0*
Pics:


Installed pictures are coming soon.
Last edited by dirtbag; 10-05-2013 at 09:19 PM.
 09-04-2013, 08:11 PM
#2
On The Tree
iTrader: (2)

Join Date: Aug 2013
Location: Stationed in Oklahoma City,OK
Posts: 176
Likes: 0
Received 0 Likes
on
0 Posts
Founder's Performance On-Car Adjustable Torque Arm
Founder's Performance Lower Control Arm Relocation Brackets
Founder's Performance On-Car Adjustable Panhard Bar with Poly/Poly Bushings
Founder's Performance On-Car Adjustable Lower Control Arms with Poly/Poly Bushings
^^^How is all that treating you i am also going to purchase that package you have any comments?
09-04-2013, 08:14 PM
#3
Founder's Performance On-Car Adjustable Torque Arm
Founder's Performance Lower Control Arm Relocation Brackets
Founder's Performance On-Car Adjustable Panhard Bar with Poly/Poly Bushings
Founder's Performance On-Car Adjustable Lower Control Arms with Poly/Poly Bushings
^^^How is all that treating you i am also going to purchase that package you have any comments?
Founder's Performance Lower Control Arm Relocation Brackets
Founder's Performance On-Car Adjustable Panhard Bar with Poly/Poly Bushings
Founder's Performance On-Car Adjustable Lower Control Arms with Poly/Poly Bushings
^^^How is all that treating you i am also going to purchase that package you have any comments?
 .
09-05-2013, 12:52 PM
.
09-05-2013, 12:52 PM
#4

A lot of people are convinced that if you spend more, you get more.
This is not the case at all with the Founders pieces.
I just bought the exact same stuff you did, and I was more than happy with the quality. I've had BMR and UMI on my cars before, and to be honest they are probably identical quality.
You won't be disappointed.
09-05-2013, 01:14 PM
#5

I did a custom alignment similar to yours with -1 camber, +4 caster and 0 toe, and noticed an immediate improvement in turn in with no changes to suspension parts whatsoever. I can't wait to see what it'll feel like when I get all the goodies like yours on the car.
09-05-2013, 09:01 PM
#6
On The Tree
Join Date: Jul 2012
Posts: 120
Likes: 0
Received 0 Likes
on
0 Posts

I've got the same LCA bars and reloc. brackets. Going to do the install this weekend. Question, I've read write-ups on the UMI and BMR relocation brackets and on both, you have to cut the brake brackets. Did you have to do that for these as well? I'm guessing you did since the other two brands you have to... I was just hoping I wouldn't have to...
Thanks!
Thanks!
Trending Topics
09-05-2013, 09:56 PM
#8
I've got the same LCA bars and reloc. brackets. Going to do the install this weekend. Question, I've read write-ups on the UMI and BMR relocation brackets and on both, you have to cut the brake brackets. Did you have to do that for these as well? I'm guessing you did since the other two brands you have to... I was just hoping I wouldn't have to...
Thanks!
Thanks!
09-07-2013, 05:30 AM
#11
Teching In

Join Date: Jul 2013
Location: morgantown pa
Posts: 30
Likes: 0
Received 0 Likes
on
0 Posts
I have them on my car. They are nice. I cut the brake bracket . I use a screwdriver an a cut off wheel to cut it off. I all so used the bottom set of holes for my controlle arm.
 09-07-2013, 06:09 PM
#13
Well everything is on the car now. From a stop or slow roll I either have no tire spin or very little spin. Set my pinion angle at 2* and the TA is mounted 5th set of holes from the bottom on the BMR crossmember. One thing of note, the axles had to come out to install the ARP wheel studs.
I'm embarrassed of the dirty underside of the car or I'd post some photos. Ended up having a bad pinion seal so oil and dirt was flicked everywhere. Fixed it today while the axles were out. After she's all cleaned up I'll take some good pics.
I'm embarrassed of the dirty underside of the car or I'd post some photos. Ended up having a bad pinion seal so oil and dirt was flicked everywhere. Fixed it today while the axles were out. After she's all cleaned up I'll take some good pics.
Last edited by dirtbag; 09-07-2013 at 06:40 PM.
 09-12-2013, 07:50 PM
#15
Did some more tweaking with the suspension setup. I borrowed a fancy digital angle finder from work accurate to 0.01* and found I was off quite a bit with my original angle measurements. Zero'd on the front driveshaft U-Joint, then measured my driveshaft angle, then the rear end angle. Then, matched my rear end angle to match the front U-Joint angle. This angle as found to be 2.2*.
Doing this significantly reduced any vibrations (and 99% eliminated) or knocking of the TA on the underbody.
While I was down there, measured my LCA and rear shock angles. Found my right rear shock was at -5.1*, while the driver's side was at -6.0*. So, I adjusted the passenger LCA out to match this same shock angle.
One thing I'm trying to figure out is - what is the correct shock angle while unloaded (i.e. on all 4 tires sitting in the garage).
The front suspension really needs attention now. Obviously, the my front tie rod ends need to be addressed ASAP. The car feels highly unstable and "loose" up front. Maybe this is just more pronounced now that the rear end is so solid. While it's all apart I'll go ahead and install similar mods as the rear end.
Already on the car (front):
1LE Front Sway Bar
Bilstein HD Shocks
Eibach Pro-Kit Springs
Moog Outer Tie Rod Ends
Turn One PS Pump
Energy Suspension Sway Bar Mounts/End Links
10-05-2013, 08:05 PM
#16
Time for an update:
Finally started cleaning up the underbody today and snapped a few pictures of the progress. I'm about 50% done; you can clearly see the line I stopped at. Once all new front suspension components and cleaning are completed, I'll be prepping for primer and masking anything not intended to be painted. The plan is spray semi-gloss black instead of the factory non-cleared white for a high contrast clean look.
What's left on the growing list:
- Re-Alignment for suspension (Tomorrow).
- Install Energy Suspension Sway Bar Mount Bushings, End Links, and Tie-Rod Dust Boots (Front).
- New Founder's Performance Panhard Bar Relocation Mount
- Finish degreasing/cleaning underbody (Doors-Forward).
- New Energy Suspension Shock Bushings (Front/Rear).
- New Prothane Bump Stops (Rear).
- Patch two pin holes on exhaust welds, blend welds flush, and put a nice TIG pass over the existing welds.
- Sand and prep everything for primer.
- Masking.
- Paint.
- Fix a bad pinion seal, install yukon 4.11's and TA girdle. **
- De-rust headers, TIG on v-clamps, paint with hi-temp silver. **
Opinions?
**Not for sure at this moment.
Now for the progress pictures...


Thanks for looking guys. Any ideas or feedback is welcome.
Last edited by dirtbag; 10-05-2013 at 09:44 PM.
10-05-2013, 08:47 PM
#17
I was under the impression that the torque arm bolts went in from the top, and the nuts went in the bottom, so if the nut were to somehow vibrate loose the whole bolt wouldn't fall out the bottom and you have the TA fall off the rear end while you're driving down the road.
10-05-2013, 09:13 PM
#18
If you don't have lowering springs, clearance should not be an issue. You could always lower the rear end to get yourself the req'd clearance, but then you run into problems with setting up/aligning the front TA mount.
To be honest, I doubt they will rattle loose. I would have to look at the instructions to verify this - the bolts get 220 lb/ft of torque and I opted to apply lock tight liberally as insurance.
10-05-2013, 10:00 PM
#19
I believe you are correct. The problem is getting the bolts in through the top. Clearance is at a premium. If you don't have lowering springs, clearance should not be an issue. You could always lower the rear end to get yourself the req'd clearance, but then you run into problems with setting up/aligning the front TA mount. To be honest, I doubt they will rattle loose. I would have to look at the instructions to verify this - the bolts get 220 lb/ft of torque and I opted to apply lock tight liberally as insurance.
I would be really weary that the whole TA just fall off the car with the bolts facing down like that. That wouldn't be a fun thing to have to pull over to, and would probably cause a lot of damage if it did happen.
10-05-2013, 10:29 PM
#20
I installed a umi Adj. TA a few weeks ago. Got their bolt kit with it also. I took the rear TA mount off the actual TA, lowered the rear down. And put the mount on the rear slid the bolts in from the top and bolted the down then messed with the front of the TA at the trans later. Also, unbolting the shocks from the axle will give you even more clearance if necessary to drop the axle down more.
I would be really weary that the whole TA just fall off the car with the bolts facing down like that. That wouldn't be a fun thing to have to pull over to, and would probably cause a lot of damage if it did happen.
I would be really weary that the whole TA just fall off the car with the bolts facing down like that. That wouldn't be a fun thing to have to pull over to, and would probably cause a lot of damage if it did happen.
I'll post up another update once the remaining components installed and underbody is prepped for paint.