Assembling Koni Front Strut
Thread Starter
Joined: Aug 2004
Posts: 11,258
Likes: 146
From: Pace, FL
So, I started working on getting my BMR/Koni front strut put together with new Moog stuff (Moog K6516 & K6517 Front Strut Mounts, Moog K6573 Front Coil Spring Isolators, and Moog K80927 Front Lower Spring Pads). And I have a couple of questions:
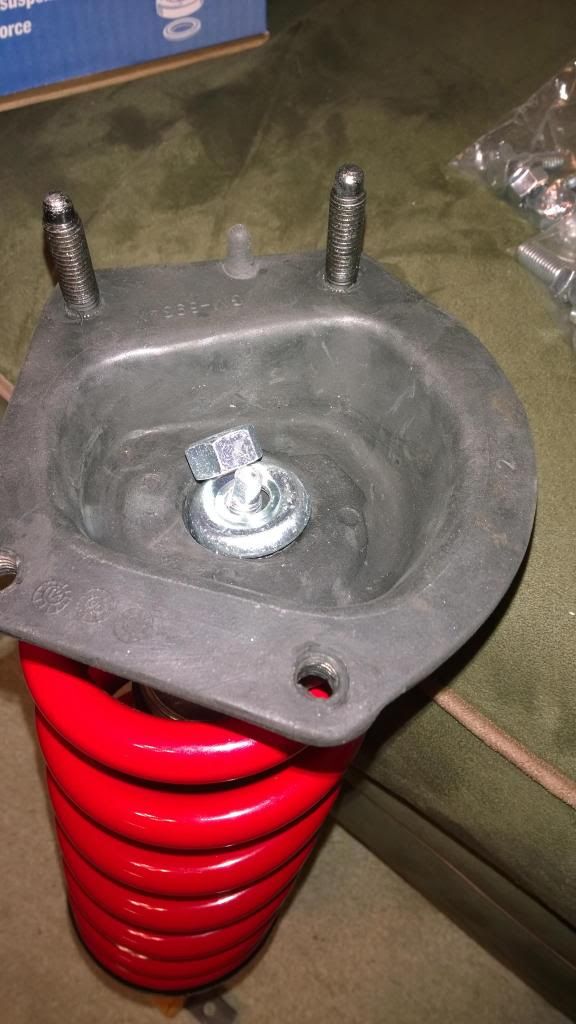
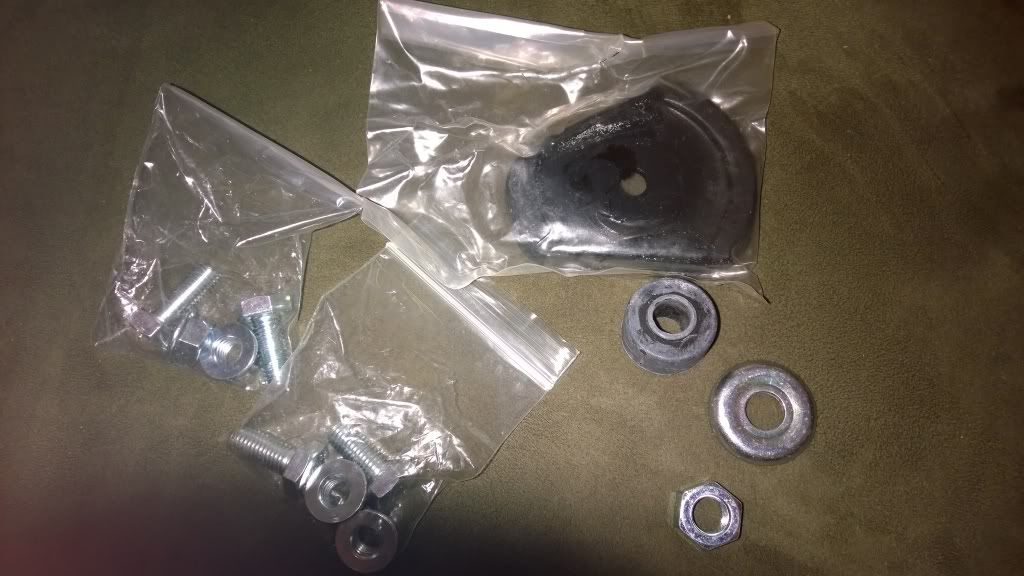
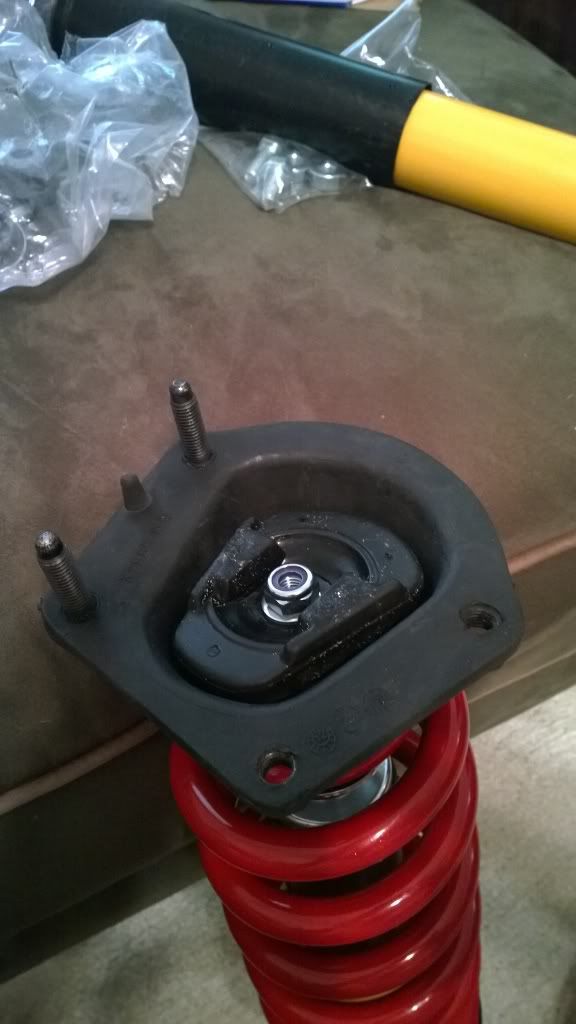
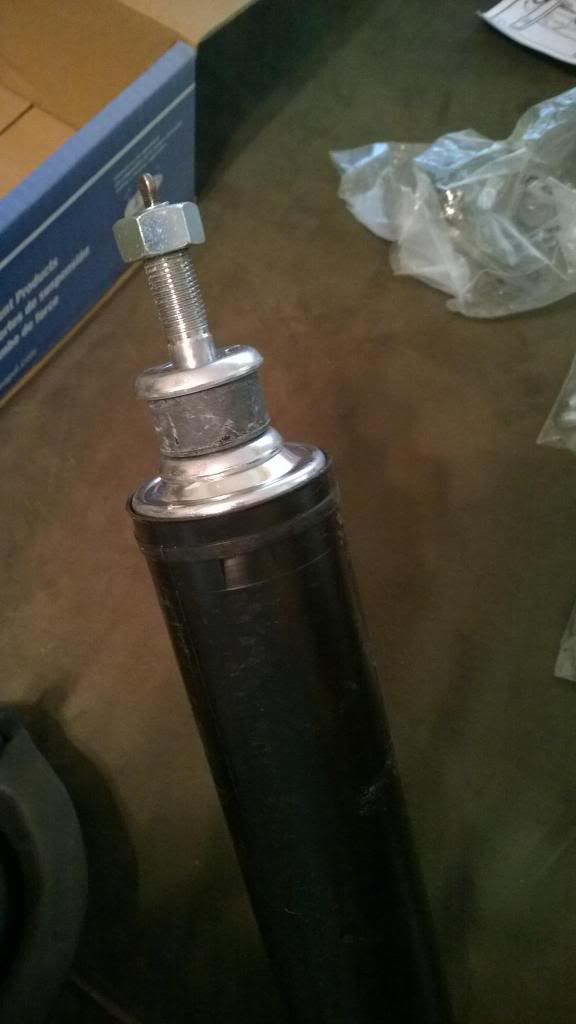
1) The Koni struts came with four washers, nuts, and bump stops. Why so many? And where does the nut fit? It doesn't actually fit the strut. See attached picture. Also, I assume the washer goes there, but it doesn't seem to fit the Moog strut mount quite flush.
2) Why does the Moog strut mounts and isolators both come with nuts and bolts? I had assumed the Moog strut mounts came with two bolts and nuts for attaching to the car. But the nut actually fits the Koni strut. It's not to be used there is it? Wtf?
3) Where does the isolator go? Is that part of the a-arm assembly or coilover assembly? I don't see a place that looks right for it on this assembly.
4) Does the isolator go where I have it? Also, the Moog strut mount looks like it would fit in the spring, but it doesn't really. Is that ok or do I need to adjust somehow?
5) The lower spring pad from Moog comes with both the pad and the "cup" which is already installed on the Koni - I don't need that for anything, correct?
I realize I will need to compress the spring to get the nut on, but it looks like the way I have this set up, that I will end up compressing the shock as well. And the strut mount will be touching the isolator. That doesn't seem correct to me?
I couldn't find any assembled pictures on how this fits together. And I haven't removed the stock ones yet to see how they fit together.
Any help would be great. Thanks!
Give me a call here at the shop and I would be more than happy to help you out. I would have to write a novel so it is easier to explain over the phone. The number here to the shop is (813)986-9302 and I am here till 6pm eastern time.
__________________
Glenn ***
Sales Tech
www.bmrsuspension.com
813.986.9302

Find a Quality alignment shop near you!
Glenn ***
Sales Tech
www.bmrsuspension.com
813.986.9302
Find a Quality alignment shop near you!

__________________
Glenn ***
Sales Tech
www.bmrsuspension.com
813.986.9302
Find a Quality alignment shop near you!
Glenn ***
Sales Tech
www.bmrsuspension.com
813.986.9302
Find a Quality alignment shop near you!
Thread Starter
Joined: Aug 2004
Posts: 11,258
Likes: 146
From: Pace, FL
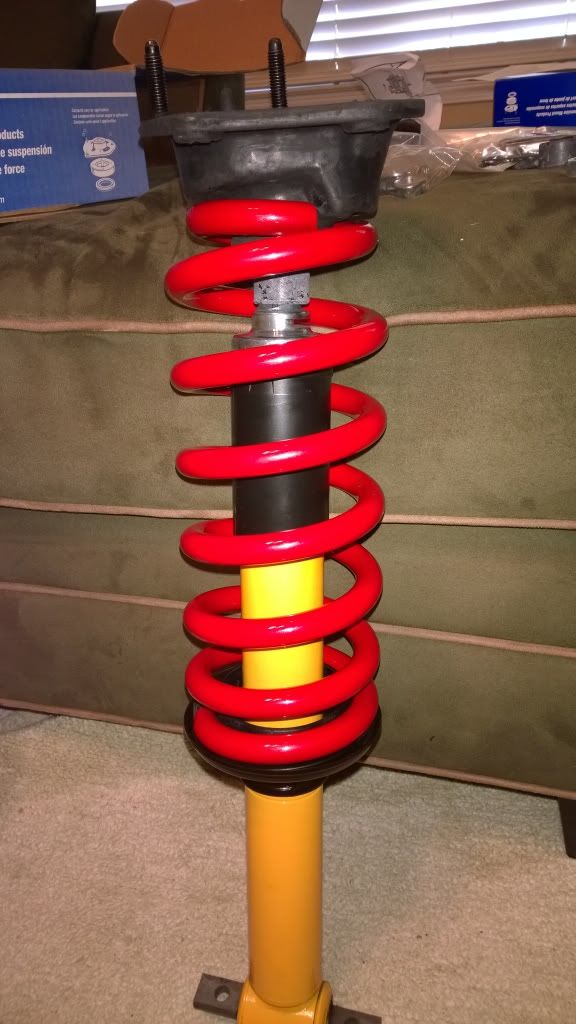
So here's how it's supposed to look for anyone with questions:
Lower spring perch in place, spring, huge flat washer, upper strut mount, strut isolator, washer, and nylon lock nut:
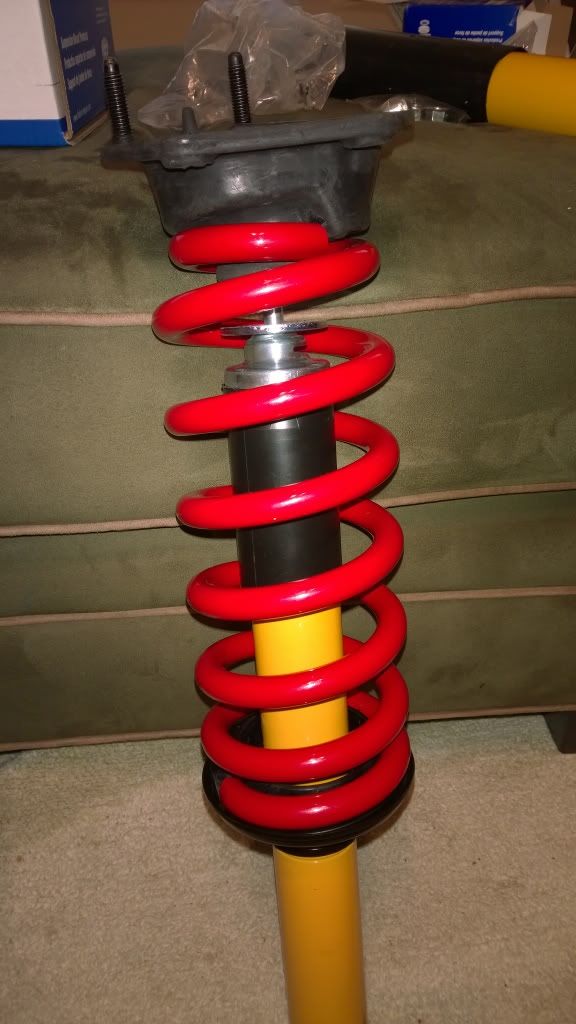
And Kyle, I didn't have the shocks in the house when I called, but is there a reason they gave me four of the washers, nuts, and spacers? I just use one set per shock correct? I put a washer both below and on top of the rubber bump stop - does it matter which goes where (I assume only use one)? Sorry!
Lower spring perch in place, spring, huge flat washer, upper strut mount, strut isolator, washer, and nylon lock nut:
And Kyle, I didn't have the shocks in the house when I called, but is there a reason they gave me four of the washers, nuts, and spacers? I just use one set per shock correct? I put a washer both below and on top of the rubber bump stop - does it matter which goes where (I assume only use one)? Sorry!
And Kyle, I didn't have the shocks in the house when I called, but is there a reason they gave me four of the washers, nuts, and spacers? I just use one set per shock correct? I put a washer both below and on top of the rubber bump stop - does it matter which goes where (I assume only use one)? Sorry!
Here is the orientation of everything with it installed from top to bottom on the shock shaft:
Poly lock nut
Cupped washer
Rubber bushing
Car chassis
Rubber bushings
Cupped washer
__________________
Glenn ***
Sales Tech
www.bmrsuspension.com
813.986.9302
Find a Quality alignment shop near you!
Glenn ***
Sales Tech
www.bmrsuspension.com
813.986.9302
Find a Quality alignment shop near you!
Trending Topics
LS1 Tech Stories
The Best V8 Stories One Small Block at Time

6 Common C5 Corvette Failures and What's Involved In Repairing Them
Pouria Savadkouei
Retro Modern Bandit Pontiac Trans AM Comes With Burt Reynolds' Autograph
Verdad Gallardo
Top 10 Greatest Cadillac V Series Performance Models Ever, Ranked
Pouria Savadkouei
Top 10 Most Powerful Chevy Trucks Ever Made!

Hennessey's New Supercharged Silverado ZR2 Has 700 HP
Verdad Gallardo
Coachbuilt N2A Anteros Is an LS2-Powered C6 Corvette In Italian Clothes
Verdad Gallardo
Awesome K5 Blazer Restomod Comes With C7 Corvette Power
Verdad Gallardo
10 Camaros You Should Never Buy

10 LS Engine Myths That Refuse to Die
Verdad Gallardo If you have not already compressed the springs and installed the upper mount assembly then I'd remove the upper mount assembly and give the upper shock mount shaft a good coat of Anti-Seize all the way up including the threads at the top, then slide the upper mount on and then give it another coat of Anti-Seize right around where the shaft comes through the top of the upper mount. Now install the strut (shock) isolator, washer and lock nut. This way you should never have to worry about the upper shock shaft and mount assembly rusting out.
Last edited by 99Bluz28; May 16, 2014 at 06:14 PM.

different shocks but if you look at the picture attached this is the layout of the rear shocks for how the bushings go, basically the body of the car gets sandwiched between the 2 rubber pieces.
A heads up.
That upper mount does not fit that spring very well, over time it will conform to the spring and possibly loosen that nut on the top.
I would run it 6 mos and check that nut again.
Or you could get this. I did not install these, they were on the car when I bought it.

EDIT
Put grease all over that top nut and threads, the upper arms hold water. See the rust in that pic?
That upper mount does not fit that spring very well, over time it will conform to the spring and possibly loosen that nut on the top.
I would run it 6 mos and check that nut again.
Or you could get this. I did not install these, they were on the car when I bought it.
EDIT
Put grease all over that top nut and threads, the upper arms hold water. See the rust in that pic?


Joined: Nov 2003
Posts: 6,216
Likes: 236
From: Wichita KS / Rancho San Diego
It should fit properly once the spring is compressed, and then when the nut is torqued down, everything will snug up nicely. Or so it appears to me.
As long as the rubber was in fairly good shape and there was only surface rust, nothing deep then you should be fine. I would still recommend that any exposed metal in the upper mount and upper control arm mount be cleaned up and given a coat of anti-seize or synthetic waterproof grease(clear poly bushing grease works good!) to protect the metal from rust damage.
Thread Starter
Joined: Aug 2004
Posts: 11,258
Likes: 146
From: Pace, FL
I'll be swapping to new upper and lower a-arms soon.
The upper mount actually fits once you compress the spring and fully torque the nut. I could see that being a problem if you use the nut to torque the mount down. It'll never be tight enough.
The upper mount actually fits once you compress the spring and fully torque the nut. I could see that being a problem if you use the nut to torque the mount down. It'll never be tight enough.
Thread Starter
Joined: Aug 2004
Posts: 11,258
Likes: 146
From: Pace, FL
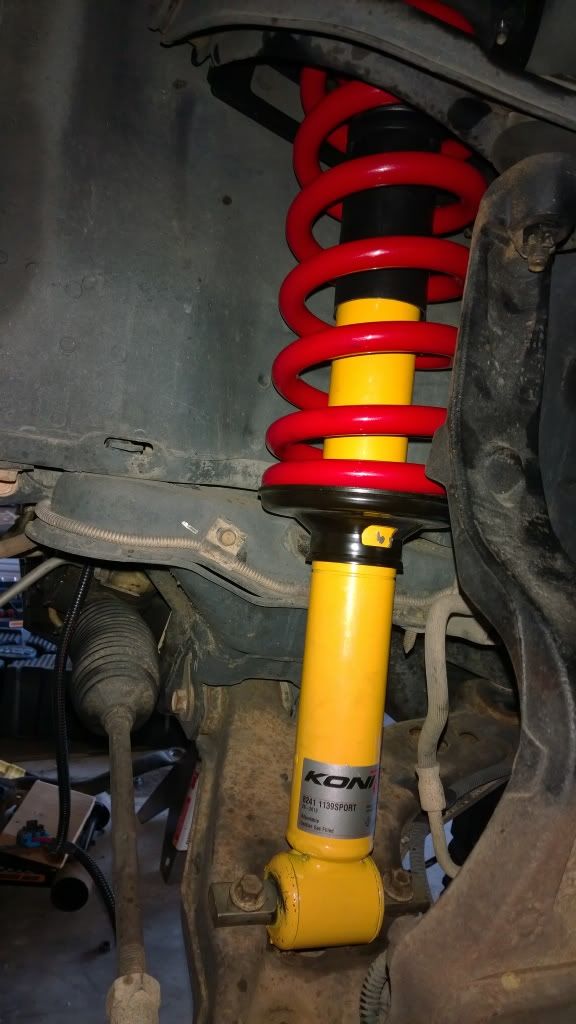
And here it is installed. Luckily, I had everything lined up spot on, so it slid in like butter. One of the mounts had the bolt going in crooked, so... nothing an impact can't fix.