
Home Grown Torque Arm Project
 09-18-2008 | 09:13 AM
#1

Well I sold my spohn TA about six months ago and went back to a stocker. I have sportlines on the and the spohn unit was a mother on ground clearance. So I decided I was going to build my own full length TA.
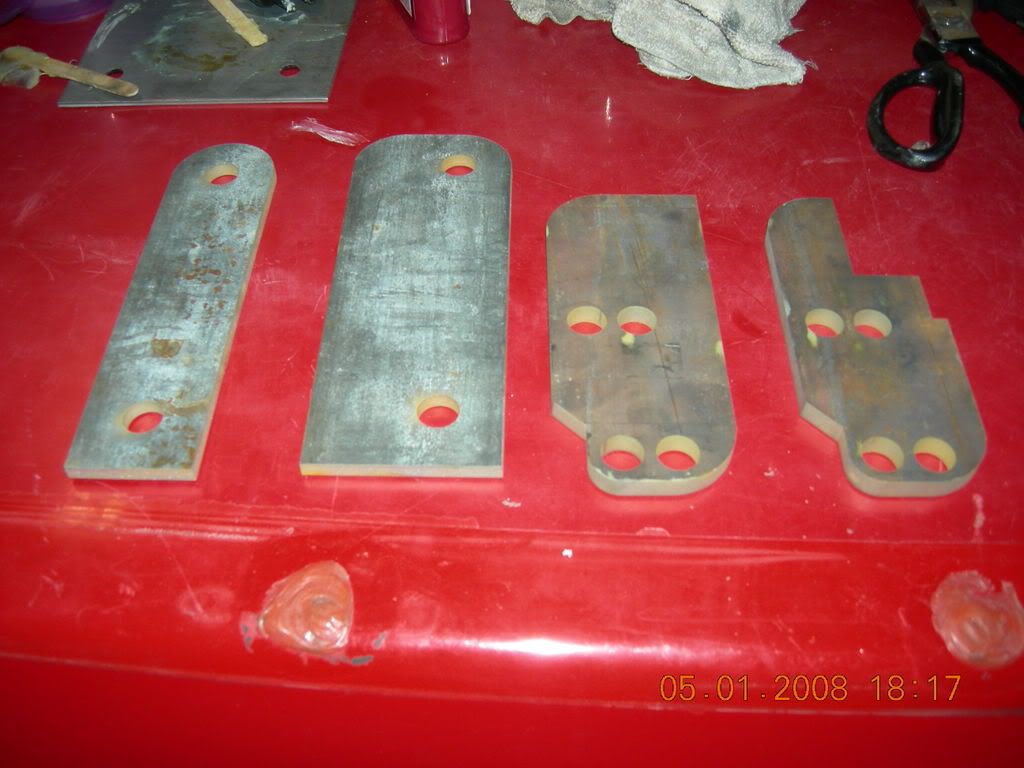
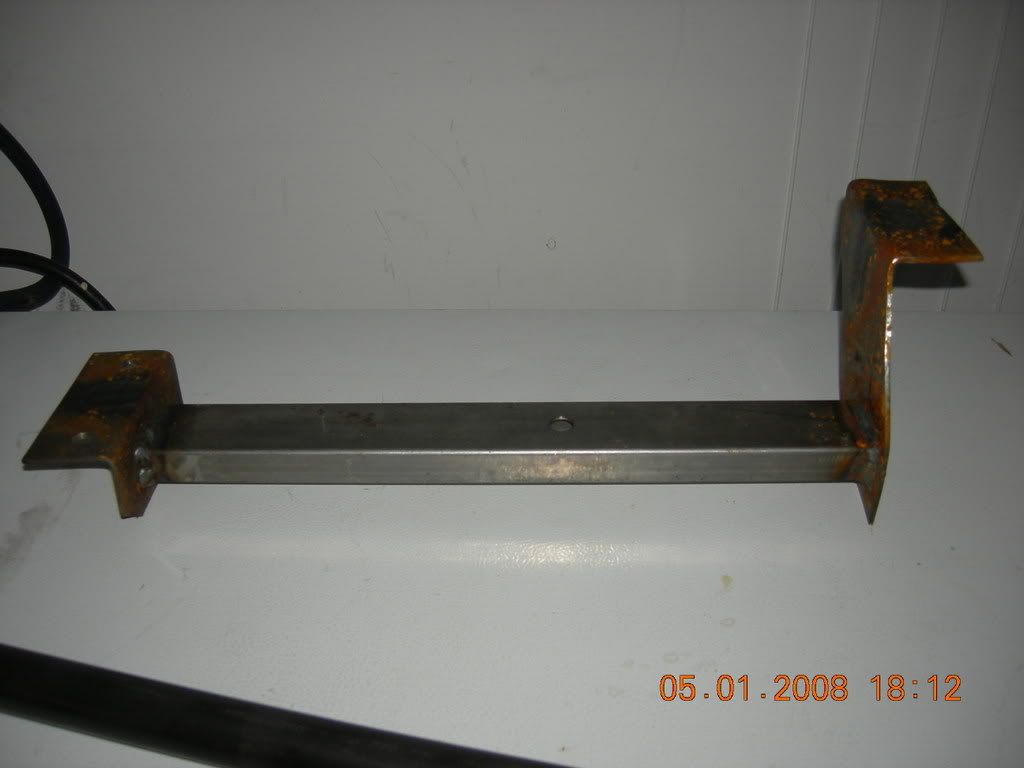
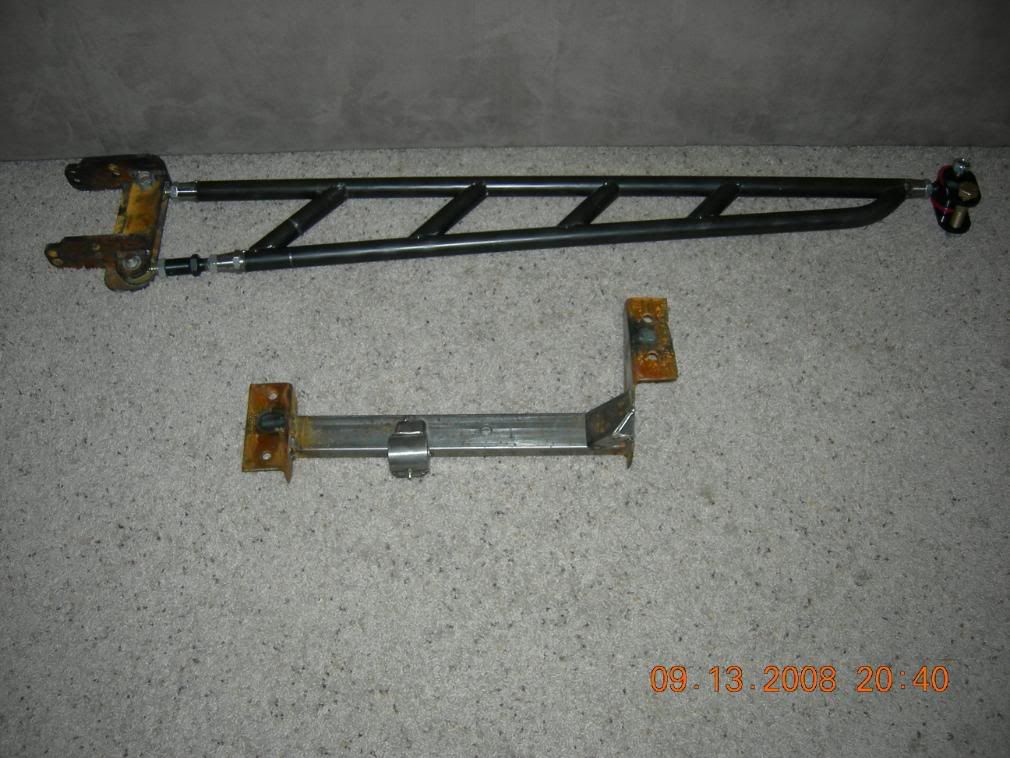
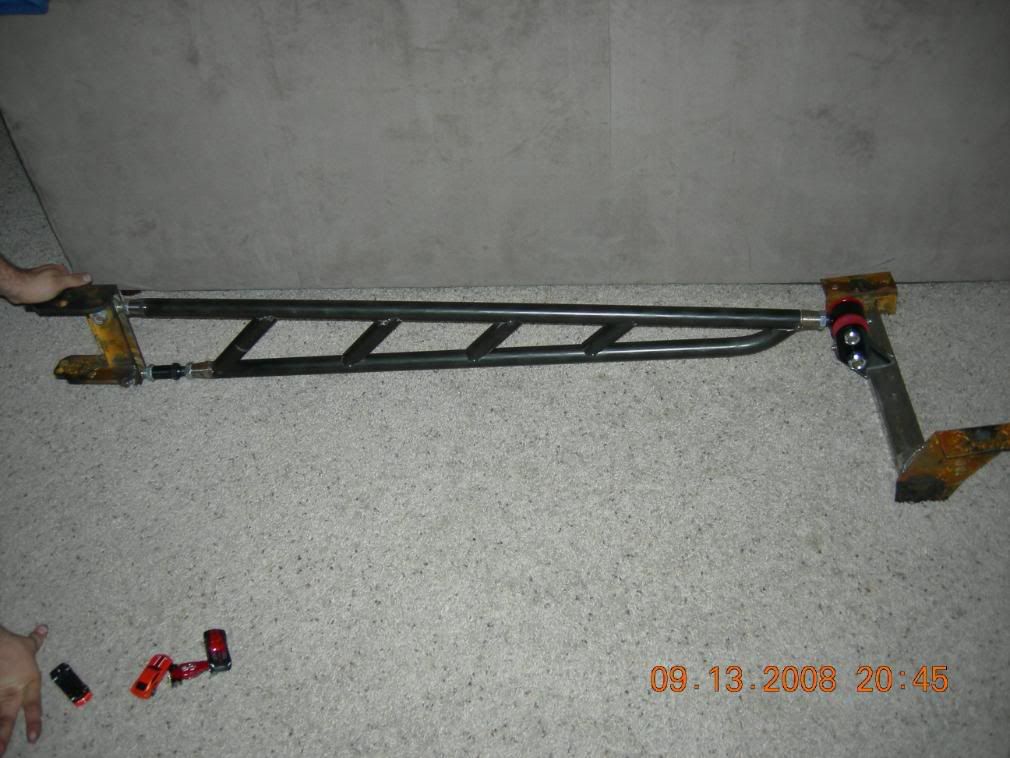
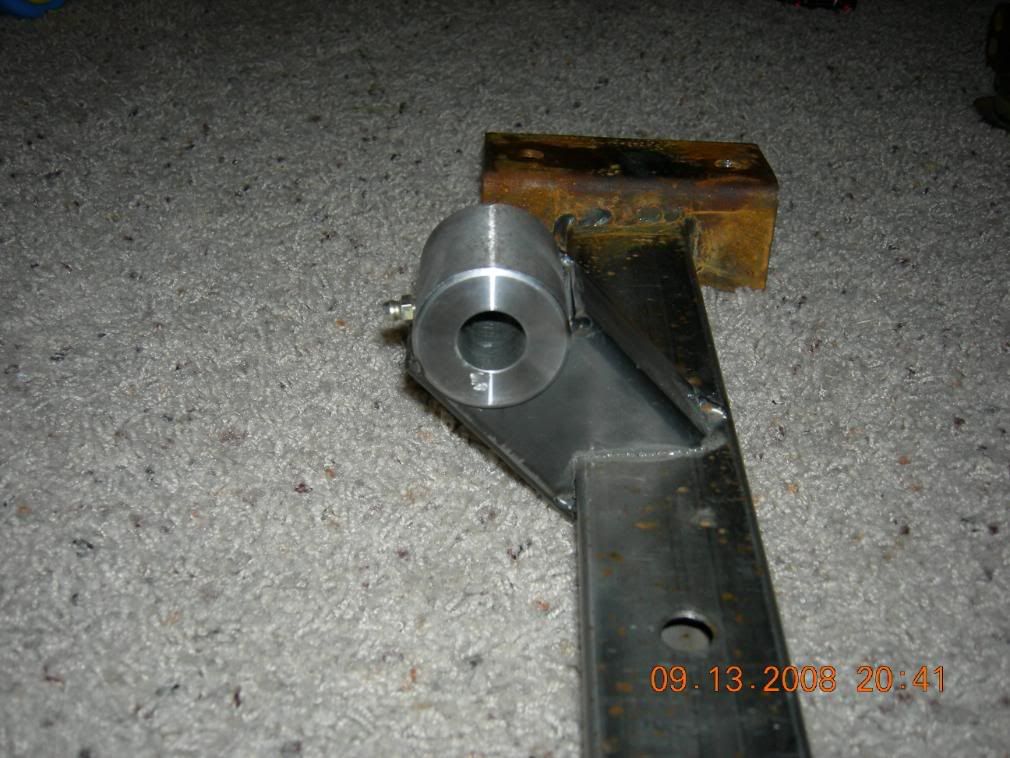
I lost interest for a while and wasn't really thrilled about building the rear mount/bracket. But after CamTom12's BMR TA broke on him I asked him if I could borrow the mount and use it for a little R&D. The BMR is made from mild steal and uses 3/16 on the side plates. These were warped and basically not up to the job IMO. So I used 4130(chromoly) and the side plates were beefed to 1/4. All TIG Welded
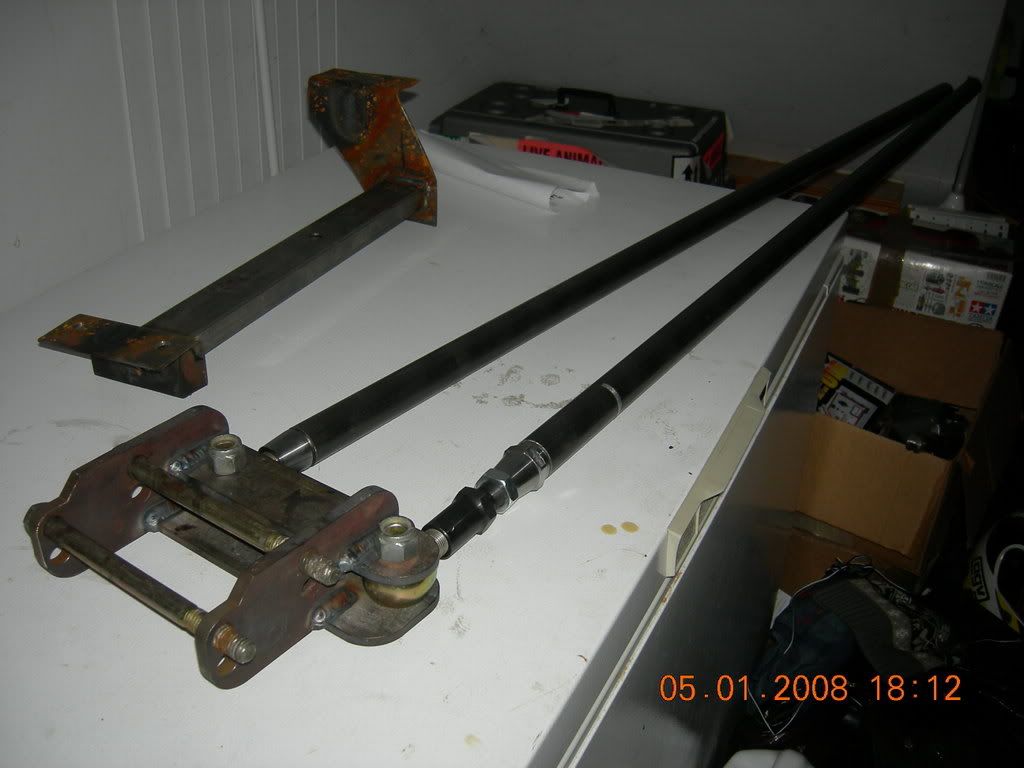
Tubing is seamless .095/1.25 4130 Aircraft grade chromoly
I also made a tranny crossmember since this is going to be a tranny crossmemer mount set up. The crossmember is not yet done. I need to do one more gusset on the large side plate. I know these side plates look a bit puney but they are 4130 and with the added gussets they should be more than enough, IMO.
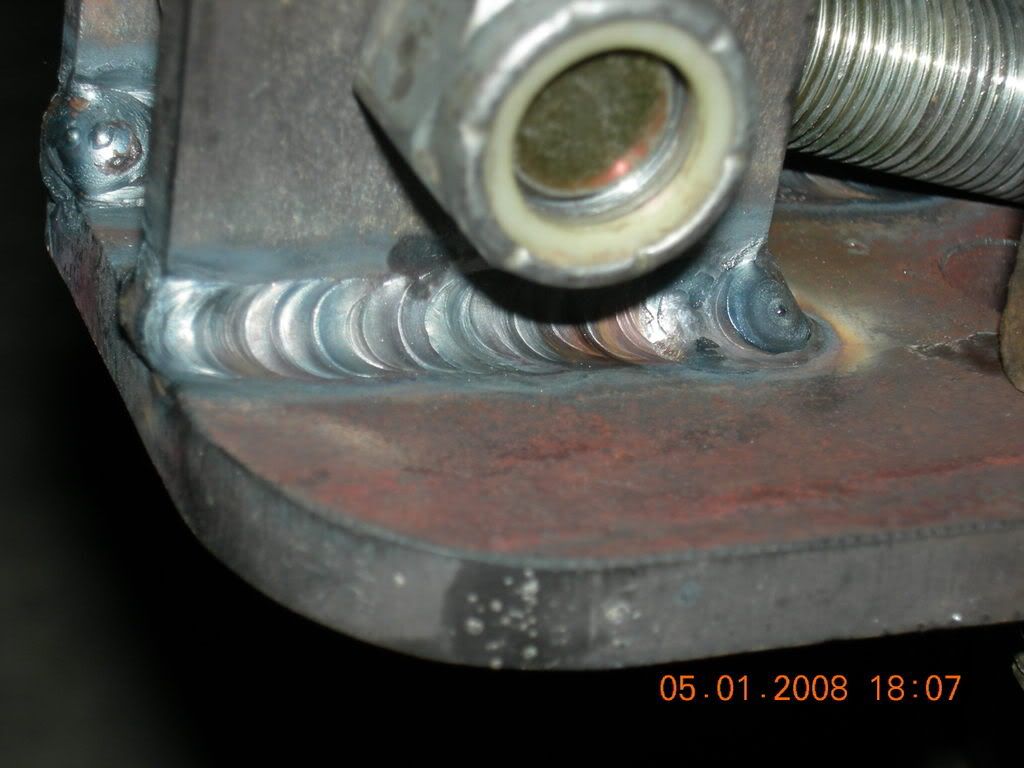
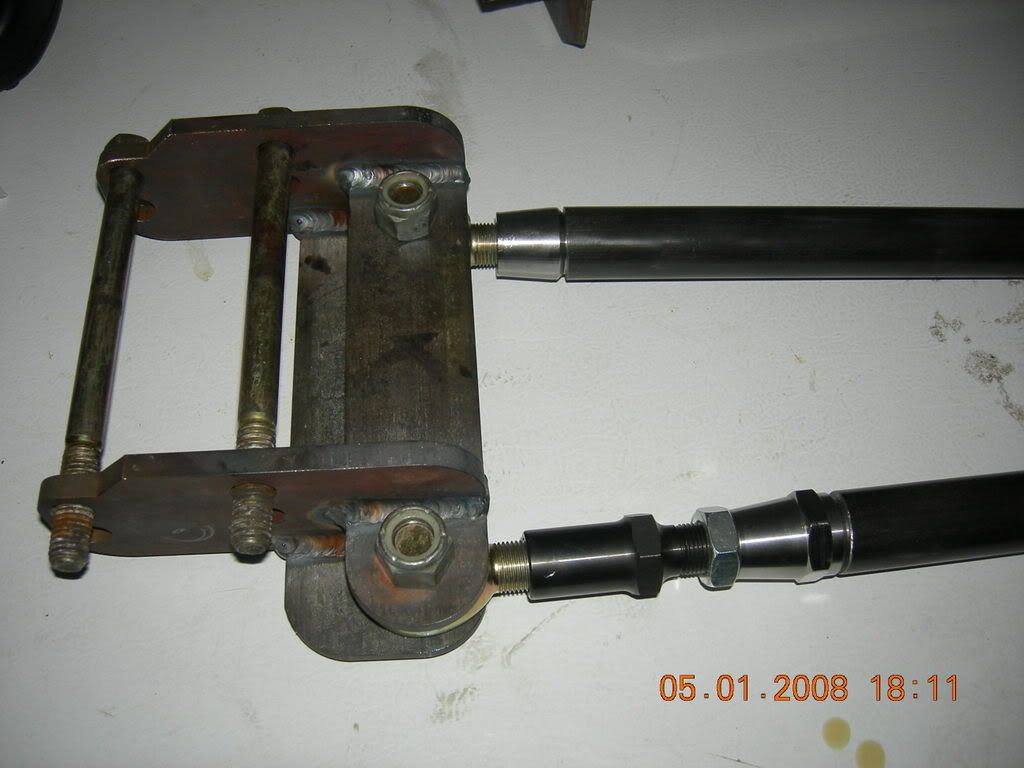
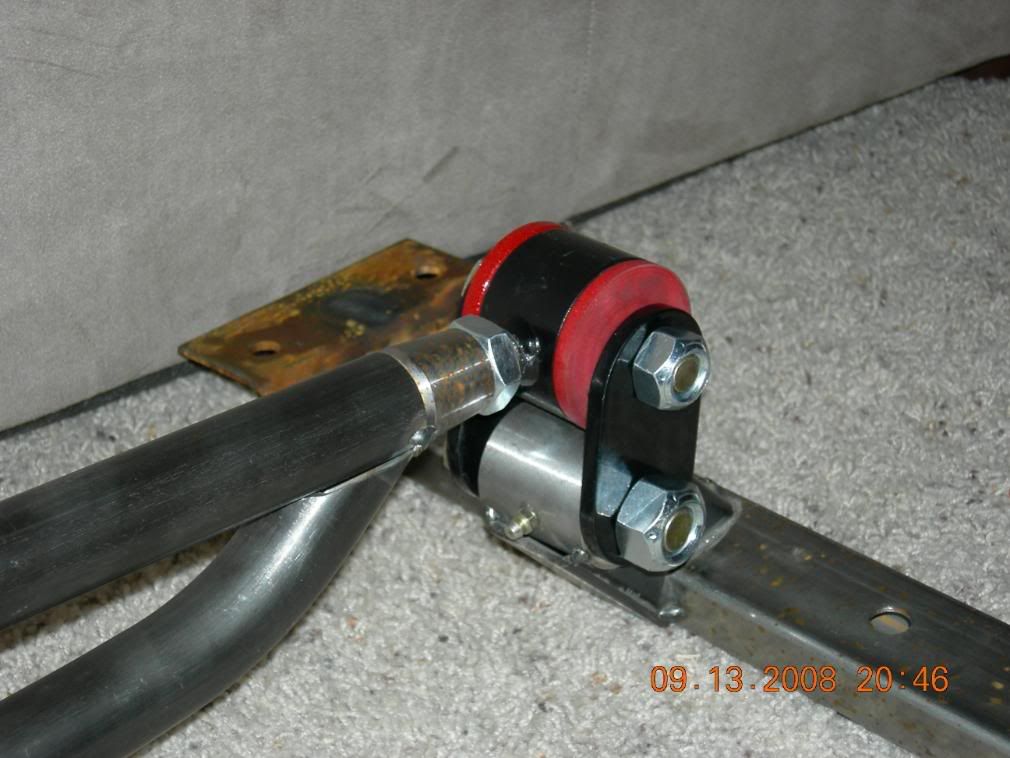
I'm going to use a Poly type rodend for the tranny TA mount and the front Ronend, this should cut down on noise, I hope. I still need 2 plates that will connect the 2 rodends and be the pivot point for the mount and TA.
When it's all finished I'll use the same guy(HARDSHELL POWDER COAT) that did the POWDER COAT on my brakes and I'll have this TA, Rear mount, and crossmember POWDER COATED black.
(JAM NUTS ARE NOT INSTALLED)
I lost interest for a while and wasn't really thrilled about building the rear mount/bracket. But after CamTom12's BMR TA broke on him I asked him if I could borrow the mount and use it for a little R&D. The BMR is made from mild steal and uses 3/16 on the side plates. These were warped and basically not up to the job IMO. So I used 4130(chromoly) and the side plates were beefed to 1/4. All TIG Welded
Tubing is seamless .095/1.25 4130 Aircraft grade chromoly
I also made a tranny crossmember since this is going to be a tranny crossmemer mount set up. The crossmember is not yet done. I need to do one more gusset on the large side plate. I know these side plates look a bit puney but they are 4130 and with the added gussets they should be more than enough, IMO.
I'm going to use a Poly type rodend for the tranny TA mount and the front Ronend, this should cut down on noise, I hope. I still need 2 plates that will connect the 2 rodends and be the pivot point for the mount and TA.
When it's all finished I'll use the same guy(HARDSHELL POWDER COAT) that did the POWDER COAT on my brakes and I'll have this TA, Rear mount, and crossmember POWDER COATED black.
(JAM NUTS ARE NOT INSTALLED)
Last edited by speedyhawk101; 09-18-2008 at 04:34 PM.
09-18-2008 | 09:14 AM
#2
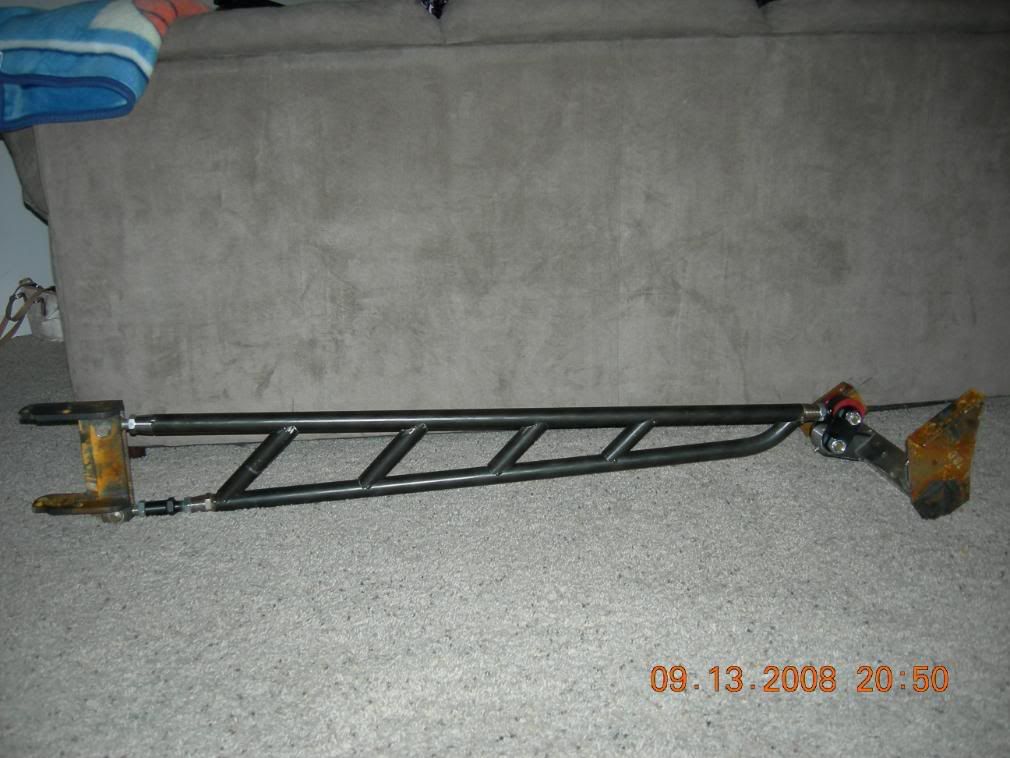
OK Guys here it is. BIG THANKS to Tater (Tricked-out-Toy) for voluntering his skills and time and helping me ALL day get this thing completed.
Here is the final product, well not quite final, it still needs to be TIGed and a little trimming on the tranny Xmember. Oh and I may get the whole deal powder coated, if not PC'd then I'll just rattle can it.
Here is the final product, well not quite final, it still needs to be TIGed and a little trimming on the tranny Xmember. Oh and I may get the whole deal powder coated, if not PC'd then I'll just rattle can it.
Last edited by speedyhawk101; 09-18-2008 at 04:36 PM.

Trending Topics
09-18-2008 | 09:43 PM
#9
The rest of the project was trial and error, more trial than error since I only had two 5' sections of tube. It took the better half of a day test fitting and cutting. I'm pleased with the result.
Thanks Man

