Camaro and Firebird: How to Repair and Replace Parking Brake
The parking brake will typically last for years without any special maintenance; however, operator error can significantly shorten its service life.
This article applies to the Chevrolet Camaro and Pontiac Firebird (1993-2002).
The parking brake is one of those components that may not be used regularly, but when you need it, you better hope it works. If it isn't working, you may find your car has rolled away and isn't where you parked it anymore. The parking brake systems on the 4th generation Camaros and Firebirds use common components that are found on numerous past and present GM vehicles. Early models (1993-1997) mechanically operate the rear brake calipers via the parking brake lever to pinch the rear rotors, whereas newer cars (1998-2002) use a small drum brake setup that is integral to the rear brake rotors to lock the rear brakes in place when parked. Both of these parking brake setups are fairly reliable and do not require regular service, but just a few miles of driving with it engaged can cause serious wear in short order. This article will outline how to repair/replace parking brake components on 1993 to 2002 F-body cars.

Materials Needed
- Floor jack and jack stands
- Metric socket set
- Metric wrench set
- Metric hex (Allen) key set
- Ratchet, breaker bar, and extension
- Torque wrench
- Silicone grease
- Hammer and punch
- Wire brush
- Brake parts cleaner
- Bungee cord or rubber snubber
- Rubber mallet or dead blow hammer
- Medium strength Threadlocker (blue)
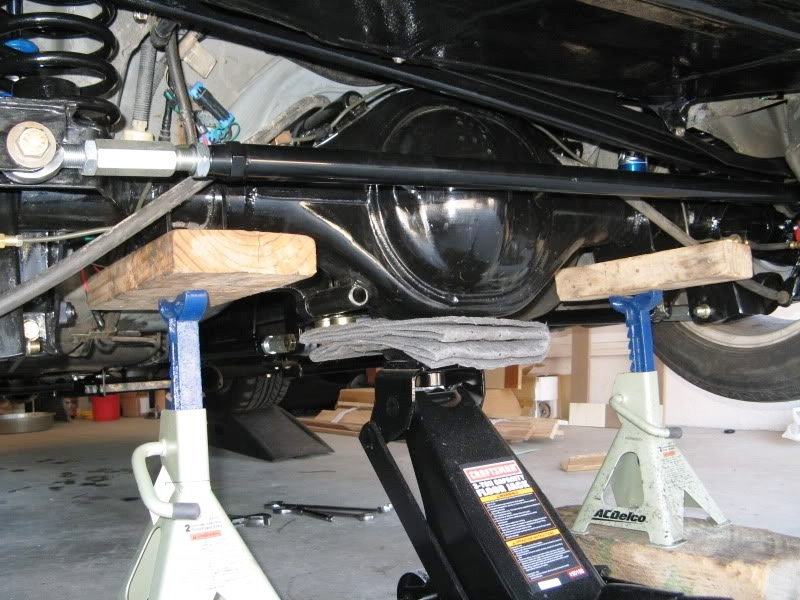
Step 1 – Lift the vehicle
To begin, lift the rear of the vehicle, support it with jack stands, and remove the rear wheels. For additional information on lifting your car, see How to Jack Up Your Car.
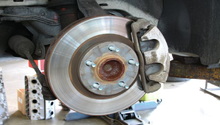
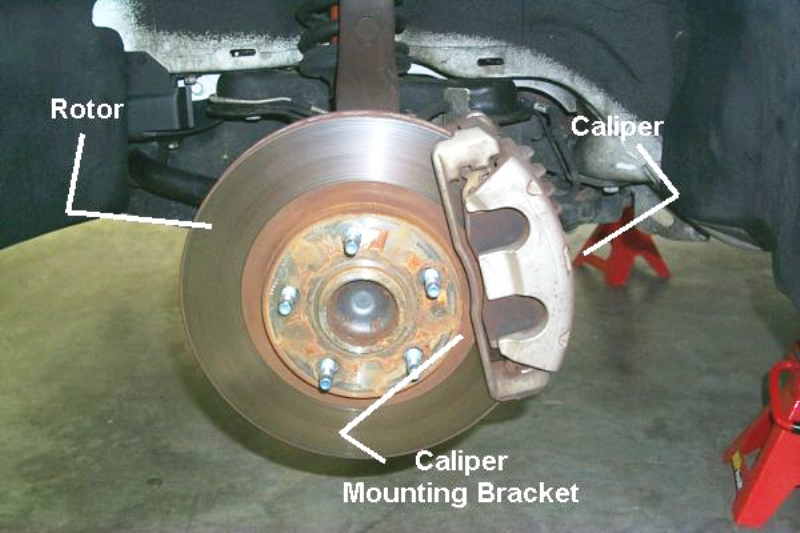
Step 2 – Remove brake calipers and rotors
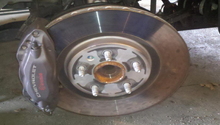
On 1998 to 2002 models, the parking brake assembly is located inside the hat of each brake rotor. When applied, the parking brake shoes move outward against the rotor hat and function similarly to a brake drum setup. In order to access the brake shoes and adjuster mechanisms, the brake rotors and calipers must be removed. For information on removing the brake calipers and rotors, see How to Replace Brake Pads/Calipers/Rotors.
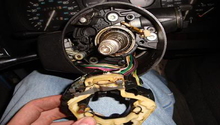
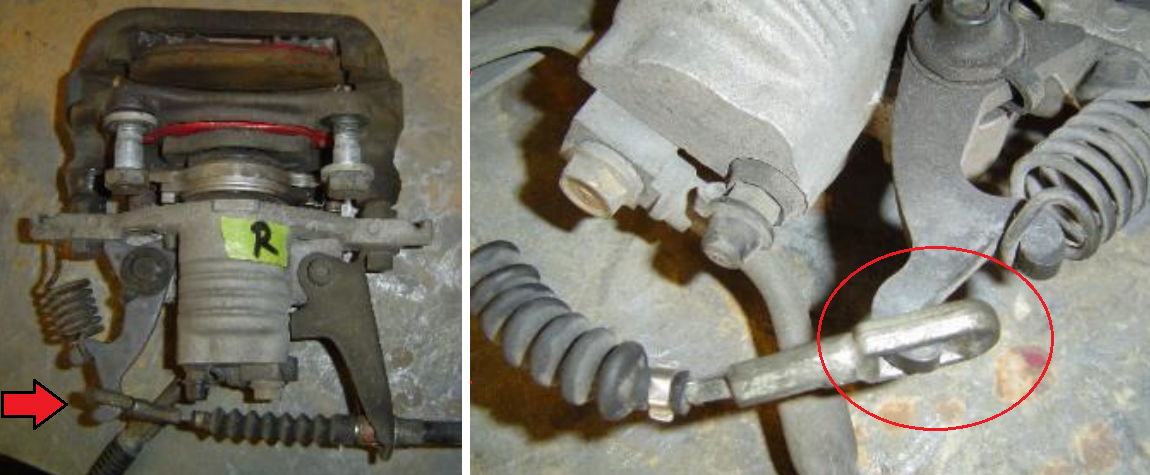
The 1993 to 1997 LT1 F-body cars with rear discs use a lever attached to the rear caliper that forces a small finger to mechanically move the inner brake pad against the rotor to act as a parking brake. Depending on which component needs replacement, this style of parking brake can be serviced while still mounted to the car; however, most find it easier to work on the lever assembly with the caliper removed.
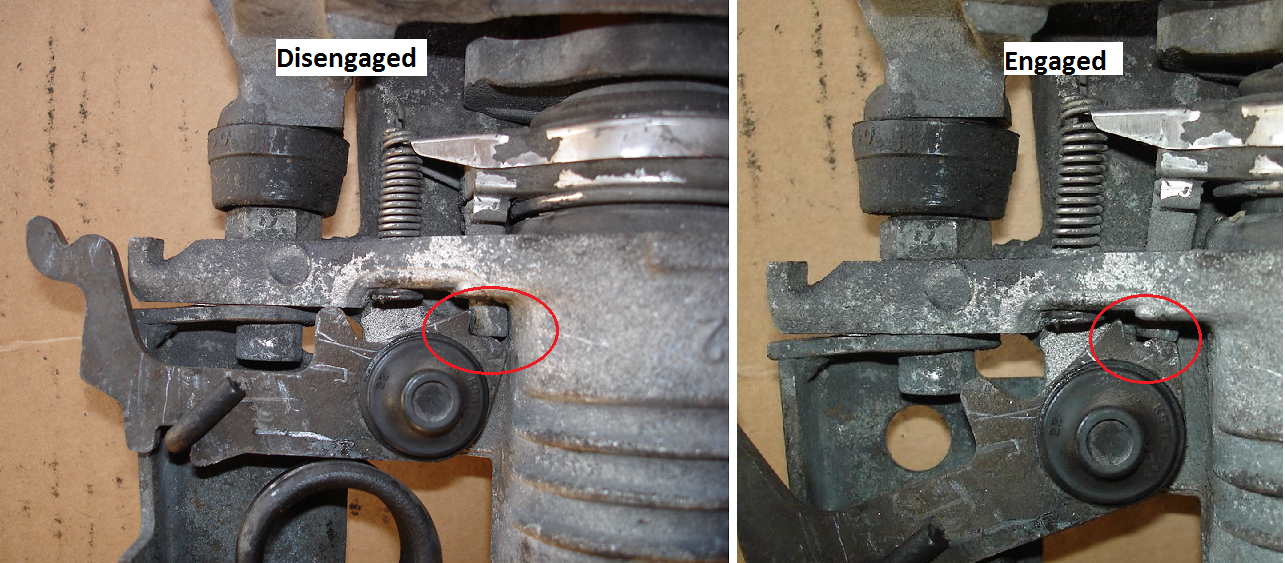
Figure 3. The 1993 to 1997 caliper parking brake mechanism.
Step 3 – Replace parking brake components
The 1998 to 2002 models will be covered first, and the 1993 to 1997 models last.
1998-2002 Models
After each brake caliper and rotor has been removed, the parking brake assembly is now accessible.
- To remove the brake shoe(s), remove the shoe retaining clip to allow the shoe to move freely. Similarly, you can use a punch or screwdriver to tap the the shoe from its retaining clip.
- In some instances, the tension on the shoe may need to be loosened via the star adjuster before removal.
- Spread the ends of the brake shoe ring to free it from the adjuster before sliding it over the hub and off of the vehicle.
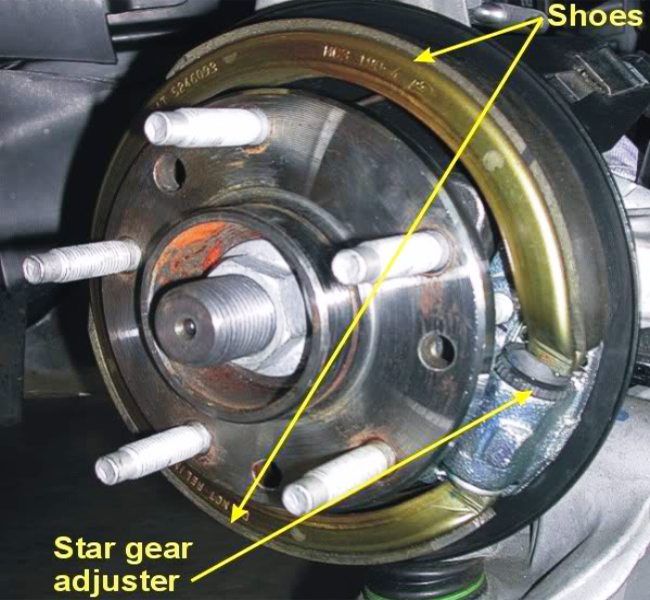
Figure 4. Brake shoes and adjuster. 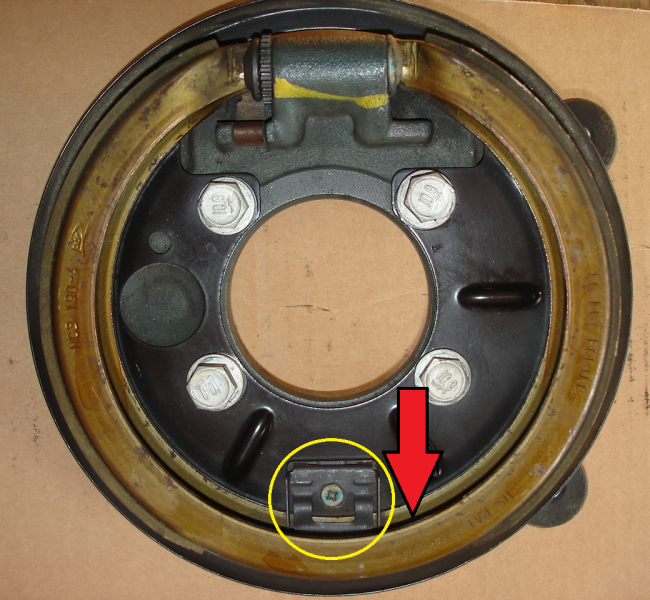
Figure 5. Remove retaining clip or drive the parking brake shoe off of the clip (assembly removed from vehicle for visual purposes). 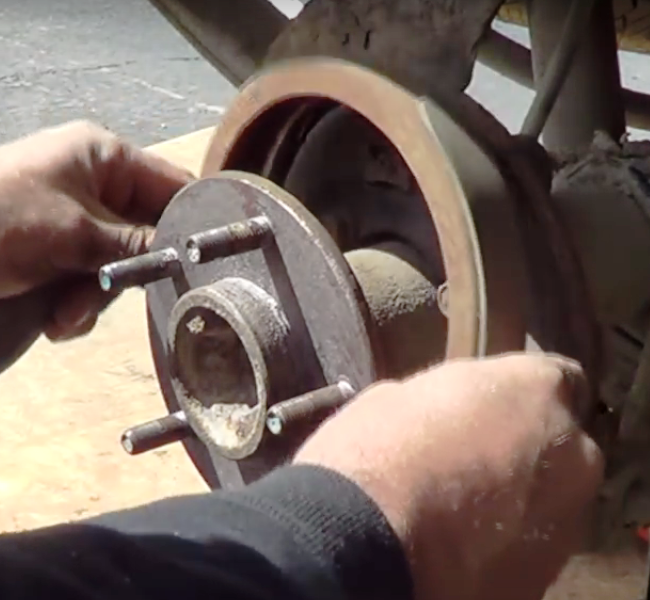
Figure 6. Brake shoe removal.
- To lubricate the star adjuster, work the brake lever on the backside of the backing plate back and forth, then push out the tappets. Remove the tappets and pin. Clean all components in brake parts cleaner and lubricate at points 1, 2, and 3 with a silicone-based grease before reassembling.
- Slide the new brake shoe over the hub assembly. Place the ends of the shoe into the tappets of the star adjuster, making sure the shoe is properly seated in its retaining clip. If the retaining clip was removed during disassembly, reinstall the clip over the shoe and tighten the screw to 44 in/lbs.
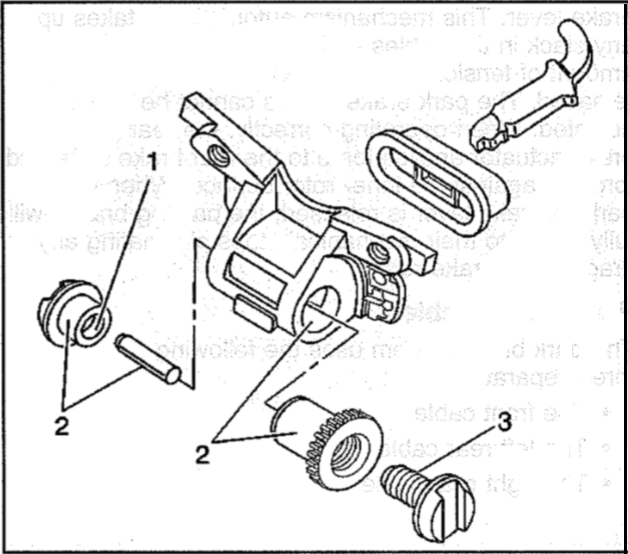
Figure 7. Star wheel adjuster exploded view. 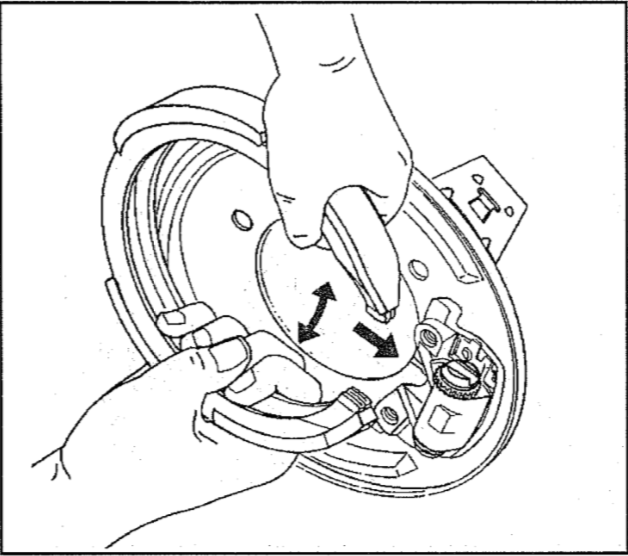
Figure 8. Installing new parking brake shoe.
- With the new parking brake shoes installed, adjust the parking brakes via the star wheel adjuster. With the rotors installed, the brake shoe levers (located on backside of backing plate) should have 3-8mm of free play before contacting the inner surfaces of the rotor hats (drums). Make sure that the rotors spin free and the parking brake shoes do not drag on the rotor hat (drum) with the parking brake is released.
1993-1997 Models
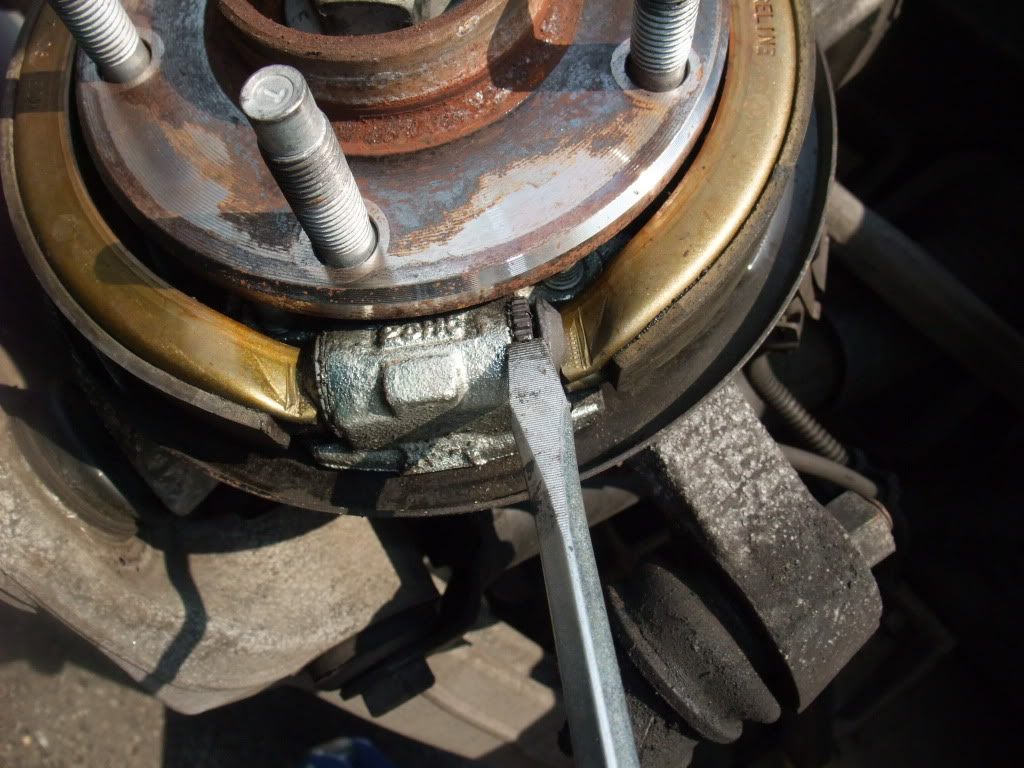
The older style parking brake assemblies use the same brake pads as the regular rear brake, so wear is taken care of by a normal pad change. The mechanism is fairly reliable and rarely needs adjustment; however, a worn finger end of the parking brake lever mechanism or a broken spring can leave you with a faulty parking brake. To replace the lever or spring, first slacken the parking brake cable from the equalizer under the center console before removing the cable from the caliper lever. Similarly, the lever can be pried forward to allow the cable to be released.
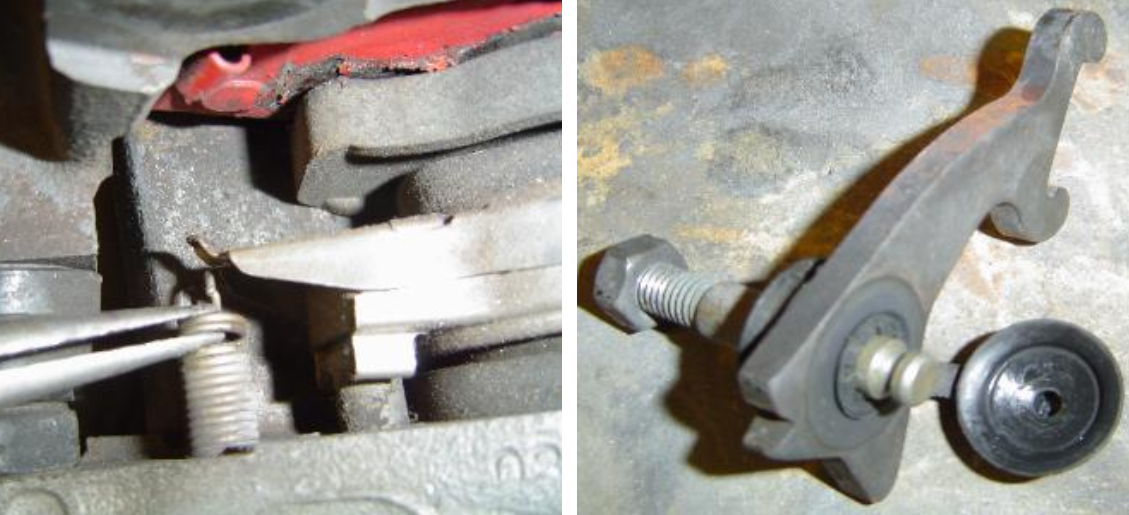
- If necessary, remove and replace the collar springs with a set of needle nose pliers or similar.
- The lever return spring can also be removed with a set of pliers.
- The lever itself is held in place by a bolt that goes through the length of the caliper and is fastened with a nut on the other side. By removing the bolt/nut, the lever can be removed from the caliper.
- Install the new collar springs and lever assembly. Work the lever by hand to ensure it is properly engaging the push rod to move the piston/brake pad. Install the return spring and re-attach the parking brake cable to the lever.
Pro Tip
The service manual suggest that parking brake adjustments are typically unnecessary after replacing the springs or lever assembly on '93-'97 model parking brakes.
Related Discussions
- Parking Brake Adjustment? - LS1Tech.com
- How to replace shoes on E-brake? - LS1Tech.com
- Parking Brake Removal? - LS1Tech.com