Camaro and Firebird: How to Replace Knock Sensor
Faulty knock sensors will typically trigger a check engine light and prevent your engine from running at its best. Replacing the knock sensors can prevent detonation related engine damage and restore engine performance.
This article applies to the Chevrolet Camaro and Pontiac Firebird (1993-2002).
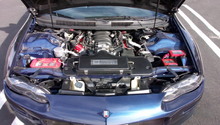
Knock sensors are basically small microphones attached to the engine that listen for the typical frequencies emitted from detonation. When the set frequency is detected, the sensor(s) relay this information to the powertrain control module to retard the ignition timing and prevent engine damage. A common problem that LS1 equipped F-body cars suffer from are faulty knock sensors. With the knock sensors positioned under the intake manifold in the valley of the engine, moisture has a tendency to settle in the valley and corrode the sensors. The sensors can falsely begin to detect knock and limit engine power, or they can fail to measure when knock is occurring and leave your engine susceptible to damage. A bad knock sensor will often throw a diagnostic trouble code to let you know there is a problem.
Knock sensor issues were such a problem on various GM models, GM released a Technical Service Bulletin to create a water-tight seal on the knock sensors to prevent premature failure. If the knock sensors on your LS1 equipped Camaro or Firebird have gone kaput, this article will outline the basic removal and replacement procedure.

Materials Needed
- 8mm, 10mm, 15mm, and 22mm sockets
- 1/4" or 3/8" drive ratchet and extensions
- Flat head screwdriver
- Torque wrench (in/lbs)
- Hose clamp pliers
- RTV sealer
This article focuses on knock sensor replacement for vehicles equipped with the LS1 engine. The 4th generation F-body cars that are not equipped with an LS1 V8 engine have the knock sensors located on the side of the engine block and can easily be replaced from under the vehicle.
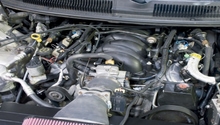
Step 1 – Remove intake manifold
The knock sensors are located in the valley of the engine and require the intake manifold to be removed for replacement.
- Disconnect the battery before removing the airbox lid and mass airflow sensor (MAF). Be sure to disconnect the intake air temperature sensor (IAT) and mass airflow sensor wiring harness plugs. Loosen the hose clamp at the throttle body and remove the MAF and airbox lid as an assembly.
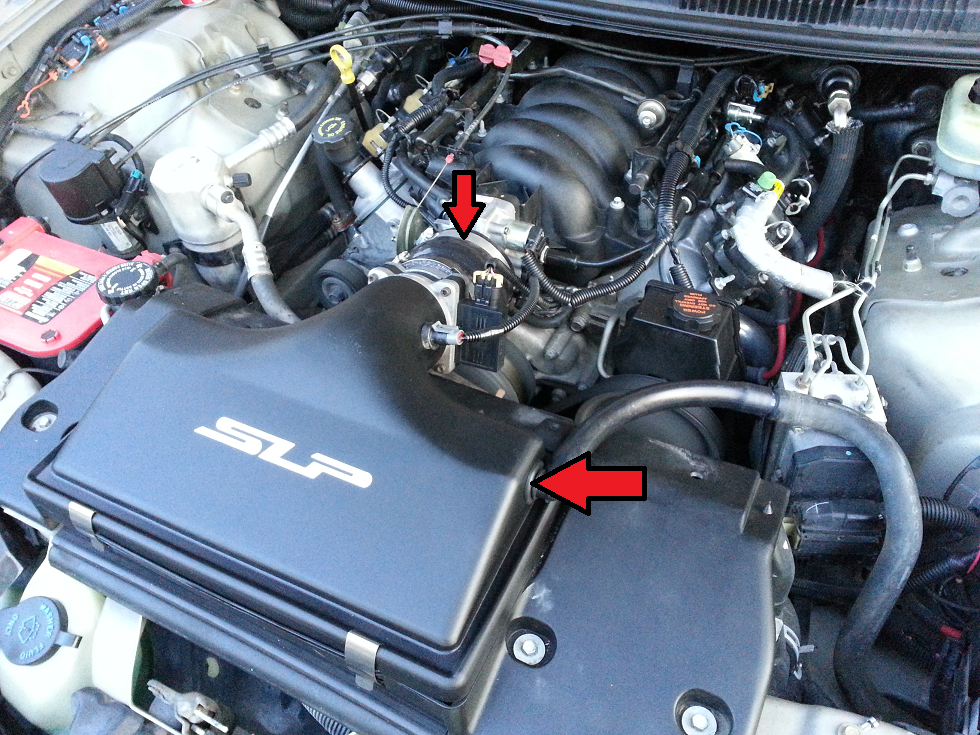
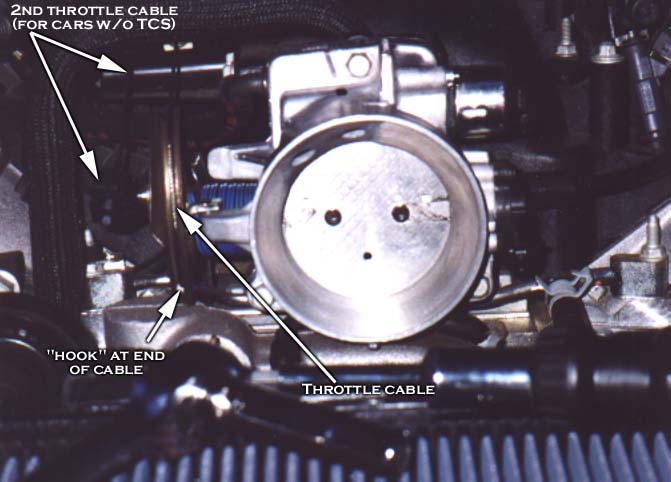
- Remove the throttle and cruise control cables from the throttle body. Slide the cables out of the cable support attached to the intake manifold and move cables aside.
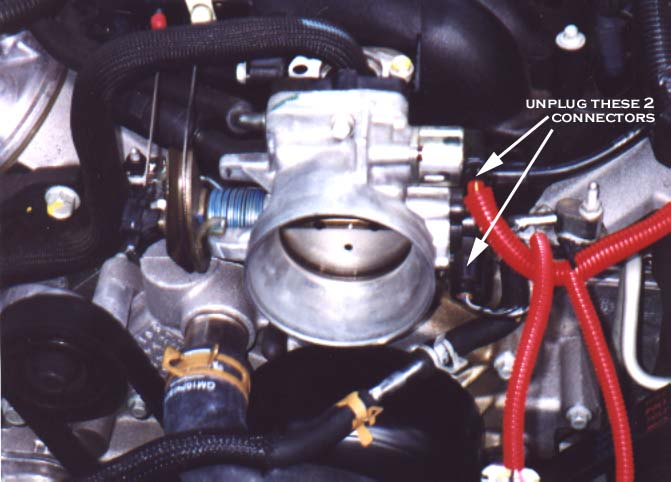
- Disconnect the throttle position sensor (TPS) and intake air control (IAC) from the throttle body.
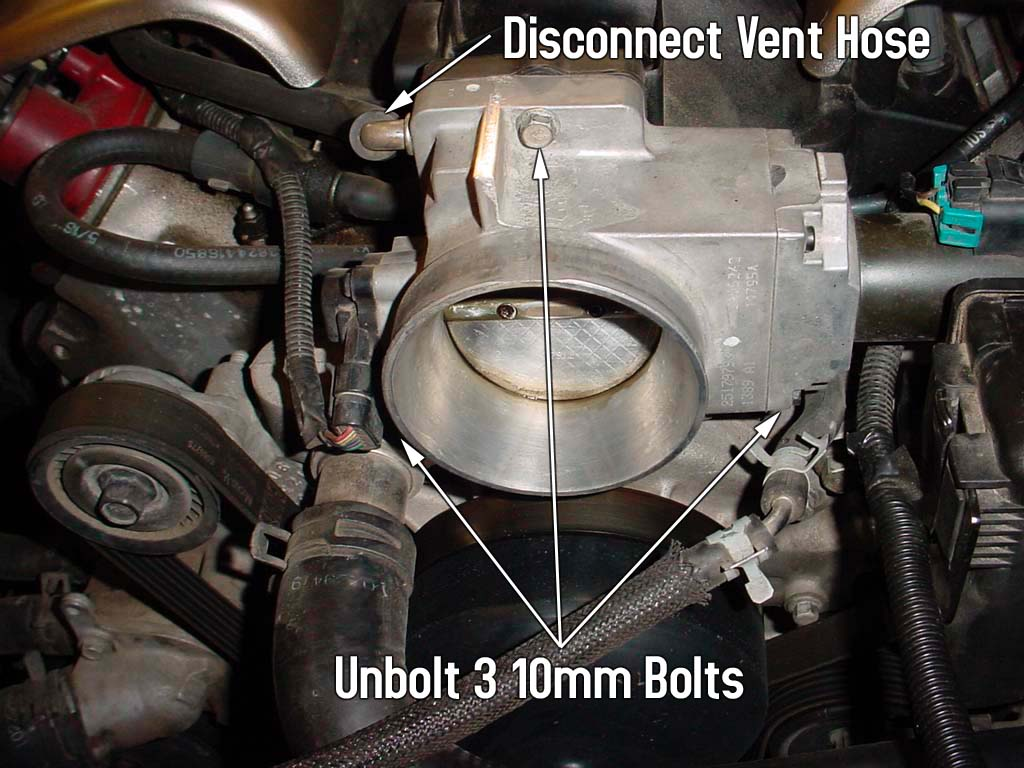
- Disconnect the (2) coolant hoses on the underside of the throttle body (many cars have a tb coolant bypass mod, so this will be unnecessary). Disconnect the vent hose on the topside of the throttle before removing the (3) 10mm bolts securing the throttle body in place. Set throttle body aside.
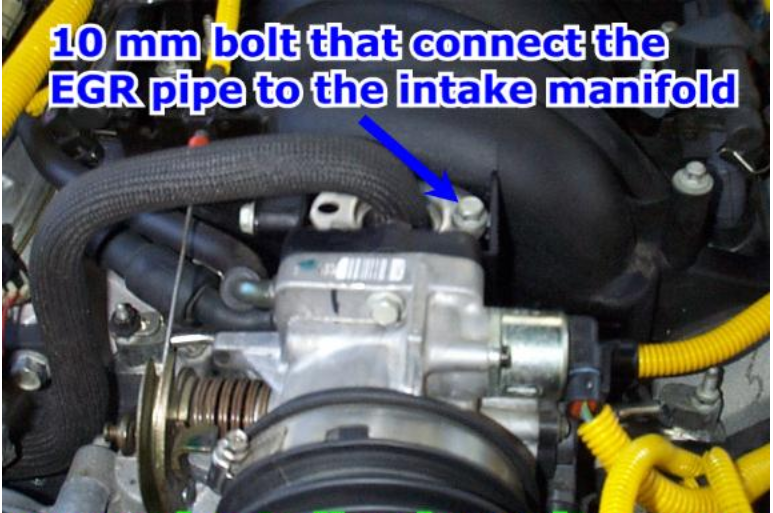
- Remove the EGR pipe from the top of the intake manifold.
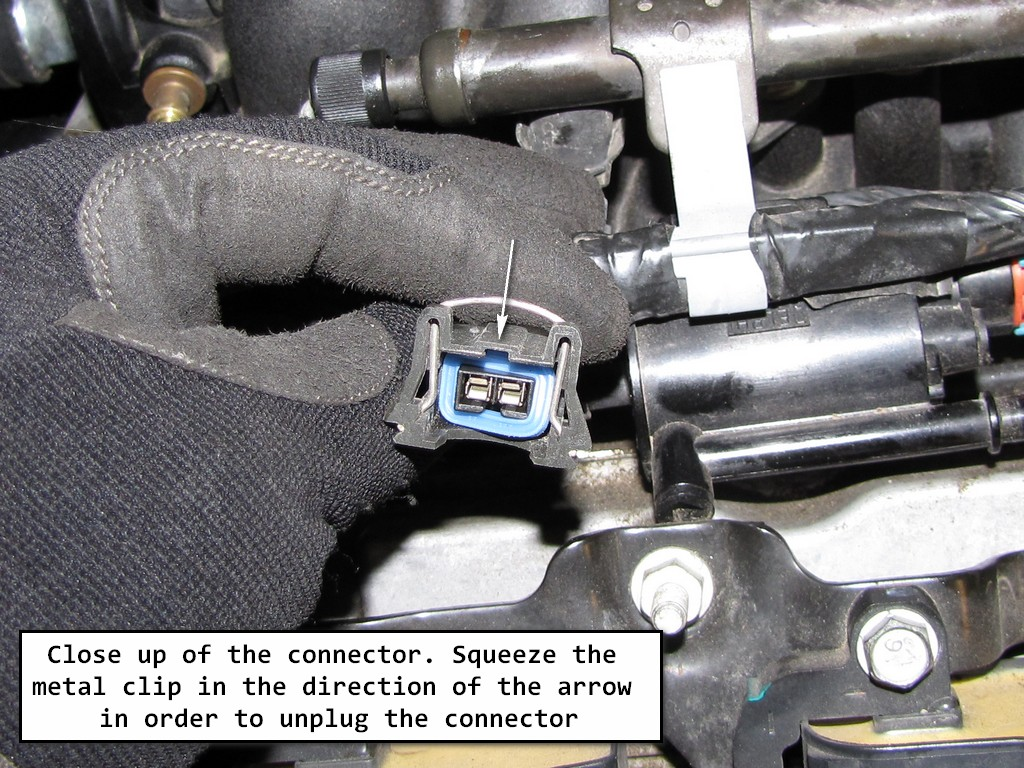
- Disconnect each fuel injector from the wiring harness plugs by depressing the metal fasting clip and wiggling the plug off of each injector.
- Disconnect the large vacuum hose running to the brake booster.
- Disconnect the PCV valve from the front passenger side of the intake manifold by removing the 10mm nut from the pipe strap.
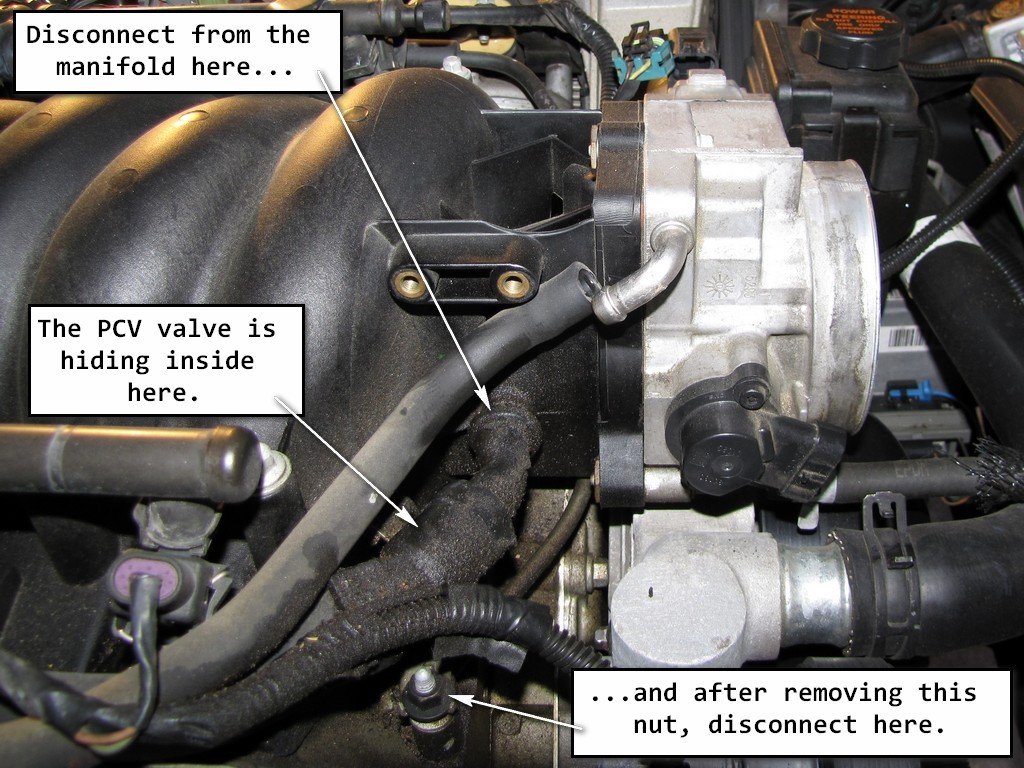
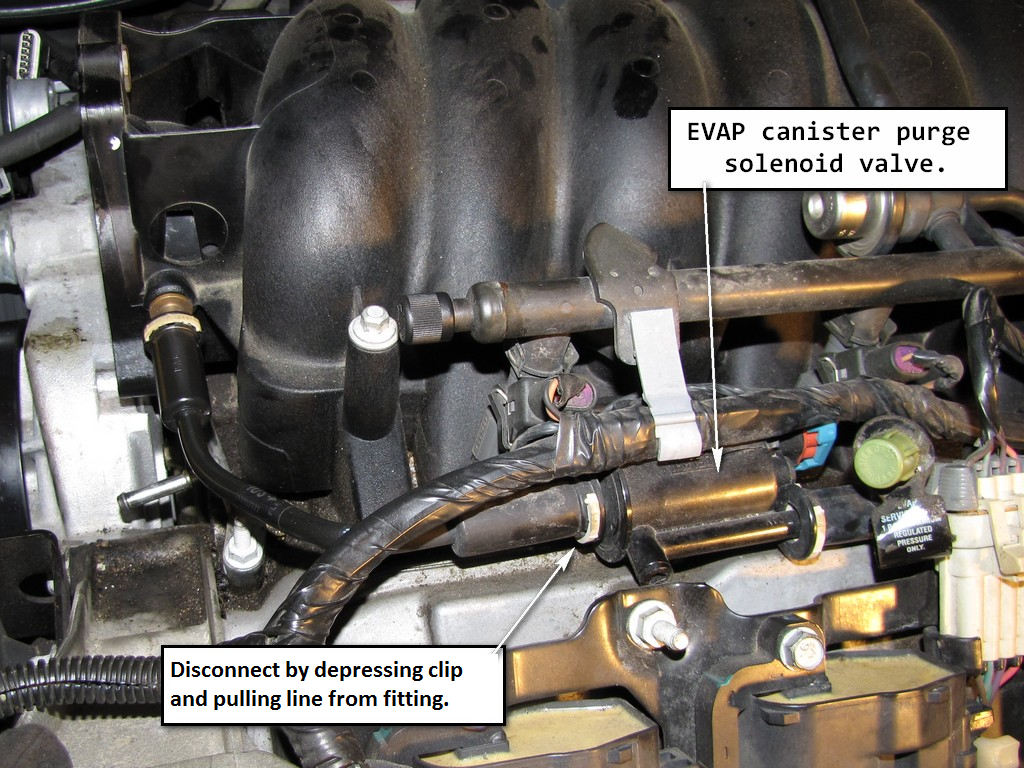
- Disconnect the EVAP quick release fittings on the driver's side of the manifold by depressing the grey/vanilla colored clips and pulling the line to disconnect it from the fittings.
- Remove the (10) 8mm bolts securing the intake manifold to the cylinder heads. Carefully slide the intake manifold forward to access the small vacuum line and manifold absolute pressure sensor (MAP). Disconnect the vacuum hose and sensor plug.
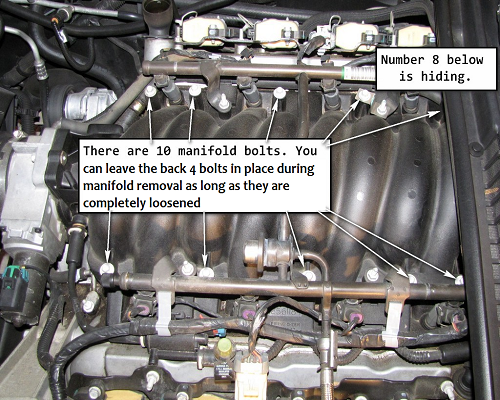
Figure 10. Manifold bolt locations. 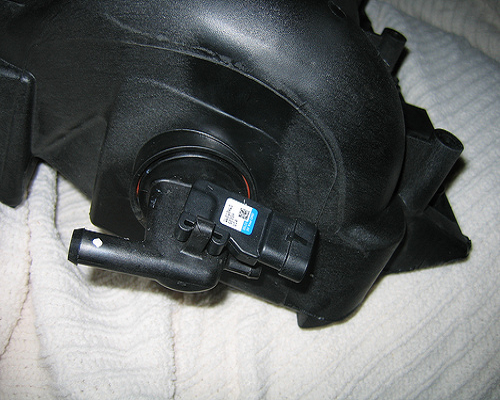
Figure 11. Vacuum nipple and sensor at back of manifold.
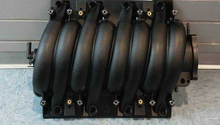
The manifold can now be slid further forward and turned 90 degrees to rest on the front of the engine. This will allow the fuel line to stay connected to the injector rail(s); however, some prefer to disconnect the fuel line and the injector rails for complete removal of the intake manifold from the engine bay.
Figure 12. Intake manifold with injectors connected. 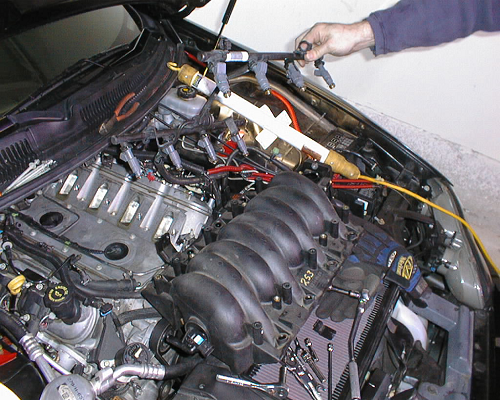
Figure 13. Intake manifold with injectors removed (optional).
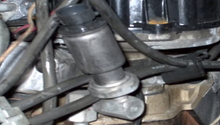
Step 2 – Replace knock sensors
With the intake manifold removed, the knock sensors are now accessible.
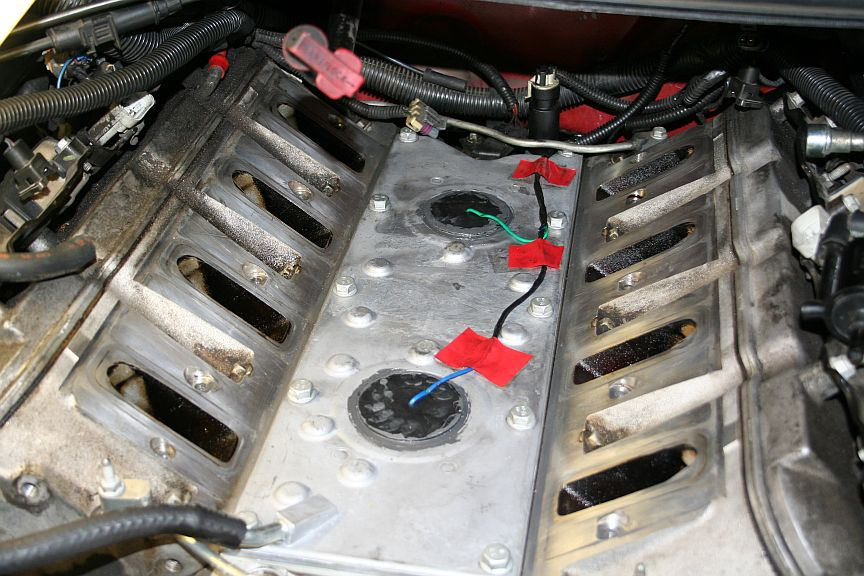
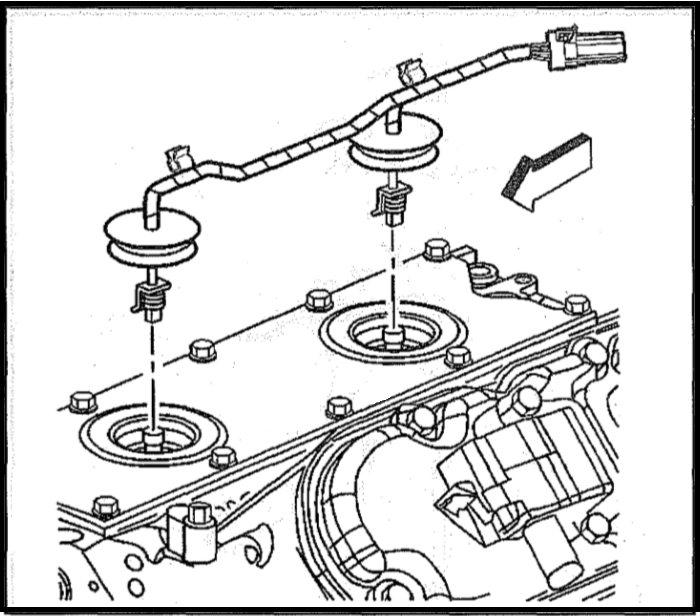
- Remove the knock sensor plugs from the valley plate and disconnect the wiring harness assembly from the knock sensors.
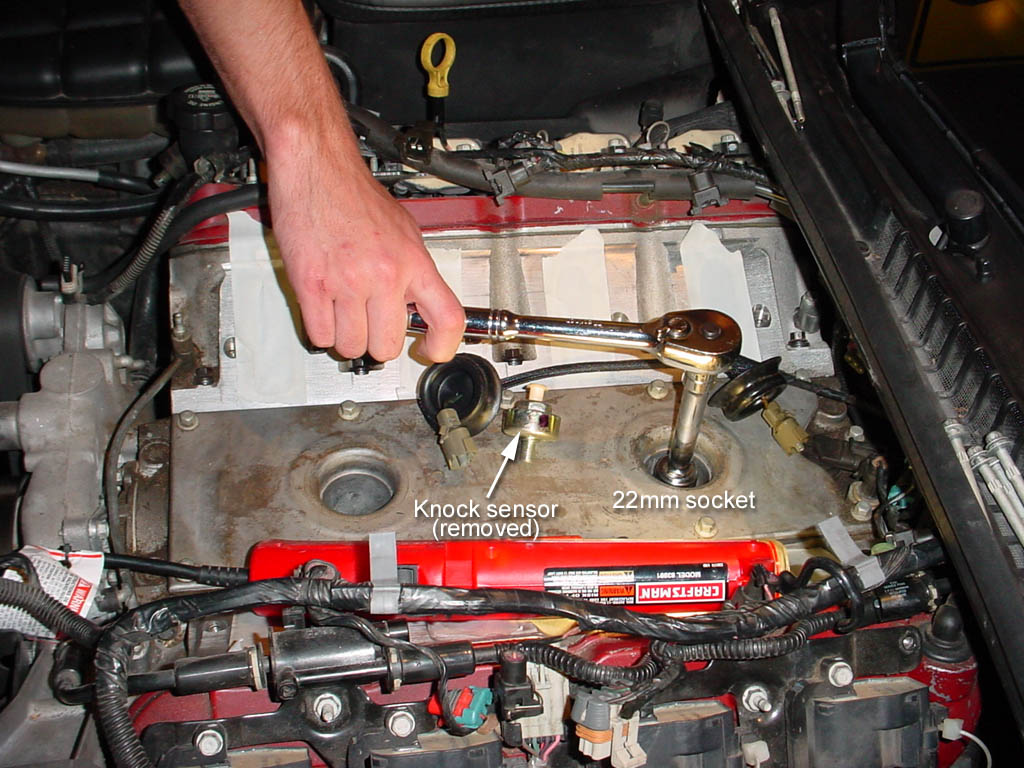
- Remove the knock sensors using a 22mm socket, extension and ratchet.
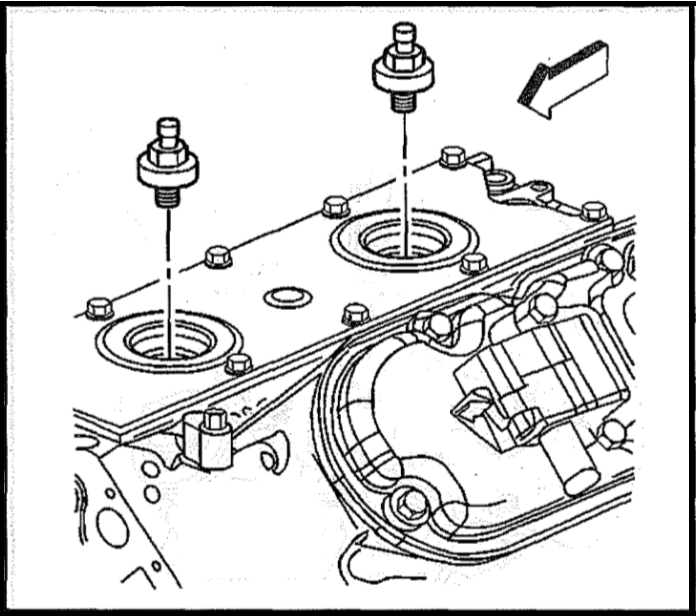
- Thread the new knock sensors into place and torque to approximately 11 ft/lbs.
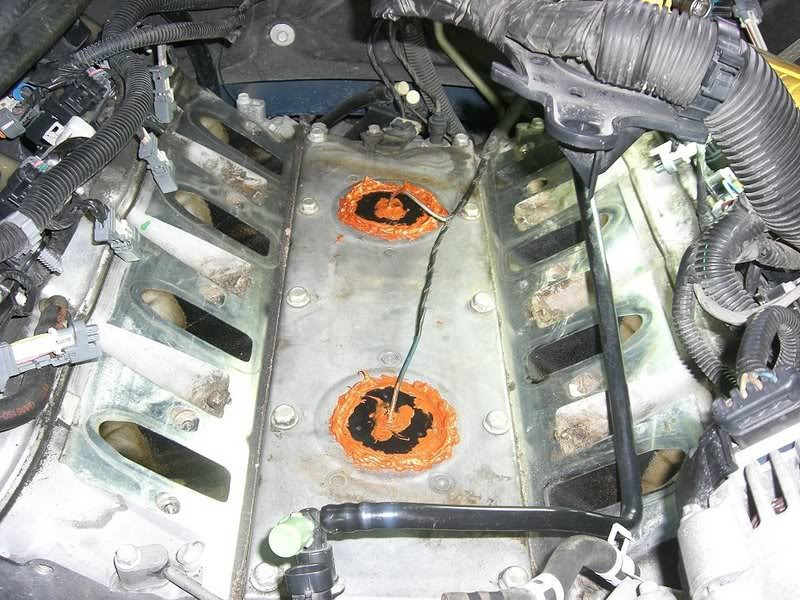
- Install the wiring harness and apply an RTV sealer to the knock sensor plugs. It is always recommended that a new wiring harness be installed when replacing the knock sensors. Per GM Technical Service Bulletin #02-06-04-023, RTV sealant needs to be applied to create a dam to keep water out of the knock sensor cavities and prevent premature knock sensor failure.
Pro Tip
If the head of the knock sensor is damaged or broken, the valley cover can be removed for better access to the knock sensors.
Step 3 – Re-install intake manifold
With the new knock sensors and sensor plugs properly installed, the intake manifold can be installed.
- Clean any debris or foreign objects from the valley before installing the intake manifold.
- Install the intake manifold on the engine using new gaskets if necessary. Be sure to connect the vacuum hose and MAP sensor harness plug at the back of the manifold. Tighten the manifold bolts to 44 in/lbs in the appropriate sequence as shown in Figure 19. After the initial tightening sequence, torque the manifold bolts to a final value of 84 in/lbs using the same sequence.
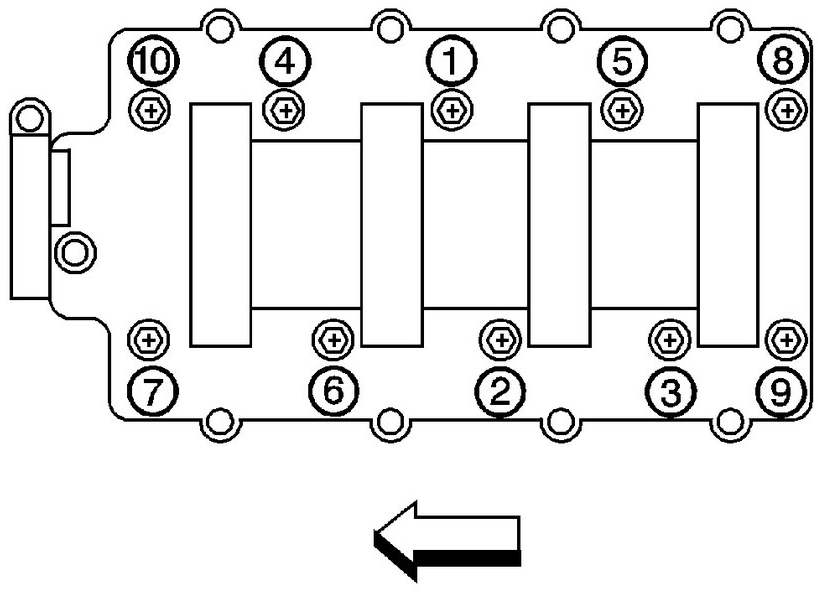
Figure 19. Manifold tightening sequence. - Install the EVAP quick connect fittings, making sure they securely snap into place.
- Install the PCV valve and torque the pipe strap nut to 106 in/lbs.
- Attach the large vacuum hose back onto the brake booster.
- Connect the fuel injector harness plugs.
- Install the EGR pipe back into the intake manifold and torque to 89 in/lbs.
- Attach the coolant hoses to the underside of the throttle body as well as the small vent hose before installing the throttle body to the manifold. Use new sealing rings if necessary and torque to 89 in/lbs.
- Reconnect the TPS and IAC at the throttle body.
- Re-attach the throttle body and cruise control cables.
- Install the MAF and airbox lid. Connect the IAT and MAF harness plugs.
- Reconnect the battery.
Pro Tip
It is a good idea to tape down the knock sensor wiring to the valley plate with some high temperature tape to prevent wiring damage when installing the intake manifold.
Featured Video: How to Remove Manifold and Change Knock Sensors on LS1
Related Discussions
- Knock Sensor Replacement - LS1Tech.com
- 99 LS1 Knock Sensor Problem - LS1Tech.com
- Knock Sensor Code New Knock Sensors - LS1Tech.com