

4L60E 3rd gear gone
 06-24-2012, 10:42 PM
#1
TECH Resident
Thread Starter
iTrader: (55)
Join Date: Oct 2005
Location: Cleveland, Oh
Posts: 847
Likes: 0
Received 0 Likes
on
0 Posts

I have a trans that third gear went out during a nitros pull and 1/2 gears still work just wont shift to 3rd. I'm an auto newb but I've rebuilt everything else on cars so I know cars. I was thinking about fixing this myself. I'm just not sure what goes wrong with these and possibly might not have a special tool needed. I need to hear from the guys that have torn these down for a little insite. Thanks for any help in advance.


 06-25-2012, 10:20 PM
#4
TECH Resident
Thread Starter
iTrader: (55)
Join Date: Oct 2005
Location: Cleveland, Oh
Posts: 847
Likes: 0
Received 0 Likes
on
0 Posts
I usually only use manuals. I've rebuilt T56's and dodge fwd manuals but autos have always been something I've stayed away from. I'm wondering if it's the first pack to pull out after taking pump off.
08-18-2012, 07:23 AM
#6
Moderator
https://ls1tech.com/forums/automatic...-get-them.html
https://ls1tech.com/forums/automatic...lp-needed.html
https://ls1tech.com/forums/automatic...ease-help.html
https://ls1tech.com/forums/automatic...p-rebuild.html
Figure on at least $200-$300 for special tools and using a local trans shop to install the teflon rings as those tools are another $300 and a bit tricky to do without them.
It sure helps to have a stand of some kind too. I made my own on wheels:
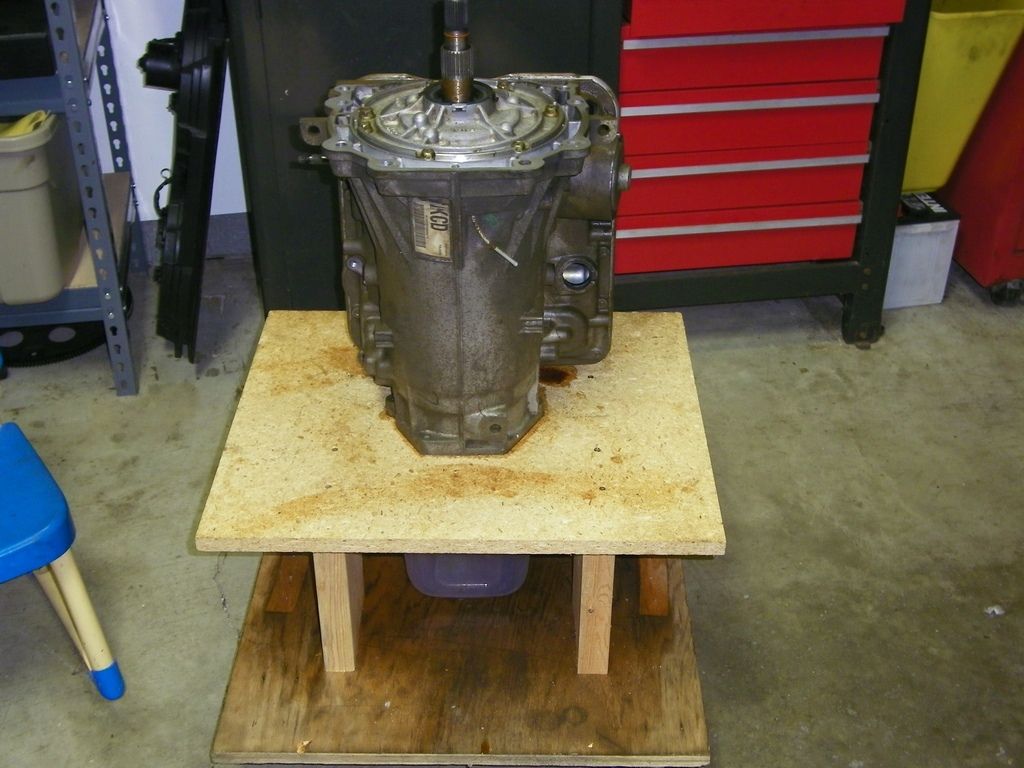
As I have said in many posts and people seem to concur, that unless you really want to learn about rebuilding, or plan to rebuild more than 1 or 2 trans, don't try it yourself as the startup costs are significant, many confusing decisions have to be made and the process is error-prone. And errors are very time consuming (R&R the trans and rebuild it again) and can be costly.
08-18-2012, 09:30 AM
#7
TECH Enthusiast
Join Date: Jun 2002
Location: In the garage fixing LT1
Posts: 634
Likes: 0
Received 0 Likes
on
0 Posts
KD clutch spring compressor ($70)
Good set of expansion C-clip pliers.
Some 2x4s to build a stand (I bolt the 2x4s to the bell housing and let the trans hang from them)
Teflon ring installer and resizer kit ($60)
Plus a good rebuild kit, then buy some upgrade parts (beast shell, hardened sungear, TransGo shift kit)
You can just replace the clutches if you want. It only takes a couple of hours to rebuild the trans once you know what you're doing. Very satisfying experience too. I bought a second transmission to swap in whenever I rebuild one. It worth it to learn to do your own trans because you can learn to tweak them to your liking.
Get a vid and a couple of books. I used the Haynes and ATSG Manual with Kevin Galindo's video.
Last edited by Speedy; 08-19-2012 at 09:13 AM.
Trending Topics
08-18-2012, 12:00 PM
#8
TECH Resident
Thread Starter
iTrader: (55)
Join Date: Oct 2005
Location: Cleveland, Oh
Posts: 847
Likes: 0
Received 0 Likes
on
0 Posts
Thanks for the input. The Trans has a shift kit already. 1st and second gear works fine. What happened was the guy hit the nitros in third gear and fried it. I wanted to pull it apart and see if it's just the clutches because the fluid still looks clean like there may not be alot of damage.
08-18-2012, 06:17 PM
#9

I'm having the same prob. If the fluid is cleanish and smells ok it's likely not just burnt clutches. I pulled out my 3/4 pack the steels are a little blued but plenty of clutch left. My problem is the bushing inside the pump hub is worn away causing the nylon ring on the input shaft to be severed. Still contemplating my next move. Pull out the pump and check for burrs in the pump hub. To access 3/4 clutch pack remove pump then simply grab input shaft and lift out assembly. Once out, flip it all over then 3/4's are right on top
08-18-2012, 09:05 PM
#10
Moderator
I'm having the same prob. If the fluid is cleanish and smells ok it's likely not just burnt clutches. I pulled out my 3/4 pack the steels are a little blued but plenty of clutch left. My problem is the bushing inside the pump hub is worn away causing the nylon ring on the input shaft to be severed. Still contemplating my next move. Pull out the pump and check for burrs in the pump hub. To access 3/4 clutch pack remove pump then simply grab input shaft and lift out assembly. Once out, flip it all over then 3/4's are right on top
So far I have always completely disassembled the trans beginning with removing the valve body, then pump, then band, then input drum, etc.
At the very least you need to loosen the band by removing the servo. Has anyone had luck R&R the input drum with the band in place?
08-18-2012, 09:20 PM
#11
Moderator
When replacing the 3/4 clutch, at a minimum you want to go 7 frictions. One way to do that is to order a 4L65E rebuild kit. Or order a quality 3/4 clutch set from a sponsor or other performance source. I would never use just the 6 frictions which come with a standard 4L60E rebuild kit.
Think of how you would engage the clutch on a manual transmission car - a very slow engagement is smoother but might wear the clutch more. The stock 4L60E is designed for a very smooth and gradual engagement of the 3/4 clutch; this done with a large clearance of e.g. .060 to .075 and relatively low line pressure. While fine for the family car, it does lead to premature wear in performance applications. Therefore, a tighter clearance of e.g. .040 to .050 and high line pressure (shift kit) will increase the life of the 3/4 clutch. Running 7 or 8 frictions with higher line pressure will also help ensure that it doesn't slip under WOT with a 400+ ft/lb engine.
In other words, it takes more than "1 thing" to really improve the 3/4 clutch life expectancy. It takes, more and better frictions, tighter clearance and higher line pressure. Another common failure reason is a leak in the critical servo area or the 3rd accumulator check ball. Any leak here will drop the line pressure to the clutch causing it to slip and quickly self destruct.
08-18-2012, 09:31 PM
#12
TECH Resident
Thread Starter
iTrader: (55)
Join Date: Oct 2005
Location: Cleveland, Oh
Posts: 847
Likes: 0
Received 0 Likes
on
0 Posts
Perfect that's the kind of info I was looki g for guys. I am buying a book for rebuilding it. That clutch info is greatly appreciated. Thanks
08-18-2012, 09:48 PM
#13
Moderator
Here are my 3/4 clutch specs from the last two trans I built for street/strip use:
7 Friction with GPZ105:
.215 Apply
5x .066 Friction GPZ105
2x .079 Friction GPZ100
6x .098 Plain Steel
.145 Backing
.092 Snap ring (stock)
==> .045 dry clearance (.040 wet)
8 Friction with GPZ105 (or with Raybestos 558305)
.215 Apply
8x .066 Friction GPZ105
7x .078 Kolene steel (TranStar part #74120AK)
.157 Backing
.092 Snap ring (stock)
==> .038 to 0.040 dry clearance
You can purchase a .215 or .221 apply plate, a .145 and .157 backing plate. (Also some other sizes.) Some kits like the Z-pak use a thin .060 snap ring, but I don't trust that.
By using different apply and backing plates, and different thicknesses of the same frictions, you can get the desired clearance.


 09-12-2012, 08:59 PM
#16
Moderator
While you are putting a better clutch kit in, I would still ensure that a 3rd fluid leak didn't cause the failure.
Page 42 of the ATSG manual describes "Inspect 3rd Accum Capsule for Leakage". A leak here can limit pressure to the 3/4 clutch and cause it to slip and self destruct. Replace the seal on the 2nd servo for the same reason. Sonnax makes a O-ring kit for the servos that might seal better than the stock split rings.
Also consider the Sonnax Servo Release Check Valve # 77701-076 which supposedly extends the life of the 3/4 clutch:
http://www.sonnax.com/system/announcement/77701-076.pdf
With that Sonnax valve, drill the 3rd feed hole on the separator plate to .120. Without it, I would still drill the 3rd feed hole to .101 to help compensate for any small leakage somewhere.
(The Transgo HD2 instructions call that the "2-3 Shift" hole and suggest .101 for high stall or full race.)
Also this assumes you have a .500 boost valve installed as part of the shift kit.
09-13-2012, 05:09 PM
#19
Moderator