
show me your modified fuel rail covers!
 02-09-2009, 04:41 PM
#1
TECH Addict
Thread Starter
iTrader: (3)
Join Date: Oct 2007
Location: Orange County
Posts: 2,543
Likes: 0
Received 0 Likes
on
0 Posts
looking for pics of modified fuel rail covers, i want to hack up these vette covers as little as possible to fit my camaro. thanks


 02-09-2009, 06:08 PM
#5
TECH Apprentice

Join Date: Nov 2004
Location: Kitchener, Ontario, Canada
Posts: 300
Likes: 0
Received 0 Likes
on
0 Posts

Here you go. Drivers side doesn't need much. There are a couple brackets that attach under the fuel rail bolts that hold cables. I had to trim for them. When I took my intake off I didnt reinstall them.
Passenger side I trimmed off about the back 1/3.
Passenger side I trimmed off about the back 1/3.
02-09-2009, 09:16 PM
#6
TECH Resident
iTrader: (19)
Join Date: Apr 2008
Location: Sully, Iowa
Posts: 764
Likes: 0
Received 0 Likes
on
0 Posts
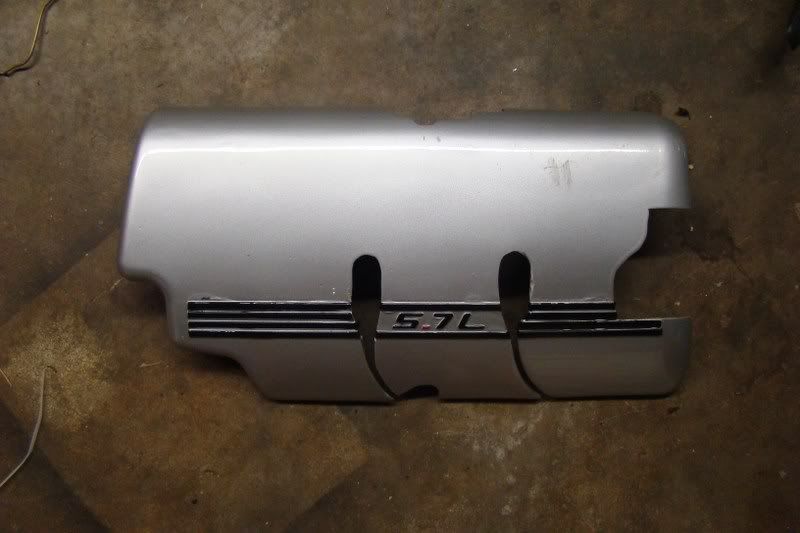
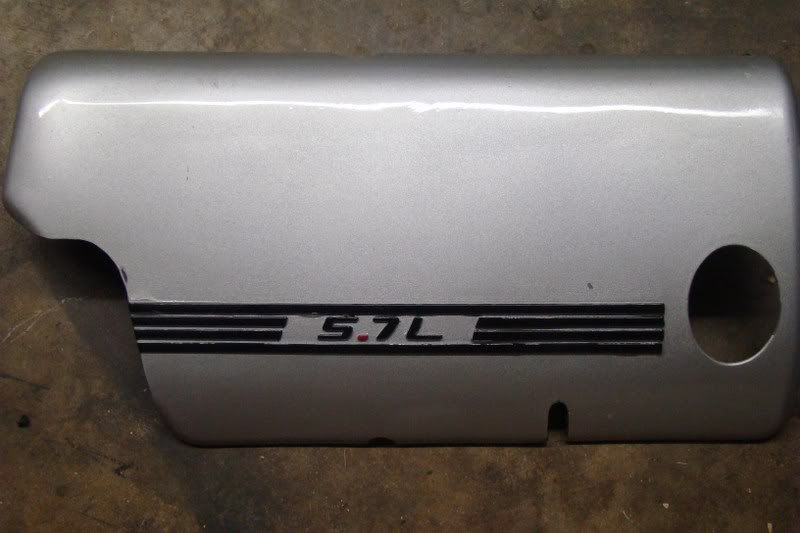
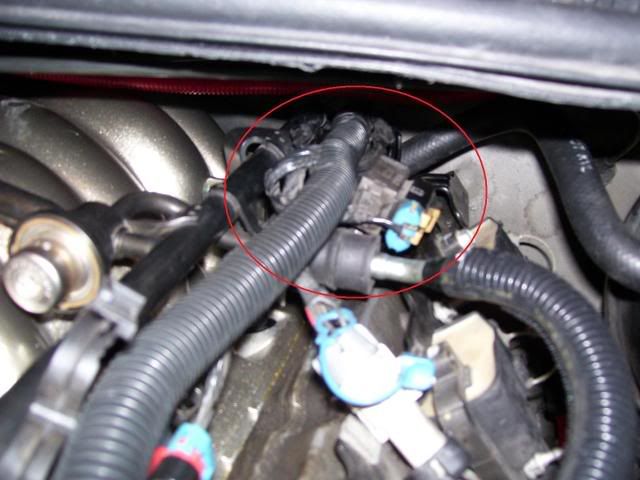
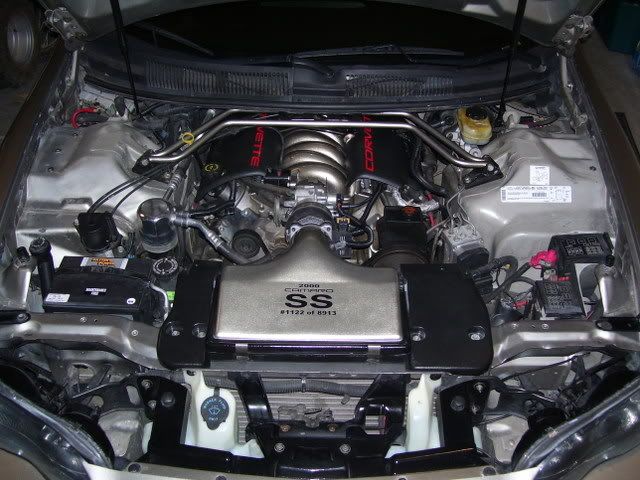
OK after looking at your engine bay you shouldn't need to cut your Drivers side at all. As for the Passenger side you will have to cut a hole for the dip stick and take a little chunck out of the back more then i did for this big wire loom that goes back there and then finally you will have to cut for you throttle cable. You wont have to take out as much as i did for the throttle cable tho since you only have one cable not too like me bc i don't have traction control. It really not that hard tho to test fit and cut and test fit and cut thats how i did it. Here are some pics i circled where you need to cut.

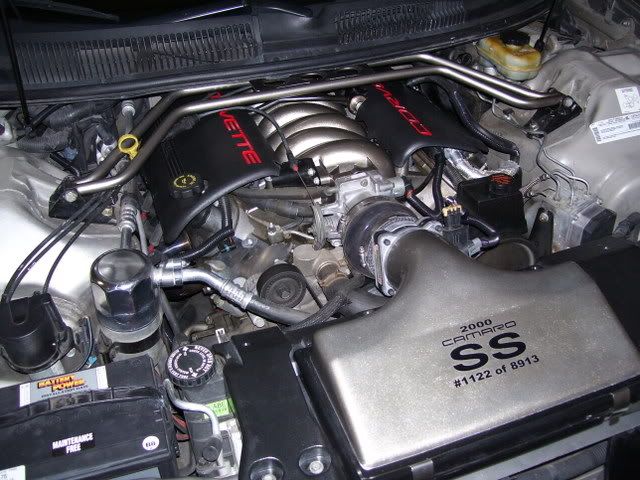
Here are some installed pics after i got them cut and before paint.


Here are some installed pics after i got them cut and before paint.
Last edited by firehawk#682; 02-10-2009 at 07:29 AM.
Trending Topics
02-09-2009, 09:29 PM
#8
TECH Addict
Thread Starter
iTrader: (3)
Join Date: Oct 2007
Location: Orange County
Posts: 2,543
Likes: 0
Received 0 Likes
on
0 Posts
OK after looking at your engine bay you shouldn't need to cut your passenger side at all. As for the drivers side you will have to cut a hole for the dip stick and take a little chunck out of the back more then i did for this big wire loom that goes back there and then finally you will have to cut for you throttle cable. You wont have to take out as much as i did for the throttle cable tho since you only have one cable not too like me bc i don't have traction control. It really not that hard tho to test fit and cut and test fit and cut thats how i did it. Here are some pics i circled where you need to cut.
Here are some installed pics after i got them cut and before paint.
Here are some installed pics after i got them cut and before paint.
 02-09-2009, 09:42 PM
#10
you can do fiberglass filler, sand that down, and then pay some metal glaze ove rthe top of it to fill in any pin holes, and that stuff sands down perfect! heck you may even be able to use metal glaze for the whole thing, not tooo sure, i did it the safe way!
02-09-2009, 09:50 PM
#11
TECH Resident
iTrader: (19)
Join Date: Apr 2008
Location: Sully, Iowa
Posts: 764
Likes: 0
Received 0 Likes
on
0 Posts
I used a product called Evercoat Poly-Flex. It works great on plastics bc it will flex and not crack. It worked really good we had some where i work so i just borrowed some
 02-09-2009, 10:54 PM
#12
TECH Addict
Thread Starter
iTrader: (3)
Join Date: Oct 2007
Location: Orange County
Posts: 2,543
Likes: 0
Received 0 Likes
on
0 Posts
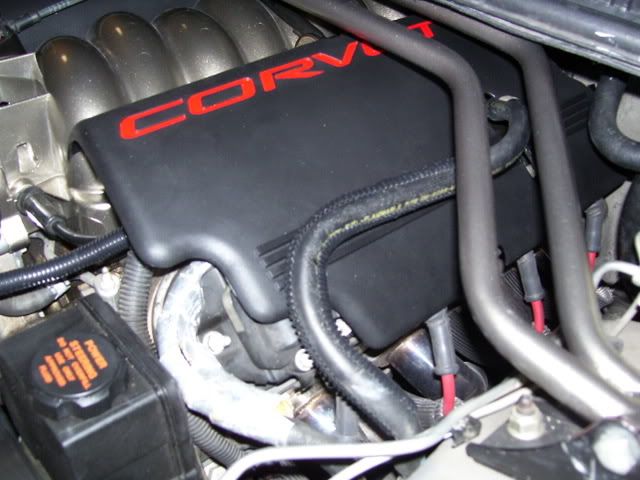
ok im having some fitment issues with the drivers side cover. i can't get it to snap in because of this stuff in the way. what do i do with it?
02-09-2009, 10:58 PM
#13
there should be some clip holding that group of wires to the fuel rail (i think). break that bitch and ziptie it to somethin else. that group of wiring is sitting higher than the fuel rail, and not allowing the cover to snap to the rail because it hits the wires first.

 02-10-2009, 09:16 AM
#19
TECH Addict
Thread Starter
iTrader: (3)
Join Date: Oct 2007
Location: Orange County
Posts: 2,543
Likes: 0
Received 0 Likes
on
0 Posts
yea. im going to leave it like this for week so i can see how it is with heat and everything. i might add some heat tape to the bottom of them. and im still not sure what to do, im thinking black with pewter writing
lol ya i always tell girls i have a corvette engine 
02-10-2009, 09:25 AM
#20
Launching!
iTrader: (1)
Join Date: Mar 2008
Location: PASADENA,TX.
Posts: 281
Likes: 0
Received 0 Likes
on
0 Posts
WOW!! LOOKS GREAT!,
the red lettering really pops w/ the blk n pewter
but I've also seen a stainless strip that covers the CORVETT lettering that
has SS in blk.........looks good now though!
the red lettering really pops w/ the blk n pewter
but I've also seen a stainless strip that covers the CORVETT lettering that
has SS in blk.........looks good now though!