
Some VHT Action
 05-24-2010, 05:51 PM
#1
TECH Apprentice
Thread Starter

Join Date: Sep 2009
Location: Louisville, KY
Posts: 332
Likes: 0
Received 0 Likes
on
0 Posts
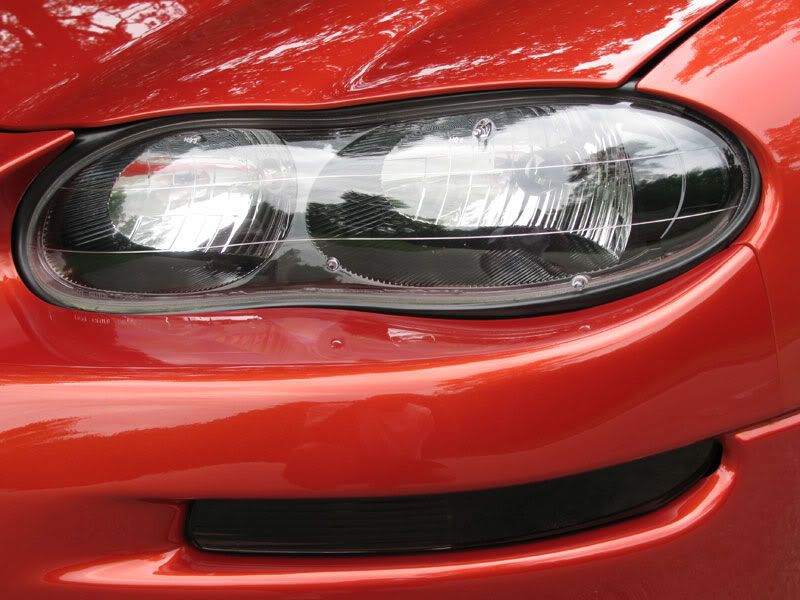
So, decided to do VHT on both corner and rear markers over the weekend. Tried doing the taillights too but I went rediculously dark and had to start over on them. Here's some pics of the corners and the rear sides. I'll post up some pics of the taillights when I finish with them. Let me know what you guys think, too dark too light? Also, should I take the time and effort to wetsand/buff to that glassy gloss finish?


Last edited by DukesOfHazard; 05-24-2010 at 05:58 PM.

 Did you use any clear?
05-24-2010, 06:02 PM
Did you use any clear?
05-24-2010, 06:02 PM
#3
TECH Apprentice
Thread Starter
Join Date: Sep 2009
Location: Louisville, KY
Posts: 332
Likes: 0
Received 0 Likes
on
0 Posts
Yeah, three coats I think. I don't have any experience with spray paint, literally... so I was just kind of winging it. My coats were WAY too heavy on the rears. When I do my taillights again I'm going to use lacquer thinner on the rears and start over. Got too dark when I was doing it the other day and absolutely had to take the car home so I just rolled with it.

 05-26-2010, 09:13 AM
#6
TECH Enthusiast
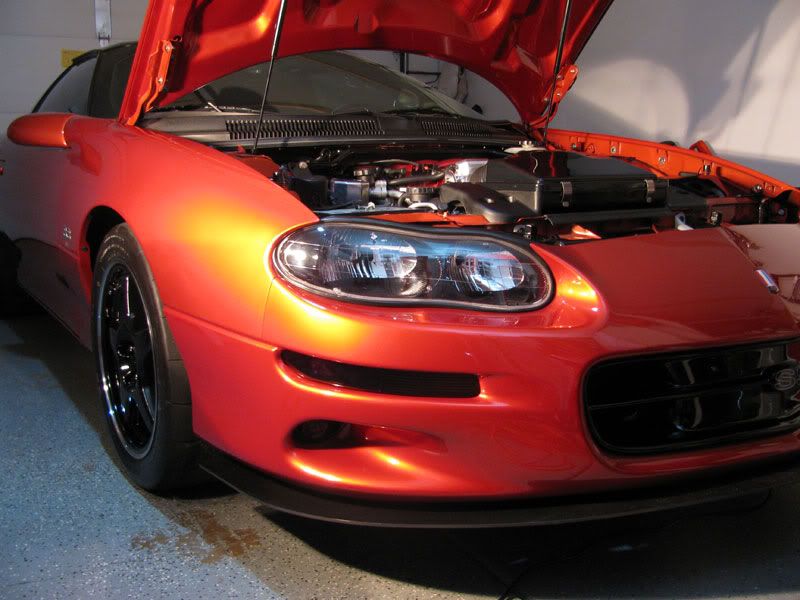
looks like you used a flat clear. There is no way you have gloss clear on those.. Here is mine with 3 coats of clear, you can see a major difference. You can just wet sand the orange peel.
05-26-2010, 01:05 PM
#7
TECH Apprentice
Thread Starter
Join Date: Sep 2009
Location: Louisville, KY
Posts: 332
Likes: 0
Received 0 Likes
on
0 Posts
I'll have to check tonight. It's I think Duplicolor Perfect Match clear coat. Didnt' even think to check for gloss or not. I was planning on wetsanding and buffing to the glass look again anyway but am in need of a buffer atm. Yours look really nice. I'll post pics of the taillights here in a minute. Finished them last night.
Trending Topics
05-26-2010, 01:15 PM
#8
12 Second Club

Join Date: Nov 2005
Posts: 1,848
Likes: 0
Received 0 Likes
on
0 Posts
any time i vht some thing i allways clear them then give them a wet sand and buff or they just dont look good and if your not that good with a spray can they they could look uneven and blotchy.
it also looks like it went on way to heave so try to lighten up the coats thats the trick to vht.
here is a cell pic i took(got to do a pro shoot soon)they tail where vht'ed and about 3 medium coats of clear then sanded with 1500 then2k then buffed.
it also looks like it went on way to heave so try to lighten up the coats thats the trick to vht.
here is a cell pic i took(got to do a pro shoot soon)they tail where vht'ed and about 3 medium coats of clear then sanded with 1500 then2k then buffed.


 05-26-2010, 01:38 PM
#10
TECH Apprentice
Thread Starter
Join Date: Sep 2009
Location: Louisville, KY
Posts: 332
Likes: 0
Received 0 Likes
on
0 Posts
Top picture looks a little weird on the right taillight. Looks a heck of a lot better in person.
These were done yesterday. The opening pics were my first attempt at VHT. These look a helluva lot better in person. i'll take some better pics (non cell) when I get home. I went a LOT lighter on these coats and it turned out a crap ton better.
These were done yesterday. The opening pics were my first attempt at VHT. These look a helluva lot better in person. i'll take some better pics (non cell) when I get home. I went a LOT lighter on these coats and it turned out a crap ton better.
05-26-2010, 08:11 PM
#11
TECH Apprentice
Thread Starter
Join Date: Sep 2009
Location: Louisville, KY
Posts: 332
Likes: 0
Received 0 Likes
on
0 Posts
Threw these inserts on today.

Gunna get the ones from emblempros.com soon.... got these as a gift so I figured it couldn't hurt.
Gunna get the ones from emblempros.com soon.... got these as a gift so I figured it couldn't hurt.
Last edited by DukesOfHazard; 05-27-2010 at 08:38 PM.
05-26-2010, 08:18 PM
#12
TECH Apprentice
Thread Starter
Join Date: Sep 2009
Location: Louisville, KY
Posts: 332
Likes: 0
Received 0 Likes
on
0 Posts
Here's a pic of the clear coat that I got. Says it's a high gloss, it's probably me just sucking with spray paint.
05-26-2010, 09:24 PM
#13
TECH Enthusiast
hmm, only other thing I can think of is you didn't put it on in even coats and kind of blotch sprayed it OR the clear was almost dry before it hit the surface of the parts. Due to humidity, temp etc.. what where your painting conditions?
05-26-2010, 09:27 PM
#14
TECH Apprentice
Thread Starter
Join Date: Sep 2009
Location: Louisville, KY
Posts: 332
Likes: 0
Received 0 Likes
on
0 Posts
Hot as ***** honestly. Like 90 degrees and high 70s for humidity I think. I was afraid of it running so I might not have went thick enough with the clear. I have enough vht and clear to redo em if need be
05-26-2010, 09:31 PM
#15
TECH Enthusiast
yea man that's your problem then. The clear is drying before it's hitting your parts, therefore making it really blotchy looking like you see in your pics.. It almost gives you an overspray type effect.. You need to paint those in cooler temps, with less humidity.. Wait for it to be cooler outside and less humidity or do it in your garage that's cooled by a fan for awhile. Then turn the fan off so you don't have debris flying all over the place and clear quickly, coats should dry quickly. Wait like 15 minutes, then do another one.
05-26-2010, 10:07 PM
#16
TECH Apprentice
Thread Starter
Join Date: Sep 2009
Location: Louisville, KY
Posts: 332
Likes: 0
Received 0 Likes
on
0 Posts
Gay, :-( guess I'll wait for it to cool off and redo em. Should I use lacquer thinner and completely start over or just sand down a coat or two of clear and redo the clear. I'd rather not start completely over but I'd rather have it look right more lol
 05-27-2010, 08:39 AM
#18
TECH Apprentice
Thread Starter
Join Date: Sep 2009
Location: Louisville, KY
Posts: 332
Likes: 0
Received 0 Likes
on
0 Posts
Yeah, I'm going to redo them. I see it as a learning experience so all is well. I appreciate the feedback, good and bad. Honestly the pictures don't do it justice though but when do they right?
So, my question to you guys now is, do I need to completely sand everything off the lights? Or just use some lacquer thinner and take EVERYTHING off and start over or just sand a coat or two of the clear off and reclear it?
So, my question to you guys now is, do I need to completely sand everything off the lights? Or just use some lacquer thinner and take EVERYTHING off and start over or just sand a coat or two of the clear off and reclear it?
05-27-2010, 07:56 PM
#19
TECH Apprentice
Thread Starter
Join Date: Sep 2009
Location: Louisville, KY
Posts: 332
Likes: 0
Received 0 Likes
on
0 Posts
Anyone know if I should get the lights completely back to stock and then start over or should I just sand off a layer or two of clear and start from there?
05-27-2010, 08:02 PM
#20
TECH Enthusiast