
Shaker Air Box for Shaker Scoop OR Cowl Induction hoods...
 06-29-2010, 05:00 PM
#1

EDIT: Pics and ordering page is up...
http://6litereaterdesigns.com/store/...roducts_id=214
Original post... Well, we're about a day away from having our first FINISHED Shaker Air Box for LSX motors...
Since it is a TRUE SHAKER (mounts to the engine) it will actually work right now for almost any LS1 car (F-Bodies FOR SURE, testing GTOs and Vettes) and with a change of a bracket can work on any LSX car.
It is designed with a 100mm opening to not slow any of you big dogs down but can also come with a stock 75mm opening (that is 4" and 3.5").
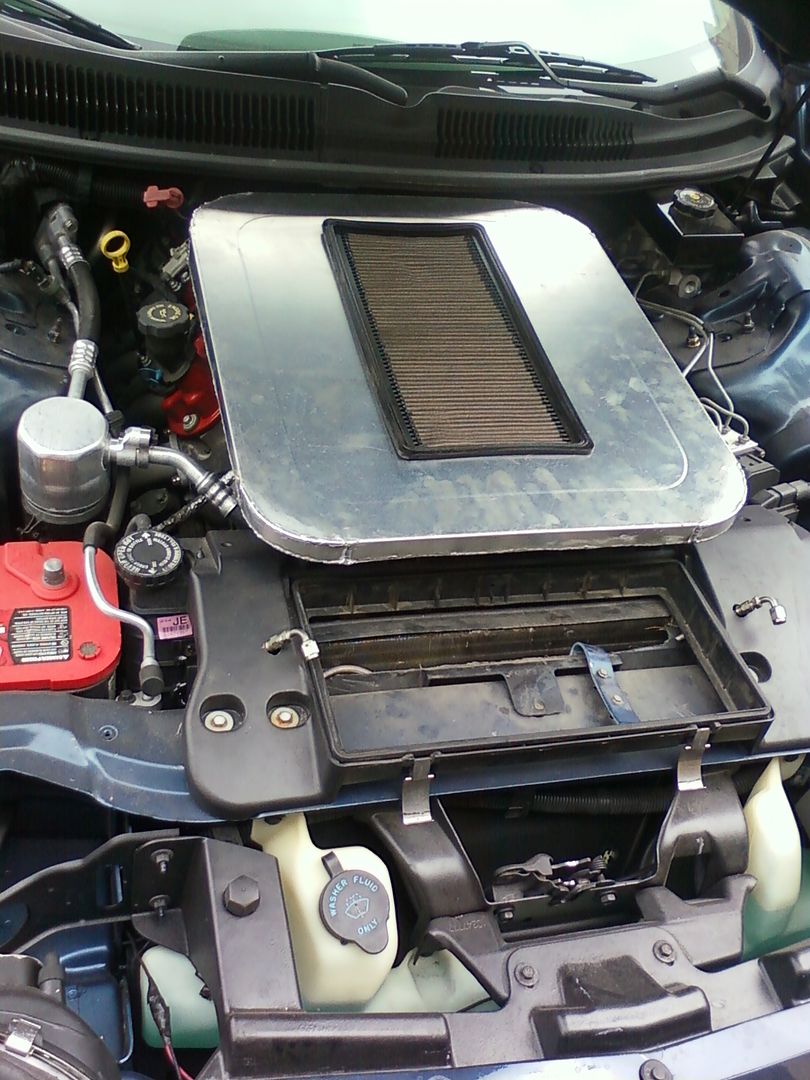
It uses your FACTORY air filter and will come RAW or powder coated flat black (custom colors also available). Yes, if you want a shaker you have to cut your own hood...
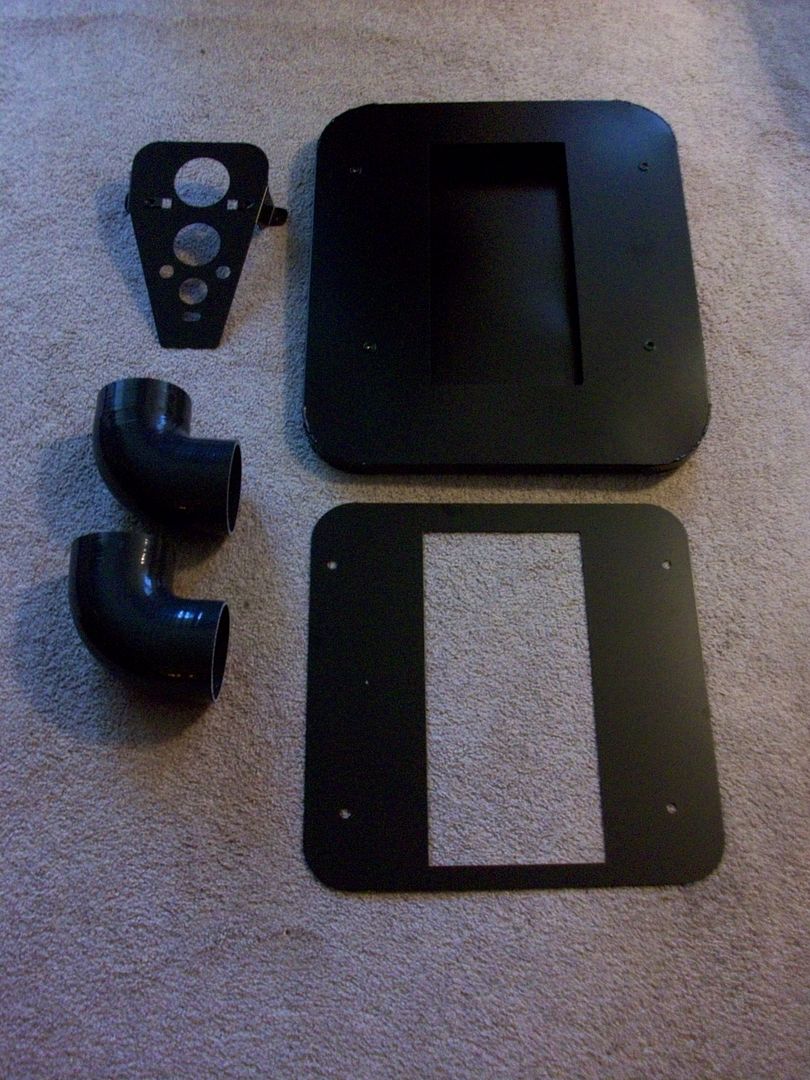
Finished version will be sold as:
1) Just the air box and piping (to be used on any LSx cars). This way you can put whatever style shaker you want on it OR just use it with a WS6/Cowl/Sunoco/etc.. style hood.
2) Air box and radiator shroud (to delete the factory piece with a nice finished version sans the opening).
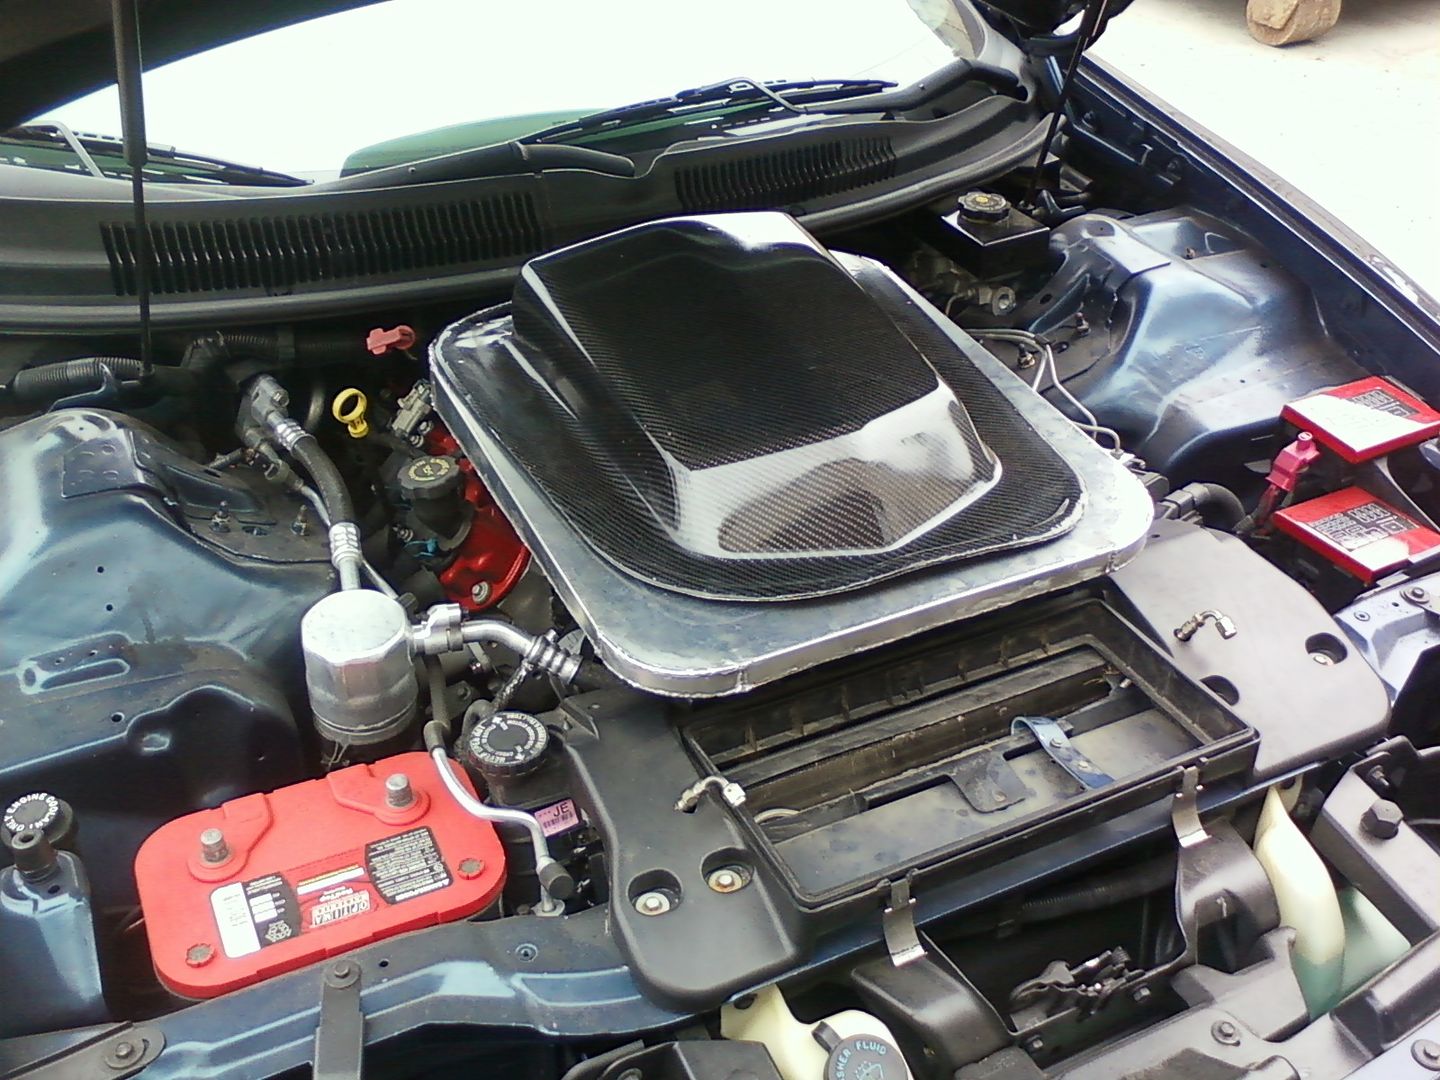
3) Air box and Shaker Scoop (77-78 Trans-Am style in fiberglass or Carbon Fiber as seen in the pics).
4) Air box, Shaker Scoop and Radiator Shroud for a finished full kit.
I HAVE NO PRICING INFO YET but will update this thread as soon as I do.
Here's some pics BUT THEY ARE JUST PRODUCTION PICS (nothing nice and finished until the end of the week)...
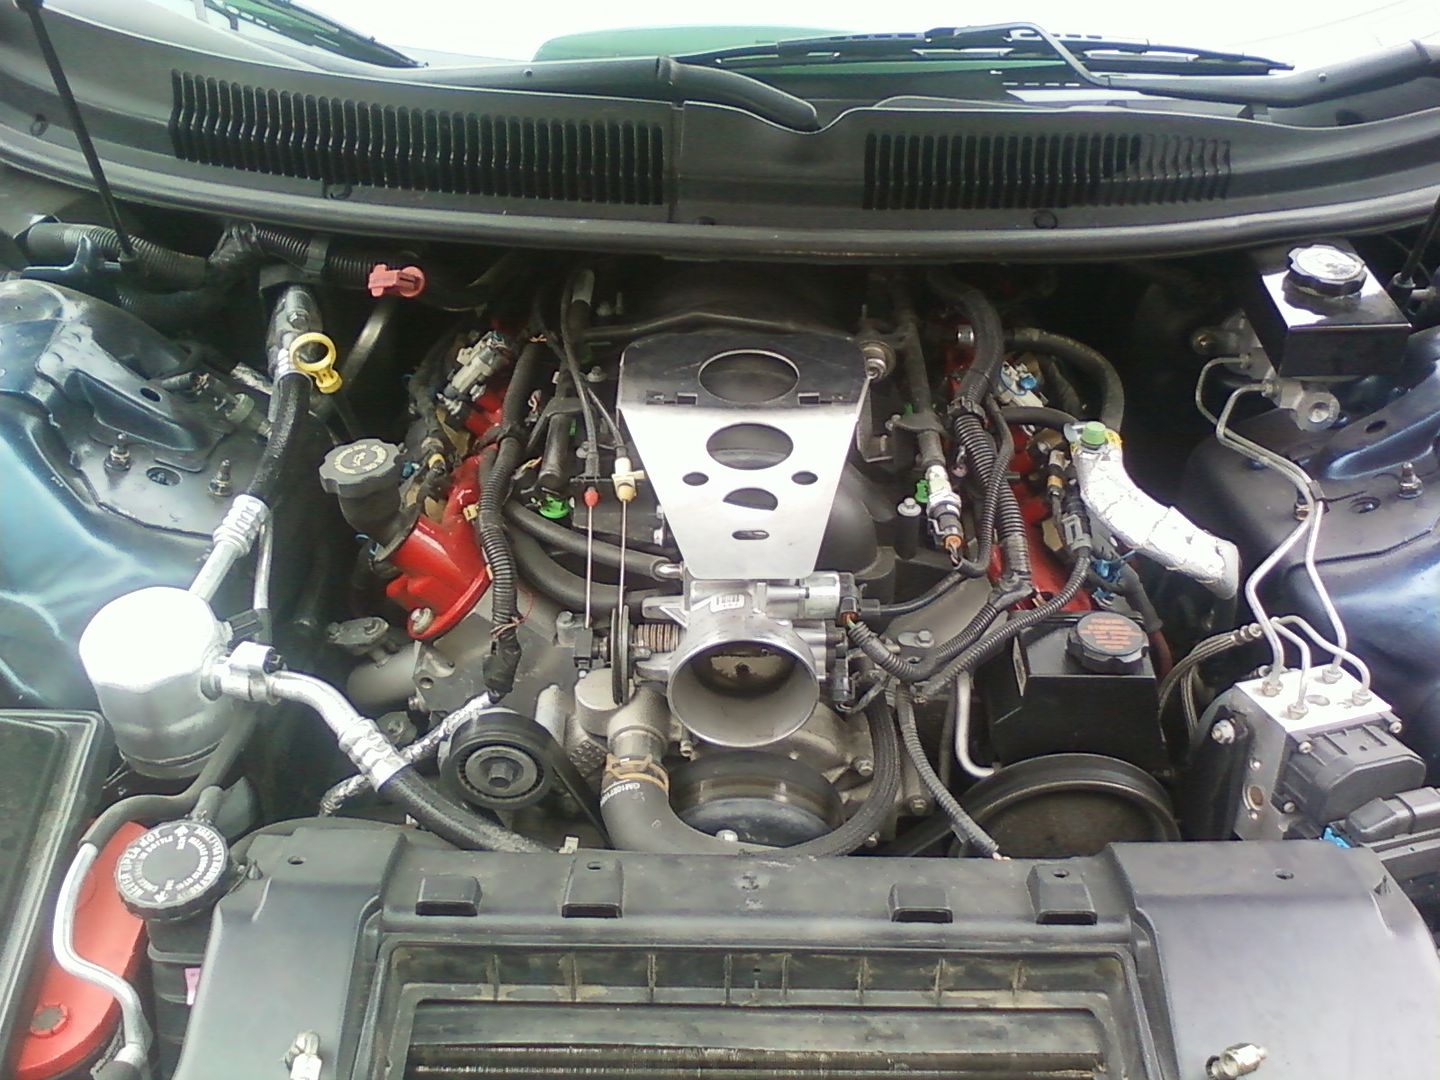
Here you see the bracket you attach to the intake with two bolts...
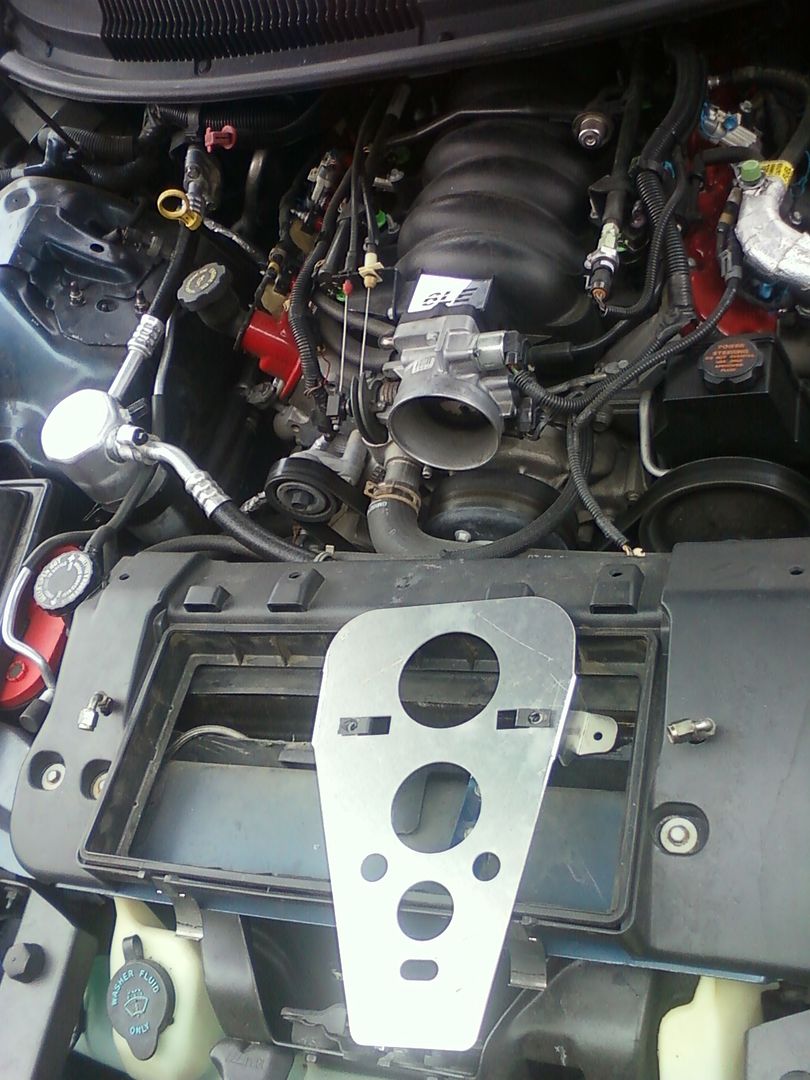
...attached to the two FACTORY bolts...
Here was our piping test, had to order elbows 1" shorter (on each end) that these in the pics...
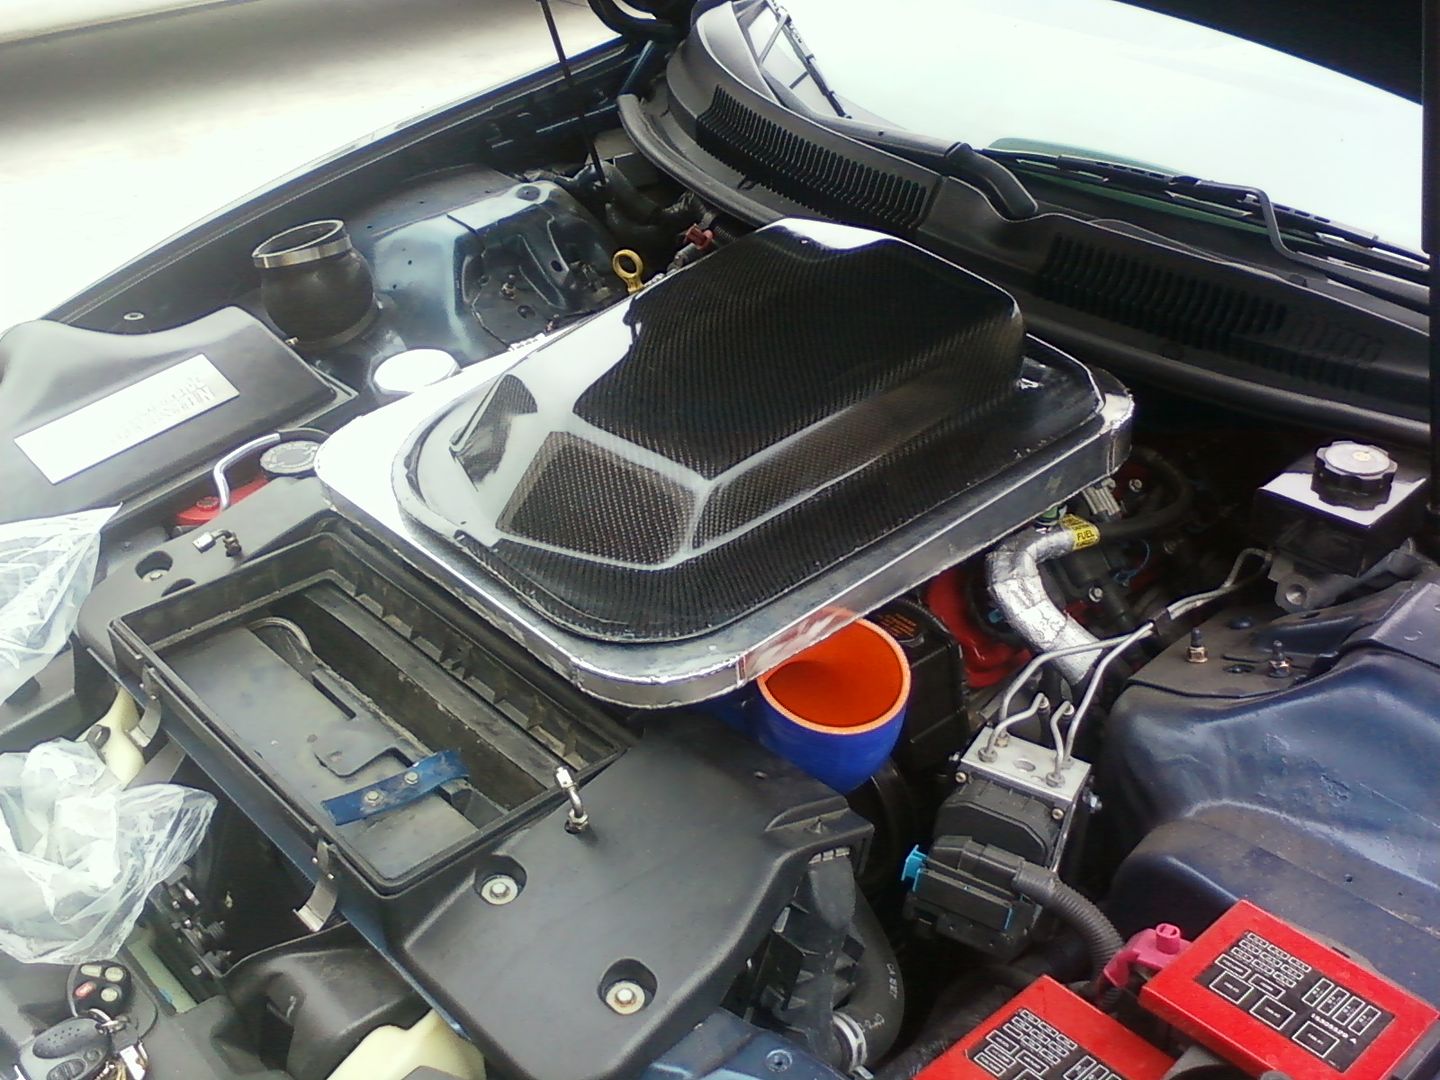
If you look inside the box you can see the two bolts you use to bolt the box itself to the bracket that you bolted to the intake...
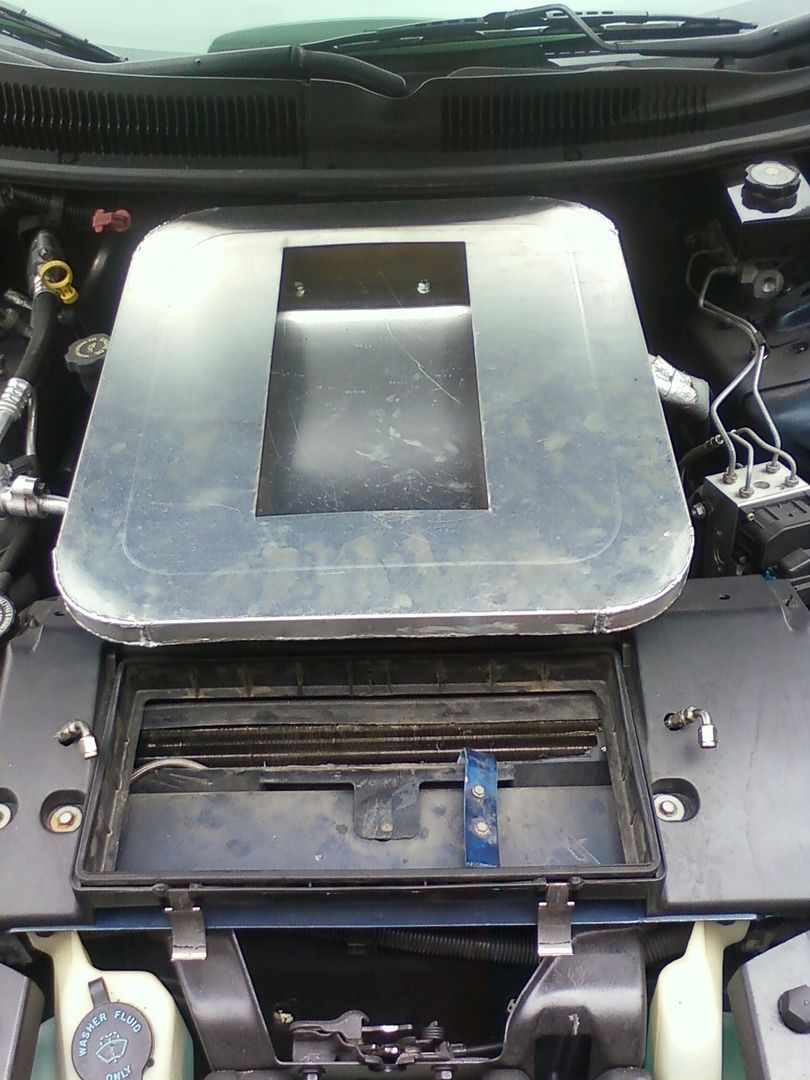
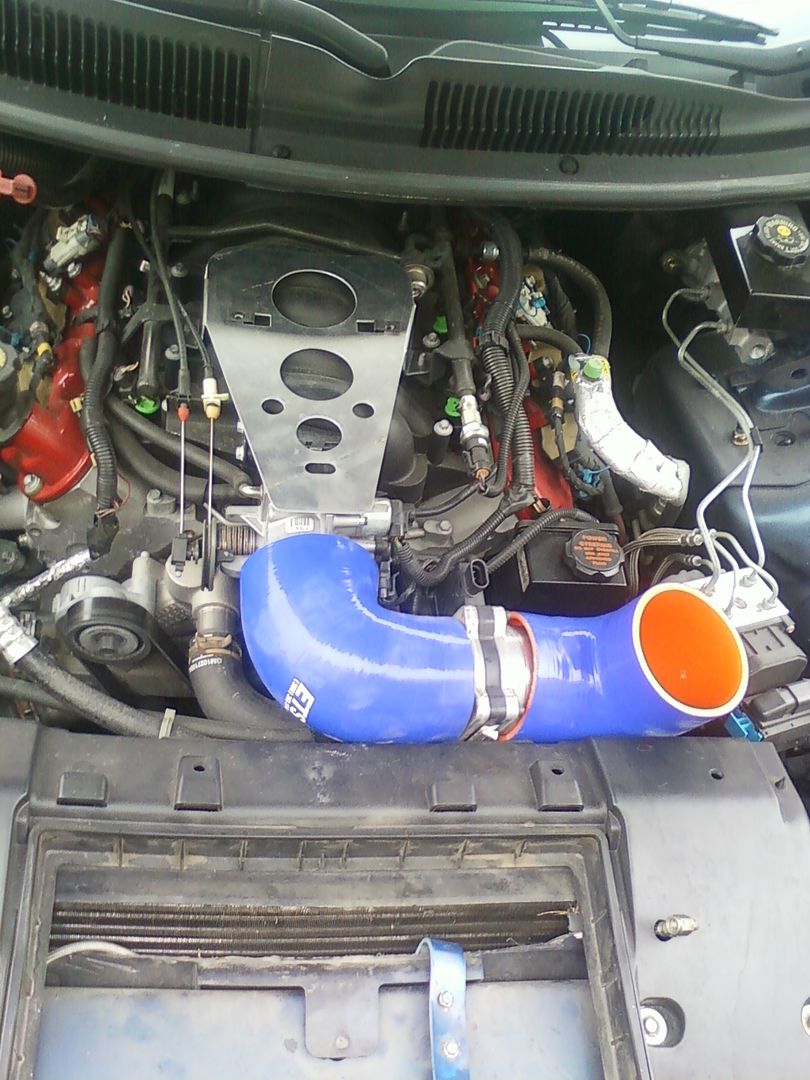
Here's the airbox mounted by itself (no scoop on it) WITH the smaller elbows so all fits PERFECT...
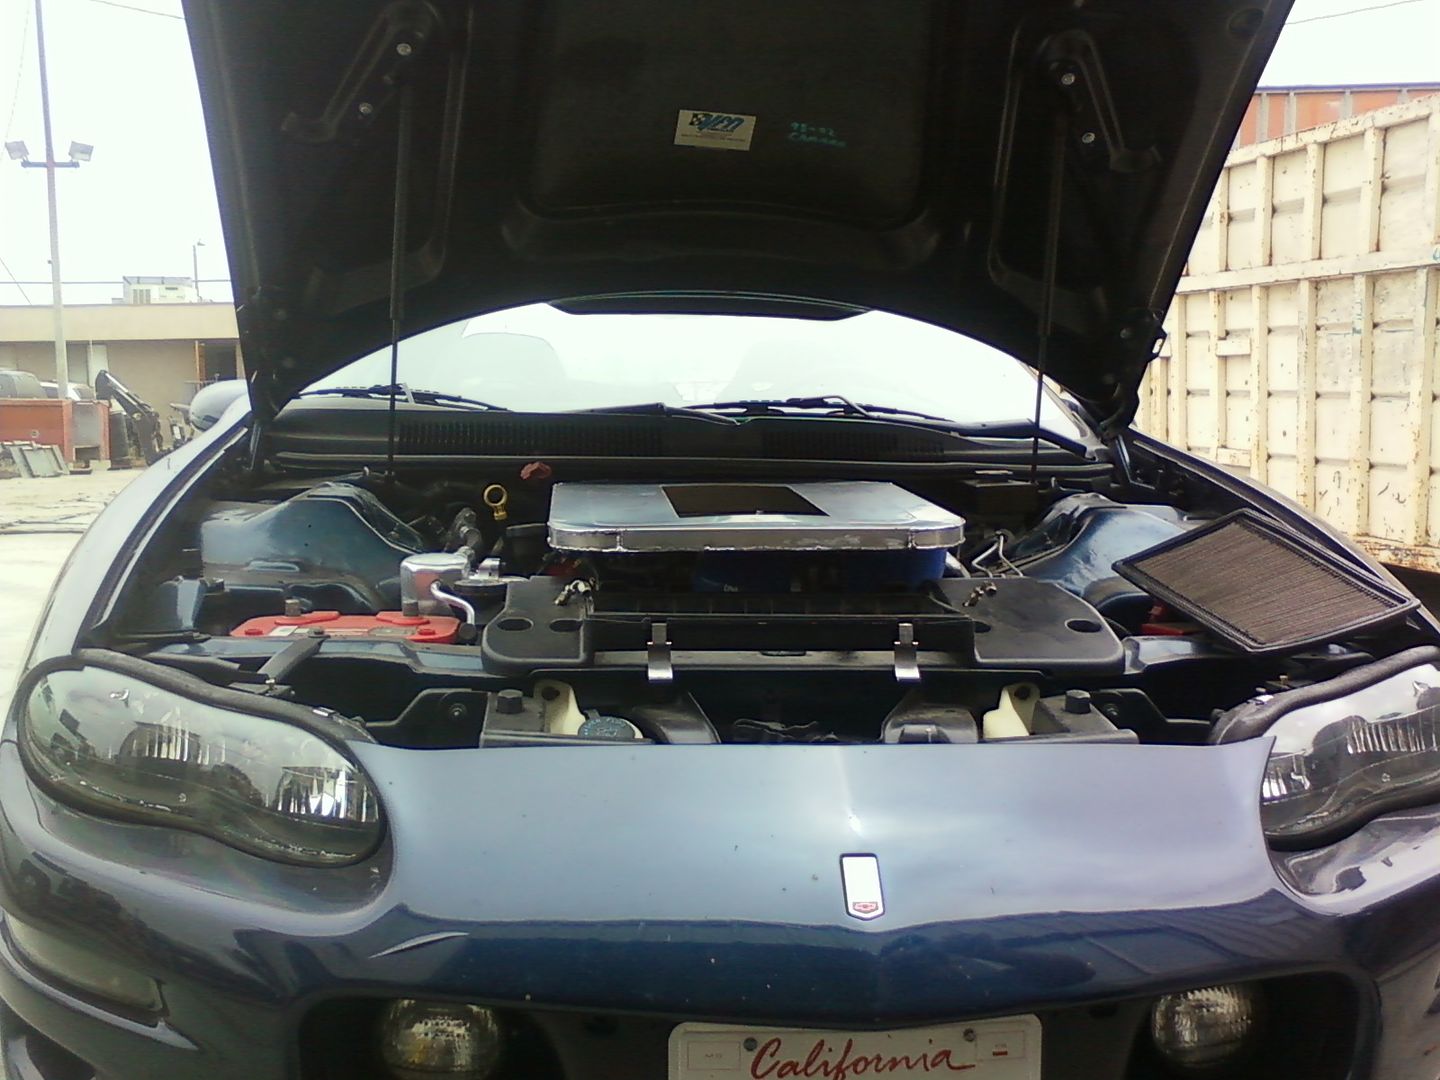
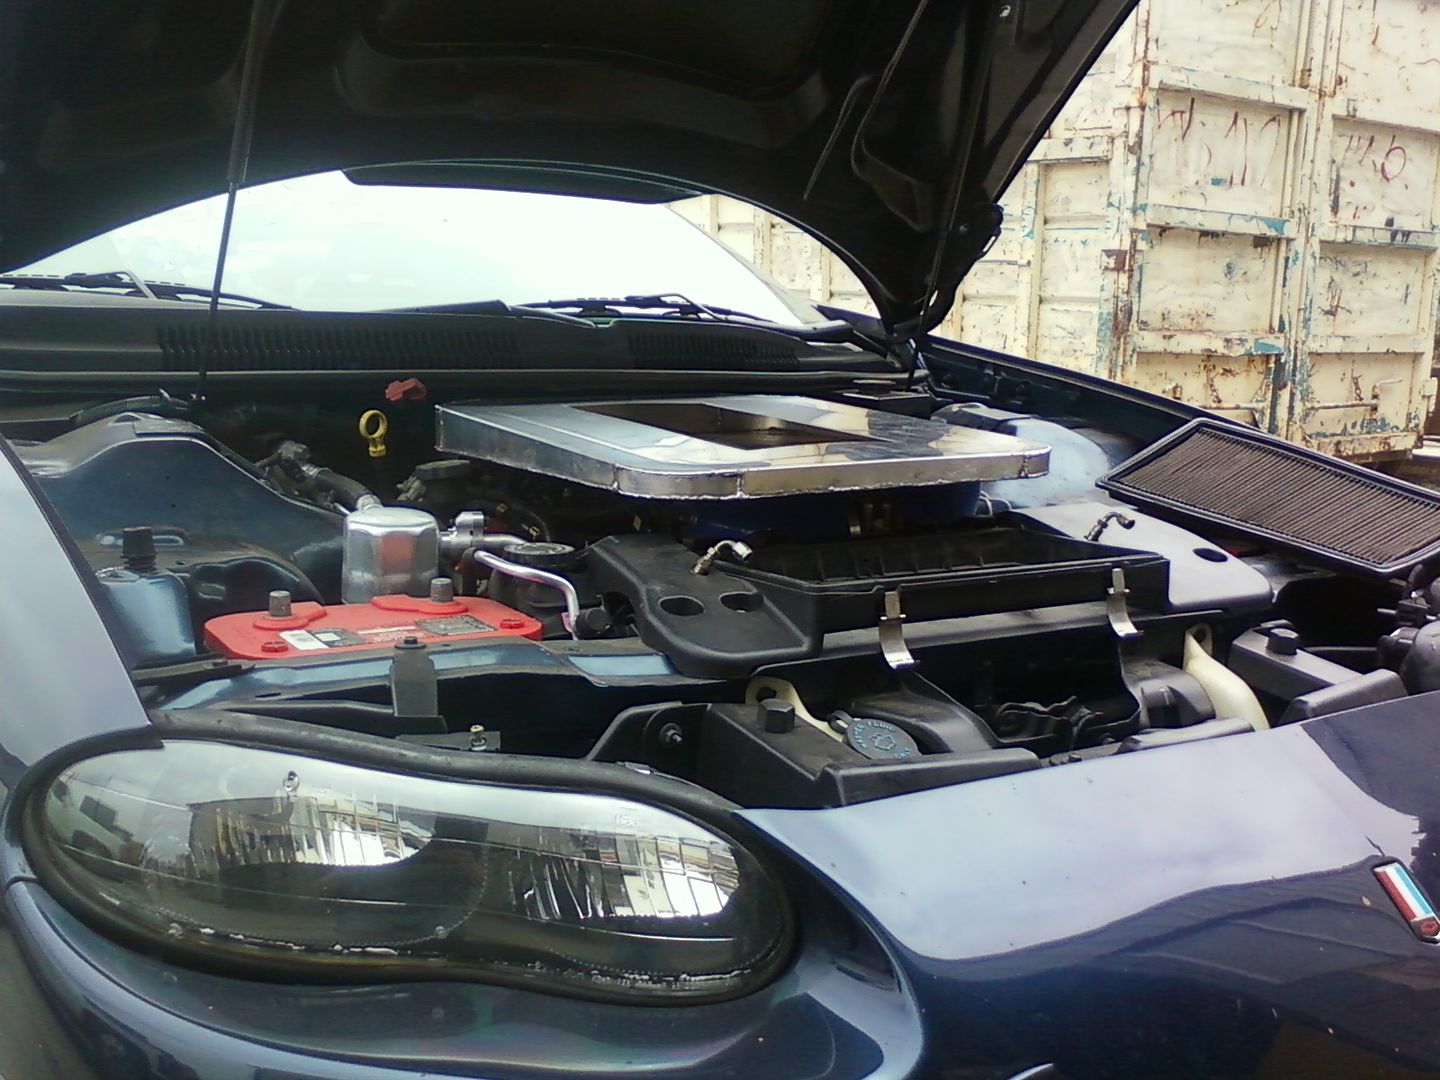
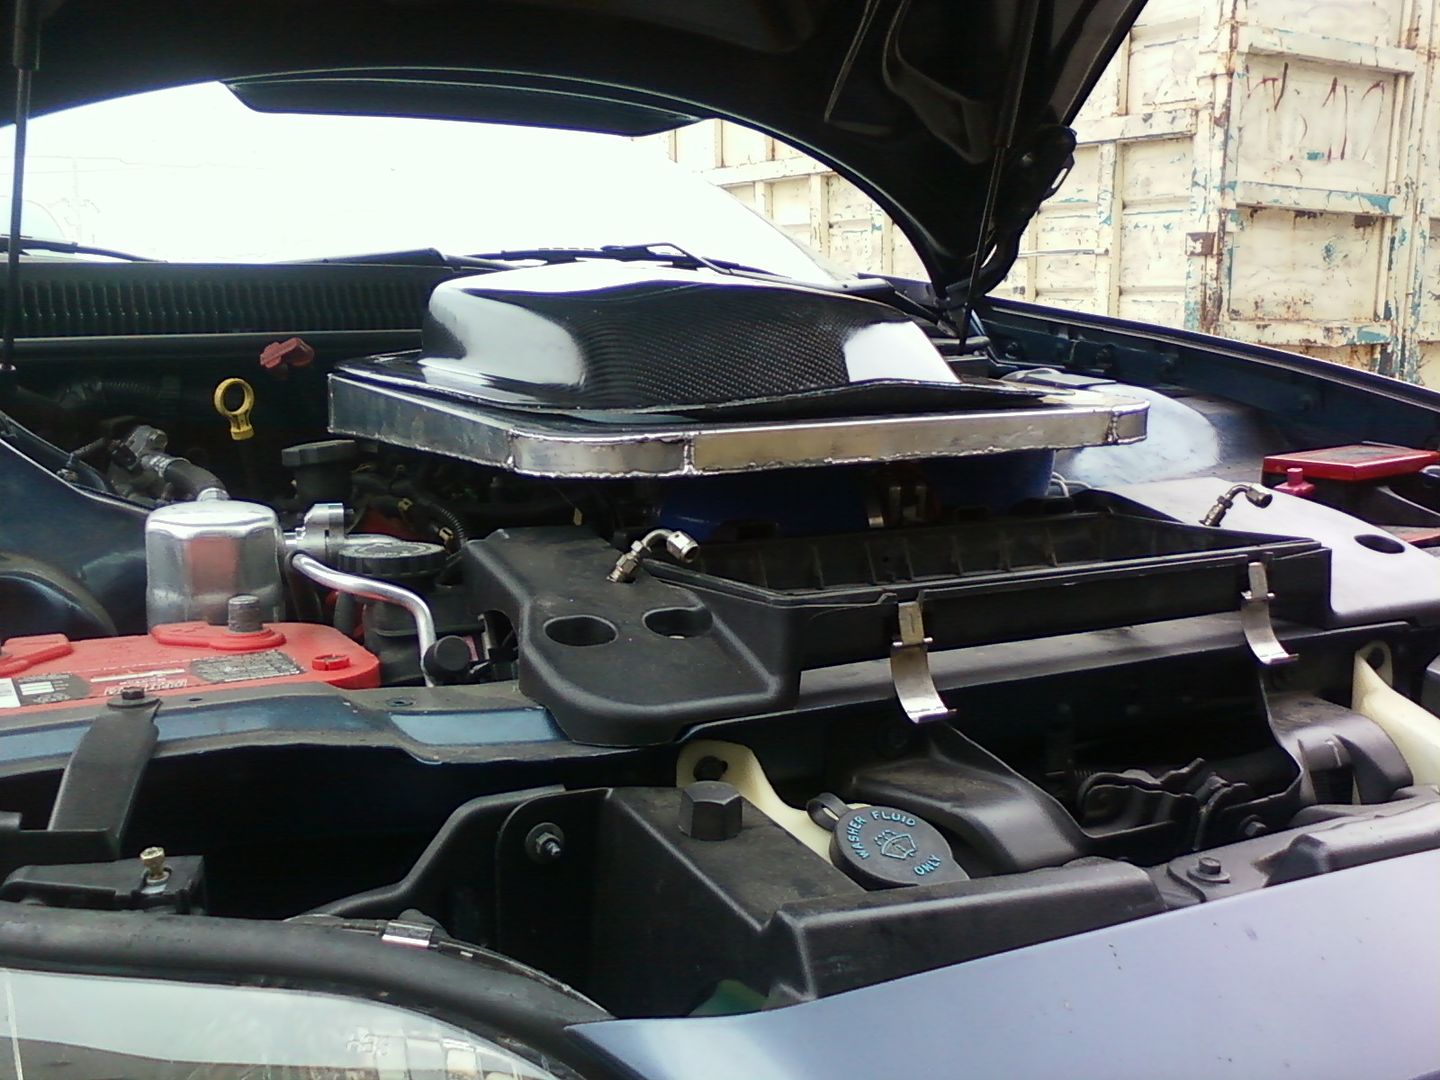
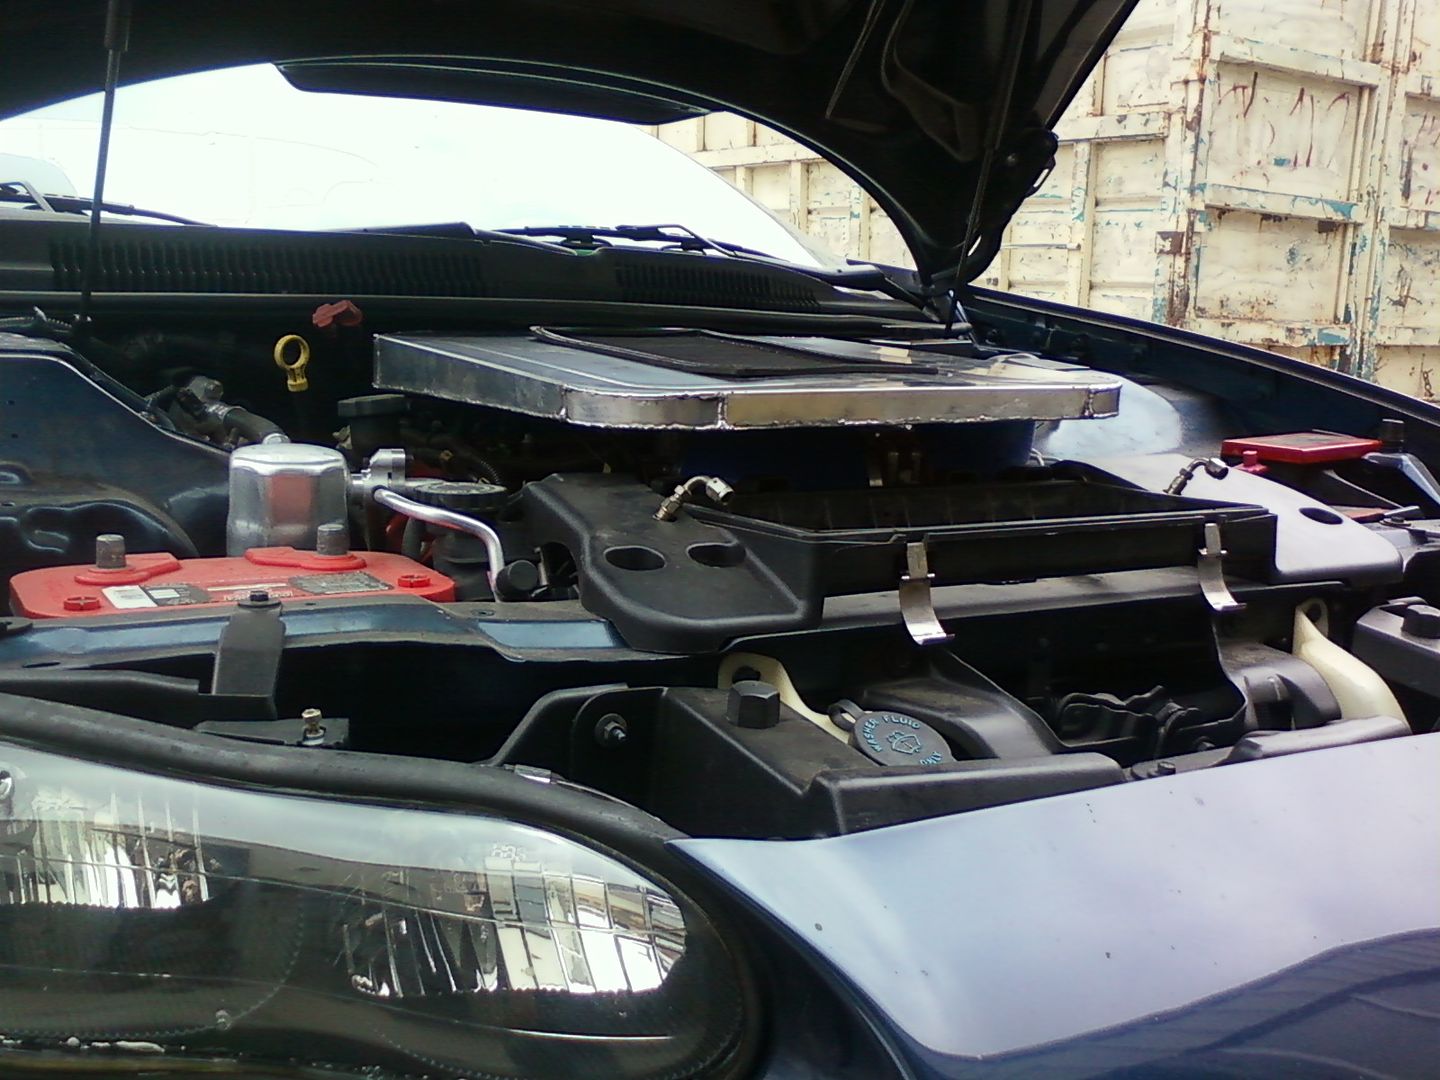
Hood closes, elbows line up to throttle body, have space for MAF and then turn into the bottom of the air box and connect to a piece of 4" piping protruding from it. Also a place to plug in your factory IAT sensor AND it clears the belt !!!
!!!
Took a LONG time to get to the point of having a clean design but we fell we succeeded. Pics of finished air box (sans the radiator cover delete) and pricing by Friday.
Thoughts?
http://6litereaterdesigns.com/store/...roducts_id=214
Original post... Well, we're about a day away from having our first FINISHED Shaker Air Box for LSX motors...
Since it is a TRUE SHAKER (mounts to the engine) it will actually work right now for almost any LS1 car (F-Bodies FOR SURE, testing GTOs and Vettes) and with a change of a bracket can work on any LSX car.
It is designed with a 100mm opening to not slow any of you big dogs down but can also come with a stock 75mm opening (that is 4" and 3.5").
It uses your FACTORY air filter and will come RAW or powder coated flat black (custom colors also available). Yes, if you want a shaker you have to cut your own hood...
Finished version will be sold as:
1) Just the air box and piping (to be used on any LSx cars). This way you can put whatever style shaker you want on it OR just use it with a WS6/Cowl/Sunoco/etc.. style hood.
2) Air box and radiator shroud (to delete the factory piece with a nice finished version sans the opening).
3) Air box and Shaker Scoop (77-78 Trans-Am style in fiberglass or Carbon Fiber as seen in the pics).
4) Air box, Shaker Scoop and Radiator Shroud for a finished full kit.
I HAVE NO PRICING INFO YET but will update this thread as soon as I do.
Here's some pics BUT THEY ARE JUST PRODUCTION PICS (nothing nice and finished until the end of the week)...
Here you see the bracket you attach to the intake with two bolts...
...attached to the two FACTORY bolts...
Here was our piping test, had to order elbows 1" shorter (on each end) that these in the pics...
If you look inside the box you can see the two bolts you use to bolt the box itself to the bracket that you bolted to the intake...
Here's the airbox mounted by itself (no scoop on it) WITH the smaller elbows so all fits PERFECT...
Hood closes, elbows line up to throttle body, have space for MAF and then turn into the bottom of the air box and connect to a piece of 4" piping protruding from it. Also a place to plug in your factory IAT sensor AND it clears the belt
Took a LONG time to get to the point of having a clean design but we fell we succeeded. Pics of finished air box (sans the radiator cover delete) and pricing by Friday.
Thoughts?
Last edited by 6LITEREATER; 07-18-2010 at 05:32 AM.

 06-29-2010, 08:10 PM
#6
 . Getting something to look simple is WAY harder than you think
 Also, the BIGGEST challenge is the fact that a shaker is supposed to sit on top of the engine BUT half of our engine is under the cowl...
Last edited by 6LITEREATER; 06-29-2010 at 08:33 PM.
06-29-2010, 08:29 PM
#9
TECH Fanatic
iTrader: (14)
Join Date: Mar 2007
Location: Phoenix/Tempe, AZ
Posts: 1,969
Likes: 0
Received 0 Likes
on
0 Posts


That CF scoop really is badass.
Any pics of how the scoop attaches to the box? The 2 bolt setup is just intake to mount and mount to box right?
EDIT: black elbows??
06-29-2010, 08:32 PM
#10
FWIW ill be running this on my new ls2 402 stroker (ls3 heads/intake, 95mm TB, 100mm maf)... Ill be sure to get some dyno numbers after Im rockin one
That CF scoop really is badass.
Any pics of how the scoop attaches to the box? The 2 bolt setup is just intake to mount and mount to box right?
EDIT: black elbows??
That CF scoop really is badass.
Any pics of how the scoop attaches to the box? The 2 bolt setup is just intake to mount and mount to box right?
EDIT: black elbows??
Yup, two bolts are just intake to bracket and then another two bolts for bracket to box.
We're making a trim plate as well so when all said and done there will be four stainless allen head bolts that bolt the shaker and trim plate (trim plate is what causes tight seal for air filter to the box) to the box
 06-29-2010, 08:42 PM
#12

I wish I had a clue on price for you guys though... Elbows alone COST me $75... Trying to find a better supplier. Waiting on my fab guy on cost of box but there is a LOT of time in it (water jets pieces and then welds and assembles).
06-29-2010, 08:43 PM
#13
TECH Fanatic
iTrader: (14)
Join Date: Mar 2007
Location: Phoenix/Tempe, AZ
Posts: 1,969
Likes: 0
Received 0 Likes
on
0 Posts
Yup, two bolts are just intake to bracket and then another two bolts for bracket to box.
We're making a trim plate as well so when all said and done there will be four stainless allen head bolts that bolt the shaker and trim plate (trim plate is what causes tight seal for air filter to the box) to the box
We're making a trim plate as well so when all said and done there will be four stainless allen head bolts that bolt the shaker and trim plate (trim plate is what causes tight seal for air filter to the box) to the box
Did you track down the elbow guys, and if so, can we do those in black silicone?
. Pretty awesome how the TSP 100mm maf fits right in there.
Is the back of the sunoco open? thatd be badass
06-29-2010, 11:45 PM
#14
Looks cool. The only thing that concerns me is how the filter is backwards. Now, before you call me an idiot and that the filter flows both ways, consider the proper method of cleaning a re-usable filter. The debris in this setup would enter the filter and get stuck in pockets created by the rubber filter seal because you cannot bend the filter the proper way to provide a gap and flush all that crap out (solution is to switch to paper filters??). Also, what provides pressure to push the filter onto the mounting plate to provide an even seal?
06-30-2010, 01:08 AM
#15
Damn... and a stainless trim piece, a man after my heart.
Did you track down the elbow guys, and if so, can we do those in black silicone?
Thats what i was gonna do instead of this.
Pretty awesome how the TSP 100mm maf fits right in there.
Is the back of the sunoco open? thatd be badass
Did you track down the elbow guys, and if so, can we do those in black silicone?
Thats what i was gonna do instead of this
. Pretty awesome how the TSP 100mm maf fits right in there.
Is the back of the sunoco open? thatd be badass
I contacted the guys I bought from and asked for black, we'll see what they say. You can't see the elbows AT ALL when it is all installed though.
06-30-2010, 01:14 AM
#16
Thanks for pointing this out Lee... By the way, I dropped your project off today for pricing
EDIT: Happen to have your stock hood
 ?
06-30-2010, 01:25 AM
?
06-30-2010, 01:25 AM
#17
I'll show you the filter bending thing on Wednesday at Johns thing if you're going, or Friday if you're going. The extra trim piece that sandwiches the filter in is a great idea. You just need to figure out if it mounts to the box, the scoop, or both. Oh, and thanks for dropping it off.
06-30-2010, 01:26 AM
#18
I'll show you the filter bending thing on Wednesday at Johns thing if you're going, or Friday if you're going. The extra trim piece that sandwiches the filter in is a great idea. You just need to figure out if it mounts to the box, the scoop, or both. Oh, and thanks for dropping it off.
06-30-2010, 01:42 PM
#20
My only point is you can also use just this air box as a great set up for a cowl hood. Just like the 96-97 SS cars EXCEPT our box is aluminum and shouldn't get heat soaked...