
Finally did wire mod. Write-up, lots of pics. 56k: You're outta luck!
 07-22-2007, 03:40 PM
#1
After having the car for three years, and talking about it multiple times, I finally got off my *** and did this. I took lots of pics in hopes of helping out people who want to do this mod.
Don't be scared about doing this. It is very simple, so long as you have a basic mechanical knowledge. If you can wire an amp, you can do this mod. It took just over two hours, and that was fiddle-farting around because of the heat.
Supplies needed:
1 Hole saw, at least 1.5 inches. You can go smaller if you feel like de-pinning the connectors, or lengthening the wires. I however, am lazy.
1 Drill, corded or cordless.
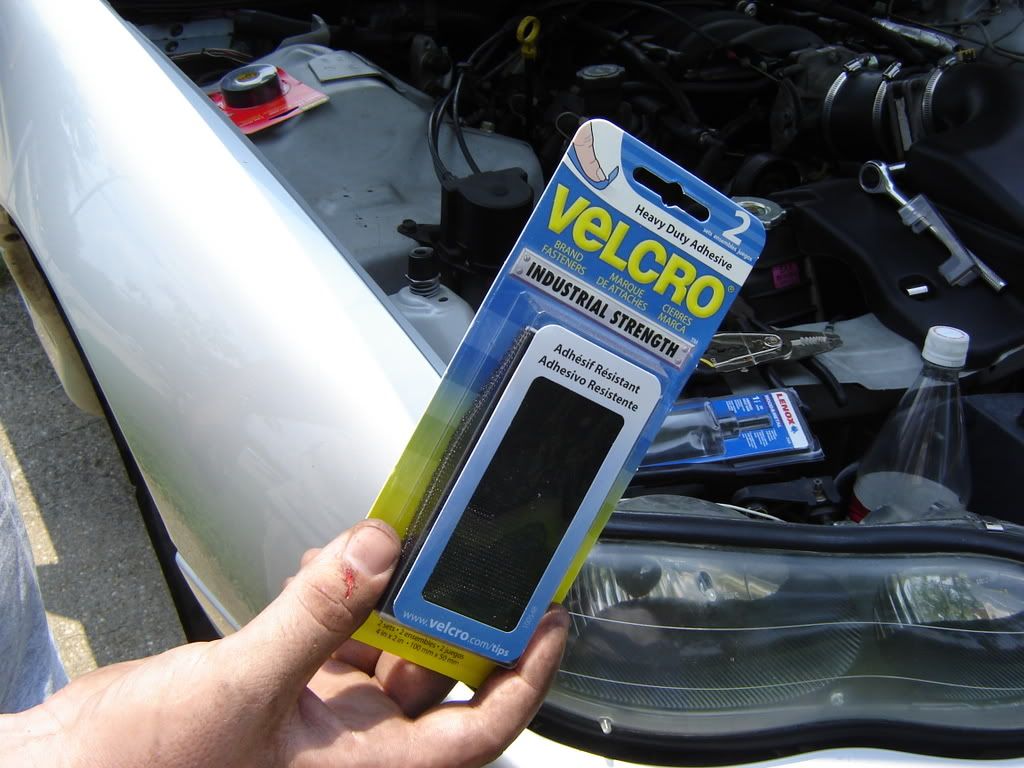
1 Pack Industrial Velcro.
Various hand tools.
Jack and Stands.
I assume you know how to properly jack your car and put a stand under the passenger-side, and remove the passenger front wheel, so this write-up starts there.
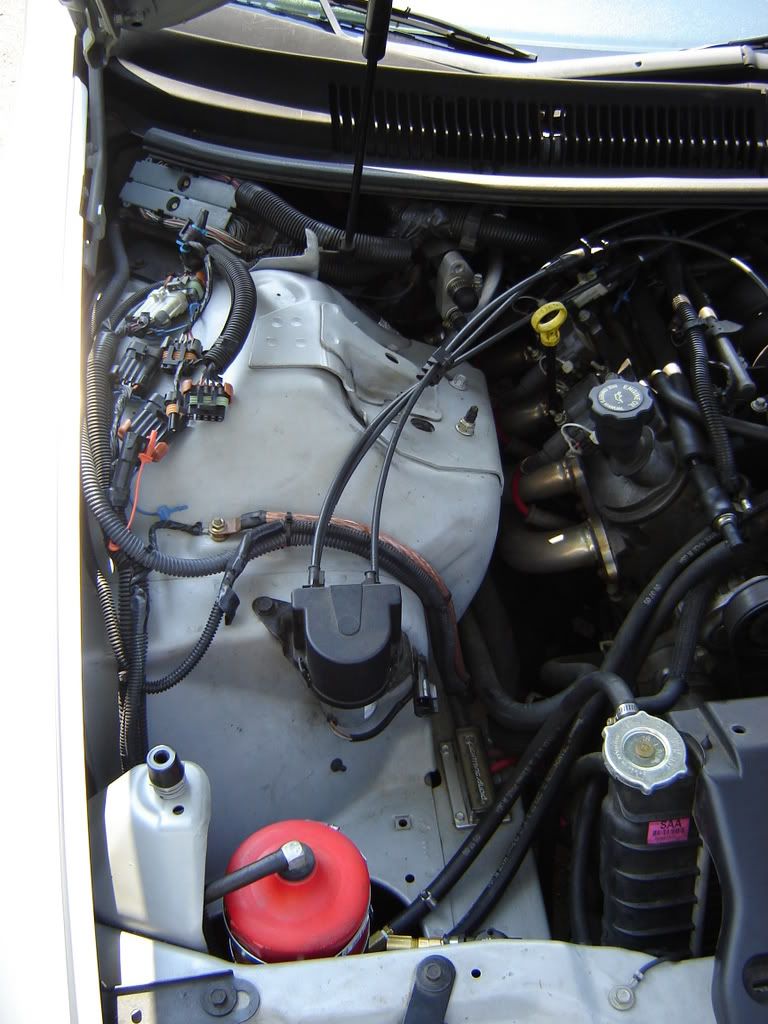
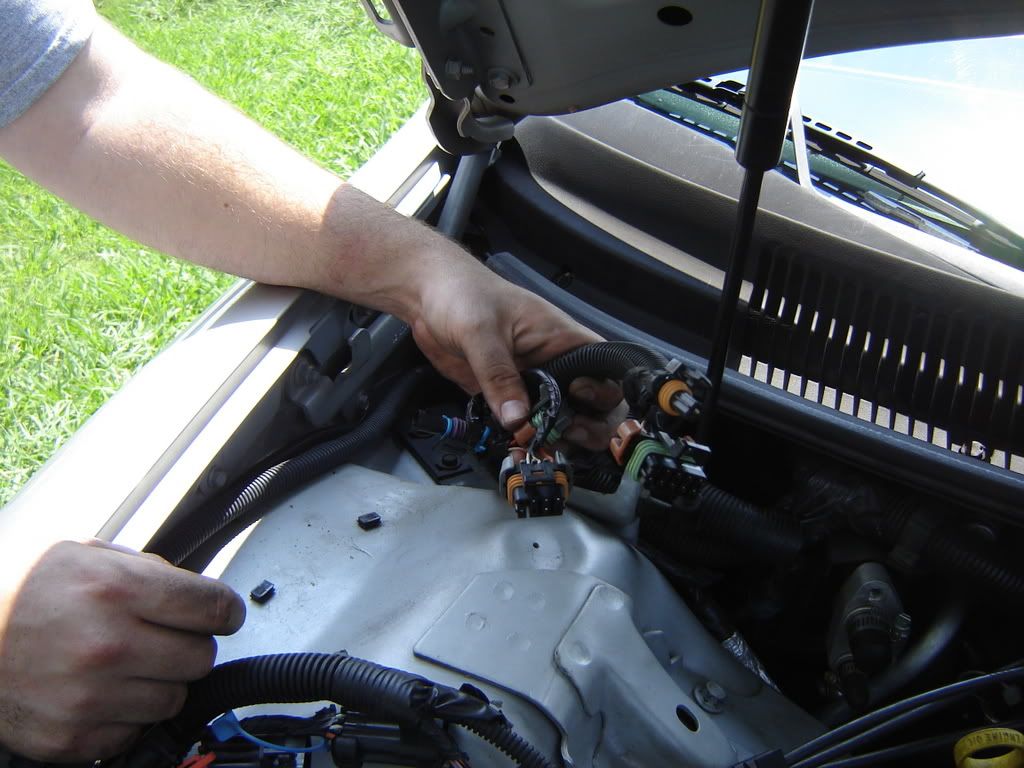
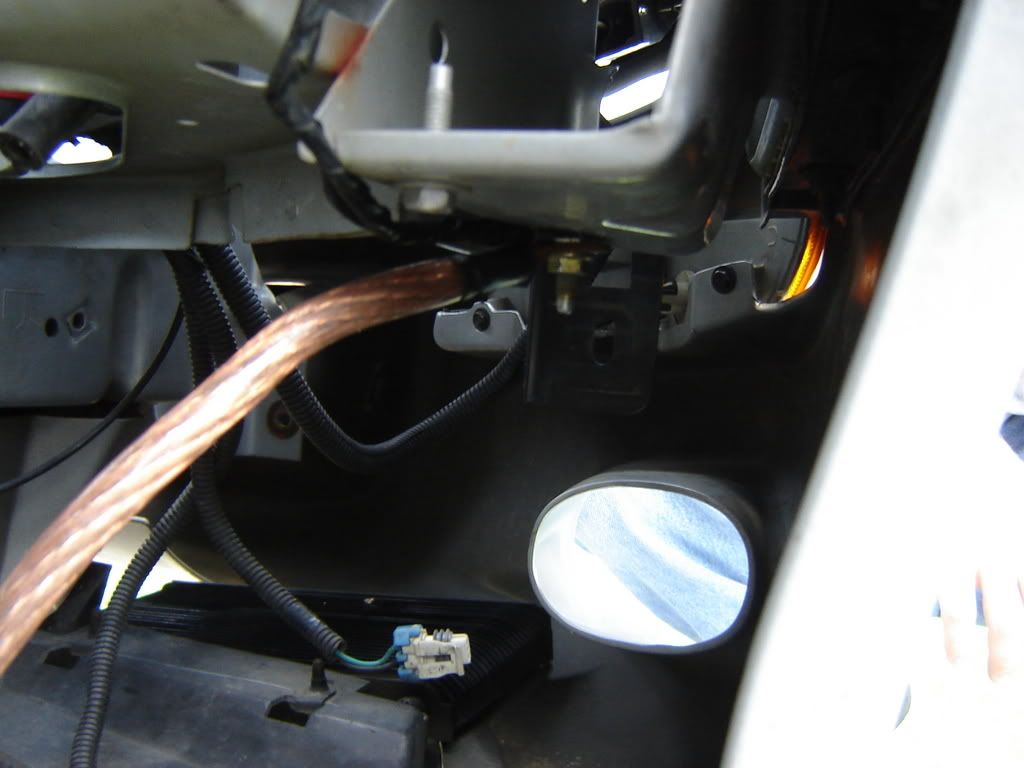
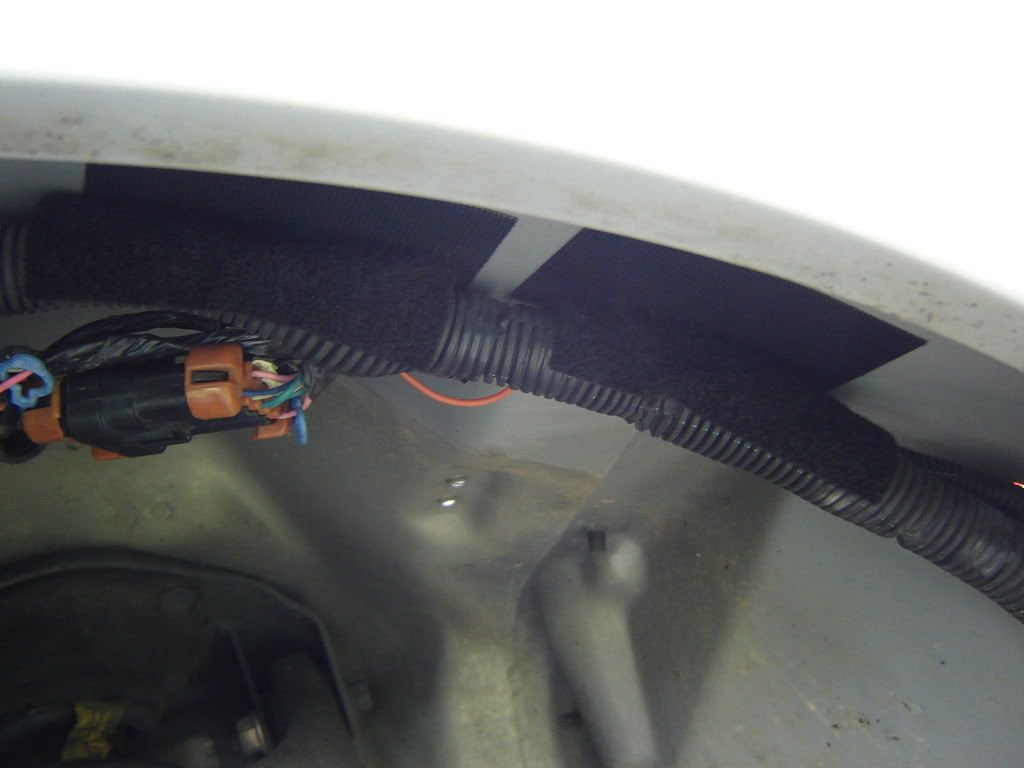
Here is what I started with. All wires are unplugged, and you can see my power wire from my battery relocation, as well as the clear-jacketed ground upgrade coming from the block. There is also a wire in a loom for my temperature gauge in all that mess.
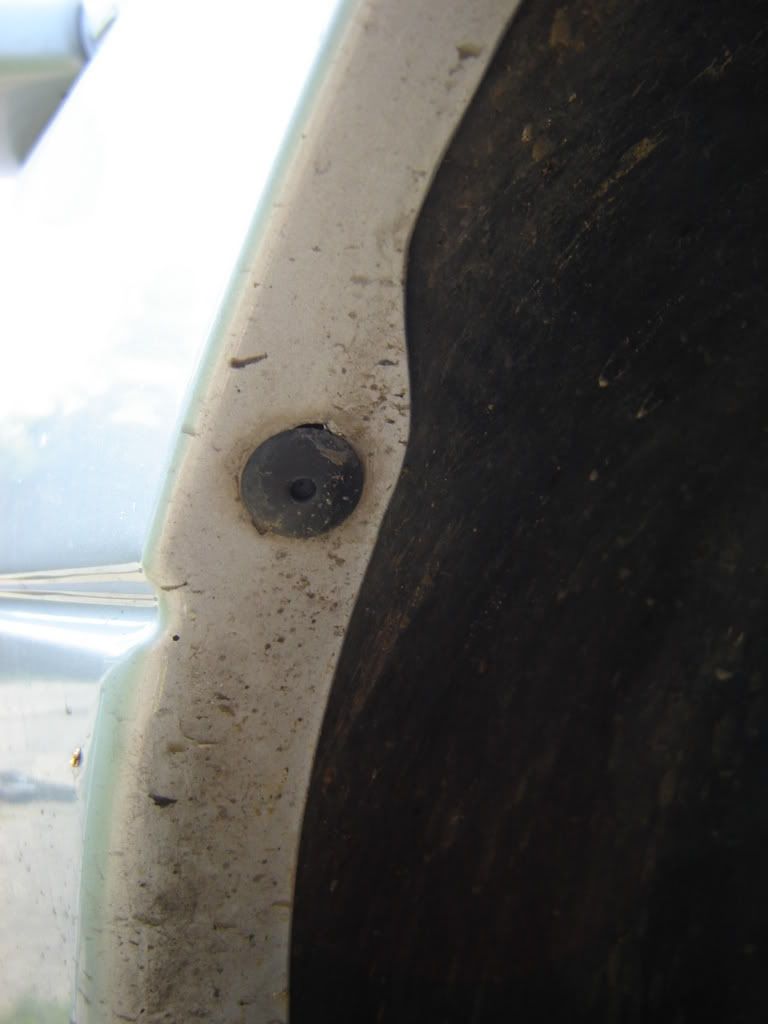
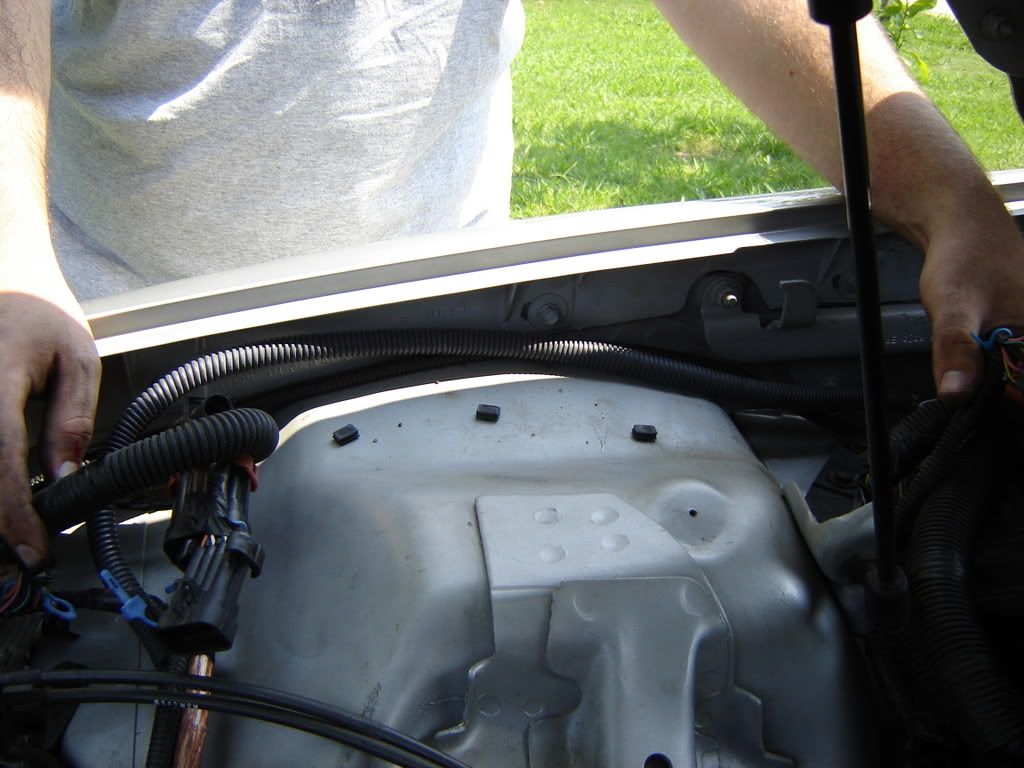
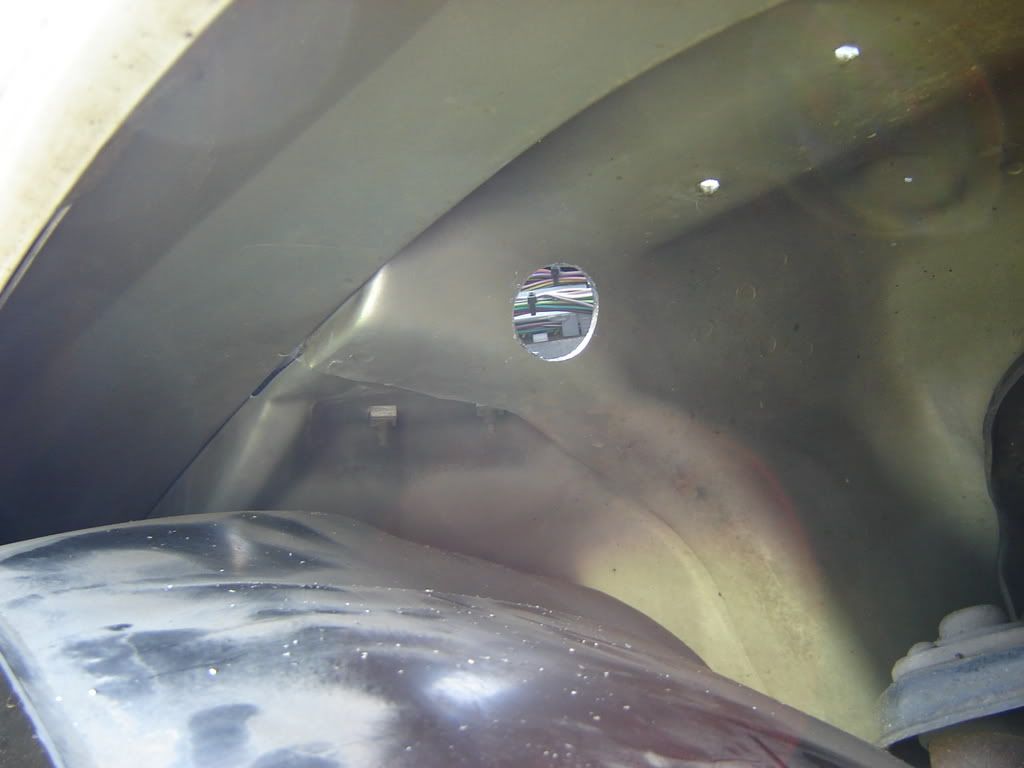
Here is where we are going through from the fender side. I DID NOT pull the entire inner fender, I didn't feel any need to. I also didn't feel like messing with the two plastic rivets on the back side of the fender.
Here is the aforementioned plastic rivet. You could replace these with some universal plugs from an auto-parts store, but why bother when you don't need to? Yes I know that the car is filthy right there. It's a drag car, not a show car, and I haven't washed it properly in two months. Give me a break.
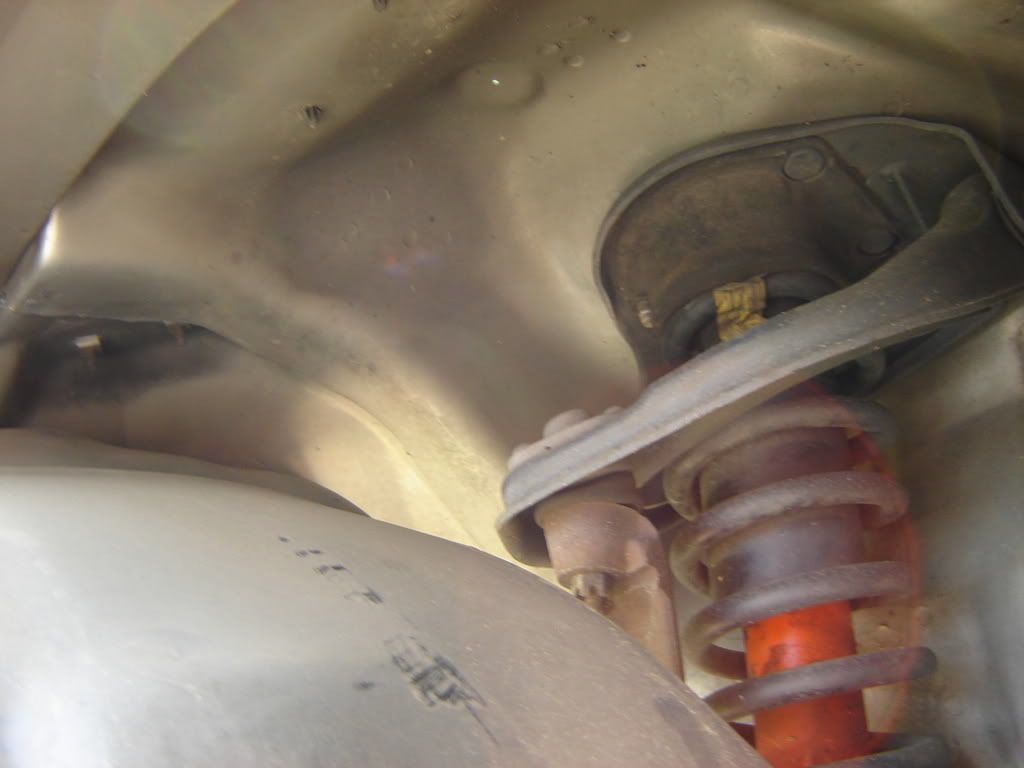
Make sure that you also disconnect the ABS Sensor wire, it is in that jumble of a harness up top, and you'll need to put it through the hole. It's also clamped with a little plastic clamp on the frame rail.
Here is the wire next to the heater lines that you want to pull up for the ABS sensor.
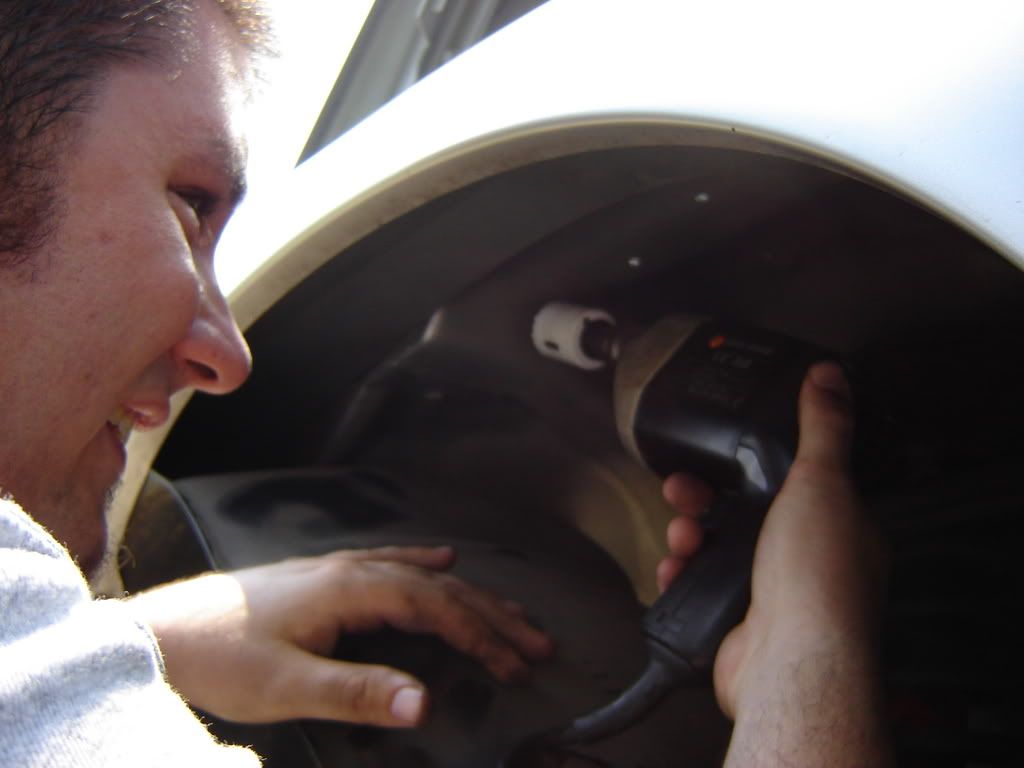
It helps to take out the bolt holding the heater lines in. It's a T30 Torx bit.

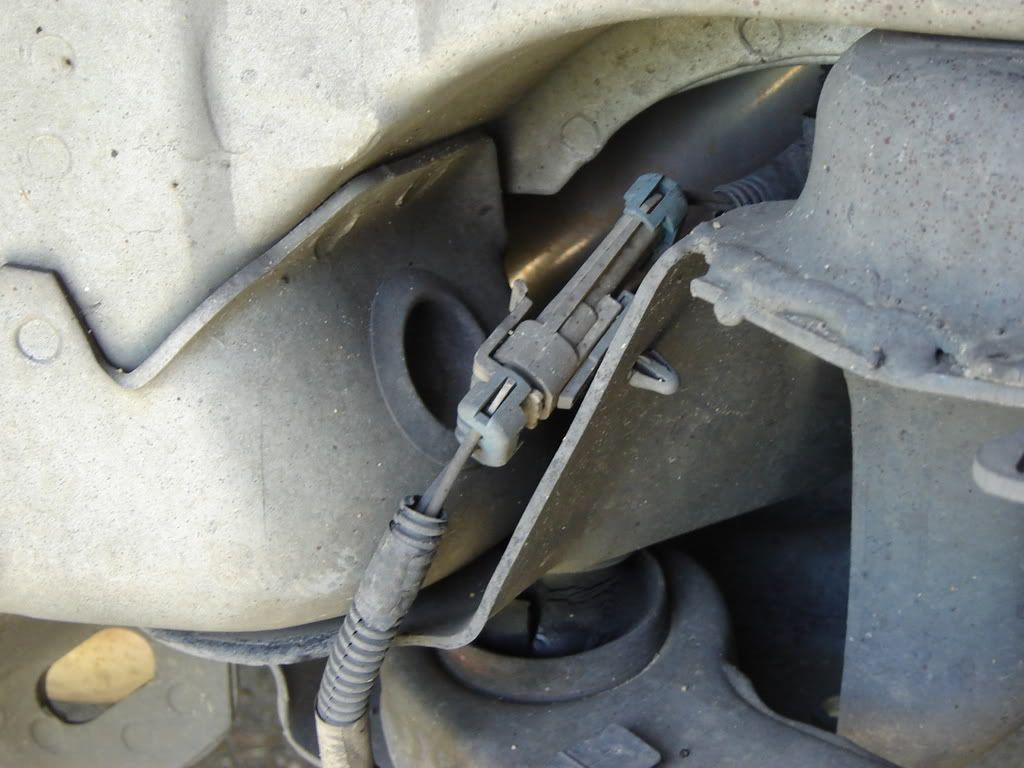
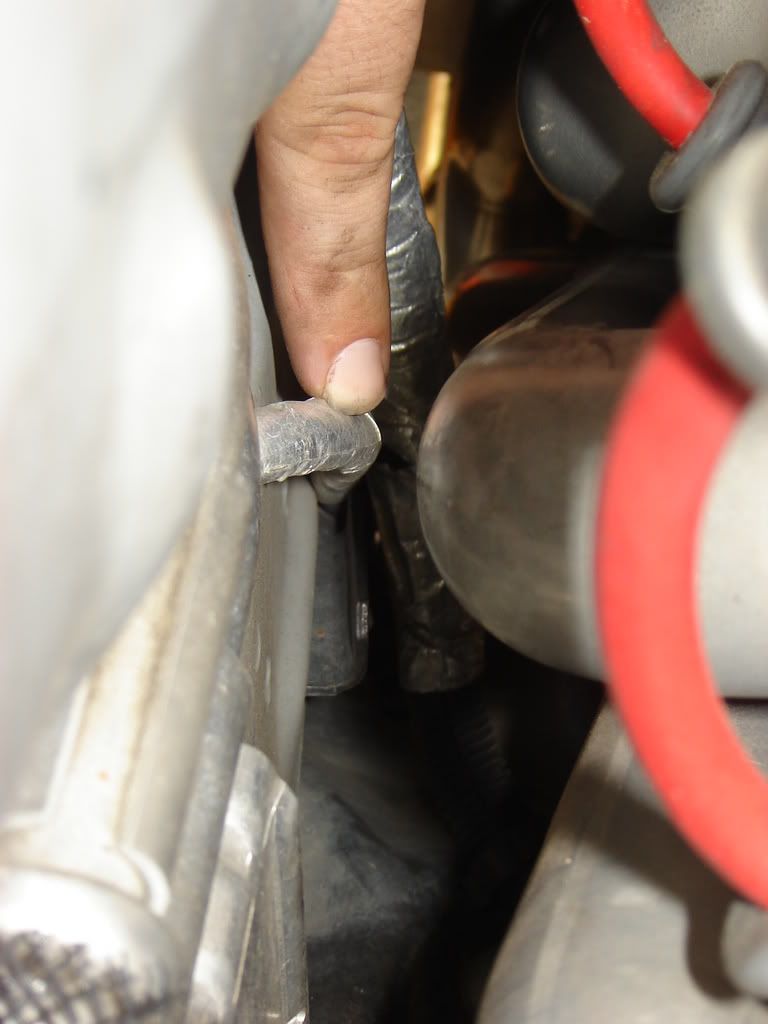
Also disconnect the vacuum connector for the air conditioning controls. Don't be a dumbass like me and break it.
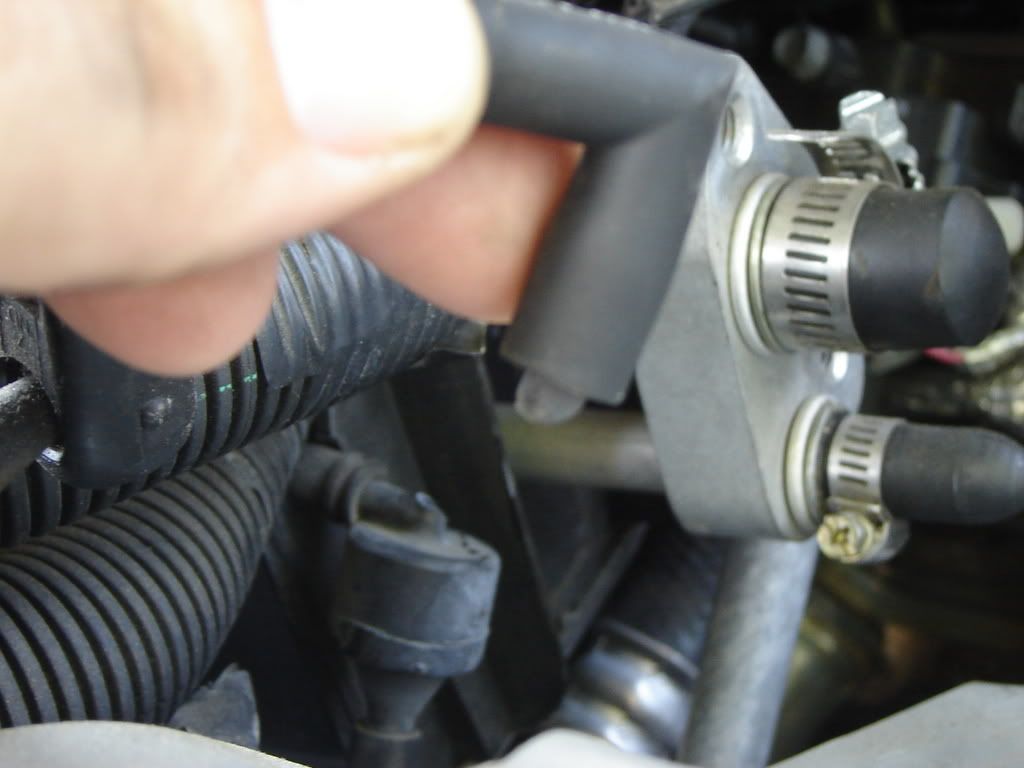
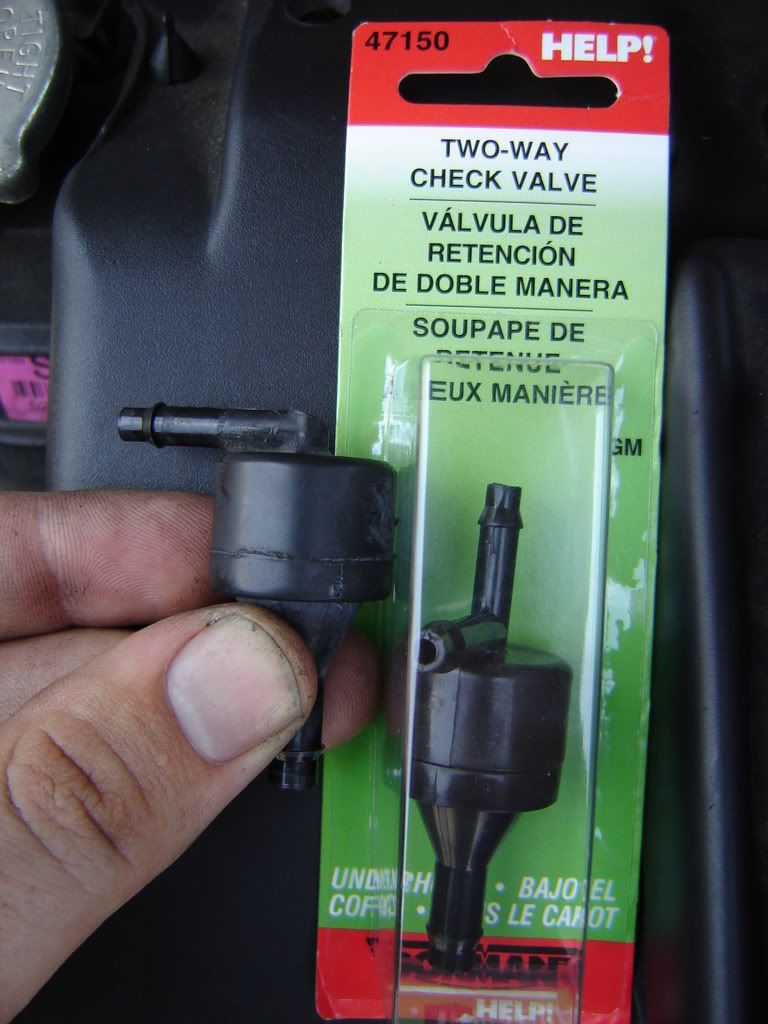
If you are unfortunate and you do break it, you can go to any local parts house ( I went to Advance Auto because I work there ), and pick up this part out of the HELP section. You DO NOT need to go to the dealer and spend more money on a part that's less than $4.
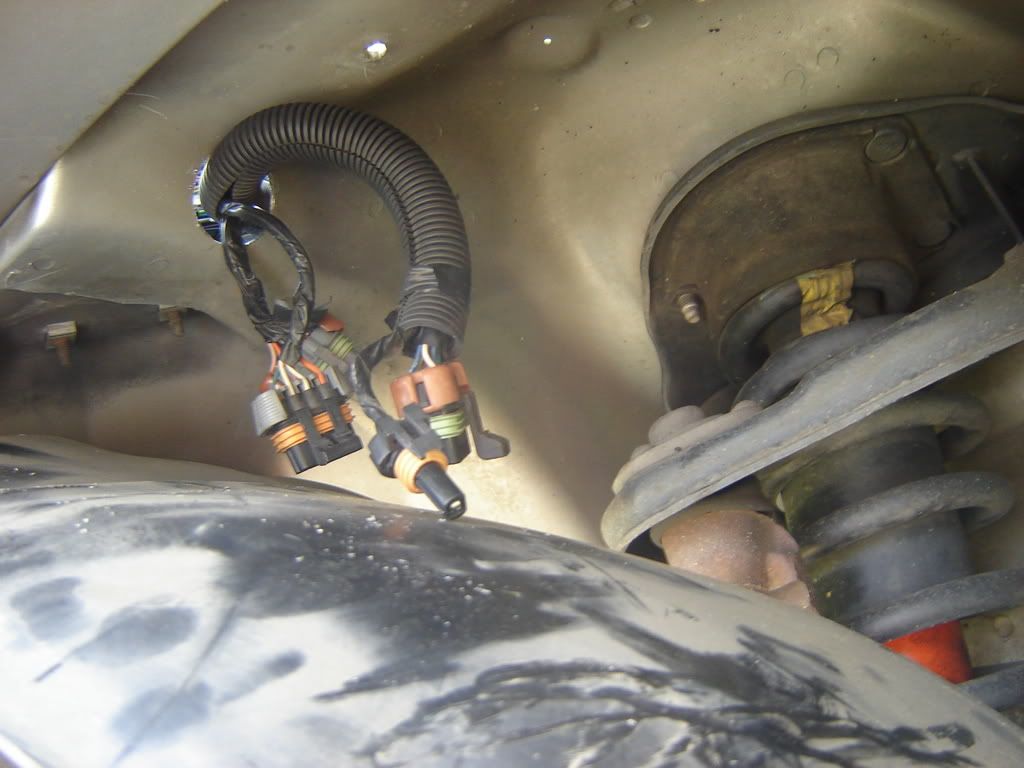
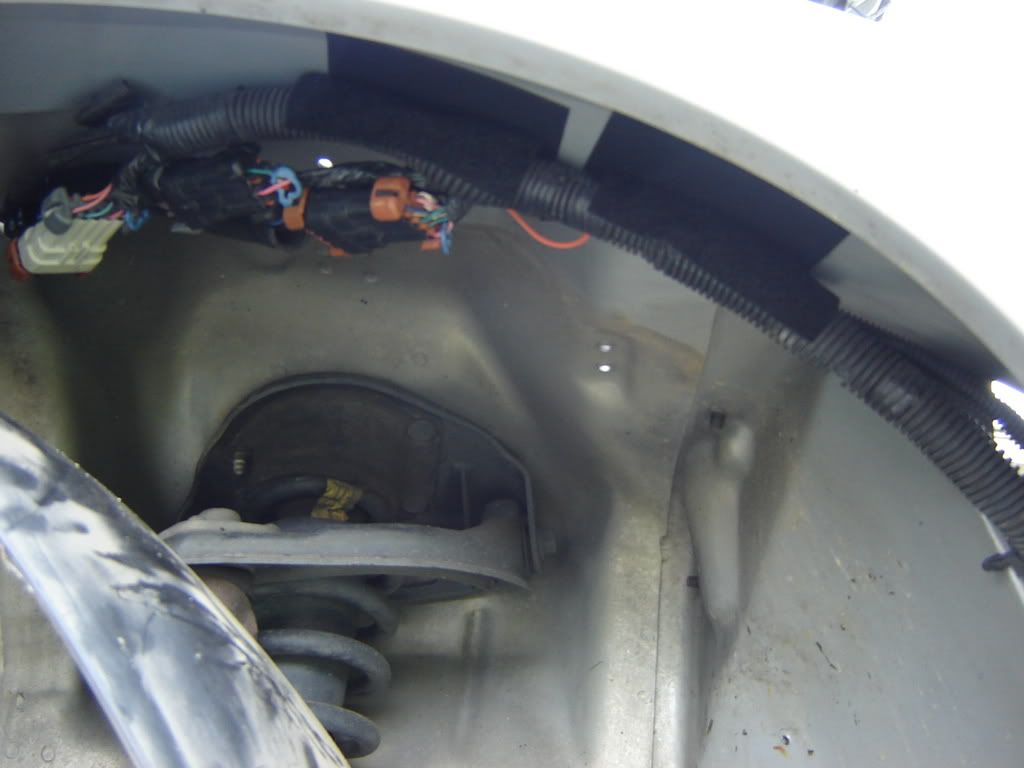
Here's what you should have down by the headlight after you disconnect everything. Run it through that little hole by the battery and into the fender well.
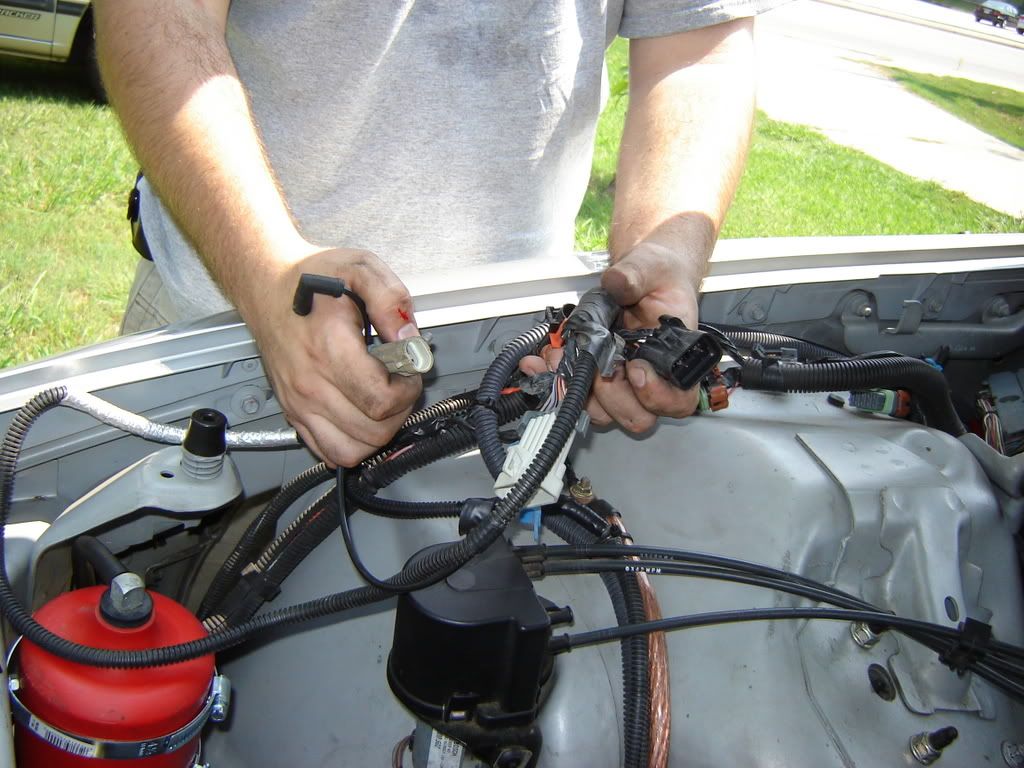
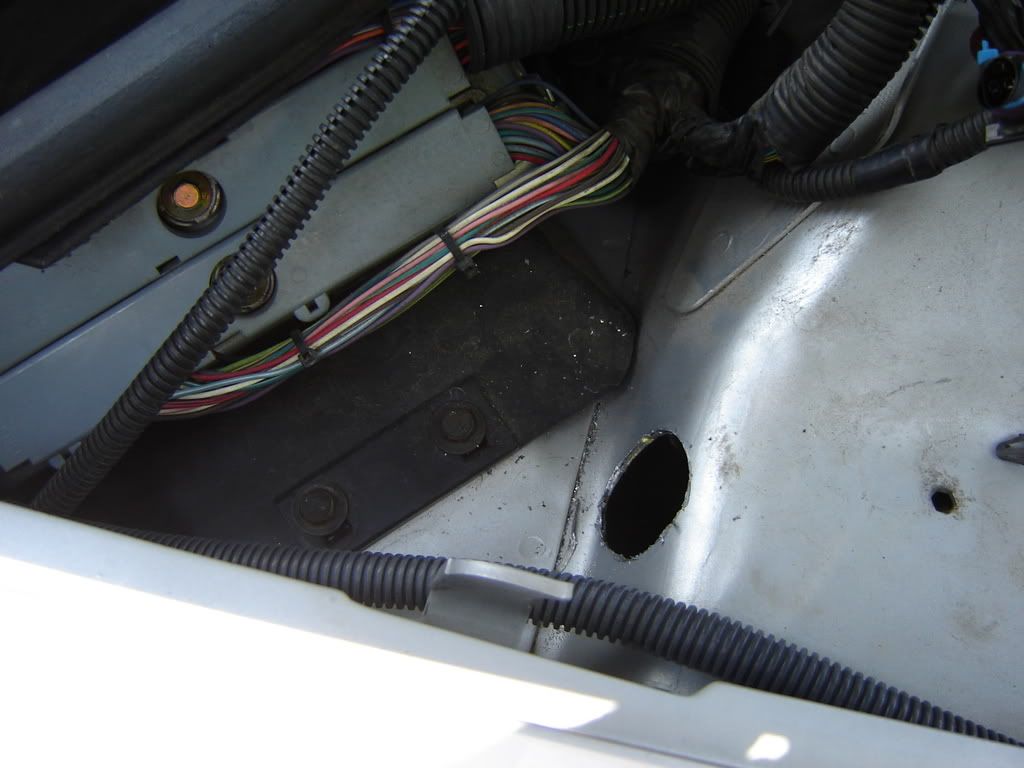
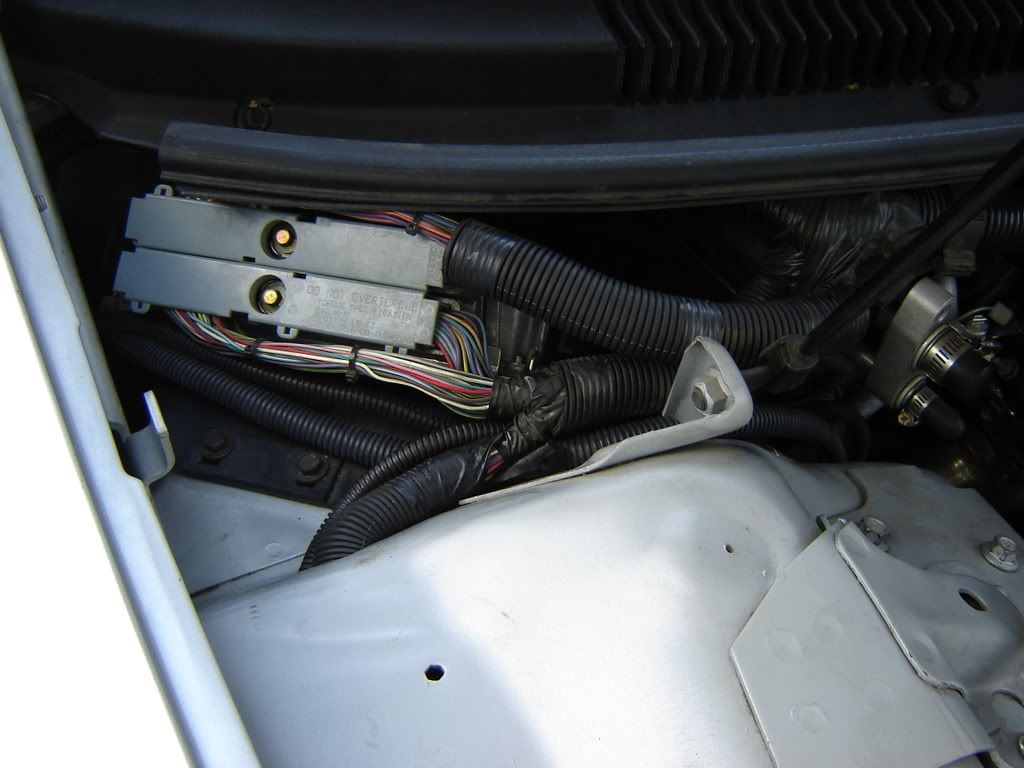
Here's everything you'll have up top by the PCM as far as wires. We'll be stuffing that down into the inner fender in a moment. After we drill a 1.5" hole.
Don't be scared about doing this. It is very simple, so long as you have a basic mechanical knowledge. If you can wire an amp, you can do this mod. It took just over two hours, and that was fiddle-farting around because of the heat.
Supplies needed:
1 Hole saw, at least 1.5 inches. You can go smaller if you feel like de-pinning the connectors, or lengthening the wires. I however, am lazy.
1 Drill, corded or cordless.
1 Pack Industrial Velcro.
Various hand tools.
Jack and Stands.
I assume you know how to properly jack your car and put a stand under the passenger-side, and remove the passenger front wheel, so this write-up starts there.
Here is what I started with. All wires are unplugged, and you can see my power wire from my battery relocation, as well as the clear-jacketed ground upgrade coming from the block. There is also a wire in a loom for my temperature gauge in all that mess.
Here is where we are going through from the fender side. I DID NOT pull the entire inner fender, I didn't feel any need to. I also didn't feel like messing with the two plastic rivets on the back side of the fender.
Here is the aforementioned plastic rivet. You could replace these with some universal plugs from an auto-parts store, but why bother when you don't need to? Yes I know that the car is filthy right there. It's a drag car, not a show car, and I haven't washed it properly in two months. Give me a break.
Make sure that you also disconnect the ABS Sensor wire, it is in that jumble of a harness up top, and you'll need to put it through the hole. It's also clamped with a little plastic clamp on the frame rail.
Here is the wire next to the heater lines that you want to pull up for the ABS sensor.
It helps to take out the bolt holding the heater lines in. It's a T30 Torx bit.
Also disconnect the vacuum connector for the air conditioning controls. Don't be a dumbass like me and break it.
If you are unfortunate and you do break it, you can go to any local parts house ( I went to Advance Auto because I work there ), and pick up this part out of the HELP section. You DO NOT need to go to the dealer and spend more money on a part that's less than $4.
Here's what you should have down by the headlight after you disconnect everything. Run it through that little hole by the battery and into the fender well.
Here's everything you'll have up top by the PCM as far as wires. We'll be stuffing that down into the inner fender in a moment. After we drill a 1.5" hole.
 07-22-2007, 03:51 PM
#4
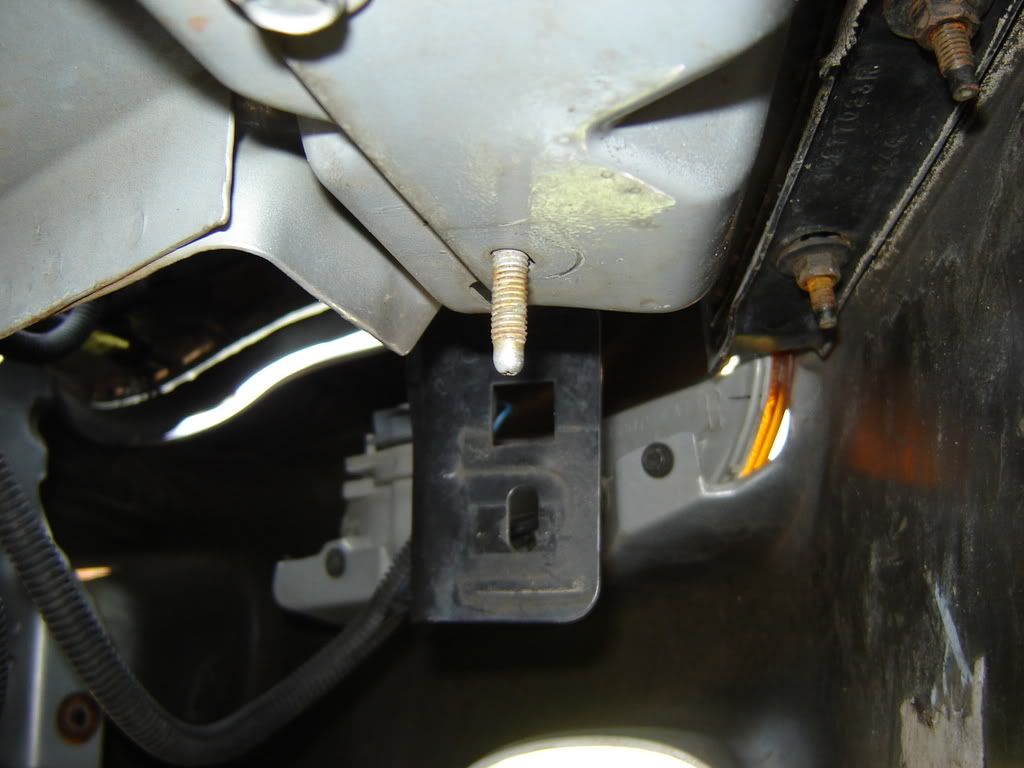
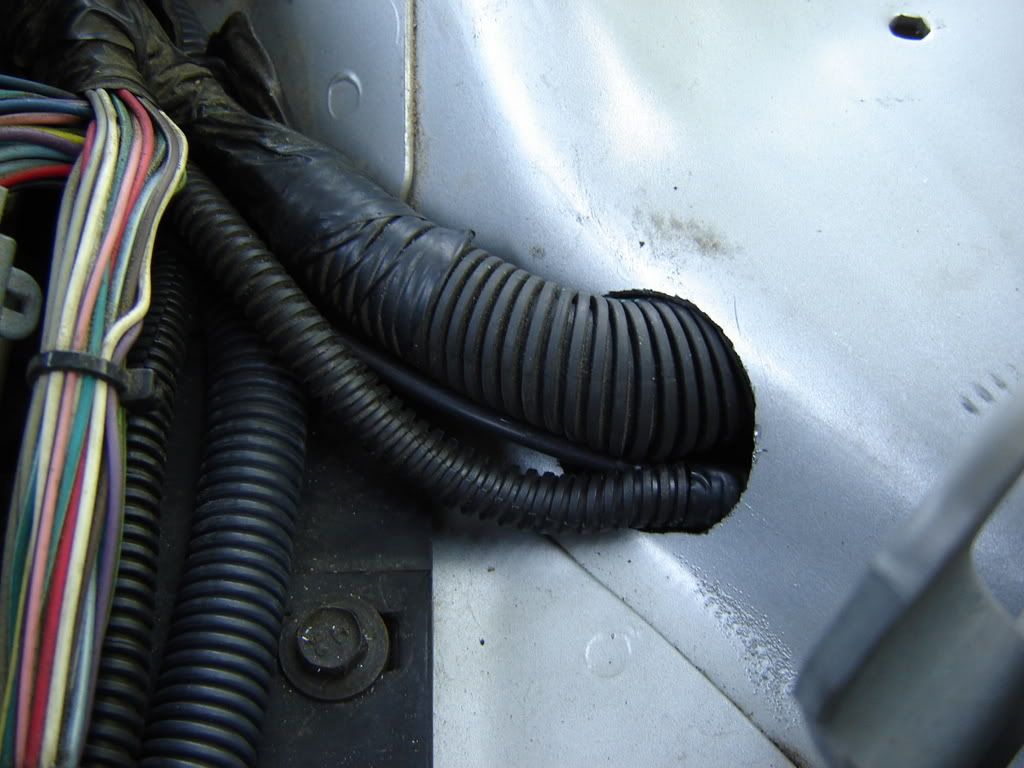
Here is what you've got left on the fender after moving all the wires. Three little clips. The connectors slide right off of them. You can reach up in the fenderwell now and push them up through the holes.
Here is what I used to drill the hole. Got it at Lowe's. The drill is my fathers, and is probably older than I am. But it works damn good.
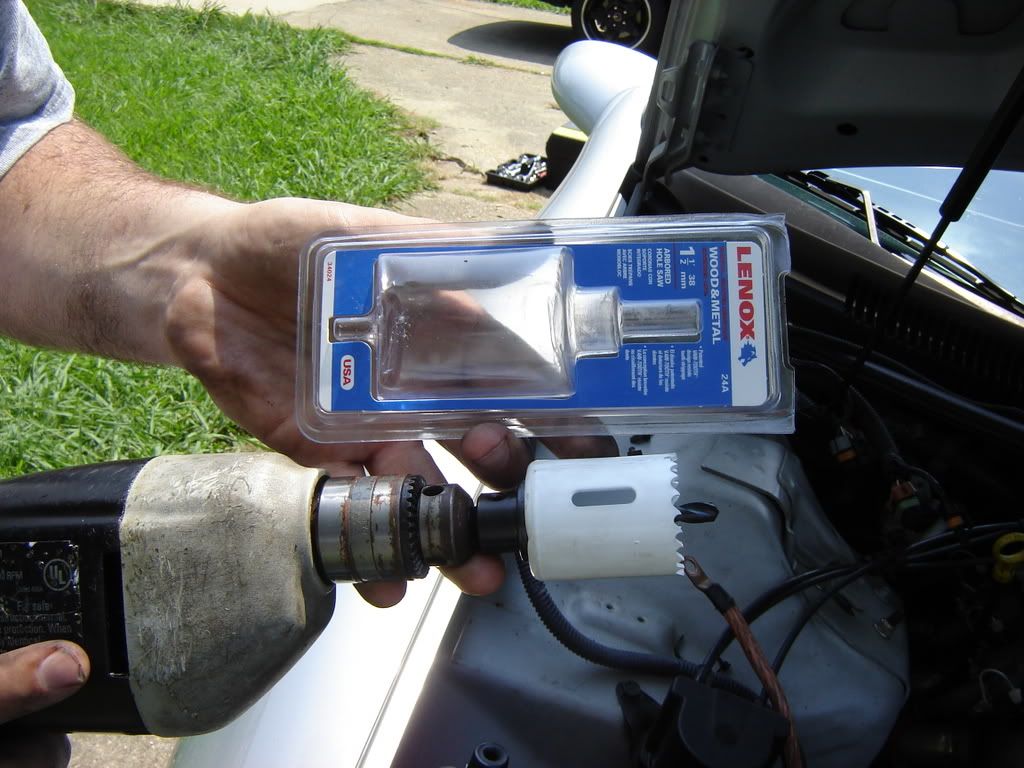
Here's me grinning like a goofy bastard, about to drill the hole. Be sure of where you want to drill. You might want to put a pilot hole in there first. My hole saw had an arbor, so I wasn't worried about it.
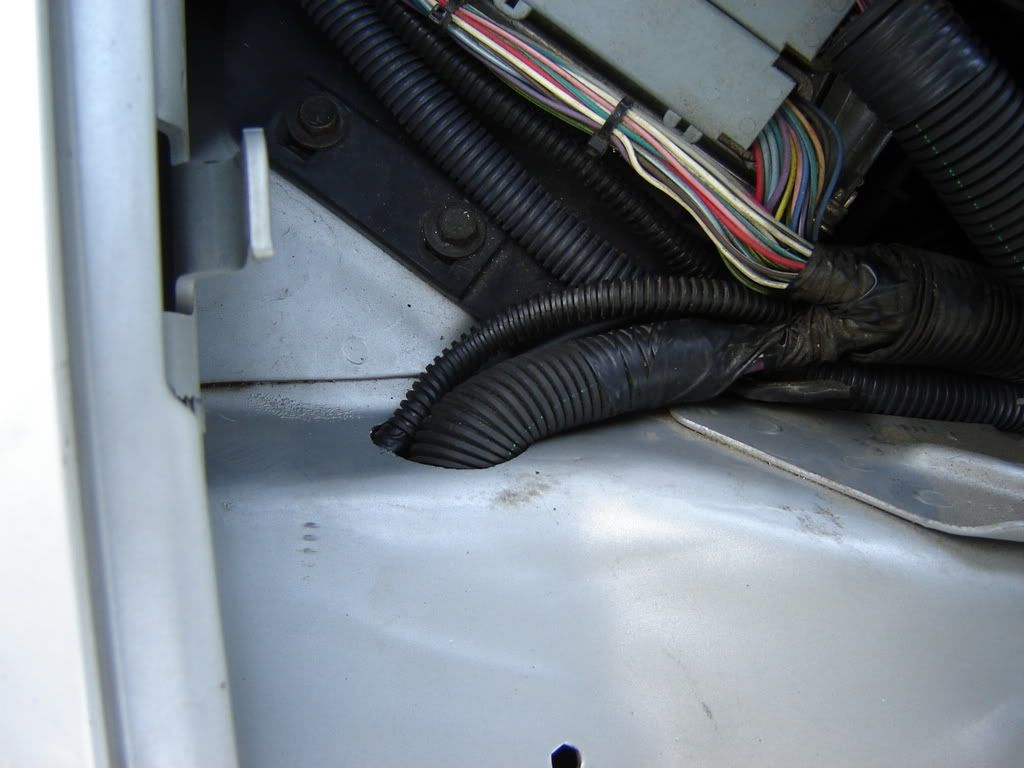
Here's the hole, finished. Only took like 30 seconds of drilling.
Here's the underhood side. You'll want to use a file to smooth down the edges. I used the file on my Leatherman Wave. In hindsight, a round file would probably work better. It's smooth enough now that I'm not worried about it cutting the loom or wires.
Here's one of the factory grounds that you want to relocate. I used the stud near the turn signal. You will want to cut the electrical tape to get the slack needed to relocate it. I had already re-done my factory ground for the battery, you can just relocate yours to the same spot as this one.

Here's the ground loose.
Here's the stud we're going to. Make sure that you get it all shiny around the base, so you get a good ground.
Here's both grounds on the stud, ready to roll.
Here's the wires coming through from the hole by the PCM. You have to turn the connectors sideways to get them to go through. Put the ones with the smaller wires through first, then the larger connector with the bigass loom connected to it.
Here is what I used to drill the hole. Got it at Lowe's. The drill is my fathers, and is probably older than I am.
But it works damn good.Here's me grinning like a goofy bastard, about to drill the hole. Be sure of where you want to drill. You might want to put a pilot hole in there first. My hole saw had an arbor, so I wasn't worried about it.
Here's the hole, finished. Only took like 30 seconds of drilling.
Here's the underhood side. You'll want to use a file to smooth down the edges. I used the file on my Leatherman Wave. In hindsight, a round file would probably work better. It's smooth enough now that I'm not worried about it cutting the loom or wires.
Here's one of the factory grounds that you want to relocate. I used the stud near the turn signal. You will want to cut the electrical tape to get the slack needed to relocate it. I had already re-done my factory ground for the battery, you can just relocate yours to the same spot as this one.
Here's the ground loose.
Here's the stud we're going to. Make sure that you get it all shiny around the base, so you get a good ground.
Here's both grounds on the stud, ready to roll.
Here's the wires coming through from the hole by the PCM. You have to turn the connectors sideways to get them to go through. Put the ones with the smaller wires through first, then the larger connector with the bigass loom connected to it.
07-22-2007, 04:01 PM
#5
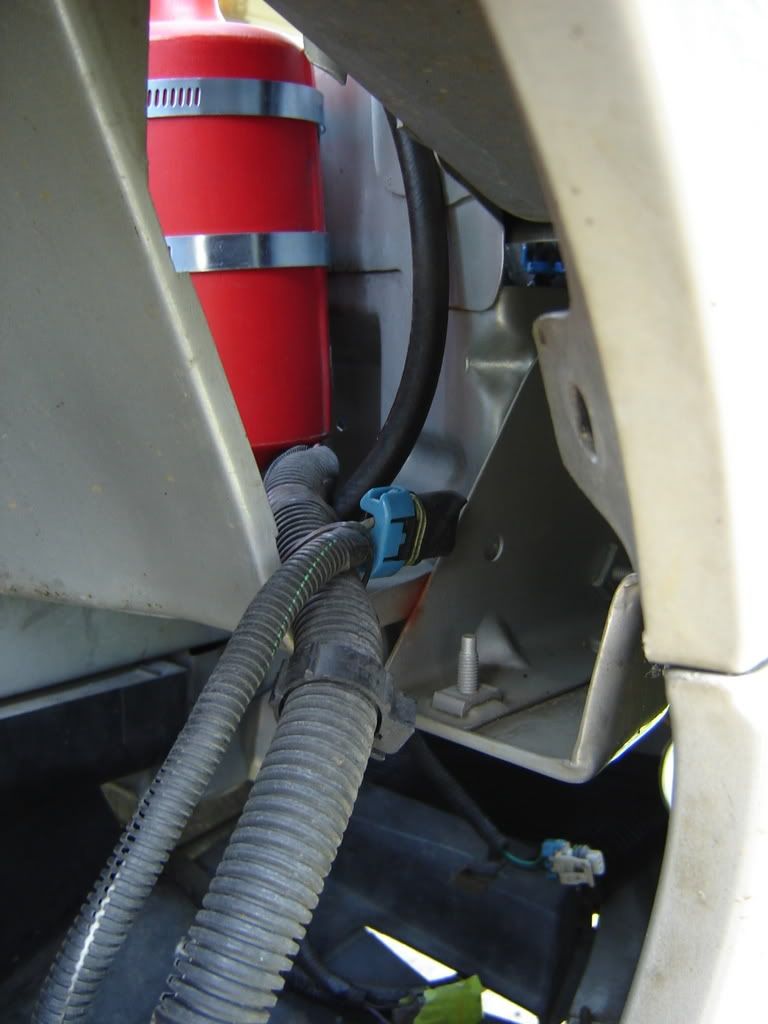
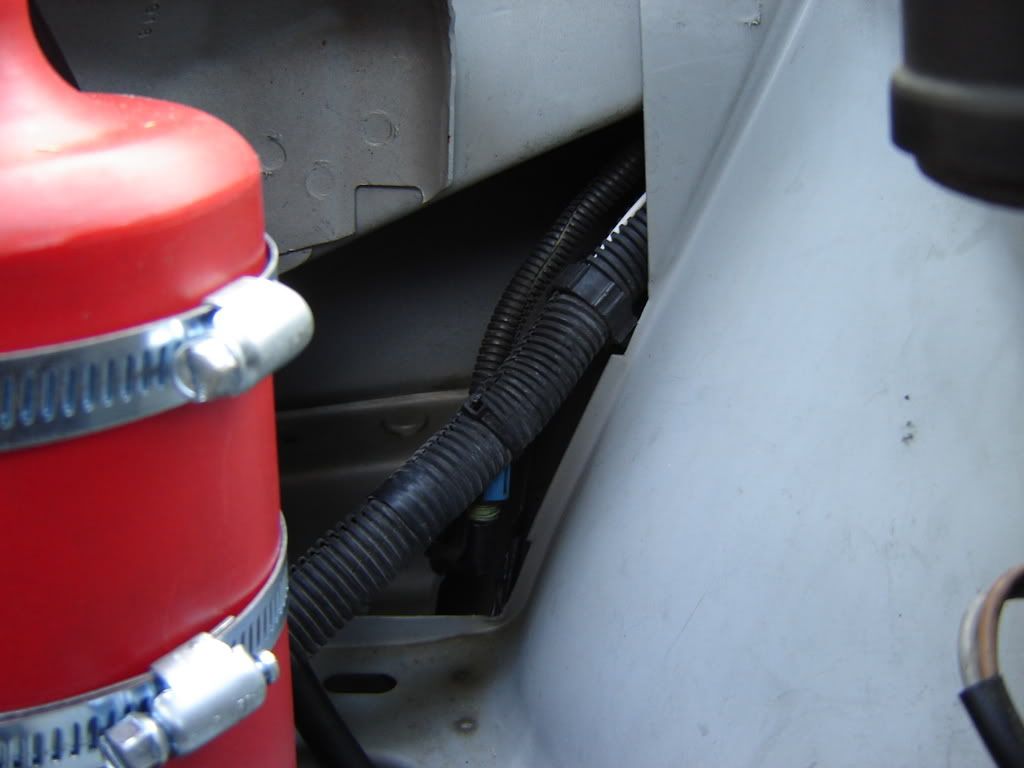
Here's where the wires come through by the battery:
Industrial Velcro, to hold the wires in place.
Velcro'd up wires. I didn't wrap them in electrical tape or anything. I don't hardly drive the car anymore, much less in the rain, and I don't see how they'd get wet anyway.
Another shot of them velcro'd up.
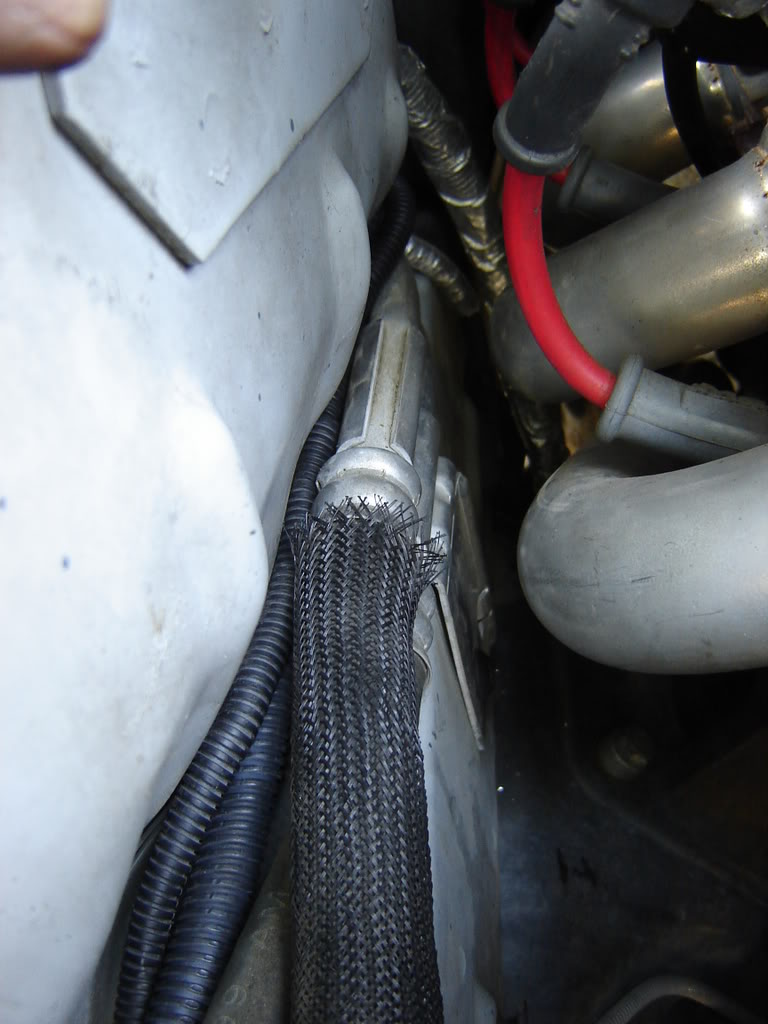
Put my power wire and my gauge wire down behind the heater hoses to hide them.
Cleaned up fender. Need to delete the ASR/TCS box soon, and get it off the fender.

Wires going through the hole. No grommet yet. I'll get to it soon enough. I don't think that anything will happen to the wires in the meantime though.
Wires coming through near where the battery would be on most cars. I think that it would be easier to remove your battery when you do this mod. Mine was already relocated however, so it was already easy.
Wires going through the hole by the PCM.
And here you go, a cleaned up looking fender for under $20, and a few hours work.


If anyone has any questions, feel free to ask them in this thread.
If I could please get a mod to put the posts in the correct order one right behind each other, that would be great also. Thanks in advance for that.
Hope you enjoyed this write-up, and that it helps someone do this in the future.
Allen
Industrial Velcro, to hold the wires in place.
Velcro'd up wires. I didn't wrap them in electrical tape or anything. I don't hardly drive the car anymore, much less in the rain, and I don't see how they'd get wet anyway.
Another shot of them velcro'd up.
Put my power wire and my gauge wire down behind the heater hoses to hide them.
Cleaned up fender. Need to delete the ASR/TCS box soon, and get it off the fender.
Wires going through the hole. No grommet yet. I'll get to it soon enough. I don't think that anything will happen to the wires in the meantime though.
Wires coming through near where the battery would be on most cars. I think that it would be easier to remove your battery when you do this mod. Mine was already relocated however, so it was already easy.
Wires going through the hole by the PCM.
And here you go, a cleaned up looking fender for under $20, and a few hours work.
If anyone has any questions, feel free to ask them in this thread.
If I could please get a mod to put the posts in the correct order one right behind each other, that would be great also. Thanks in advance for that.
Hope you enjoyed this write-up, and that it helps someone do this in the future.
Allen
 07-22-2007, 04:40 PM
#7
Nice write-up. 
Here are a few additional tips for anyone wanting to do this.
If drilling from inside the wheel well, drill a pilot hole first. This will give you a chance to review the location from topside before you drill your big hole.
By all means, file that hole. Also, use a grommet around that hole. A grommet this size is tough to find at local brick and mortar stores.
1 1/2" x 1/8" x 1 3/4" x 2 1/8" x 1/2" RUBBER GROMMETOMAR-2875
Also, consider protecting the cable assembly with �Economy Discharge Hose". This is the super flexible hose used for pumping out pools. It is flat when water is not being pushed through it. I ran it from just inside the engine bay near the PCM to the battery. I wrapped the cable bundle/hose at the PCM tightly w/ black electrical tape to help keep water out and cover up the blue hose at that end. If you try this, I would suggest the next larger size than 2�. I used 2" hose, but it was a PITA to get all the connectors through.
Trending Topics

 07-22-2007, 09:04 PM
#11
TECH Regular

Join Date: Jan 2005
Posts: 418
Likes: 0
Received 0 Likes
on
0 Posts

Good write up. I went ahead and filled the holes and I also relocated the ground wires on the front cross bar that are located on each side of the air box I simply moved them under the airbox and then filled those holes as well.
Then I went to the other side and basically did the same type mod with the hood latch cable.
Also like someone noted get a rubber gromment in that hole. I used a small rubber length of tube that I split down the length of the tube as a gromment


Then I went to the other side and basically did the same type mod with the hood latch cable.
Also like someone noted get a rubber gromment in that hole. I used a small rubber length of tube that I split down the length of the tube as a gromment
07-22-2007, 09:25 PM
#13
TECH Regular
Join Date: Jan 2005
Posts: 418
Likes: 0
Received 0 Likes
on
0 Posts
Originally Posted by SpdFrk1990
^ Love your engine bay man.
Thanks, also see you posted that you can't decide if you want to do the mod, just do it it will be one of the easiest things you do to your car.
Also I seran wrapped the wire harness and then coated the whole thing with a wrap of electrical tape to help protect from possible moisture.
07-22-2007, 09:35 PM
#14
Getav8, love your engine bay man.
I plan on doing the other side next Sunday. I work all the time, so I just try to do one thing at a time. We're also probably going to do the wire mod with an LT1 at the same time, so I may post up again for the LT1 guys.
The other side will be easy, just relocate the hood latch cable, along with the wire for the line lock, then peel two stickers, done! I might even clean my engine bay for the first time in a year or so.
I plan on doing the !HVAC mod sometime soon when I get another car to use as a daily driver. The car looks more and more like a drag car every day.
07-22-2007, 09:44 PM
#15
TECH Regular
Join Date: Jan 2005
Posts: 418
Likes: 0
Received 0 Likes
on
0 Posts
I do not daily drive her but when I do it is hot in traffic down here in the south.
When you get really bold toss out the power steering too.
When you get really bold toss out the power steering too.
Originally Posted by DOUBT IT
Getav8, love your engine bay man.
I plan on doing the other side next Sunday. I work all the time, so I just try to do one thing at a time. We're also probably going to do the wire mod with an LT1 at the same time, so I may post up again for the LT1 guys.
The other side will be easy, just relocate the hood latch cable, along with the wire for the line lock, then peel two stickers, done! I might even clean my engine bay for the first time in a year or so.
I plan on doing the !HVAC mod sometime soon when I get another car to use as a daily driver. The car looks more and more like a drag car every day.
I plan on doing the other side next Sunday. I work all the time, so I just try to do one thing at a time. We're also probably going to do the wire mod with an LT1 at the same time, so I may post up again for the LT1 guys.
The other side will be easy, just relocate the hood latch cable, along with the wire for the line lock, then peel two stickers, done! I might even clean my engine bay for the first time in a year or so.
I plan on doing the !HVAC mod sometime soon when I get another car to use as a daily driver. The car looks more and more like a drag car every day.
 07-22-2007, 09:52 PM
#17
TECH Regular
Join Date: Jan 2005
Posts: 418
Likes: 0
Received 0 Likes
on
0 Posts
Originally Posted by kebie05
are there any other ways to hold the wires up underneath, other than velcro? great write up.
The fender liner will pretty much hold it in place with or with out velcro