
Painted ls6 intake and lid
 03-09-2008, 11:02 AM
#1
Launching!
Thread Starter
iTrader: (7)
Join Date: Oct 2005
Location: Melbourne, FL
Posts: 228
Likes: 0
Received 0 Likes
on
0 Posts

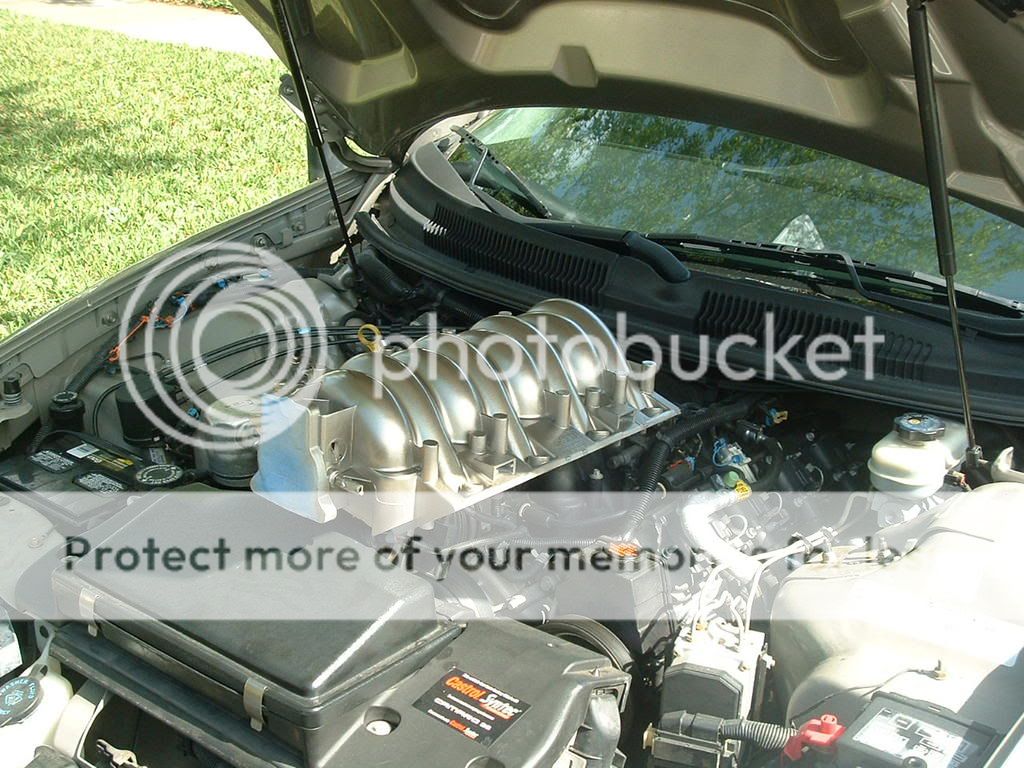
My dad surprised me on my bday by painting my ls6 intake. 
EDIT: Added Installed pic...
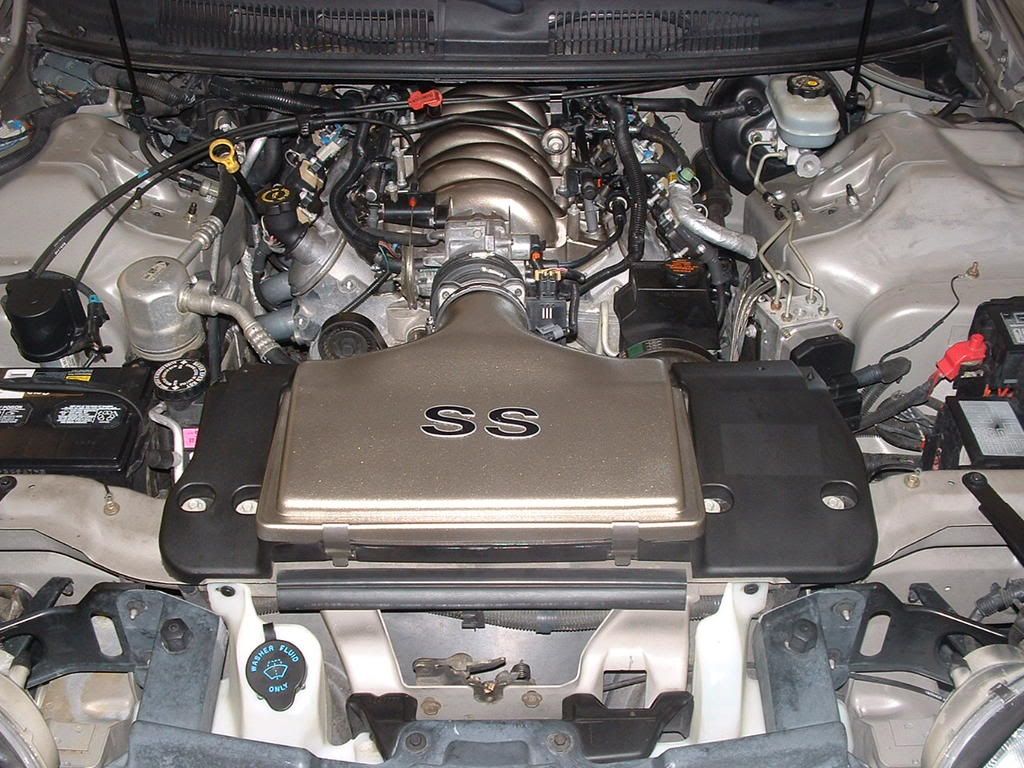
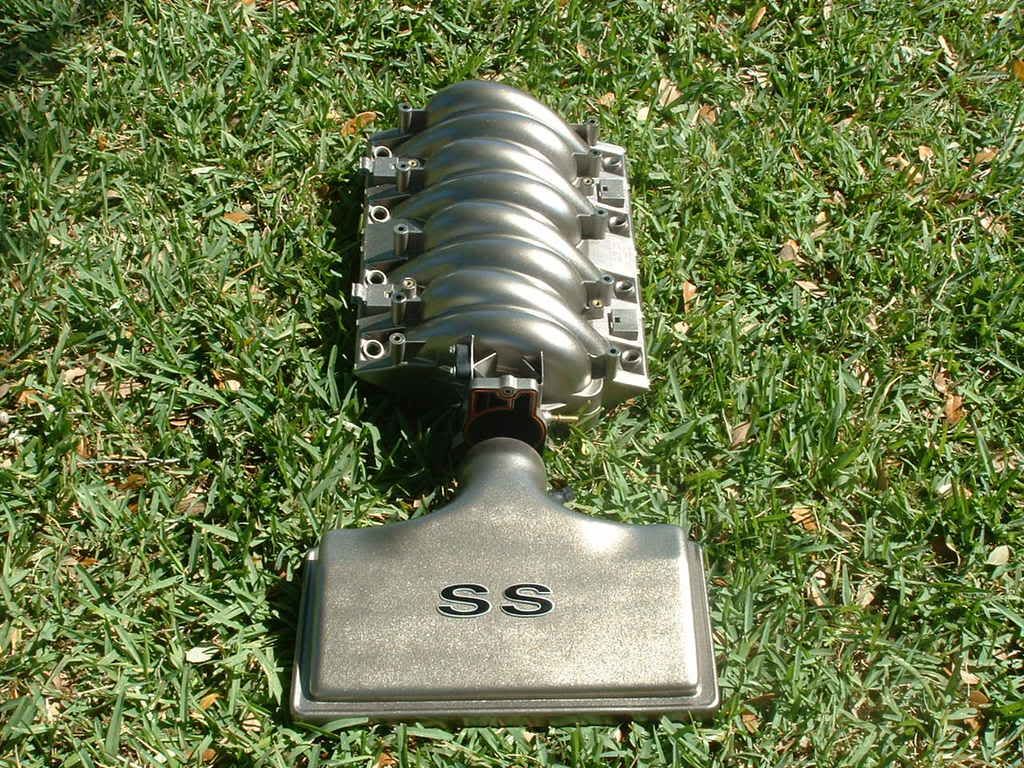
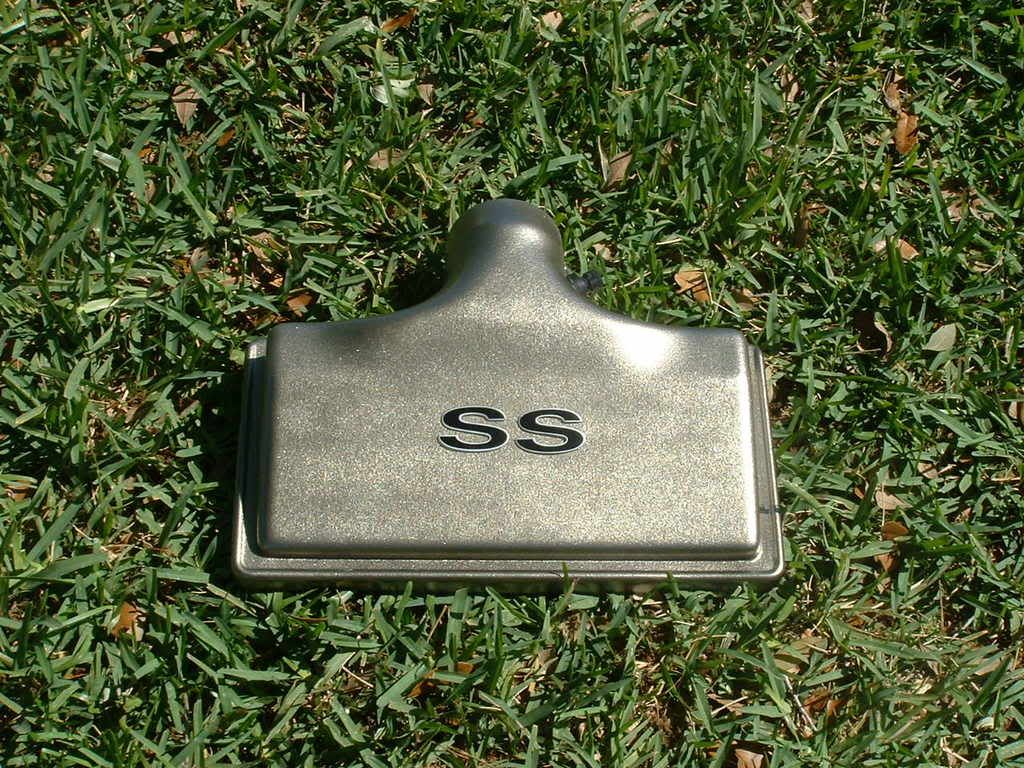
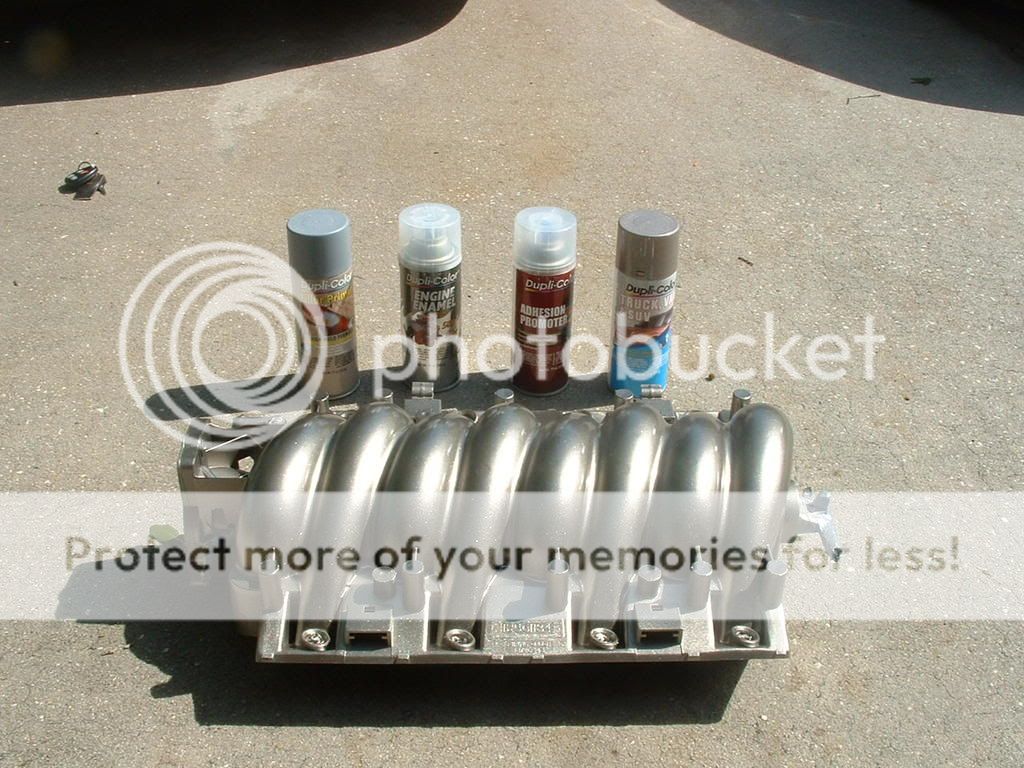
Dad's writeup:
Sanding composite intake ~ 200, 320, 400 wet/dry paper
Trying to completely remove the casting circles on top of runners very difficult. Using machine
to sand could loose the natural runner shape. After sanding completed, power washed clean with
detergent.
Tape and cover all holes on intake and trim with razor to avoid overspray.
Check weather humidity to be below 60% and temp to be above 65 deg.
Adhesion Promoter ~ initially spray with two light misting coats. Third coat to be medium wet
coat. Follow directions on can drying times. Apply primer coat within 20 minutes of adhesion
promoter.
Filler Primer (high build formula) ~ apply 2 light misting coats. Third coat to cover, and fourth &
fifth coats to be medium wet. Additional coats can be applied if necessary pending on your
sanding. Filler primer will cover any sanding marks and hide the casting circles on runners. Try
to avoid spraying with can held horizontal. Move intake to enable spraying can to be held upright.
Keep spray nozzle clear of buildup with clean rag to avoid "spitting" on spray surface.
Follow can directions. Allow to dry overnight.
Lacquer Paint coat ~ color of choice. Remember, can not spray lacquer over enamel.
Used color to match car exterior and engine bay. Start with light misting coating. Allow to
dry ten minutes between coats. Used 5 coats, the last two being wet ones. Watch carefully
for runs on contoured surfaces. Keep nozzle clean prior and during each coat to avoid spitting
and uneven coatings. Follow direction on can.
Clear Coat ~ Used a clear 500 deg engine enamel paint with a ceramic base for added durability.
Apply first two coats with light misting. Allow to dry about 10 minutes between coats.
Last two coats were wet coats for shine. Follow directions on can. (Can also use clear lacquer.)
No sanding of any paint coats is required if you are proficient with the spray cans.
Allow to completely cure for 3~4 days before installation.
EDIT: Added Installed pic...
Dad's writeup:
Sanding composite intake ~ 200, 320, 400 wet/dry paper
Trying to completely remove the casting circles on top of runners very difficult. Using machine
to sand could loose the natural runner shape. After sanding completed, power washed clean with
detergent.
Tape and cover all holes on intake and trim with razor to avoid overspray.
Check weather humidity to be below 60% and temp to be above 65 deg.
Adhesion Promoter ~ initially spray with two light misting coats. Third coat to be medium wet
coat. Follow directions on can drying times. Apply primer coat within 20 minutes of adhesion
promoter.
Filler Primer (high build formula) ~ apply 2 light misting coats. Third coat to cover, and fourth &
fifth coats to be medium wet. Additional coats can be applied if necessary pending on your
sanding. Filler primer will cover any sanding marks and hide the casting circles on runners. Try
to avoid spraying with can held horizontal. Move intake to enable spraying can to be held upright.
Keep spray nozzle clear of buildup with clean rag to avoid "spitting" on spray surface.
Follow can directions. Allow to dry overnight.
Lacquer Paint coat ~ color of choice. Remember, can not spray lacquer over enamel.
Used color to match car exterior and engine bay. Start with light misting coating. Allow to
dry ten minutes between coats. Used 5 coats, the last two being wet ones. Watch carefully
for runs on contoured surfaces. Keep nozzle clean prior and during each coat to avoid spitting
and uneven coatings. Follow direction on can.
Clear Coat ~ Used a clear 500 deg engine enamel paint with a ceramic base for added durability.
Apply first two coats with light misting. Allow to dry about 10 minutes between coats.
Last two coats were wet coats for shine. Follow directions on can. (Can also use clear lacquer.)
No sanding of any paint coats is required if you are proficient with the spray cans.
Allow to completely cure for 3~4 days before installation.
Last edited by medwar11; 03-15-2008 at 09:20 AM.


Trending Topics


 I didn't find any at all the auto parts store in my area. I went with Dark Shadow Grey instead.
  03-09-2008, 09:13 PM
#14
Launching!
Thread Starter
iTrader: (7)
Join Date: Oct 2005
Location: Melbourne, FL
Posts: 228
Likes: 0
Received 0 Likes
on
0 Posts
I like that color! I like the painted fuel rails too, I think I'm going to have to do that during the swap. There are still a few casting marks on mine too, my dad said those were just impossible.

