Aftermarket aluminum radiator install thread- ALRADCO (American Made!)
 08-31-2011, 07:22 PM
#1
Staging Lane
Thread Starter

Join Date: Jul 2011
Location: San Diego, CA
Posts: 79
Likes: 0
Received 0 Likes
on
0 Posts
AFTERMARKET ALUMINUM RADIATOR INSTALL THREAD- ALRADCO AMERICAN MADE!
Alright, there has been lots of discussions of radiators on the boards lately, and as I posted in a few other threads, I met a guy who has access and ability to have aluminum radiators built. They are built here in the US, in California no less! He started by building them for the Buick Grand National, as that is one of the cars he has, and is active on one of the other turbo Buick boards. He had one made, and I was able to do the testing on it. It fit perfect, works like a monster, and looks beautiful. I have the black powder coated one in my Grand National and it is amazing. So, I hit him up about doing one for the Cad-V’s. I know my car runs hot, but that is how these cars are designed with the high temp opening thermostats and super crazy high fan turn ons… I know the biggest problem on these cars’ radiators are that they leak/ seep at the seams. I know mine does.
So, I sent him my stock radiator as a mock up. He just finished the fabricated, all aluminum radiator and it looks FANTASTIC!!! The welds are amazing, the necks are super thick, the bolt bosses have heli-coils in them so you don’t pull them out the first time you tighten the fan down, etc.
Price: I finally get a chance to meet Peter in person when my wife and I were travelling in North Cali for a wedding. My wife and I got to meet him and his sons and this guy truly is a car-guy. Although he could ask much more for the radiators, he is not in it to make a bunch of money, just to make a good product for other car guys. This radiator is planned to be under $500. I know of others that are comparable, but can run $300 more than this one, if not more.
Anyhow, here is my install process with a ton of pics. I put them as photobucket links as not to drop the whole internet in one move… Enjoy, and please let me know if you have any questions.
EDIT: Right up front, this is a DROP IN RADIATOR, stock replacement (albeit wider) and not a bunch of mods are needed. As a matter of fact, there is only one mod done, and that is trimming a few inches off the tiny hose that leads to the top of the radiator. The stock airbox fits, etc. My big mouth cold air intake pipe fit, but needed a little dimple here and there. Dimpling was done with a heat gun (about $10 from Harbor Freight) and pressing a 1/8 – �” dimple into it with the smooth end of a screwdriver.
https://ls1tech.com/forums/cadillac-...diators-3.html
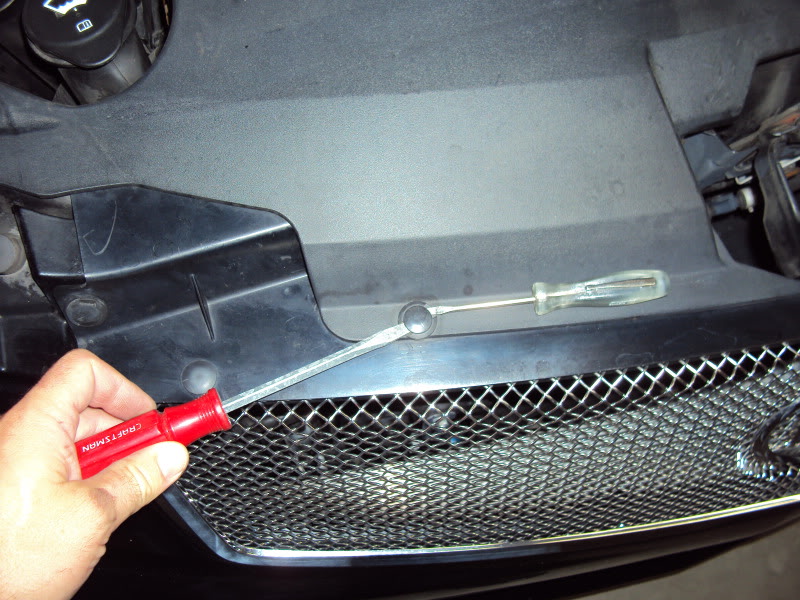
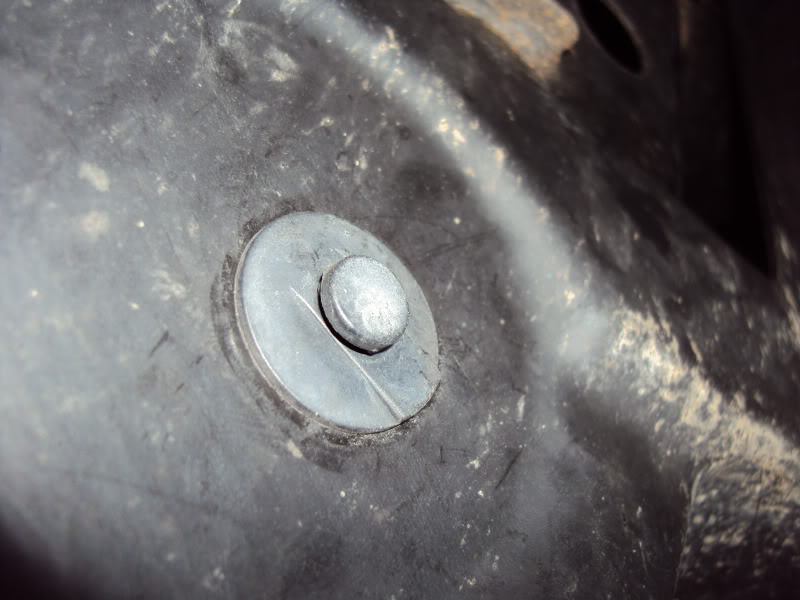
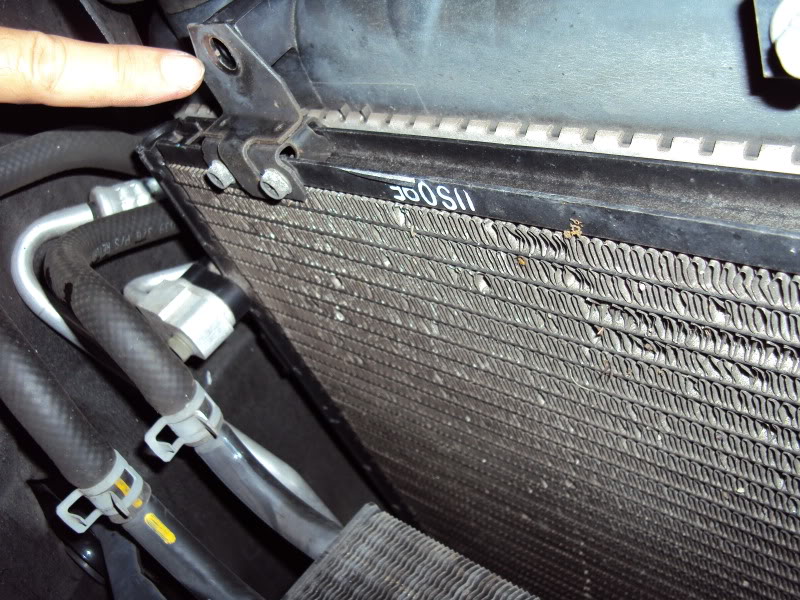
Alright, in case you don’t know how to remove the upper radiator cover there are two “rivets” and two little clips on the ends. I used two small screwdrivers to start pulling the head of the rivet up, then pulled it by hand. Here they are:
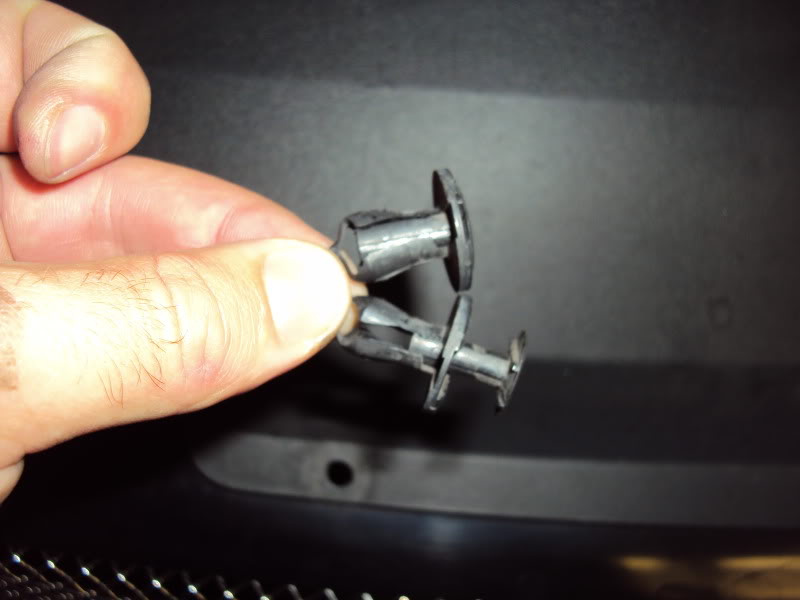
Here is what they look like open and closed:
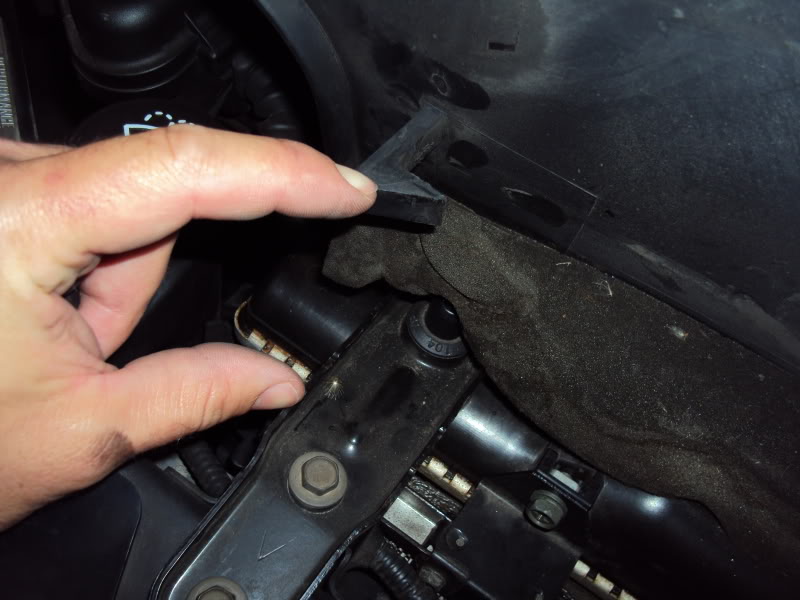
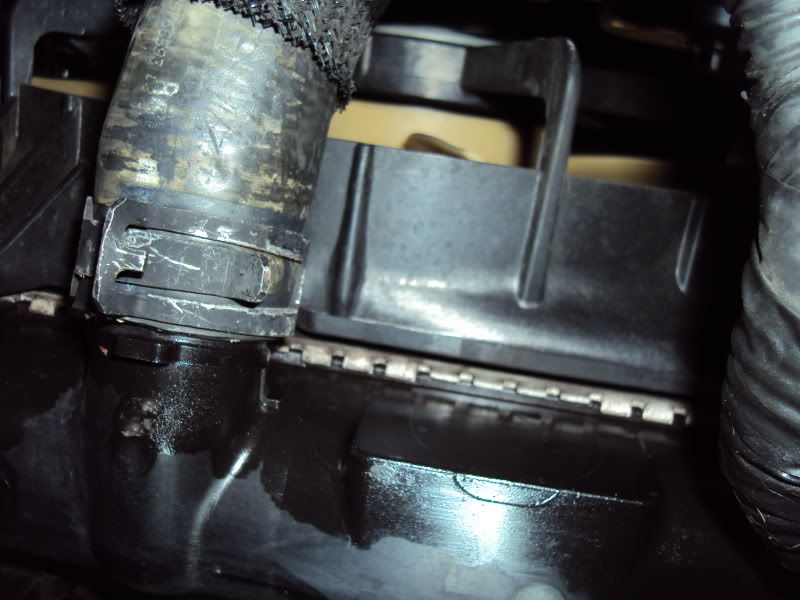
After removing "rivets" for top cover, these little things clip in on the sides of the radiator hold down brackets.
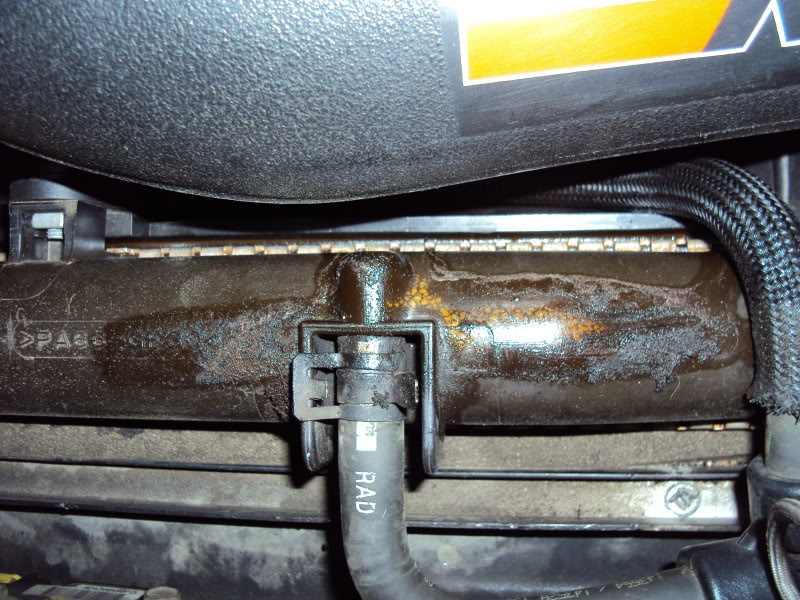
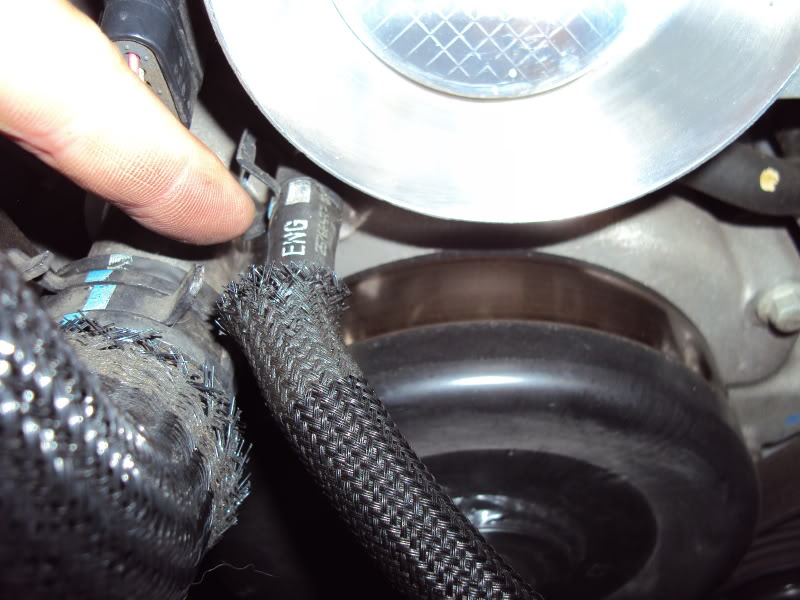
Here is the little top hose on top of the rad. This must be removed. Stupid leaking stocker…
Got to remove this screw, which holds the hard AC line on the side of the radiator fans. A 1/4" drive ratchet with a phillips head works well.
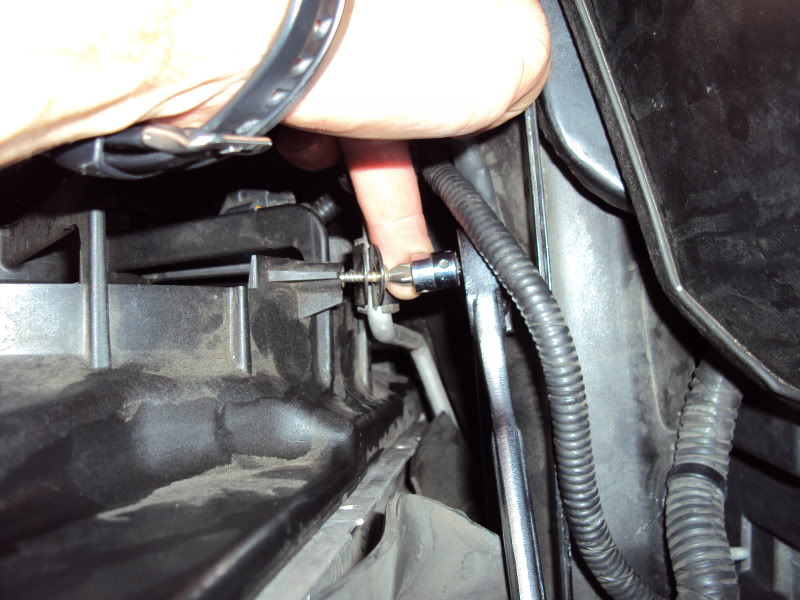
Disconnect this fan attachment. (drivers side fan motor) NOTE* compare this amount of clearance to the final install. This is ~1/2", ALRADCO if about 1/8" but fits fine. Can be overcome too if need be later.
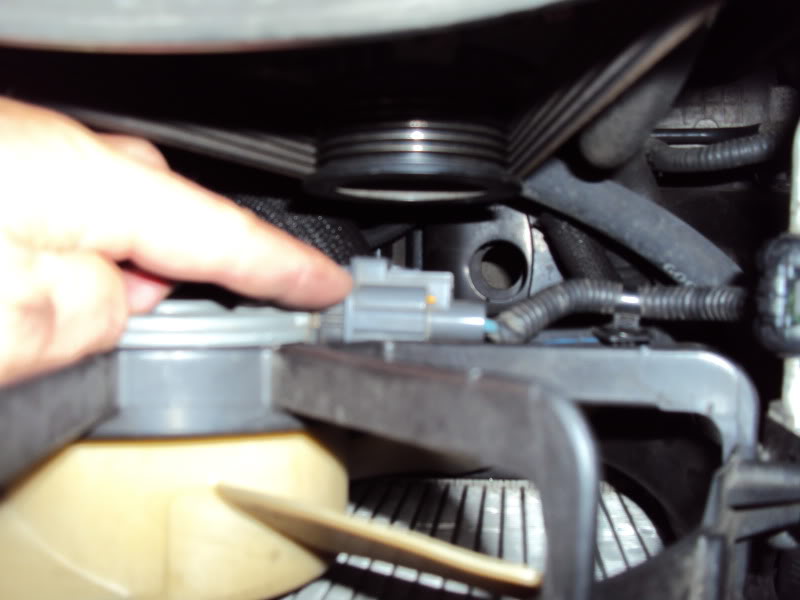
Disconnect this fan connector. (Pass side)
Alright, there has been lots of discussions of radiators on the boards lately, and as I posted in a few other threads, I met a guy who has access and ability to have aluminum radiators built. They are built here in the US, in California no less! He started by building them for the Buick Grand National, as that is one of the cars he has, and is active on one of the other turbo Buick boards. He had one made, and I was able to do the testing on it. It fit perfect, works like a monster, and looks beautiful. I have the black powder coated one in my Grand National and it is amazing. So, I hit him up about doing one for the Cad-V’s. I know my car runs hot, but that is how these cars are designed with the high temp opening thermostats and super crazy high fan turn ons… I know the biggest problem on these cars’ radiators are that they leak/ seep at the seams. I know mine does.
So, I sent him my stock radiator as a mock up. He just finished the fabricated, all aluminum radiator and it looks FANTASTIC!!! The welds are amazing, the necks are super thick, the bolt bosses have heli-coils in them so you don’t pull them out the first time you tighten the fan down, etc.
Price: I finally get a chance to meet Peter in person when my wife and I were travelling in North Cali for a wedding. My wife and I got to meet him and his sons and this guy truly is a car-guy. Although he could ask much more for the radiators, he is not in it to make a bunch of money, just to make a good product for other car guys. This radiator is planned to be under $500. I know of others that are comparable, but can run $300 more than this one, if not more.
Anyhow, here is my install process with a ton of pics. I put them as photobucket links as not to drop the whole internet in one move… Enjoy, and please let me know if you have any questions.
EDIT: Right up front, this is a DROP IN RADIATOR, stock replacement (albeit wider) and not a bunch of mods are needed. As a matter of fact, there is only one mod done, and that is trimming a few inches off the tiny hose that leads to the top of the radiator. The stock airbox fits, etc. My big mouth cold air intake pipe fit, but needed a little dimple here and there. Dimpling was done with a heat gun (about $10 from Harbor Freight) and pressing a 1/8 – �” dimple into it with the smooth end of a screwdriver.
https://ls1tech.com/forums/cadillac-...diators-3.html
Alright, in case you don’t know how to remove the upper radiator cover there are two “rivets” and two little clips on the ends. I used two small screwdrivers to start pulling the head of the rivet up, then pulled it by hand. Here they are:
Here is what they look like open and closed:
After removing "rivets" for top cover, these little things clip in on the sides of the radiator hold down brackets.
Here is the little top hose on top of the rad. This must be removed. Stupid leaking stocker…
Got to remove this screw, which holds the hard AC line on the side of the radiator fans. A 1/4" drive ratchet with a phillips head works well.
Disconnect this fan attachment. (drivers side fan motor) NOTE* compare this amount of clearance to the final install. This is ~1/2", ALRADCO if about 1/8" but fits fine. Can be overcome too if need be later.
Disconnect this fan connector. (Pass side)
 08-31-2011, 07:23 PM
#2
Staging Lane
Thread Starter
Join Date: Jul 2011
Location: San Diego, CA
Posts: 79
Likes: 0
Received 0 Likes
on
0 Posts
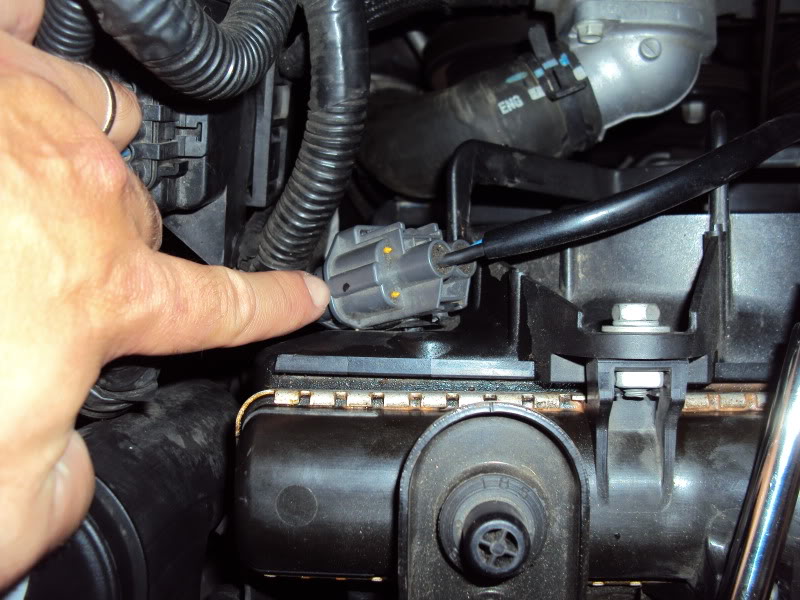
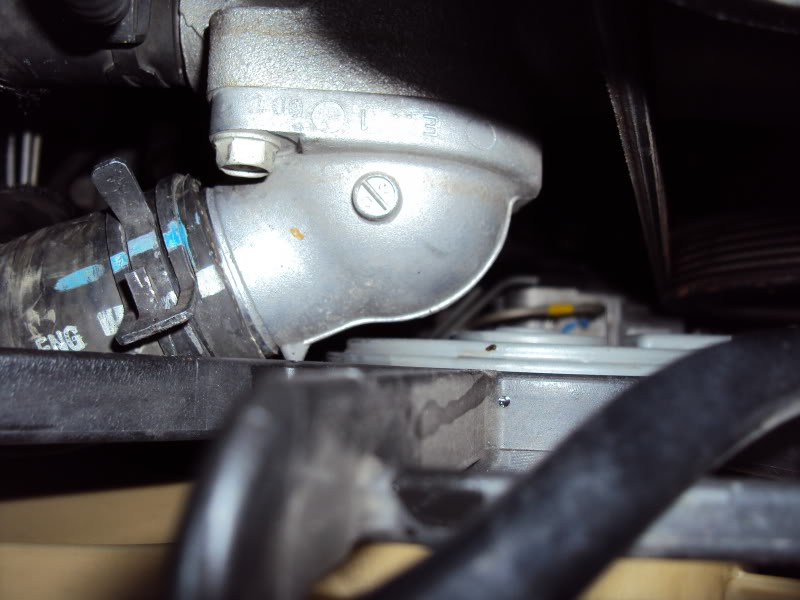
Disconnect the TPS wiring, just to be safe and not hit it later.
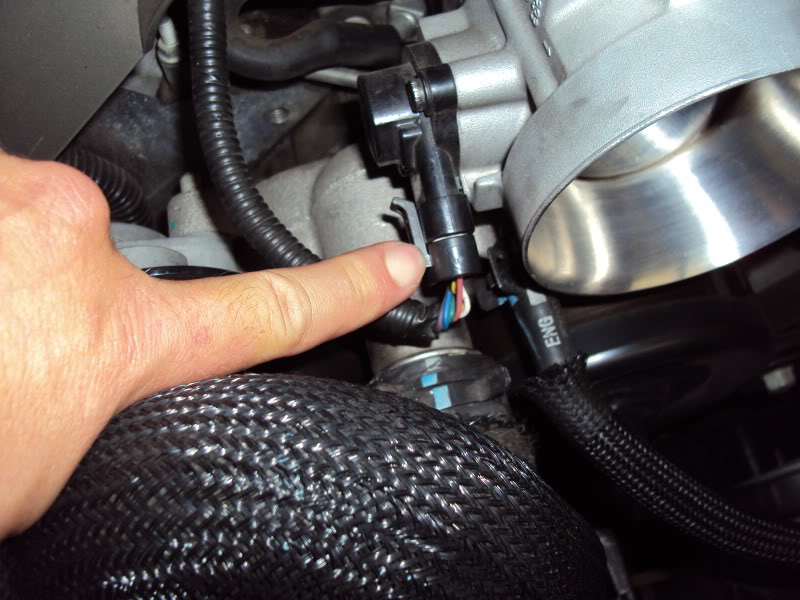
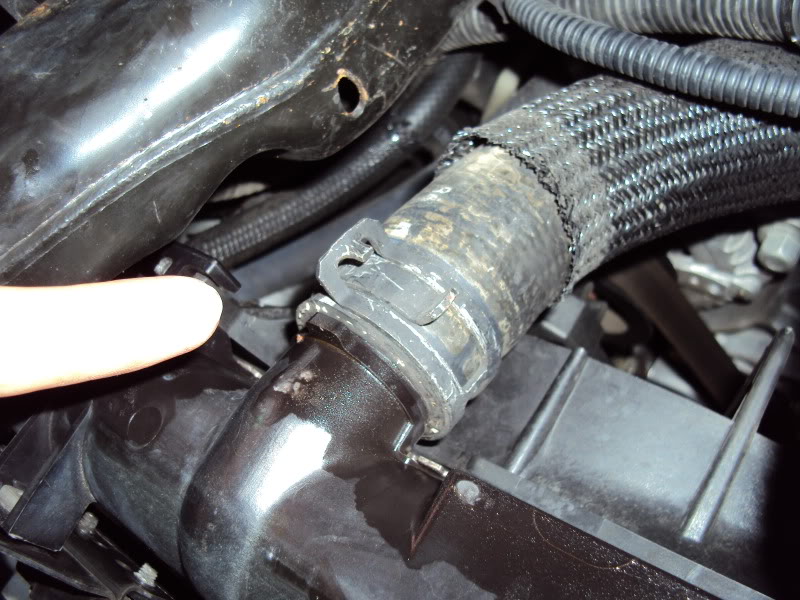
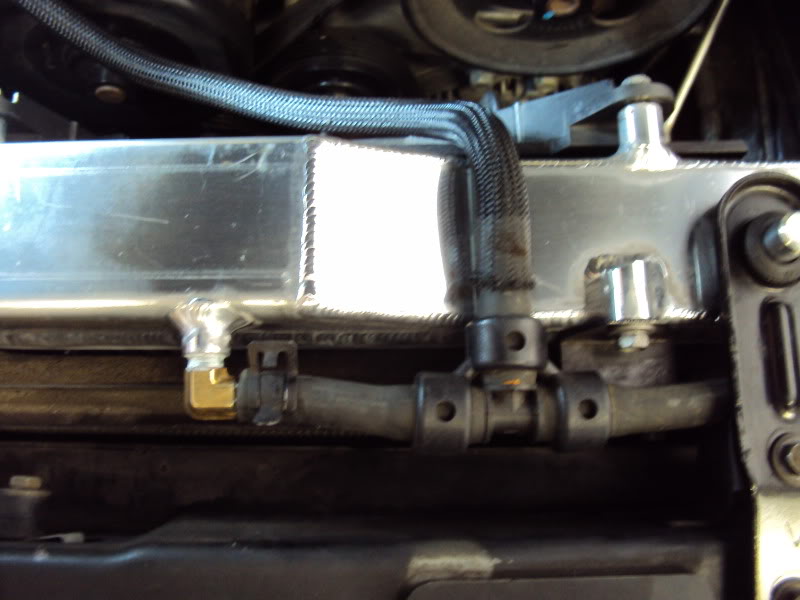
Disconnect this water fitting off the throttle body area.
Disconnect this hose barb on the top of the radiator.
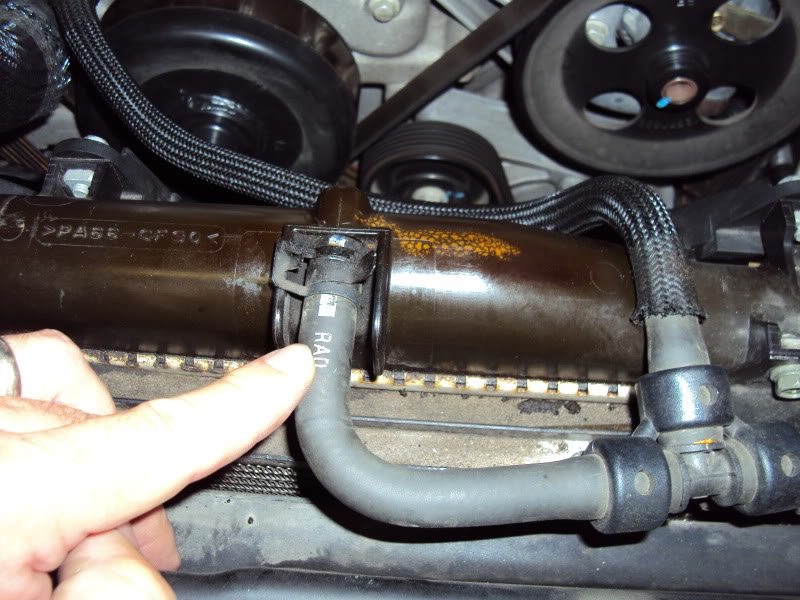
Remove the top radiator hose.
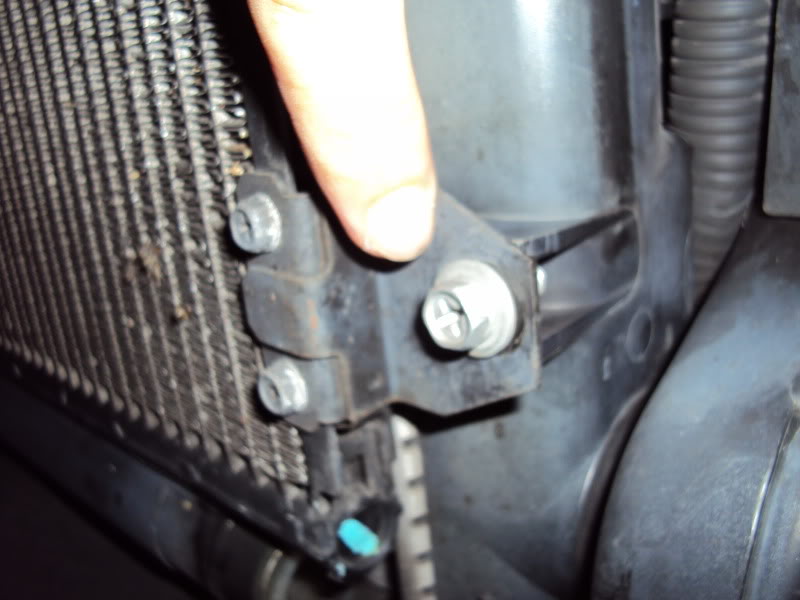
Remove the two top radiator hold down brackets. Each held on by 2 bolts, 10mm socket.
Here are the "rivets" that hold the chin spoiler/ front under engine plastic. You don't "HAVE" to remove it, but it makes life so much better, not having to reach around it to remove lower hose, etc.
Lower rad hose and lower side of the radiator. Seeps like crazy...
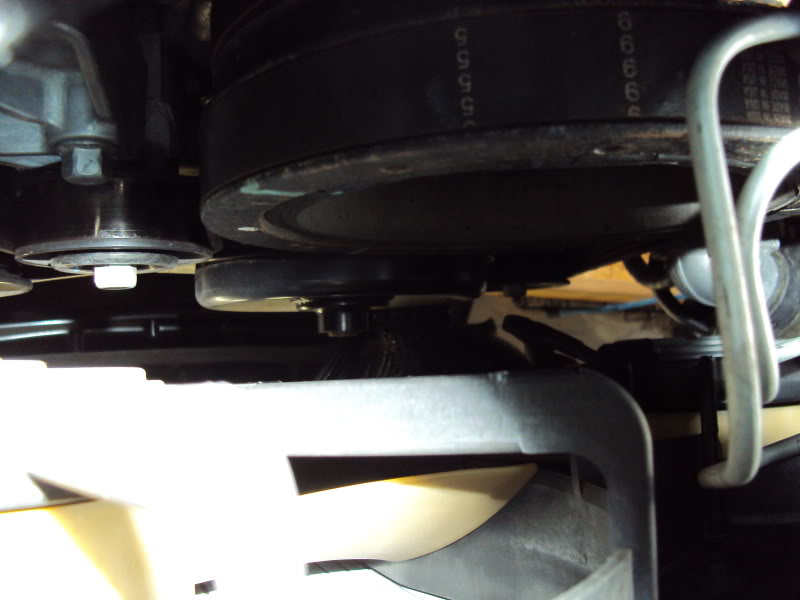
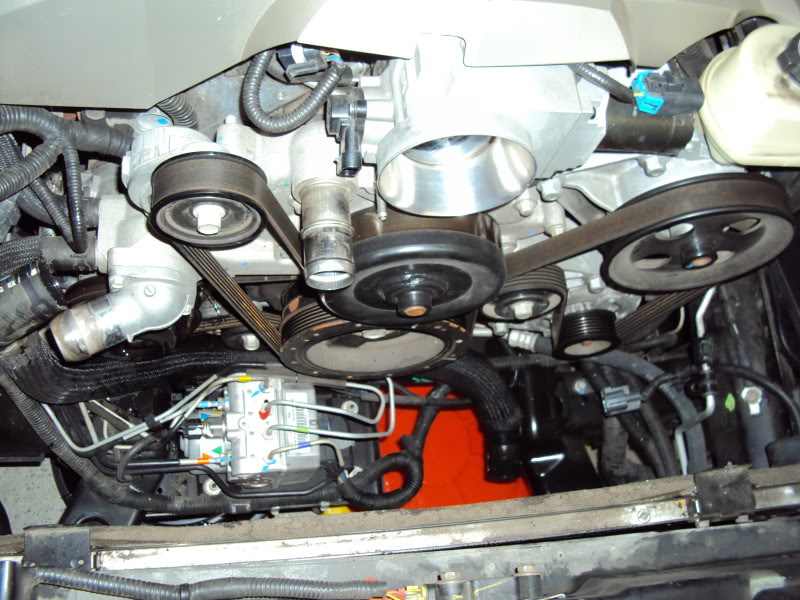
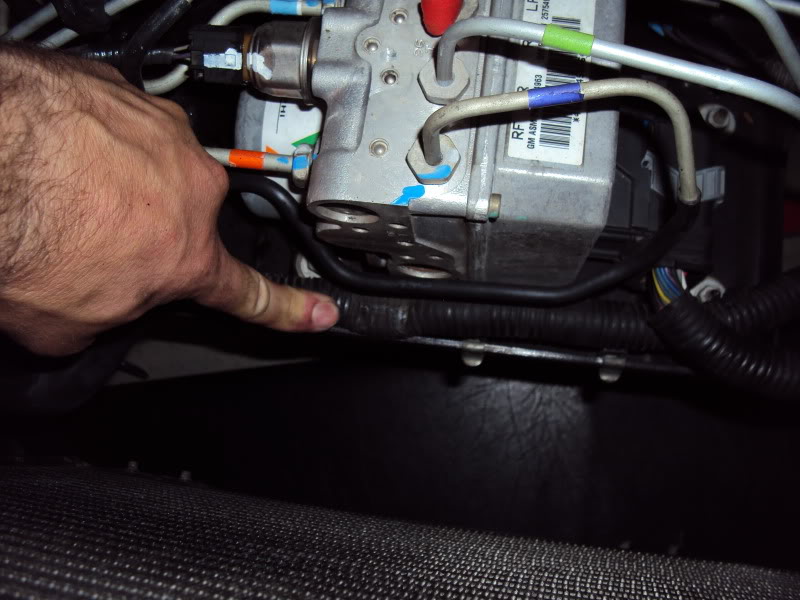
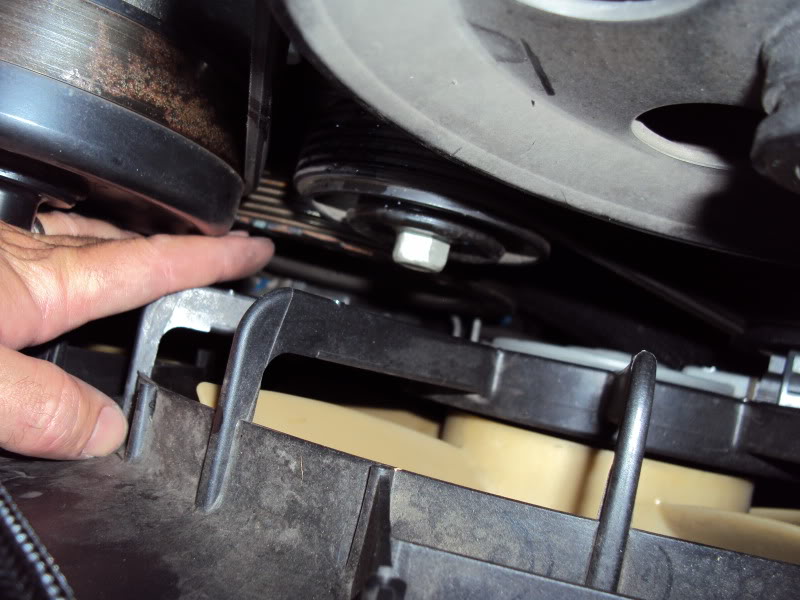
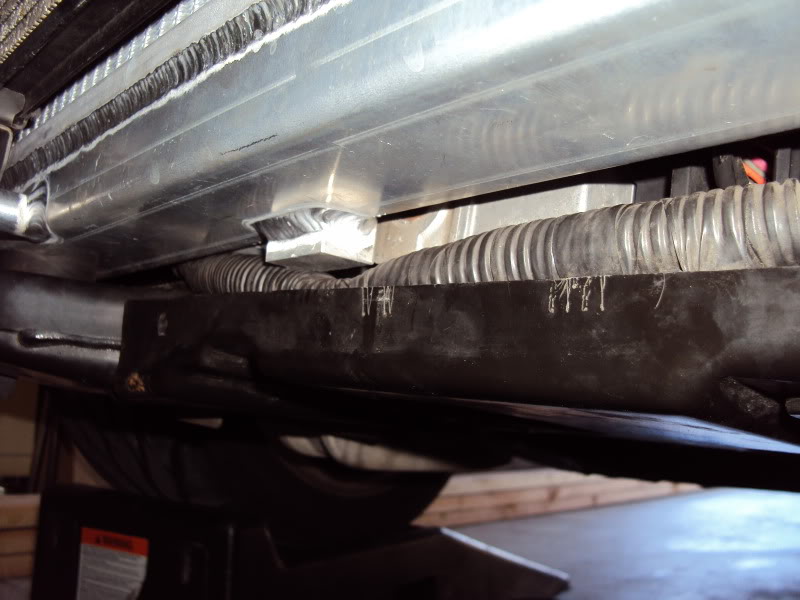
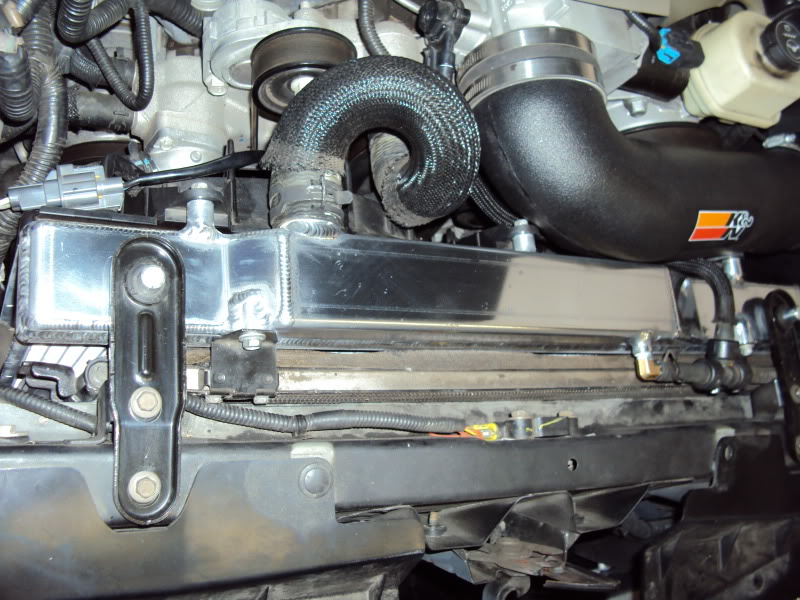
Clearance from underneath. You see the crank pulley, idler pulley, fan and shroud, and the ABS hard lines.
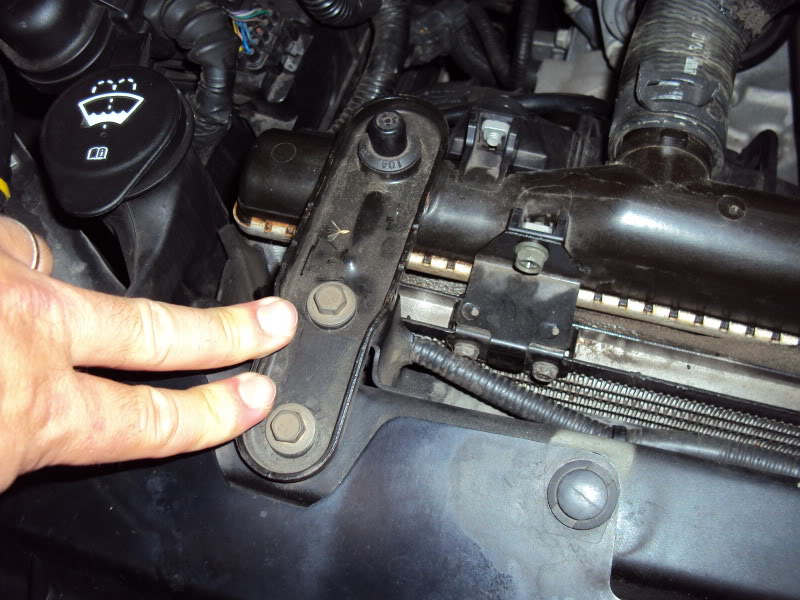
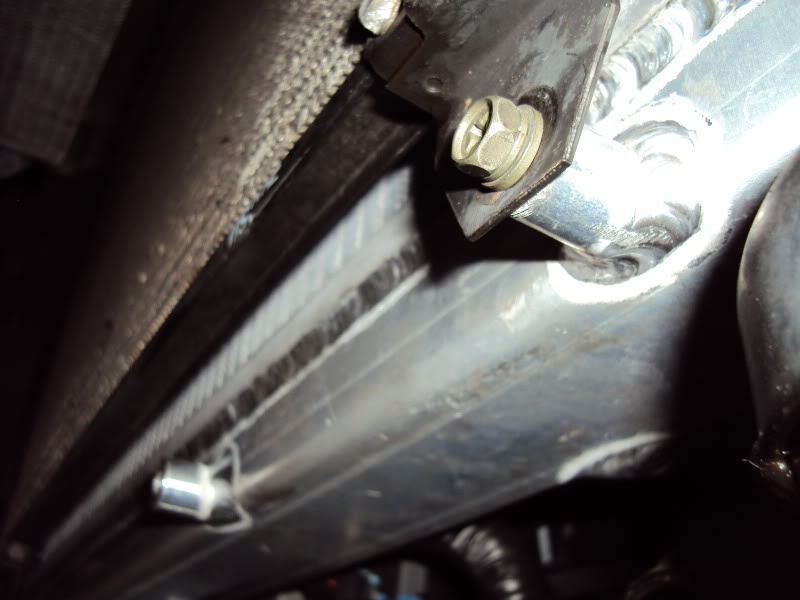
Have to remove two of these on the bottom of the rad. The fins you see to the left are the condenser for the AC, and the screw/bolt threads into the radiator. The bottom right of the pic is the frame area, with a cup in it for the radiator/bushing to sit in as a "locator" and to absorb shock. This is a 10mm socket as well.
Just remove the single 10mm bolt, not the other two 8 or 9mm ones. Those should only need to be loosened to adjust the bracket if the holes do not line up. Mine were spot on, no need to move them!
I think I am supposed to be pointing to the "T" bracket where the stock fan fits on top of the T on the radiator.
Remove the whole assembly together. I don't think the fan/rad will come out separate because of the hose necks. I know the rad won't, but not sure on the fan coming out alone...

Rad and fan out. I bet the supercharger guys wish they had this much room WITH the rad and fans in place, huh!?!?!?
Stocker is a lightweight.
Disconnect this water fitting off the throttle body area.
Disconnect this hose barb on the top of the radiator.
Remove the top radiator hose.
Remove the two top radiator hold down brackets. Each held on by 2 bolts, 10mm socket.
Here are the "rivets" that hold the chin spoiler/ front under engine plastic. You don't "HAVE" to remove it, but it makes life so much better, not having to reach around it to remove lower hose, etc.
Lower rad hose and lower side of the radiator. Seeps like crazy...
Clearance from underneath. You see the crank pulley, idler pulley, fan and shroud, and the ABS hard lines.
Have to remove two of these on the bottom of the rad. The fins you see to the left are the condenser for the AC, and the screw/bolt threads into the radiator. The bottom right of the pic is the frame area, with a cup in it for the radiator/bushing to sit in as a "locator" and to absorb shock. This is a 10mm socket as well.
Just remove the single 10mm bolt, not the other two 8 or 9mm ones. Those should only need to be loosened to adjust the bracket if the holes do not line up. Mine were spot on, no need to move them!
I think I am supposed to be pointing to the "T" bracket where the stock fan fits on top of the T on the radiator.
Remove the whole assembly together. I don't think the fan/rad will come out separate because of the hose necks. I know the rad won't, but not sure on the fan coming out alone...
Rad and fan out. I bet the supercharger guys wish they had this much room WITH the rad and fans in place, huh!?!?!?
Stocker is a lightweight.
08-31-2011, 07:24 PM
#3
Staging Lane
Thread Starter
Join Date: Jul 2011
Location: San Diego, CA
Posts: 79
Likes: 0
Received 0 Likes
on
0 Posts
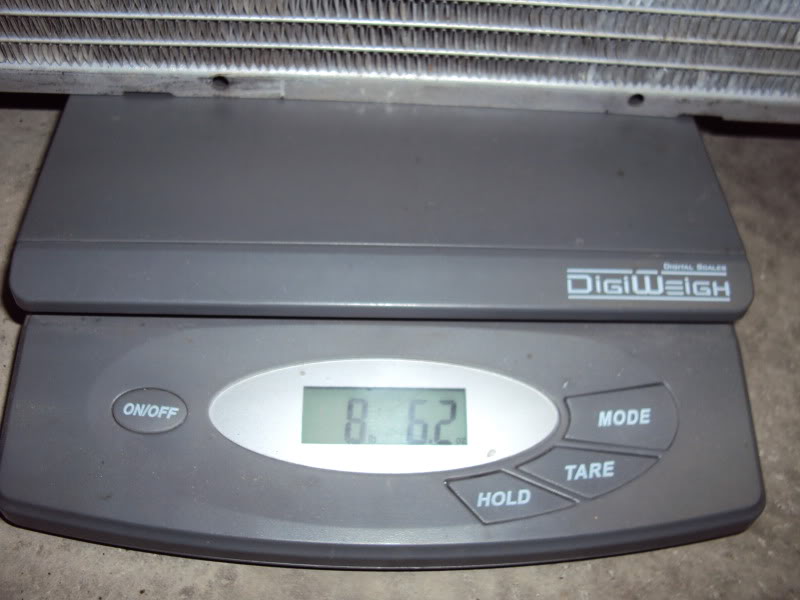
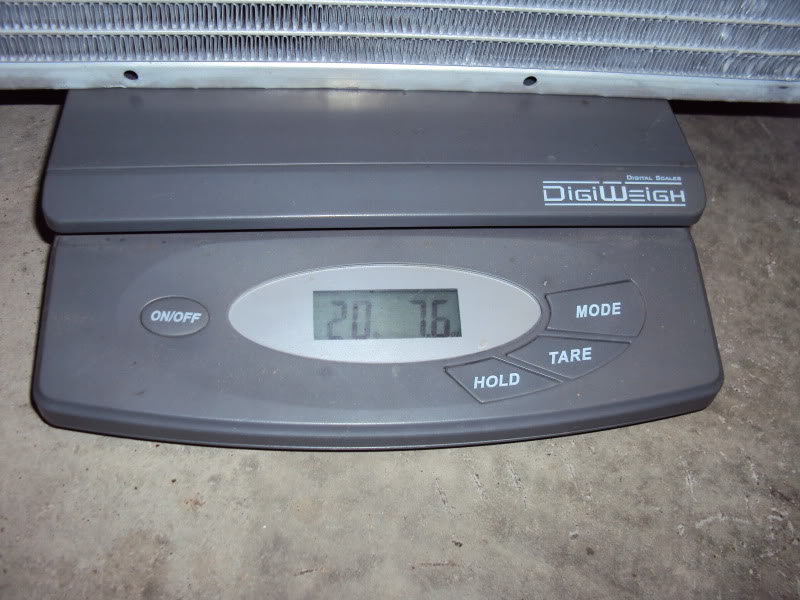
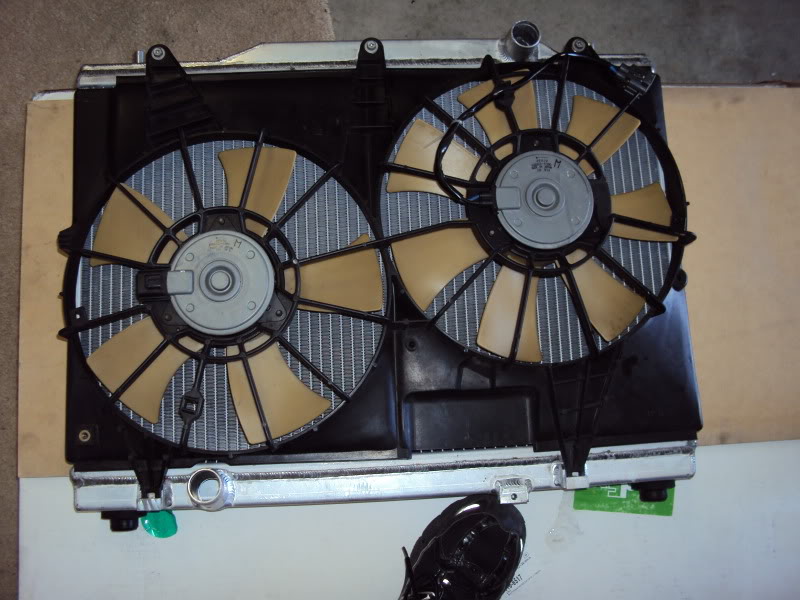
ALRADCO is quite a bit heavier, but to be expected of a fabricated all aluminum radiator.
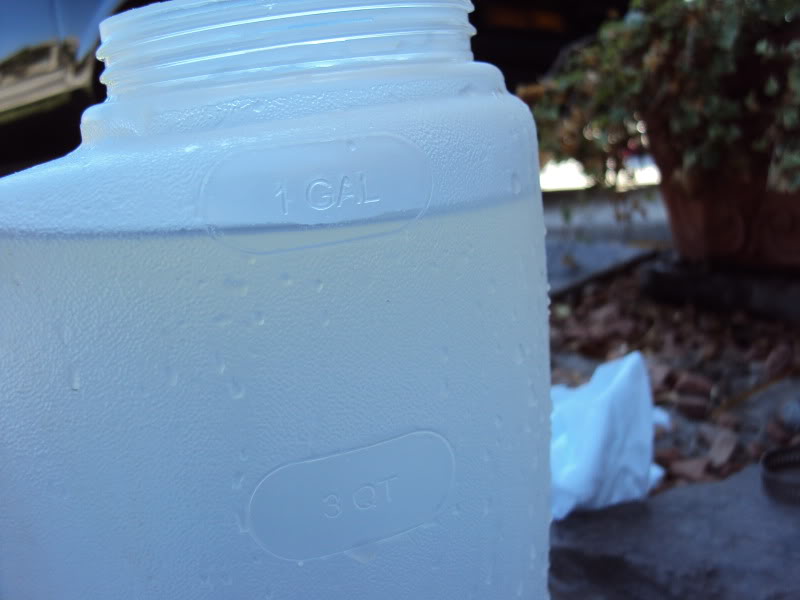
Stocker liquid capacity, less than 3 quarts.

ALRADCO liquid capacity, BUT NOT DONE YET!!! Holds 5 quarts, a full 2 quarts over the stocker.
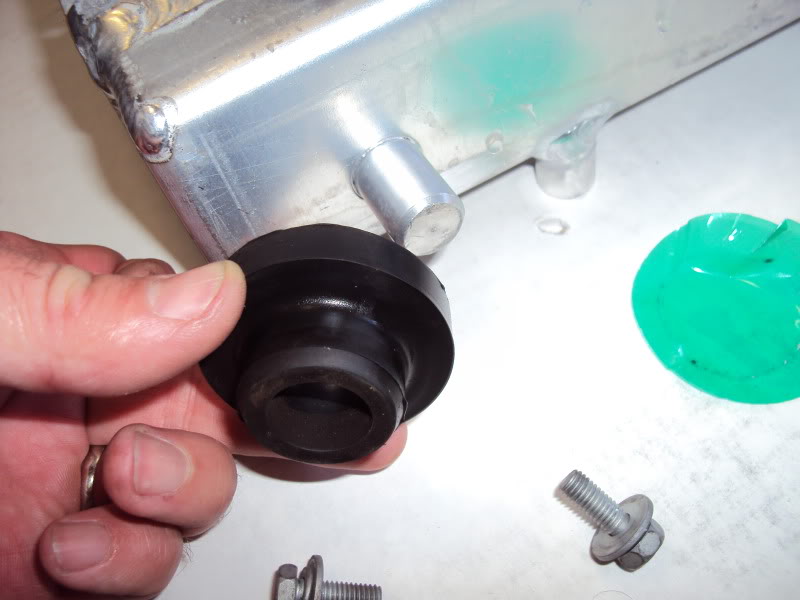
Need to take these rubber "bushings" off the bottom of the stock radiator, and reinstall on the alradco. You can see the posts where they go.
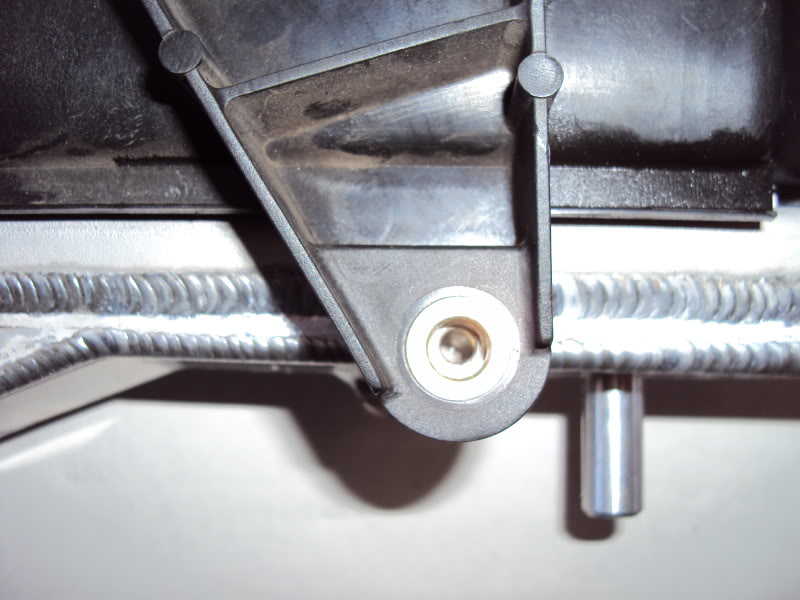
Perfect line up!!!
I zip-tied the condenser up so it doesn't hang on the drivers side hard line. I am using a Sharpie to point at a tight spot. The bracket with the hole in it could be filed to gain 1/4" or so of clearance if needed, but I didn't need it at all.
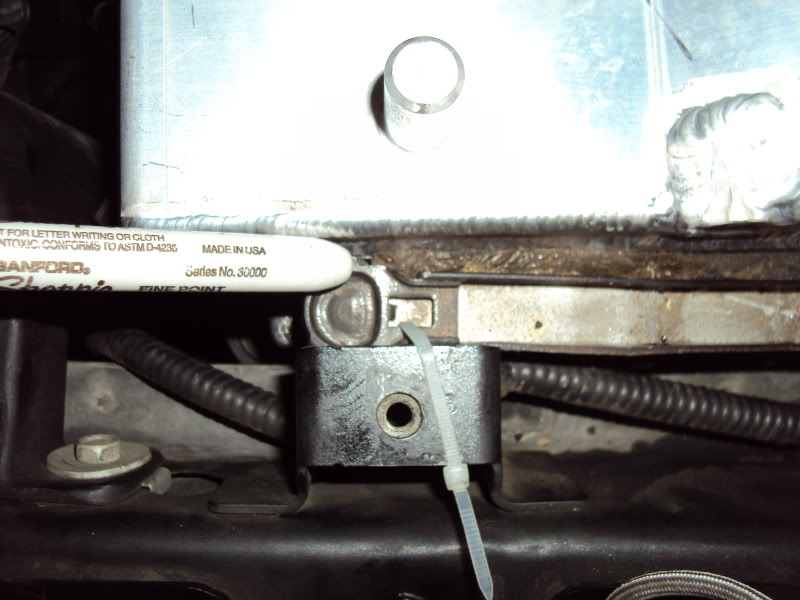
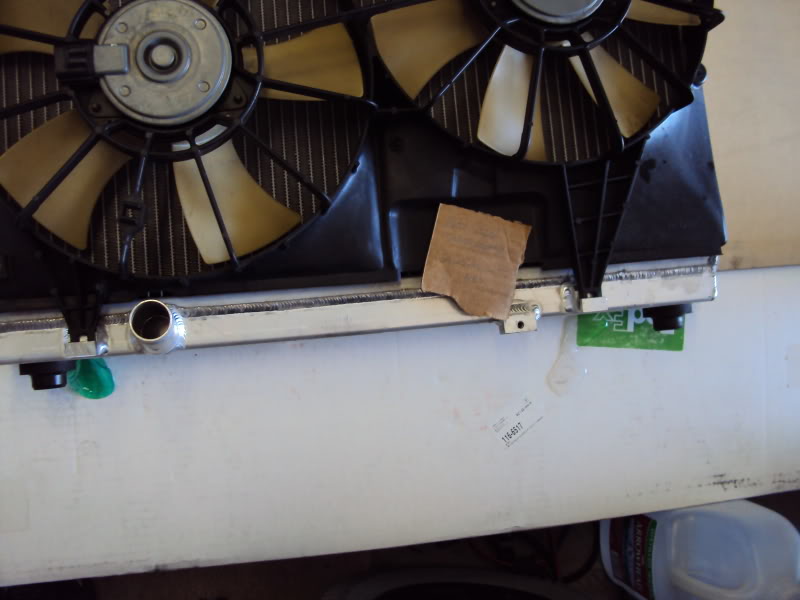
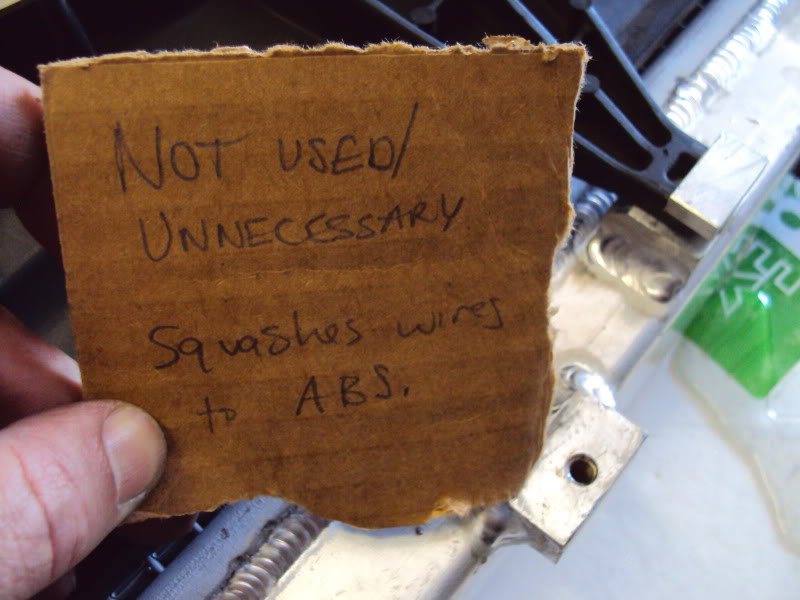
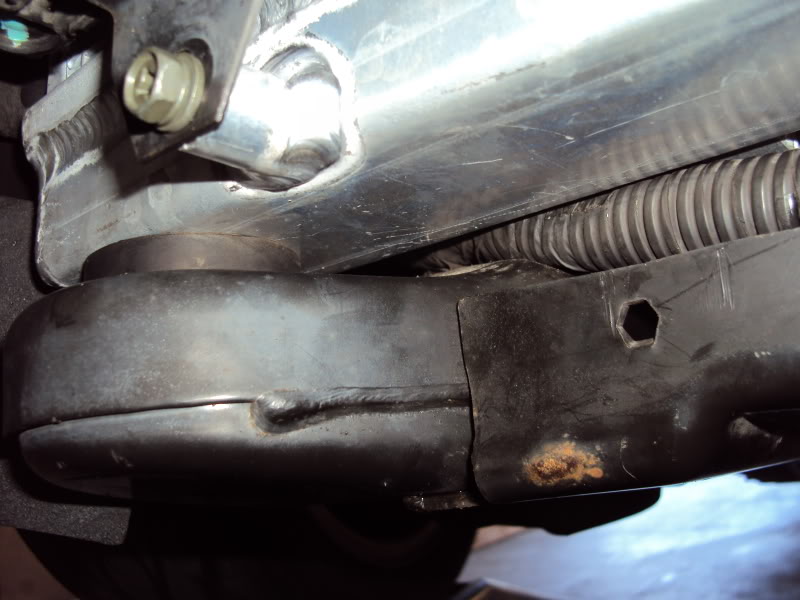
As my superb handwriting and sign making abilities show, this bolt boss is not needed on the radiator, either the stocker or ALRADCO, as it is unused. Also, if installed like the stocker it sits directly on the wiring for the ABS controller.
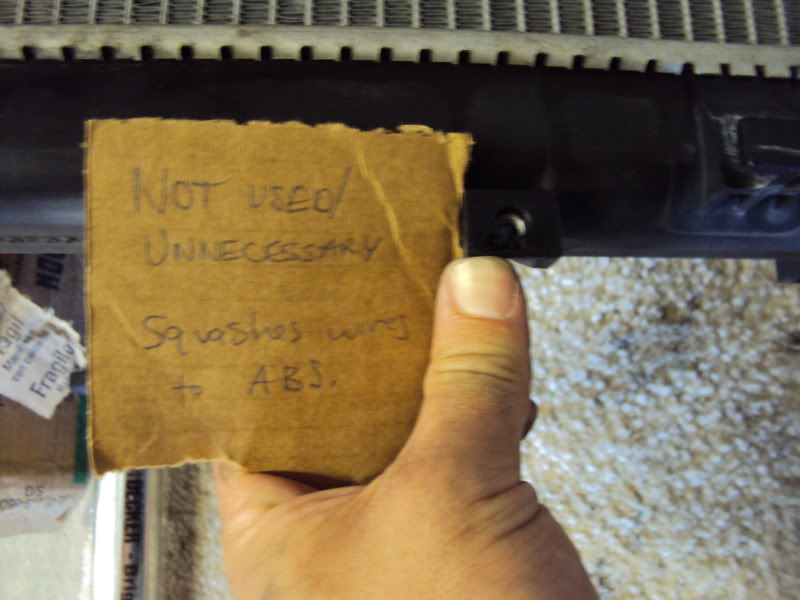
The corner of the cardboard is pointing at the unnecessary bolt boss. I thought I might have to grind it off, but just moved the wires a little bit, which should have been done with the stocker radiator as well.
Here is the wires that that last bolt boss sat on when the stocker was in the car. You can see the squished area. If you unhook those two metal clips you see on the bottom of the ABS controller bracket, and push the wiring back (up in this pic) they actually lay down in a channel, behind the lip of the bracket. This way the wires are about 1/2" lower, and further towards the back of the car, and the radiator doesn't sit on them.
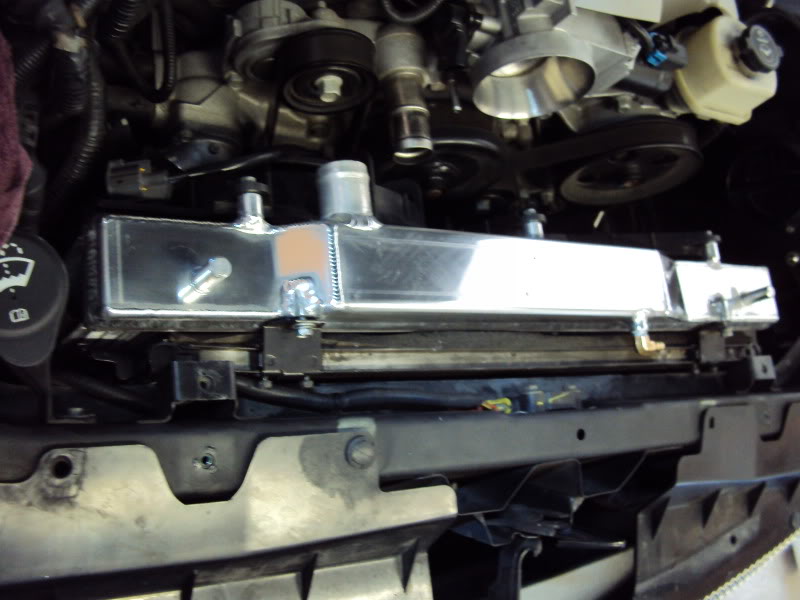
ALRADCO radiator with stock fan attached, ready to go in. Ready to DROP IN!!!
Dropped right in like a stocker.
Hooked up the little brackets holding the condenser to the radiator.

Okay, was curious to see what she looked like not just raw, but with a little polish job. This was a quick 3 minute polish job. Imagine how nice it'd be with a real polish job!
Stocker liquid capacity, less than 3 quarts.
ALRADCO liquid capacity, BUT NOT DONE YET!!! Holds 5 quarts, a full 2 quarts over the stocker.
Need to take these rubber "bushings" off the bottom of the stock radiator, and reinstall on the alradco. You can see the posts where they go.
Perfect line up!!!
I zip-tied the condenser up so it doesn't hang on the drivers side hard line. I am using a Sharpie to point at a tight spot. The bracket with the hole in it could be filed to gain 1/4" or so of clearance if needed, but I didn't need it at all.
As my superb handwriting and sign making abilities show, this bolt boss is not needed on the radiator, either the stocker or ALRADCO, as it is unused. Also, if installed like the stocker it sits directly on the wiring for the ABS controller.
The corner of the cardboard is pointing at the unnecessary bolt boss. I thought I might have to grind it off, but just moved the wires a little bit, which should have been done with the stocker radiator as well.
Here is the wires that that last bolt boss sat on when the stocker was in the car. You can see the squished area. If you unhook those two metal clips you see on the bottom of the ABS controller bracket, and push the wiring back (up in this pic) they actually lay down in a channel, behind the lip of the bracket. This way the wires are about 1/2" lower, and further towards the back of the car, and the radiator doesn't sit on them.
ALRADCO radiator with stock fan attached, ready to go in. Ready to DROP IN!!!
Dropped right in like a stocker.
Hooked up the little brackets holding the condenser to the radiator.
Okay, was curious to see what she looked like not just raw, but with a little polish job. This was a quick 3 minute polish job. Imagine how nice it'd be with a real polish job!
08-31-2011, 07:24 PM
#4
Staging Lane
Thread Starter
Join Date: Jul 2011
Location: San Diego, CA
Posts: 79
Likes: 0
Received 0 Likes
on
0 Posts
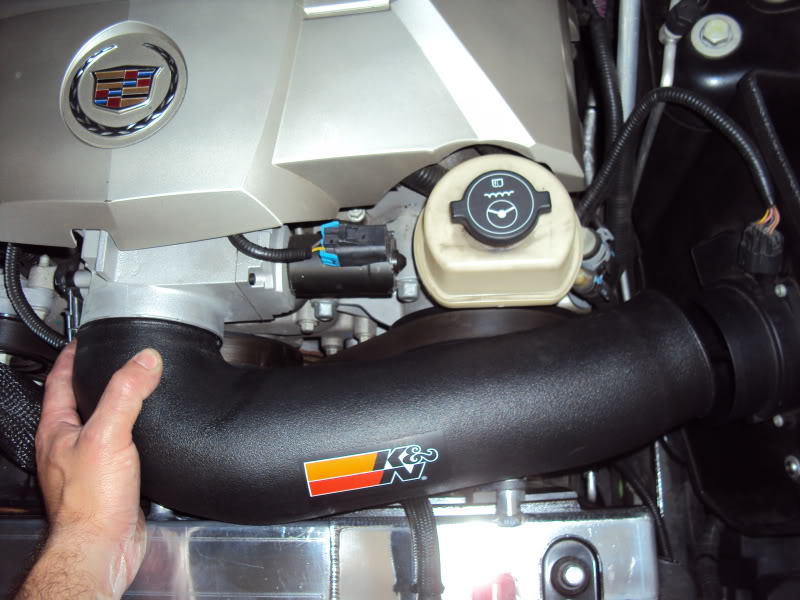
The brass hose barb is different than the stocker. The stocker is inset, which would add a little more to the process and since there is so much room in front of the top of the rad, why not do it like this. The 90 degree hose barb is used (and included) so all you have to do is trim the hose right before the 90 degree bend. If you have something against cutting the hose, I think there is even enough room to put a straight hose barb and trim the straight side of the hose back about 1/2".
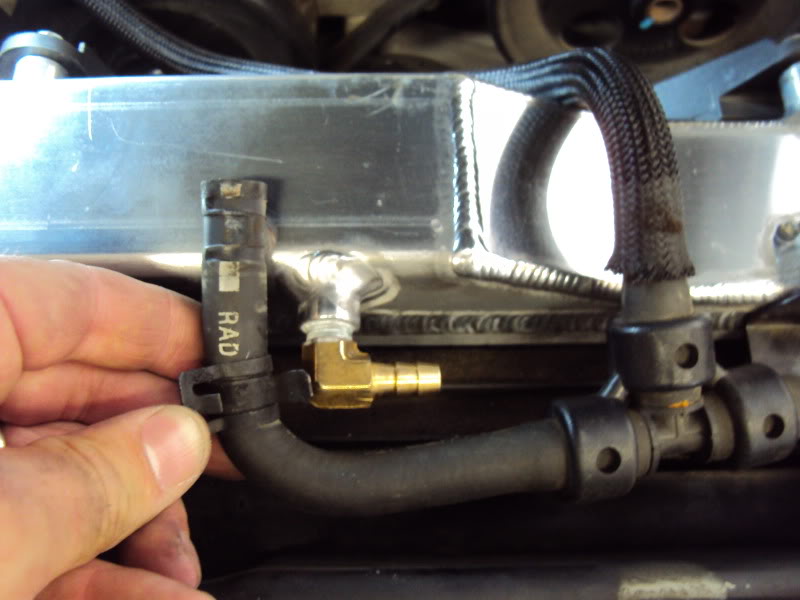
Showing where it would sit if using straight hose barb, and just trimming 1/2" off the end of the hose.
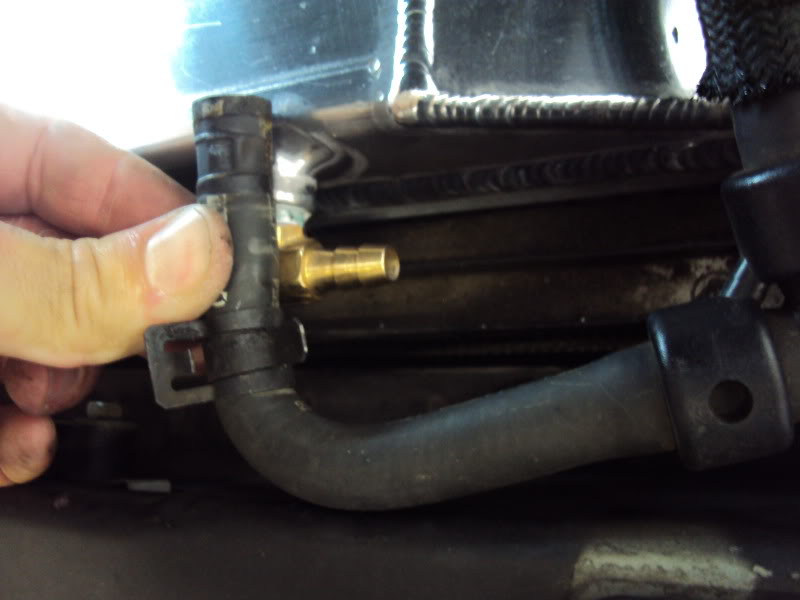
Figure out where to cut it.
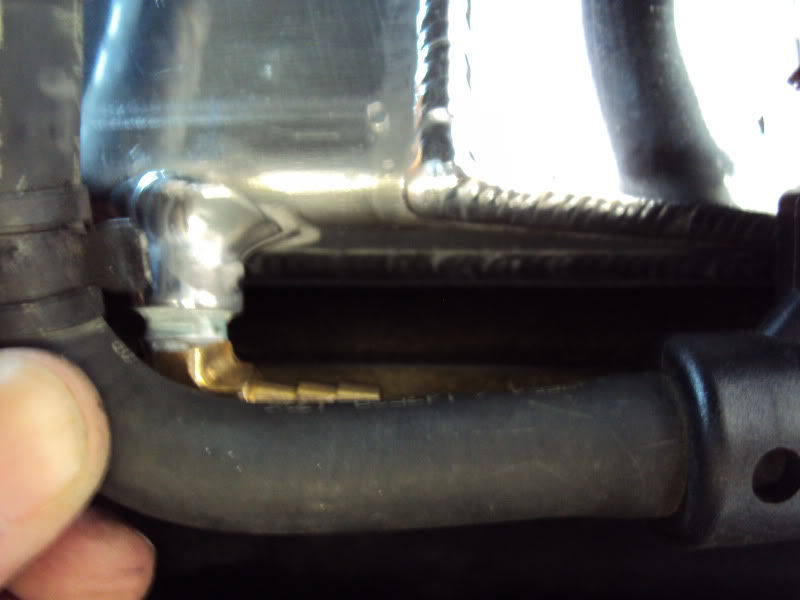
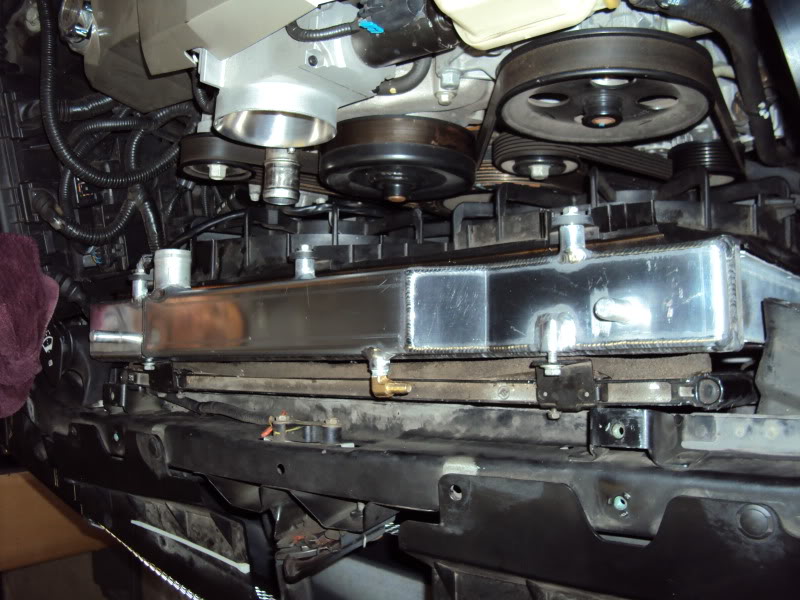
Voila, there it is, all attached... Look at those sexy welds!!!
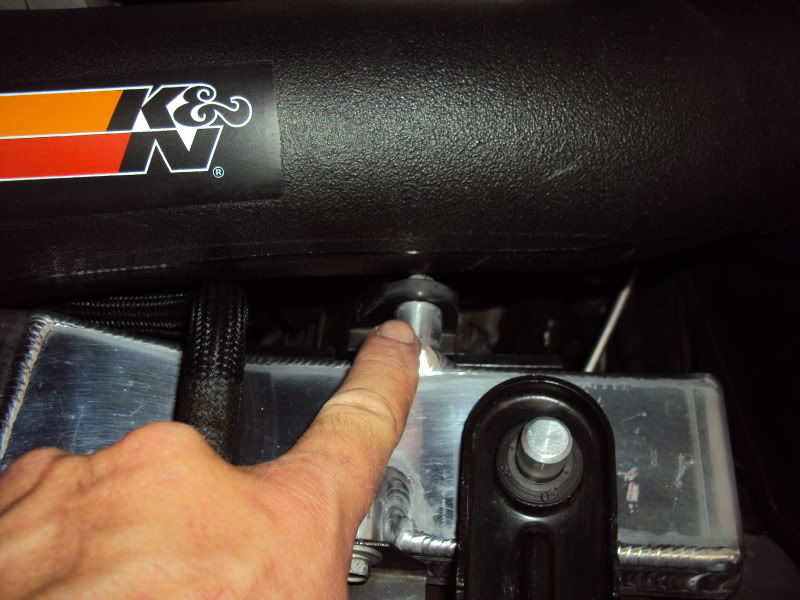
Hard to tell, but about 1/4" clearance between the back of the fan motor and the thermostat housing. Could file the rib off the tstat housing, and even grind it if it were closer, but not necessary at all here.
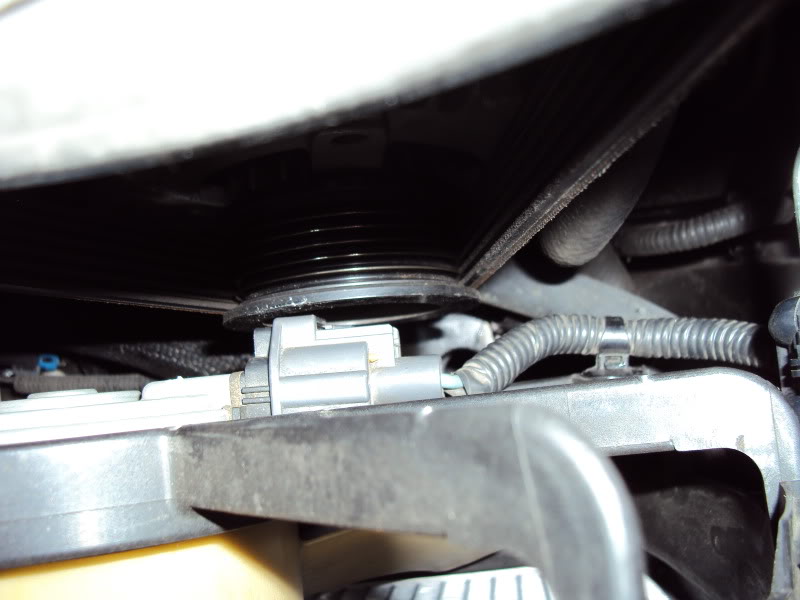
A good inch of clearance between the water pump pulley and the fan framework.
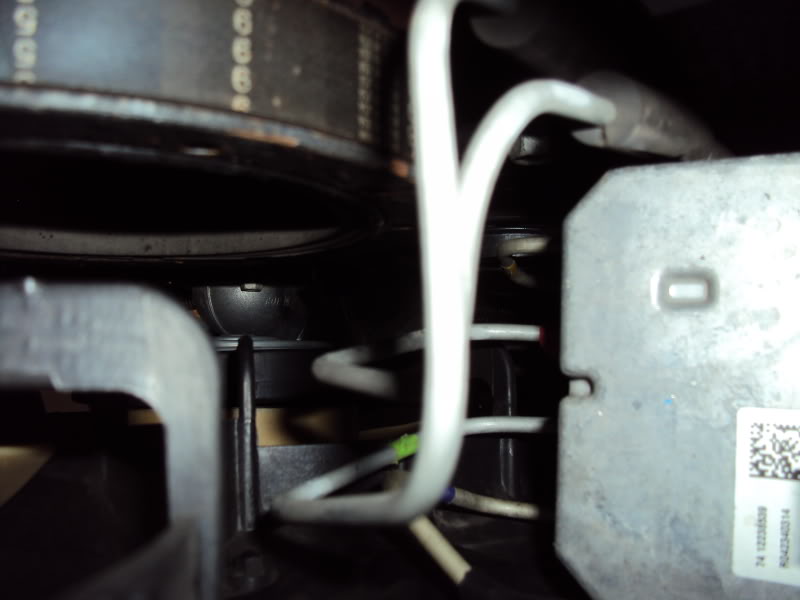
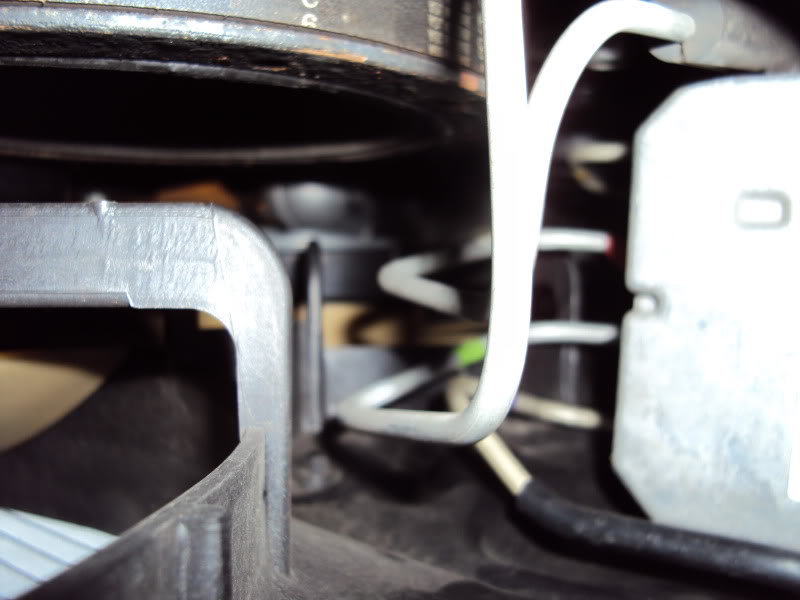
This is the tightest area of the install. Still 1/8" clearance. If it were touching or tight, you could file/sand almost 1/4" off the attaching click together parts of this, then super glue it. There is about a foot of harness going off to the right to the main harness, where you could put another weather-pak connector to be able to disconnect. Again, this is ONLY IF YOU WERE MAKING CONTACT AND NEEDED A WAY TO MAKE ROOM. It is not necessary here!!!
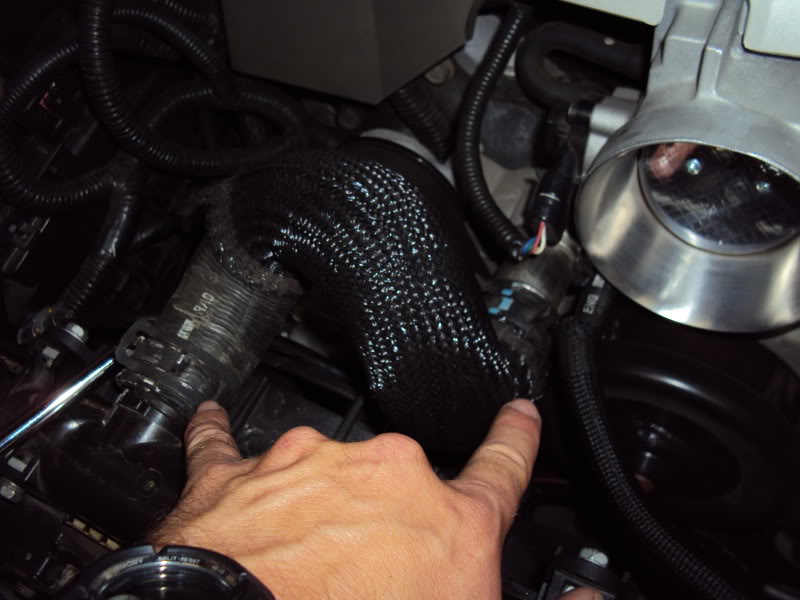
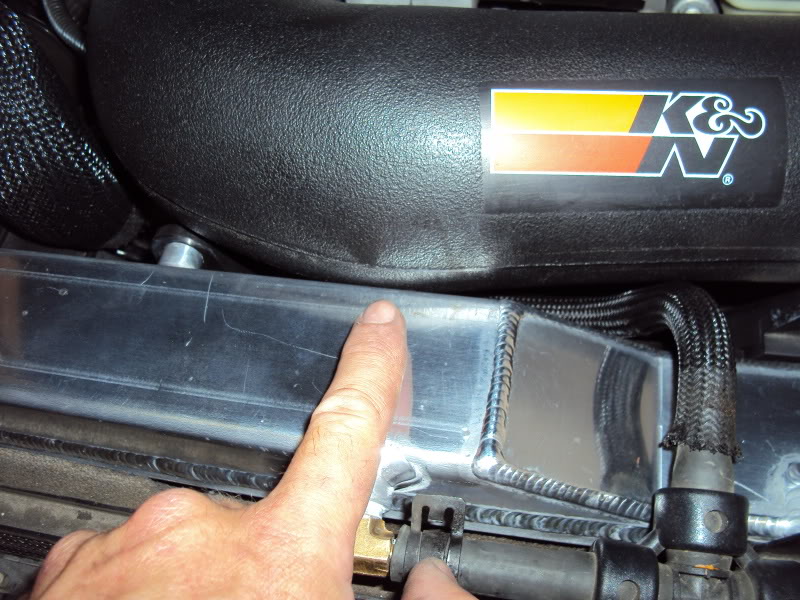
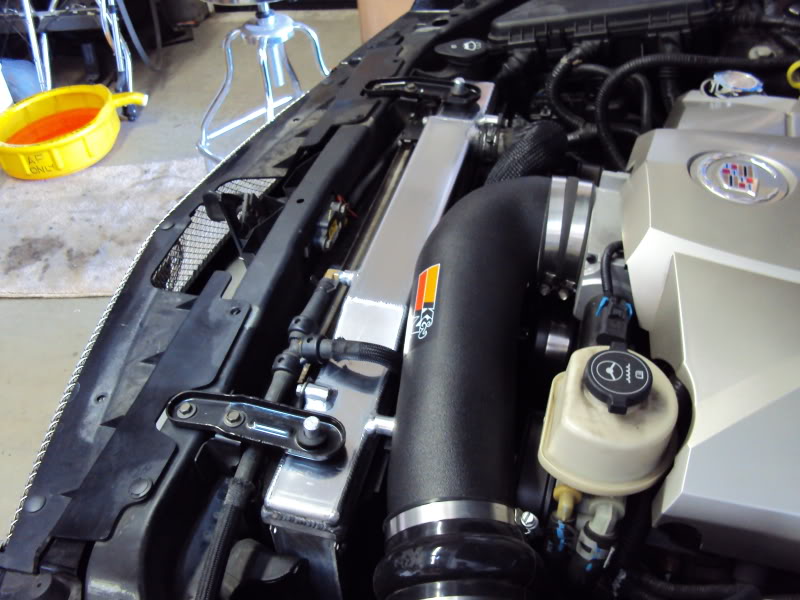
Stock airbox hose fit with all kinds of room.
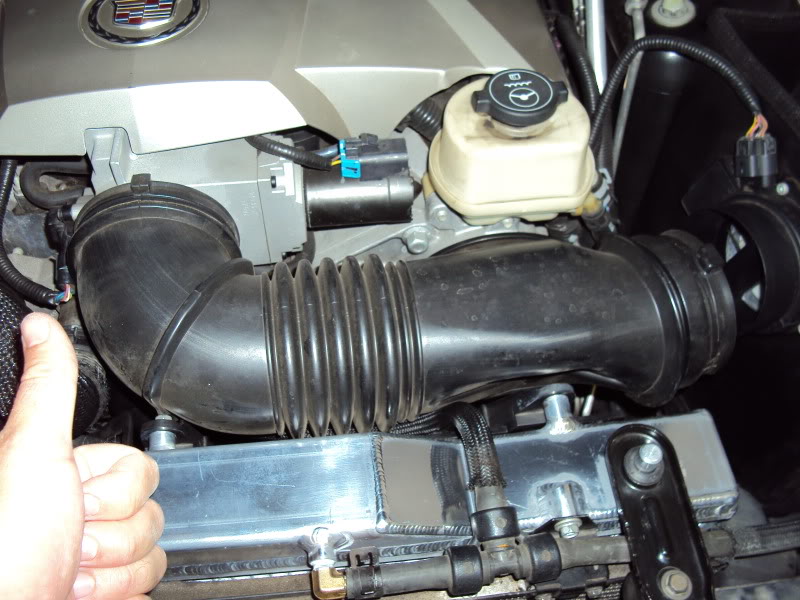
With my big CAI, I needed to use a heat gun to warm up the plastic, then a round screwdriver handle to push in gently to create a little clearance. This is similar to denting a set of headers for clearance of bolts or spark plugs on other cars. Should not affect performance in any way, was barely dimpled in 1/8-1/4".
It was close, so I chose to dimple this one as well.
Without dimpling, this is about how it fits. With slight dimpling, the right side of the pipe fit straight.
Third and final tiny dimple. If needed, could also have ground the circumference of the plastic around the bolt head, then used an allen button head bolt. The stock bolts have 2 thick washers attached to them, so they are thick. The button head allen bolts and rounded, and short, so they don't get in the way. This is only a suggestion in case someone elses was close. Mine only needed a tiny bit of dimpling.
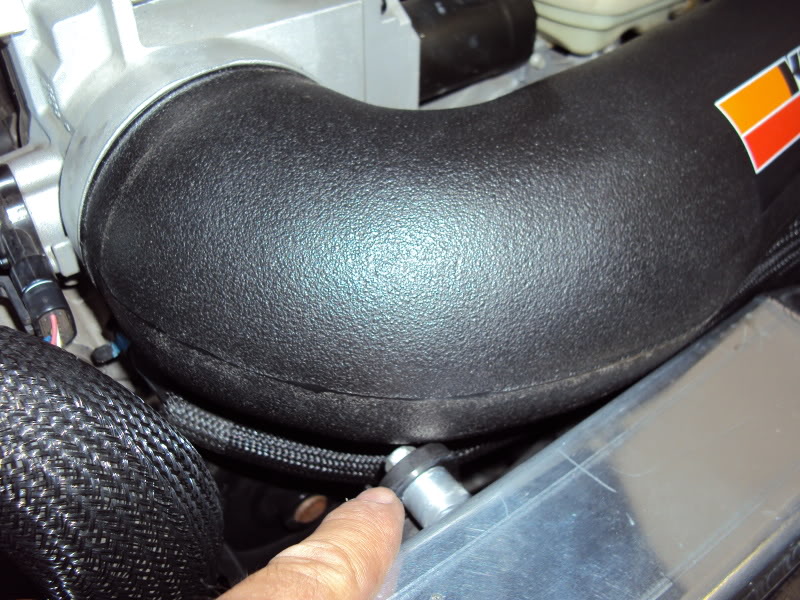
Close up of the dimpled area.
Close up of where I chose to dimple the 2nd spot.
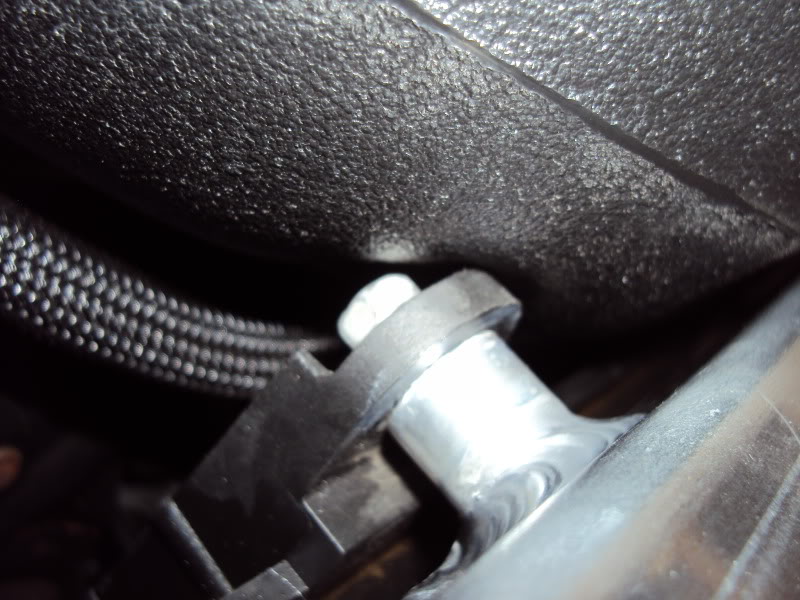
As described earlier, the wires laid back over that lip instead of on top of it, and now the rad doesn't sit on top of them.
The bolt boss on the left bottom is unused. Could this be left off in production?
Extra room for the wires now, and that bold boss (block on bottom) is unused. Can it be left off in production as well?
Rubber isolators on the posts of the bottom of the rad, slipped into the rounded frame pucks or holes.
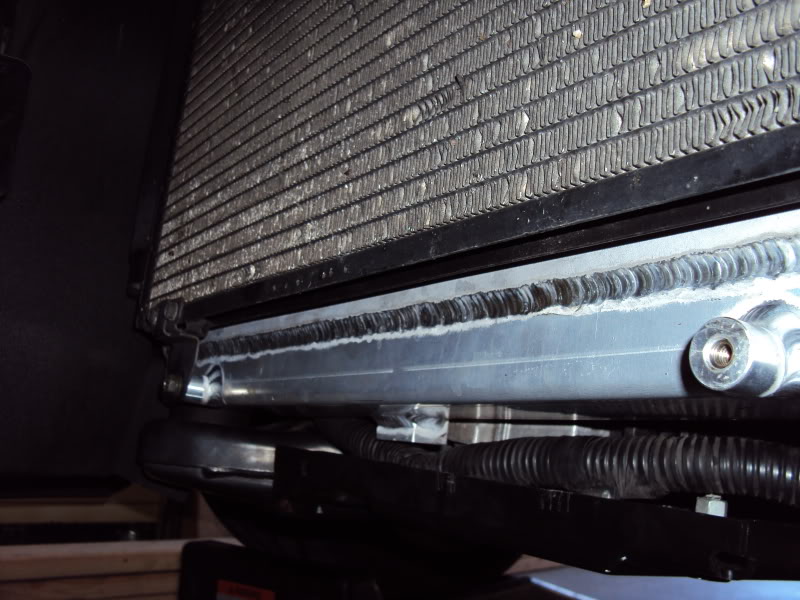
Clearance from bottom view. Over an inch crank pulley to fan body frame. Not needed here at all, but if running a supercharger, you may be able to section these fan frame/shrouds (cut in half or ever remove altogether).
Doesn't interfere with the ABS box or lines. Did NOT need to tweak, bend, or move the hard lines at all.
Another, with better view of the hard lines of the ABS.
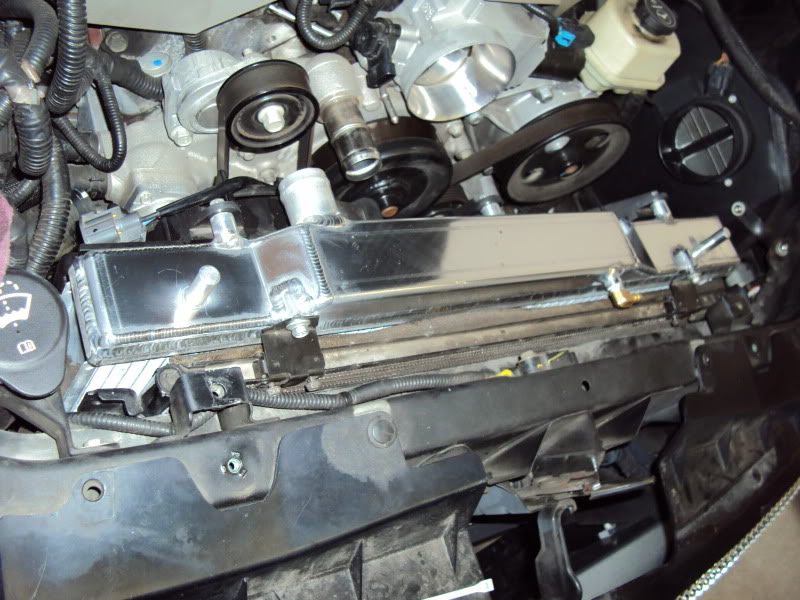
Installed. Couple hours work, dropped right in. All I had to do different was tweak the CAI tube. Many ways to compensate like trimming the end where it goes into the throttle body, heat and dimple like I did, file the fan brackets and use allen, button head bolts, etc.
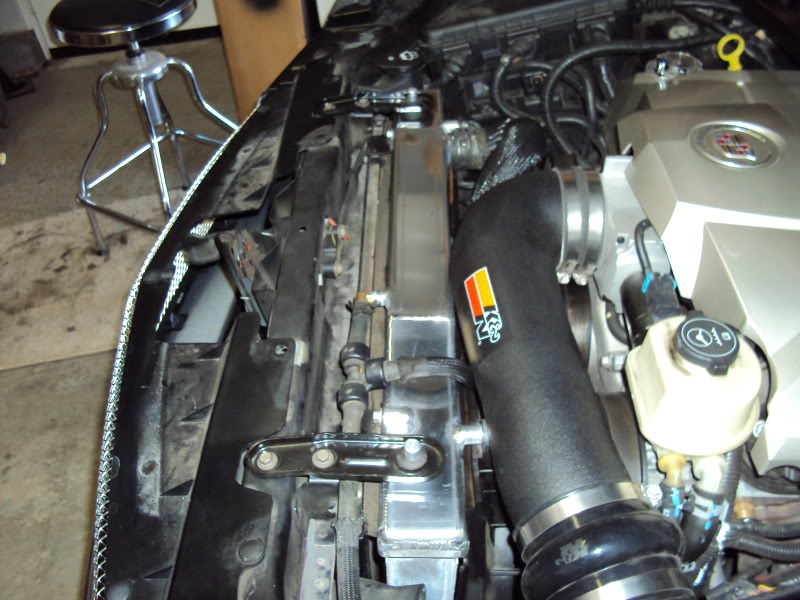
Oh, and she looks too pretty to hide under the radiator top cover. I know in front of the rad is ugly, but I like the radiator being seen! Maybe trim/ fab up a rad top cover, but leave the rad unshrouded?
My quick, 3 min polish job... She's purty....
Yes, the stock top radiator cover fits like stock, but why hide the killer welds of the rad???

Showing where it would sit if using straight hose barb, and just trimming 1/2" off the end of the hose.
Figure out where to cut it.
Voila, there it is, all attached... Look at those sexy welds!!!
Hard to tell, but about 1/4" clearance between the back of the fan motor and the thermostat housing. Could file the rib off the tstat housing, and even grind it if it were closer, but not necessary at all here.
A good inch of clearance between the water pump pulley and the fan framework.
This is the tightest area of the install. Still 1/8" clearance. If it were touching or tight, you could file/sand almost 1/4" off the attaching click together parts of this, then super glue it. There is about a foot of harness going off to the right to the main harness, where you could put another weather-pak connector to be able to disconnect. Again, this is ONLY IF YOU WERE MAKING CONTACT AND NEEDED A WAY TO MAKE ROOM. It is not necessary here!!!
Stock airbox hose fit with all kinds of room.
With my big CAI, I needed to use a heat gun to warm up the plastic, then a round screwdriver handle to push in gently to create a little clearance. This is similar to denting a set of headers for clearance of bolts or spark plugs on other cars. Should not affect performance in any way, was barely dimpled in 1/8-1/4".
It was close, so I chose to dimple this one as well.
Without dimpling, this is about how it fits. With slight dimpling, the right side of the pipe fit straight.
Third and final tiny dimple. If needed, could also have ground the circumference of the plastic around the bolt head, then used an allen button head bolt. The stock bolts have 2 thick washers attached to them, so they are thick. The button head allen bolts and rounded, and short, so they don't get in the way. This is only a suggestion in case someone elses was close. Mine only needed a tiny bit of dimpling.
Close up of the dimpled area.
Close up of where I chose to dimple the 2nd spot.
As described earlier, the wires laid back over that lip instead of on top of it, and now the rad doesn't sit on top of them.
The bolt boss on the left bottom is unused. Could this be left off in production?
Extra room for the wires now, and that bold boss (block on bottom) is unused. Can it be left off in production as well?
Rubber isolators on the posts of the bottom of the rad, slipped into the rounded frame pucks or holes.
Clearance from bottom view. Over an inch crank pulley to fan body frame. Not needed here at all, but if running a supercharger, you may be able to section these fan frame/shrouds (cut in half or ever remove altogether).
Doesn't interfere with the ABS box or lines. Did NOT need to tweak, bend, or move the hard lines at all.
Another, with better view of the hard lines of the ABS.
Installed. Couple hours work, dropped right in. All I had to do different was tweak the CAI tube. Many ways to compensate like trimming the end where it goes into the throttle body, heat and dimple like I did, file the fan brackets and use allen, button head bolts, etc.
Oh, and she looks too pretty to hide under the radiator top cover. I know in front of the rad is ugly, but I like the radiator being seen! Maybe trim/ fab up a rad top cover, but leave the rad unshrouded?
My quick, 3 min polish job... She's purty....
Yes, the stock top radiator cover fits like stock, but why hide the killer welds of the rad???
 08-31-2011, 08:08 PM
#6
Staging Lane
Thread Starter
Join Date: Jul 2011
Location: San Diego, CA
Posts: 79
Likes: 0
Received 0 Likes
on
0 Posts

Didn't get to drive it much, but on the highway for the short amount I drive it, it stayed at or under the tstat opening temp. Usually 184-197, depending on traffic, acceleration, etc.
I imagine with the oil temps and normal coolant operating temps still so dang high in these cars, there are a few things I plan on doing to really take advantage of the radiator:
1. lower temp tsat.
2. tune or tuner to lower fan turn on temps.
3. maybe an oil cooler later on too.
Plus, regardless, my stocker was leaking and I can't see spending any money on another leaky, made in China piece of junk... This thing will last forever!
More to report when I get to really test it out, unfortunately I won't be able to for a few weeks, due to work...
Trending Topics


 09-04-2011, 02:50 PM
#12

Looks like a nice unit...aluminum radiators are typically not as good (efficient) as copper/brass ones, apples to apples, but can be made to function well. Not to mention, rather run one of those rather than crappy plastic ends that tend to crack!
I have an AFCO custom aluminum radiator that I bought for the chevelle a few years ago and those things are a piece of beauty And ones that are custom made (like the one in the post and the AFCO) are generally less $$$ and better quality than the 'big names' you buy in summit, etc. if they're even available...I want to say I paid only like $270 for it, although they've gone up considerably since then...Will have to keep this one in mind if I ever need a radiator. Didn't see it above (but kind of scrolled quick), but what do they charge for these? [EDIT - nevermind, see they are around $500...not too bad I bet, compared to what those must cost these days and esp if it's a direct fit]
I have an AFCO custom aluminum radiator that I bought for the chevelle a few years ago and those things are a piece of beauty
And ones that are custom made (like the one in the post and the AFCO) are generally less $$$ and better quality than the 'big names' you buy in summit, etc. if they're even available...I want to say I paid only like $270 for it, although they've gone up considerably since then...Will have to keep this one in mind if I ever need a radiator. Didn't see it above (but kind of scrolled quick), but what do they charge for these? [EDIT - nevermind, see they are around $500...not too bad I bet, compared to what those must cost these days and esp if it's a direct fit]  09-05-2011, 11:35 AM
#14
Staging Lane
Thread Starter
Join Date: Jul 2011
Location: San Diego, CA
Posts: 79
Likes: 0
Received 0 Likes
on
0 Posts
Thanks man, just trying to help us all out. I tend to get a little OCD, so my apologies if the writeup was a little over the top. My rad had just over 50k on it.
I have heard that before about brass vs aluminum, but always had great luck with aluminum. Maybe because they are much more readily available. Yeah, I confirmed with Peter on the price, his exact words were "it WILL be below $500 unless something in production changes drastically", which he doesn't forsee. And it is direct fit, drop in. I was really impressed.
Yeah, I totally expected it to be heavier, but wasn't sure how much. I guess it is like comparing a Geo metro to an Abrams tank. You kinda expect it when you think about the raw toughness of it. It is sick looking in person!
Once I get back from my "trip" I will be beating on the car, getting a lower tstat possibly, and putting it through more testing. When all is said and done, with no issues to report, the production will begin. He is chomping at the bit to get it rolling and get them into production. My unplanned trip kinda threw a wrench in the plans.
Looks like a nice unit...aluminum radiators are typically not as good (efficient) as copper/brass ones, apples to apples, but can be made to function well. Not to mention, rather run one of those rather than crappy plastic ends that tend to crack!
I have an AFCO custom aluminum radiator that I bought for the chevelle a few years ago and those things are a piece of beauty And ones that are custom made (like the one in the post and the AFCO) are generally less $$$ and better quality than the 'big names' you buy in summit, etc. if they're even available...I want to say I paid only like $270 for it, although they've gone up considerably since then...Will have to keep this one in mind if I ever need a radiator. Didn't see it above (but kind of scrolled quick), but what do they charge for these? [EDIT - nevermind, see they are around $500...not too bad I bet, compared to what those must cost these days and esp if it's a direct fit]
I have an AFCO custom aluminum radiator that I bought for the chevelle a few years ago and those things are a piece of beauty
And ones that are custom made (like the one in the post and the AFCO) are generally less $$$ and better quality than the 'big names' you buy in summit, etc. if they're even available...I want to say I paid only like $270 for it, although they've gone up considerably since then...Will have to keep this one in mind if I ever need a radiator. Didn't see it above (but kind of scrolled quick), but what do they charge for these? [EDIT - nevermind, see they are around $500...not too bad I bet, compared to what those must cost these days and esp if it's a direct fit]Once I get back from my "trip" I will be beating on the car, getting a lower tstat possibly, and putting it through more testing. When all is said and done, with no issues to report, the production will begin. He is chomping at the bit to get it rolling and get them into production. My unplanned trip kinda threw a wrench in the plans.
09-05-2011, 02:38 PM
#15
Yeah, with the aluminum vs. brass/copper thing as far as efficiency, that would be a direct comparison, since aluminum does not conduct heat as well. However, many of the aluminum radiators have a different design...The important factors in a heat exchanger are surface area and airflow passing...Surface area can be increased by not only more, wider rows, but the fin density (FPI) and of course better fans. Also, the quality in which the fins are brazed onto the 'coolant paths' (the bars that run across) can make a difference, as a poor one would not conduct the heat as well...Cooling media type can help too, but we're pretty limited on availablity there (many other varities are available in the industrial market for cooling plates let's say)...Believe it or not, pure distilled water is one of the better things to use, but it has a lower boiling point and of course can freeze easier than coolant mixture...
Of course, the higher the pressure inside your cooling system, the higher the boiling point would be (for say water) and the nice thing about water (distilled, not tap) is there is less chance of corrosion and especially on aluminum vs. coolant mixes...If you ever look at an aluminum manifold at the thermostat housing, you'll see what I mean Just don't go crazy with the % of coolant and you'll probably be fine, but just wanted to point out that aluminum does have a tendency to corrode with that stuff higher than say brass...
Nothing really wrong with using an aluminum radiator though, properly designed, and imagine they've come a long way with them...As I mentioned earlier, much rather have one of those than the stupid plastic end tank types (oem) that have a tendency to crack!
Of course, the higher the pressure inside your cooling system, the higher the boiling point would be (for say water) and the nice thing about water (distilled, not tap) is there is less chance of corrosion and especially on aluminum vs. coolant mixes...If you ever look at an aluminum manifold at the thermostat housing, you'll see what I mean
Just don't go crazy with the % of coolant and you'll probably be fine, but just wanted to point out that aluminum does have a tendency to corrode with that stuff higher than say brass...Nothing really wrong with using an aluminum radiator though, properly designed, and imagine they've come a long way with them...As I mentioned earlier, much rather have one of those than the stupid plastic end tank types (oem) that have a tendency to crack!
09-08-2011, 09:57 AM
#16
Staging Lane
Thread Starter
Join Date: Jul 2011
Location: San Diego, CA
Posts: 79
Likes: 0
Received 0 Likes
on
0 Posts
Working on getting this radiator into a car that sees more track action. Peter actually made two prototypes, so I may be able to get one into a car that'll get used and abused more than my street abuse. Then we will have two cars being reported on.
As for availablility, these won't go into production until the prototype unit(s) are fully beat on with no adverse affects and no issues. I seriously doubt anything will come up, but Peter at ALRADCO is very meticulous and has very strong feelings about quality of the product he puts out. Once given the go ahead, he would need approximately 4-6 weeks to get them ready to ship. He is currently doing a large run (~100) radiators for the Grand Nationals (they are getting snatched up like mad!) and he is also doing a prototype rad for the first gen Camaro.
More to follow as I learn more so stay tuned.

 09-19-2011, 11:44 AM
#20
Staging Lane
Thread Starter
Join Date: Jul 2011
Location: San Diego, CA
Posts: 79
Likes: 0
Received 0 Likes
on
0 Posts
Yeah, I figured as much... I plan to put it back on for my further testing, but may have to find a way to either trim it or maybe fab something else as not to hide the rad, but still direct the airflow. Shame to hide that thing!