05 CTS-V Walbro 450lph E85 pump install
 04-30-2013, 10:56 AM
#1
Teching In
Thread Starter
iTrader: (3)

Join Date: Apr 2009
Posts: 7
Likes: 0
Received 0 Likes
on
0 Posts
NOTE*! I have my car apart for a cam and fast intake install. I do not have power or fuel rails on the car to test the base pressure yet! I will report back in a day or so to let you know how well the factory regulator works!
Hey guys,
I'm changing my car over to E85 for my nitrous setup and wanted more pump for the extra fuel required. I searched until my eyes hurt and decide I would buy one of the new Walbro 450lph intank pumps and see if i could make it work.
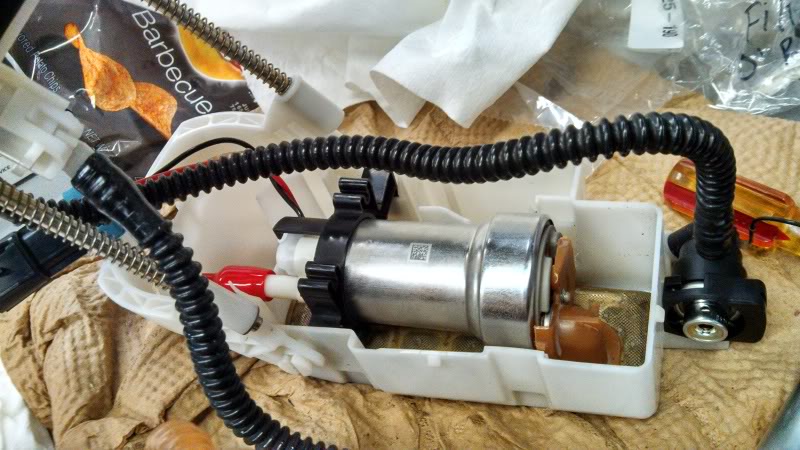
This is the pump I used.
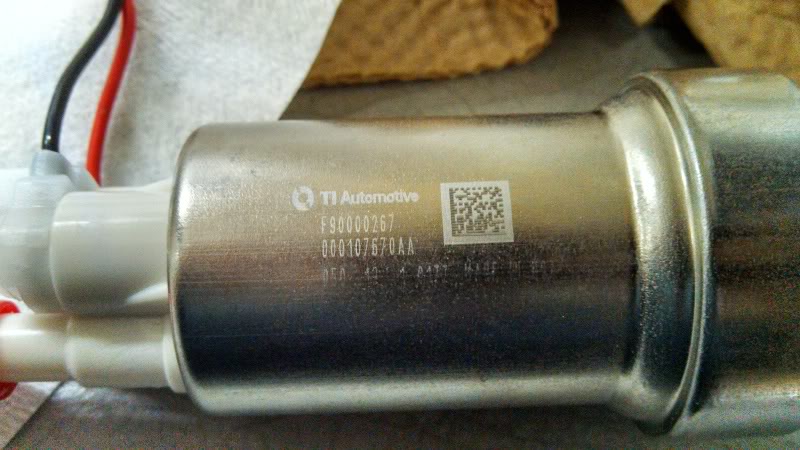
I'm Really sorry I don't have more pictures. I was doing this by myself at midnight with fuel everywhere so pics are crap! The biggest thing I wanted everyone to know is that it can be done with minimal modifications and is a cost effective option for someone needing more than currently available without going to an expensive double pump setup!
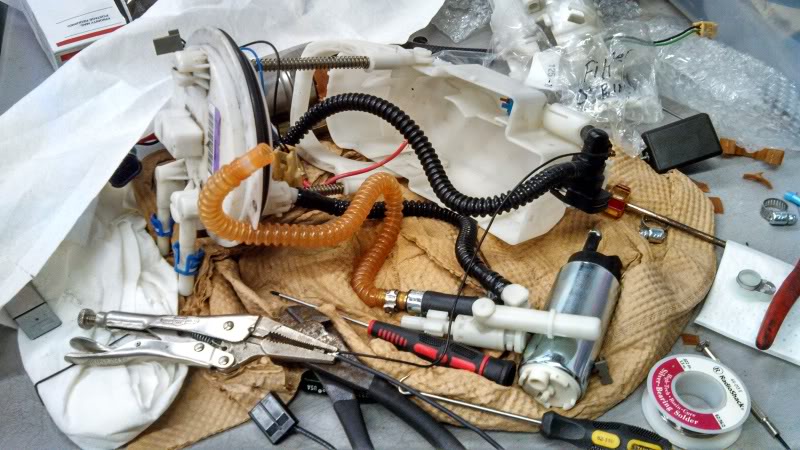
I'm going to go on the assumption you know how to remove your fuel pump assembly and I will pick up from there.
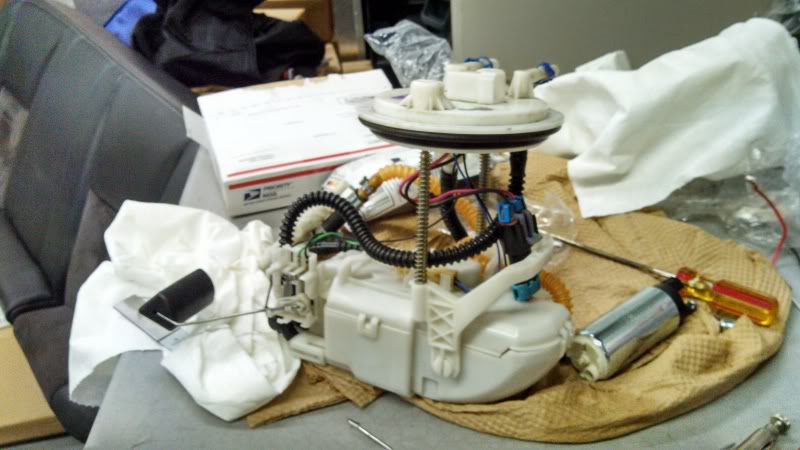
1) Remove your fuel pump assembly (either cutting an access hole or dropping the tank) and set it on the work bench. I would HIGHLY recommend you find somewhere outdoors to work on the fuel pump assembly since it holds fuel in several lines and ports. It will spew gas every time you move it. Get plenty of rags/towels or something you can throw away when you are done to put underneath it.
2) Unclip the top of the pump assembly to make it easier to work on by pulling on the top hat(part where your external tank lines connected. (I didn't realize this was removable until the end of the process but setting it to the side will give you a good bit more room to work when you start to work on the wiring)
3) Separate the two halves of the canister by using a screw drive to undo the plastic clips.
4) Remove the factory fuel pump and fuel strainer
*the factory clamp on the pump is not a worm gear style clamp but a crimp on. Use a screwdriver to wedge in and release the clamp. it is a PITA and you will probably stab yourself in the hand with the screwdriver a few times.
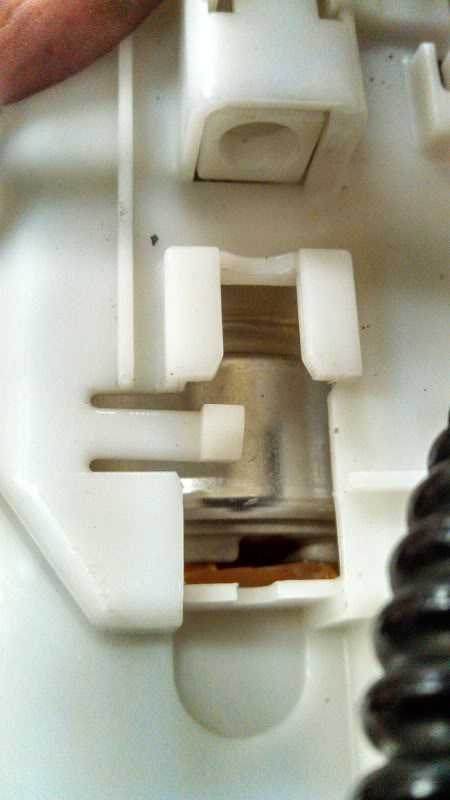
5) Remove the fuel pump strainer from the fuel pump by pulling from the bottom of the pump. This is where the modifications start.
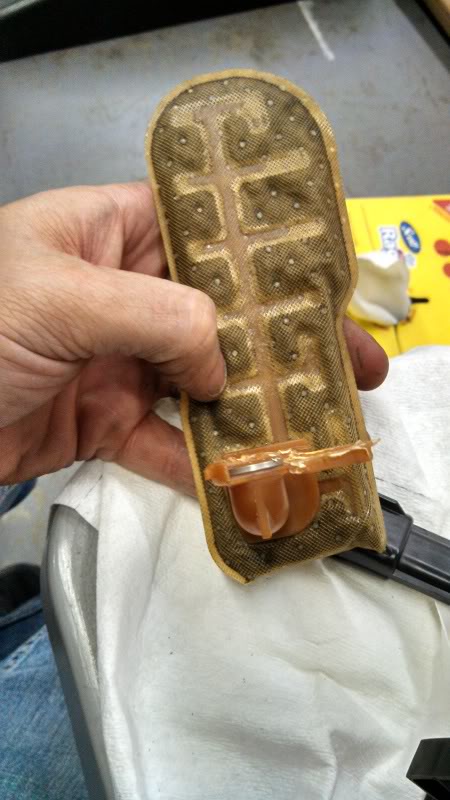
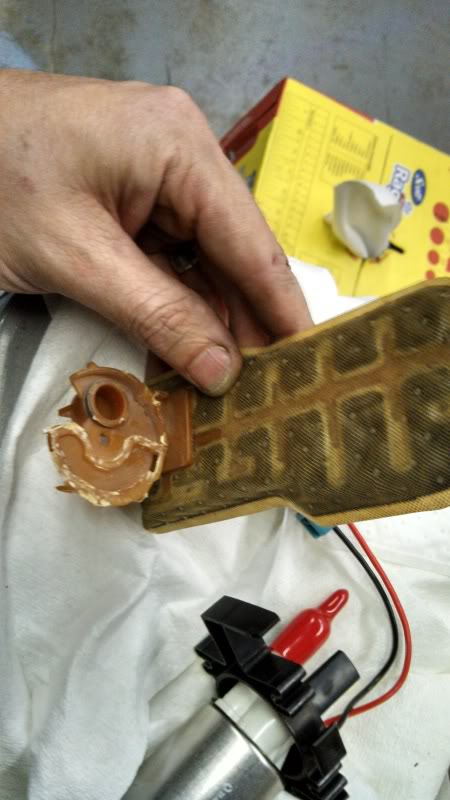
I used a pair of wire cutters to SLOWLY snip the edge of the plastic off as close as i could then used a dremel grind it the rest of the way down. I left as much as I could in tact for structural reasons. Do yourself a favor and spray your factory strainer with carb cleaner when you are done to clean out the filth.
We are cutting away the pieces used to hold the bottom of the factory pump in place but it does not matter. You will see why when we are done but the pump is physically larger on that end and fits TIGHT and perfectly in place. I'm not worried about it moving around.
It should look something like this when you are done.
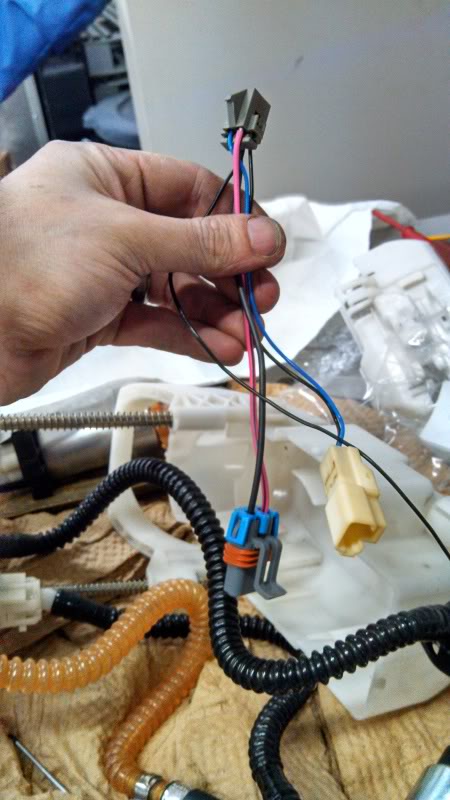
Now on to the wiring:
I'm am obsessive about wiring.... I hate half a** wire jobs so I cut the ghetto job someone did on the Walbro 255 pump that was already in my car and improved it.
Since I am changing to E85 I din't want to chance using a crimp/insulated connector that would possibly disolve over time and short my pump so I decided to solder it into the factory connector.
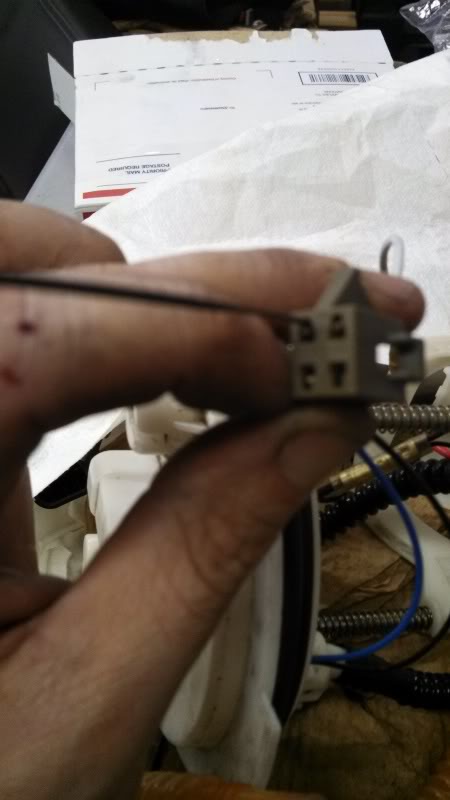
Remove the factor plug from the bottom of the top hat.
There is a little tab on the back of the connector. You will need to remove it so you can get the pins out of the connector. Just pull on the clip with a pair of pliers.
Now I made a "specialty tool" I couldn't find a screwdriver or pick small enough to fit inside the connector so I ground a small allen wrench flat with a dremel.
"specility tool"
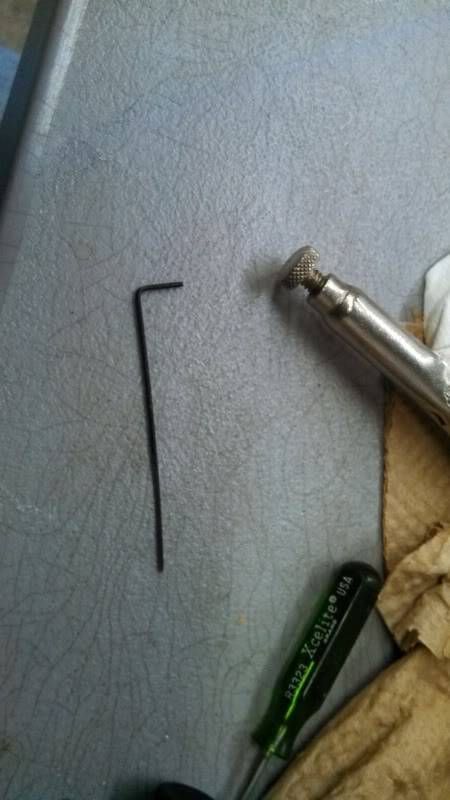
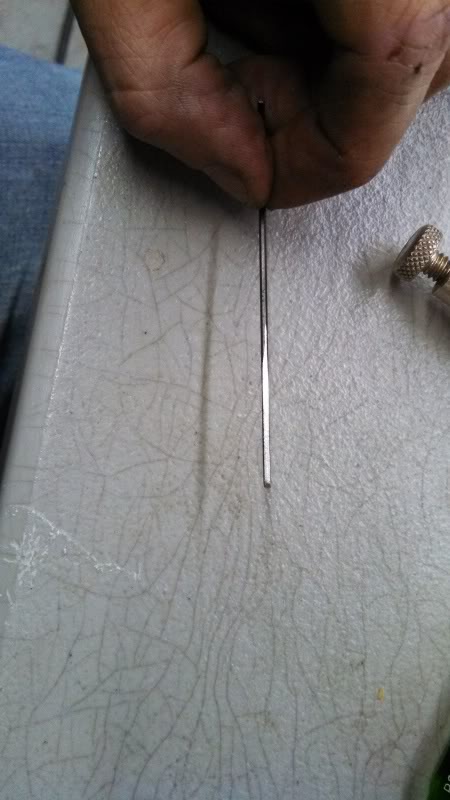
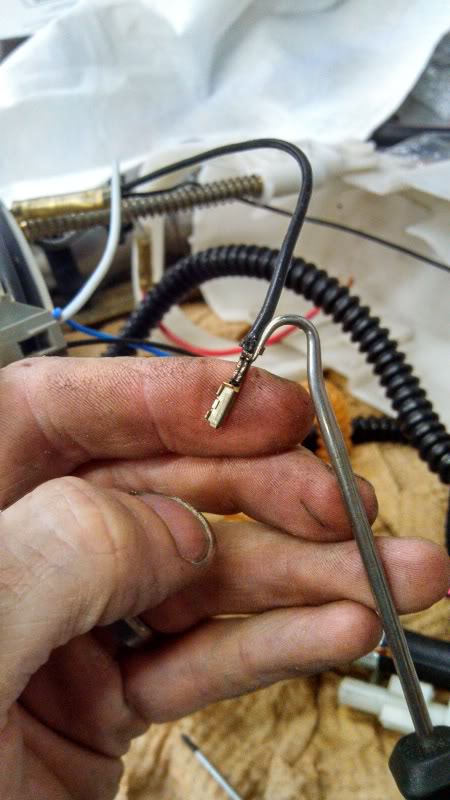
Now insert this tool into the slot for the wire on the front of the connector and pull on the wire. I should come right out nice and easy. TAKE ONE AT A TIME OUT so you don't get the wires backwards.
I then used a dental pick to spread the crimped on part of the wire and snip the wire as close to the connector as i could.
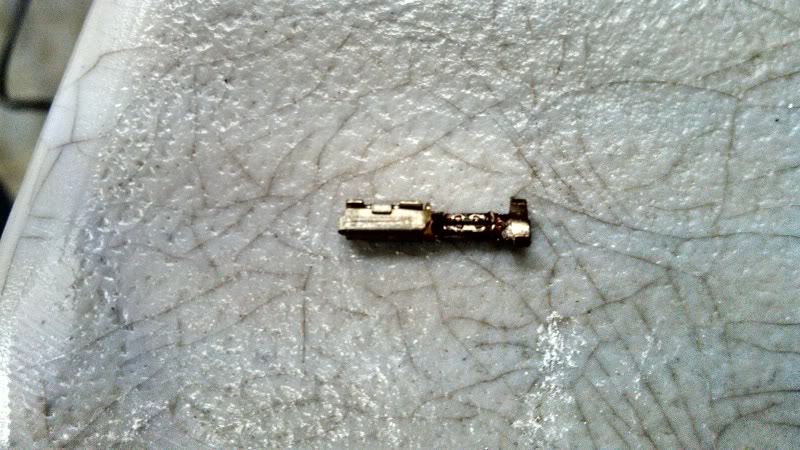
Spread these crimped pieces:
Your connector should look like this when you are done.
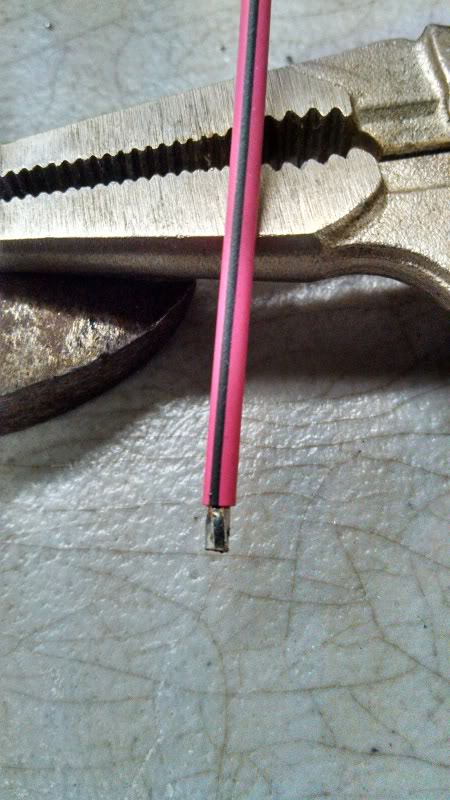
I went ahead an put some solder on the pump power wire can cut it "short" maybe 1/8th of an inch long so the power wire doesn't stick out below the connector and short on anything.
Put the soldering iron on the base of the connector and HOLD IT THERE for a while. MIne was nasty and had to burn off all the old gas and gunk that was on it. Use some solder and feed it until the solder sticks and starts to "suck" to the connector then add the power (or ground whichever you are working on) *NOTE for the ground wire you will need to make sure you remember the extra black wire coming from the bottom of the assembly and get them together as tight as you can on the connector.
Soldering is not a "the bigger the glob the better the job" kind of thing. Take your time and do it correctly . If you have to much solder it will not fit back into the connector. After you do each wire make sure you test fit in the connector with the retaining clip before you move on.
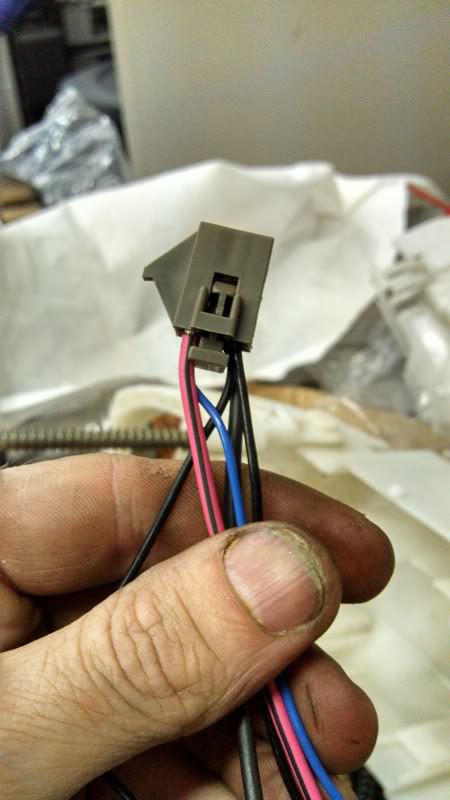
Now that you have done this to both wires you can put the retaining clip back in place and it will look like this.
Plug the harness back on the bottom of the top hat and now we can put the pump in its place and attach the feed line to the pump.
The 450lph pump outlet is a bit larger than the GS342 (255lph) pump but the factory line fits but TIGHT. Push and push some more until it gets over the second barb.
I did not use the crimp line on the hose again. I used a Stainless Steel worm gear clamp provided with the pump kit. Put it on nice an tight and put the pump in position.
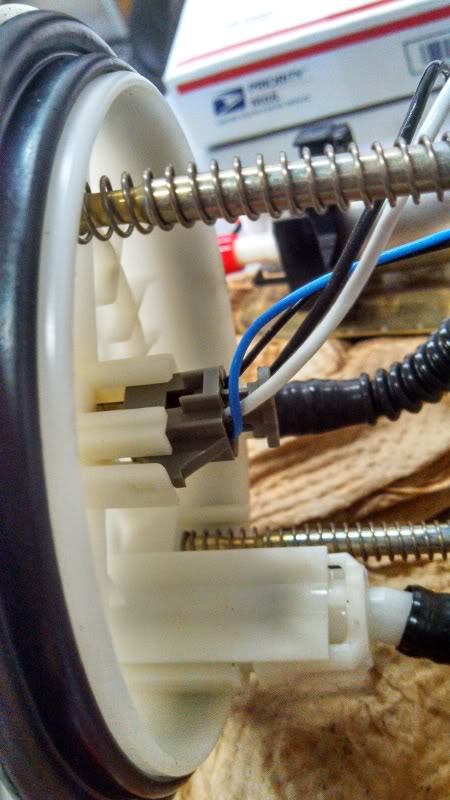
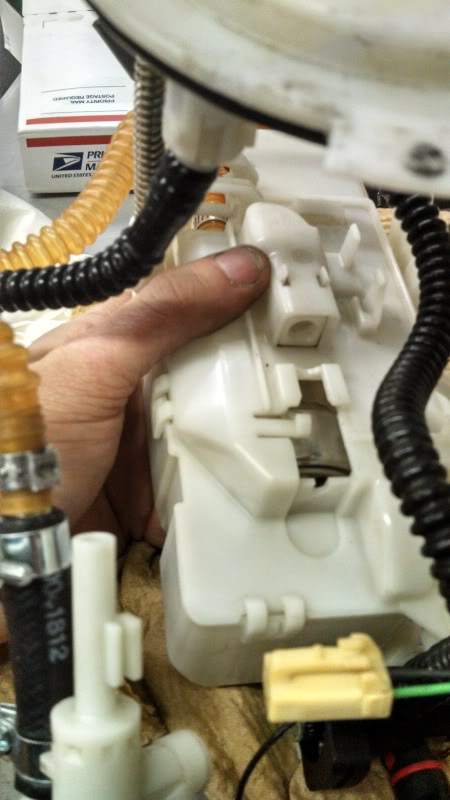
As you can see below the front black plastic "holder" for the pump fits like the factory one.
now that it is in place you can put the canister back together. But make sure all you hoses and wires are tight and in the correct place.
When you put top half of the canister on you may have to push with a screwdriver on the bottom of the pump a little. Remember at the begining of the how to I told you the bottom fits tight even though we cut the factor clips off the bottom? Well this is what I'm talking about. It fits nice and tight in place and no moving around.
Now you have a Walbro 450lph pump and you are ready to put it in the car!
Hey guys,
I'm changing my car over to E85 for my nitrous setup and wanted more pump for the extra fuel required. I searched until my eyes hurt and decide I would buy one of the new Walbro 450lph intank pumps and see if i could make it work.
This is the pump I used.

I'm Really sorry I don't have more pictures. I was doing this by myself at midnight with fuel everywhere so pics are crap! The biggest thing I wanted everyone to know is that it can be done with minimal modifications and is a cost effective option for someone needing more than currently available without going to an expensive double pump setup!
I'm going to go on the assumption you know how to remove your fuel pump assembly and I will pick up from there.
1) Remove your fuel pump assembly (either cutting an access hole or dropping the tank) and set it on the work bench. I would HIGHLY recommend you find somewhere outdoors to work on the fuel pump assembly since it holds fuel in several lines and ports. It will spew gas every time you move it. Get plenty of rags/towels or something you can throw away when you are done to put underneath it.
2) Unclip the top of the pump assembly to make it easier to work on by pulling on the top hat(part where your external tank lines connected. (I didn't realize this was removable until the end of the process but setting it to the side will give you a good bit more room to work when you start to work on the wiring)
3) Separate the two halves of the canister by using a screw drive to undo the plastic clips.
4) Remove the factory fuel pump and fuel strainer

*the factory clamp on the pump is not a worm gear style clamp but a crimp on. Use a screwdriver to wedge in and release the clamp. it is a PITA and you will probably stab yourself in the hand with the screwdriver a few times.
5) Remove the fuel pump strainer from the fuel pump by pulling from the bottom of the pump. This is where the modifications start.
I used a pair of wire cutters to SLOWLY snip the edge of the plastic off as close as i could then used a dremel grind it the rest of the way down. I left as much as I could in tact for structural reasons. Do yourself a favor and spray your factory strainer with carb cleaner when you are done to clean out the filth.
We are cutting away the pieces used to hold the bottom of the factory pump in place but it does not matter. You will see why when we are done but the pump is physically larger on that end and fits TIGHT and perfectly in place. I'm not worried about it moving around.
It should look something like this when you are done.


Now on to the wiring:
I'm am obsessive about wiring.... I hate half a** wire jobs so I cut the ghetto job someone did on the Walbro 255 pump that was already in my car and improved it.
Since I am changing to E85 I din't want to chance using a crimp/insulated connector that would possibly disolve over time and short my pump so I decided to solder it into the factory connector.
Remove the factor plug from the bottom of the top hat.

There is a little tab on the back of the connector. You will need to remove it so you can get the pins out of the connector. Just pull on the clip with a pair of pliers.

Now I made a "specialty tool" I couldn't find a screwdriver or pick small enough to fit inside the connector so I ground a small allen wrench flat with a dremel.
"specility tool"


Now insert this tool into the slot for the wire on the front of the connector and pull on the wire. I should come right out nice and easy. TAKE ONE AT A TIME OUT so you don't get the wires backwards.

I then used a dental pick to spread the crimped on part of the wire and snip the wire as close to the connector as i could.
Spread these crimped pieces:

Your connector should look like this when you are done.

I went ahead an put some solder on the pump power wire can cut it "short" maybe 1/8th of an inch long so the power wire doesn't stick out below the connector and short on anything.

Put the soldering iron on the base of the connector and HOLD IT THERE for a while. MIne was nasty and had to burn off all the old gas and gunk that was on it. Use some solder and feed it until the solder sticks and starts to "suck" to the connector then add the power (or ground whichever you are working on) *NOTE for the ground wire you will need to make sure you remember the extra black wire coming from the bottom of the assembly and get them together as tight as you can on the connector.
Soldering is not a "the bigger the glob the better the job" kind of thing. Take your time and do it correctly . If you have to much solder it will not fit back into the connector. After you do each wire make sure you test fit in the connector with the retaining clip before you move on.
Now that you have done this to both wires you can put the retaining clip back in place and it will look like this.

Plug the harness back on the bottom of the top hat and now we can put the pump in its place and attach the feed line to the pump.
The 450lph pump outlet is a bit larger than the GS342 (255lph) pump but the factory line fits but TIGHT. Push and push some more until it gets over the second barb.
I did not use the crimp line on the hose again. I used a Stainless Steel worm gear clamp provided with the pump kit. Put it on nice an tight and put the pump in position.
As you can see below the front black plastic "holder" for the pump fits like the factory one.

now that it is in place you can put the canister back together. But make sure all you hoses and wires are tight and in the correct place.
When you put top half of the canister on you may have to push with a screwdriver on the bottom of the pump a little. Remember at the begining of the how to I told you the bottom fits tight even though we cut the factor clips off the bottom? Well this is what I'm talking about. It fits nice and tight in place and no moving around.


Now you have a Walbro 450lph pump and you are ready to put it in the car!

 04-30-2013, 10:59 AM
#2
Teching In
Thread Starter
iTrader: (3)
Join Date: Apr 2009
Posts: 7
Likes: 0
Received 0 Likes
on
0 Posts
I will add this is the Kit i bought:
http://www.ebay.com/itm/WALBRO-E85-R...-/170945680470
and I already had the Racetronix wiring upgrade!
http://www.ebay.com/itm/WALBRO-E85-R...-/170945680470
and I already had the Racetronix wiring upgrade!
04-30-2013, 12:25 PM
#3
TECH Fanatic
Interesting. Really interested in how this thing holds up since the Aeromotive 340 pumps seize up due to the jet pump not being able to keep the bucket full. Also, the regulator is on the fuel bucket, not the rail unless you changed that.
04-30-2013, 04:04 PM
#4


it will be very interesting indeed - DMM is right... bigger pumps were starving the bucket. Cavitation and done.!
The stock regulator looks like its going in based on the pictures...
The stock regulator looks like its going in based on the pictures...
04-30-2013, 05:43 PM
#6
TECH Regular
iTrader: (14)

Join Date: Jan 2009
Location: Cypress TX
Posts: 422
Likes: 0
Received 0 Likes
on
0 Posts
If anyone doing this mod wants a new fuel sock autozone sells one that should work, I just got one for a DW300 pump. Had it in stock at my local store. Part number FS194, about $20.
http://www.autozone.com/autozone/par...ntifier=225021
Disregard, reusing the stock sock is probably the better option with a DW300.
http://www.autozone.com/autozone/par...ntifier=225021
Disregard, reusing the stock sock is probably the better option with a DW300.
Last edited by GulfM3; 05-02-2013 at 07:59 AM.
04-30-2013, 06:42 PM
#7
TECH Resident
iTrader: (1)

Join Date: Sep 2010
Location: Winnipeg, mb
Posts: 789
Likes: 0
Received 0 Likes
on
0 Posts
I've been running a aeromotive 340 for 2 seasons without incident. When i first installed it, it would starve if the tank was low (around 1/8 th tank) and accelerating. I drilled some extra holes in the basket in the top portion towards the front . Haven't had a problem since, I try not to let it go below a 1/4 tank.
Trending Topics
04-30-2013, 11:05 PM
#8
Teching In
Thread Starter
iTrader: (3)
Join Date: Apr 2009
Posts: 7
Likes: 0
Received 0 Likes
on
0 Posts
I've been running a aeromotive 340 for 2 seasons without incident. When i first installed it, it would starve if the tank was low (around 1/8 th tank) and accelerating. I drilled some extra holes in the basket in the top portion towards the front . Haven't had a problem since, I try not to let it go below a 1/4 tank.
03-02-2017, 03:45 AM
#13
I got the pump installed, and was gettin 67-69psi of fuel pressure.
I melted the ground side plug from the top as well as the one inside the pump.
How did you guys battle this problem?
I am tryin another solution where i am using machined bolts and nuts to be my connector between the car and the fuel pump. Its an old quick fix, but i need a more long term solution.
I melted the ground side plug from the top as well as the one inside the pump.
How did you guys battle this problem?
I am tryin another solution where i am using machined bolts and nuts to be my connector between the car and the fuel pump. Its an old quick fix, but i need a more long term solution.