
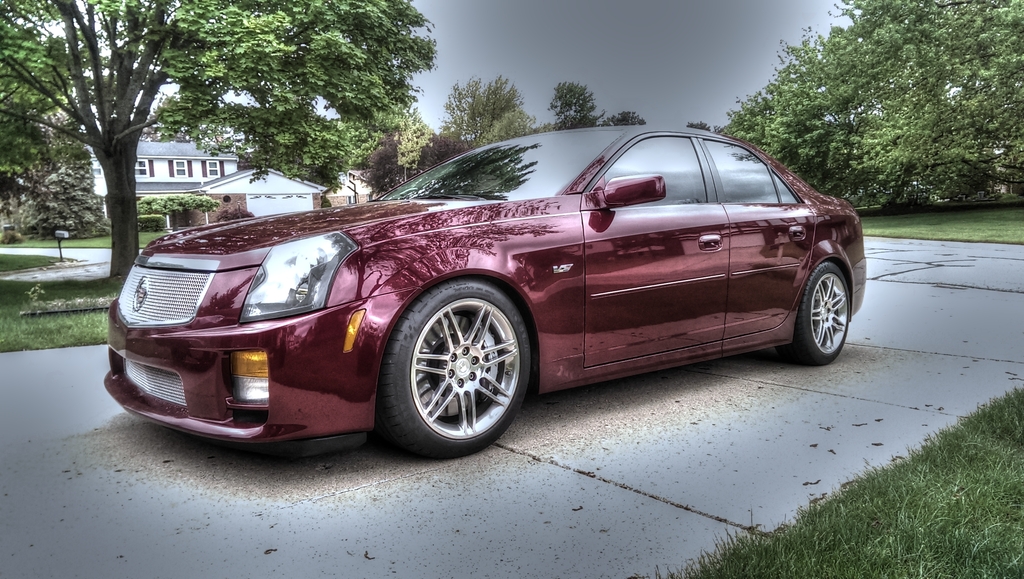
What did you do to your V today?
 05-11-2015, 10:12 PM
#521
TECH Addict
iTrader: (19)
Join Date: Aug 2007
Location: Where the Navy tells me to go
Posts: 2,408
Received 107 Likes
on
89 Posts

Thanks for the leads on the 8.8" parts, barrok69. Do you by chance know what thread size the fill and drain ports are? I have one of the old GMPP diff cooler setups that I've never installed, and I just want to be sure those ports wouldn't be too much of a restriction.
Edit: When you cut the rear mount off the LPW cover, did you just cut it all the way down to that lip at the base of the mount?
Edit2: Just looking at different cover options, one difference I see with the non-IRS ones is that they don't have a location for a vent (since there's a vent on the one or both of the axle tubes). Not a huge deal to overcome, but something to be aware of. The Ford Racing cover is $40 more (@ Summit) than the LPW one, and it looks to me like there would be more grinding required on the cover to make it work (if it was possible at all). The LPW one seems to be a great find.
Last edited by AAIIIC; 05-11-2015 at 10:37 PM.
 05-12-2015, 09:25 PM
#522
TECH Enthusiast
Thanks for the leads on the 8.8" parts, barrok69. Do you by chance know what thread size the fill and drain ports are? I have one of the old GMPP diff cooler setups that I've never installed, and I just want to be sure those ports wouldn't be too much of a restriction.
Edit: When you cut the rear mount off the LPW cover, did you just cut it all the way down to that lip at the base of the mount?
Edit2: Just looking at different cover options, one difference I see with the non-IRS ones is that they don't have a location for a vent (since there's a vent on the one or both of the axle tubes). Not a huge deal to overcome, but something to be aware of. The Ford Racing cover is $40 more (@ Summit) than the LPW one, and it looks to me like there would be more grinding required on the cover to make it work (if it was possible at all). The LPW one seems to be a great find.
Edit: When you cut the rear mount off the LPW cover, did you just cut it all the way down to that lip at the base of the mount?
Edit2: Just looking at different cover options, one difference I see with the non-IRS ones is that they don't have a location for a vent (since there's a vent on the one or both of the axle tubes). Not a huge deal to overcome, but something to be aware of. The Ford Racing cover is $40 more (@ Summit) than the LPW one, and it looks to me like there would be more grinding required on the cover to make it work (if it was possible at all). The LPW one seems to be a great find.
I machined down to their initial machine marks at the boss. This was a good guess and left about 10mm of clearance between the cover and rear crossmember of the cradle at that location. When i was locating the diff it looked like it was going to be closer, so i did a quick pass with the grinder and took it down another 5mm off the top part of the mount boss to make it flush with the cover in that area. It wasn't completely necessary, but helped maneuver it a bit while I was installing.
I used the mini mesh breather that the cover came with. It also came with a brass barb fitting, but it was too large to clear the CS diff bracket, and i didn't want to have a hose dangling with a check valve on the end under the car. I'm never going to submerge this car anyways.
I originally looked at the Ford Racing cover as my first choice due to its overall design and "OEM solution", but the shape of it simply required way too much modifications, and would have had to modify the CS bracket, which I didn't not want to do. At the end of the day I didn't want a "FORD" logo visible from the back of the car

I forgot to mention the DSS 1000hp axles are HUGE and weigh a ton compared to stock or Gforce stuff which is fine. I had to "massage" the axle window across from where the inner control arm bolt head is on the cradle a couple mm's to clear the driver-side inner CV to be able to install it.
05-13-2015, 03:04 PM
#524
TECH Enthusiast
The 3 hole style LPW racing cover like I got was just introduced in January 2015. The previous version had just 2 holes fyi (fill and drain).
Anwyays... the newer style 3 hole cover is 3/8" NPT on each plug. There is enough room and meat on the boss to drill them out to 1/2" NPT without issue. I got this information from calling LPWracing directly.
Anwyays... the newer style 3 hole cover is 3/8" NPT on each plug. There is enough room and meat on the boss to drill them out to 1/2" NPT without issue. I got this information from calling LPWracing directly.
05-14-2015, 11:24 AM
#525
I guess I never thought of that being an issue. At any rate I ran a breather tube from the diff up along the spare tire well towards the back. Used an NPT elbow and brass pipe to do so. Reason being is at an HDPE event with 90 ambient and 5 laps into each heat the gear oil would get hot enough that going around hard lefts fluid would come out and land on the exhaust pipe. Causing me to get black flagged every heat due to smoke, which got most annoying. And embarrassing since everyone thought I blew my motor.
That was with the breather that came with the CS kit, or maybe I ordered it form summit. Can't remember, but it was just a breather cap basically.
Anyway, figured I would let you know as to why you may want to run an actual diff breather some how.
That was with the breather that came with the CS kit, or maybe I ordered it form summit. Can't remember, but it was just a breather cap basically.
Anyway, figured I would let you know as to why you may want to run an actual diff breather some how.
05-14-2015, 11:57 AM
#526
TECH Enthusiast
I guess I never thought of that being an issue. At any rate I ran a breather tube from the diff up along the spare tire well towards the back. Used an NPT elbow and brass pipe to do so. Reason being is at an HDPE event with 90 ambient and 5 laps into each heat the gear oil would get hot enough that going around hard lefts fluid would come out and land on the exhaust pipe. Causing me to get black flagged every heat due to smoke, which got most annoying. And embarrassing since everyone thought I blew my motor.
That was with the breather that came with the CS kit, or maybe I ordered it form summit. Can't remember, but it was just a breather cap basically.
Anyway, figured I would let you know as to why you may want to run an actual diff breather some how.
That was with the breather that came with the CS kit, or maybe I ordered it form summit. Can't remember, but it was just a breather cap basically.
Anyway, figured I would let you know as to why you may want to run an actual diff breather some how.
05-17-2015, 10:01 AM
#527
I've never tracked the V and i have plenty of gear oil all over the rear center section, so even in daily driver status this happens. I end up cleaning it every time change wheels.
05-17-2015, 10:29 AM
#528
TECH Addict
iTrader: (19)
Join Date: Aug 2007
Location: Where the Navy tells me to go
Posts: 2,408
Received 107 Likes
on
89 Posts
Slapped the summer wheels/tires back on the car (a bit late, I had to get the front tires flipped to even out the wear and I was a bit slow getting around to that) and changed the erl (aka oal aka oil).
05-17-2015, 10:53 AM
#529
TECH Enthusiast
I gave mine a bath and had an alignment done after putting in the KW3's, Creative Steel balljoint wide trailing arms and rear poly toe rods. My stock toe rods were seized and not adjustable anymore. Rear camber was stuck at -2.5� and couldn't go any more positive 
I dialed everything down slightly with the new rear toe rods in place and put: Front Camber: -2.0�
Front Toe: +0.02�
Rear Camber: -2.3�
Rear Toe: -0.02�
She handles like a dream now.
I dialed everything down slightly with the new rear toe rods in place and put: Front Camber: -2.0�
Front Toe: +0.02�
Rear Camber: -2.3�
Rear Toe: -0.02�
She handles like a dream now.
 05-17-2015, 11:51 AM
#531
TECH Enthusiast
 05-23-2015, 09:30 AM
#532
TECH Addict
iTrader: (19)
Join Date: Aug 2007
Location: Where the Navy tells me to go
Posts: 2,408
Received 107 Likes
on
89 Posts
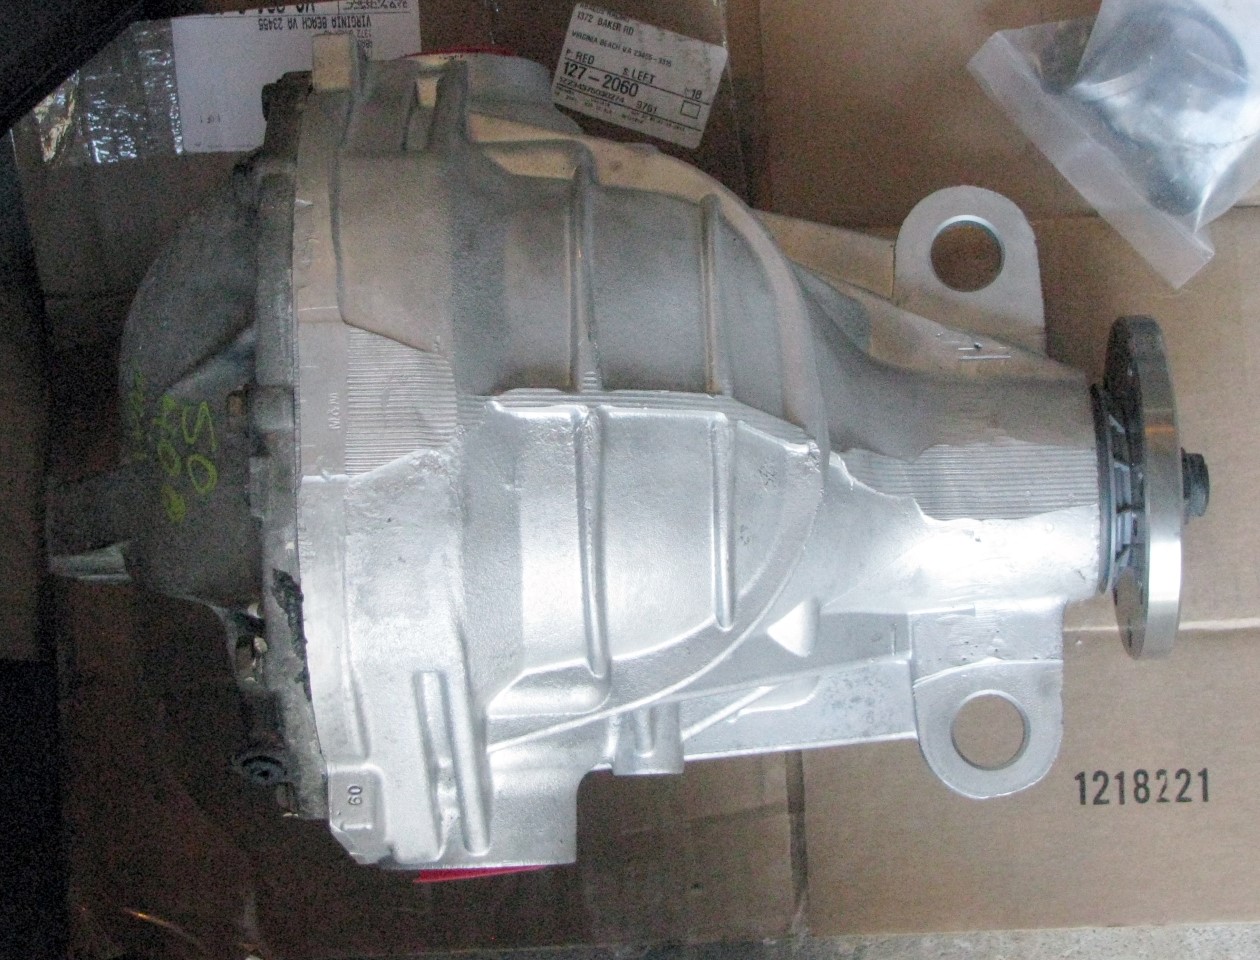
Picked up my 8.8" from the machine shop - they bead-blasted the housing and rebuilt the diff with a Truetrac and 3.73 gears. Rear cover is going to be replaced, so I didn't bother to get that blasted.
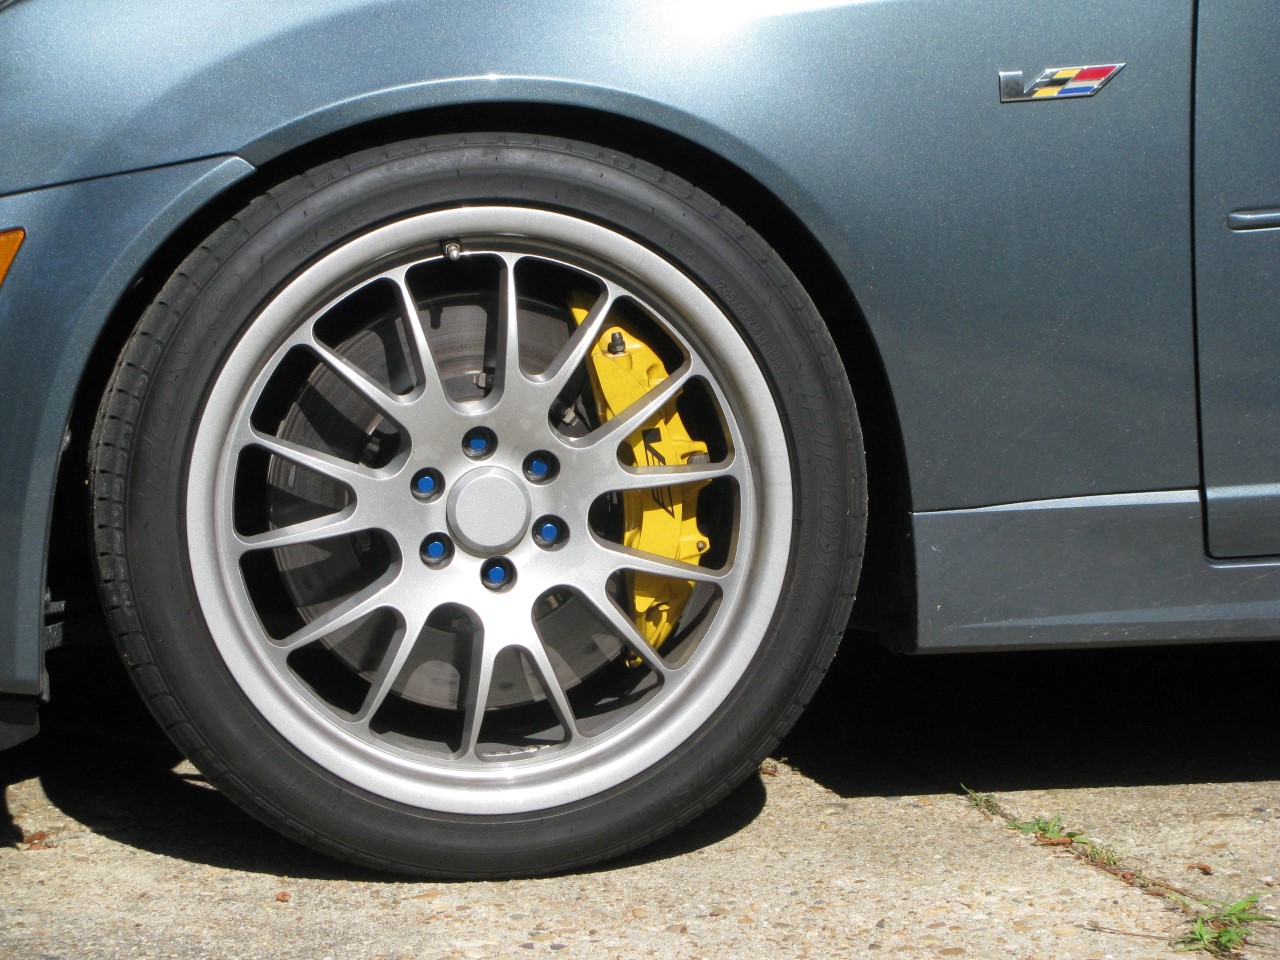
And I also installed some new lug nuts. I have some red steel Muteki lug nuts that I bought a couple/few years ago to beautify my track setup. (Track events are all about looking good in the paddock, right?!
  ) I was running black McGard Splinedrives with my street wheels, but then I left the red Mutekis on with the street wheels and decided I liked the little splash of color. Unfortunately, the Muteki finish is garbage - they literally came out of the packaging brand new already chipped, and that just got worse with time. I decided last week to splurge on some new McGard Splinedrives that are chrome with red caps on the ends - all of my wheels have pretty deep lug nut holes, so really all you see is the red cap.
I ordered a 20-pack and a 4-pack of the red tip ones, and I also ordered a 4-pack of the blue tip ones, just to try them out. Here's how the blue looks (with a little Paint.net cutting and pasting to make all 6 blue):
Since the car is blue-ish, and the blue on the lug nuts doesn't match, I figured I wouldn't like them, and I was right. But it was worth a shot to see how they would look. On a black or red or silver V I think they would look good.
As for the red ones, the first pic is a shot of the old Mutekis, which you can see are faded and you can kind of see that they're all chipped around the edge. The other two pics are with the new McGards.
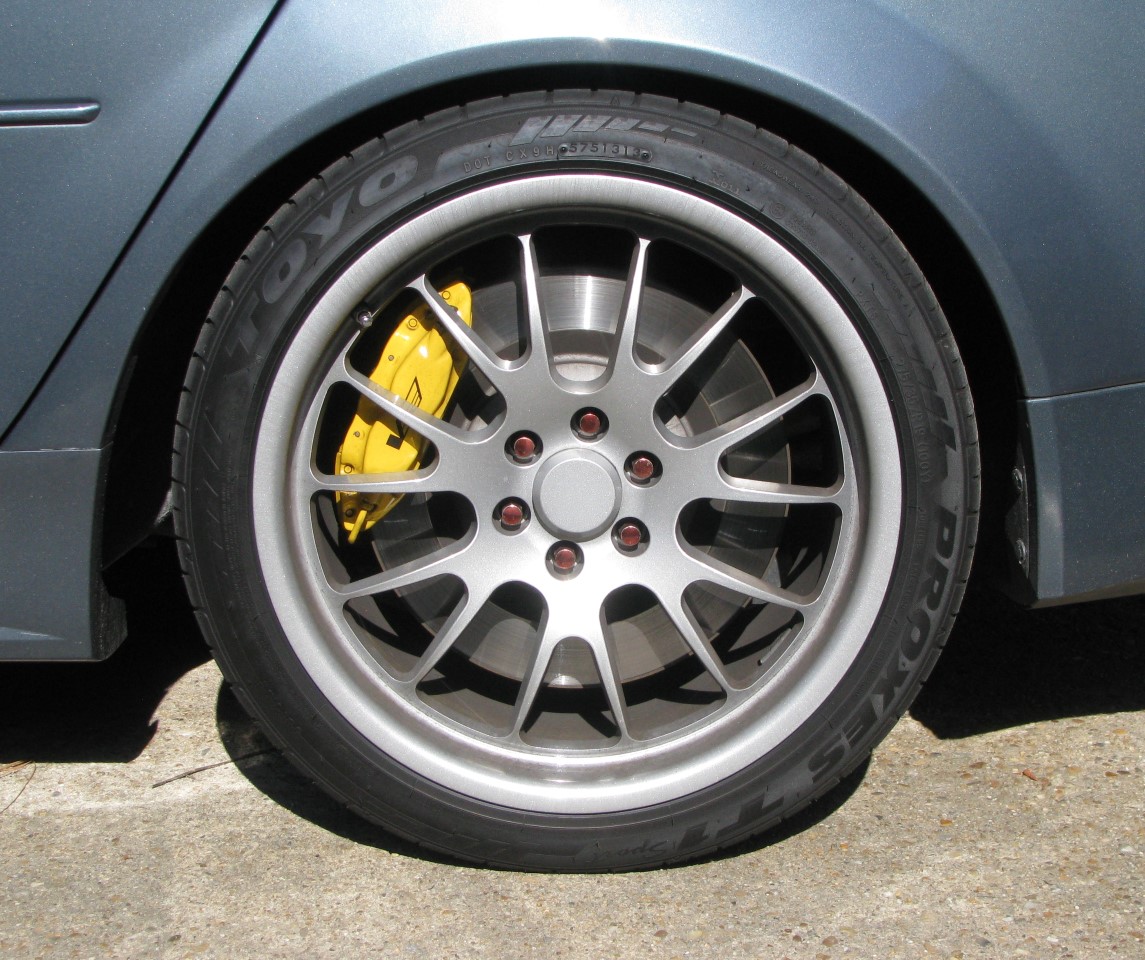
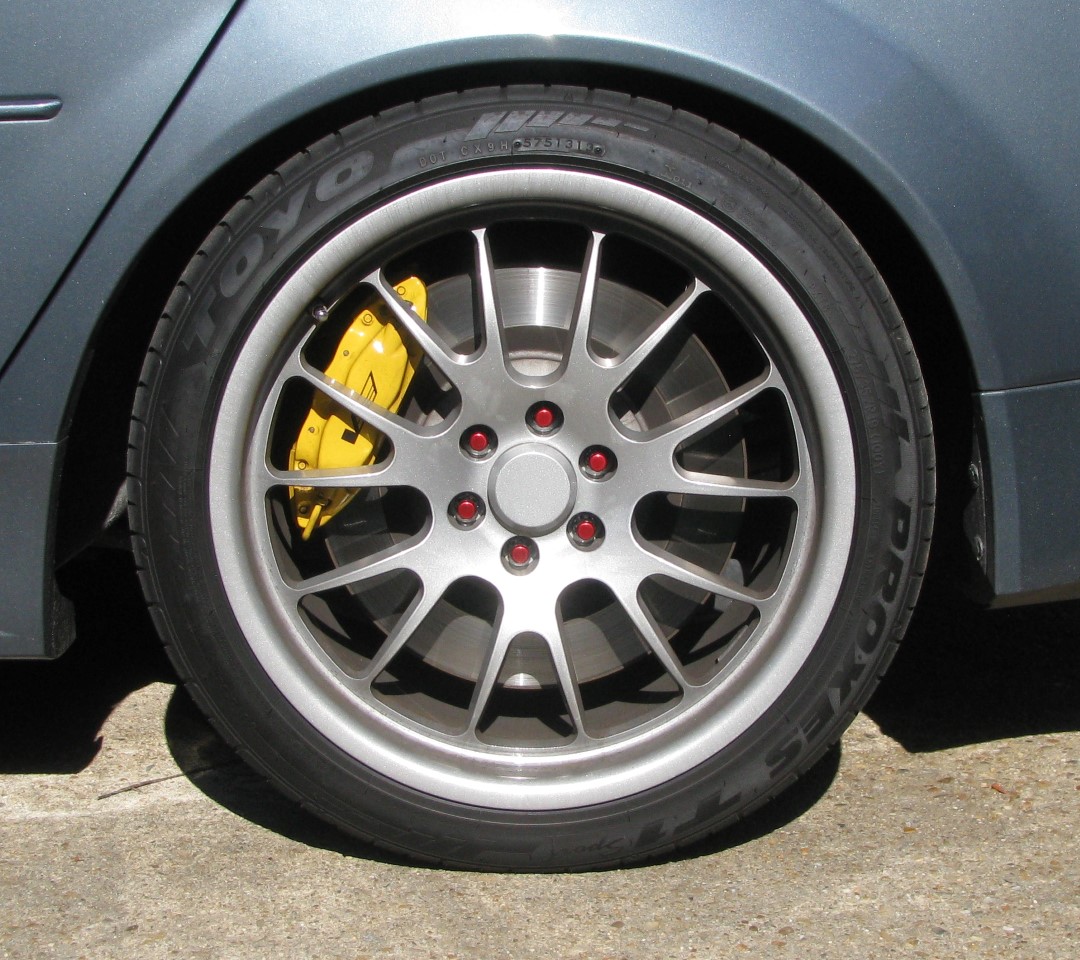
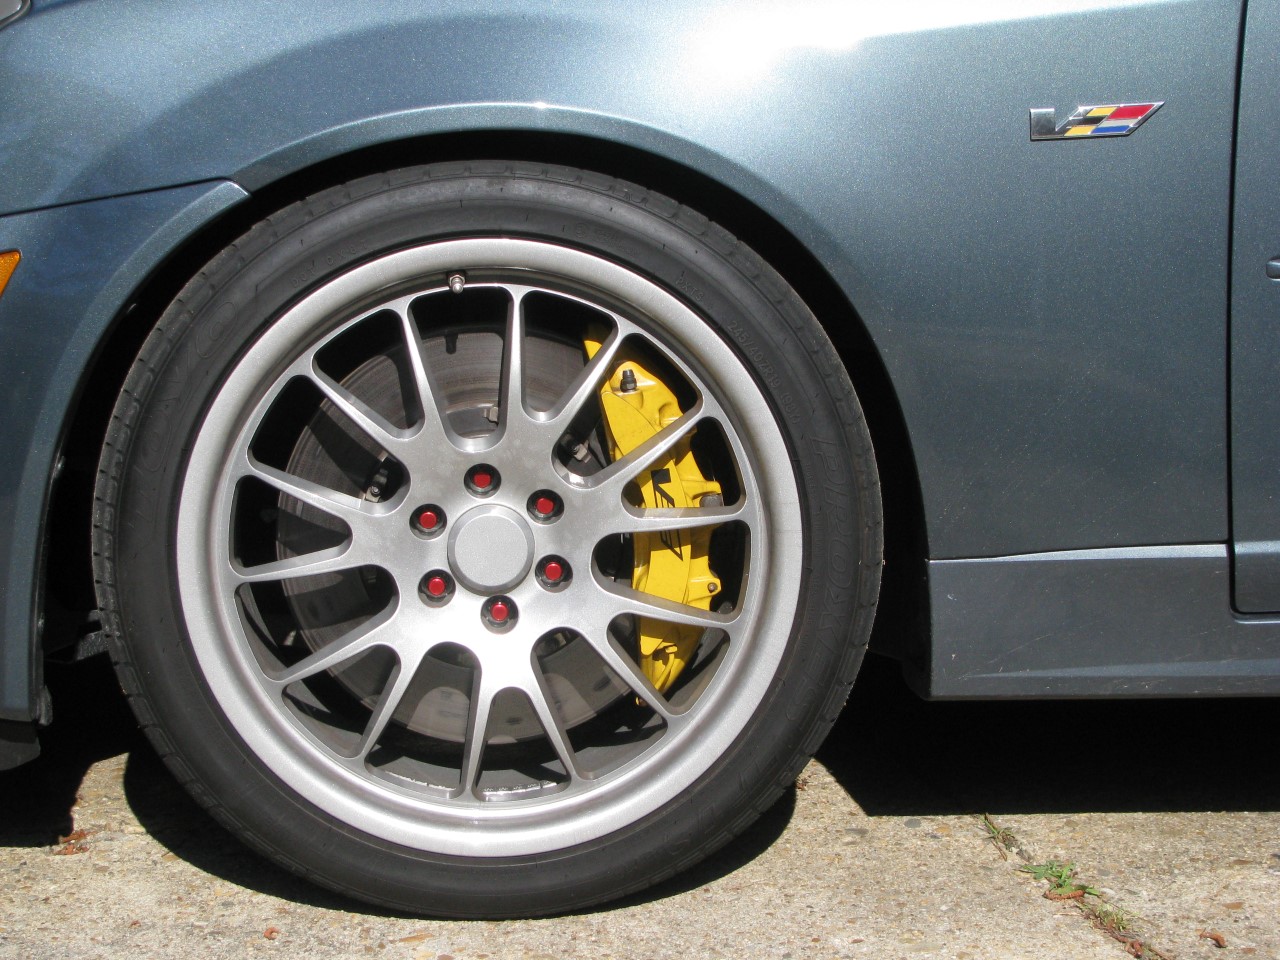
And I also installed some new lug nuts. I have some red steel Muteki lug nuts that I bought a couple/few years ago to beautify my track setup.
(Track events are all about looking good in the paddock, right?! I ordered a 20-pack and a 4-pack of the red tip ones, and I also ordered a 4-pack of the blue tip ones, just to try them out. Here's how the blue looks (with a little Paint.net cutting and pasting to make all 6 blue):
Since the car is blue-ish, and the blue on the lug nuts doesn't match, I figured I wouldn't like them, and I was right.
But it was worth a shot to see how they would look. On a black or red or silver V I think they would look good.As for the red ones, the first pic is a shot of the old Mutekis, which you can see are faded and you can kind of see that they're all chipped around the edge. The other two pics are with the new McGards.
Last edited by AAIIIC; 10-21-2015 at 02:17 PM.

 05-24-2015, 07:41 PM
#537
TECH Addict
iTrader: (19)
Join Date: Aug 2007
Location: Where the Navy tells me to go
Posts: 2,408
Received 107 Likes
on
89 Posts
Installed a new serpentine belt. In the process of reinstalling the air inlet tube and the top of the filter box, one of the tabs broke off the filter box.  So now I have a nice spot to suck in unfiltered air, so I've got that going for me.
So now I have a nice spot to suck in unfiltered air, so I've got that going for me. 

