69 Buick GS 415/T56

 09-07-2012, 05:23 PM
#42
On The Tree
Thread Starter
Join Date: Nov 2011
Location: South east Wisconsin
Posts: 159
Likes: 0
Received 0 Likes
on
0 Posts
I got the engine moved a half inch forward, great clearance everywhere!
Engine to firewall clearance.
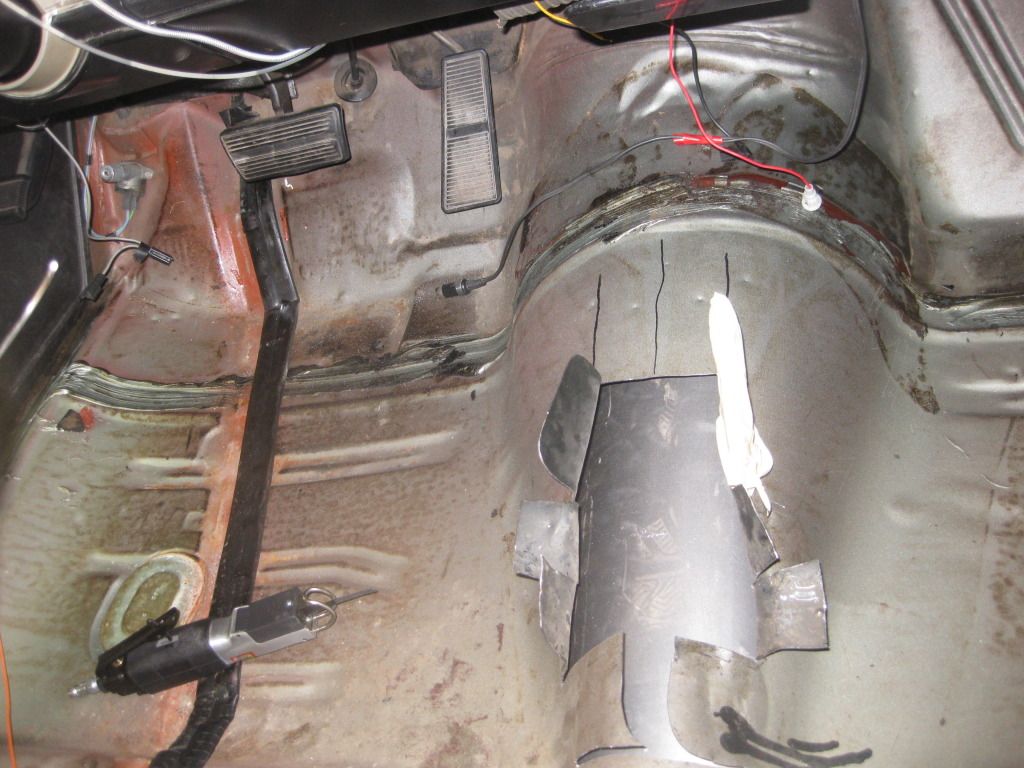
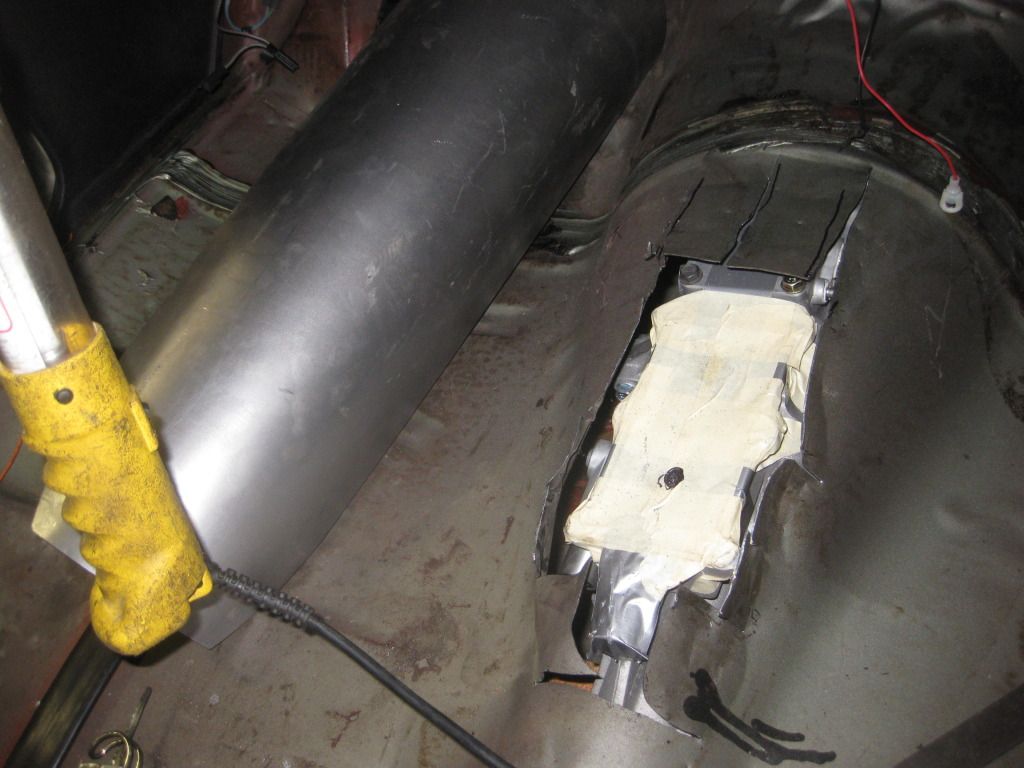
Hooked the trans up and dropped it in. I took measurements to get a wherabouts of the shifter location. From there I used the body saw to cut and peel open the tunnel. I still need to pull the engine and trans out to put some additional dents in the tunnel up closer to the bell housing to get a little more clearance. Its going to be tight!

Engine to firewall clearance.
Hooked the trans up and dropped it in. I took measurements to get a wherabouts of the shifter location. From there I used the body saw to cut and peel open the tunnel. I still need to pull the engine and trans out to put some additional dents in the tunnel up closer to the bell housing to get a little more clearance. Its going to be tight!
09-07-2012, 06:16 PM
#43
On The Tree
Thread Starter
Join Date: Nov 2011
Location: South east Wisconsin
Posts: 159
Likes: 0
Received 0 Likes
on
0 Posts
I will be running the Holley HP EFI computer and harness. Wondering if anyone has used it or has any experience with it, or how they like it?
09-13-2012, 03:12 PM
#44
On The Tree
Thread Starter
Join Date: Nov 2011
Location: South east Wisconsin
Posts: 159
Likes: 0
Received 0 Likes
on
0 Posts
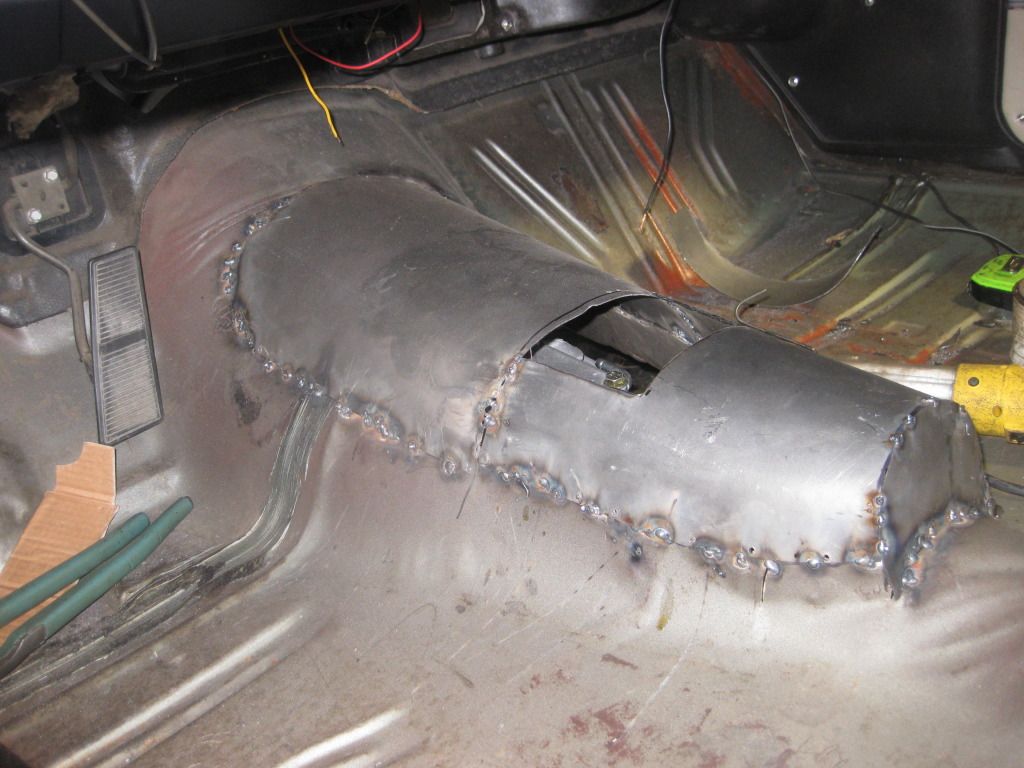
Almost have the tunnel  completed, so far it is only tacked togother. Looks like I will be able to keep my bench seat!!!! Wont be able to slide the seat forward for shorter people.
completed, so far it is only tacked togother. Looks like I will be able to keep my bench seat!!!! Wont be able to slide the seat forward for shorter people.
09-16-2012, 11:02 PM
#46
On The Tree
Thread Starter
Join Date: Nov 2011
Location: South east Wisconsin
Posts: 159
Likes: 0
Received 0 Likes
on
0 Posts
Went up to Wegner Motorsports Friday night to pick up my intake and hang out. Casey was busy loading up his harley getting ready for the Tamahawk Bike Rally. They are showcasing their new harley exhaust!
The poishing on the intake looks phenomenal!!!!
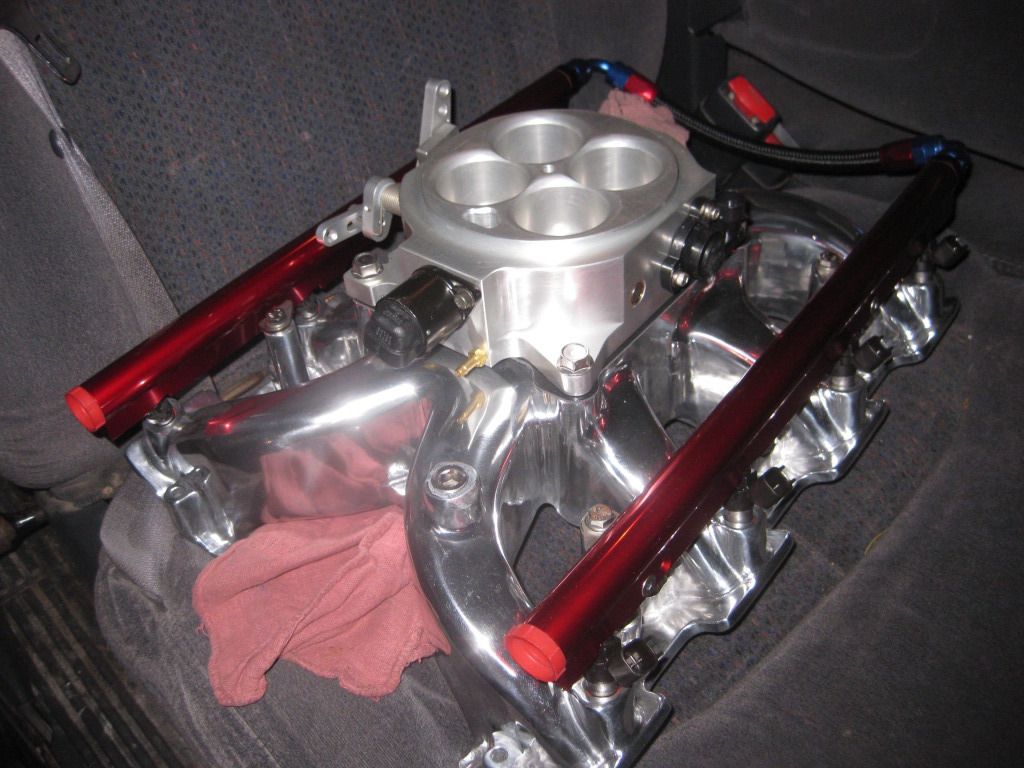
The poishing on the intake looks phenomenal!!!!
09-17-2012, 12:15 AM
#47
TECH Fanatic
iTrader: (15)
Join Date: Jun 2006
Location: Janesville WI
Posts: 1,155
Likes: 0
Received 0 Likes
on
0 Posts

Subscribed. I'm hoping to get back at my Buick swap in the near future. I wanted to see what mounts your chose and how much tunnel massaging was needed for a T56.
I hope I can check out your car in person one day. Very nice!!
What is your plan for the fuel system?
Is the rear shifter position going to work with your bench seat?
I hope I can check out your car in person one day. Very nice!!
What is your plan for the fuel system?
Is the rear shifter position going to work with your bench seat?
09-17-2012, 09:25 AM
#48
On The Tree
Thread Starter
Join Date: Nov 2011
Location: South east Wisconsin
Posts: 159
Likes: 0
Received 0 Likes
on
0 Posts
You are just a stone throw away from me, come and check out the progress! Send me a pm.
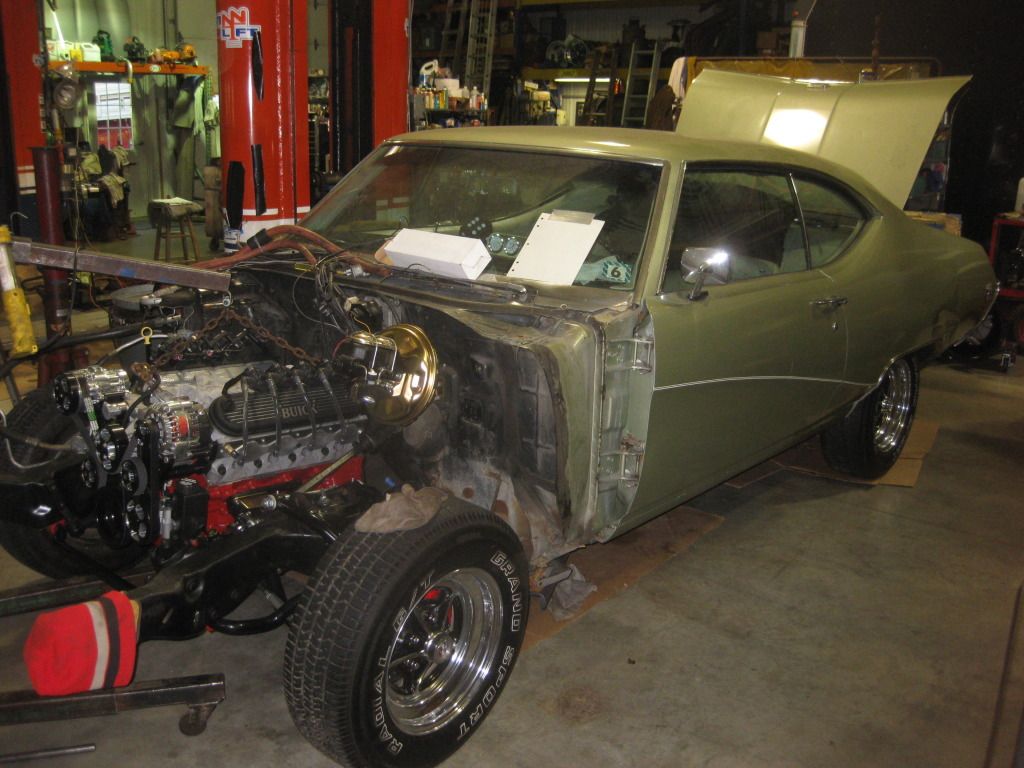
I used the dougs headers mounts with the tall and narrow stands. They are the standard and one inch set back mounts. I put them in the standard location and slotted the engine stands so I could move the engine back a half inch. That gave me the clearance I needed for my power steering pump.
The tunnel if i were to do it again I would have cut down the center and peeled it open just like several others have. What I did I had alot of time into cutting more and more!
The shifter is in the forward location of the back mount (if that makes sense). Not sure if all t56 have the same casing(t56 magnum from american powertrain) but you can spin the shifter around to put him it in a more towards the front location. There is even alternative spot on the trans to use as well but that needs a special shifter!
The fuel tank is a Ricks tank with an aeromotive 340 fuel pump. Its the best set up and I didnt want to have an starvation issues going a different route!
Last edited by LS2GS; 09-20-2012 at 09:17 PM.
09-17-2012, 03:52 PM
#50
TECH Fanatic
iTrader: (15)
Join Date: Jun 2006
Location: Janesville WI
Posts: 1,155
Likes: 0
Received 0 Likes
on
0 Posts
You are just a stone through away from me, come and check out the progress! Send me a pm.
I used the dougs headers mounts with the tall and narrow stands. They are the standard and one inch set back mounts. I put them in the standard location and slotted the engine stands so I could move the engine back a half inch. That gave me the clearance I needed for my power steering pump.
The tunnel if i were to do it again I would have cut down the center and peeled it open just like several others have. What I did I had alot of time into cutting more and more!
The shifter is in the forward location of the back mount (if that makes sense). Not sure if all t56 have the same casing(t56 magnum from american powertrain) but you can spin the shifter around to put him it in a more towards the front location. There is even alternative spot on the trans to use as well but that needs a special shifter!
The fuel tank is a Ricks tank with an aeromotive 340 fuel pump. Its the best set up and I didnt want to have an starvation issues going a different route!
So, I take it your cross member was drilled for the chevy mounts or do the stands just bolt in the same spot if they are Chevy or Buick?
I know what you mean on the shifter. Maybe I should have just went the Magnum route. I picked up a CTS-V T56. I was thinking I could use the shifter you mentioned in the forward position. But after more research, that may be to far forward. What do you think?
I shot an email to Rick's. Last time I looked, the 73-77 A-bodies are ignored by the aftermarket tank makers. Fingers crossed. Otherwise, I was thinking about trying a 94-96 Impala SS tank.
09-17-2012, 04:26 PM
#51
On The Tree
Thread Starter
Join Date: Nov 2011
Location: South east Wisconsin
Posts: 159
Likes: 0
Received 0 Likes
on
0 Posts
09-17-2012, 09:52 PM
#53
On The Tree
Thread Starter
Join Date: Nov 2011
Location: South east Wisconsin
Posts: 159
Likes: 0
Received 0 Likes
on
0 Posts
I always like getting feedback on products that other people may have experience on. From what I was told was that Holleys self tune is spot on leaving very little to improve on other than adjusting for mileage. I will keep you posted with my experience, may be a few weeks yet!
09-17-2012, 11:05 PM
#54
I'm using speedhut gauges with a gps speedo so that won't matter, I was thinking more about the vss that stock pcms need signal from to prevent stalling when letting off the gas and slowing or pushing the clutch in. Just wondering how the holley knows how fast you're going (or if it needs to). You'll unquestionably get to that stuff before I do so I'll just see how it goes, I don't even have a t56 yet.
09-20-2012, 07:42 AM
#55
On The Tree
Thread Starter
Join Date: Nov 2011
Location: South east Wisconsin
Posts: 159
Likes: 0
Received 0 Likes
on
0 Posts
There are Three connections on the trans so there may be something for the vss. I will look into that further This week.
I believe I just put the engine and trans in for the final time(at least until its time for a restoration!).
I was sent the wrong pedal assembly so I am waiting on that. So far I am not too sure to where exactly the clutch master gets mounted. Is there a template available to go off of. I am holding off until I get the right pedals, if anyone has a link on there hydraulic clutch install please send me a link!
09-20-2012, 09:14 PM
#57
On The Tree
Thread Starter
Join Date: Nov 2011
Location: South east Wisconsin
Posts: 159
Likes: 0
Received 0 Likes
on
0 Posts
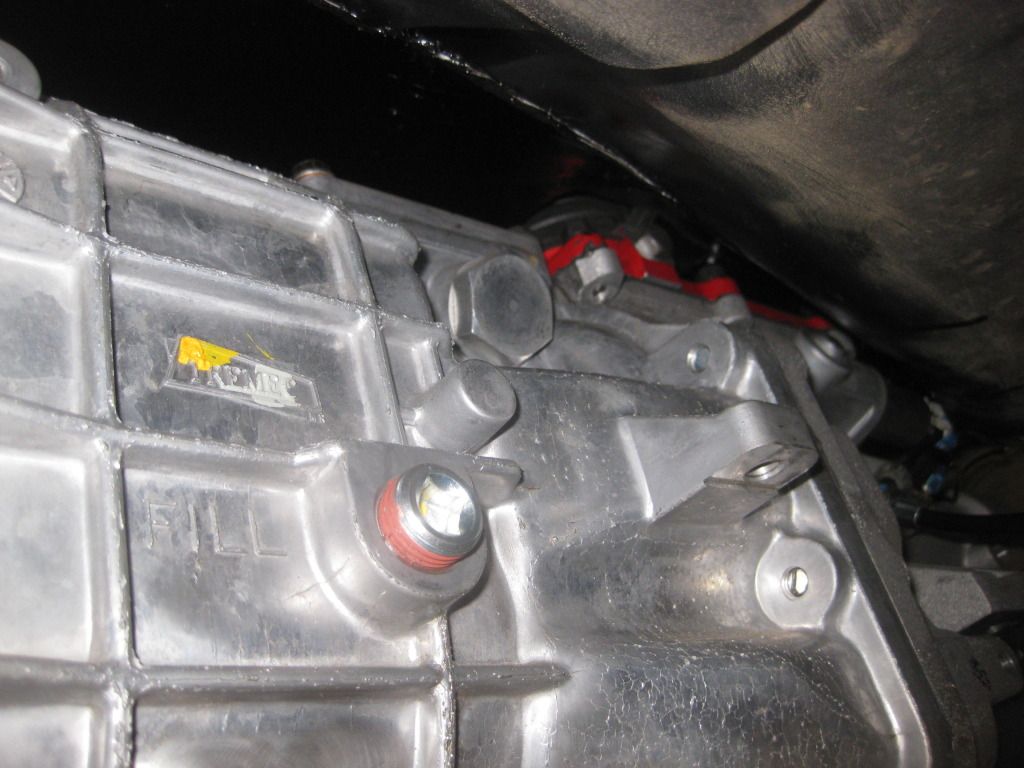
I think a lot of people use this: http://www.ebay.com/itm/LS1-T-56-Con...item4168d530e1
At least that was my plan.
At least that was my plan.
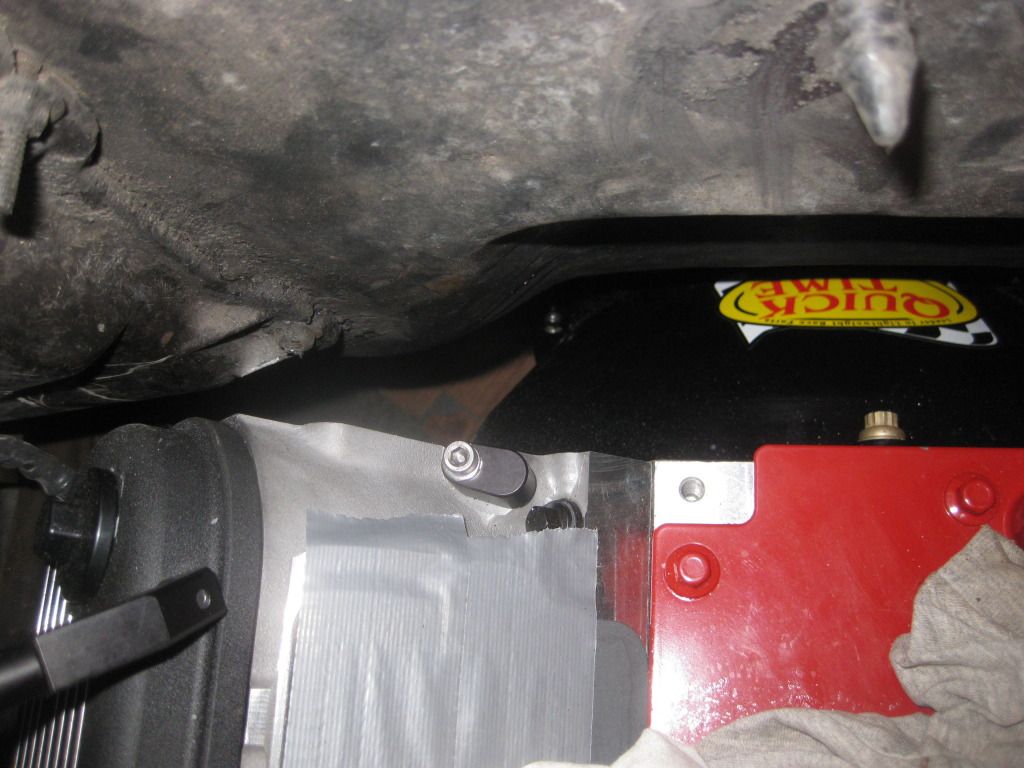
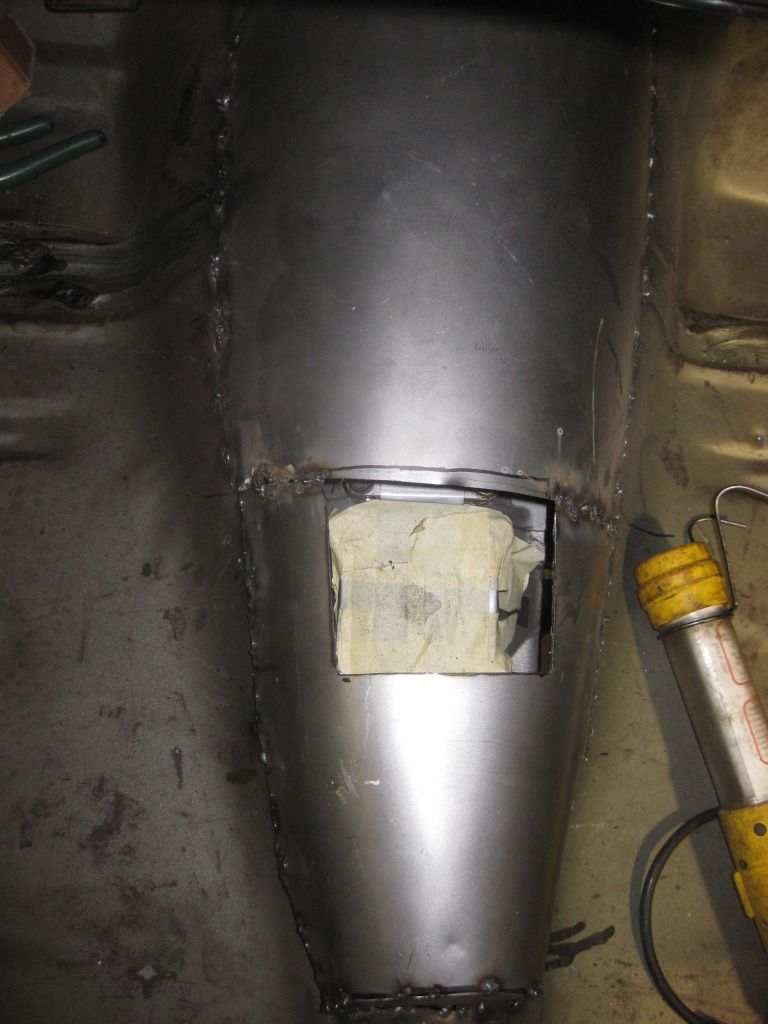
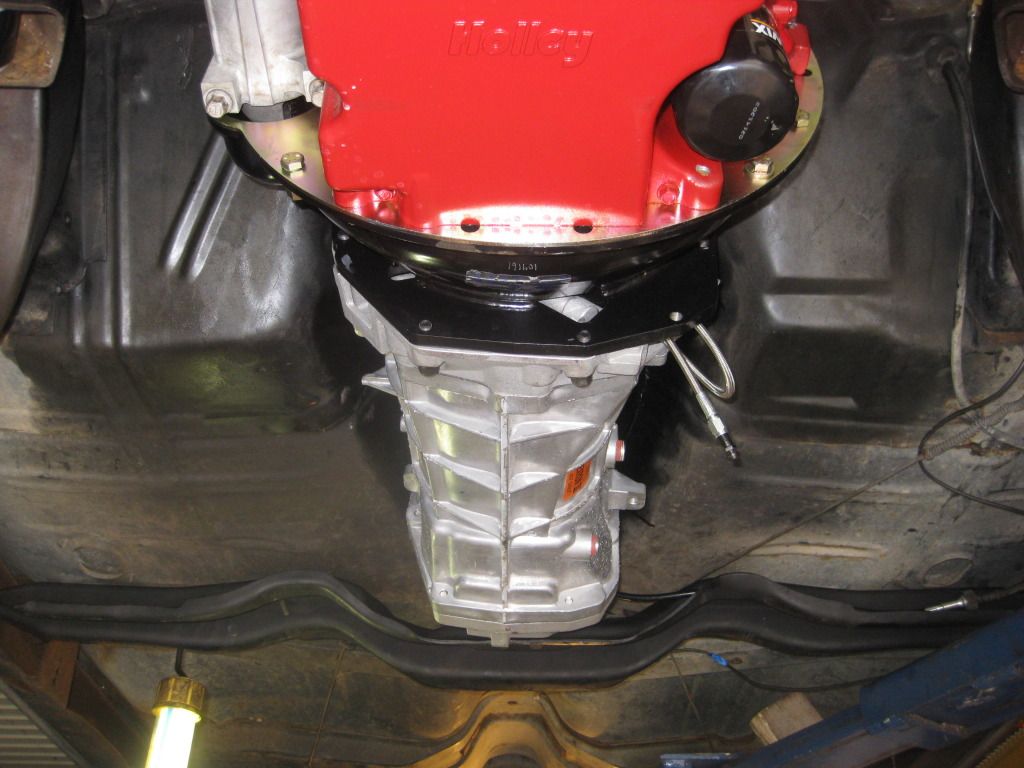
Today I tinkered a bit. I went to put my crossmemeber in and discovered I needed to do more tweeking to the tunnel
 . I also had to slightly bend the crossmemeber down. I used the factory crossmember that actually has rubber slip on pads and brackets that saddle the rubber and mount to the frame. The rubber is nice and allowed me to custom make a solid trans mount. I did not take that rubber into consideration when I made the tunnel so therefore when I put them on the trans smacked the tunnel!!!!! Just another job one step forward two steps back. Now I have to weld up or fill the relief cuts.
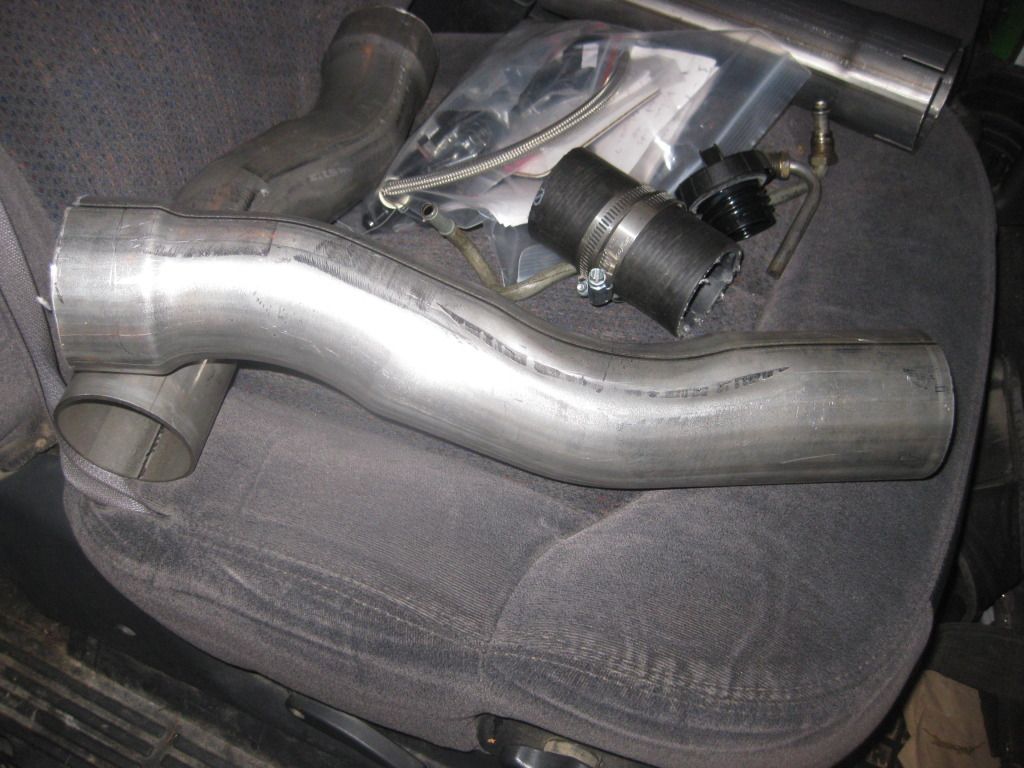
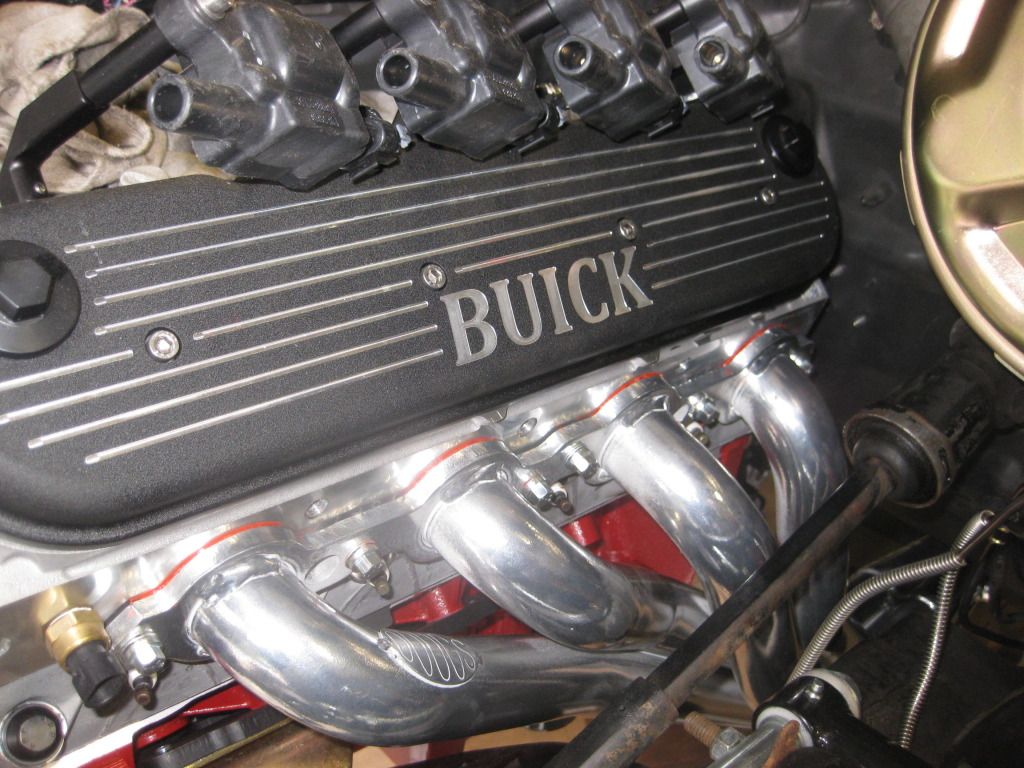
 I also slapped on the headers, things are looking good! So here I go starting trouble again. Instead of using header gaskets we used a thin bead of red high temp silicon. My buddy Mel told me that he has not used anything more than that since the 80s, he even runs silicon on his headers in his 700hp ZO6 Vette.
 09-21-2012, 09:58 PM
#60
On The Tree
Thread Starter
Join Date: Nov 2011
Location: South east Wisconsin
Posts: 159
Likes: 0
Received 0 Likes
on
0 Posts
We will see how the silicon holds up!
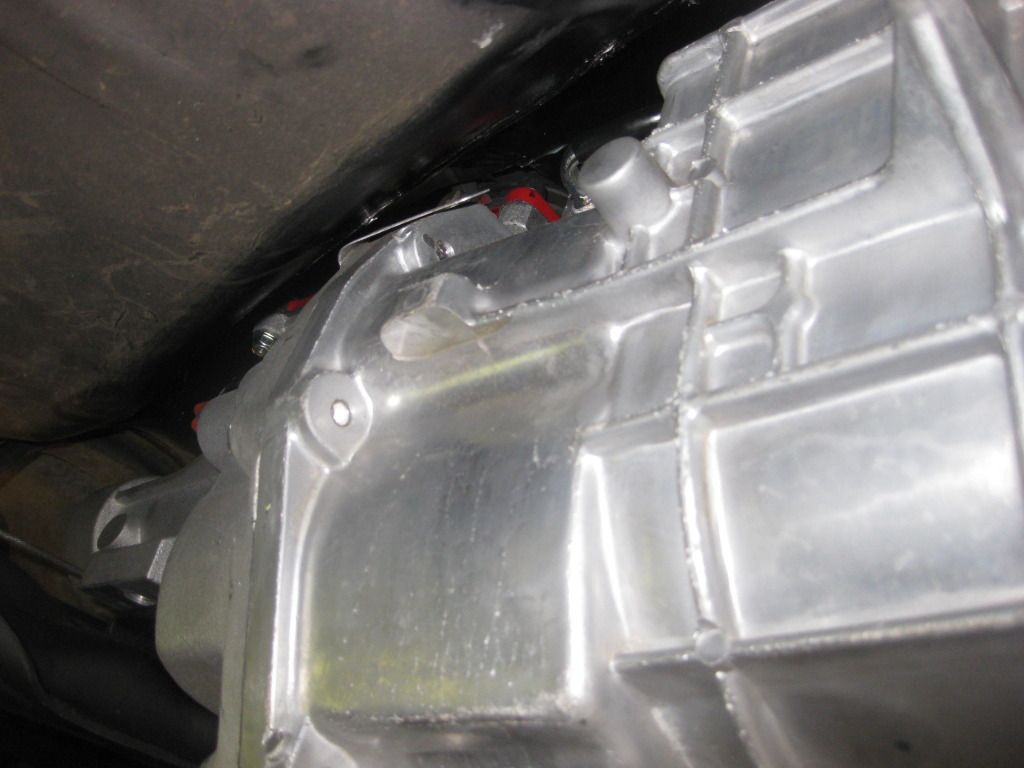
One other thing I forgot to mention, Do Not jack up your trans and try to push up the floor or tunnel! I almost busted the corner off of the shifter mount at the rear of the trans trying it myself.
More updates, it seems like there is always another five minute job that takes half a day. 1 step forward 2 steps back. Aside from waiting on items in the mail I decided to hang my fuel tank and start on the exhaust. No issues with the tank, just need to figure out my wiring and fuel lines. On the other hand my exhaust needs a little fabn. The headers are pretty close to the floor and are pointed right at the cross member. For now I had one of the local shops bend me up some 3 inch pipe(They dont do stainless) to have a 2 inch drop/ off set. Tomorrow I will see how they work but I cant finish the exhaust do to the fact that I am waiting on mufflers.