
Project El Salvador - 72' Chevelle Build Thread
 04-24-2013, 07:53 AM
#1


So I have gotten a few inquires about my Chevelle project going on over at Team Chevelle. I figured I will just post up the info here for those interested. The story will go back to the beginning of Summer 2012. It's quite lengthy, but I can assure you if you're interested in cars, you might like the build!
Read on.....
Anyway, this thread is posted here, but I will try to update the same info on this site as well.
http://www.chevelles.com/forums/showthread.php?t=397557
So I've finally gotten around to formalizing a build thread. I'm about 6 months late to the game with this thread, but it has given me the time necessary to really dig in and figure out what I wanted to do with this car.
I've dubbed it 'Project El Salvador' meaning 'the savior'. I saved another classic from the crusher.
In case you missed some of my original posts, here they are:
1. Dream Car - http://www.chevelles.com/forums/show...3840&highlight
2. Front windshield looksee - http://www.chevelles.com/forums/show...551&highlight=
3. Quarter panel thread - http://www.chevelles.com/forums/show...789&highlight=
Cont...
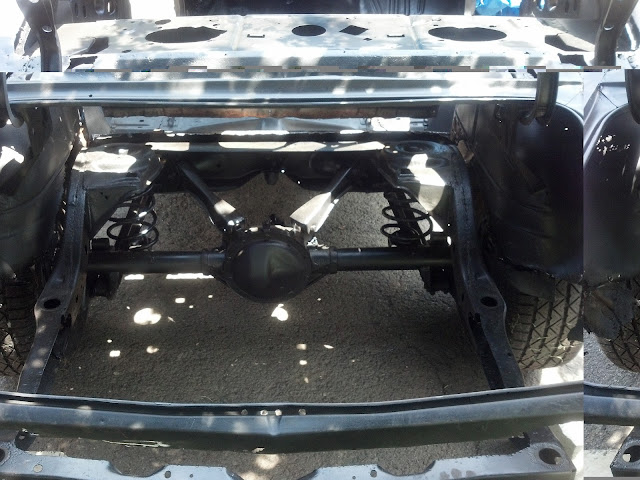
So the car was a rolling chassis when I got it -


As I started to dig into things it got worse and worse -


You can visit the first link above for more pictures.
Cont -
Everyone said to give up and get rid of the car. I probably should have listened, but -
1. I was looking for a challenge
2. I wanted to know exactly what I had when I was done with the car
3. I couldn't afford to buy what I wanted to build over time
Those were probably the 3 main reasons why I kept the car.
I kept wavering back and forth how I wanted to proceed with the car. I thought about doing a rat rod, then it went to a street/strip style car, and now I'm at a frame off. The car still may have some street/strip flavor as I proceed. Either way, this car will be a daily driver once I'm done. I'm not putting all this work into the car to have it sit there. Therefore I'm trying to be mindful about certain things like:
1. Frame coating
2. Paint selection
3. Engine/trans combo
4. Overall budget
So once I settled on my direction I will let some of these pictures do the talking....
Cont -
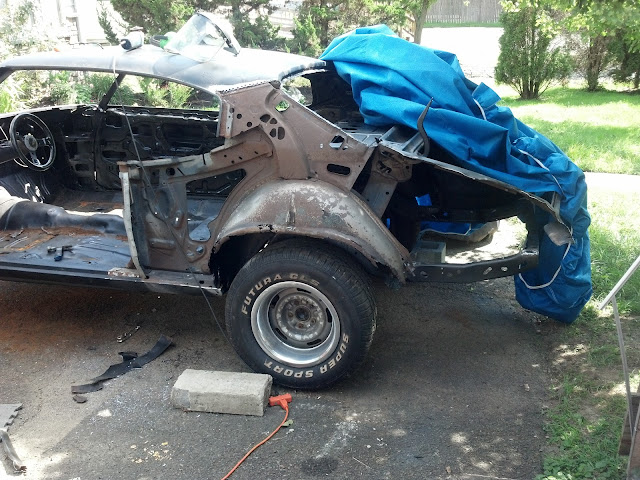
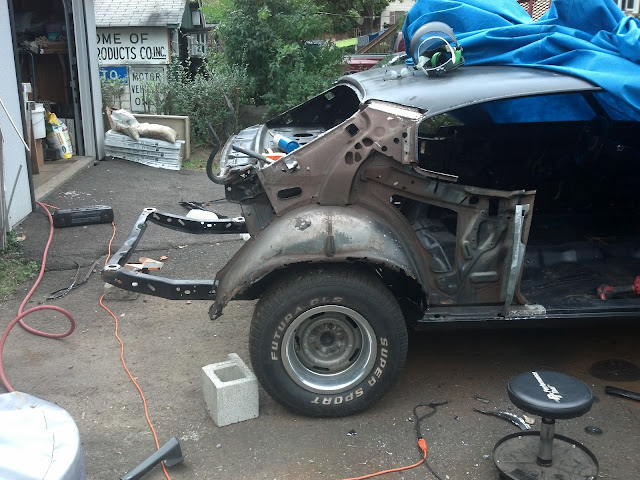
I stripped the entire car, bagged all the nuts/bolts, and got it ready to be blasted. I found this company local to me in Philadelphia. They will remain nameless because they did a horrible job. The background went like this... I called around to find local shops who did blasting work. I found a place relatively local to me who told me they could do both the blasting and the epoxy painting right after it was blasted. I took the rolling chassis and body down on a trailer and backed it up to the door. I had been dealing with the son on the phone and the father initially met me at the door. I could tell he was uneasy about something as soon as he looked at the car. The son came out and the father starts arguing with the son right in front of me. "How the F could you tell him we're going to do this job for that kind of money?" So as they sit there and argue I'm feeling out of place. Now the father turns to me and starts yelling at me and asking him why I brought it there?? I said because they were the experts, no? The father walked off and I was now just dealing with the son. I wrote down some instructions to the guy about how I wanted the car blown off and wiped down with wax and grease remover prior to spraying my epoxy. Etc, etc. Now the father comes back and he hears me tell the son about pulling the body off the frame. The father says HUH??? Frame off the body??? WHAT? To make a long story short he just went off and I'm caught in the middle. I should have left but at this point, I borrowed the trailer, spent the night before loading up, took a day off work to bring it over an hour away, etc. I was trying to avoid leaving. I told the guy to give me the tools and I would pull the body off right now. So I got down on the floor and took out the body bolts which I had already removed a week earlier. 10 mins later I was done. Now I told him to bring his fork lift and run the forks right through the side and lift it up. It was separated and I left. I get a call the next day and I pick it up the following.
Here's the before and after....
Before -


Cont -
And the after -


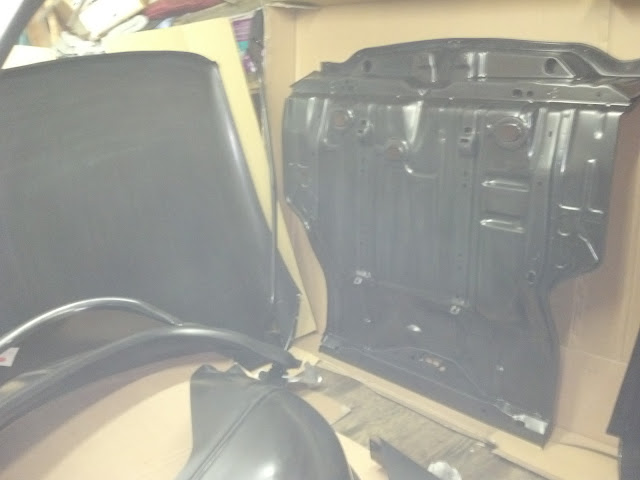
Floor pan very good actually. Couple small rust spots.


Day light through the roof -

Doug
Read on.....
Anyway, this thread is posted here, but I will try to update the same info on this site as well.
http://www.chevelles.com/forums/showthread.php?t=397557
So I've finally gotten around to formalizing a build thread. I'm about 6 months late to the game with this thread, but it has given me the time necessary to really dig in and figure out what I wanted to do with this car.
I've dubbed it 'Project El Salvador' meaning 'the savior'. I saved another classic from the crusher.
In case you missed some of my original posts, here they are:
1. Dream Car - http://www.chevelles.com/forums/show...3840&highlight
2. Front windshield looksee - http://www.chevelles.com/forums/show...551&highlight=
3. Quarter panel thread - http://www.chevelles.com/forums/show...789&highlight=
Cont...
So the car was a rolling chassis when I got it -
As I started to dig into things it got worse and worse -
You can visit the first link above for more pictures.
Cont -
Everyone said to give up and get rid of the car. I probably should have listened, but -
1. I was looking for a challenge
2. I wanted to know exactly what I had when I was done with the car
3. I couldn't afford to buy what I wanted to build over time
Those were probably the 3 main reasons why I kept the car.
I kept wavering back and forth how I wanted to proceed with the car. I thought about doing a rat rod, then it went to a street/strip style car, and now I'm at a frame off. The car still may have some street/strip flavor as I proceed. Either way, this car will be a daily driver once I'm done. I'm not putting all this work into the car to have it sit there. Therefore I'm trying to be mindful about certain things like:
1. Frame coating
2. Paint selection
3. Engine/trans combo
4. Overall budget
So once I settled on my direction I will let some of these pictures do the talking....
Cont -
I stripped the entire car, bagged all the nuts/bolts, and got it ready to be blasted. I found this company local to me in Philadelphia. They will remain nameless because they did a horrible job. The background went like this... I called around to find local shops who did blasting work. I found a place relatively local to me who told me they could do both the blasting and the epoxy painting right after it was blasted. I took the rolling chassis and body down on a trailer and backed it up to the door. I had been dealing with the son on the phone and the father initially met me at the door. I could tell he was uneasy about something as soon as he looked at the car. The son came out and the father starts arguing with the son right in front of me. "How the F could you tell him we're going to do this job for that kind of money?" So as they sit there and argue I'm feeling out of place. Now the father turns to me and starts yelling at me and asking him why I brought it there?? I said because they were the experts, no? The father walked off and I was now just dealing with the son. I wrote down some instructions to the guy about how I wanted the car blown off and wiped down with wax and grease remover prior to spraying my epoxy. Etc, etc. Now the father comes back and he hears me tell the son about pulling the body off the frame. The father says HUH??? Frame off the body??? WHAT? To make a long story short he just went off and I'm caught in the middle. I should have left but at this point, I borrowed the trailer, spent the night before loading up, took a day off work to bring it over an hour away, etc. I was trying to avoid leaving. I told the guy to give me the tools and I would pull the body off right now. So I got down on the floor and took out the body bolts which I had already removed a week earlier. 10 mins later I was done. Now I told him to bring his fork lift and run the forks right through the side and lift it up. It was separated and I left. I get a call the next day and I pick it up the following.
Here's the before and after....
Before -
Cont -
And the after -
Floor pan very good actually. Couple small rust spots.
Day light through the roof -
Doug
 04-24-2013, 07:55 AM
#2
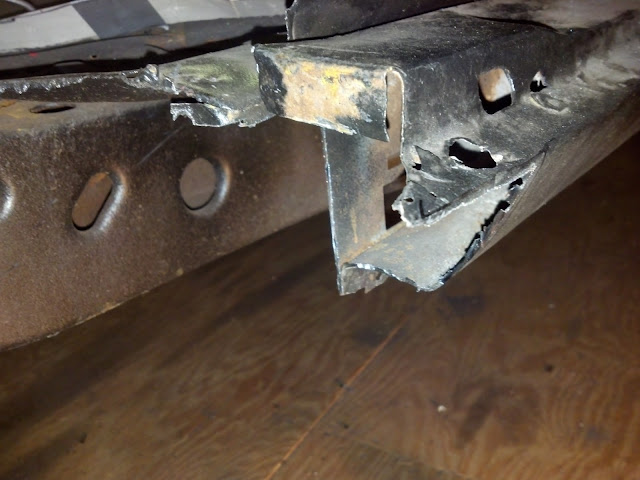
Quarters had patches earlier in its life. Installed horribly. Just spot welds. No continuous welding.


The trunk looks like someone took a shot gun to it -


Cont -
So it was raining when I got the car back after blasting. I took the above pictures, unloaded, and got inside quick without a thorough inspection.
The next day I went on vacation and returned a week later. I finally went through the car and this is what I found -

That was the roof. The blaster literally stretched the roof so bad that it was unuseable even if I wanted to save it. It's had about an inch indentation in some spots.
I made another mistake... I gave him my original LS6 hood.... which he proceeded to do the same thing to. It was stretched horribly. I was furious I emailed the blaster (son). I was cordial but firm in that he ruined my expensive hood. If I wanted to save anything, it was that hood. It may still be salvageable, but it will be some work. Surprisingly, the guy apologized and offered half my money back. I actually couldn't believe he owned up to it. He must have realized the damage before it left the shop. Anyway, the check arrived in the mail 2 days later and it cashed without issue.
Cont -
That was end of July 2012 and beginning of August 2012.
Since then I started to hack the back half of the car apart.
Trunk cut out -
Door gaps set and quarter cut off -


Cont -
I finished that work on about 3 different Saturdays.
I also welded new washers on all the body mounts -
And then I fixed the front two body mounts. I totally reformed half the driver's side.


I was trying to plan ahead and at this point in the project, I needed to get the car indoors. I wanted to work on the car over the winter, and this outdoor business would get old I'm sure. Unfortunately one of my side businesses occupied my entire garage. So I drew up some CAD plans and pulled permits to install a 10'x20' shed at the rear of my property. Between the township permit BS, site prep, shed install, moving all the stuff into the shed, my fall side work, and the weather, I just got the car into the garage mid November. The car sat since the beginning of October.
I placed an order for all my sheet metal parts early November. I ordered the full one piece trunk pan, drop offs, quarters, deck filler, tail panel, roof, and drip rails. My goal is to get as much of this installed over the Xmas break. I have off two weeks from work - HELL YEAH! starting 12/20/12 - 1/7/13.
So I started to mock up the rear of the car just to see what I was in for. This is the first time I've ever installed and done body work like this. I knew I didn't like body work before this job. It reminds me of spackling drywall. I can do it, but I just don't like it. I had heard horror stories of the repo sheet metal, and I can confirm it does fit like crap. With the help of several key people on this board, I got some good hints to start the process. It started going together much much better and I started to get the hang of things.
See the first post of the thread for more details. Here are a few pics -


Doug
The trunk looks like someone took a shot gun to it -
Cont -
So it was raining when I got the car back after blasting. I took the above pictures, unloaded, and got inside quick without a thorough inspection.
The next day I went on vacation and returned a week later. I finally went through the car and this is what I found -
That was the roof. The blaster literally stretched the roof so bad that it was unuseable even if I wanted to save it. It's had about an inch indentation in some spots.
I made another mistake... I gave him my original LS6 hood.... which he proceeded to do the same thing to. It was stretched horribly. I was furious I emailed the blaster (son). I was cordial but firm in that he ruined my expensive hood. If I wanted to save anything, it was that hood. It may still be salvageable, but it will be some work. Surprisingly, the guy apologized and offered half my money back. I actually couldn't believe he owned up to it. He must have realized the damage before it left the shop. Anyway, the check arrived in the mail 2 days later and it cashed without issue.
Cont -
That was end of July 2012 and beginning of August 2012.
Since then I started to hack the back half of the car apart.
Trunk cut out -
Door gaps set and quarter cut off -
Cont -
I finished that work on about 3 different Saturdays.
I also welded new washers on all the body mounts -
And then I fixed the front two body mounts. I totally reformed half the driver's side.
I was trying to plan ahead and at this point in the project, I needed to get the car indoors. I wanted to work on the car over the winter, and this outdoor business would get old I'm sure. Unfortunately one of my side businesses occupied my entire garage. So I drew up some CAD plans and pulled permits to install a 10'x20' shed at the rear of my property. Between the township permit BS, site prep, shed install, moving all the stuff into the shed, my fall side work, and the weather, I just got the car into the garage mid November. The car sat since the beginning of October.
I placed an order for all my sheet metal parts early November. I ordered the full one piece trunk pan, drop offs, quarters, deck filler, tail panel, roof, and drip rails. My goal is to get as much of this installed over the Xmas break. I have off two weeks from work - HELL YEAH! starting 12/20/12 - 1/7/13.
So I started to mock up the rear of the car just to see what I was in for. This is the first time I've ever installed and done body work like this. I knew I didn't like body work before this job. It reminds me of spackling drywall. I can do it, but I just don't like it. I had heard horror stories of the repo sheet metal, and I can confirm it does fit like crap. With the help of several key people on this board, I got some good hints to start the process. It started going together much much better and I started to get the hang of things.
See the first post of the thread for more details. Here are a few pics -
Doug


 04-24-2013, 07:57 AM
#4
12/20/12
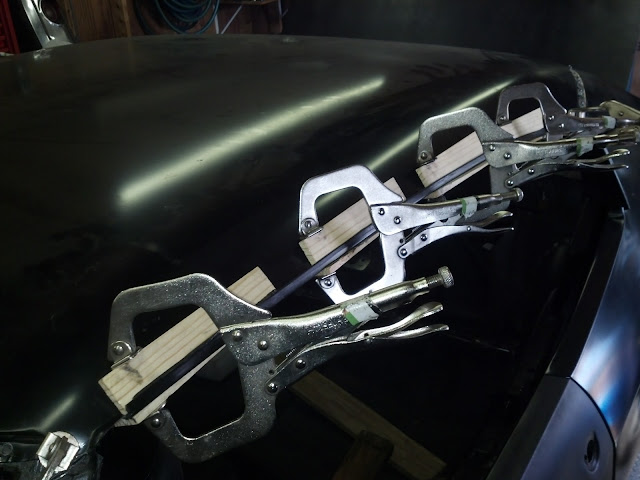
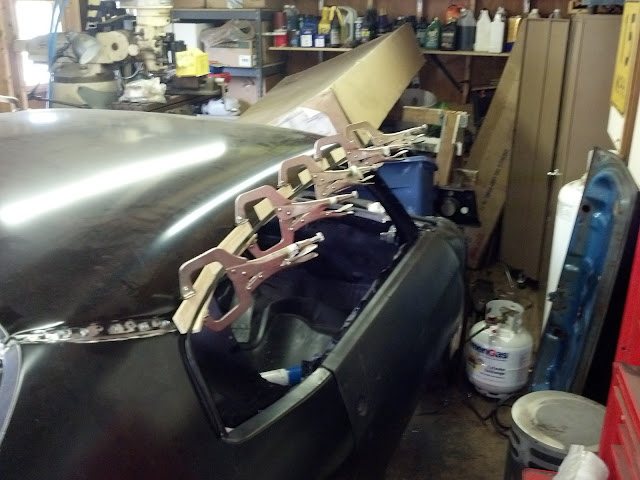
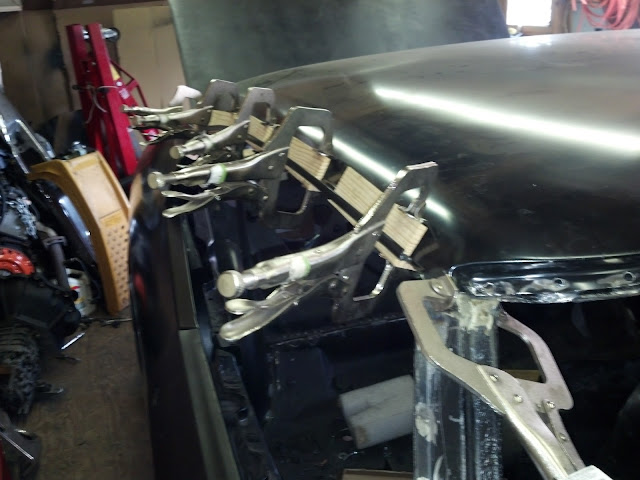
I installed the passenger side drip rail today then tested the new roof for mockup.
I had to trim an 1/16" - 1/8" off the one side which I heard is pretty normal. It basically dropped in with a little persuasion.
I guess I measured fairly accurately because it looks pretty good.


Doug
I installed the passenger side drip rail today then tested the new roof for mockup.
I had to trim an 1/16" - 1/8" off the one side which I heard is pretty normal. It basically dropped in with a little persuasion.
I guess I measured fairly accurately because it looks pretty good.
Doug
04-24-2013, 07:58 AM
#5
Ok project update 12/30/12 -
This week has been productive to say the least!
As I said earlier, I had off until January 7th, so I figured I'd hit it hard. I didn't start working this week until Wednesday with the holidays here. I started working every morning between 8AM and 9AM. From Wednesday to Sunday I counted up between 40-45 hours of work. I'm whooped! Tomorrow I'm relaxing and Tuesday 1/1/13 is my birthday! Woot Woot!
Anyway, the progress....
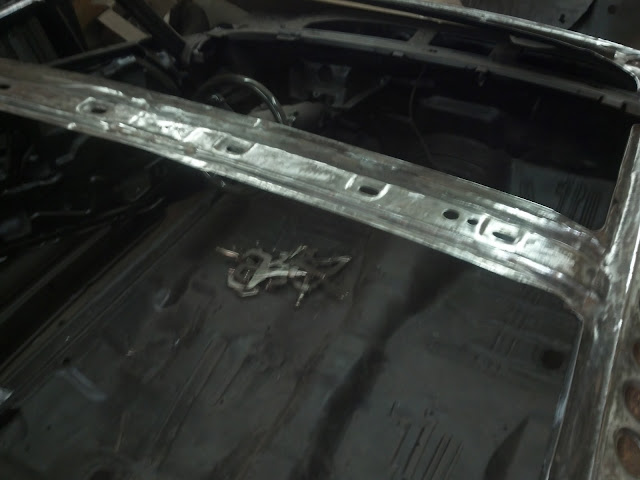
I started this week by removing the roof, the quarters, and the trunk pan. During initial mockup, I was not happy with the rear window flange on the left and right side. It was only about 1/2" - 5/8" and it did not allow me a good surface to clamp to, nor much room to weld. So I cut off the flanges on both sides and welded in a new flange.
Before passenger side (driver side identical) -

During driver side -


After both sides -


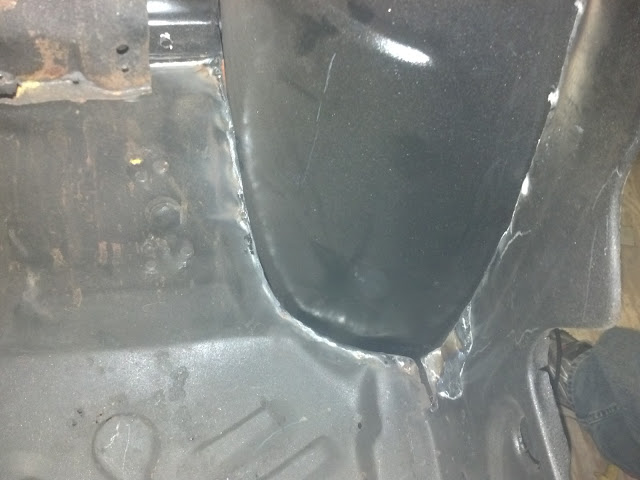
Then I repaired under the deck filler panel a bunch of small holes. I also rebuilt the flange where the quarter wraps down to the filler panel/trunk hinges. That area was completely gone.

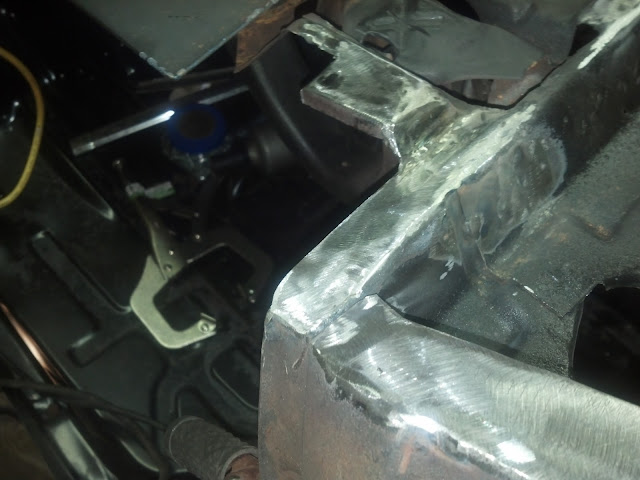

Then I repaired the flange behind the rear seat divider where the trunk floor will get welded to.
Flange cut off (what's left of it anyway) -


New piece cut and tacked on -
Completed -

Now I had to remove all the minor surface rust on the sub-structure under the quarters and roof. That took 8 hours in itself. What a pain!


After grinding/sanding everything. I would say I removed about 98% of the rust to the best of my ability. Since all of this will be covered, this should suffice! -


Then I used a flap disc on all the rear body mounts to remove the light surface rust. I welded those Sept/Oct?

Continued -
This week has been productive to say the least!
As I said earlier, I had off until January 7th, so I figured I'd hit it hard. I didn't start working this week until Wednesday with the holidays here. I started working every morning between 8AM and 9AM. From Wednesday to Sunday I counted up between 40-45 hours of work. I'm whooped! Tomorrow I'm relaxing and Tuesday 1/1/13 is my birthday! Woot Woot!
Anyway, the progress....
I started this week by removing the roof, the quarters, and the trunk pan. During initial mockup, I was not happy with the rear window flange on the left and right side. It was only about 1/2" - 5/8" and it did not allow me a good surface to clamp to, nor much room to weld. So I cut off the flanges on both sides and welded in a new flange.
Before passenger side (driver side identical) -
During driver side -
After both sides -
Then I repaired under the deck filler panel a bunch of small holes. I also rebuilt the flange where the quarter wraps down to the filler panel/trunk hinges. That area was completely gone.
Then I repaired the flange behind the rear seat divider where the trunk floor will get welded to.
Flange cut off (what's left of it anyway) -
New piece cut and tacked on -
Completed -
Now I had to remove all the minor surface rust on the sub-structure under the quarters and roof. That took 8 hours in itself. What a pain!
After grinding/sanding everything. I would say I removed about 98% of the rust to the best of my ability. Since all of this will be covered, this should suffice! -
Then I used a flap disc on all the rear body mounts to remove the light surface rust. I welded those Sept/Oct?
Continued -
04-24-2013, 07:59 AM
#6
Two coats of epoxy on the sub-structure. Since I'm forced to spray in the garage, I had to run the propane heater to get the metal up to temp - plus I don't like working in a cold garage. I worked all day and the grinding on the sub-structure took longer than I anticipated. I didn't want to waste the propane I used to heat the garage all day, so I forced myself to continue working to get two coats of epoxy on the car. Then I had to run the heater for an additonal 5 hours to make sure everything flashed off and cured before shutting down for the night. I quit at 12:15AM on Sunday morning.


Then I was up again at 8AM and began to setup for spraying the underside of trunk, roof, quarters, deck filler, wheel houses, etc. I feel like I'm working in a hole in less than ideal conditions. I moved to this house almost 3 years ago and I still miss my oversized two car garage at the old place. This garage is odd shaped too - 14x28. Still never enough room.
Here's the setup -


Two coats later - 5 more hours with the heater on!

I think I was running out of paint on the roof and didn't realize it because I was painitng in a little bit of fog. It shows some tiger striping, but I went back over that piece. Plenty of paint on there.


That is all for now.
Like I said earlier, I'm whooped! Time for a couple days off.
Enjoy!
Doug
Then I was up again at 8AM and began to setup for spraying the underside of trunk, roof, quarters, deck filler, wheel houses, etc. I feel like I'm working in a hole in less than ideal conditions. I moved to this house almost 3 years ago and I still miss my oversized two car garage at the old place. This garage is odd shaped too - 14x28. Still never enough room.
Here's the setup -
Two coats later - 5 more hours with the heater on!
I think I was running out of paint on the roof and didn't realize it because I was painitng in a little bit of fog. It shows some tiger striping, but I went back over that piece. Plenty of paint on there.
That is all for now.
Like I said earlier, I'm whooped! Time for a couple days off.
Enjoy!
Doug
04-24-2013, 07:59 AM
#7
Update 1/4/13 -
So everything was painted as of last week. I decided to install the trunk pan and get ready to remove the wheel houses.
First I drilled holes for plug welding later on -


Body bushings installed -


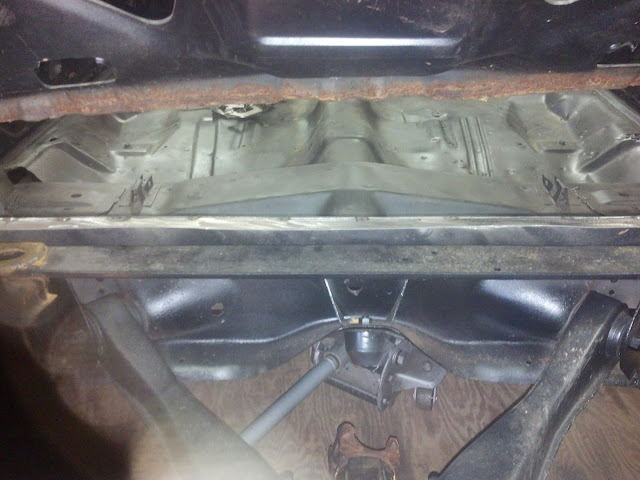
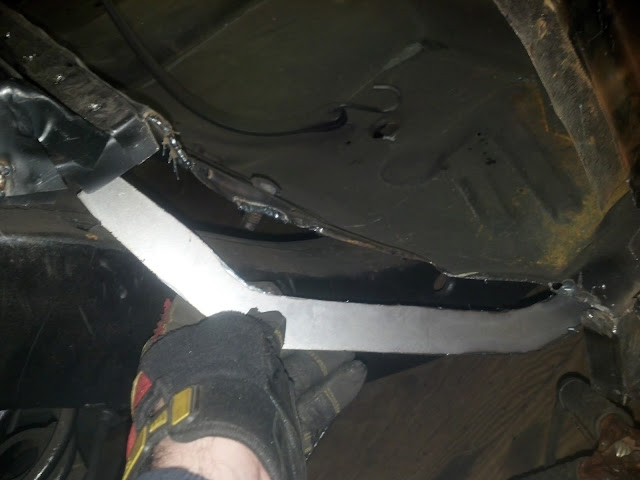
Trunk pan installed and centered between the wheel houses. If you look closely, you will also notice I braced the rear package tray with some X-bracing plus some vertical supports on the trunk hinge ends. This will enable me to keep the alignment in consitent during final welding of the trunk bracing to the wheel houses.

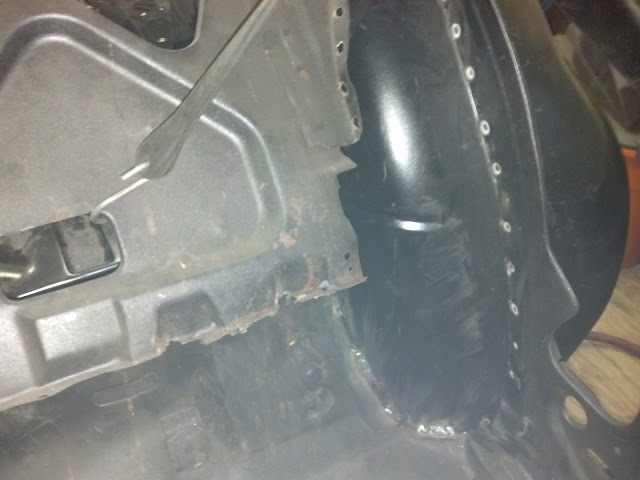
I then tore out the wheel houses on both sides -


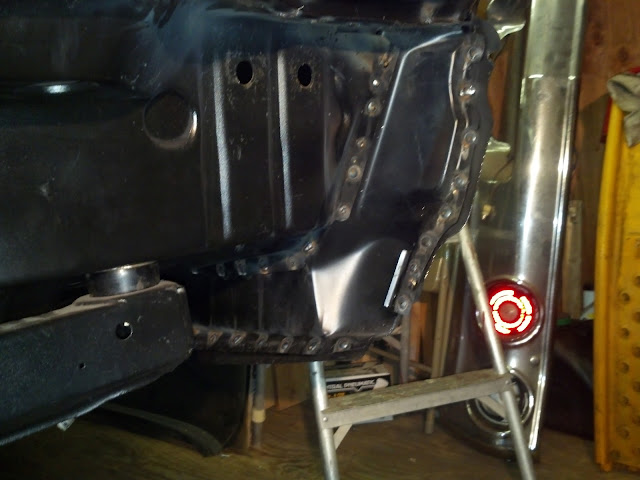
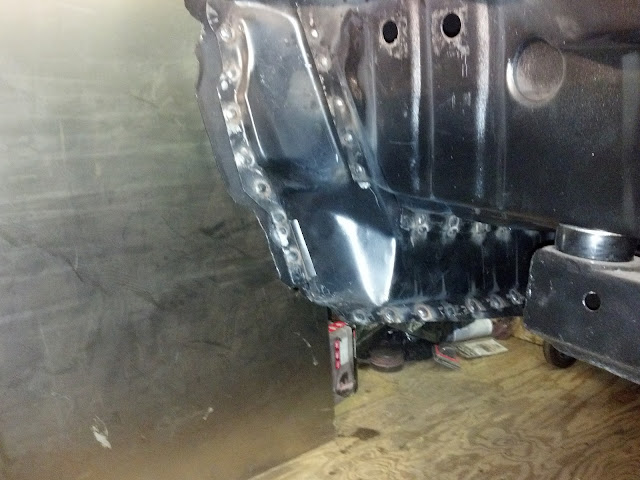
The rocker panels are toast on both sides where the wheel houses meet. Here's that repair.
I didn't take a picture right before I cut out the bad stuff on the passenger side, but here is the driver's side to give you an idea. The passenger was worse.
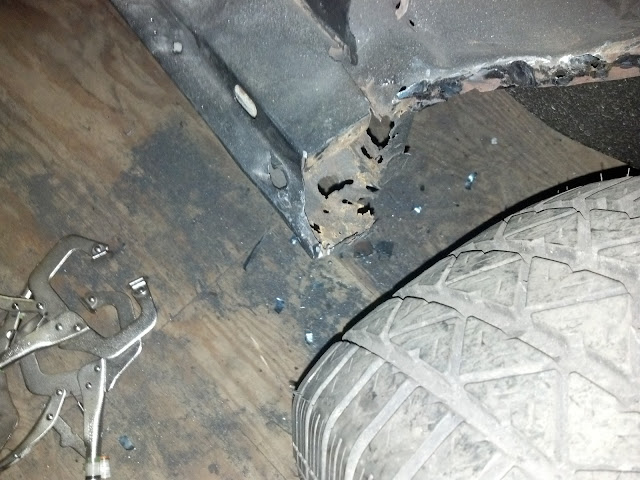
Here's the bad stuff cut out on the front and back.

Back side welded in -


Front side tacked in -


Finished!


Now I have to fix a couple other small items on the passenger side, then I have to do an identical repair on the rocker on the driver's side. Then hopefully I can start to reinstall and weld everything back together.
Enjoy!
Doug
So everything was painted as of last week. I decided to install the trunk pan and get ready to remove the wheel houses.
First I drilled holes for plug welding later on -
Body bushings installed -
Trunk pan installed and centered between the wheel houses. If you look closely, you will also notice I braced the rear package tray with some X-bracing plus some vertical supports on the trunk hinge ends. This will enable me to keep the alignment in consitent during final welding of the trunk bracing to the wheel houses.
I then tore out the wheel houses on both sides -
The rocker panels are toast on both sides where the wheel houses meet. Here's that repair.
I didn't take a picture right before I cut out the bad stuff on the passenger side, but here is the driver's side to give you an idea. The passenger was worse.
Here's the bad stuff cut out on the front and back.
Back side welded in -
Front side tacked in -
Finished!
Now I have to fix a couple other small items on the passenger side, then I have to do an identical repair on the rocker on the driver's side. Then hopefully I can start to reinstall and weld everything back together.
Enjoy!
Doug
Trending Topics


 04-24-2013, 08:01 AM
#9
Update 1/13/13
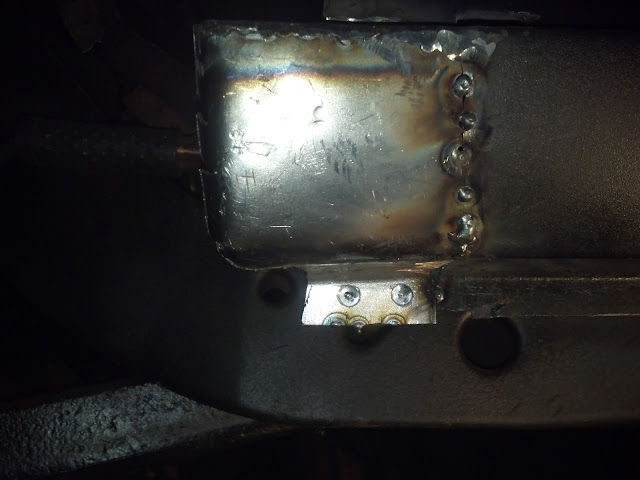
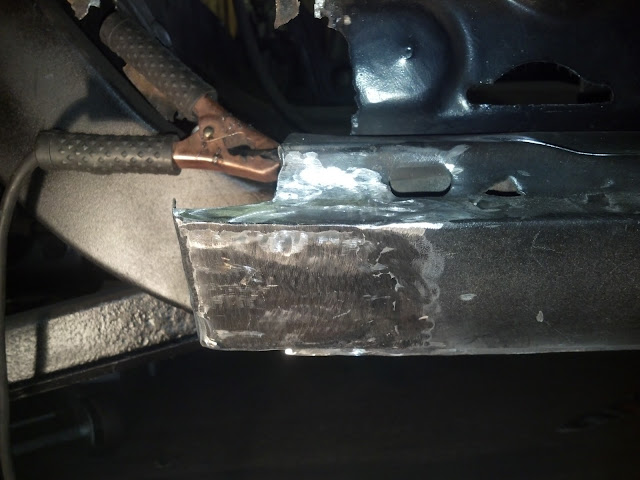
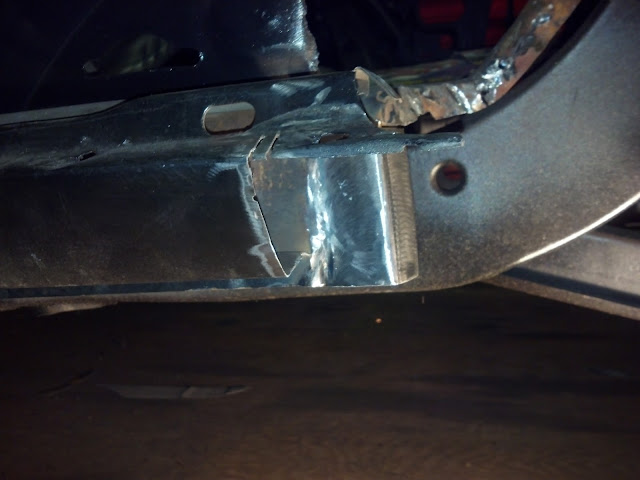
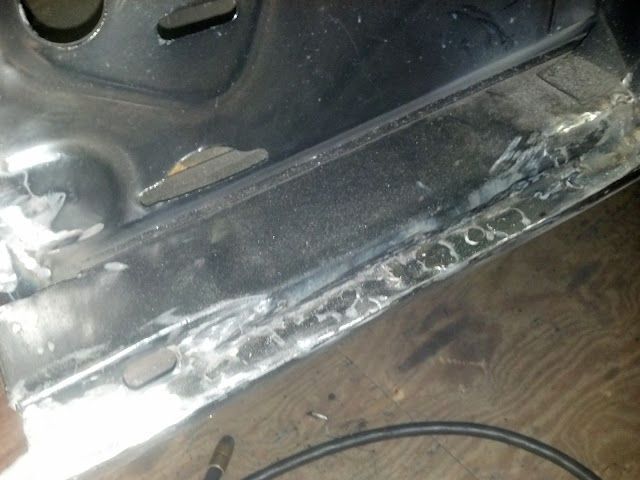
Yesterday I made my way to finishing the rocker holes, floor pan flange where the inner wheel house attaches, and the flange where the wheel houses get welded to behind the quarter.
Nothing spectacular, but finished nonetheless.
Before -
Directly behind the passenger door. I had to make a cut in the support where the door bolt goes in order to bend it out of the way. The hole in the rocker was directly below it and I was not removing the entire piece to fix it.

Here's the small patch for the wheel house flange cut -

And here's the patch cut for the floor pan pan where the wheel house attaches to -
Rocker tacked -

Rocker fixed -

All the small holes in the rocker welded up -
Wheel house flange fixed -


Floor pan flange fixed -


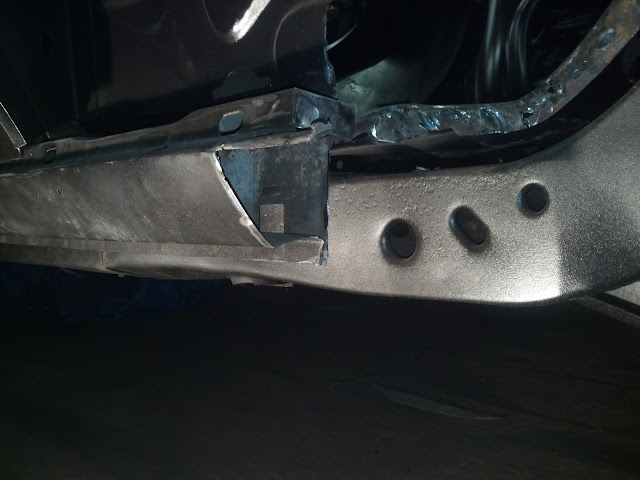
Inner wheel house mocked up. Gap to flange repair looks money.

Driver's side, same deal -


More mock up and tight gappage -
That is all.
Doug
Yesterday I made my way to finishing the rocker holes, floor pan flange where the inner wheel house attaches, and the flange where the wheel houses get welded to behind the quarter.
Nothing spectacular, but finished nonetheless.
Before -
Directly behind the passenger door. I had to make a cut in the support where the door bolt goes in order to bend it out of the way. The hole in the rocker was directly below it and I was not removing the entire piece to fix it.
Here's the small patch for the wheel house flange cut -
And here's the patch cut for the floor pan pan where the wheel house attaches to -
Rocker tacked -
Rocker fixed -
All the small holes in the rocker welded up -
Wheel house flange fixed -
Floor pan flange fixed -
Inner wheel house mocked up. Gap to flange repair looks money.
Driver's side, same deal -
More mock up and tight gappage -
That is all.
Doug
04-24-2013, 08:02 AM
#10
No real update at the moment other than I spent the last couple evenings gettings all the panels on and aligned.
Everything is fitting pretty well. The only thing that has given me a little fit is the left rear quarter and making sure it's level with the deck lid. I have gone as far as using a ratchet strap through the marker hole and strapping it to the roof joist. I've used a ton of pressure, enough to totally unload the suspension, and it's not getting any better. I think I got it as good as it's going to be within 1/16"-1/8" or so. Regardless if the outer wheel house is unclamped, rotating it slightly forward or aft, it does not change the gap and the levelness at the bumper. It also slightly hard to tell because the quarter stamping itself is off at the rear. I have checked photos from other people's restos and it shows body filler in that area to level out that body line above the bumper. I think if that were to be filled, it would make up that 1/16"-1/8" and be darn near 100% level. I also noticed that when installing the bumper, it actually twists and also raises up while tightening the bolts. I may need to keep that in mind and machine some spacers to put between the brackets while bolting it up to keep gaps consistent. I finally starting drilling holes for all the plug welds while the panels are on the car. I got 50% of the drilling done tonight. I should finish the other part tomorrow. I should be welding everything up starting with the wheel houses by Saturday. I will continue to check the door and trunk gaps while I weld up the quarters. Hopefully all my pre-work and my double/triple checking will pay off in the end.
Stay tuned....
Doug
04-24-2013, 08:02 AM
#11
No update at the moment. Last weekend was the perfect weekend since I had off Monday to get a lot of stuff done. The bad news is that I got nothing done because 1. Thursday night I found a steal on an 5.3 motor which I picked up Friday right after work. I visited my best friend who lived near by and got home late the next morning. By the time I picked up a hoist from Craigslist, got some chain, unloaded the engine, and finally got it into the corner, it was dinner time. Game over for Saturday. 2. Sunday I helped my buddy install an electric choke on his 70 something Firebird, then I picked up a posi unit and 3.08 gears for my car for $75. On the way home from that, my truck started shuddering on the road. When I got home and exited the vehicle, I smelled that distinct brake smell. Sure enough a caliper was frozen. 3. Well that turned into my job for Monday. Of course I couldn't get away with just a caliper, it ended up being two new front rotors, two new brake hoses, two calipers, one set of pads. Got to love unexpected expenditures on big trucks.
Hopefully this weekend works more in my favor.
Doug
Hopefully this weekend works more in my favor.
Doug
04-24-2013, 08:02 AM
#12
Update 1/28/13
Well this past weekend was very productive. I locked myself in the garage for a while. It's amazing how long this stuff takes? I sure wish I had an extra set of hands sometimes.
Saturday I pulled bumper along with all the other panels back off the car. I drilled everything while it was installed except for the wheel houses. So back to marking and drilling.... of course not without tweaking things again. I didn't notice earlier that each half of the passenger wheel house wasn't perfectly flush with each other. There was maybe 3/16"-1/4" difference towards the back side where they mated. While the seam sealer would probably hide it, I just wasn't happy with it. Of course once you start messing with the location after everything was clamped, now you have to mock the quarter up again to verify alignment is still on. I finally got it to where I was happy with things and screwed them back together for the 3rd try. No pictures of this portion. You'll have to use your imagination.
I also mixed up a small batch of epoxy primer so I could brush it on the rocker repair from before. I also wanted to brush the inside of the rocker, and of course I had to do this before I installed the wheel houses because at that point it would be inaccessible. Note to self - Do not mix up small batches of epoxy in SOLO cups. Dumb move #1 - I forgot that when epoxy is mixed, it's an exorhermic reaction (gives off heat). It caused the cup to melt with about 8 ounces of paint in the cup. I had the cup stored up on a shelf and it leaked everywhere and onto the floor. That was a $20 lesson.
Painted -


Here's what's keeping me warm when it's 20 degrees F out!

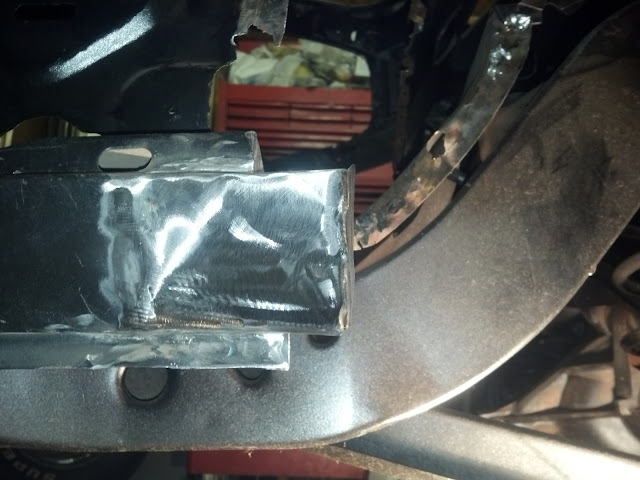
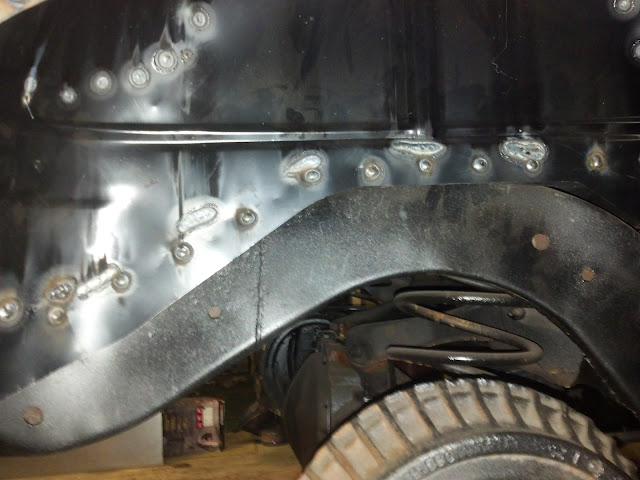
Anyway, the rest of the pictures are pretty self explanatory. I got the wheel houses installed and welded in their final resting place. I was able to weld the trunk support braces back onto the wheel house and finally remove the temporary package tray bracing. I recorded the measurement from the trunk pan to the top of the package tray before I welded in the bracing. They were identical from left to right at 18 1/4". This time I verified the measurement before I removed the temp bracing. The driver's side was about 1/2" higher than the left. Hmmmm?? I recalled a couple weeks ago when I was mocking things up that I broke one of the welds on the temp bracing and I must have not verified the distance before welding it home. This led to the discrepancy now. Of course I had already welded the brace back on the wheel house (Dumb move #2) and I was not drilling out 6 new spot welds. I decided to slice the trunk support and use the BFH to tweak the support which would lower the package tray. Once I hit the dimension I needed, I welded it back up and no one will know... except you guys! I finished stitching the wheel house to the trunk floor. Pictures....


Trunk brace -

Stitched to trunk floor -


Passenger side -


Looking rearward at the passenger wheel house inside the car -

Driver's side again -


At that point I started mocking up the quarters for the last time (hopefully?). I have all the gaps looking pretty damn good. Door gaps - check. Rocker gaps - check. Quarter to drip rail gap - check. I am working, sorry fighting is better, the gap on the trunk lid AGAIN!. The quarter/trunk gap is tight at the very back near the bumper for some reason. I'm sure the quarter isn't flush with the bumper, so that may help some once I mock it up to verify. I didn't even move the deck lid from last time, so it should go back together perfect, right? WRONG AGAIN! I will mess with it this evening. Should only take me another 8 hours! Ha!
Doug
Well this past weekend was very productive. I locked myself in the garage for a while. It's amazing how long this stuff takes? I sure wish I had an extra set of hands sometimes.
Saturday I pulled bumper along with all the other panels back off the car. I drilled everything while it was installed except for the wheel houses. So back to marking and drilling.... of course not without tweaking things again. I didn't notice earlier that each half of the passenger wheel house wasn't perfectly flush with each other. There was maybe 3/16"-1/4" difference towards the back side where they mated. While the seam sealer would probably hide it, I just wasn't happy with it. Of course once you start messing with the location after everything was clamped, now you have to mock the quarter up again to verify alignment is still on. I finally got it to where I was happy with things and screwed them back together for the 3rd try. No pictures of this portion. You'll have to use your imagination.
I also mixed up a small batch of epoxy primer so I could brush it on the rocker repair from before. I also wanted to brush the inside of the rocker, and of course I had to do this before I installed the wheel houses because at that point it would be inaccessible. Note to self - Do not mix up small batches of epoxy in SOLO cups. Dumb move #1 - I forgot that when epoxy is mixed, it's an exorhermic reaction (gives off heat). It caused the cup to melt with about 8 ounces of paint in the cup. I had the cup stored up on a shelf and it leaked everywhere and onto the floor. That was a $20 lesson.
Painted -
Here's what's keeping me warm when it's 20 degrees F out!
Anyway, the rest of the pictures are pretty self explanatory. I got the wheel houses installed and welded in their final resting place. I was able to weld the trunk support braces back onto the wheel house and finally remove the temporary package tray bracing. I recorded the measurement from the trunk pan to the top of the package tray before I welded in the bracing. They were identical from left to right at 18 1/4". This time I verified the measurement before I removed the temp bracing. The driver's side was about 1/2" higher than the left. Hmmmm?? I recalled a couple weeks ago when I was mocking things up that I broke one of the welds on the temp bracing and I must have not verified the distance before welding it home. This led to the discrepancy now. Of course I had already welded the brace back on the wheel house (Dumb move #2) and I was not drilling out 6 new spot welds. I decided to slice the trunk support and use the BFH to tweak the support which would lower the package tray. Once I hit the dimension I needed, I welded it back up and no one will know... except you guys! I finished stitching the wheel house to the trunk floor. Pictures....
Trunk brace -
Stitched to trunk floor -
Passenger side -
Looking rearward at the passenger wheel house inside the car -
Driver's side again -
At that point I started mocking up the quarters for the last time (hopefully?). I have all the gaps looking pretty damn good. Door gaps - check. Rocker gaps - check. Quarter to drip rail gap - check. I am working, sorry fighting is better, the gap on the trunk lid AGAIN!. The quarter/trunk gap is tight at the very back near the bumper for some reason. I'm sure the quarter isn't flush with the bumper, so that may help some once I mock it up to verify. I didn't even move the deck lid from last time, so it should go back together perfect, right? WRONG AGAIN! I will mess with it this evening. Should only take me another 8 hours! Ha!
Doug
04-24-2013, 08:07 AM
#13
Boom!!
Got it aligned!


Everything is now clamped and screwed together on the rear.
I need to leave town for a couple days on business, so I will weld it all up when I return.
Doug
Got it aligned!
Everything is now clamped and screwed together on the rear.
I need to leave town for a couple days on business, so I will weld it all up when I return.
Doug
04-24-2013, 08:09 AM
#14
Update 2/8/13
I ran out of time to post this last weekend. I've been tied up with a lot of projects at work. Anyway.... pretty exciting news right here for me anyway.
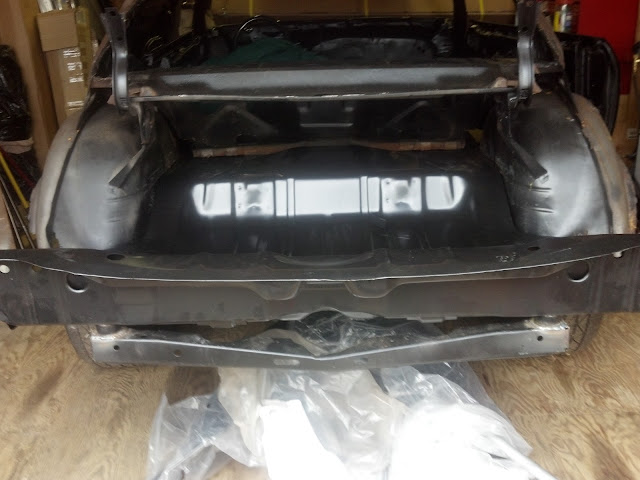
I got the entire rear welded up last weekend!! Woot!
I spent all day Saturday welding up the panels. Sunday I came back and welded up the trunk latch, switched the trunk lids to another one I had in better shape, aligned the lid, welded up the trunk gutters on the left and right side, and then welded up the rear seat divider. My neighbor stopped over who is originally from England. He used to own a body shop in England, so he's been keeping tabs on my project. He still has several old cars plus a '72 Convertible Chevelle in his garage. He told me he was really really impressed with my workmanship and speed that I have been moving at. Needless to say, that made me feel pretty good coming from a professional.
Onto the pics. I'm very excited to be at this point.
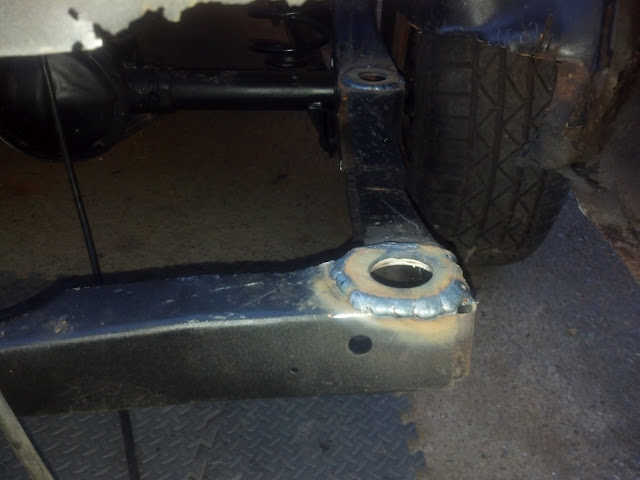
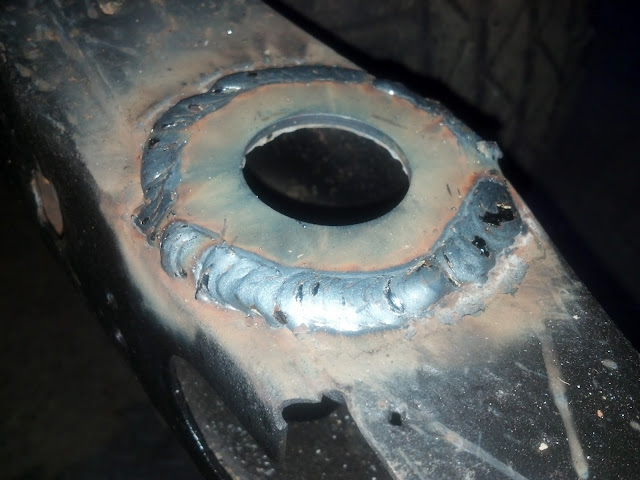
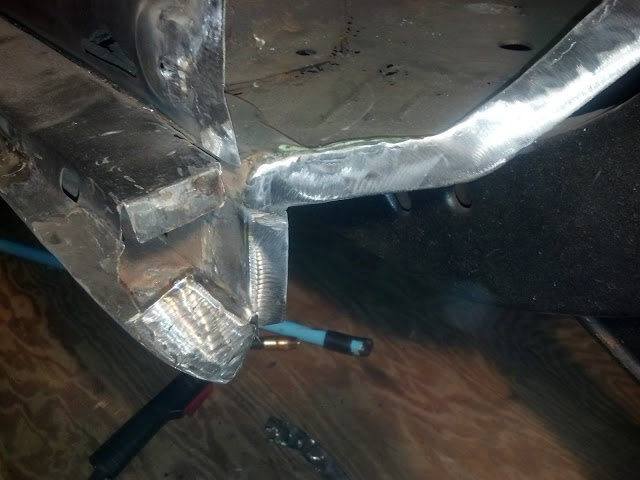
As I started welding things up I had to improvise and make my own body/frame machine on a couple of area. I welded on a washer on the quarter at the quarter/rocker gap so I could tweak things with a ratchet strap.


I also did something similar on the trunk to tweak the quarter to get the gaps correct on the trunk lid. Worked beautifully.


Doneski!


I didn't take any pictures of the driver's side wheel well, but it's pretty much the same as the passenger.
Doug
I ran out of time to post this last weekend. I've been tied up with a lot of projects at work. Anyway.... pretty exciting news right here for me anyway.
I got the entire rear welded up last weekend!! Woot!
I spent all day Saturday welding up the panels. Sunday I came back and welded up the trunk latch, switched the trunk lids to another one I had in better shape, aligned the lid, welded up the trunk gutters on the left and right side, and then welded up the rear seat divider. My neighbor stopped over who is originally from England. He used to own a body shop in England, so he's been keeping tabs on my project. He still has several old cars plus a '72 Convertible Chevelle in his garage. He told me he was really really impressed with my workmanship and speed that I have been moving at. Needless to say, that made me feel pretty good coming from a professional.
Onto the pics. I'm very excited to be at this point.
As I started welding things up I had to improvise and make my own body/frame machine on a couple of area. I welded on a washer on the quarter at the quarter/rocker gap so I could tweak things with a ratchet strap.
I also did something similar on the trunk to tweak the quarter to get the gaps correct on the trunk lid. Worked beautifully.
Doneski!
I didn't take any pictures of the driver's side wheel well, but it's pretty much the same as the passenger.
Doug
04-24-2013, 08:09 AM
#15
Update 2/17/13
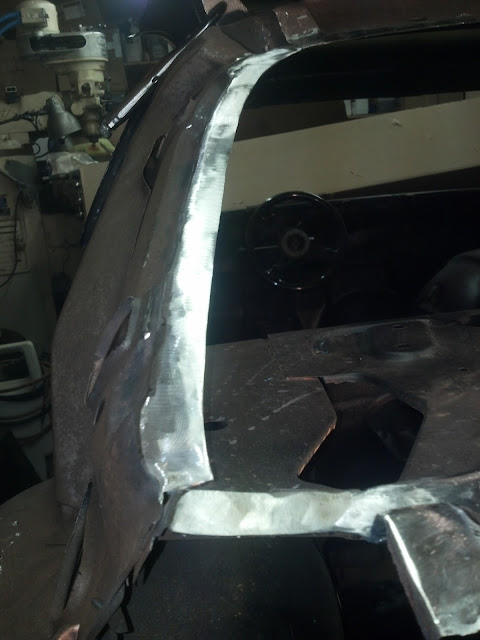
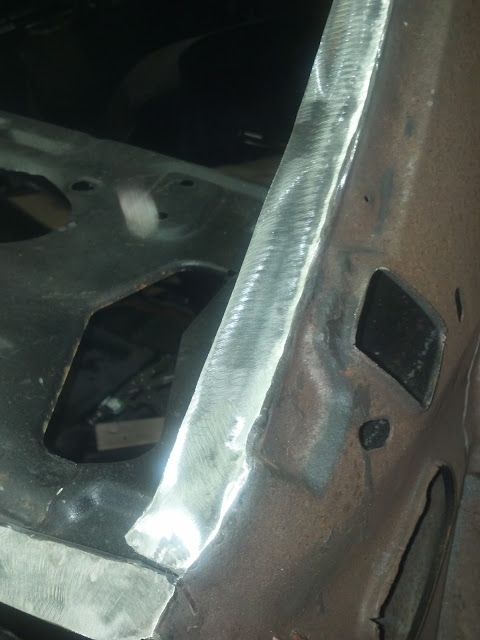
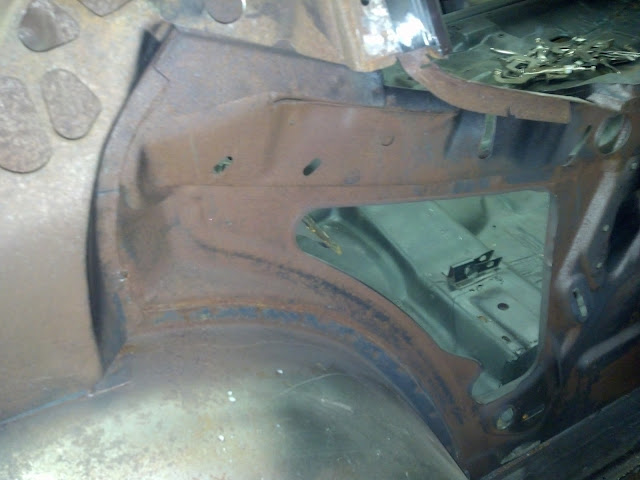
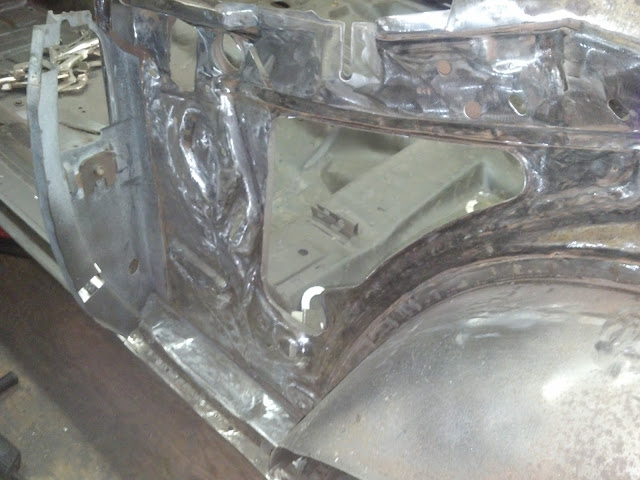
You all probably remember from my previous posts that I cut out the rotted A-pillar on the passenger side last summer. I got a replacement pillar from AZchevs junkyard in Arizona. I cut apart the A-pillar and mocked it up today. After a ton of trimming to get the right fit, I got it welded in. Looks factory. Now I should be able to finish installing the roof. Then onto patching the upper cowl. You can see I cut out a bad piece next to the pillar.
Onto the pictures....
Previously in the summer -


After -


Doug
You all probably remember from my previous posts that I cut out the rotted A-pillar on the passenger side last summer. I got a replacement pillar from AZchevs junkyard in Arizona. I cut apart the A-pillar and mocked it up today. After a ton of trimming to get the right fit, I got it welded in. Looks factory. Now I should be able to finish installing the roof. Then onto patching the upper cowl. You can see I cut out a bad piece next to the pillar.
Onto the pictures....
Previously in the summer -
After -
Doug
04-24-2013, 08:10 AM
#16
Update 3/3/13
I've been on the road a lot for work during the month of February. When I came home on the weekends, my motivation was lacking so I just took it easy. I will get the roof on shortly and begin to grind down all the welds on the rear of the car.
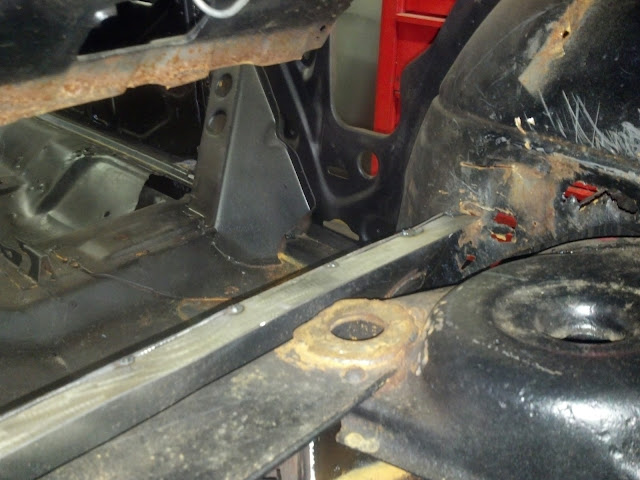
I shifted focus slightly to another part of the puzzle late in January. I decided to figure out the drivetrain situation. I really wanted a manual trans, but the $1500-$2000 price tag for a USED T56 had me seeking other options. A T5 wasn't strong enough. I even looked at the MA5's (pontiac Solstice), but their strength was also in question. I decided I would go auto first and then I would later switch over to a manual at some point. As I continued to research other options, I found a couple of posts on the internet about some folks using the Getrag 265 out of BMW's or Jaguars on some volvo conversions. I even found some posts over in the UK about guys using adapter to bolt ford or chevy engines to the Getrags for cobra kit cars. The 265 is supposed to be good for easily 500 hp. After playing email tag with the Germans (getrag headquarters) and browsing the internet, I found the dimensions and bolt pattern for the Getrag. I overlaid the dimensions in AutoCAD with that of a 621 bell housing from this era GM muscle car. Sweet, now I just needed to get it fabbed up. When I started running the numbers, I figured by the time I sourced a 621 bell housing ($200), had the adapter CNC'ed ($200), I was already in the hole $400. Further research led me to a company who already made the entire bell housing - no adapter needed for such a conversion. Well no sense in reinventing the wheel. After a month of emails between the manufacturer, the freight forwarder, etc - I finally have the elusive piece in my hands.
I hate to even post this up because the amount of time it took me to research, dimension, and engineer things for this solution to work will probably have me kicking myself once the word gets out. Like years ago when the T56 could be had for $500 all day long, now supply and demand set the market price to 3X or 4X that price. Can you tell that urks me?
Anyway the elusive piece....

And now mocked up at home...


I couldn't be happier with the fit and finish. I measured some things and they really did a nice job making things fit. The bell housing will should take all stock BMW pieces like the fork, throw out bearing, slave, etc. I still have to figure out the flywheel issue which I am honing in on right now. Once I figure out which one to get, the flywheel will lead me to the correct pressure plate. I already have the clutch disc spline issue figured out, I will just match it to the correct sized pressure plate.
That's it for today.
Doug
I've been on the road a lot for work during the month of February. When I came home on the weekends, my motivation was lacking so I just took it easy. I will get the roof on shortly and begin to grind down all the welds on the rear of the car.
I shifted focus slightly to another part of the puzzle late in January. I decided to figure out the drivetrain situation. I really wanted a manual trans, but the $1500-$2000 price tag for a USED T56 had me seeking other options. A T5 wasn't strong enough. I even looked at the MA5's (pontiac Solstice), but their strength was also in question. I decided I would go auto first and then I would later switch over to a manual at some point. As I continued to research other options, I found a couple of posts on the internet about some folks using the Getrag 265 out of BMW's or Jaguars on some volvo conversions. I even found some posts over in the UK about guys using adapter to bolt ford or chevy engines to the Getrags for cobra kit cars. The 265 is supposed to be good for easily 500 hp. After playing email tag with the Germans (getrag headquarters) and browsing the internet, I found the dimensions and bolt pattern for the Getrag. I overlaid the dimensions in AutoCAD with that of a 621 bell housing from this era GM muscle car. Sweet, now I just needed to get it fabbed up. When I started running the numbers, I figured by the time I sourced a 621 bell housing ($200), had the adapter CNC'ed ($200), I was already in the hole $400. Further research led me to a company who already made the entire bell housing - no adapter needed for such a conversion. Well no sense in reinventing the wheel. After a month of emails between the manufacturer, the freight forwarder, etc - I finally have the elusive piece in my hands.
I hate to even post this up because the amount of time it took me to research, dimension, and engineer things for this solution to work will probably have me kicking myself once the word gets out. Like years ago when the T56 could be had for $500 all day long, now supply and demand set the market price to 3X or 4X that price. Can you tell that urks me?
Anyway the elusive piece....
And now mocked up at home...
I couldn't be happier with the fit and finish. I measured some things and they really did a nice job making things fit. The bell housing will should take all stock BMW pieces like the fork, throw out bearing, slave, etc. I still have to figure out the flywheel issue which I am honing in on right now. Once I figure out which one to get, the flywheel will lead me to the correct pressure plate. I already have the clutch disc spline issue figured out, I will just match it to the correct sized pressure plate.
That's it for today.
Doug
04-24-2013, 08:10 AM
#17
I posted this elsewhere but.....
I'm doing a conversion here with a BMW transmission and I need to know if my plan of attack should work or not. If others have a better idea, please feel free to share. After I've setup the flywheel, clutch disc, pressure plate, clutch fork, and throw out bearing, I've arrived with an air gap between the throw out bearing and the pressure plate of about 3/8" or 0.375" + maybe 0.125" (hard to measure). Based on my research I need an airgap of around 0.125" to insure proper geometry and release of the clutch through pedal actuation.
These are some old parts for reference... the new ones are already on the engine/trans. Here is the how the release bearing sits in the clutch fork. Take notice of the backside how the bearing sits flush with the back of the fork.


Also note the two little tabs or 'tangs' that ride against the clutch fork surface.

Everyone should be familiar with this but to recap - the quill tube goes through the center of the throw out bearing and that sets up bearing concentricity with the pressure plate. The fork rides on those tangs and they move together on the quill tube when the slave cylinder extends and presses on the one side of the fork.
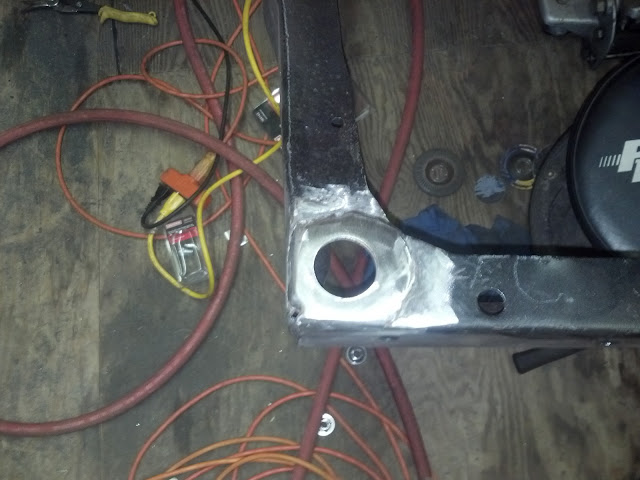
With that in mind, again I measured the airgap distance to be about 0.375" or 3/8". So I need to decrease this so I have around 0.010" between the bearing and the pressure plate. What I had in mind was to weld on two additional tabs to the tangs to space it out that 0.375". I took a couple pictures to show you what I'm planning.

And here is what the backside looks like spaced out that 0.375".

If I subtract the 0.375" from the total surface area of the throw out bearing that sits in the clutch fork, I'm left with around 0.572" that remains inside the clutch fork. This seems adequate to me.

So the final question is, does anyone see anything wrong with my idea? Seems like it should work to me. I thought about making a ring/spacer instead of just welding the tabs, but because the bearing rides on the quill tube, there's no way for the fork or bearing to twist. It will always ride on those two tabs. The ring would be like '**** on a bull' if you know what I mean.
Then this popped into my mind -
I suppose I could weld the spacer onto the fork vs. the tabs on the bearing?
Then this followed shortly thereafter -
Or maybe I cut and extend the push rod on the slave cylinder? That might be the easiest fix?
.
.
.
.
And the fix....
Well I decided to add the spacer to the clutch fork. I did this for a couple reasons.
1. I wanted to retain the stock BMW geometry when the clutch was actuated which meant lengthening the push rod was out.
2. I didn't want to weld on throw out bearing because I was worried about putting too much heat into it. I wasn't sure how it would fair long term reliability wise.
So I welded tabs onto the fork, ground them down slightly, then took them to the mill and faced the top riding surface where the bearing sat. This would insure the top surfaces would be exactly at the same height. I then took a flap disc and put a small curve on the spacer. This is so that when the fork is pushed forward, the bearing actually rotates ever so slightly.
Check it out -


I installed it all and there is maybe a 0.010" air gap. I think BMW's actually have zero gap because the slave cylinder contains a spring which pushes the fork up and ultimately causes the bearing to ride on the pressure plate regardless.
What do you think?
Doug
I'm doing a conversion here with a BMW transmission and I need to know if my plan of attack should work or not. If others have a better idea, please feel free to share. After I've setup the flywheel, clutch disc, pressure plate, clutch fork, and throw out bearing, I've arrived with an air gap between the throw out bearing and the pressure plate of about 3/8" or 0.375" + maybe 0.125" (hard to measure). Based on my research I need an airgap of around 0.125" to insure proper geometry and release of the clutch through pedal actuation.
These are some old parts for reference... the new ones are already on the engine/trans. Here is the how the release bearing sits in the clutch fork. Take notice of the backside how the bearing sits flush with the back of the fork.
Also note the two little tabs or 'tangs' that ride against the clutch fork surface.
Everyone should be familiar with this but to recap - the quill tube goes through the center of the throw out bearing and that sets up bearing concentricity with the pressure plate. The fork rides on those tangs and they move together on the quill tube when the slave cylinder extends and presses on the one side of the fork.
With that in mind, again I measured the airgap distance to be about 0.375" or 3/8". So I need to decrease this so I have around 0.010" between the bearing and the pressure plate. What I had in mind was to weld on two additional tabs to the tangs to space it out that 0.375". I took a couple pictures to show you what I'm planning.
And here is what the backside looks like spaced out that 0.375".
If I subtract the 0.375" from the total surface area of the throw out bearing that sits in the clutch fork, I'm left with around 0.572" that remains inside the clutch fork. This seems adequate to me.
So the final question is, does anyone see anything wrong with my idea? Seems like it should work to me. I thought about making a ring/spacer instead of just welding the tabs, but because the bearing rides on the quill tube, there's no way for the fork or bearing to twist. It will always ride on those two tabs. The ring would be like '**** on a bull' if you know what I mean.
Then this popped into my mind -
I suppose I could weld the spacer onto the fork vs. the tabs on the bearing?
Then this followed shortly thereafter -
Or maybe I cut and extend the push rod on the slave cylinder? That might be the easiest fix?
.
.
.
.
And the fix....
Well I decided to add the spacer to the clutch fork. I did this for a couple reasons.
1. I wanted to retain the stock BMW geometry when the clutch was actuated which meant lengthening the push rod was out.
2. I didn't want to weld on throw out bearing because I was worried about putting too much heat into it. I wasn't sure how it would fair long term reliability wise.
So I welded tabs onto the fork, ground them down slightly, then took them to the mill and faced the top riding surface where the bearing sat. This would insure the top surfaces would be exactly at the same height. I then took a flap disc and put a small curve on the spacer. This is so that when the fork is pushed forward, the bearing actually rotates ever so slightly.
Check it out -
I installed it all and there is maybe a 0.010" air gap. I think BMW's actually have zero gap because the slave cylinder contains a spring which pushes the fork up and ultimately causes the bearing to ride on the pressure plate regardless.
What do you think?
Doug
04-24-2013, 08:11 AM
#18
Update 3/17/13
I got around to installing the roof this weekend. I planned on installing it during the week, but more unplanned stuff happened.
Nevertheless, I test fitted the roof a couple of times and it was going on and off without a hitch. I prepped the surfaces with a flap disc and also made sure to clean the drip rail with wax and grease remover. In case someone missed it, my plan was to use Evercoat Panel Adhesive on the drip rails, then weld the front and rear flanges.
Here's the initial prep -


I asked my dad to come over and give me a hand so that we could manuever the roof without getting epoxy on everything. It definitely made things go a lot smoother than doing this solo.
Pro-tip - I purchased Evercoat medium set epoxy adhesive #813. The tube appears to have more material than is actually in it. I'm guessing that's because the tube has separate chambers for part A and part B and one end of the chamber slides into the other when you actuate the gun. Therefore, the large tube really only contains half of what you'd normally expect.
I guess you can figure out where I'm going? The tech sheet states to put a small thin amount on each surface, then follow up with a 3/8"-1/2" bead, then clamp. I missed the second step about an additional 3/8"-1/2" bead. Initially we clamped the panels together and I didn't see any adhesive squeeze out. The profile on the roof shape and the profile on the drip rail are slightly different, so there needs to be a good amount of adhesive to fill that gap. After we initially clamped it, I wasn't happy with it, so we took it all back apart an hour into the epoxy setting up. This required us to clean down all the surfaces again. No biggie.
The second time around we got it right. Spread a thin layer on each surface, 3/8" bead, set panel into place. Well we did the passenger side first, set the roof into the drip rail, moved to the driver's side and then began putting down the thin layer on each suface. We got that part done and we were starting to put down the 3/8" when I ran out only one foot down the gutter. WTF? So at this point we had to make a decision. I had some industrial epoxy sitting around and we mixed up two full tubes. We spread it into the gutter and clamped it like the other side. My concern was with the different drying times, but I checked it 24 hours later and everything seems ok.
So live and learn. I will go back and weld the front and rear after I give the roof an additional 24 hours to dry.
Here is everything clamped up -

Doug
I got around to installing the roof this weekend. I planned on installing it during the week, but more unplanned stuff happened.
Nevertheless, I test fitted the roof a couple of times and it was going on and off without a hitch. I prepped the surfaces with a flap disc and also made sure to clean the drip rail with wax and grease remover. In case someone missed it, my plan was to use Evercoat Panel Adhesive on the drip rails, then weld the front and rear flanges.
Here's the initial prep -
I asked my dad to come over and give me a hand so that we could manuever the roof without getting epoxy on everything. It definitely made things go a lot smoother than doing this solo.
Pro-tip - I purchased Evercoat medium set epoxy adhesive #813. The tube appears to have more material than is actually in it. I'm guessing that's because the tube has separate chambers for part A and part B and one end of the chamber slides into the other when you actuate the gun. Therefore, the large tube really only contains half of what you'd normally expect.
I guess you can figure out where I'm going? The tech sheet states to put a small thin amount on each surface, then follow up with a 3/8"-1/2" bead, then clamp. I missed the second step about an additional 3/8"-1/2" bead. Initially we clamped the panels together and I didn't see any adhesive squeeze out. The profile on the roof shape and the profile on the drip rail are slightly different, so there needs to be a good amount of adhesive to fill that gap. After we initially clamped it, I wasn't happy with it, so we took it all back apart an hour into the epoxy setting up. This required us to clean down all the surfaces again. No biggie.
The second time around we got it right. Spread a thin layer on each surface, 3/8" bead, set panel into place. Well we did the passenger side first, set the roof into the drip rail, moved to the driver's side and then began putting down the thin layer on each suface. We got that part done and we were starting to put down the 3/8" when I ran out only one foot down the gutter. WTF? So at this point we had to make a decision. I had some industrial epoxy sitting around and we mixed up two full tubes. We spread it into the gutter and clamped it like the other side. My concern was with the different drying times, but I checked it 24 hours later and everything seems ok.
So live and learn. I will go back and weld the front and rear after I give the roof an additional 24 hours to dry.
Here is everything clamped up -
Doug
04-24-2013, 08:12 AM
#19
Update 3/19/13
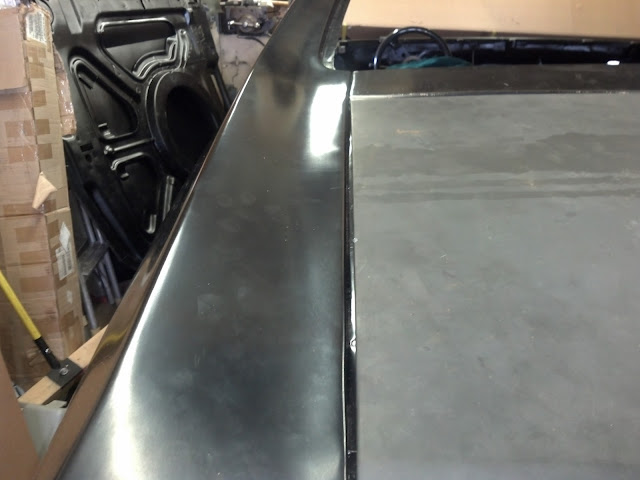
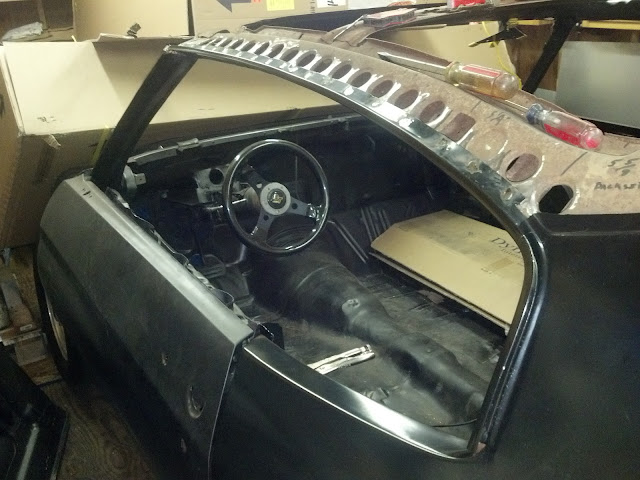
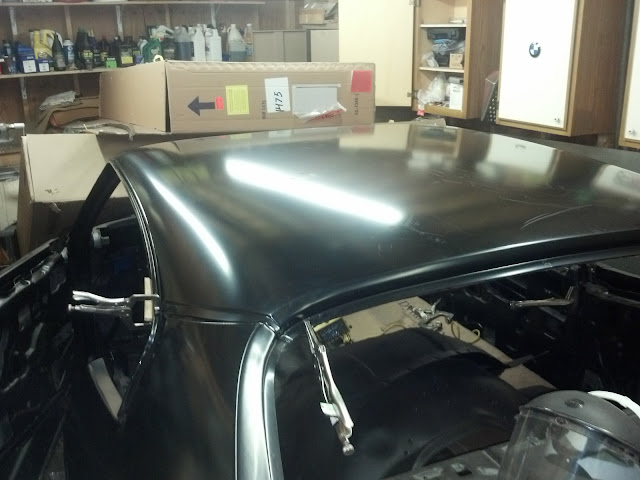
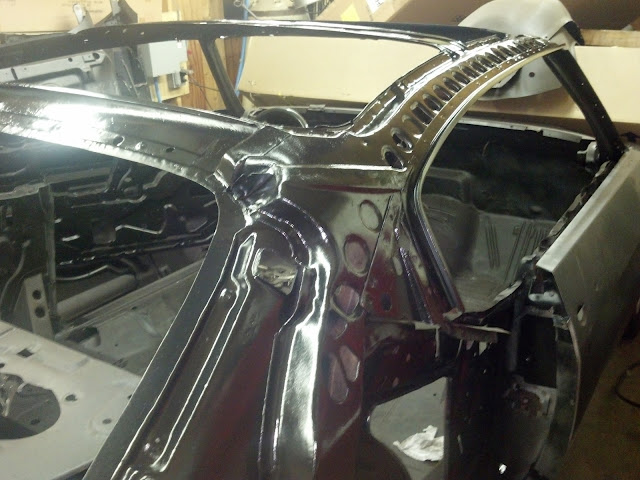
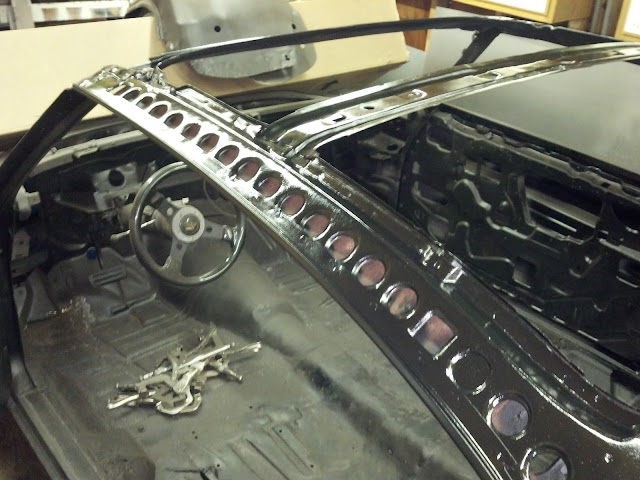
Roof is done! Epoxy is sticking like cement.


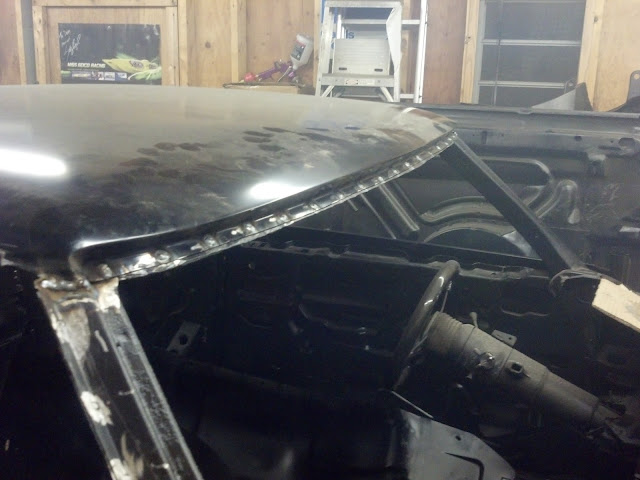
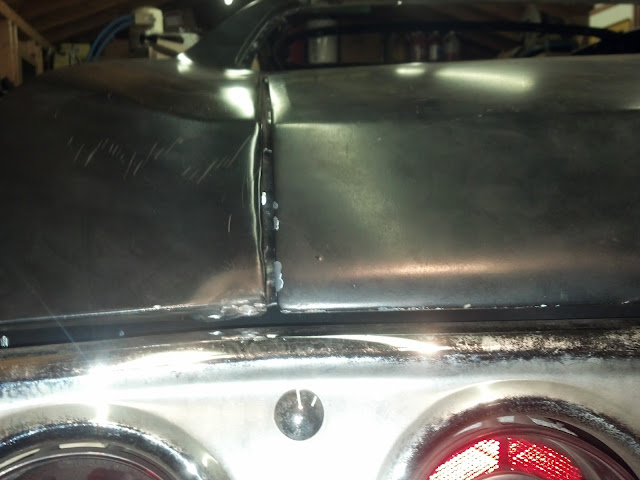
The best part about the whole thing is that I test fitted the rear window trim one last time.... Absolutely a perfect fit. Zero gap. Not bad for a rookie if I do say so myself.


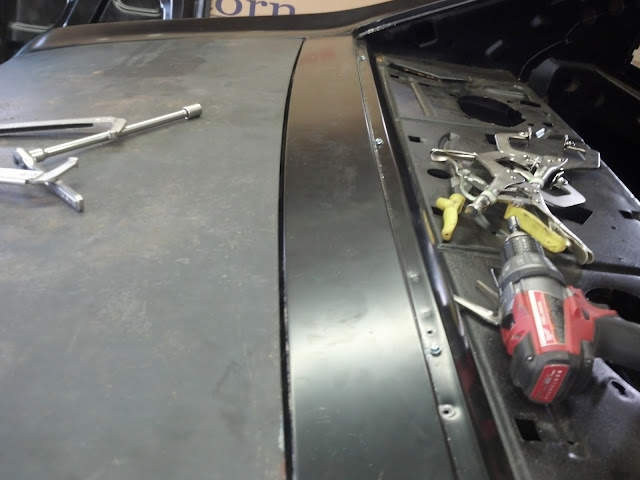
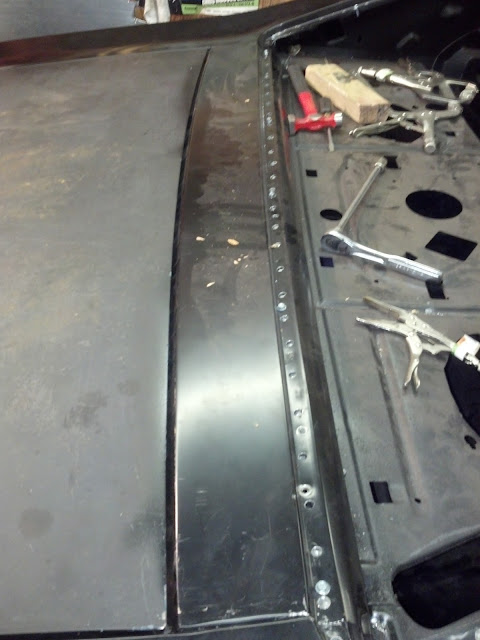
At this point, I have to be about 75% done the metal replacement. I still have the upper cowl by the windshield wipers to complete, the lower cowl shoulders need replacement, and the floor needs a few patches. I also need doors, fenders, and the hood, but because those pieces are basically bolt on, I'm not really too worried about them.
That's all for today.
Doug
Roof is done! Epoxy is sticking like cement.
The best part about the whole thing is that I test fitted the rear window trim one last time.... Absolutely a perfect fit. Zero gap. Not bad for a rookie if I do say so myself.
At this point, I have to be about 75% done the metal replacement. I still have the upper cowl by the windshield wipers to complete, the lower cowl shoulders need replacement, and the floor needs a few patches. I also need doors, fenders, and the hood, but because those pieces are basically bolt on, I'm not really too worried about them.
That's all for today.
Doug
04-24-2013, 08:13 AM
#20
Update 3/31/13
No huge update lately. Progress has slowed as I try to get my side businesses up and going for the spring time.
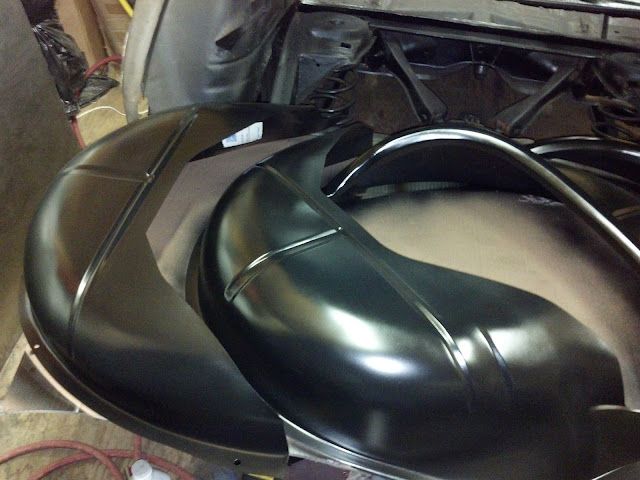
I did manage to purchase a brand new Goodmark hood (cowl hood/non-flapper style) from a local guy who had it in the box. $150! Not too shappy. Even though I had an original LS6 hood, I decided not to use it.
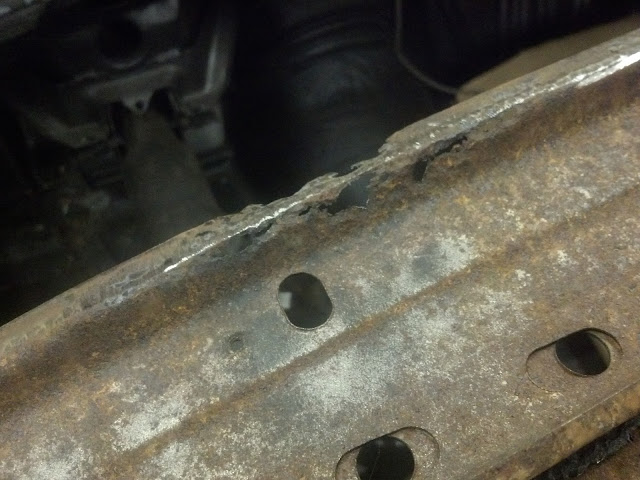
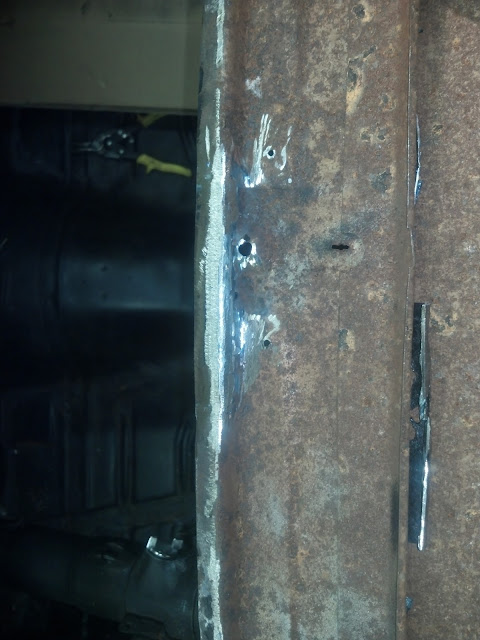
With that said, I fixed about half of the windshield cowl area. I cut out and made a patch that was really rusted out on the passenger side. I also welded up some holes that had rusted through. It can be tough at times to weld up those small holes as it tends to blow through pretty easily. You either be persistent and keep welding, or you just cut it out and go that route. For something that small, I tend to just keep welding.

A little short strand filler and that will be as good as new.
Another hour and I should have the other side done. Then it's onto the floors to repair a couple of sections that were done crappy years ago.
Doug
No huge update lately. Progress has slowed as I try to get my side businesses up and going for the spring time.
I did manage to purchase a brand new Goodmark hood (cowl hood/non-flapper style) from a local guy who had it in the box. $150! Not too shappy. Even though I had an original LS6 hood, I decided not to use it.
With that said, I fixed about half of the windshield cowl area. I cut out and made a patch that was really rusted out on the passenger side. I also welded up some holes that had rusted through. It can be tough at times to weld up those small holes as it tends to blow through pretty easily. You either be persistent and keep welding, or you just cut it out and go that route. For something that small, I tend to just keep welding.
A little short strand filler and that will be as good as new.
Another hour and I should have the other side done. Then it's onto the floors to repair a couple of sections that were done crappy years ago.
Doug