
Another Foxbody
 03-26-2015, 01:17 AM
#1
Staging Lane
Thread Starter

Join Date: Mar 2015
Posts: 55
Likes: 0
Received 0 Likes
on
0 Posts
To sum up the last couple years of my car, ill put a link to my original build thread over on moddedmustangs. MY CAR
Turns out, I recently caught the LS fever. so...
working on sourcing a t56 to go behind this 40k mile stock LS1 out of a trans am. budget is tight though.
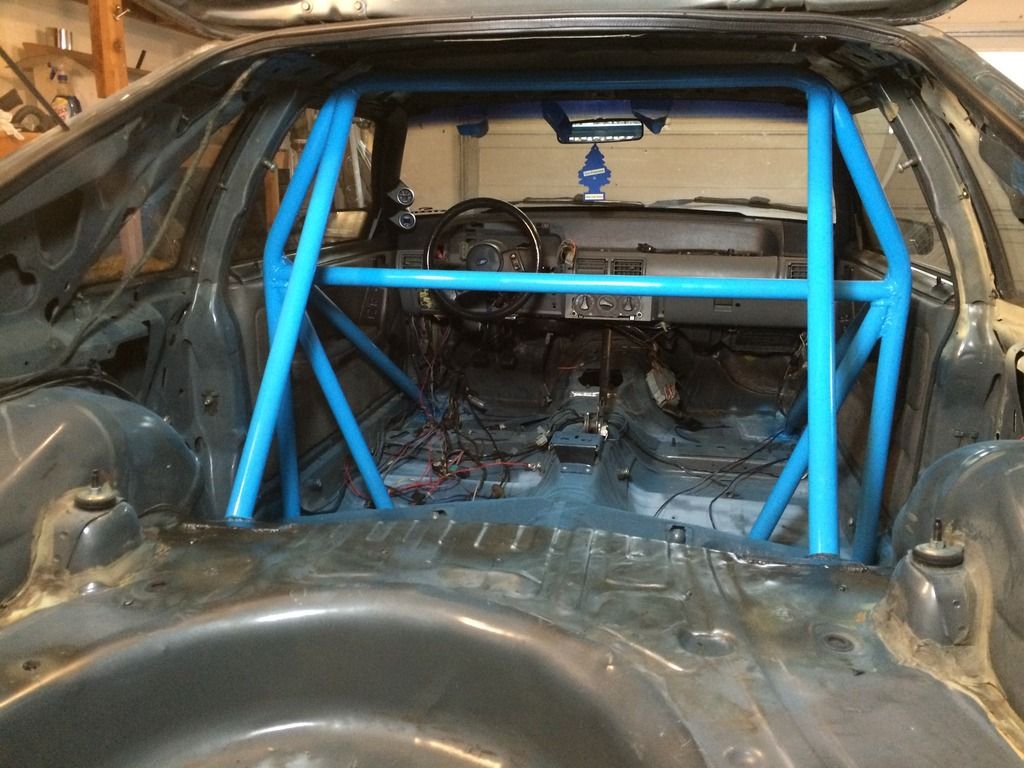
also been working on an 8 point cage.

More to come!
Turns out, I recently caught the LS fever. so...

working on sourcing a t56 to go behind this 40k mile stock LS1 out of a trans am. budget is tight though.
also been working on an 8 point cage.

More to come!
 03-26-2015, 07:59 AM
#2
On The Tree

Join Date: Sep 2010
Location: Chattanooga
Posts: 110
Likes: 0
Received 0 Likes
on
0 Posts

To sum up the last couple years of my car, ill put a link to my original build thread over on moddedmustangs. MY CAR
Turns out, I recently caught the LS fever. so...
working on sourcing a t56 to go behind this 40k mile stock LS1 out of a trans am. budget is tight though.
also been working on an 8 point cage.
More to come!
Turns out, I recently caught the LS fever. so...
working on sourcing a t56 to go behind this 40k mile stock LS1 out of a trans am. budget is tight though.
also been working on an 8 point cage.
More to come!
I have a complete Tremec 3550 5 speed setup im looking to part with. Has a Quicktime RM-6037 Swap Bell housing, 94-99 clutch fork, spec stage 3+ clutch with billet flywheel, new adj cable, hurst shifter. If your interested hit me up. all parts have less than 200 miles. trans was just freshened up with over $1000 worth of parts.
03-26-2015, 09:46 AM
#3
Staging Lane
Thread Starter
Join Date: Mar 2015
Posts: 55
Likes: 0
Received 0 Likes
on
0 Posts
I have a complete Tremec 3550 5 speed setup im looking to part with. Has a Quicktime RM-6037 Swap Bell housing, 94-99 clutch fork, spec stage 3+ clutch with billet flywheel, new adj cable, hurst shifter. If your interested hit me up. all parts have less than 200 miles. trans was just freshened up with over $1000 worth of parts.
 03-29-2015, 03:08 PM
#5
Staging Lane
Thread Starter
Join Date: Mar 2015
Posts: 55
Likes: 0
Received 0 Likes
on
0 Posts
okay, so I just got my harness down to bare essentials! im going to pull the engine back out and size it up and see what needs to be lengthened/shortened. thanks to the people on here who have answered my wiring questions so far. LT1swap has been the biggest help of all I think. I almost needed to read it, and stare at it, and re-read it like 10 times before I was comfortable cutting things up.
only think I need to teach myself now is how to hook up the relays for going into the car/external connection. a little unsure of all that still. also need to pick up and obdII port and wire that in. that does look easy though and fairly self explanatory.
only think I need to teach myself now is how to hook up the relays for going into the car/external connection. a little unsure of all that still. also need to pick up and obdII port and wire that in. that does look easy though and fairly self explanatory.
03-29-2015, 03:20 PM
#6
Staging Lane
Thread Starter
Join Date: Mar 2015
Posts: 55
Likes: 0
Received 0 Likes
on
0 Posts
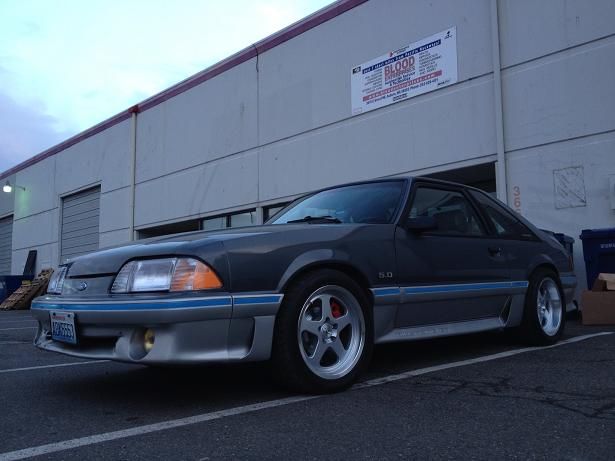
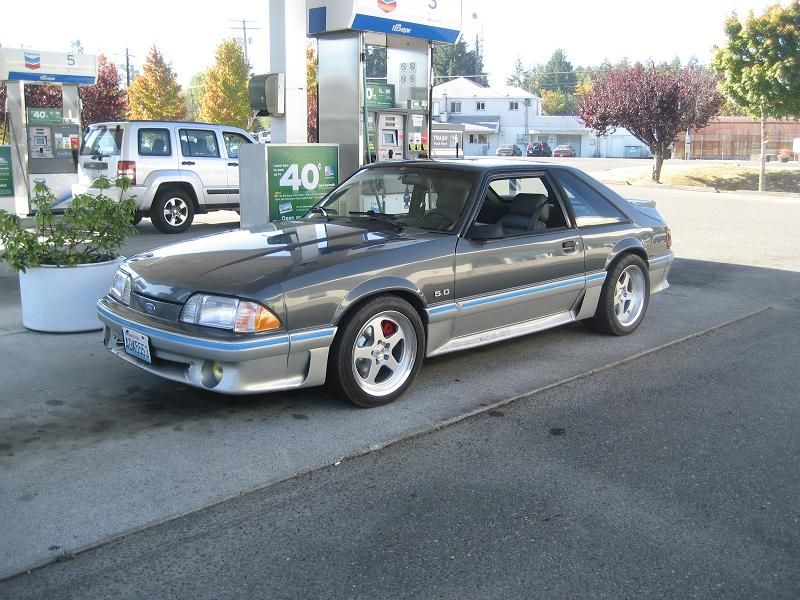
april I will have had my car for 4 years. here is what she looked like when I first got her home:
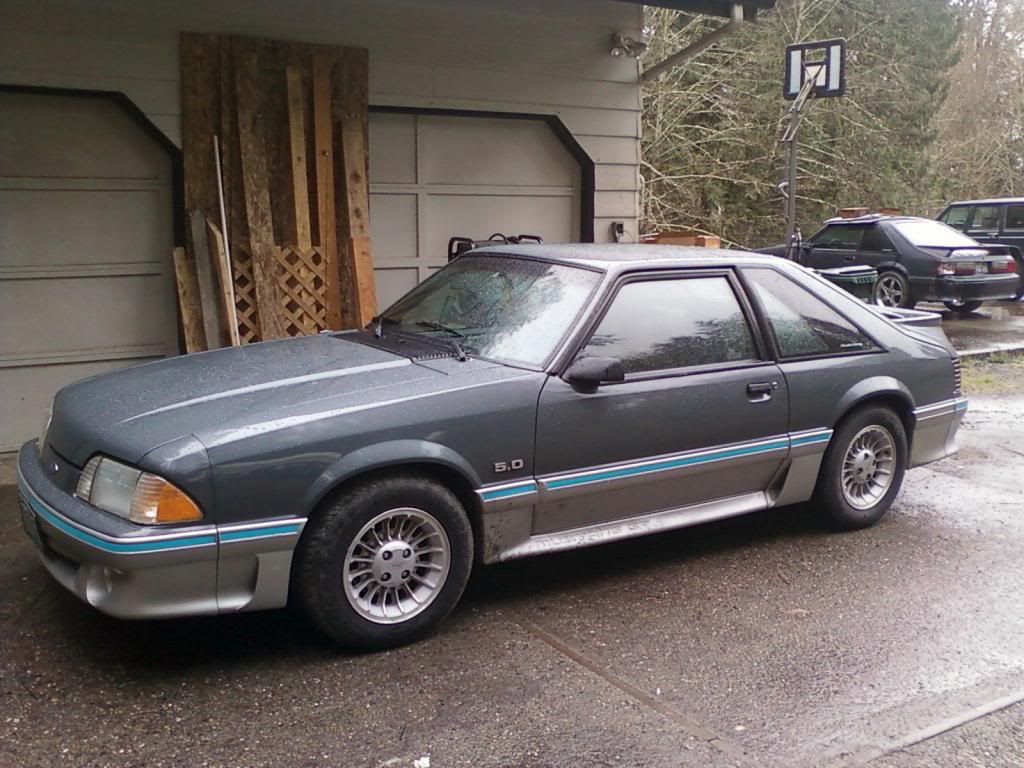
here is what she looked like last time she ran:
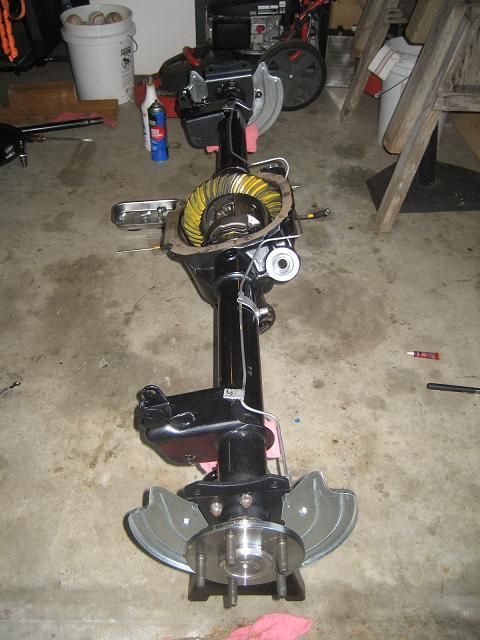
here is the rear end I built for it when I did my 5 lug swap: 3.55s, trac-lok w/ carbon fiber clutches, 31 spline carrier, 31 spline fox length 5 lug shafts, 11.65" cobra discs and sve calipers from LRS

love my car

here is what she looked like last time she ran:

here is the rear end I built for it when I did my 5 lug swap: 3.55s, trac-lok w/ carbon fiber clutches, 31 spline carrier, 31 spline fox length 5 lug shafts, 11.65" cobra discs and sve calipers from LRS


love my car
 03-29-2015, 09:23 PM
#7
Staging Lane
Thread Starter
Join Date: Mar 2015
Posts: 55
Likes: 0
Received 0 Likes
on
0 Posts
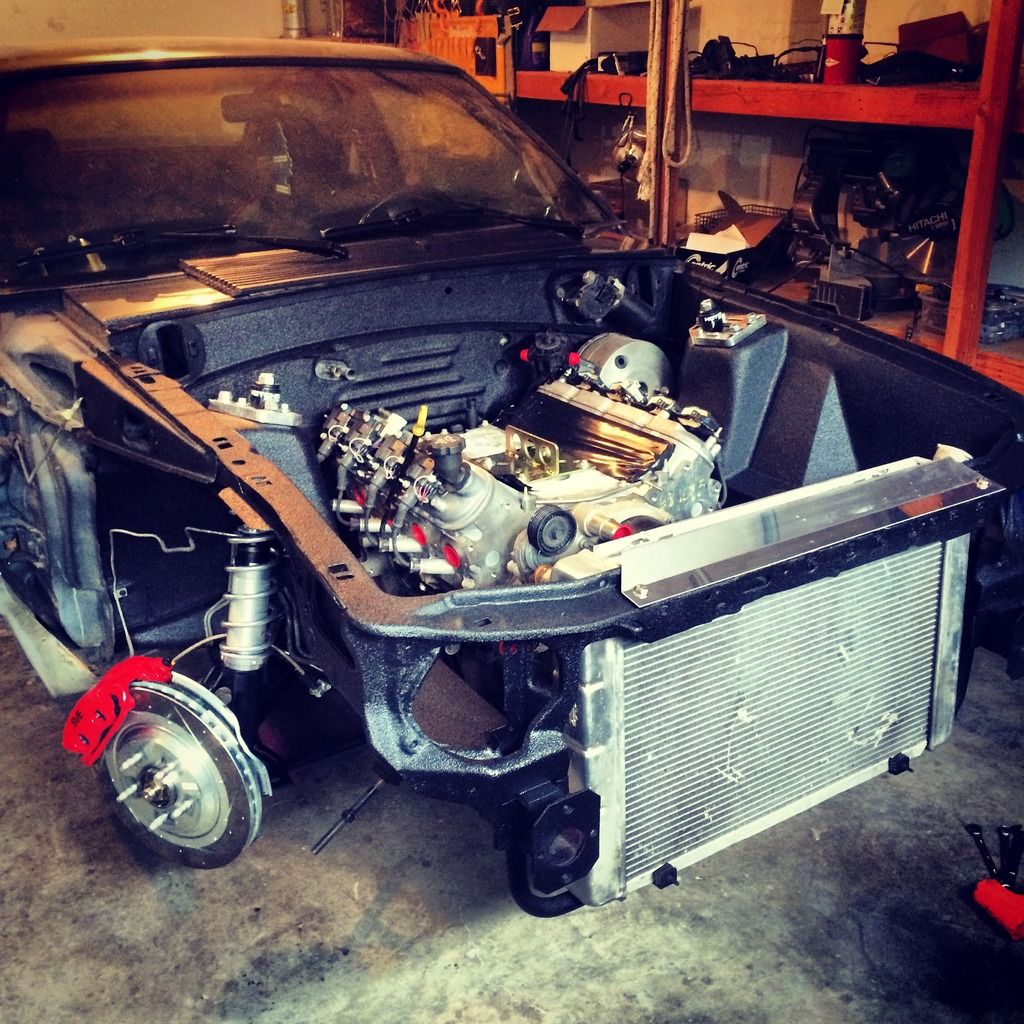
well, the cage project is done. for a while atleast. a couple of the welds I am not happy with, but most of them are awesome! the ones that suck were up top on the main hoop. I welded the cage from top to bottom, side to side like the instructions stated. so those were my first ones. took a few welds to get the wire speed and heat dialed in on the .030 wire. just swapped over from .023 and that's been in the machine for atleast a year. I did practice on a scrap piece and I felt pretty comfortable with the beads I put down. then I climbed in the car and jammed my head in the ceiling and rained sparks on myself and choked a little bit. that's okay though! thankfully all the beautiful welds are on the floor... where nobody will see them.... under the carpet...
I noticed heater cores were only $20. so I figured since I am ***** deep in the car I may as well peel the dash off and put a fresh one in!
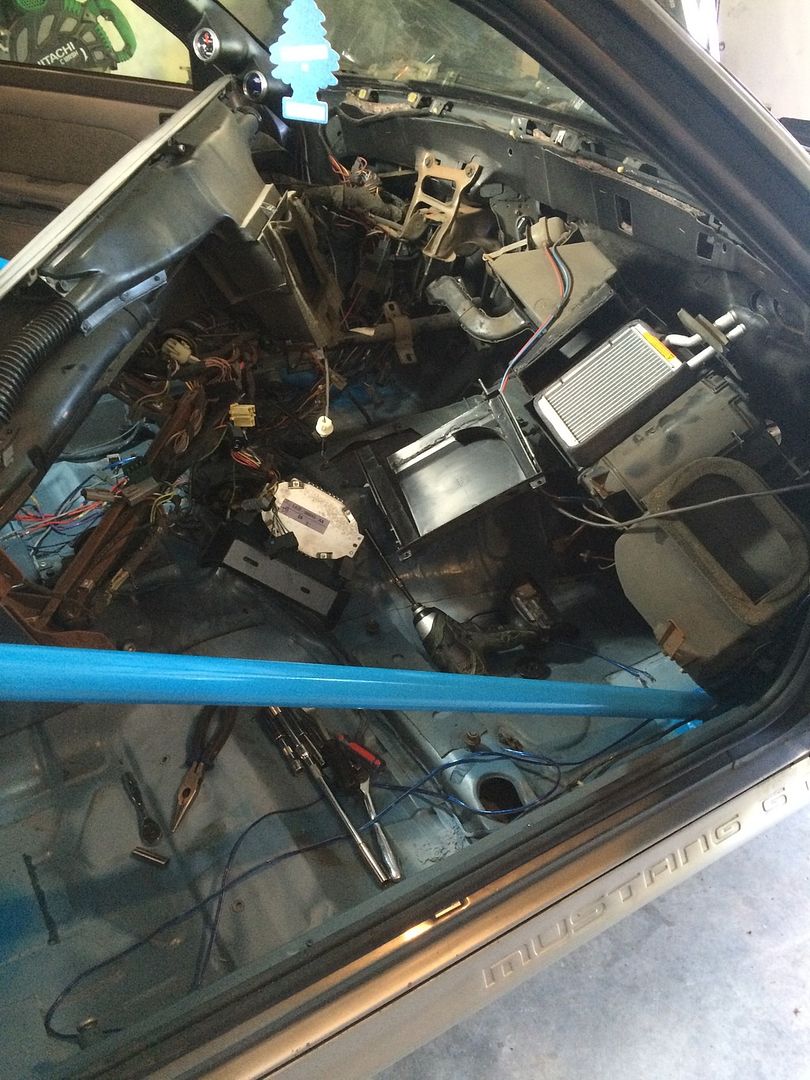
but doing that opened a can of worms! I went and removed all of the wires on the drivers side of the car that had anything to do with the engine harness. wont be needing those. at all. now the only thing that comes out of the firewall on the drivers side is my wideband o2 wire, a vac/boost tube (wont be in use), and the wires for lighting on the front clip. every other engine harness wire was traced and de-pinned at its source connector.
then I went over to my "1 piece" front clip. I rewired the entire thing with enough extension on it to easily reach the body harness connector. everything is soldered and heat shrunk. no ghetto butt splices.
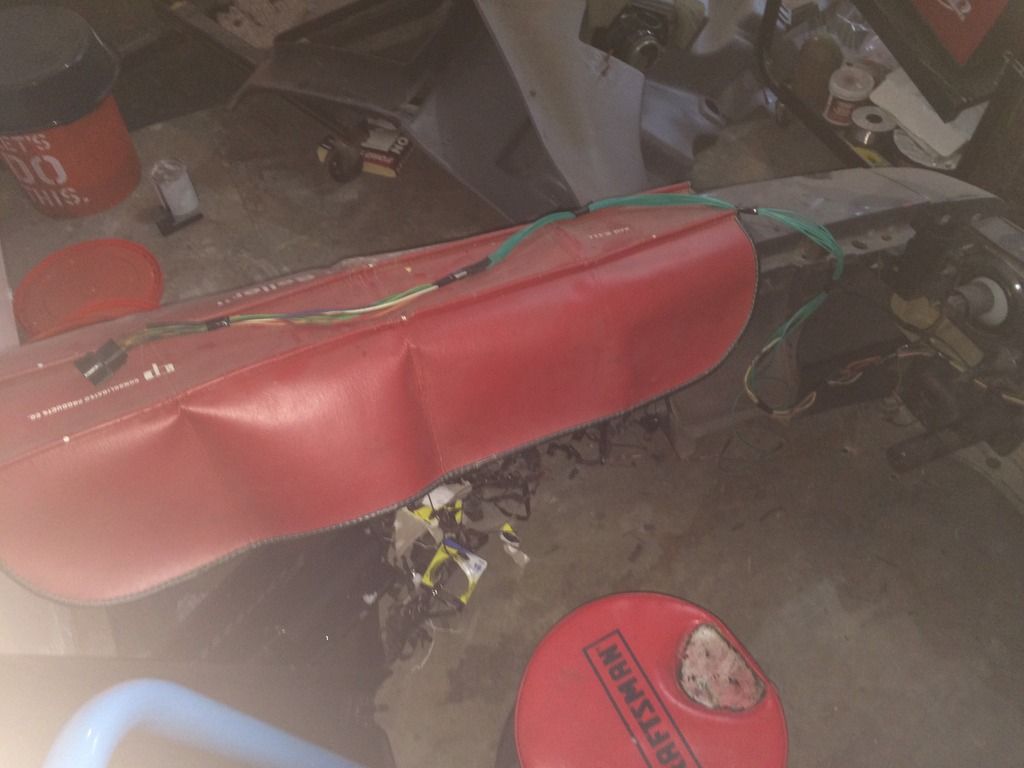
now you can easily unplug 1 plug, remove 12 bolts, and pull the front clip. I cant do it by myself though because I am not rich enough to afford the fiberglass clip. yet.
I left the dash out for now. I want to make sure when the engine goes in that all the wiring that needs to be routed into the cab can be done easily.

I noticed heater cores were only $20. so I figured since I am ***** deep in the car I may as well peel the dash off and put a fresh one in!

but doing that opened a can of worms! I went and removed all of the wires on the drivers side of the car that had anything to do with the engine harness. wont be needing those. at all. now the only thing that comes out of the firewall on the drivers side is my wideband o2 wire, a vac/boost tube (wont be in use), and the wires for lighting on the front clip. every other engine harness wire was traced and de-pinned at its source connector.
then I went over to my "1 piece" front clip. I rewired the entire thing with enough extension on it to easily reach the body harness connector. everything is soldered and heat shrunk. no ghetto butt splices.


now you can easily unplug 1 plug, remove 12 bolts, and pull the front clip. I cant do it by myself though because I am not rich enough to afford the fiberglass clip. yet.
I left the dash out for now. I want to make sure when the engine goes in that all the wiring that needs to be routed into the cab can be done easily.
Trending Topics
03-29-2015, 09:28 PM
#8
Staging Lane
Thread Starter
Join Date: Mar 2015
Posts: 55
Likes: 0
Received 0 Likes
on
0 Posts
here is where I got today with the harness thanks to the world wide web:
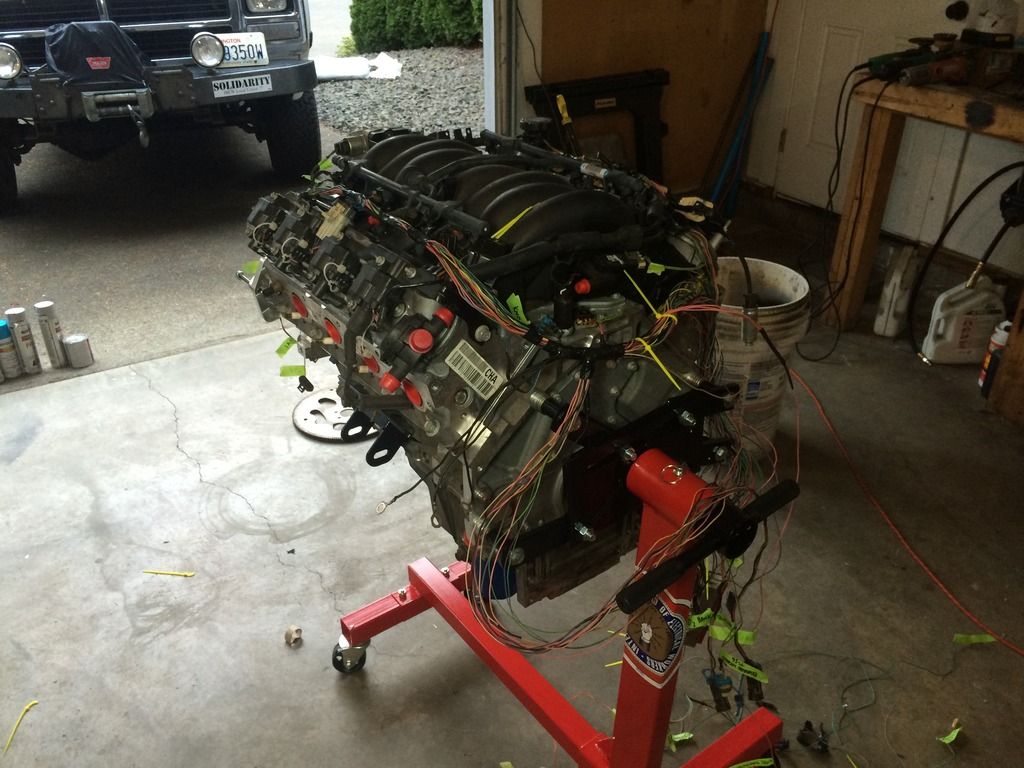
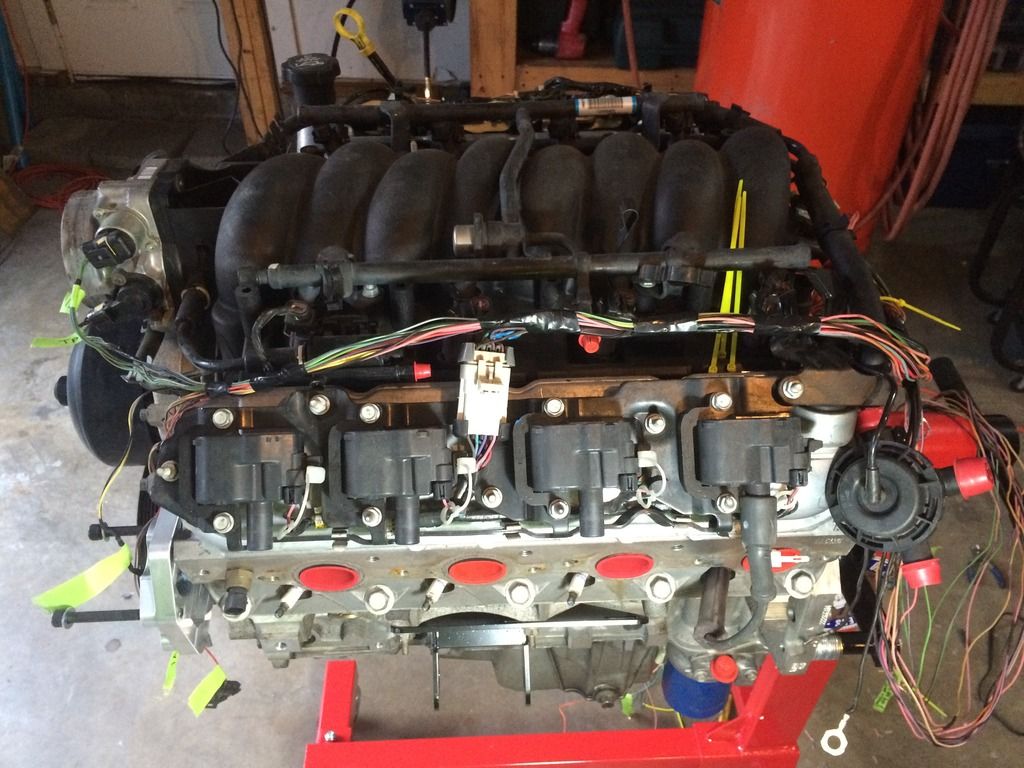
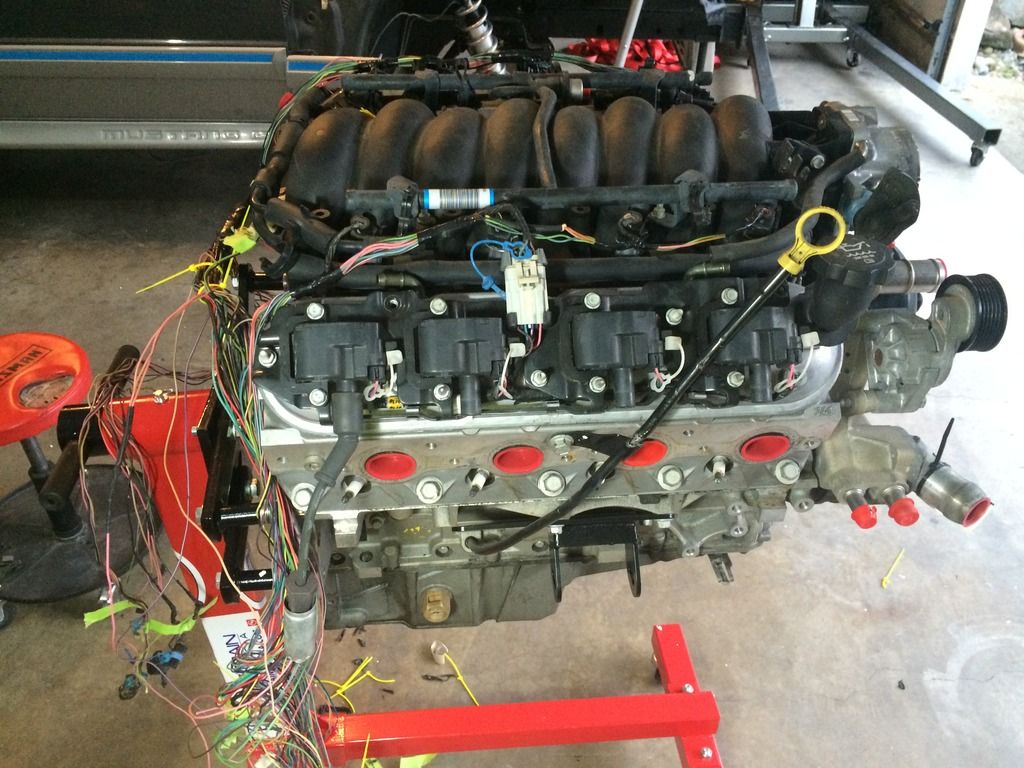
making progress! now I need to get learned on how the wiring ties into the car, and how to make it control my dual fans.


making progress! now I need to get learned on how the wiring ties into the car, and how to make it control my dual fans.
03-31-2015, 04:42 PM
#10
Staging Lane
Thread Starter
Join Date: Mar 2015
Posts: 55
Likes: 0
Received 0 Likes
on
0 Posts
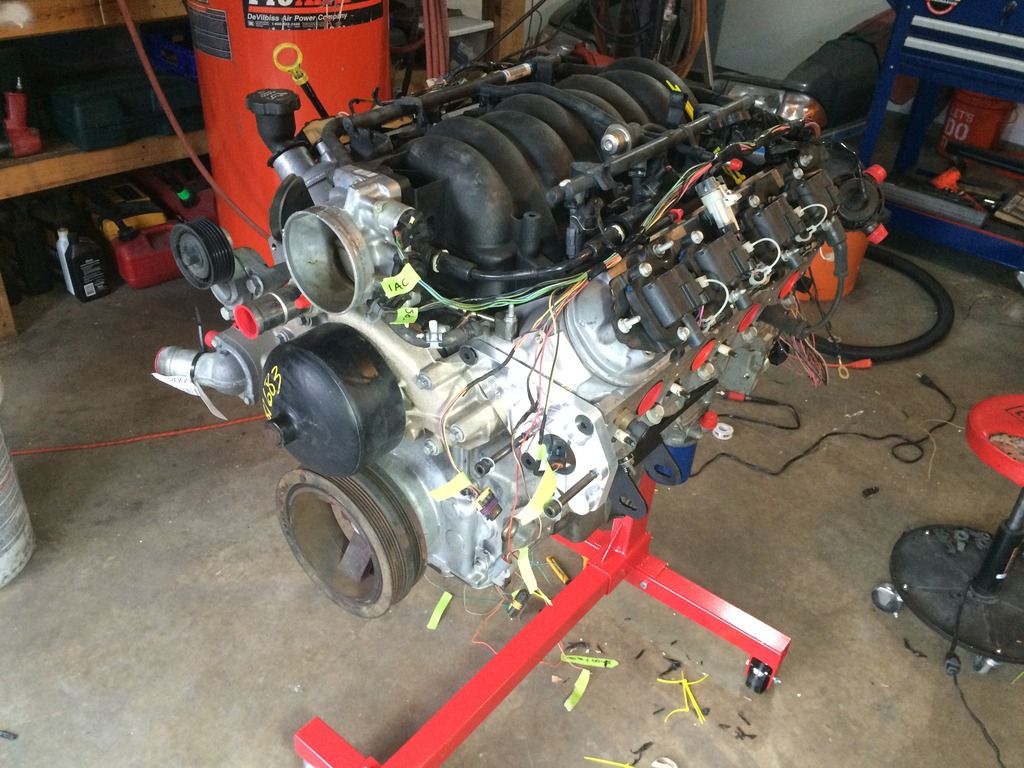
as far as the harness goes... ive walked away twice with a headache from staring at wires for too long. lots of soldering and taping and fishing for wires. once I understood what all of the connectors were and what their function was it made it much easier to determine whether they could stay or go. these two photos helped me the most off of LT1swap.com.
BEFORE
AFTER
those pictures in combination with the pin out list for the PCM of my car made it super easy to clip all the junk out.
lucky for me, it looks like I wont have to extend all the wires to the pcm! I should have enough length to get it into the cabin and tucked somewhere behind the glove box. hopefully. I don't really want to extend 50 some odd wires.
03-31-2015, 04:43 PM
#11
Staging Lane
Thread Starter
Join Date: Mar 2015
Posts: 55
Likes: 0
Received 0 Likes
on
0 Posts
picked this out of a Saturn suv at the JY around the corner from my house. its within walking distance (could come in handy some day lol) they asked $1 for it and I obliged.
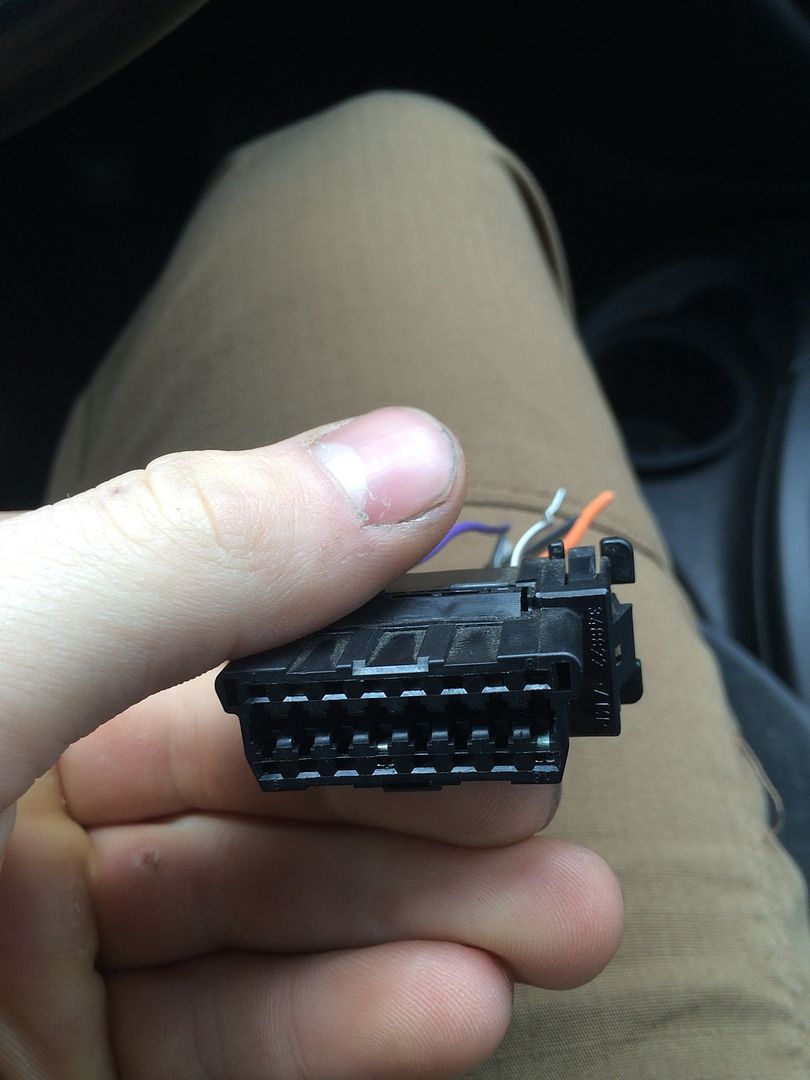
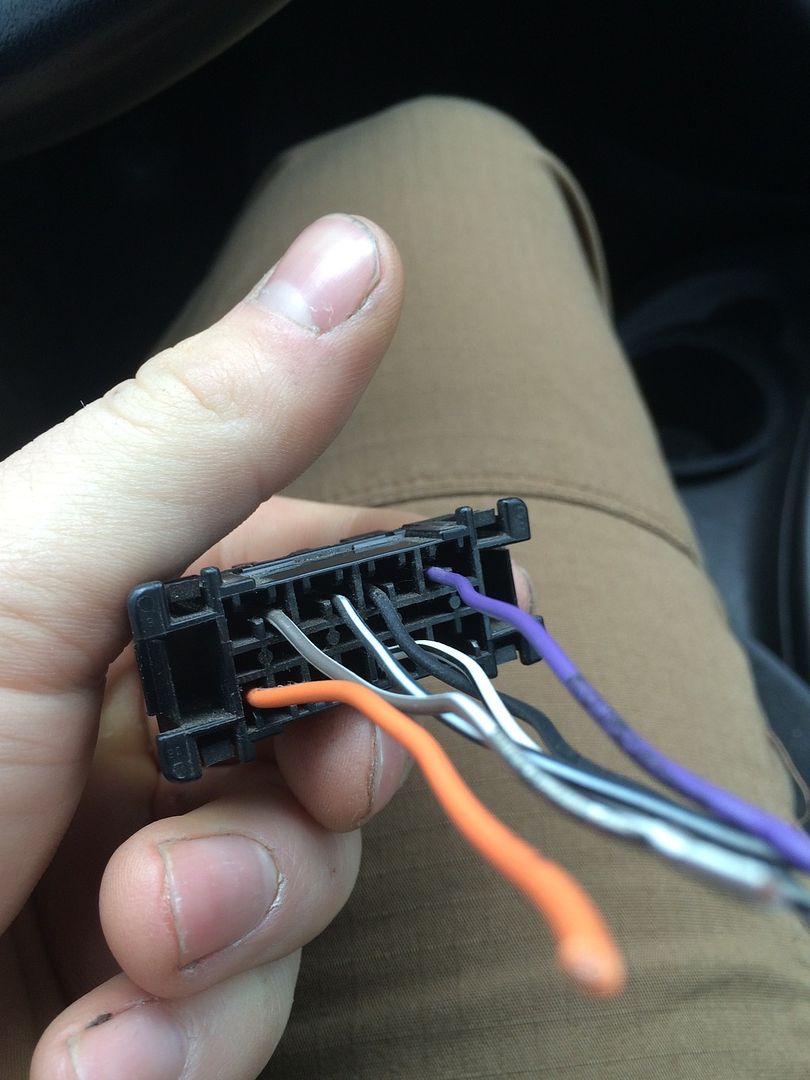
I will use 4 of the existing wires on this OBD2 port to wire into my LS stand alone harness I am building. this will allow for more tuning capabilities
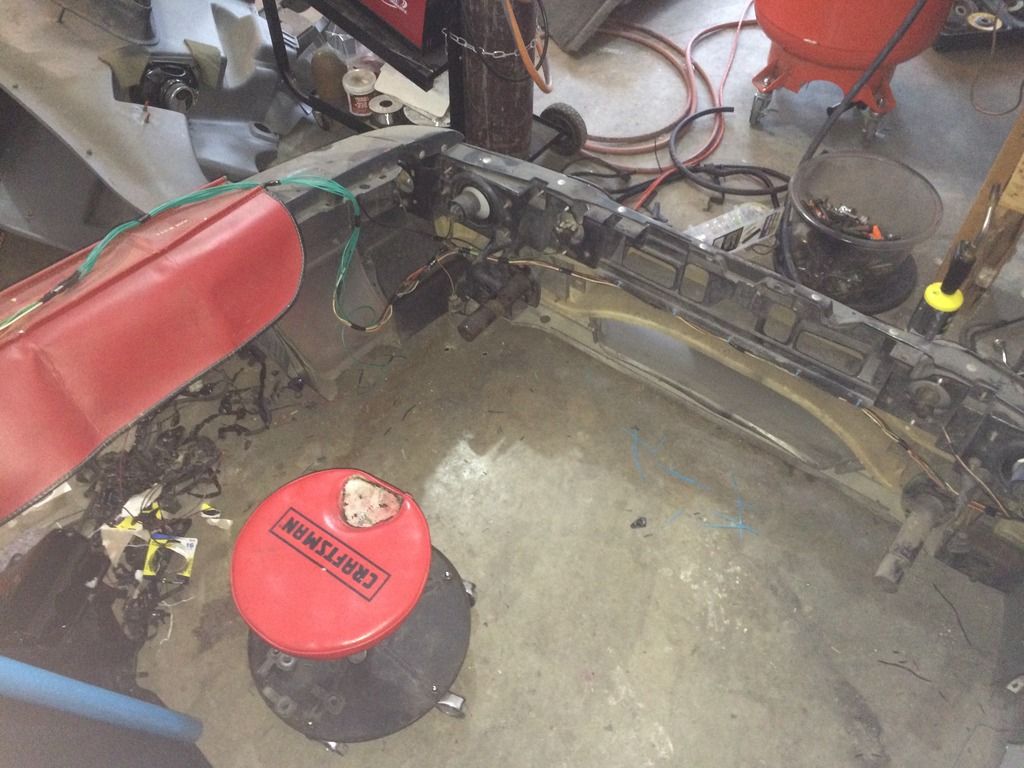
tank pulled
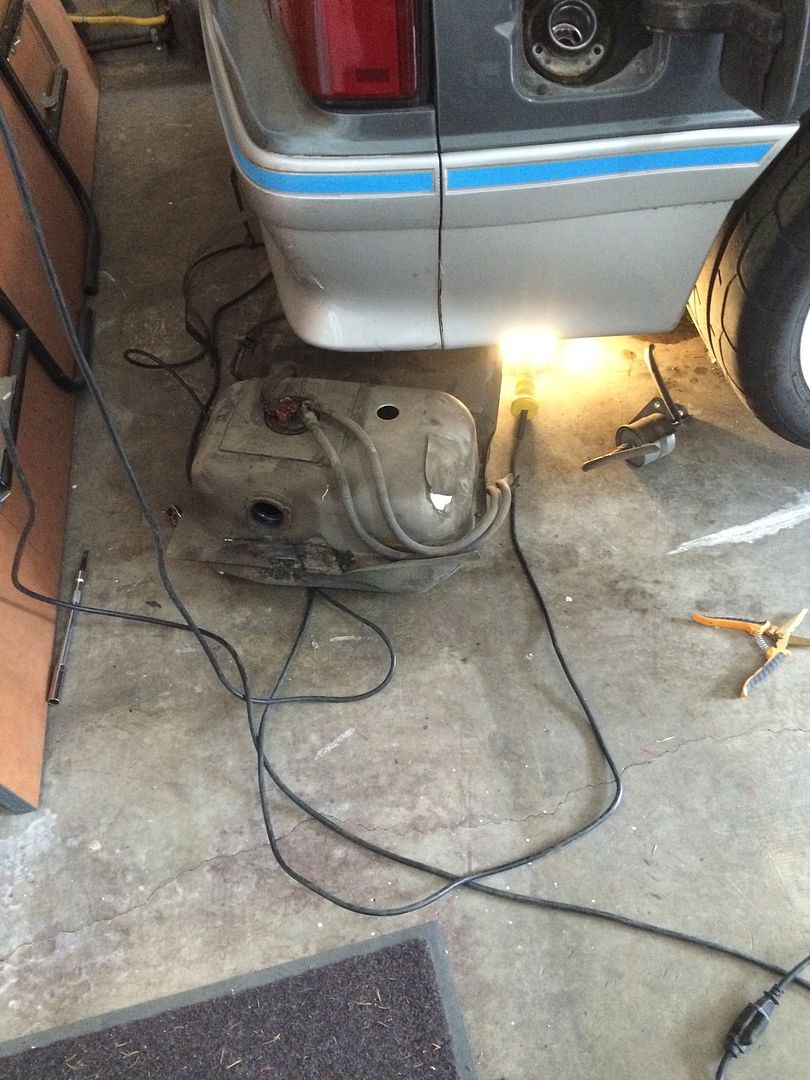
factory fuel lines removed

battery and box are back in
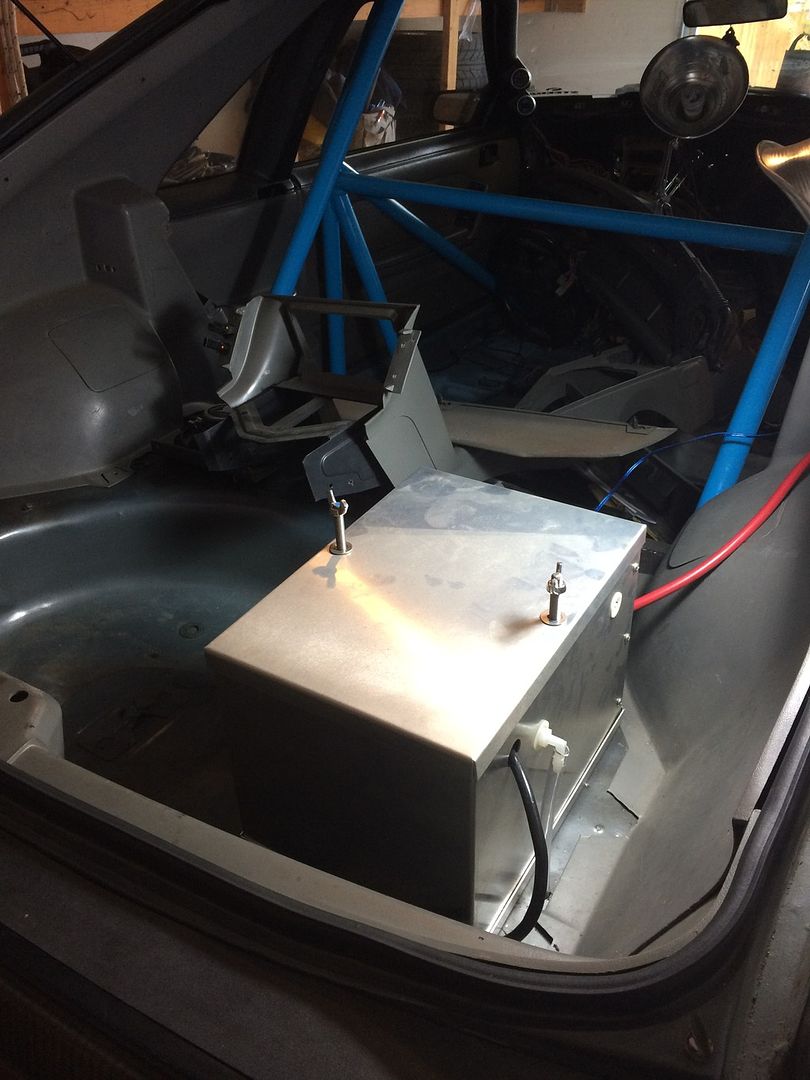
-Sean


I will use 4 of the existing wires on this OBD2 port to wire into my LS stand alone harness I am building. this will allow for more tuning capabilities
tank pulled

factory fuel lines removed

battery and box are back in

-Sean
 01-23-2016, 07:15 AM
#14
Staging Lane
Join Date: Aug 2013
Posts: 98
Likes: 0
Received 0 Likes
on
0 Posts
nice ride man, great stance, really like the dish on the rear wheels.
I like your wiring job so far, to me that really makes or breaks a engine bay. The first time I pulled out a dash to swap a heater core I was actually semi worried Id never get it back together, Ive removed every removable part from fox's and putting back together a aging dash that needs everything put back is easily my least favorite thing to do.
So I have a couple questions. Are there any changes you would make to the engine part of the wiring harness to improve ascetics or aid disassembly similar to what you did to the section for the front clip?
how do you like the textured paint on your enginebay? functionality wise i mean, I like look but worried it will cause clearance issues or needing to tap/die bolts/nuts caused by the added material.
What engine mounts are you using?
Please post more progress, Im interested to see your fuel system plans. On mine I pulled the lines like you did, then I formed a -8 line to mimic the stock supply line which I used as the return. Made a nice clean look.