
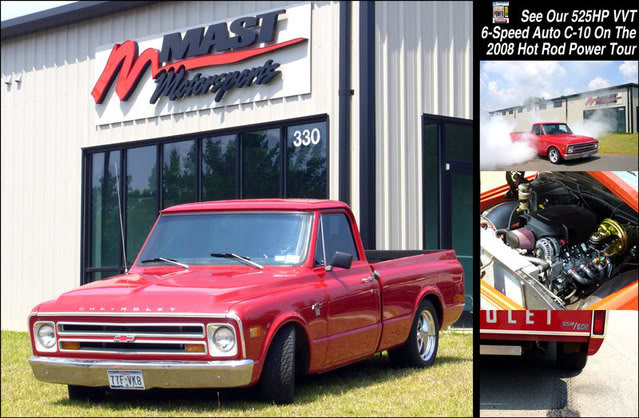
Mast Motorsports L92HO/6L90E Powered 1968 Short/Wide---Hot Rod Power Tour Long Hauler
 07-02-2008, 04:36 PM
#1
FormerVendor
Thread Starter

Join Date: Mar 2007
Location: Nacogdoches, TX
Posts: 182
Likes: 0
Received 0 Likes
on
0 Posts
Overview
We are creating this build thread to hopefully help those that are performing a similar swap.
For the past few months, we have been building a test truck for our development of GM 6L80E/6L90E 6 speed automatic transmissions. Our M-90 ECM is able to communicate with the transmission controller (TCM) that is inside the transmission. This means that there is no additional controller that you have to buy.
The truck is a 1968 Chevrolet Short/Wide that came to us with a carbureted SBC, TH350 transmission, and an open 12 bolt diff. The truck first got one of our L92 TI crate engines that uses our M-90 ECM and wiring harness. Once we got the transmission sorted out we installed a Mast Motorsports VVT Camshaft and valve springs to essentially make it our 525HP L92 TI HO crate engine. As stated above, the transmission is a GM 6L90E and the diff is an Eaton limited slip with a 3.08 gear.
We have just gotten done long hauling it on the Hot Rod Power Tour and plan on racing it at the LSX Shootout in Memphis this year. The truck ran great over the entire tour and got up to 17 MPG!!! (Depending on who was in the driver’s seat)
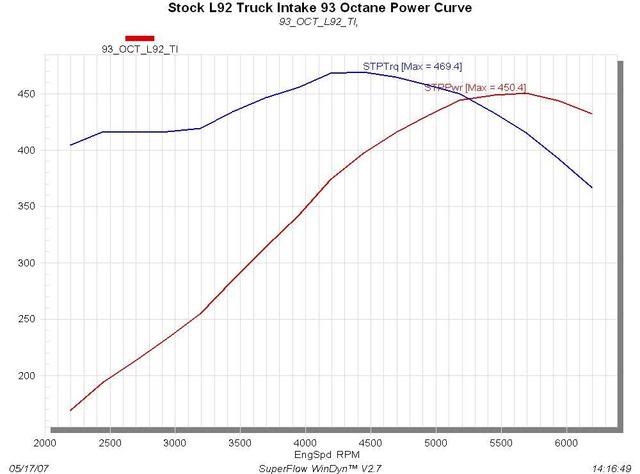
Here is an engine dyno plot of the first engine (Mast Motorsports L92 TI) that was in the truck.
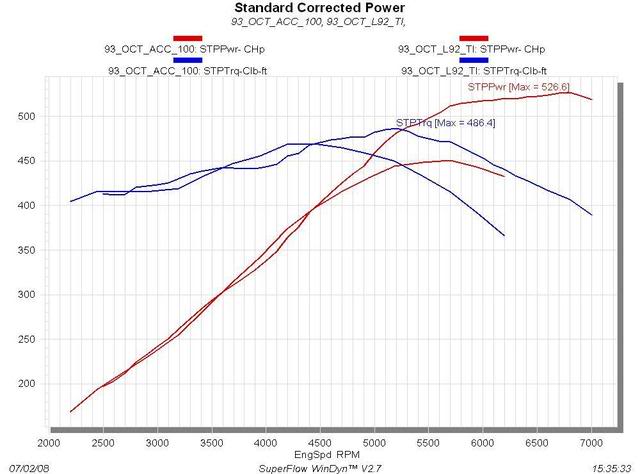
After running this engine for a short time we swapped in a Mast Motorsports VVT Camshaft to make this engine the same setup as our 525 HP L92 TI HO crate engine package. The first 450HP setup we had was no slouch by any means, but after the cam swap this truck was an absolute beast! The 75HP increase from the cam was pretty impressive to everyone here that had driven or ridden in the truck before and after the cam swap. The dyno plot below shows the power gains seen between the L92 TI and L92 TI HO. Notice that it makes WELL over 400 ft.-lbs. way down at 2500 RPM thanks to the VVT!
Engine Installation
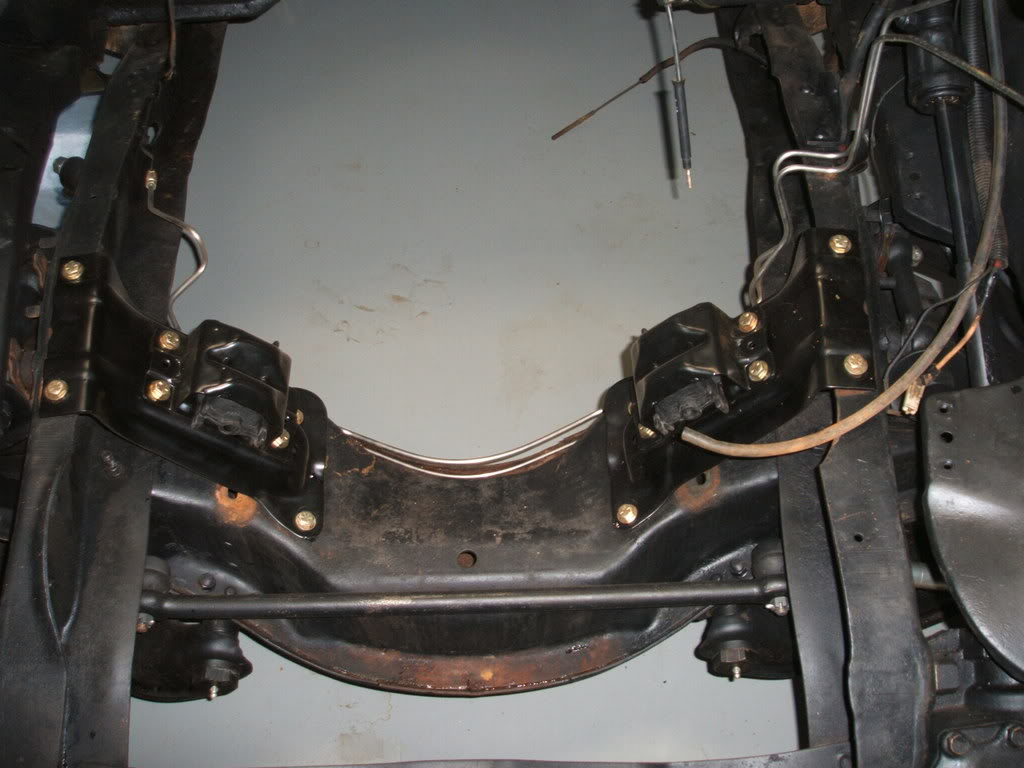
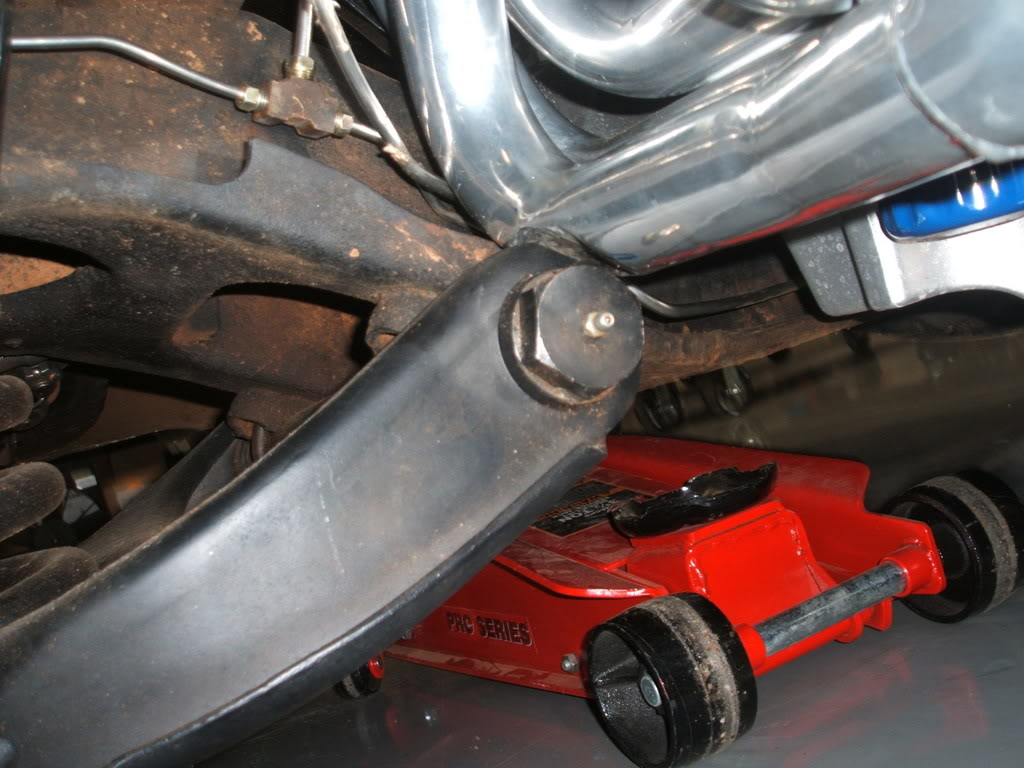
After the SBC was removed, the engine bay was cleaned up and the L92 was dropped in. We used Early Classic Enterprises engine mounts (911-GenIII). These required drilling just a few holes in the front cross member and use the stronger clamshell style engine mount. This was our first time using these mounts and we were very pleased with the quality and engine placement. One nice thing about these mounts is that we used the stock truck pan that came on the L92. That saved $250-$300.
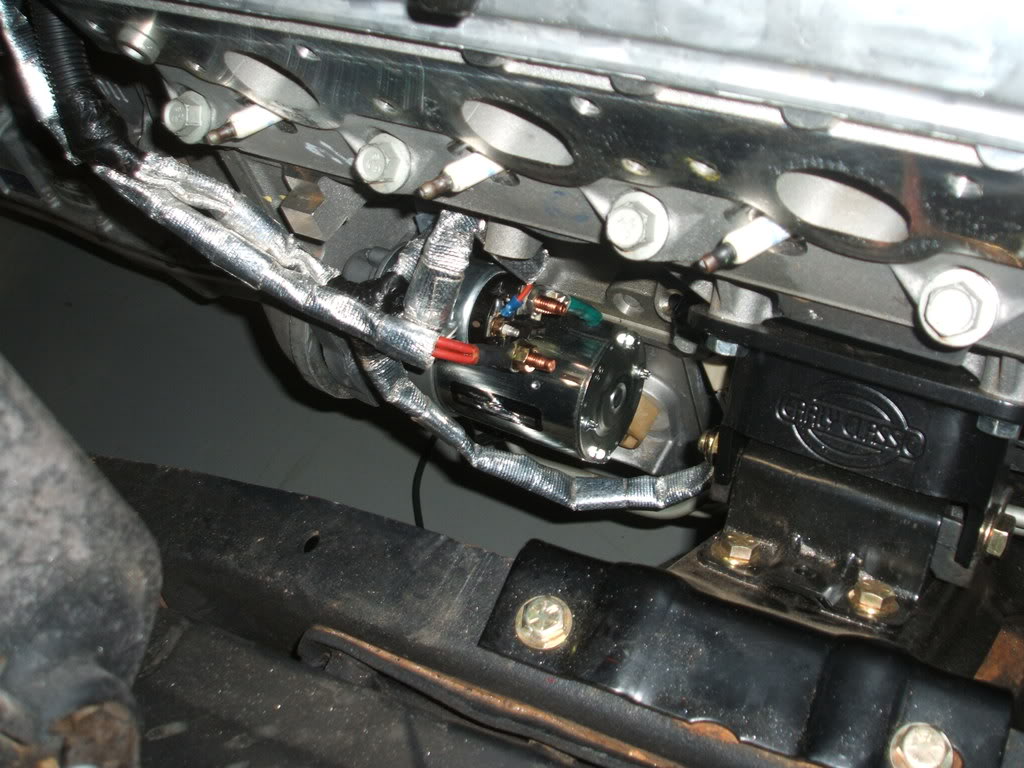
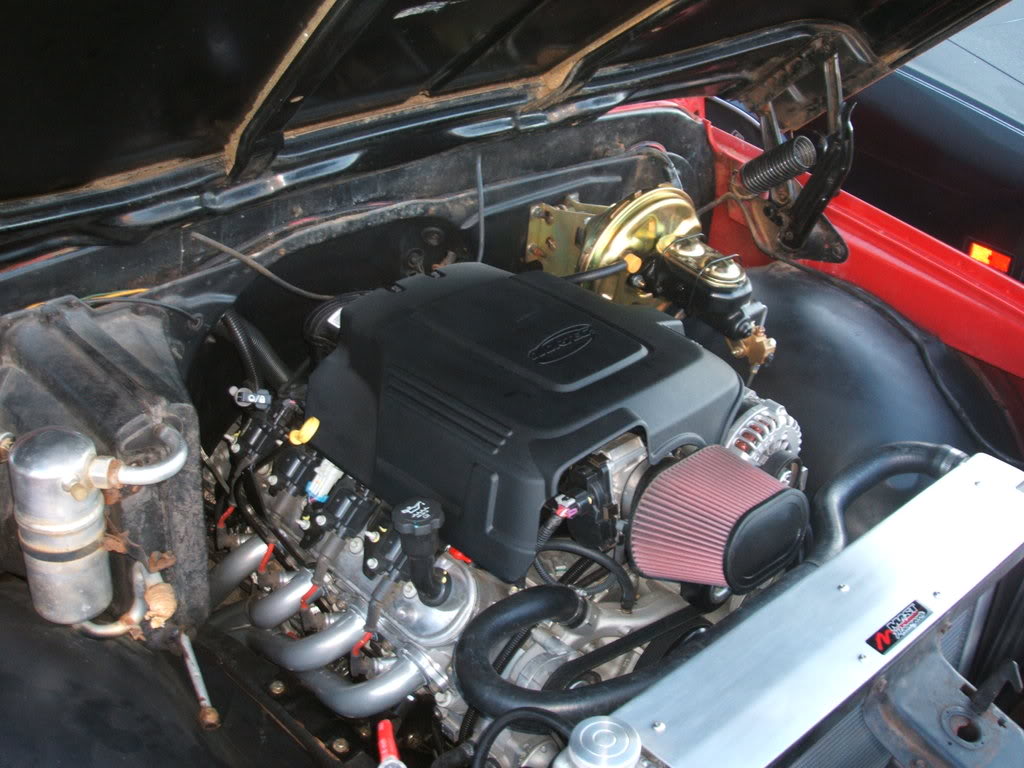
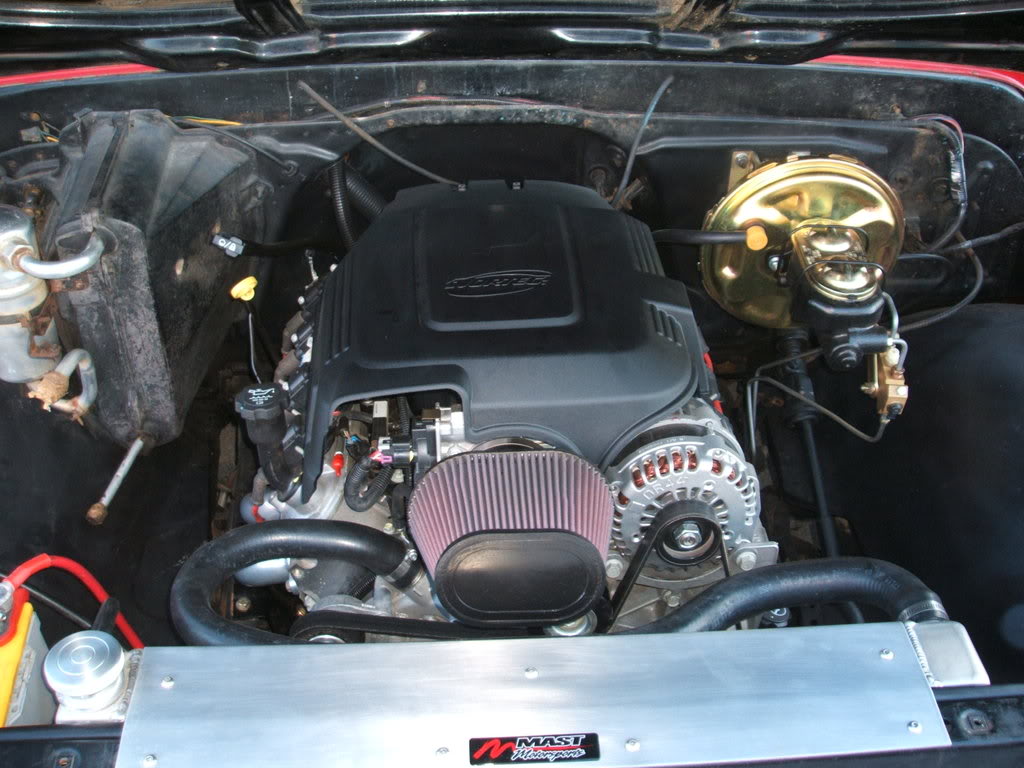
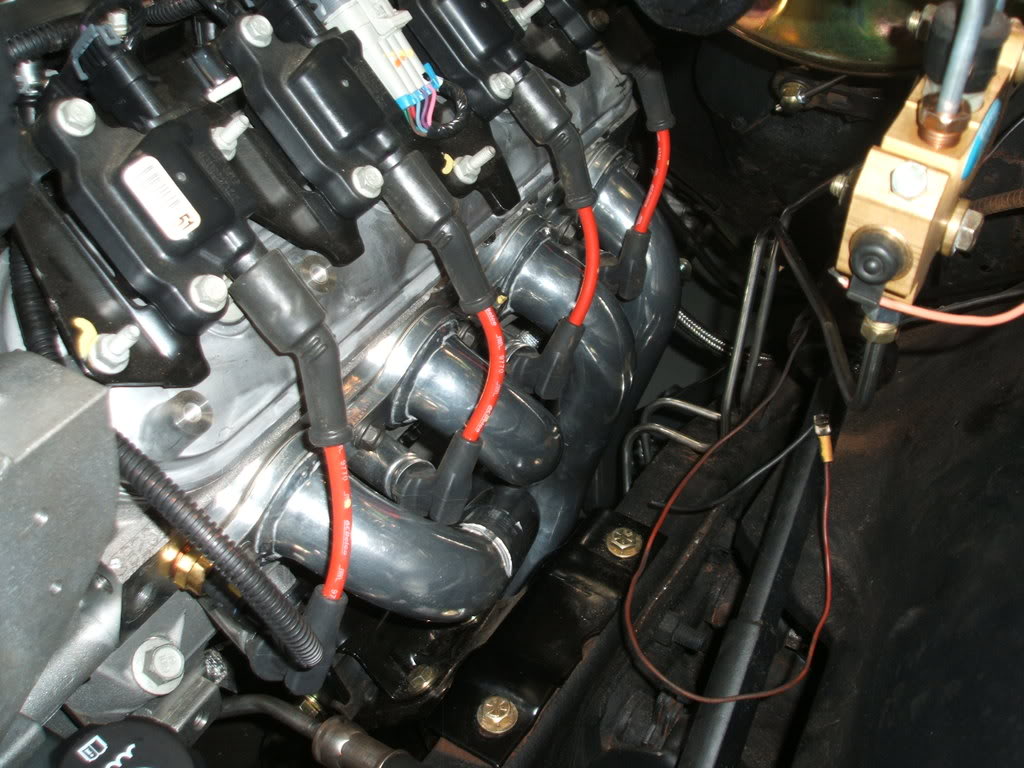
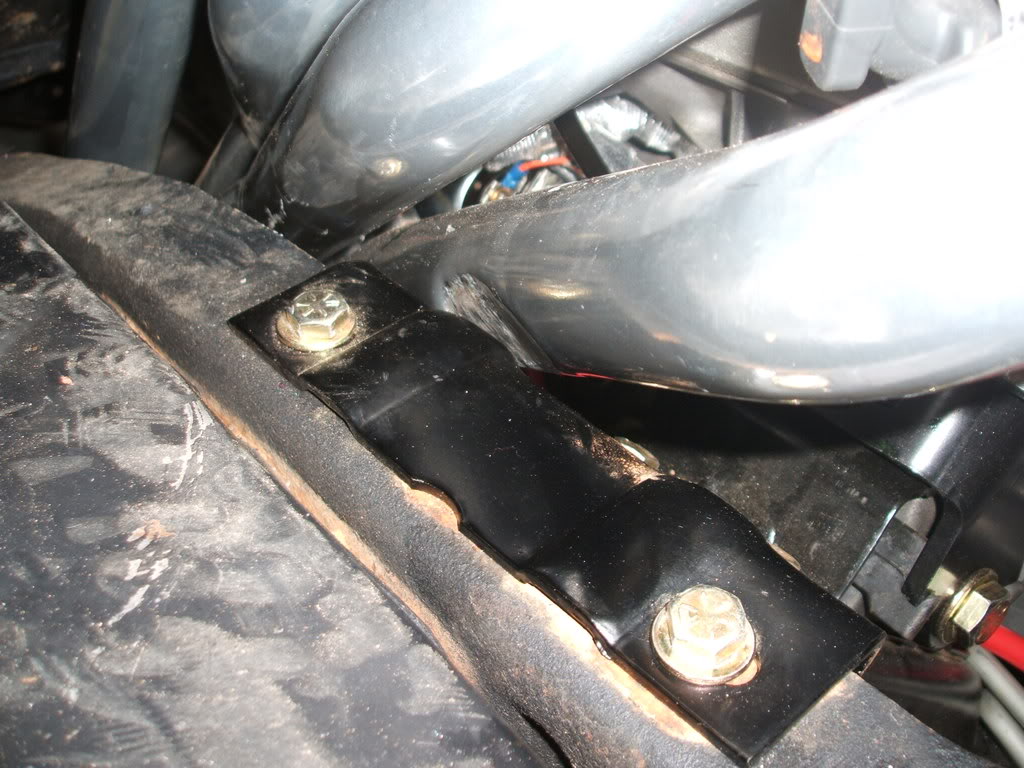
The L92 almost looks like it should have come in the engine bay from the factory. We used Pacesetter F-Body headers (72C2256). These have 1-3/4 primaries and fit after reasonable dimpling and frame notching. Doug Thorley released a set of swap headers designed for this truck after we bought ours (THY324Y-C), so that is another option.
http://67-72chevytrucks.com/vboard/s...d.php?t=287231


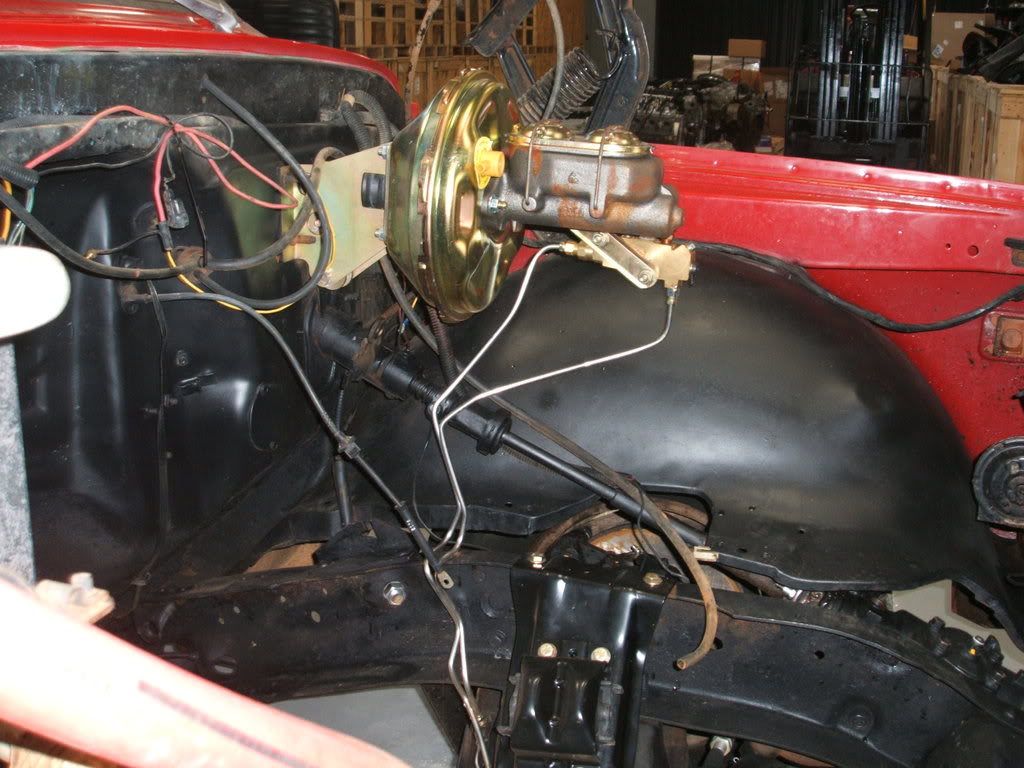
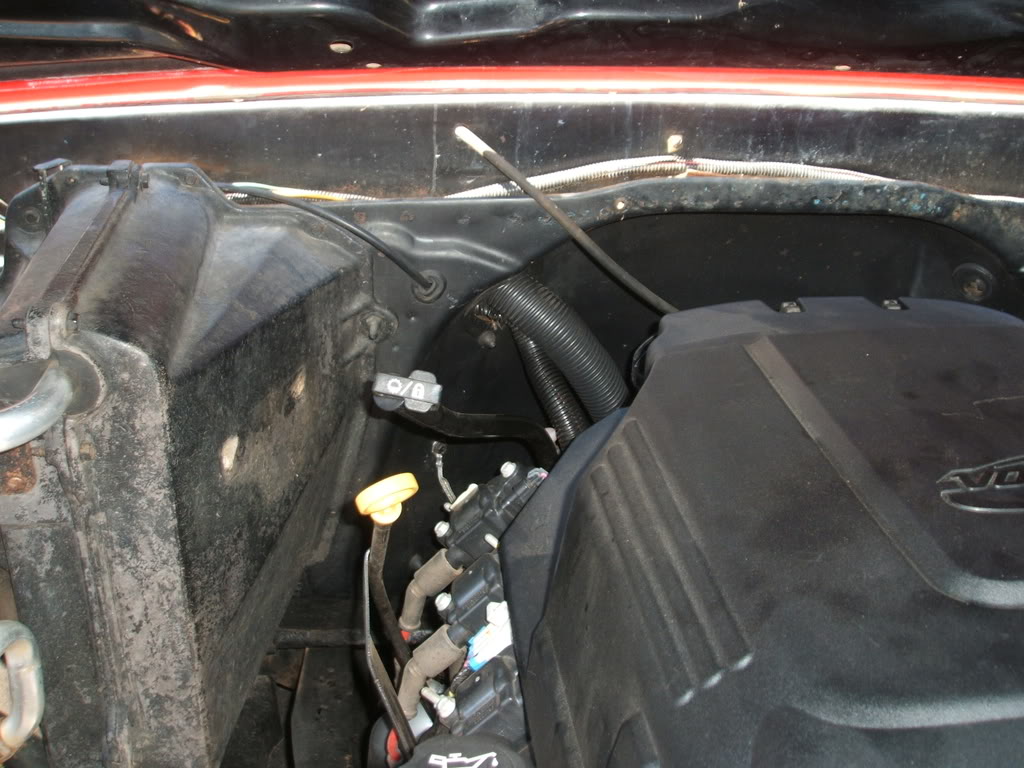
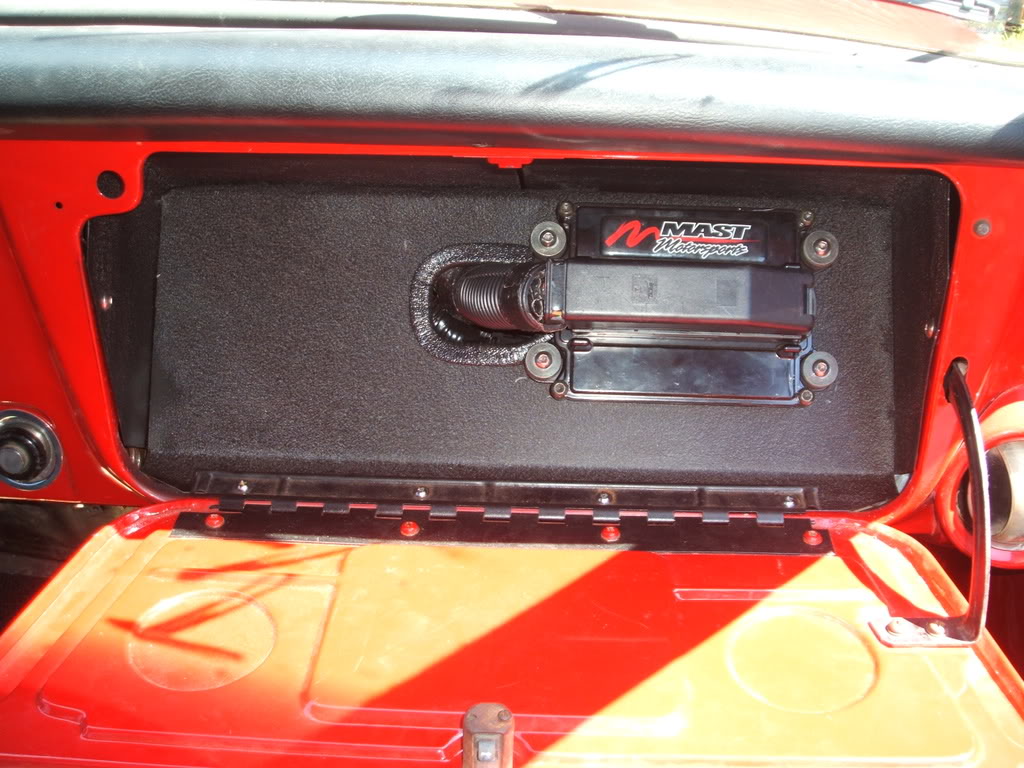
We routed the wiring harness trough the firewall on the passenger side and mounted the M-90 ECM in the glove box.
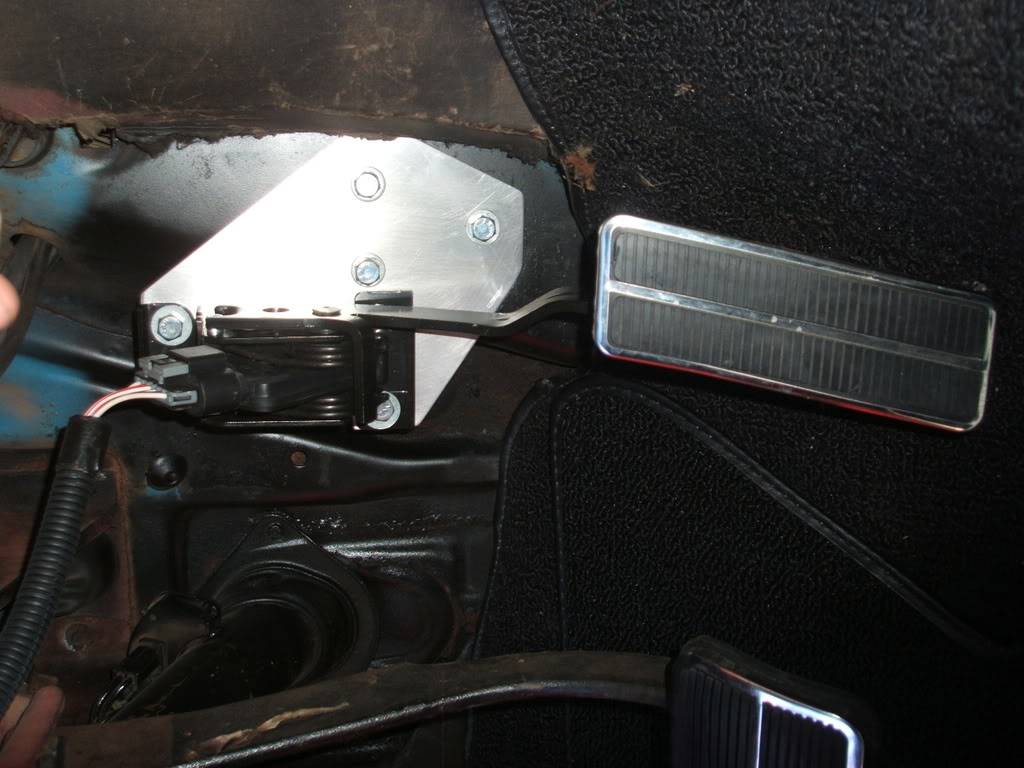
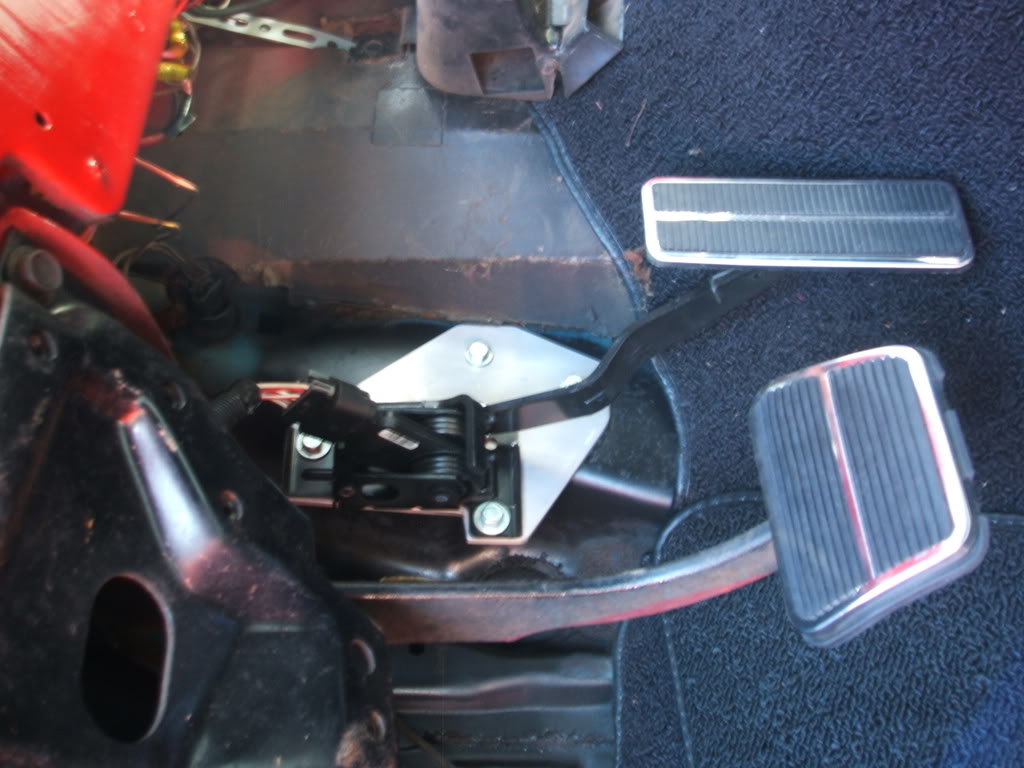
Below is a picture of the drive-by-wire pedal placement. We were really pleased with how stock appearing this came out. The stock stainless trim fits the pedal perfectly!
Transmission details coming next...so stay tuned!!!
Last edited by MastMotorsports; 07-02-2008 at 05:48 PM. Reason: typo
 07-02-2008, 06:42 PM
#4
On The Tree
iTrader: (4)

Join Date: Aug 2006
Location: Cantonment, FL
Posts: 176
Likes: 0
Received 0 Likes
on
0 Posts

sweet.
I have a set of those doug thorley headers, been sitting in my garage for some time now, they won't fit my 86 w/ 6.0 swap
Your install looks clean, bitchin'!!!!
Nice job.
got any pics of tranny xmember?
I have a set of those doug thorley headers, been sitting in my garage for some time now, they won't fit my 86 w/ 6.0 swap
Your install looks clean, bitchin'!!!!
Nice job.
got any pics of tranny xmember?
07-02-2008, 10:42 PM
#5
Teching In

Join Date: Nov 2006
Posts: 11
Likes: 0
Received 0 Likes
on
0 Posts
I had the opportunity to drive this truck on the Power Tour and I was very pleased with how the truck drove. It takes off very well for having a stock torque converter, if it did have any more stall to it she would really blow the tires off! And I dont think I drove it near as hard as they wanted me to.. lol You guys are doing a great job and I look forward to being a customer in the future.
And I dont think I drove it near as hard as they wanted me to.. lol You guys are doing a great job and I look forward to being a customer in the future.
07-03-2008, 10:56 AM
#6
FormerVendor
Thread Starter
Join Date: Mar 2007
Location: Nacogdoches, TX
Posts: 182
Likes: 0
Received 0 Likes
on
0 Posts
Thanks for all the kind comments!!!...this truck has been a blast so far. I'll post the transmission details next.
We used Pacesetter F-Body headers (72C2256). These have 1-3/4 inch primaries and a 3 inch collector (headpipe?). Is that what you were asking?
We used Pacesetter F-Body headers (72C2256). These have 1-3/4 inch primaries and a 3 inch collector (headpipe?). Is that what you were asking?
07-03-2008, 09:00 PM
#7
11 Second Club

Join Date: Feb 2008
Location: TN
Posts: 317
Likes: 0
Received 0 Likes
on
0 Posts

Trending Topics
07-08-2008, 03:25 PM
#8
FormerVendor
Thread Starter
Join Date: Mar 2007
Location: Nacogdoches, TX
Posts: 182
Likes: 0
Received 0 Likes
on
0 Posts
Transmission Installation
The 6L90E required using a 4x4 transmission tunnel pan. It is very easy to swap to this tunnel. Once the old trans. tunnel hump is cut out and the 4x4 piece is installed, it is a bolt in installation. The best part is that you can get carpet out of a catalog!
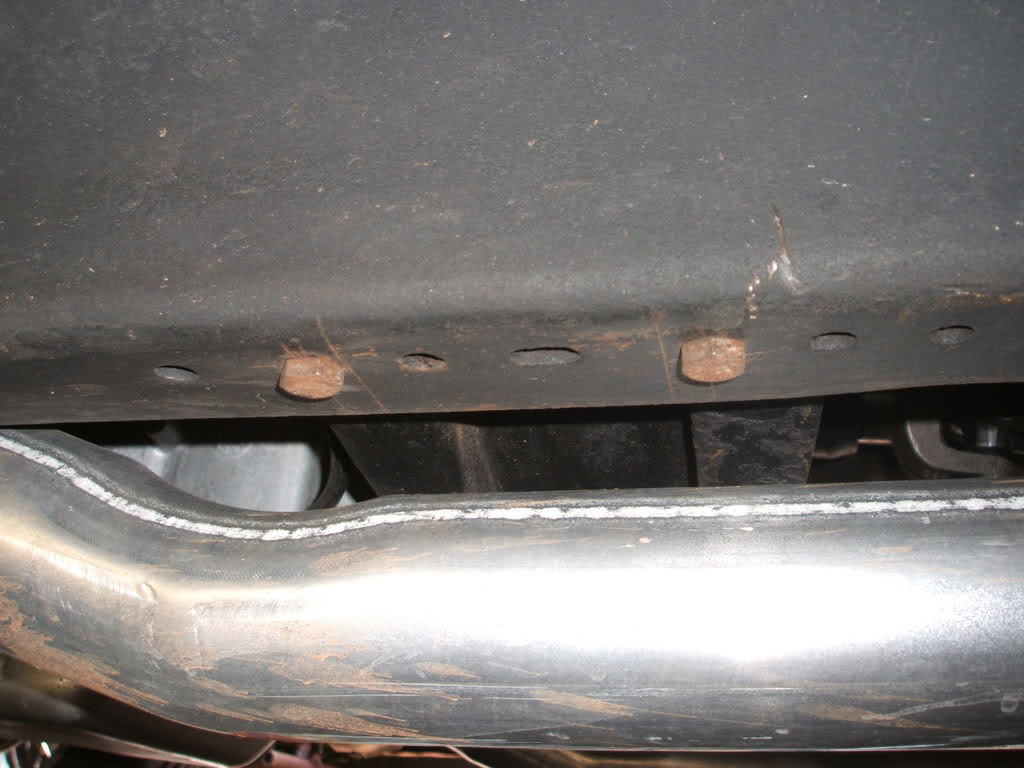
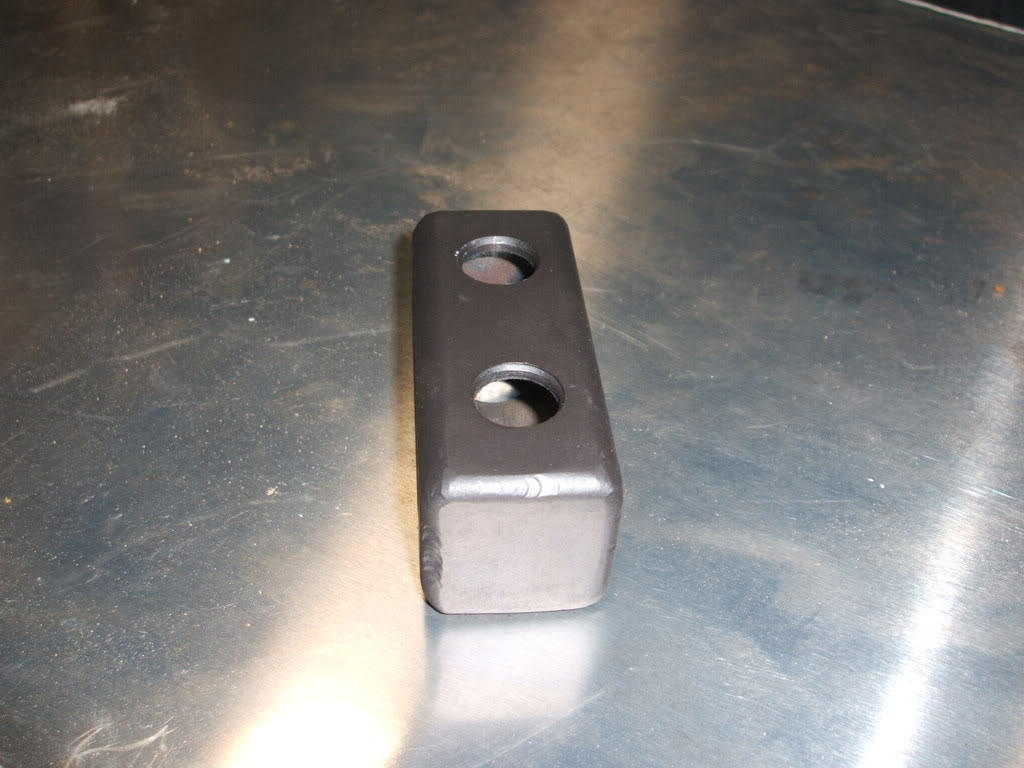
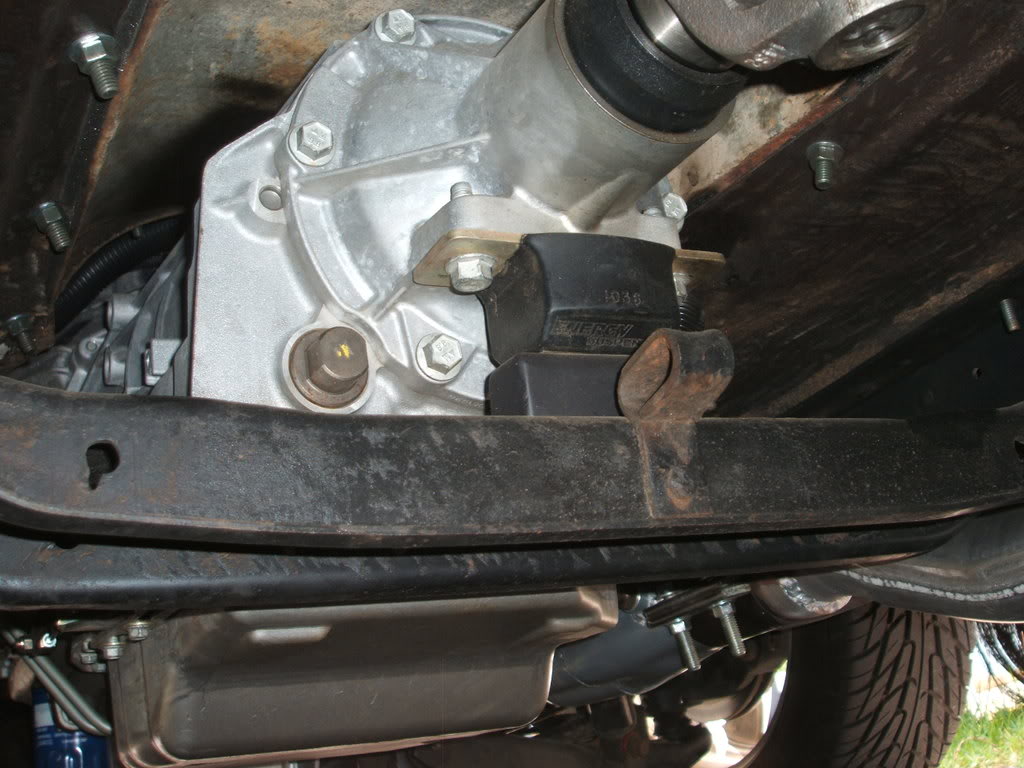
After this modification, the 6L90E fit beautifully. One thing to note is that we did not modify the transmission cross member to get the 6L90E to fit. Holes were drilled into the frame to accommodate the new transmission length. A spacer was made out of 1 �� square tubing to raise the transmission pan up.
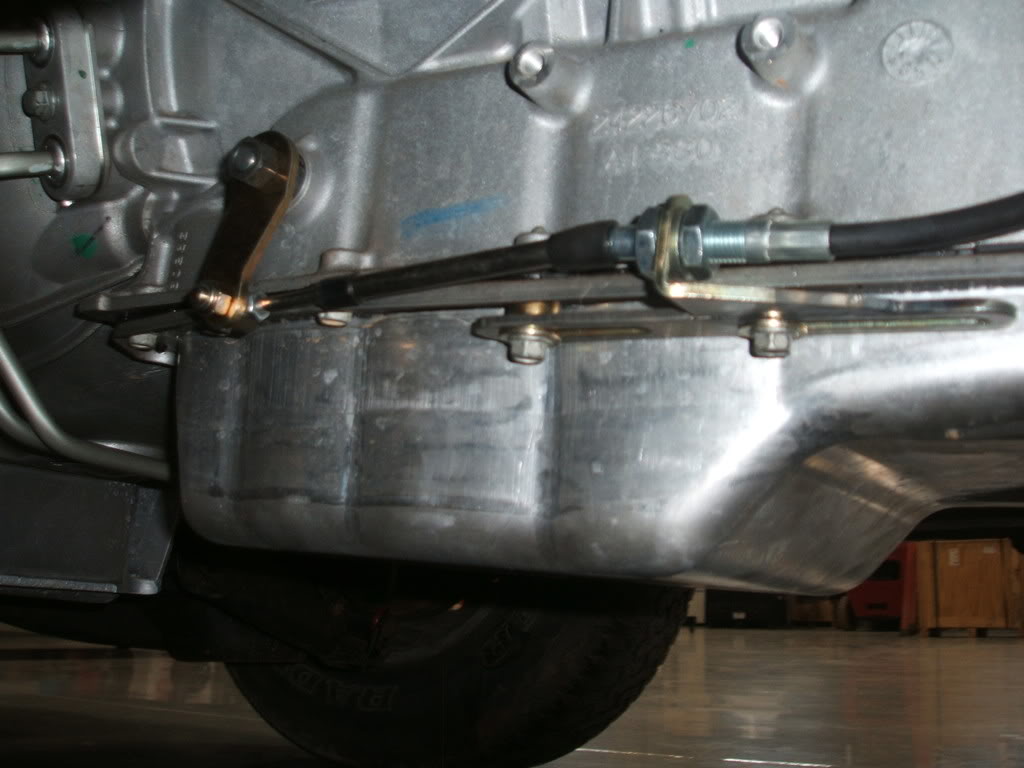
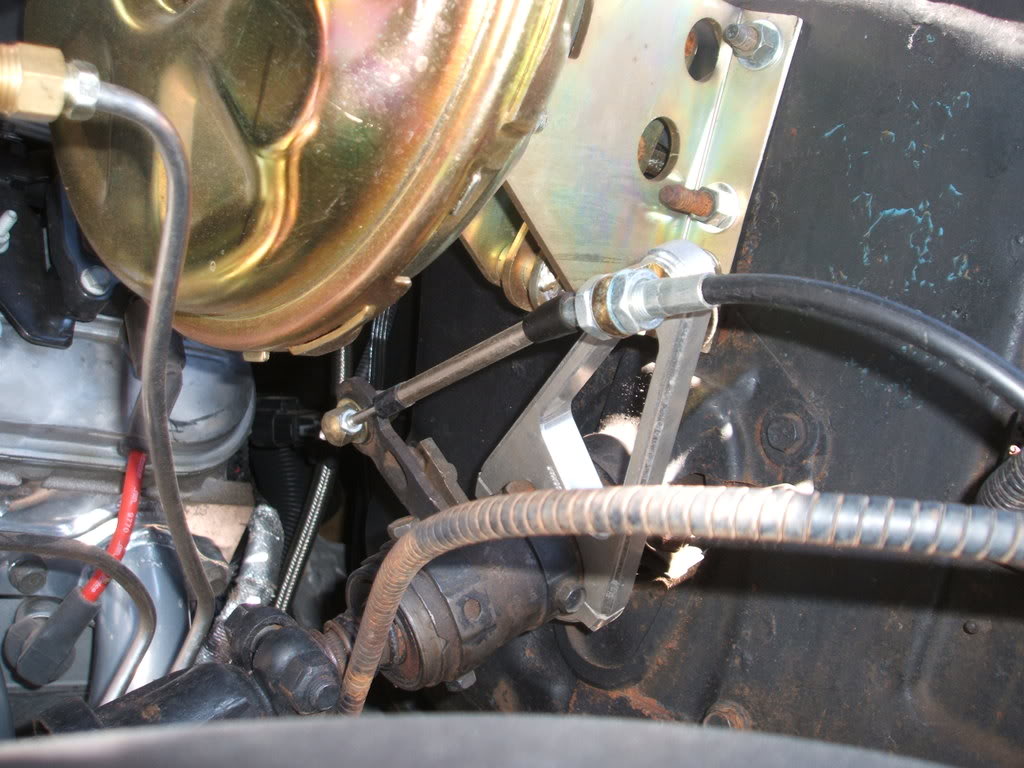
The factory column shifter was retained by using a Lokar cable shift linkage kit (ACA-1804)
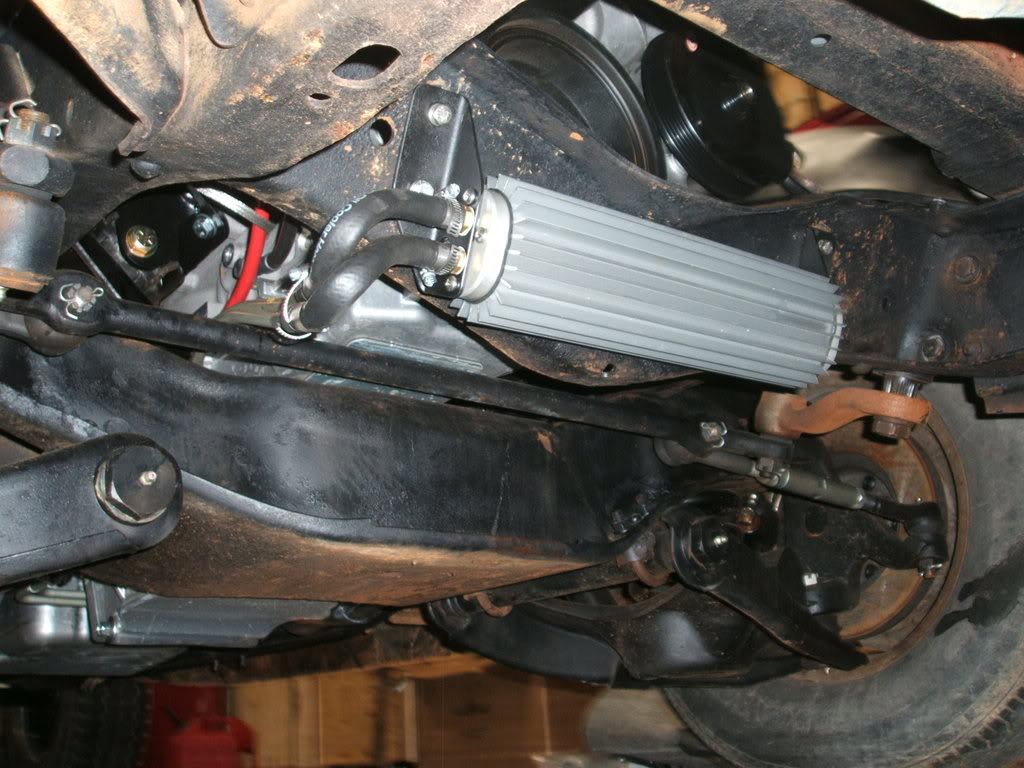
We ran the transmission oil to an external cooler. Stock GM lines off of an Escalade were modified to accommodate the aftermarket cooler.
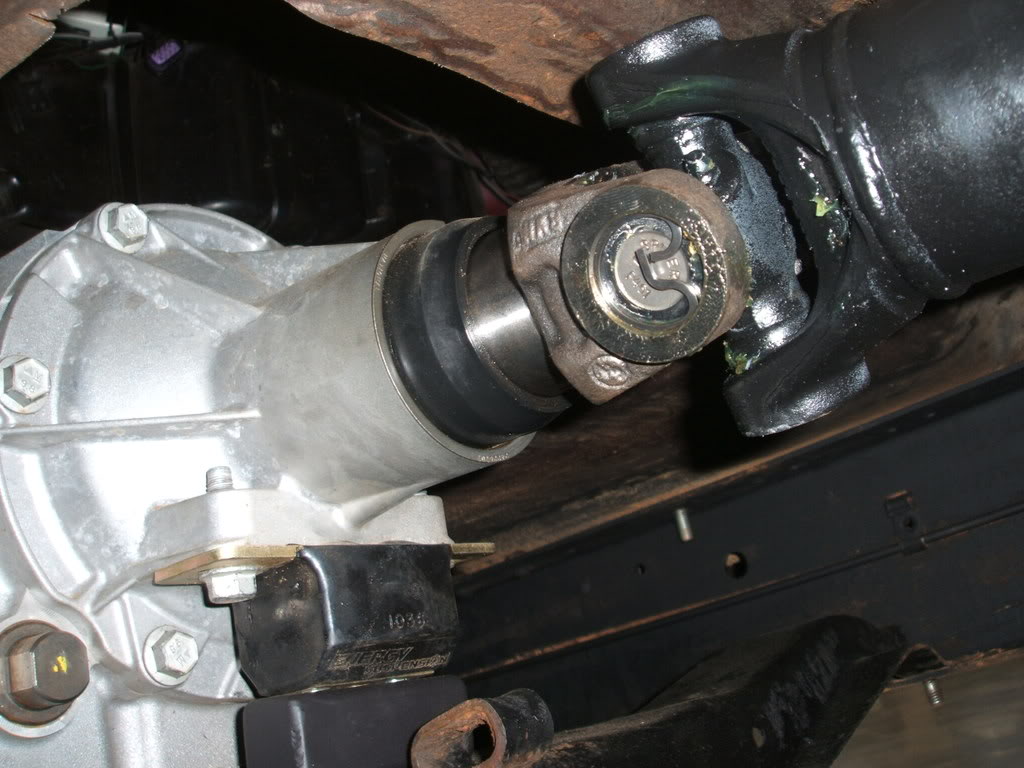
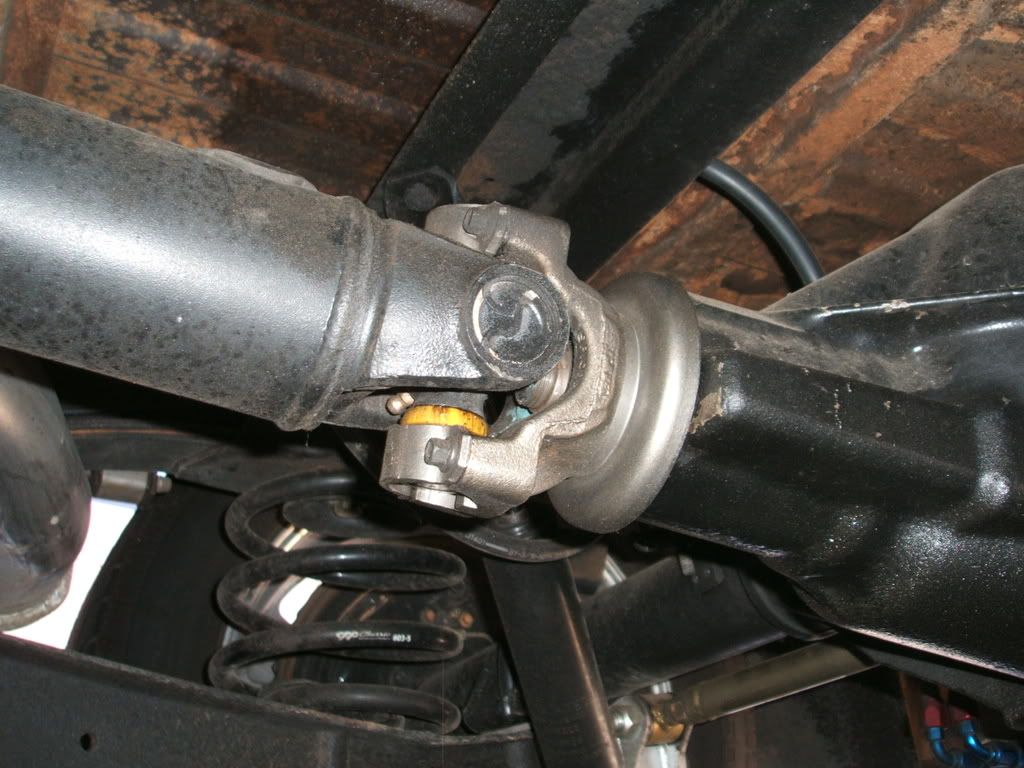
The driveshaft yoke is stock 6L90E yoke. It takes a 1410 u-joint. To make this work on the truck we just had a driveshaft made with a 1410 yoke on one end and a 1350 yoke on the other end. We chose to upgrade to a 1350 on the rear axle while we were at it. We could not find any conversion u-joints to get around having a custom driveshaft built.
Hope this infomation can help someone else with their build!
This is all new stuff...so feel free to ask away with questions.
Fuel System installation is next so stay tuned!
The 6L90E required using a 4x4 transmission tunnel pan. It is very easy to swap to this tunnel. Once the old trans. tunnel hump is cut out and the 4x4 piece is installed, it is a bolt in installation. The best part is that you can get carpet out of a catalog!
After this modification, the 6L90E fit beautifully. One thing to note is that we did not modify the transmission cross member to get the 6L90E to fit. Holes were drilled into the frame to accommodate the new transmission length. A spacer was made out of 1 �� square tubing to raise the transmission pan up.
The factory column shifter was retained by using a Lokar cable shift linkage kit (ACA-1804)
We ran the transmission oil to an external cooler. Stock GM lines off of an Escalade were modified to accommodate the aftermarket cooler.
The driveshaft yoke is stock 6L90E yoke. It takes a 1410 u-joint. To make this work on the truck we just had a driveshaft made with a 1410 yoke on one end and a 1350 yoke on the other end. We chose to upgrade to a 1350 on the rear axle while we were at it. We could not find any conversion u-joints to get around having a custom driveshaft built.
Hope this infomation can help someone else with their build!
This is all new stuff...so feel free to ask away with questions.
Fuel System installation is next so stay tuned!
07-09-2008, 09:11 AM
#9
TECH Enthusiast
iTrader: (3)

Join Date: Nov 2005
Location: Cabool, Missouri
Posts: 591
Likes: 0
Received 0 Likes
on
0 Posts
i had to be out of town the day Power Tour came through but i ran into some of the guys at Mast hanging out at Steak and Shake still and had the privelage of seeing this truck. It is SICK and i love how clean their setup is. If i had the cash id throwdown for one of their systems but im broke in college/newly wed so i get to wire my '89 myself 
07-15-2008, 10:58 AM
#10
FormerVendor
Thread Starter
Join Date: Mar 2007
Location: Nacogdoches, TX
Posts: 182
Likes: 0
Received 0 Likes
on
0 Posts
Fuel System Installation
We bought a fuel cell for this specific application. It gets the fuel out of the cab and relocates it and the filler neck to the bed of the truck. The fuel cell was a really nice piece with a straightforward installation. However, the fuel runs away from the pickups if the tank is below � full. The tank has doesn�t have the proper baffling inside, so it a lean condition when you get on it and are running below a half a tank of fuel. It really leaves a lot to be desired.
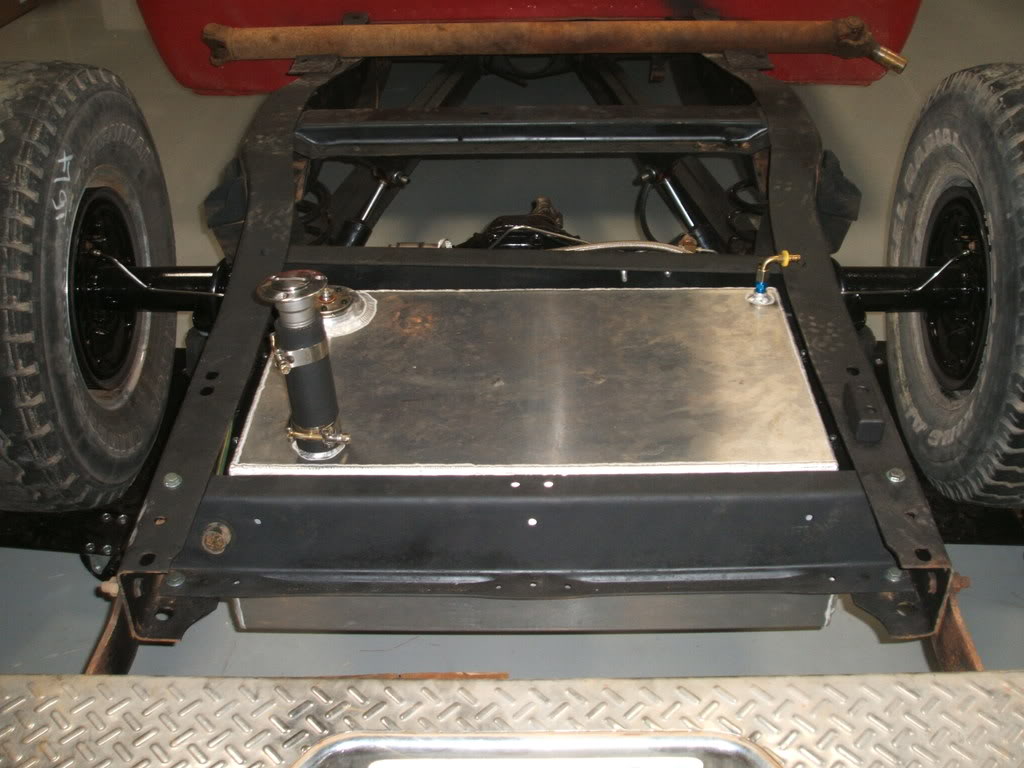
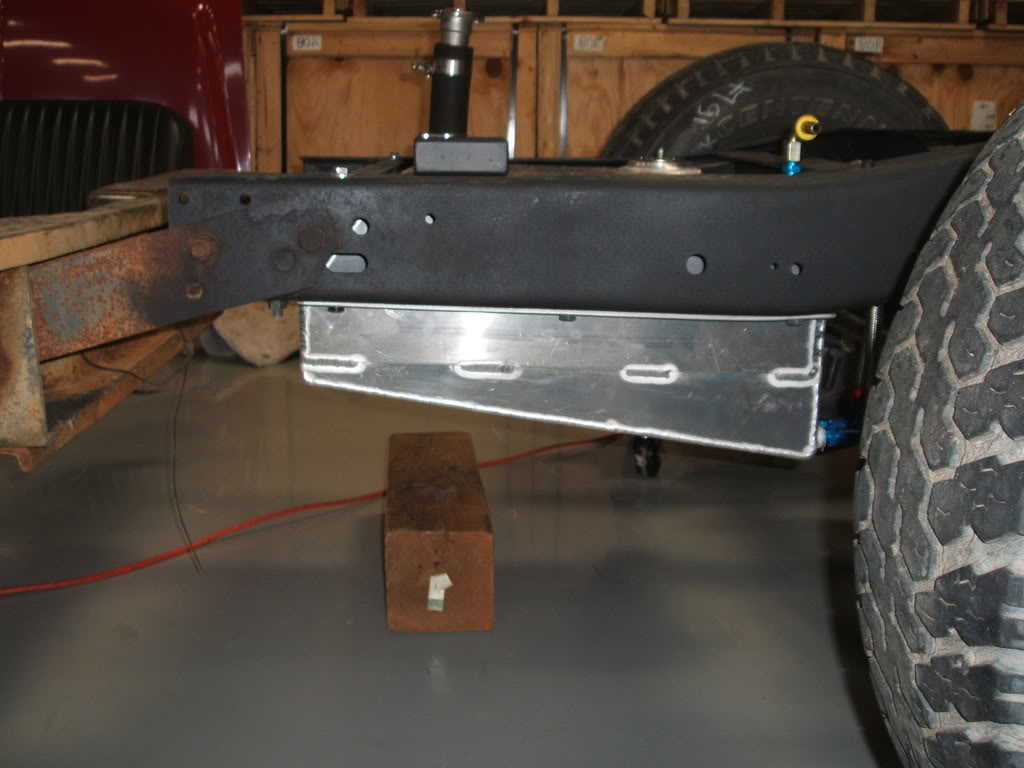
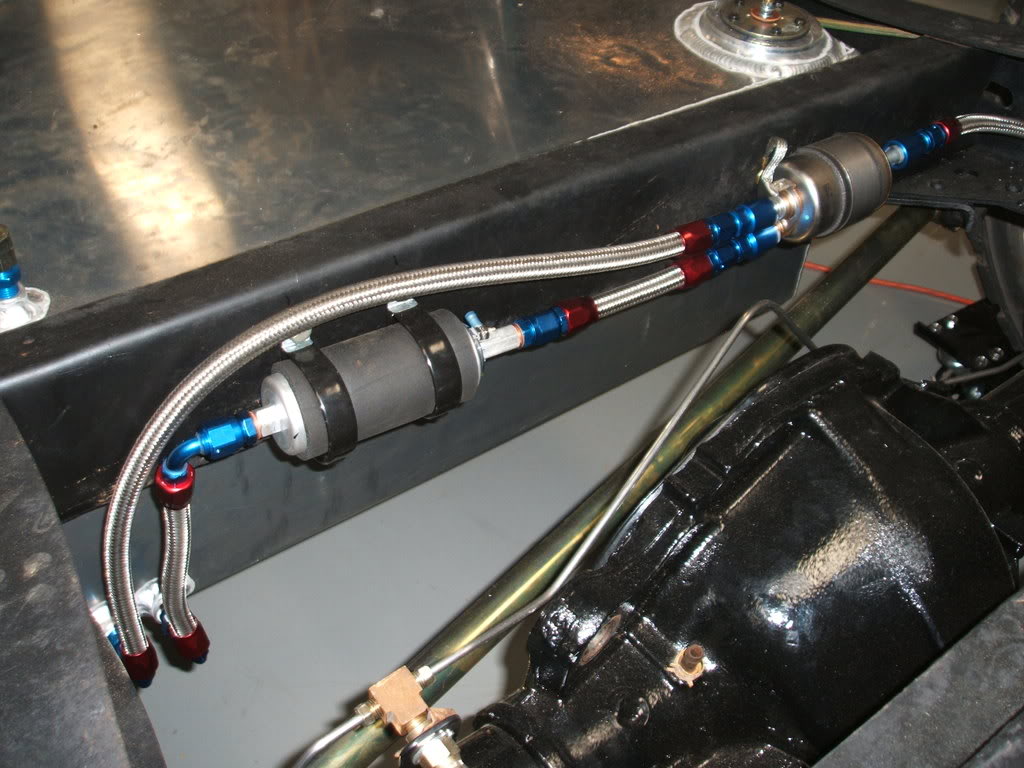
Our fuel system is a Mast Motorsports AN fuel system that is an option with our crate engine packages. We send it as a universal kit that has to be finish fit to your specific chassis and routing preferences. It uses anodized fittings and braided stainless line from the fuel cell all the way to the fuel rail. The pump (can be in-tank or in-line) is a 67 GPH and the filter/regulator is a GM unit. We have tested this pump setup on all of our engine packages that we offer thus far and it has supported the high power levels just fine. This includes our LSX 454 HO engines. Everywhere on our fuel system that has a GM push connect line uses an anodized quick connect with a 6AN outlet. This makes for a nice solution for a complete, low cost fuel system solution for the LS series swap. Below are some pics of the fuel system layout.
We haven't figured out what our solution to our fueling problem is going to be. We may just cut the tank open and put in the correct baffling or get a new tank. For now the fix is to run it with at least a half a tank of fuel.
We bought a fuel cell for this specific application. It gets the fuel out of the cab and relocates it and the filler neck to the bed of the truck. The fuel cell was a really nice piece with a straightforward installation. However, the fuel runs away from the pickups if the tank is below � full. The tank has doesn�t have the proper baffling inside, so it a lean condition when you get on it and are running below a half a tank of fuel. It really leaves a lot to be desired.
Our fuel system is a Mast Motorsports AN fuel system that is an option with our crate engine packages. We send it as a universal kit that has to be finish fit to your specific chassis and routing preferences. It uses anodized fittings and braided stainless line from the fuel cell all the way to the fuel rail. The pump (can be in-tank or in-line) is a 67 GPH and the filter/regulator is a GM unit. We have tested this pump setup on all of our engine packages that we offer thus far and it has supported the high power levels just fine. This includes our LSX 454 HO engines. Everywhere on our fuel system that has a GM push connect line uses an anodized quick connect with a 6AN outlet. This makes for a nice solution for a complete, low cost fuel system solution for the LS series swap. Below are some pics of the fuel system layout.
We haven't figured out what our solution to our fueling problem is going to be. We may just cut the tank open and put in the correct baffling or get a new tank. For now the fix is to run it with at least a half a tank of fuel.
 07-23-2008, 03:50 PM
#13
Teching In
iTrader: (3)

Join Date: Jan 2006
Location: San Antonio, TX
Posts: 15
Likes: 0
Received 0 Likes
on
0 Posts
This is the same swap I want to do. I have been wanting one of these trucks for a while. Since my vette will be done soon. I have been looking at doing this swap. I was going to go with a lq4 with the carb setup, maybe with a 6 speed. I have been looking for a good body to do my swap for a decent price. That is a nice truck!!!
08-11-2008, 11:47 AM
#15
FormerVendor
Thread Starter
Join Date: Mar 2007
Location: Nacogdoches, TX
Posts: 182
Likes: 0
Received 0 Likes
on
0 Posts
CAN Gauge Installation
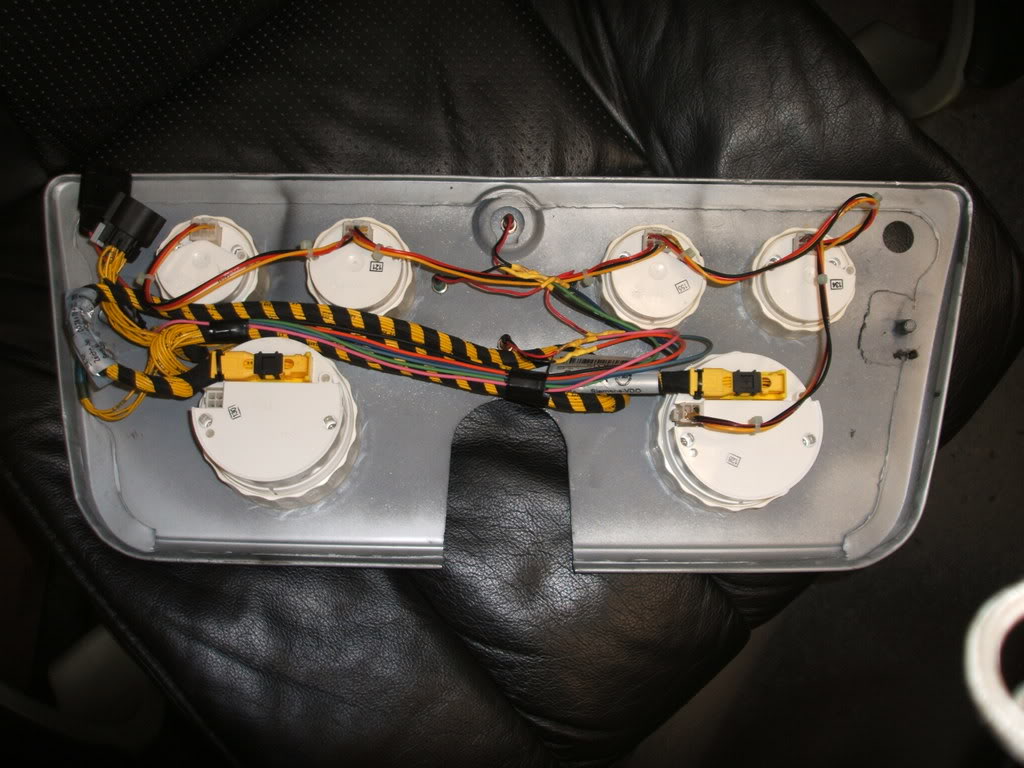
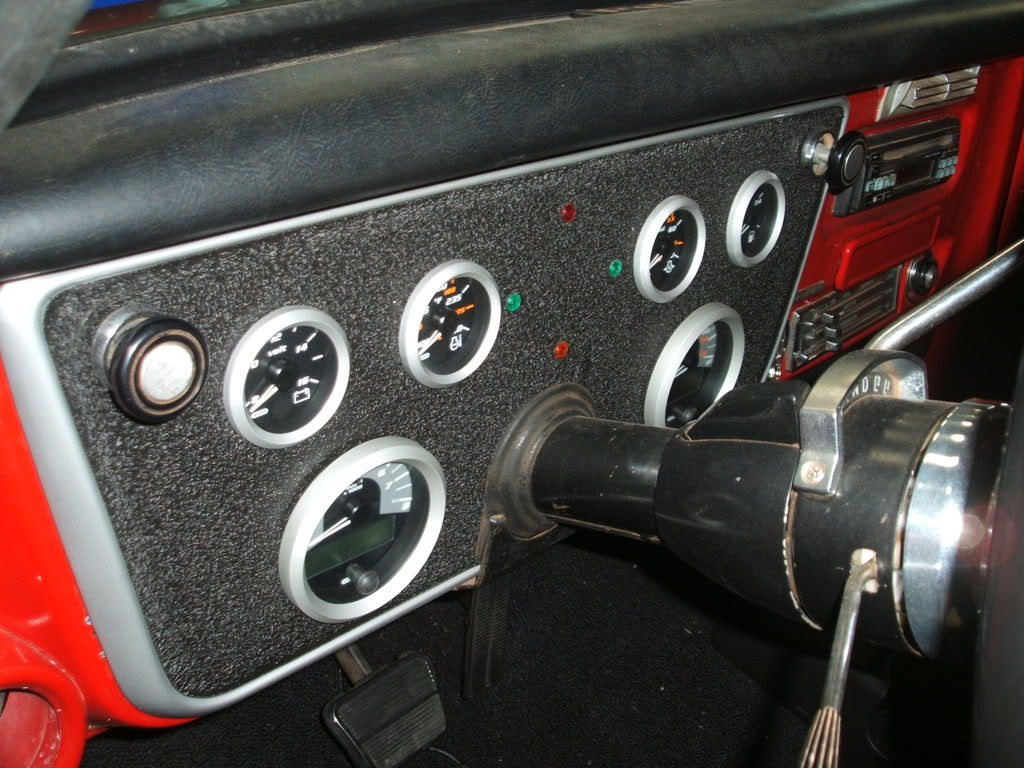
For the gauges, we used our Mast Motorsports CAN Gauge Package. These gauges hookup to the M-90 ECM�s CAN network over two wires and essentially act as a scan tool. In addition to having analog readouts on the �master� and �satellite� gauges, they allow the user to scroll through other engine parameters such as: engine hours, RPM, battery voltage, engine coolant temperature, oil pressure, fuel level, intake air temperature, throttle position, roadspeed, DTC�s, and odometer. All of these parameters come over only 2 wires. They require a 7 wire hookup for the master gauges and the satellites are plug and play with quick connectors.
The gauge panel is made from a modified glove box door. This made for a more stock appearing look using the new technology gauges.
You can see in this pic how the satellite gauges are plug and play from the master gauges.
Panel Front

Intro. screen that shows when the gauges are turned on.
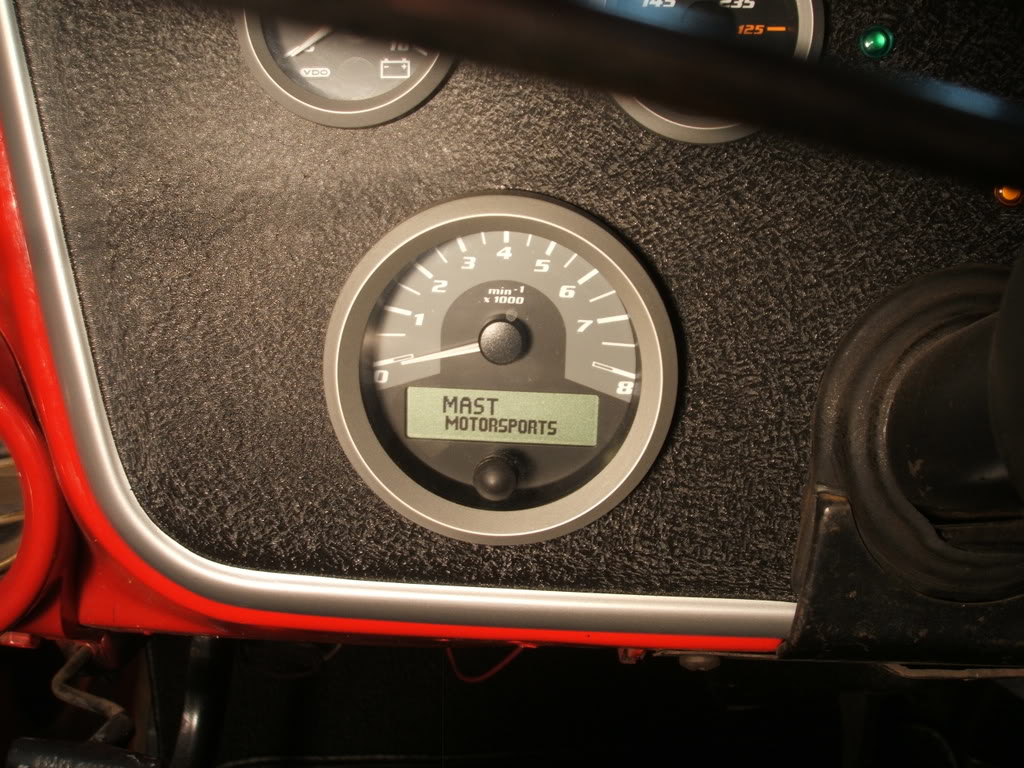
We were really pleased with how this turned out. Still retained the old look with new function.
For the gauges, we used our Mast Motorsports CAN Gauge Package. These gauges hookup to the M-90 ECM�s CAN network over two wires and essentially act as a scan tool. In addition to having analog readouts on the �master� and �satellite� gauges, they allow the user to scroll through other engine parameters such as: engine hours, RPM, battery voltage, engine coolant temperature, oil pressure, fuel level, intake air temperature, throttle position, roadspeed, DTC�s, and odometer. All of these parameters come over only 2 wires. They require a 7 wire hookup for the master gauges and the satellites are plug and play with quick connectors.
The gauge panel is made from a modified glove box door. This made for a more stock appearing look using the new technology gauges.
You can see in this pic how the satellite gauges are plug and play from the master gauges.
Panel Front
Intro. screen that shows when the gauges are turned on.
We were really pleased with how this turned out. Still retained the old look with new function.

 What radiator are you using currently?
  08-12-2008, 11:41 AM
#18
FormerVendor
Thread Starter
Join Date: Mar 2007
Location: Nacogdoches, TX
Posts: 182
Likes: 0
Received 0 Likes
on
0 Posts
Thanks for the compliments!
It is a unversal fit unit from Jeg's. I am working on a full write up on the cooling system. I am including radiator, fans, and hose part numbers. I will try and have it up in the next couple of days.
It is a unversal fit unit from Jeg's. I am working on a full write up on the cooling system. I am including radiator, fans, and hose part numbers. I will try and have it up in the next couple of days.
08-12-2008, 11:45 AM
#19
FormerVendor
Thread Starter
Join Date: Mar 2007
Location: Nacogdoches, TX
Posts: 182
Likes: 0
Received 0 Likes
on
0 Posts
