Project Land Whale (Silverado Turbo Build)
 04-29-2013, 10:34 AM
#1

I have a thread going on Performance Trucks currently so I am going to just copy paste what I have from over there so far. Then I will continue to update both threads with new information.
This thread will document the modifications, updates and general information of my newest vehicle build.
I picked the truck up Saturday December 22nd, about a 200 mile drive each way from my house. I had been searching for nearing a year and had hit the point I was starting to make compromises just to get started on a build. I went and looked at a couple of compromise trucks, and luckily they were all in fairly poor shape, so I didn't buy any of them.
Last week I randomly stumbled upon the exact truck I had been looking for the whole time. I went and took a look at it and after a little negotiation, took it home.
The details are as follows:
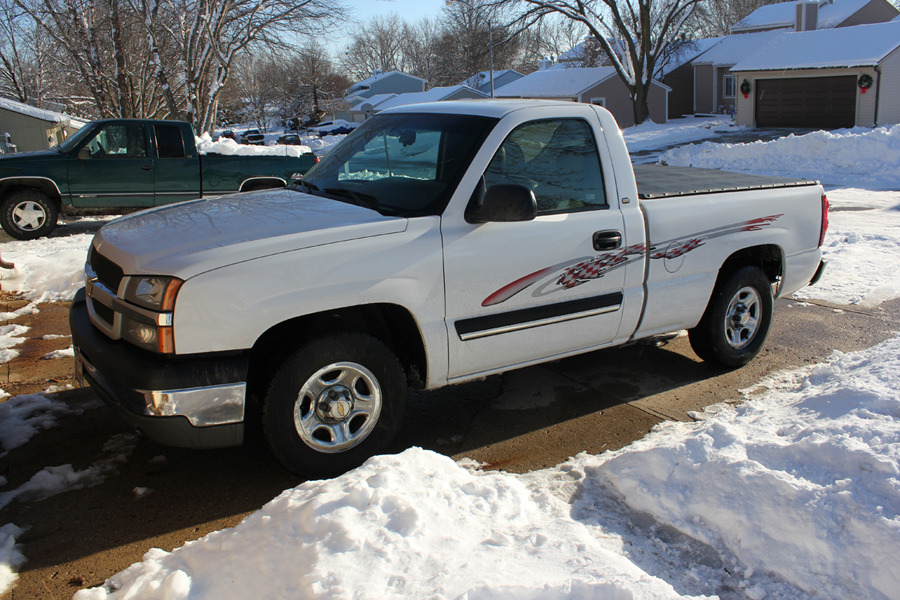
2003 Silverado 1500 RCSB W/T
Olympic White Exterior
Dark Charcoal Interior
5.3L Engine
2WD
The miles are high, but that was kind of the idea as the goal is to eventually replace about everything in the truck. Everything runs as it should and after a little bit of love it will look good as new. That is when the fun parts will start making their way onto the truck.
The first plans are:
Deep Cleaning.
Remove Vinyl, badges, moldings.
Remove all traces of bed cover.
Paint Touch-Ups, etc.
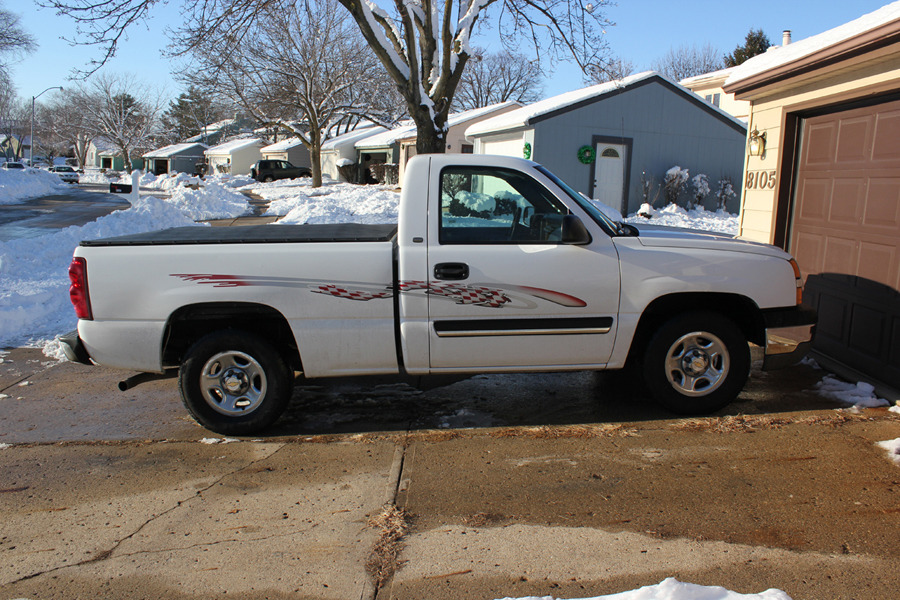
Now, onto pictures. First things first, let me say I will be removing the hideous vinyl decals as soon as I find a few spare moments.
Right after the 200+ mile drive home, excuse the dirt.
This thread will document the modifications, updates and general information of my newest vehicle build.
I picked the truck up Saturday December 22nd, about a 200 mile drive each way from my house. I had been searching for nearing a year and had hit the point I was starting to make compromises just to get started on a build. I went and looked at a couple of compromise trucks, and luckily they were all in fairly poor shape, so I didn't buy any of them.
Last week I randomly stumbled upon the exact truck I had been looking for the whole time. I went and took a look at it and after a little negotiation, took it home.
The details are as follows:
2003 Silverado 1500 RCSB W/T
Olympic White Exterior
Dark Charcoal Interior
5.3L Engine
2WD
The miles are high, but that was kind of the idea as the goal is to eventually replace about everything in the truck. Everything runs as it should and after a little bit of love it will look good as new. That is when the fun parts will start making their way onto the truck.
The first plans are:
Deep Cleaning.
Remove Vinyl, badges, moldings.
Remove all traces of bed cover.
Paint Touch-Ups, etc.
Now, onto pictures. First things first, let me say I will be removing the hideous vinyl decals as soon as I find a few spare moments.
Right after the 200+ mile drive home, excuse the dirt.
Last edited by Funkster; 09-05-2013 at 06:08 PM.
 04-29-2013, 10:35 AM
#2
From: 12/24/12
Well, the original plan for the night was to get home from work and start to work pulling the decals, badges, etc. Our Subaru decided to have a tire problem, so that didn't pan out. By the time I got home, I only had the time and motivation for a small project. So that leads us to this post.
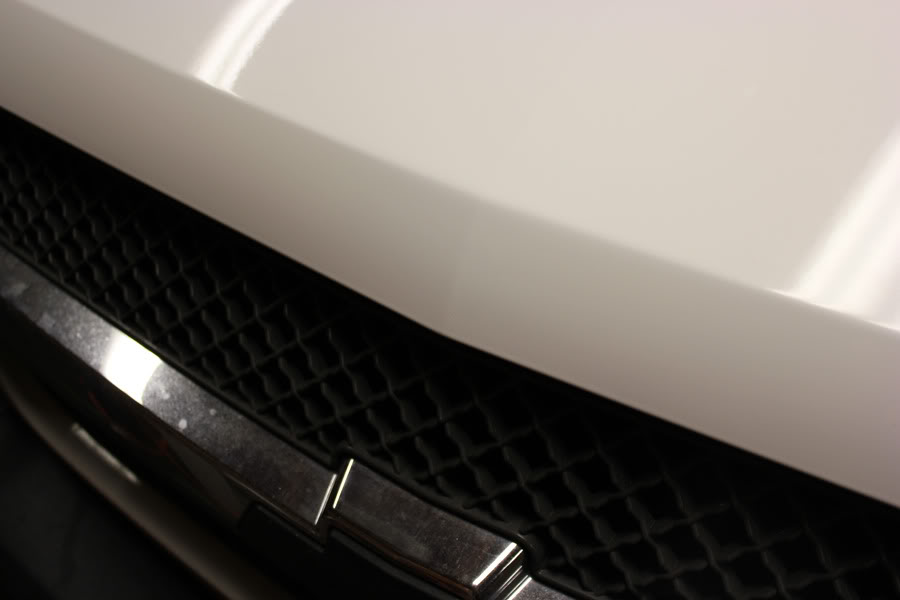
I had some left over matte black vinyl from a previous project and my front bowtie was in need of some love. Not to mention how hideous gold badges are in my opinion. So I got started.
Badge still in the grill:
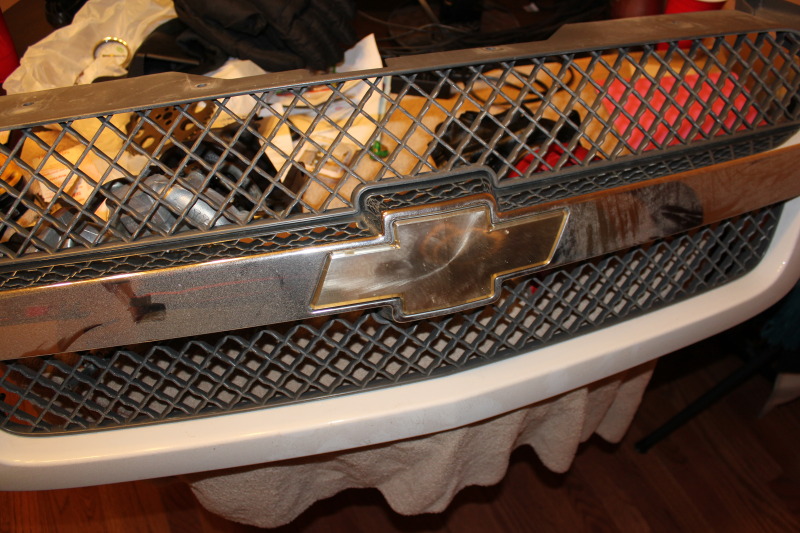
A few of my supplies:
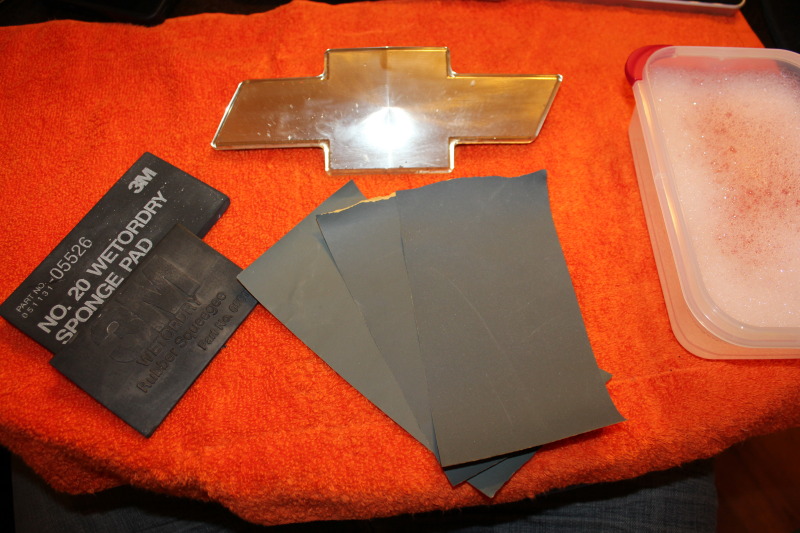
Sanded down with 1500 grit and rinsed with denatured alcohol:

All wrapped up:
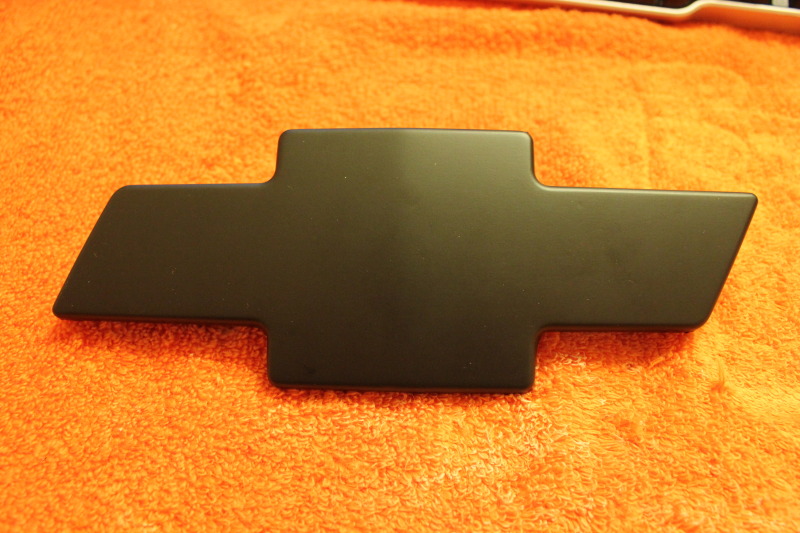
I got it all buttoned up and put back on the truck. It looks good and adds a little bit of pop to the front in my opinion. I didn't get a chance to take a picture of it back on the truck, but I will try to snap one tomorrow.
Well, the original plan for the night was to get home from work and start to work pulling the decals, badges, etc. Our Subaru decided to have a tire problem, so that didn't pan out. By the time I got home, I only had the time and motivation for a small project. So that leads us to this post.
I had some left over matte black vinyl from a previous project and my front bowtie was in need of some love. Not to mention how hideous gold badges are in my opinion. So I got started.
Badge still in the grill:
A few of my supplies:
Sanded down with 1500 grit and rinsed with denatured alcohol:
All wrapped up:
I got it all buttoned up and put back on the truck. It looks good and adds a little bit of pop to the front in my opinion. I didn't get a chance to take a picture of it back on the truck, but I will try to snap one tomorrow.
04-29-2013, 10:35 AM
#3
From 12/30/12
Friday night a couple friends and I had some beers and did a little bit of work on the truck. Pulled and replaced the intermediate shaft in an attempt to fix the clunking in the front. I am not sure if it worked or not as today will be the first time driving the truck since fixing it.
We also changed out the plugs. They really didn't look too bad for a 120k+ engine, and who knows how long they have been in there. Took a couple of pictures of them, just for ***** and gigs.
Plus 1,3,5,7 from left to right:
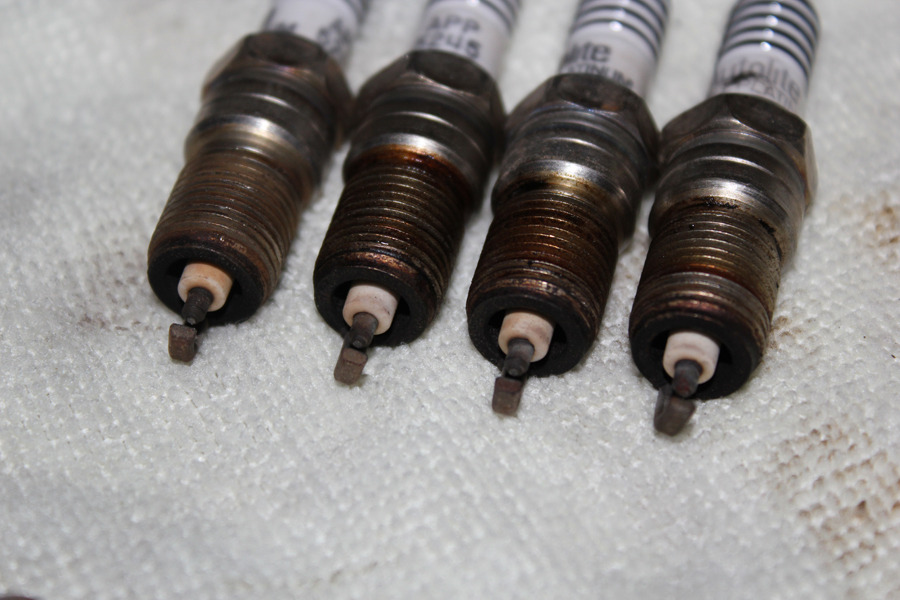
Plugs 2,4,6,8 from left to right:
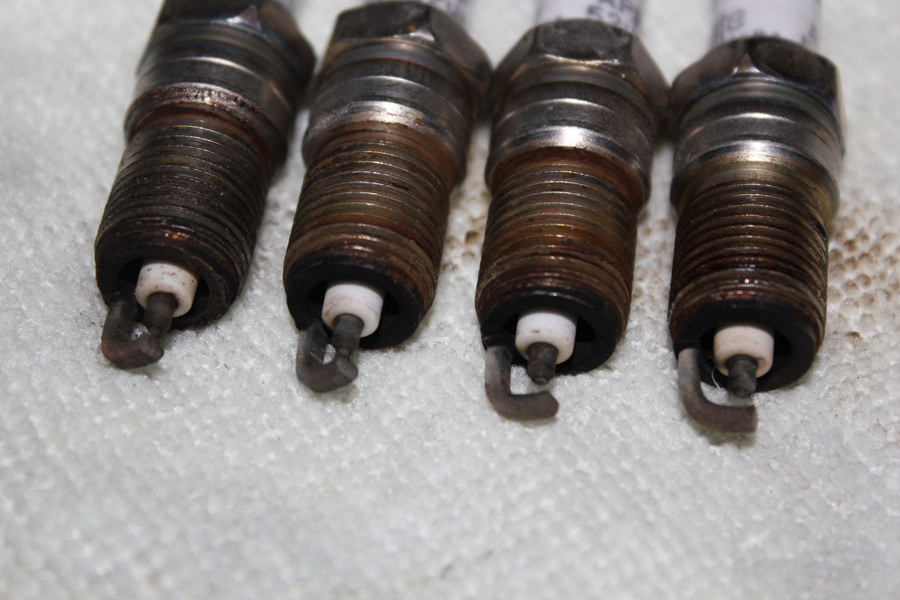
Anyway, had picked up a set of NGK TR5s, gapped them to .040 and put them in. Brought the idle up a bit and and seems to have smoothed it up as well based on startup and a couple minutes of run time.
I got bored last night and pulled the throttle body to clean it up. It was a little on the dirty side.
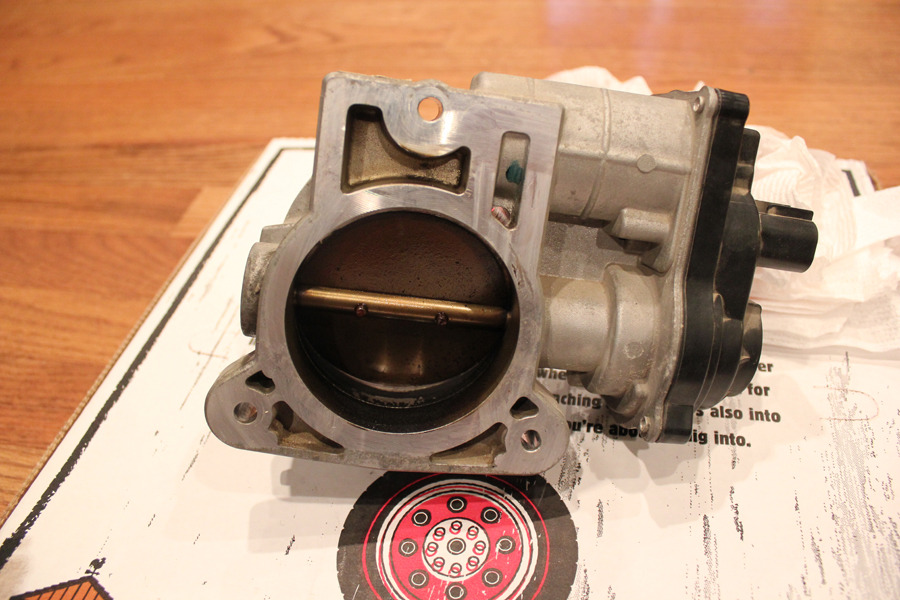
So I cleaned it all up with a mild degreaser. The backside surface that mates to the intake manifold had a good amount of oxidation. I went ahead and hit it with a Roloc disc just to clean it up and give it a smoother mating surface.
That was about it. I had some more stuff planned, but a long time friend of mine is a huge Redskins fan and I am a huge Cowboys fan. That means I have a game to get drunk and yell about tonight. So, I am heading back to my hometown for this afternoon.
As always thanks for reading, and I hope to have some more exciting stuff for you guys soon.
Friday night a couple friends and I had some beers and did a little bit of work on the truck. Pulled and replaced the intermediate shaft in an attempt to fix the clunking in the front. I am not sure if it worked or not as today will be the first time driving the truck since fixing it.
We also changed out the plugs. They really didn't look too bad for a 120k+ engine, and who knows how long they have been in there. Took a couple of pictures of them, just for ***** and gigs.
Plus 1,3,5,7 from left to right:
Plugs 2,4,6,8 from left to right:
Anyway, had picked up a set of NGK TR5s, gapped them to .040 and put them in. Brought the idle up a bit and and seems to have smoothed it up as well based on startup and a couple minutes of run time.
I got bored last night and pulled the throttle body to clean it up. It was a little on the dirty side.
So I cleaned it all up with a mild degreaser. The backside surface that mates to the intake manifold had a good amount of oxidation. I went ahead and hit it with a Roloc disc just to clean it up and give it a smoother mating surface.
That was about it. I had some more stuff planned, but a long time friend of mine is a huge Redskins fan and I am a huge Cowboys fan. That means I have a game to get drunk and yell about tonight. So, I am heading back to my hometown for this afternoon.
As always thanks for reading, and I hope to have some more exciting stuff for you guys soon.
 04-29-2013, 10:38 AM
#5
From: 1/7/13
Finally got the decals pulled off the truck. I don't have any good photos of the truck once it was finished though as it was too dark.
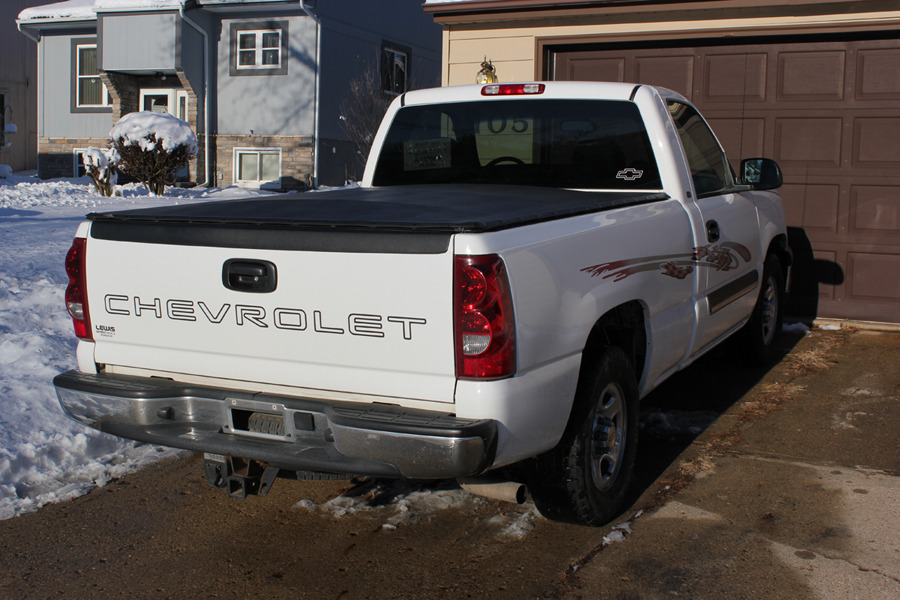
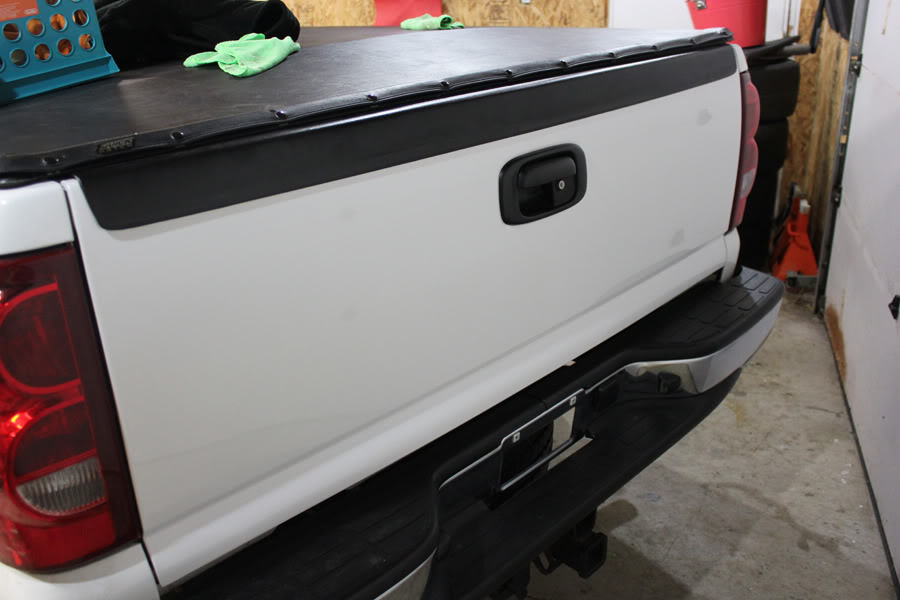
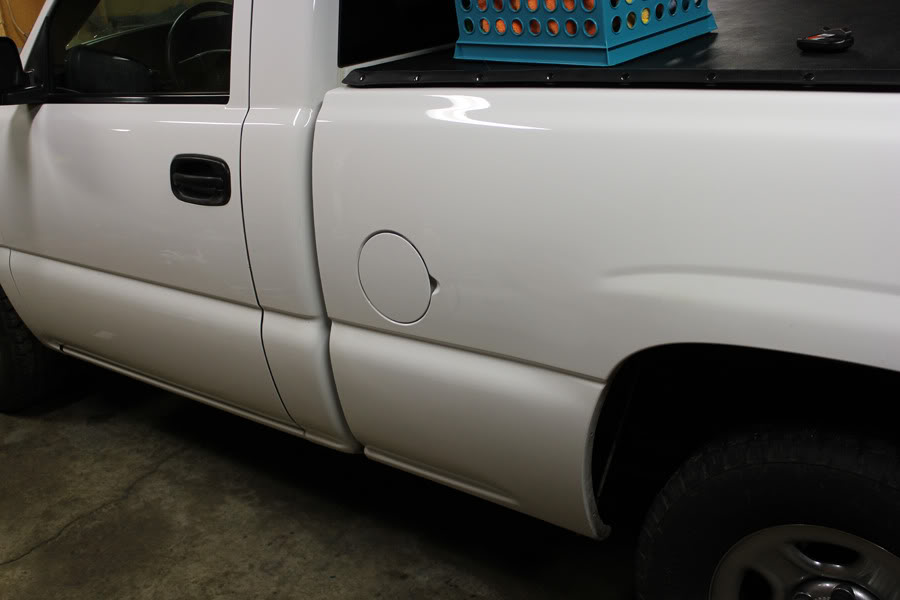
Here is the rear before any work:
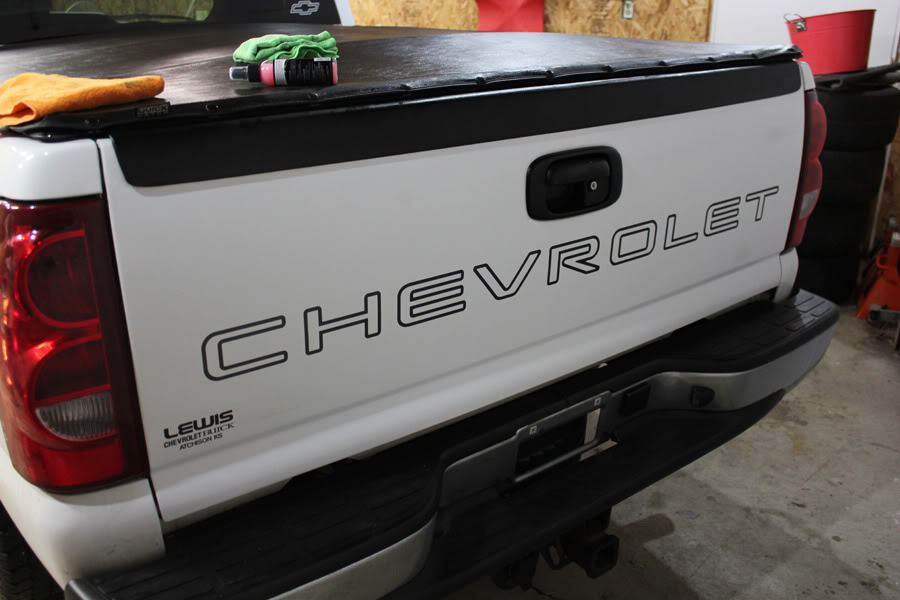
Here is how it looked after pulling the decals and a good clay bar and buff to remove all the residue and contaminants.
More to some as all the decals got pulled and the front chrome bumper was plasti-dipped as well. Dr. Colorchip system showed up today as well, so I will see how that works in a bit.
Finally got the decals pulled off the truck. I don't have any good photos of the truck once it was finished though as it was too dark.
Here is the rear before any work:
Here is how it looked after pulling the decals and a good clay bar and buff to remove all the residue and contaminants.
More to some as all the decals got pulled and the front chrome bumper was plasti-dipped as well. Dr. Colorchip system showed up today as well, so I will see how that works in a bit.
04-29-2013, 10:39 AM
#6
From: 1/11/13
Got a little bit of work done with the Dr. Colorchip system. I am pretty pleased with the results. Not perfect, but the kit does what it needs to do.
I had mentioned I detailed a lot of the truck when I pulled the decals. Well the hood was one of the panels which hadn't received any love yet. After a wash, the hood looked like this.
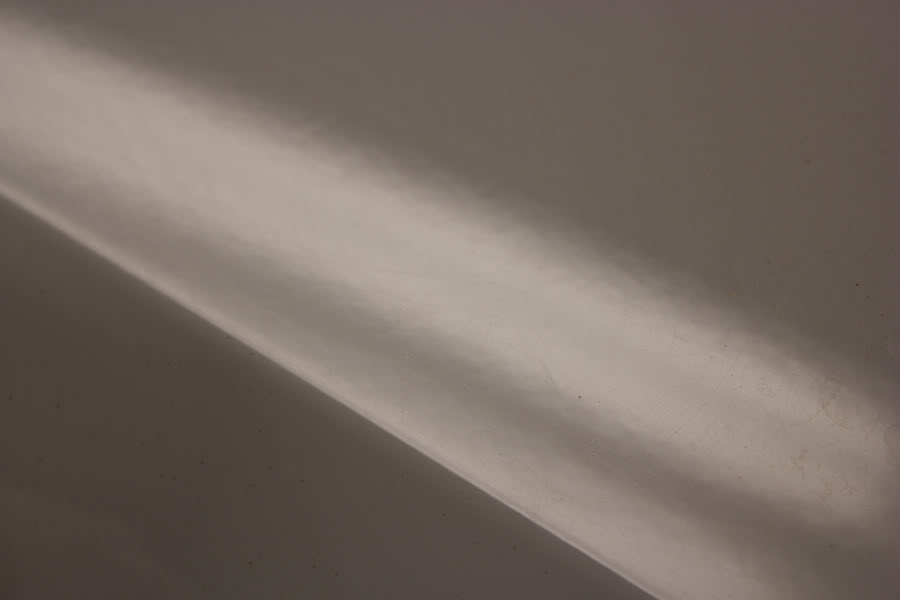
You can see the overall dullness and the small contaminants on the paint in the photo. Needless to say I hit it with a claybar before any other work. This is just from about 1/4 of the hood.
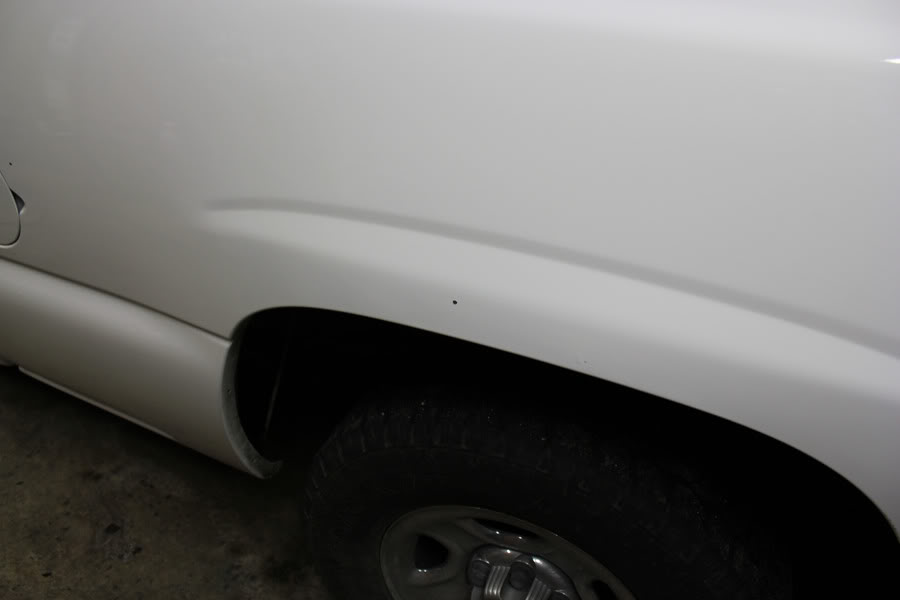
There were a few main chips I wanted to address. A couple of big ones on the driver's side rear and a couple on the front.
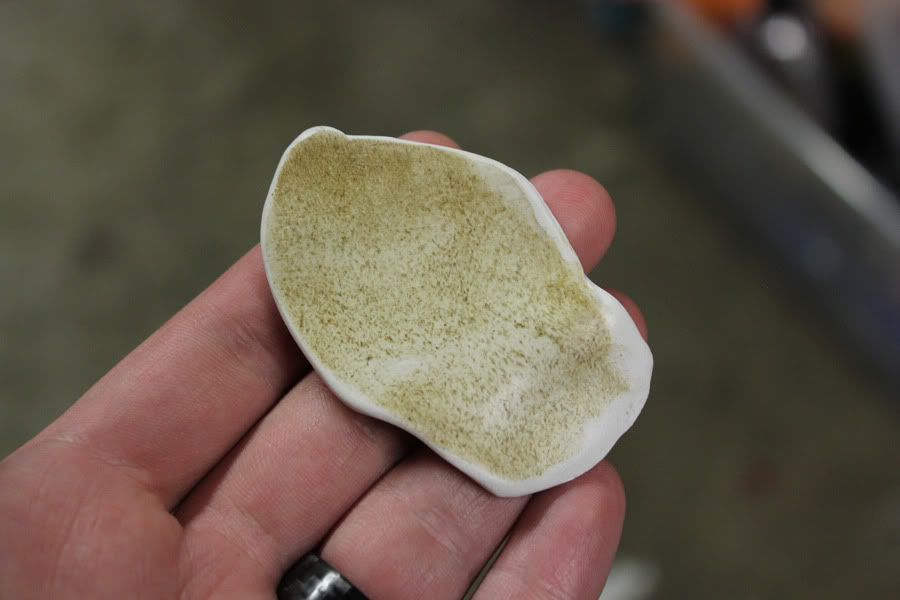
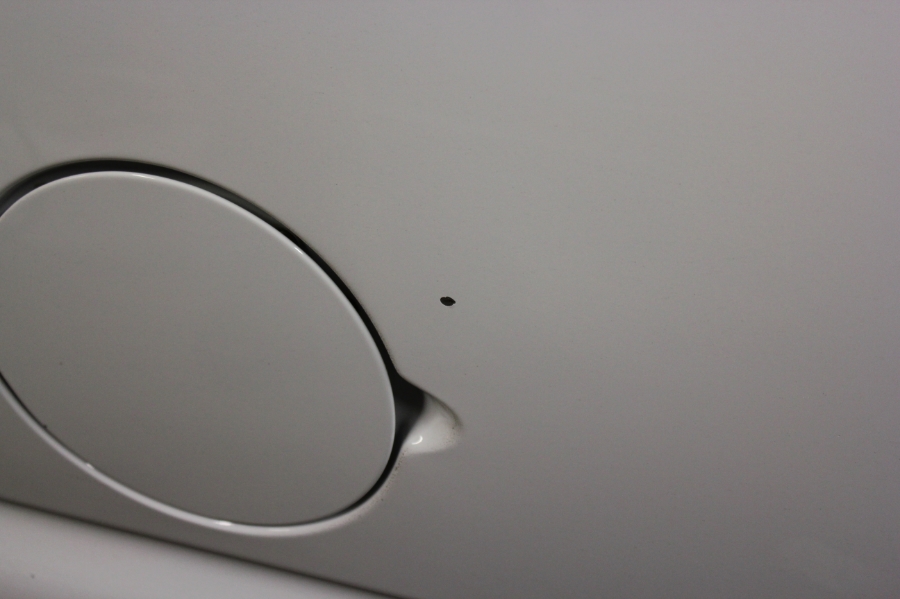
Chip by fuel door:
Chip on driver's box side:
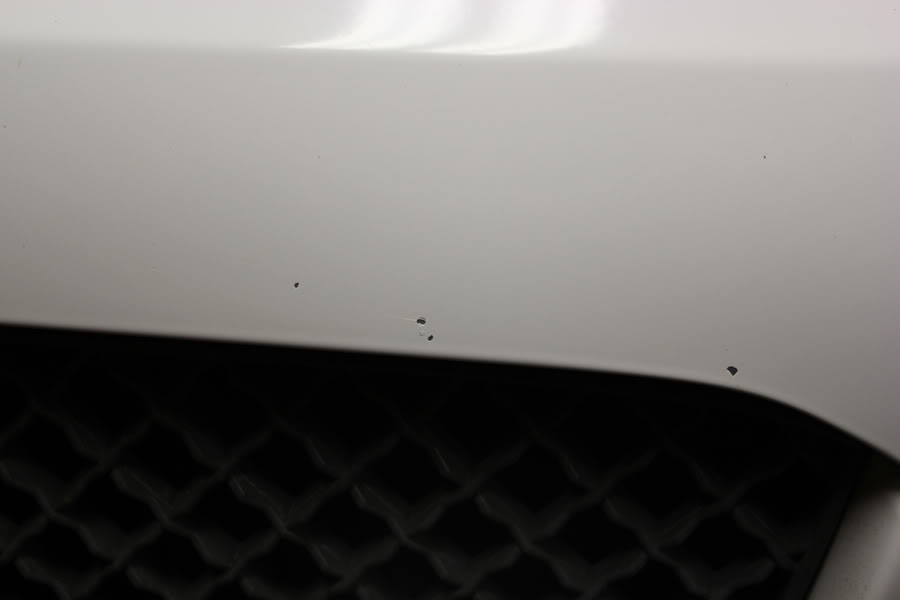
Chips on the front of the hood:
After a wipe down with Denatured Alcohol I started working. I don't have any progress pictures as it is kind of hard to take any since the paint dries so quickly. I will try to get some when I fix some more chips. Here is what I ended up with after a few times through the process:
Chips on hood after:
Chips by fuel door and on box side after:
Like I said, not perfect. However, looks a lot better than huge chips and will serve to protect from rust for the time being.
I am planning to pick up a set of tires for the stock 16's for the time being while I refinish the 20" wheels. I will be grabbing them used this weekend. I am also going to take a look at a set of 16x7 Tahoe wheels to use for a budget drag setup.
Sometime this weekend I am going to try and find time to buff out the hood and fenders, detail the interior a bit and maybe do some sound dampening. We will see what time allows for.
Got a little bit of work done with the Dr. Colorchip system. I am pretty pleased with the results. Not perfect, but the kit does what it needs to do.
I had mentioned I detailed a lot of the truck when I pulled the decals. Well the hood was one of the panels which hadn't received any love yet. After a wash, the hood looked like this.
You can see the overall dullness and the small contaminants on the paint in the photo. Needless to say I hit it with a claybar before any other work. This is just from about 1/4 of the hood.
There were a few main chips I wanted to address. A couple of big ones on the driver's side rear and a couple on the front.
Chip by fuel door:
Chip on driver's box side:
Chips on the front of the hood:
After a wipe down with Denatured Alcohol I started working. I don't have any progress pictures as it is kind of hard to take any since the paint dries so quickly. I will try to get some when I fix some more chips. Here is what I ended up with after a few times through the process:
Chips on hood after:
Chips by fuel door and on box side after:
Like I said, not perfect. However, looks a lot better than huge chips and will serve to protect from rust for the time being.
I am planning to pick up a set of tires for the stock 16's for the time being while I refinish the 20" wheels. I will be grabbing them used this weekend. I am also going to take a look at a set of 16x7 Tahoe wheels to use for a budget drag setup.
Sometime this weekend I am going to try and find time to buff out the hood and fenders, detail the interior a bit and maybe do some sound dampening. We will see what time allows for.
04-29-2013, 10:40 AM
#7
From: 3/9/13
Nothing too exciting, but I did pick up another piece of the puzzle last night.
I also dropped the hitch off the back of it. Probably shaved a good chunk of weight. (although from the worst place) I will likely refinish it in case I need it in the future.
Nothing too exciting, but I did pick up another piece of the puzzle last night.
I also dropped the hitch off the back of it. Probably shaved a good chunk of weight. (although from the worst place) I will likely refinish it in case I need it in the future.
Trending Topics
04-29-2013, 10:41 AM
#8
From: 3/10/13
Got my e-fans installed tonight along with help from a couple of friends. Didn't get a chance to really test them out as it is snowing pretty good here.
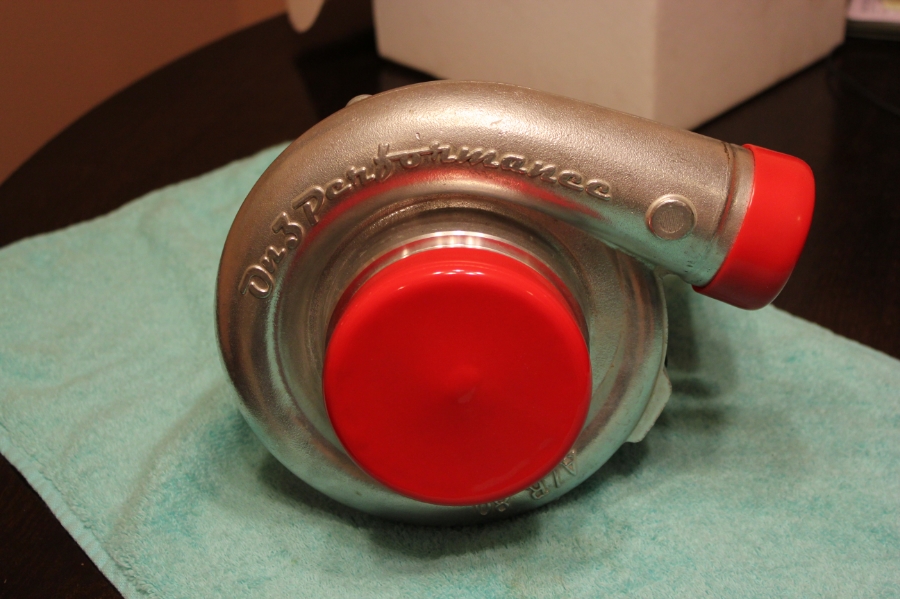
Also, won't need it for a while but picked this up off of a friend tonight.
Got my e-fans installed tonight along with help from a couple of friends. Didn't get a chance to really test them out as it is snowing pretty good here.
Also, won't need it for a while but picked this up off of a friend tonight.
04-29-2013, 10:41 AM
#9
From: 3/19/13
This last weekend got a bit more done. Put a tune on the truck that firmed up the shifts and bumped timing a bit. Get a little 1-2 chirp now.
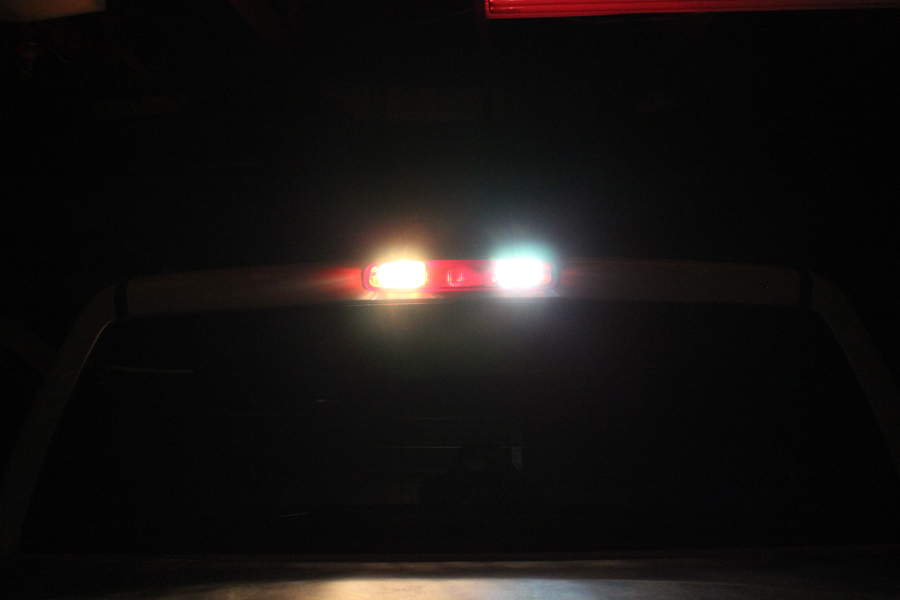
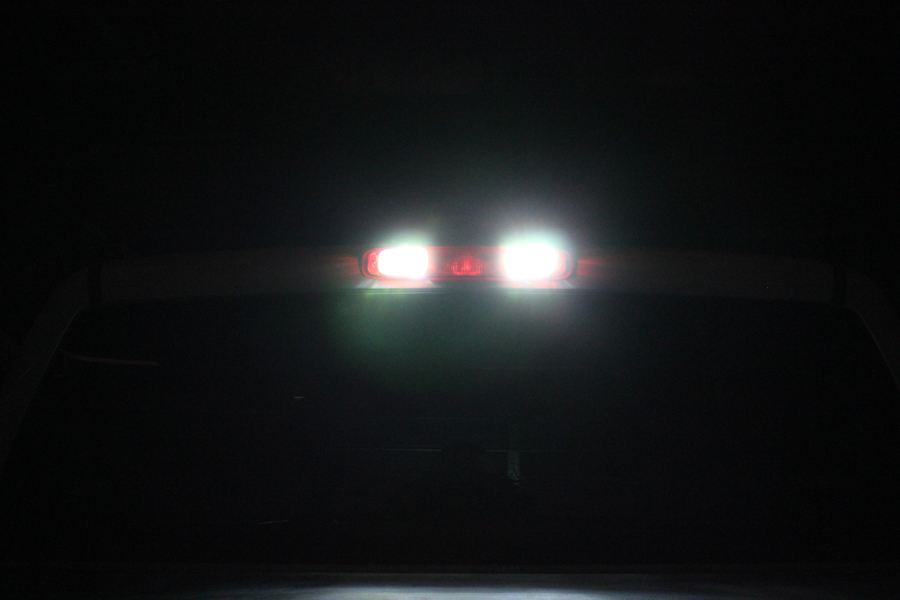
Changed the work lights over to LED bulbs as well. A little brighter and a lot easier on the eyes.
Stock:

Stock on the left, LED on the right:
Both LEDs installed:
Also did a bit of engine bay work. Plan to cut the air box for a bit more airflow and figured I would do some sprucing up and additional work in the process.
I took of the stock airbox mounting plate and cleaned it up first.
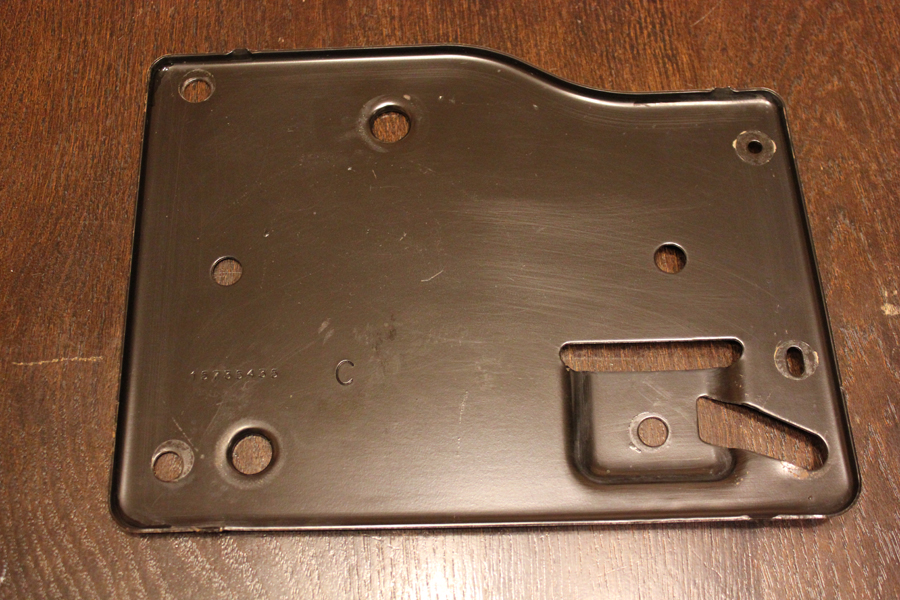
Then I laid out a grid and using a punch and a small bit got some pilot holes started.
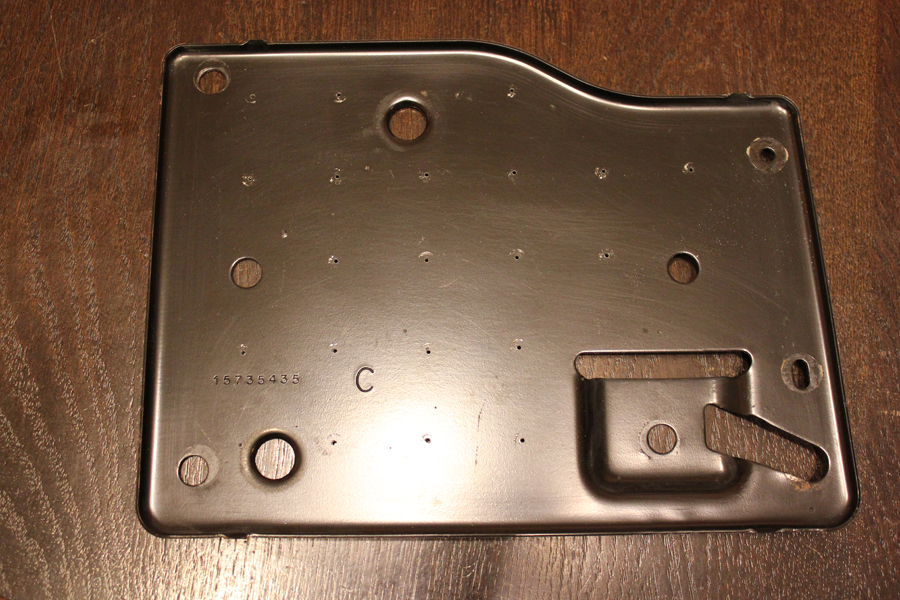
Then I stepped up the bits until I had 3/4" holes.
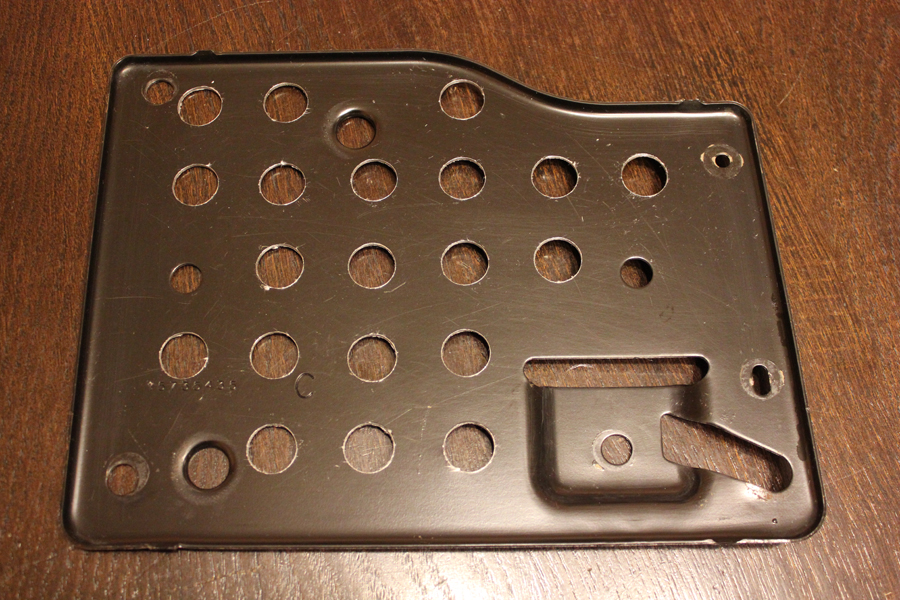
I then put the modified plate and plate mount into my stripper tank, did an outgas cycle, blasted the box plate and hit the mount with a Roloc since it had some rust on it.

Coated both pieces and all the mounting bolts in flat black. I apologize for the terrible photo.
I need to get the air box cut as well, but ran out of time. That will be a project for tomorrow.
This last weekend got a bit more done. Put a tune on the truck that firmed up the shifts and bumped timing a bit. Get a little 1-2 chirp now.
Changed the work lights over to LED bulbs as well. A little brighter and a lot easier on the eyes.
Stock:
Stock on the left, LED on the right:
Both LEDs installed:
Also did a bit of engine bay work. Plan to cut the air box for a bit more airflow and figured I would do some sprucing up and additional work in the process.
I took of the stock airbox mounting plate and cleaned it up first.
Then I laid out a grid and using a punch and a small bit got some pilot holes started.
Then I stepped up the bits until I had 3/4" holes.
I then put the modified plate and plate mount into my stripper tank, did an outgas cycle, blasted the box plate and hit the mount with a Roloc since it had some rust on it.
Coated both pieces and all the mounting bolts in flat black. I apologize for the terrible photo.
I need to get the air box cut as well, but ran out of time. That will be a project for tomorrow.
04-29-2013, 10:42 AM
#10
From: 3/24/13
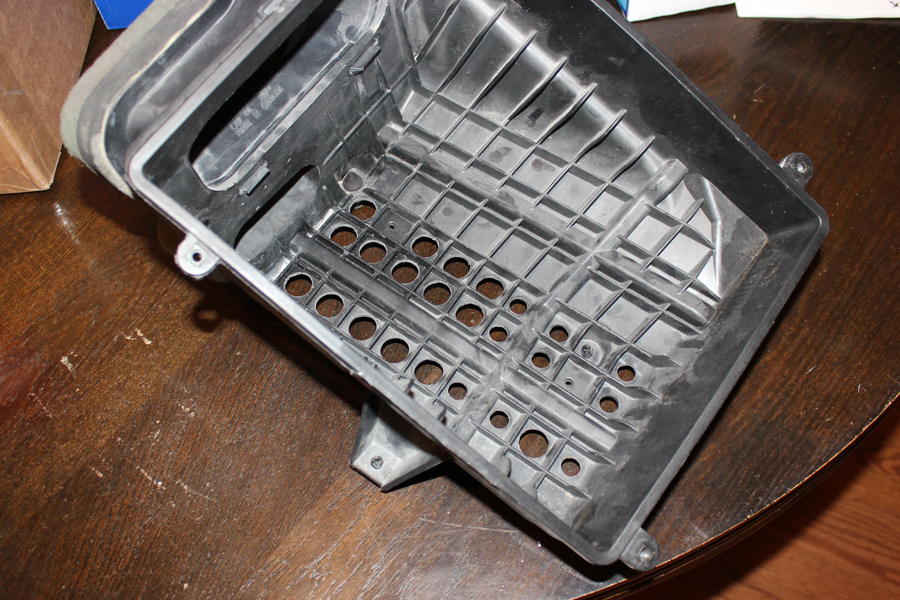
Finished the air box bottom the other day. Decided to drill holes instead of cutting it up, came out looking good and I think will do the job just fine.
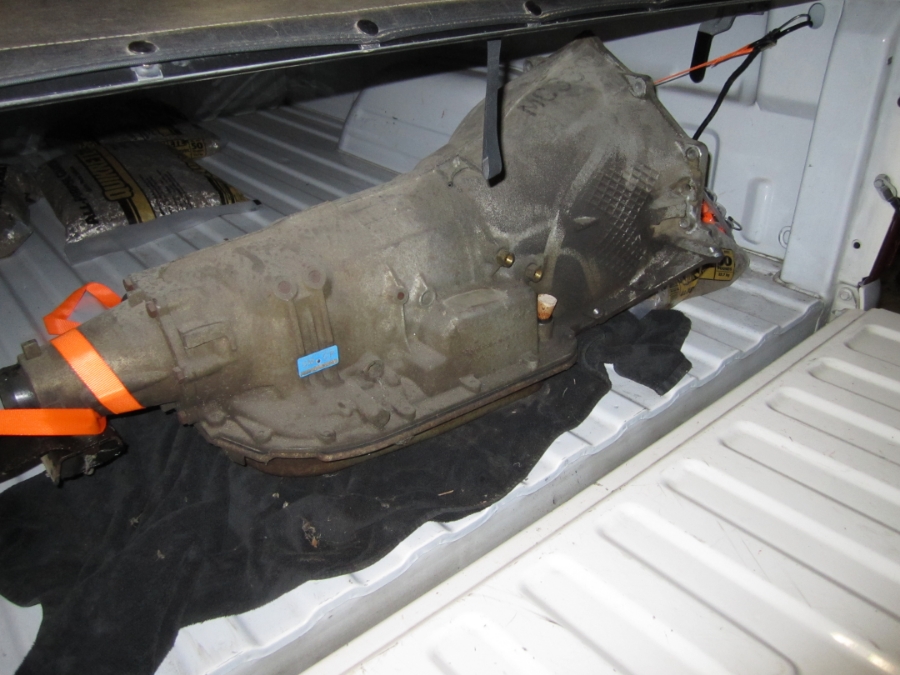
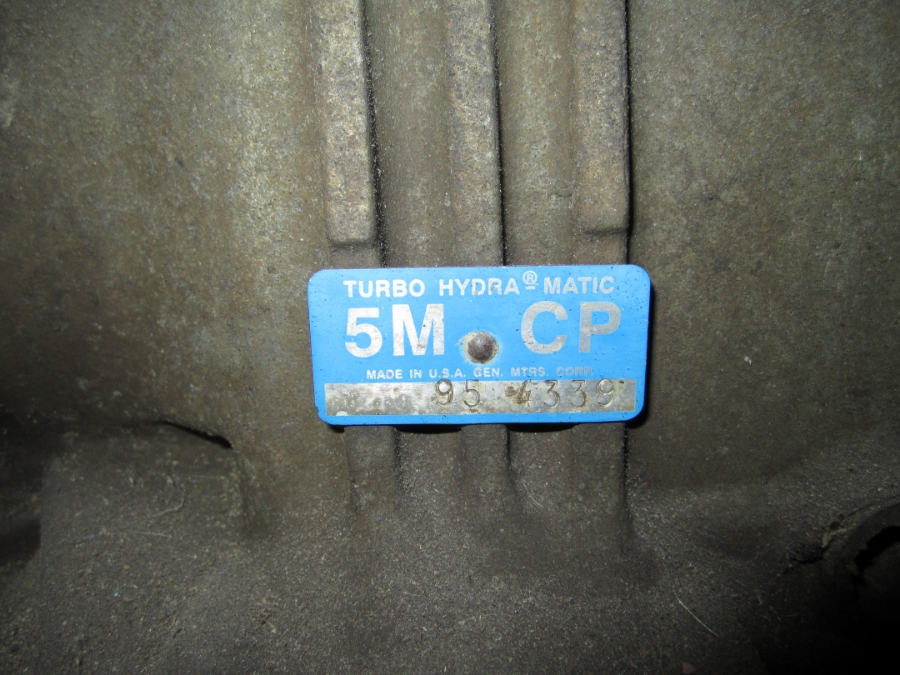
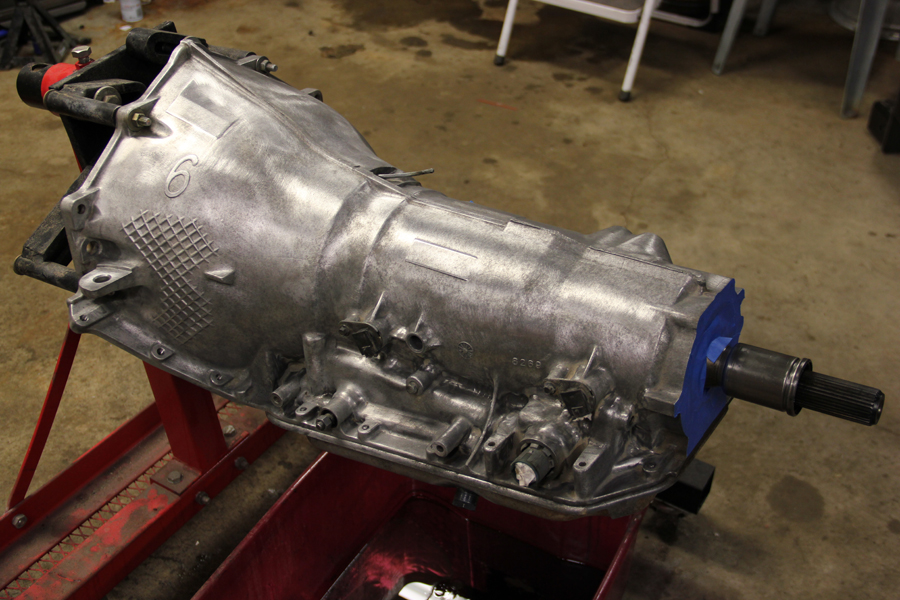
Also got the 4L80E up on the stand and dropped the pan.
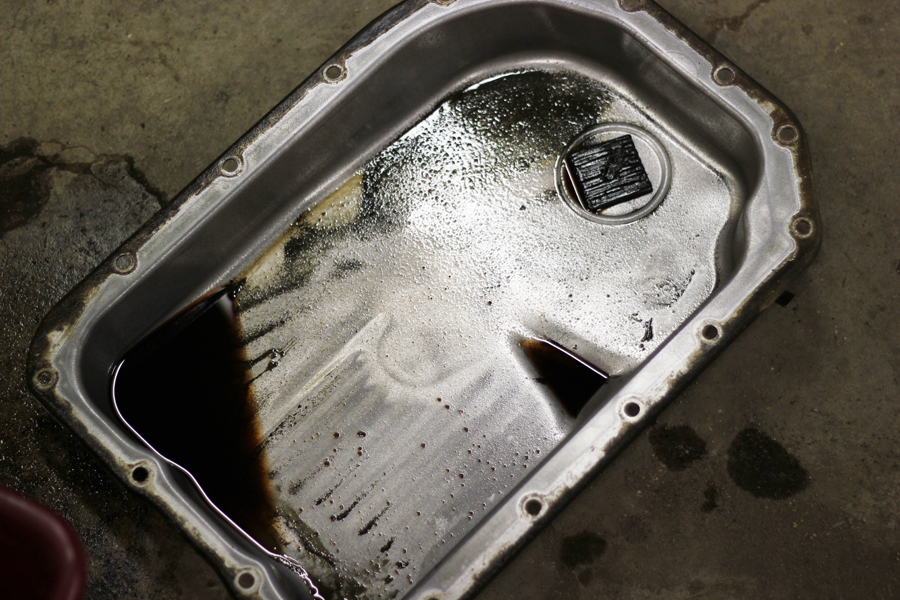
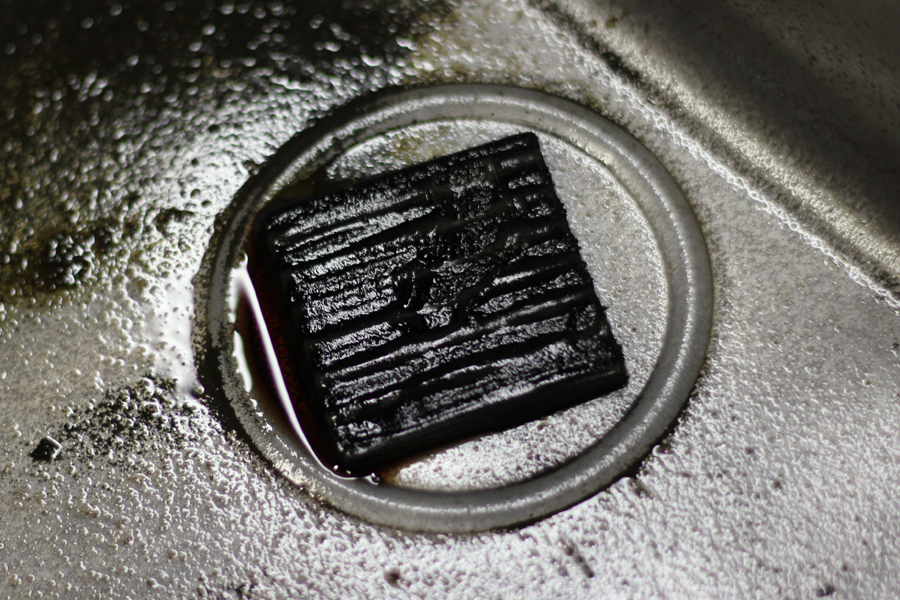
Can't say it or the magnet were pretty, but I pans that have had a lot more in them have held up to more power than I will make for a while. Gotta save for a couple weeks now and then will be picking up my torque converter. In the mean time I am going to do some more small maintanence things and maybe a bit of interior work.
Finished the air box bottom the other day. Decided to drill holes instead of cutting it up, came out looking good and I think will do the job just fine.
Also got the 4L80E up on the stand and dropped the pan.
Can't say it or the magnet were pretty, but I pans that have had a lot more in them have held up to more power than I will make for a while. Gotta save for a couple weeks now and then will be picking up my torque converter. In the mean time I am going to do some more small maintanence things and maybe a bit of interior work.
04-29-2013, 10:42 AM
#11
From: 3/28/13
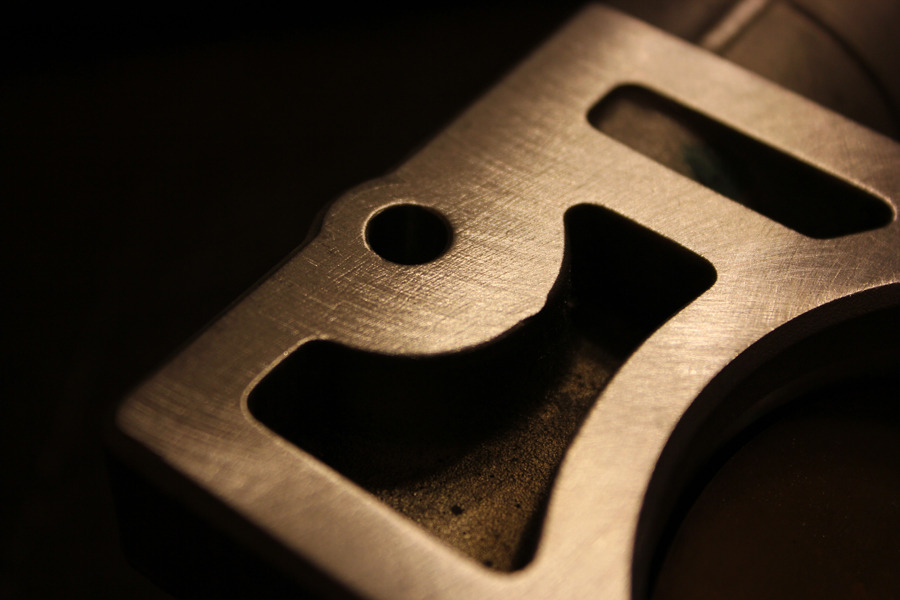
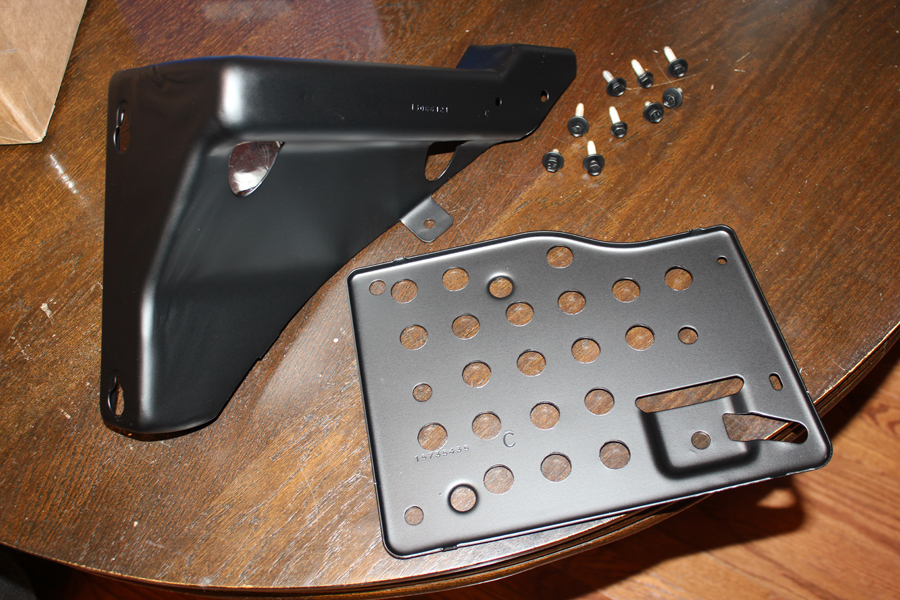
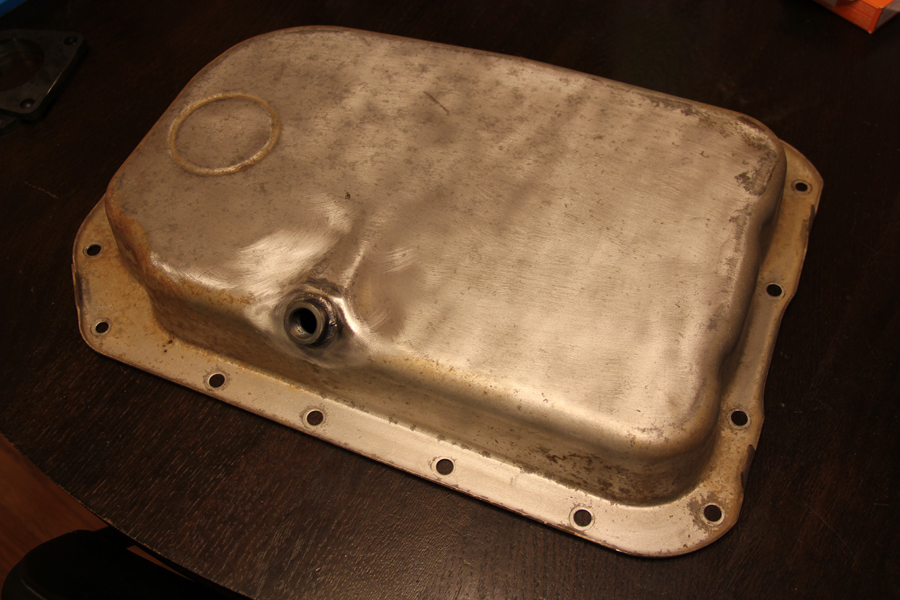
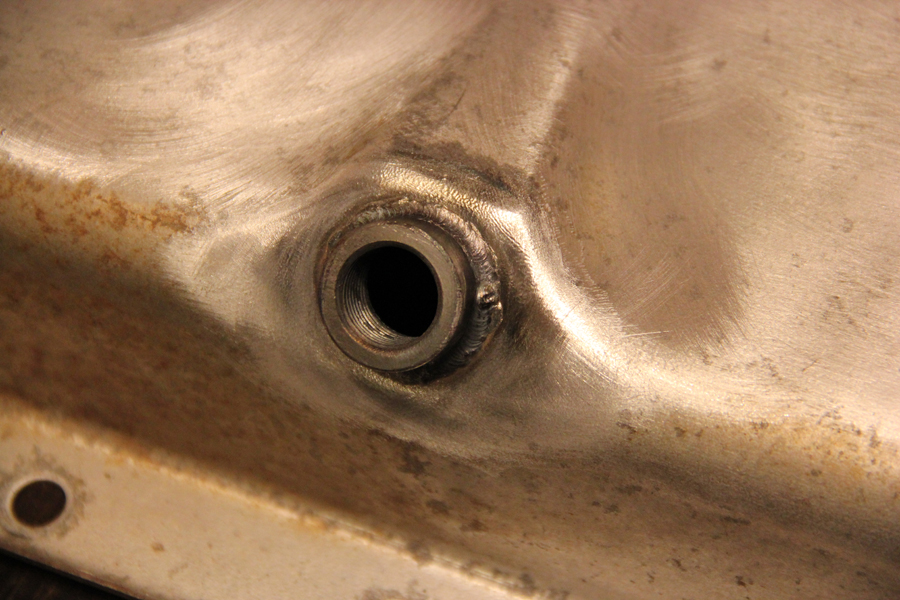
Took some parts to my fab/welding guy and had some work done this weekend. Had him modify a spare transmission crossmember for the 4L80E as well as weld a bung into the 4L80E transmission pan to make drains easier. I do also plan to prep and powder coat both parts the same flat black as the other parts.
Modified Crossmember:
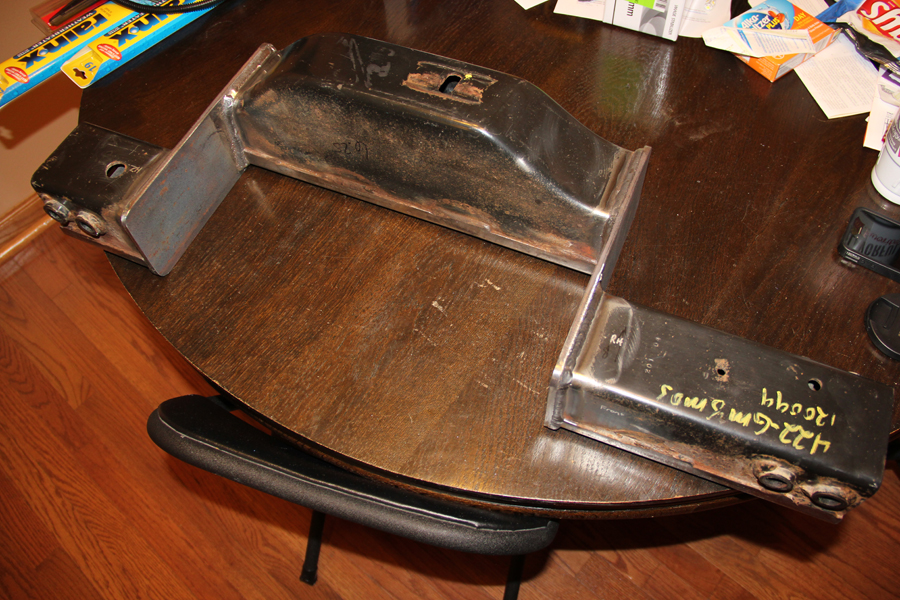
Transmission Pan:
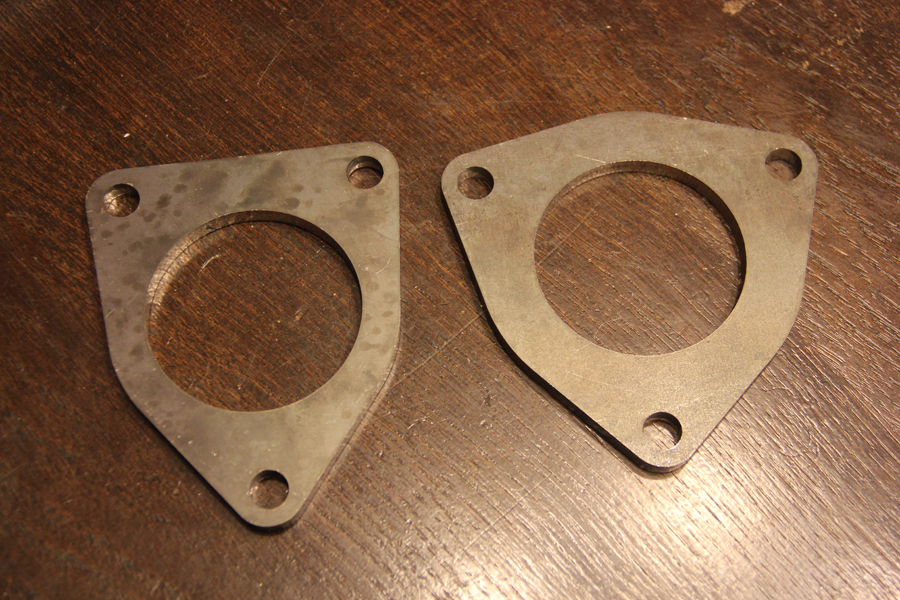
I also picked up some manifold flanges for welding the hot side.
I am also going to start a thread for this, but I took him a spare set of engine mounts to have him weld them solid. After him and I talked for a bit we decided we are going to make some dedicated solid motor mounts and I am thinking about coating them and putting sets up for sale.
Regardless, those will be done in the near future.
Took some parts to my fab/welding guy and had some work done this weekend. Had him modify a spare transmission crossmember for the 4L80E as well as weld a bung into the 4L80E transmission pan to make drains easier. I do also plan to prep and powder coat both parts the same flat black as the other parts.
Modified Crossmember:
Transmission Pan:
I also picked up some manifold flanges for welding the hot side.
I am also going to start a thread for this, but I took him a spare set of engine mounts to have him weld them solid. After him and I talked for a bit we decided we are going to make some dedicated solid motor mounts and I am thinking about coating them and putting sets up for sale.
Regardless, those will be done in the near future.
04-29-2013, 10:43 AM
#12
From: 4/12/13
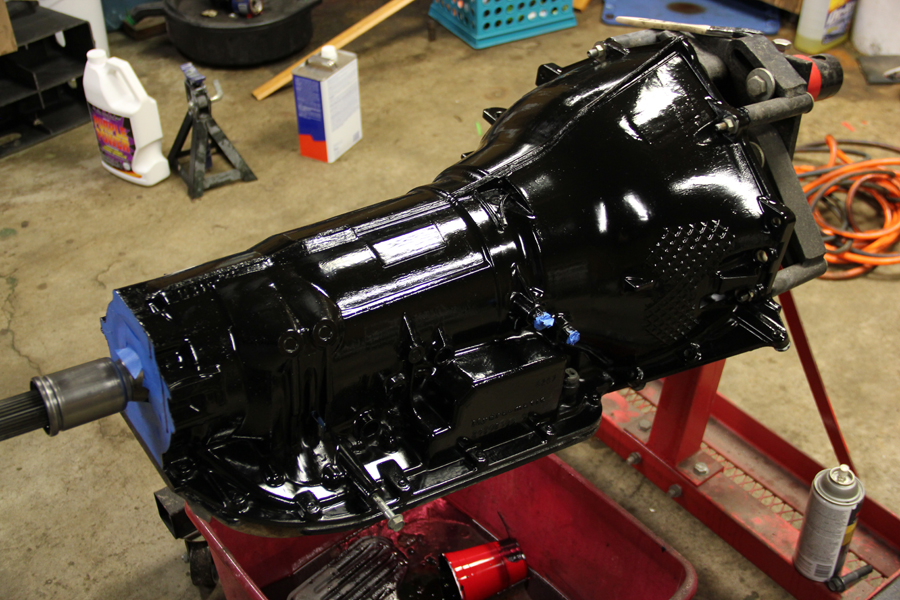
Alright, as stated before did some work on the transmission the other day. After getting the shift kit installed I brushed on some KBS. Not perfect, but it will do what I wanted it to.
Before cleaning:

Then after degreasing and hitting with Roloc wheel:
Finally a quick coat of paint:
However, my transmission parts may be put on hold...
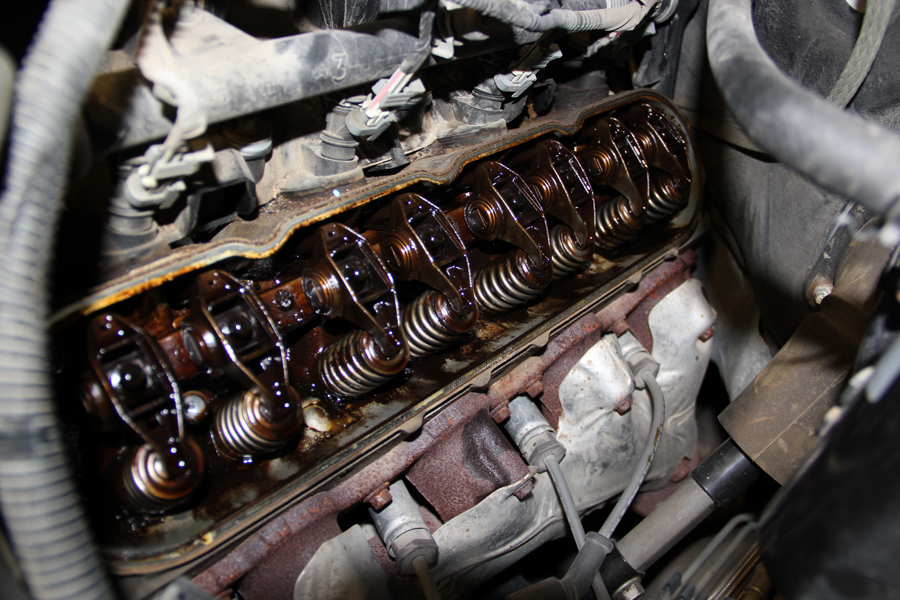
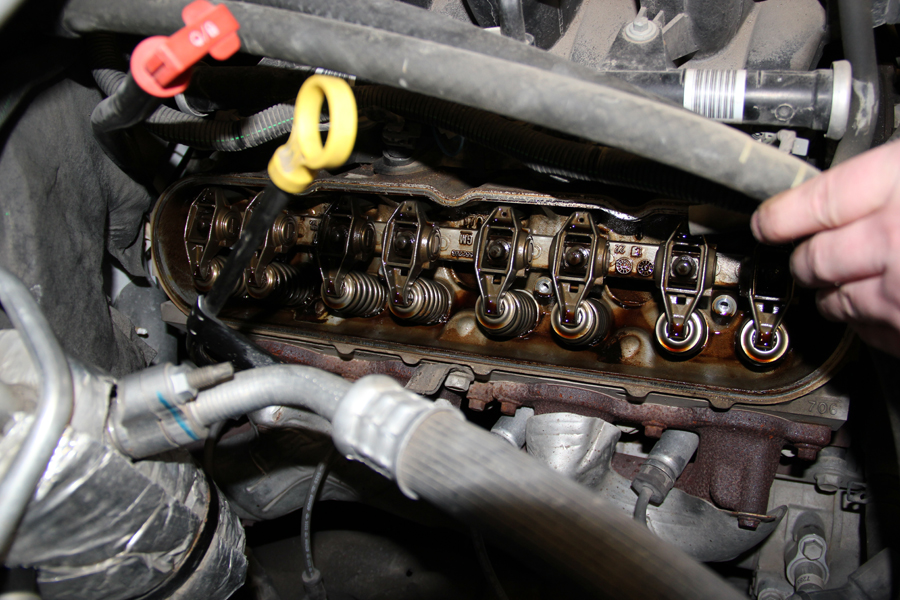
Earlier I noted an issue with coolant going missing. Well, I feared I may have the Catech heads since they are 706 castings. So I decided to pull the valve covers...
This, was not a good start:
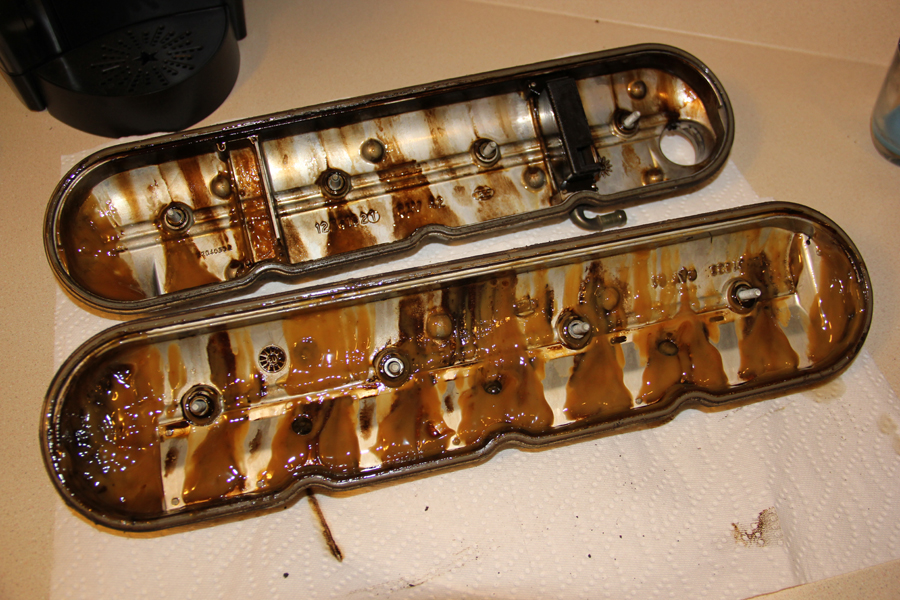
The driver's head was covered in sludge:
The passenger head wasn't ideal, but looked tons better.
So...I will be picking up a spare engine I found for a good price tomorrow and putting the 862 heads from that on to my current 5.3L. Then I will have a spare short block in case I need it as well.
Since I will be putting the new heads on, I figured I would go ahead and focus on the cam stuff while waiting for my converter to get here. So I will start ordering head gaskets, head studs, etc. for the swap. This way I can put the heads together with new springs and bolt them down. Then get all the other cam stuff installed, finish buying the few trans parts and then the truck will be ready for turbo parts to start coming in.
Alright, as stated before did some work on the transmission the other day. After getting the shift kit installed I brushed on some KBS. Not perfect, but it will do what I wanted it to.
Before cleaning:

Then after degreasing and hitting with Roloc wheel:

Finally a quick coat of paint:

However, my transmission parts may be put on hold...
Earlier I noted an issue with coolant going missing. Well, I feared I may have the Catech heads since they are 706 castings. So I decided to pull the valve covers...
This, was not a good start:

The driver's head was covered in sludge:

The passenger head wasn't ideal, but looked tons better.

So...I will be picking up a spare engine I found for a good price tomorrow and putting the 862 heads from that on to my current 5.3L. Then I will have a spare short block in case I need it as well.
Since I will be putting the new heads on, I figured I would go ahead and focus on the cam stuff while waiting for my converter to get here. So I will start ordering head gaskets, head studs, etc. for the swap. This way I can put the heads together with new springs and bolt them down. Then get all the other cam stuff installed, finish buying the few trans parts and then the truck will be ready for turbo parts to start coming in.
04-29-2013, 10:44 AM
#13
From: 4/14/13
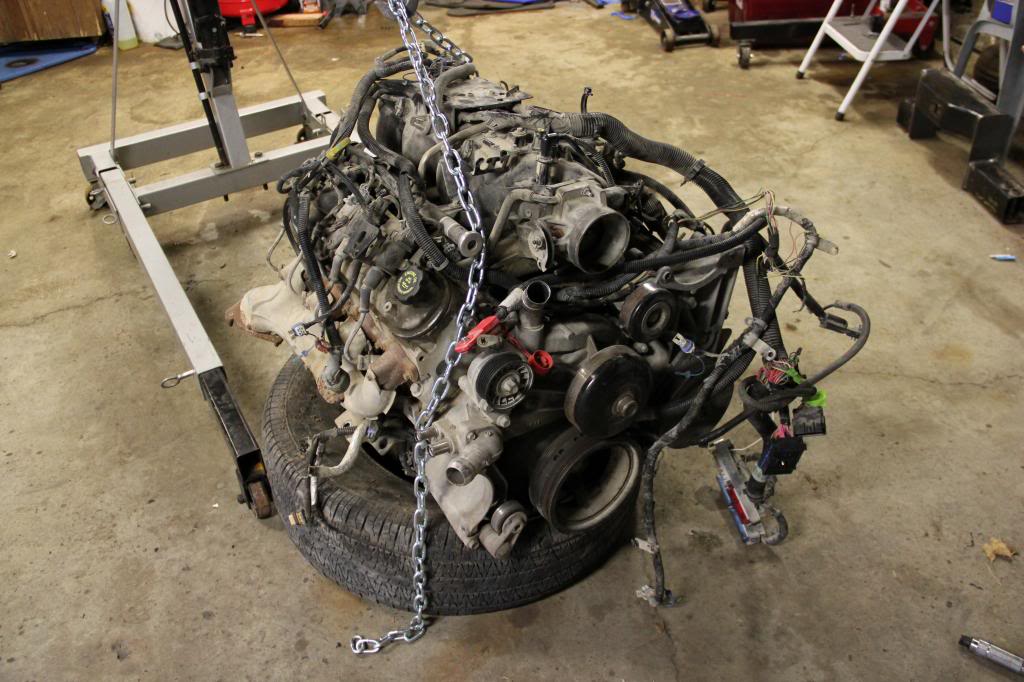
Picked up the spare engine this weekend. Picked it up, and here is how it looked.
Started getting it torn down, got the intake off. Was a bit on the dirty side.

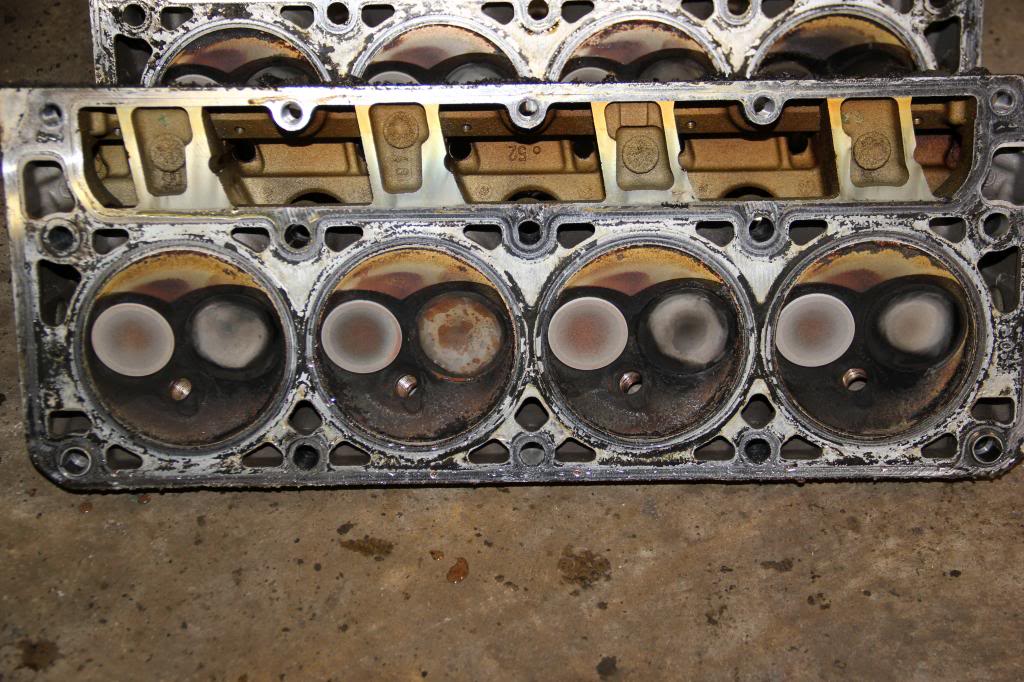
Got the heads taken off, here is the driver's bank:
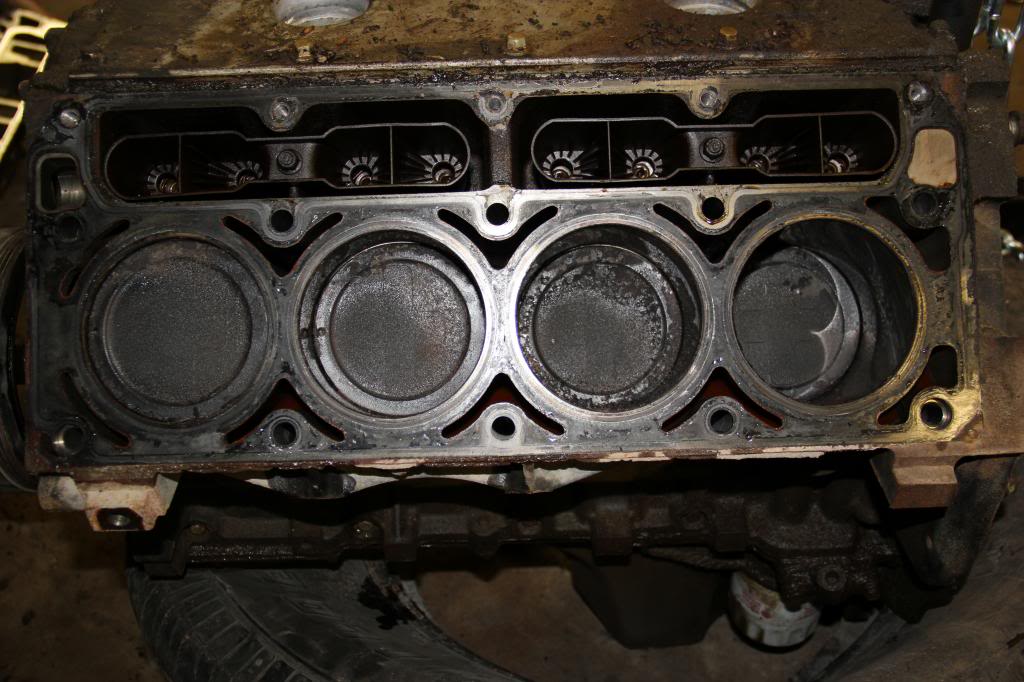
Here is the passenger's bank:

Cylinder head #1
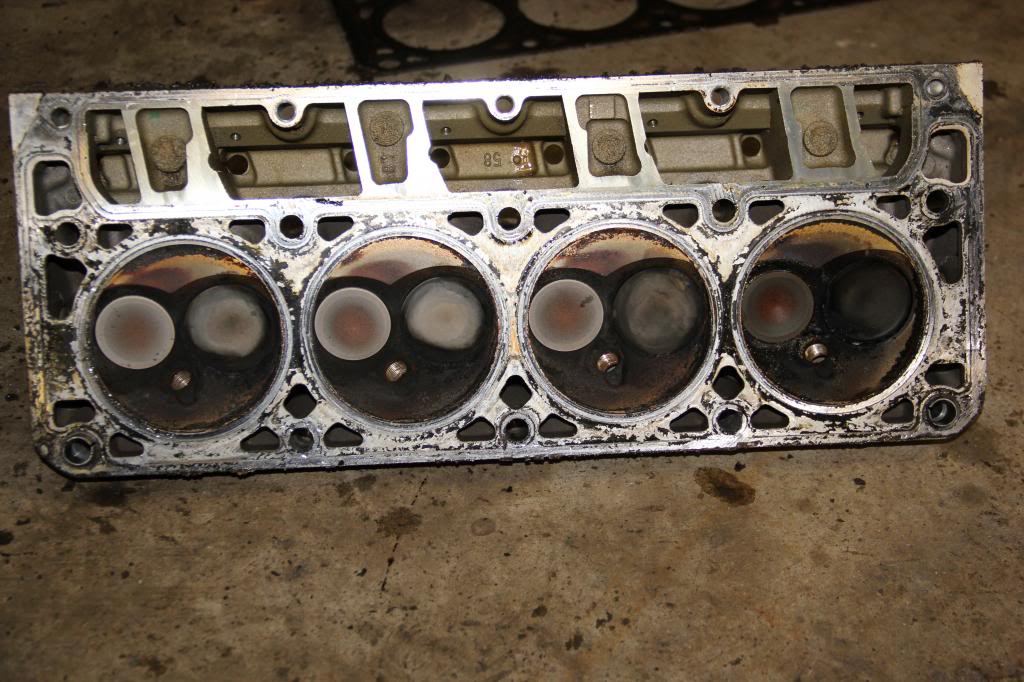
Cylinder head #2
Going to get the heads disassembled, then hot tanked and spressure tested. Then put them together. Will be using Tooley springs, stock arms, probably Speed Inc. pushrods and Tooley lifters.
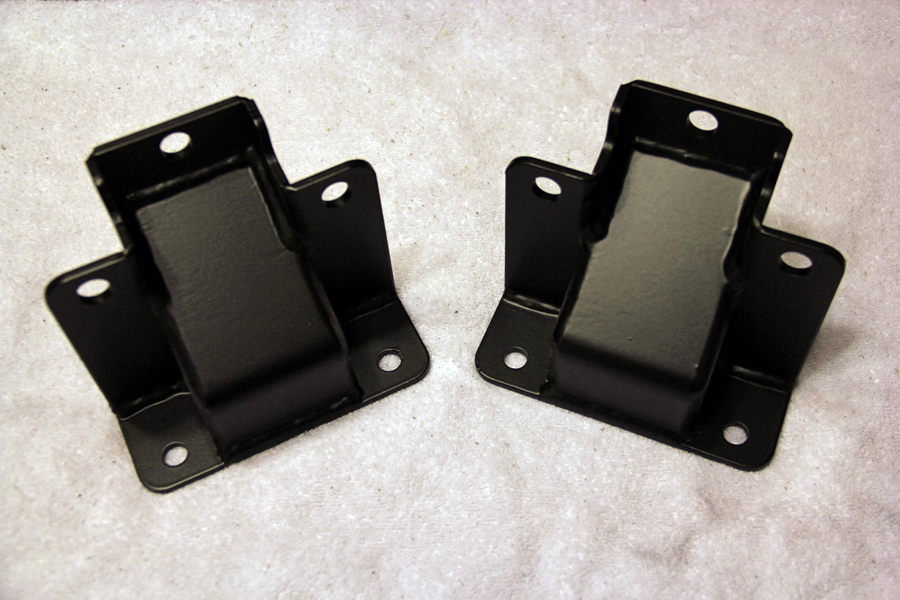
Also picked up the solid motor mounts I had my fabricator build.
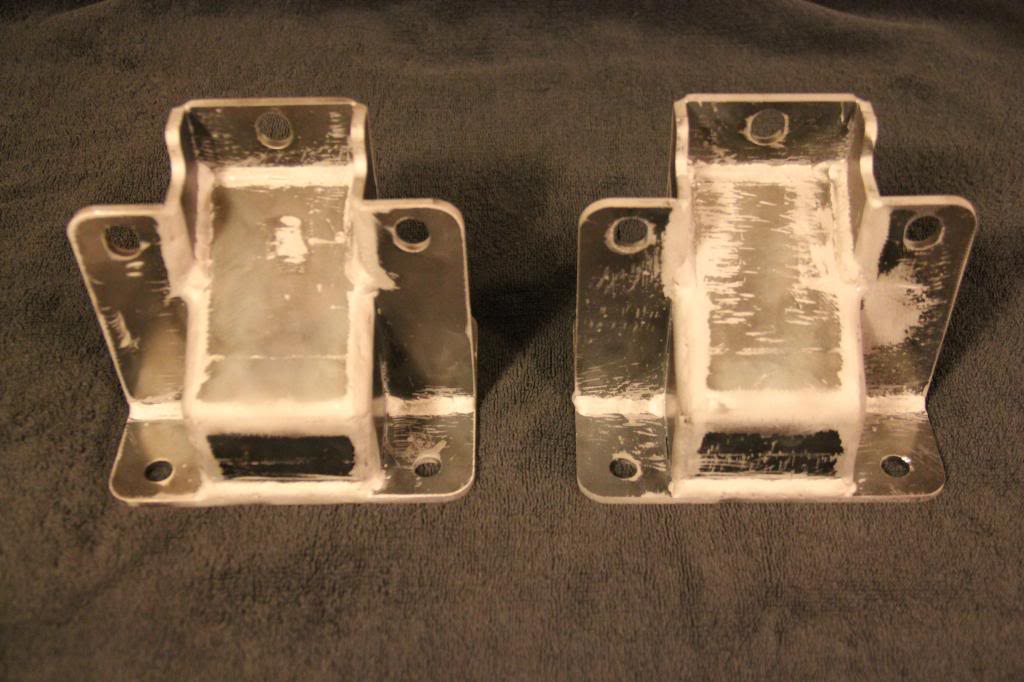
For anyone following the thread for the mounts, I will be updating it as well. These still need to be powder coated, which I plan to do when I find some time this week.
Picked up the spare engine this weekend. Picked it up, and here is how it looked.

Started getting it torn down, got the intake off. Was a bit on the dirty side.

Got the heads taken off, here is the driver's bank:

Here is the passenger's bank:

Cylinder head #1

Cylinder head #2

Going to get the heads disassembled, then hot tanked and spressure tested. Then put them together. Will be using Tooley springs, stock arms, probably Speed Inc. pushrods and Tooley lifters.
Also picked up the solid motor mounts I had my fabricator build.

For anyone following the thread for the mounts, I will be updating it as well. These still need to be powder coated, which I plan to do when I find some time this week.
04-29-2013, 10:49 AM
#14
From: 4/17/13
Dropped the new (Well, used but from the 5.3 I just bought) heads off to be hot tanked yesterday after I disassembled them.
Ordered basically everything needed to put the new heads on and make the cam upgrade. Most of which I pick up on Friday. A few other parts should come in as well. Hoping to have the cam and head replacement side of things buttoned up and tuned by the end of the month.
From: 4/19/13
Got my heads back from being cleaned today and a good chunk of parts came in:
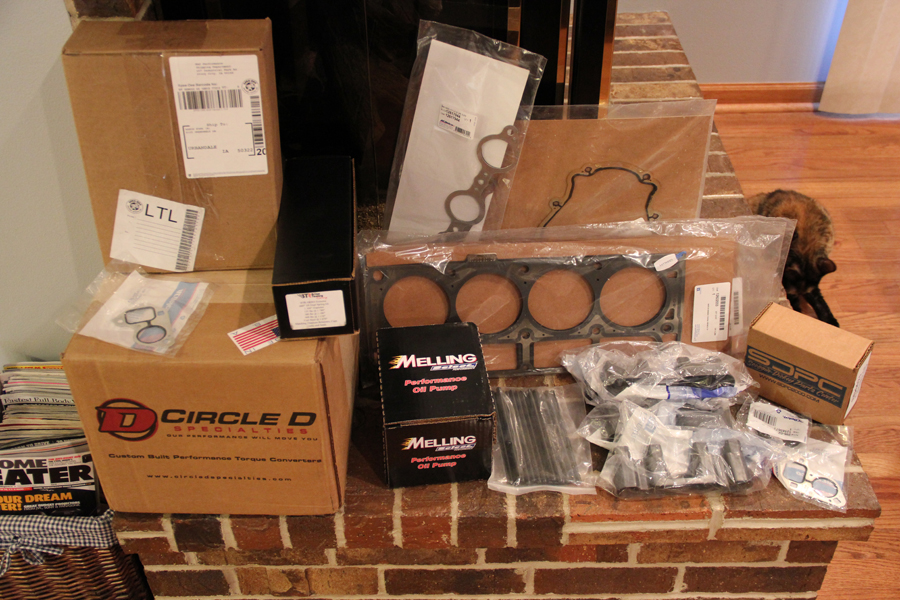
Arriving next week should be my; wideband, gauge pod, cam and Tooley Lifters. Then I will everything I need to get the cam swap and heads put back on.
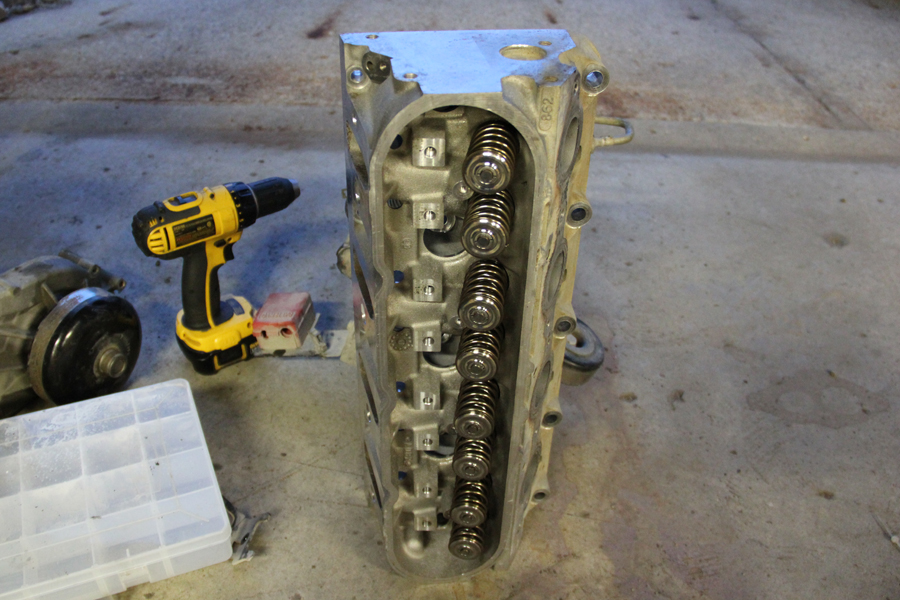
From: 4/22/13
A couple of friends came over and with the help of a few brews we got the Tooley springs on. The springs are a work of art, almost a shame to have to cover them.
Cam and gauge pod actually showed up today. Still no word on the lifters.
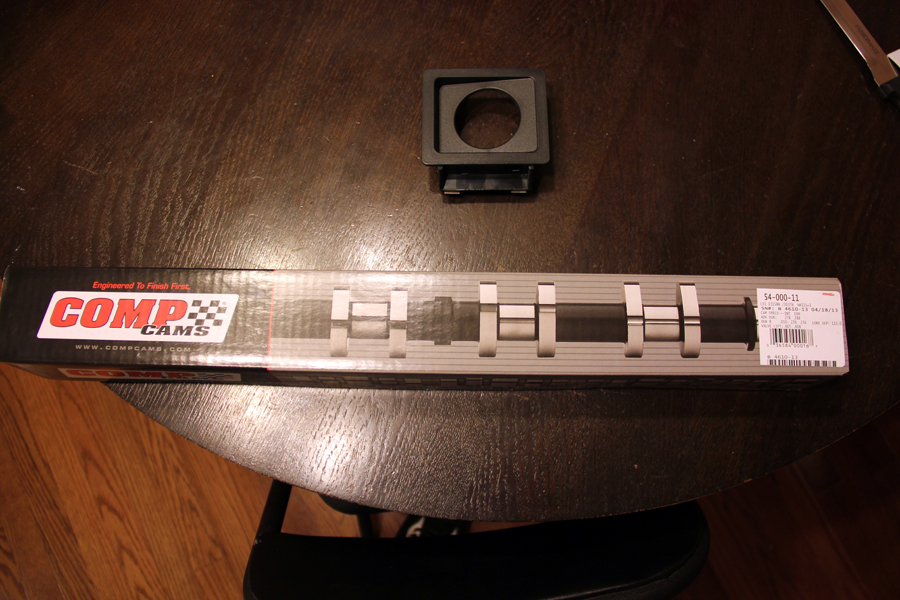
Cam Specs:

From: 4/23/13
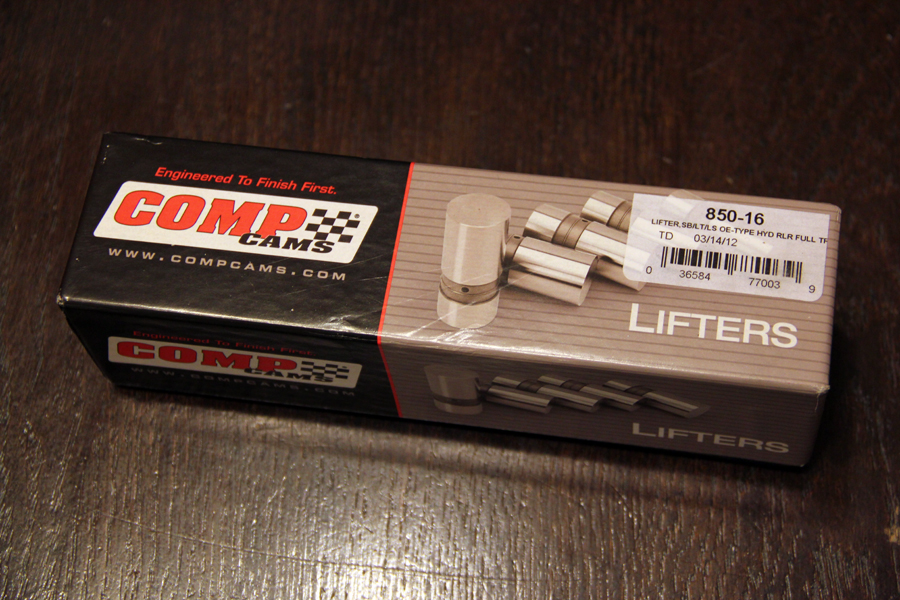
Well, after dealing with a little bit of a fiasco with shipping for the Tooley lifters, I cancelled the order and picked up some Comp Lifters.
I also got the motor mounts coated tonight. Not great pictures, but gets the point across.

Started tearing into it tonight. Got the accessories off as well as the covers. Should be able to get the heads off tomorrow and maybe even get the new cam slid in. We will see as I have to work late tomorrow.
Dropped the new (Well, used but from the 5.3 I just bought) heads off to be hot tanked yesterday after I disassembled them.
Ordered basically everything needed to put the new heads on and make the cam upgrade. Most of which I pick up on Friday. A few other parts should come in as well. Hoping to have the cam and head replacement side of things buttoned up and tuned by the end of the month.
From: 4/19/13
Got my heads back from being cleaned today and a good chunk of parts came in:

Arriving next week should be my; wideband, gauge pod, cam and Tooley Lifters. Then I will everything I need to get the cam swap and heads put back on.
From: 4/22/13
A couple of friends came over and with the help of a few brews we got the Tooley springs on. The springs are a work of art, almost a shame to have to cover them.

Cam and gauge pod actually showed up today. Still no word on the lifters.

Cam Specs:

From: 4/23/13
Well, after dealing with a little bit of a fiasco with shipping for the Tooley lifters, I cancelled the order and picked up some Comp Lifters.

I also got the motor mounts coated tonight. Not great pictures, but gets the point across.


Started tearing into it tonight. Got the accessories off as well as the covers. Should be able to get the heads off tomorrow and maybe even get the new cam slid in. We will see as I have to work late tomorrow.
04-29-2013, 10:51 AM
#15
Today's post:
Well, got the whole cam swap buttoned up late last night. Started turning it over to prime everything (Packs & injector fuses disconnected) and I could not get it to build oil pressure. After a few tries VATS kicked on and we decided to call it a night as it was nearing one in the morning.
We hooked everything back up and after some reading I decided I am going to just go ahead and start it tonight and watch for oil pressure to come up for the first few seconds. Everything should be safe for that long. The lifters were soaked in oil for a couple of days as well as the cam and rocker arms.
So, wish me luck and I will keep you guys updated.
 04-29-2013, 12:42 PM
#17
I am only doing things "right" out of paranoia I think. If I do another build down the road, it will probably be a lot cheaper. By then I will probably have finally became comfortable with the fact that a bunch of parts don't really need replacing.

 Lets fire this bitch up and do burnouts!