2000 WS6 5.3 / 7675 turbo 6 speed build thread ~ First startup video page 3!
 06-28-2013, 12:53 AM
#1
Staging Lane
Thread Starter
iTrader: (15)

Join Date: Aug 2006
Location: Cincinnati
Posts: 94
Likes: 0
Received 0 Likes
on
0 Posts
Starting this build thread a little late and couldn't have made this possible without the help of my friend Charlie Polly. Will be posting pictures along the way. Here's a basic run down of the car..
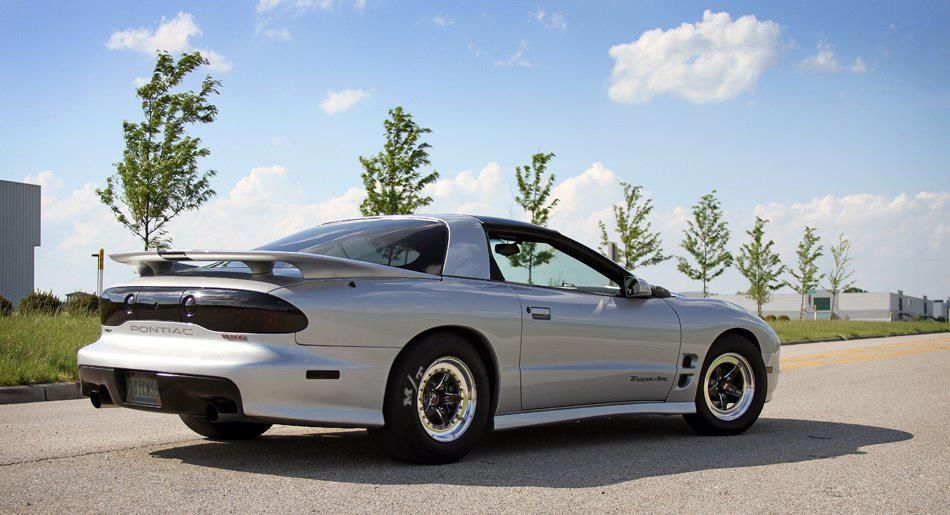
2000 Trans Am ws6 6 speed street car
Engine/Drivetrain:
2005 Iron block 5.3
BES CNC'd 243 heads with Brian Tooley valvesprings
BES custom spec turbo camshaft
Doubler roller
ARP rod bolts
ARP headstuds
LS9 gaskets
~~~~~~
Stock 6 speed
Monster clutch
Tick master
Moser 9 inch
UMI Suspension
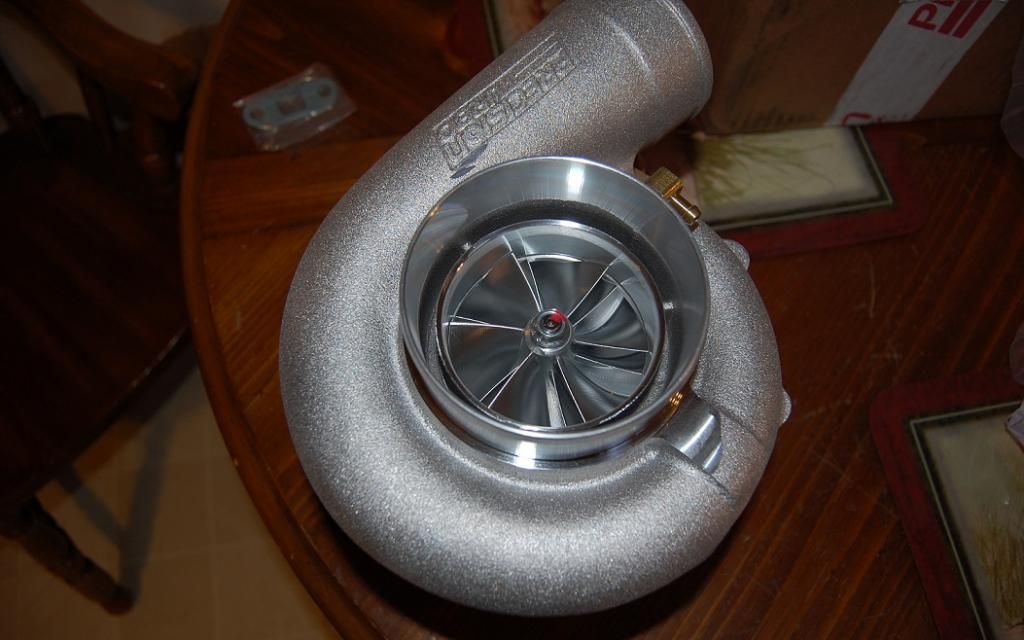
Turbo stuff:
Huron Speed hotside kit
Precision 7675 CEA turbo
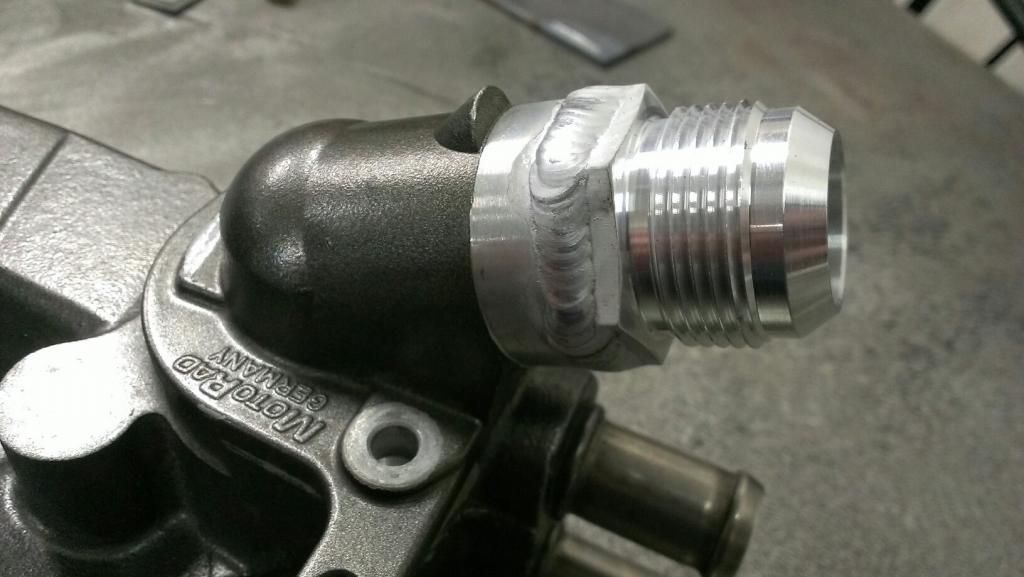
-4 feed/-10 drain
Tial 50mm blow off valve
Tial 44mm MVR wastegate
DEI Blanket and wrap
CX Racing 31x12x4 intercooler
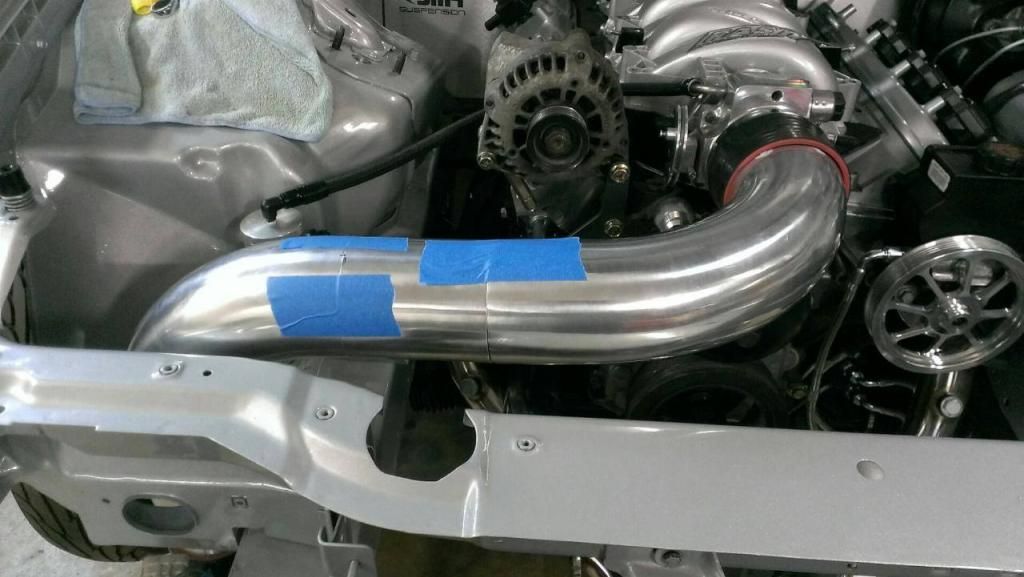
3" aluminum pipe w/ 4" charge pipe
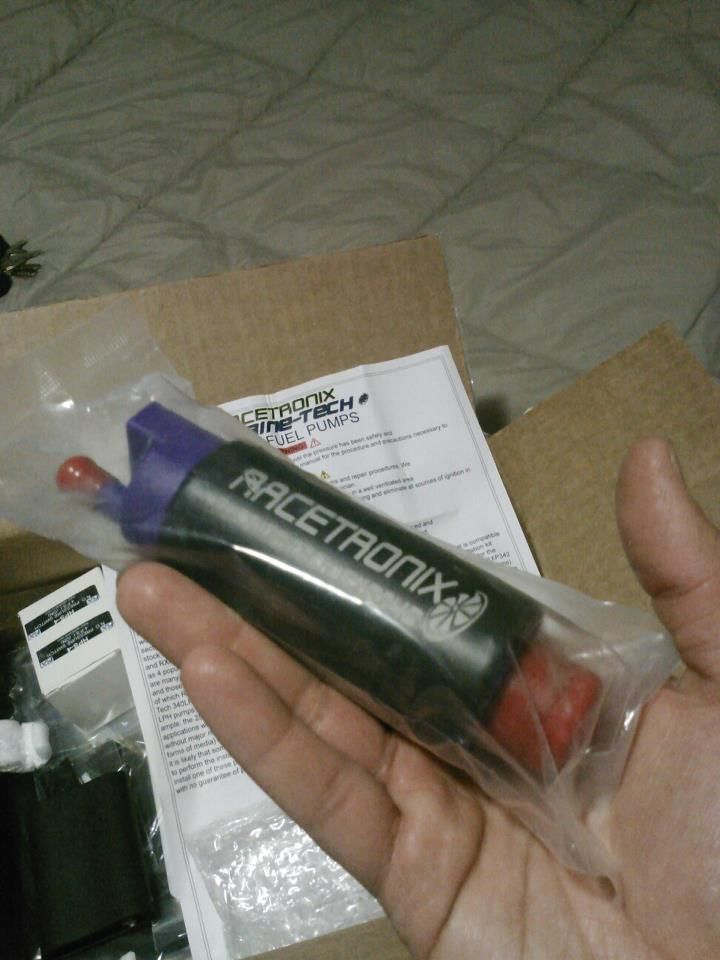
Fuel/Cooling:
Twin Racetronix 340 pumps
Racetronix dual harness
Fuel lab fuel regulator
Holley 120lb injectors
-8 feed, -6 return
E85
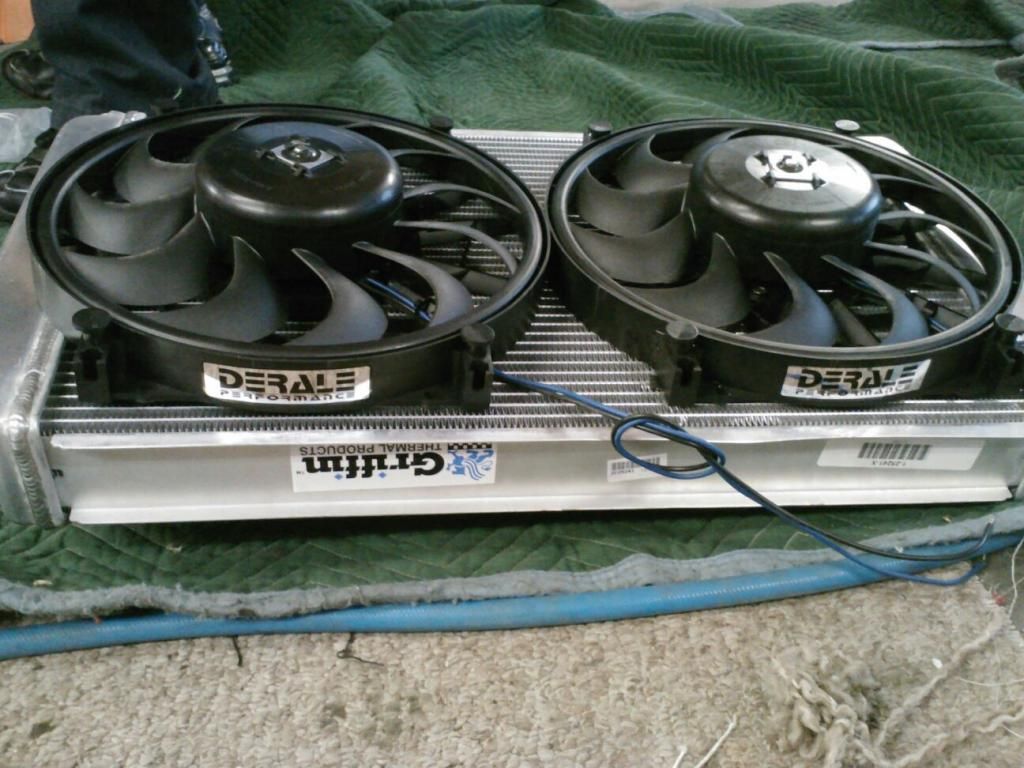
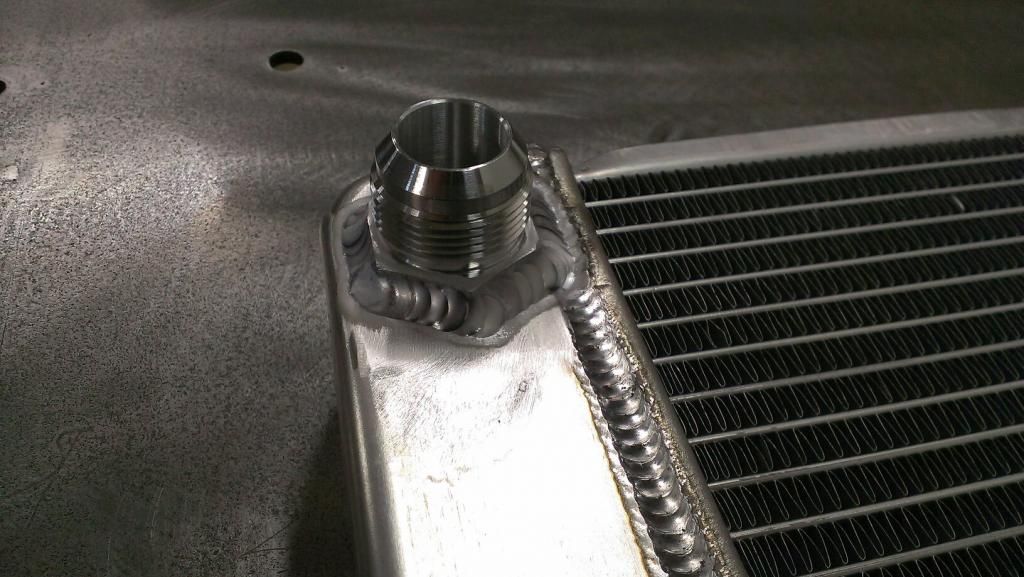
Griffin radiator -16 AN lines with Derale fans
Most of the pictures were during winter/late winter, sorry some of the pictures are cell phone shots. I have a bad habit of forgetting my camera.
Getting started


Ready for the scrap yard
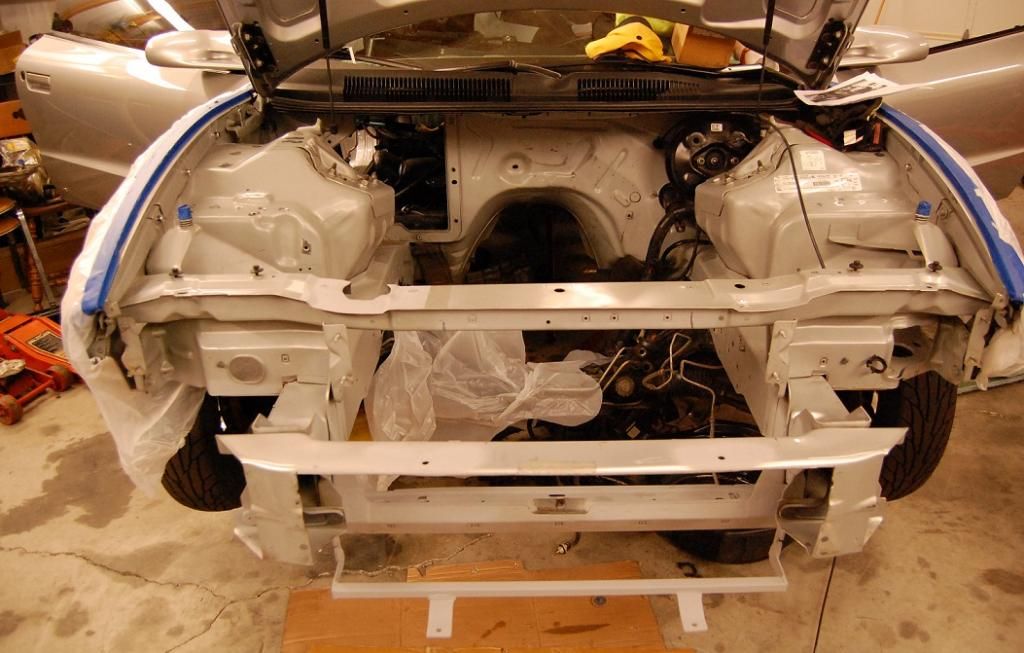
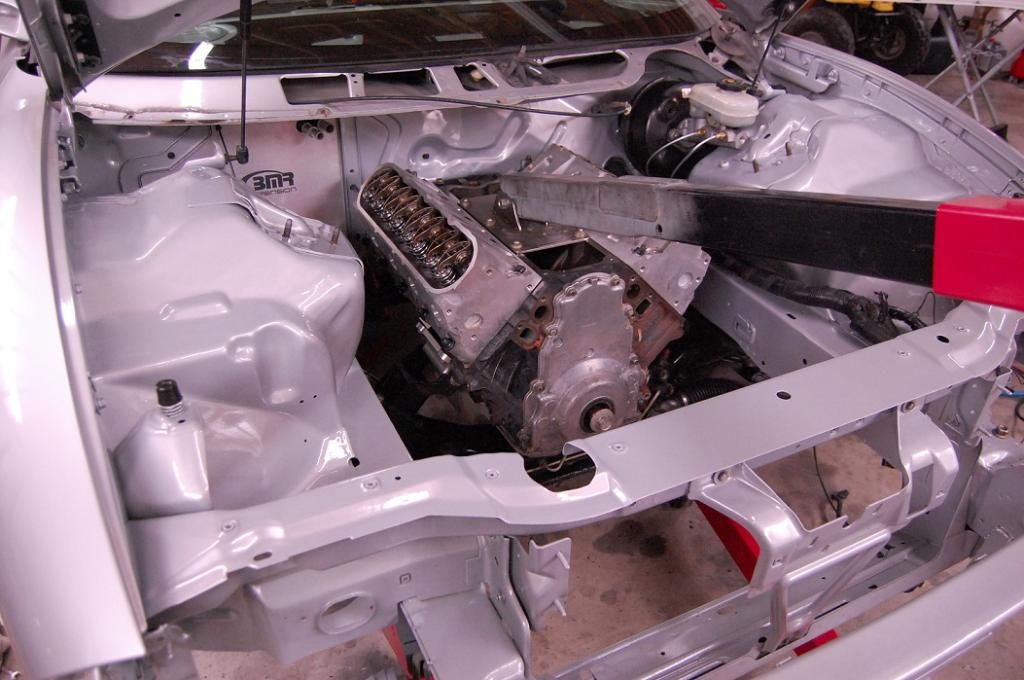
Engine bay getting prepped
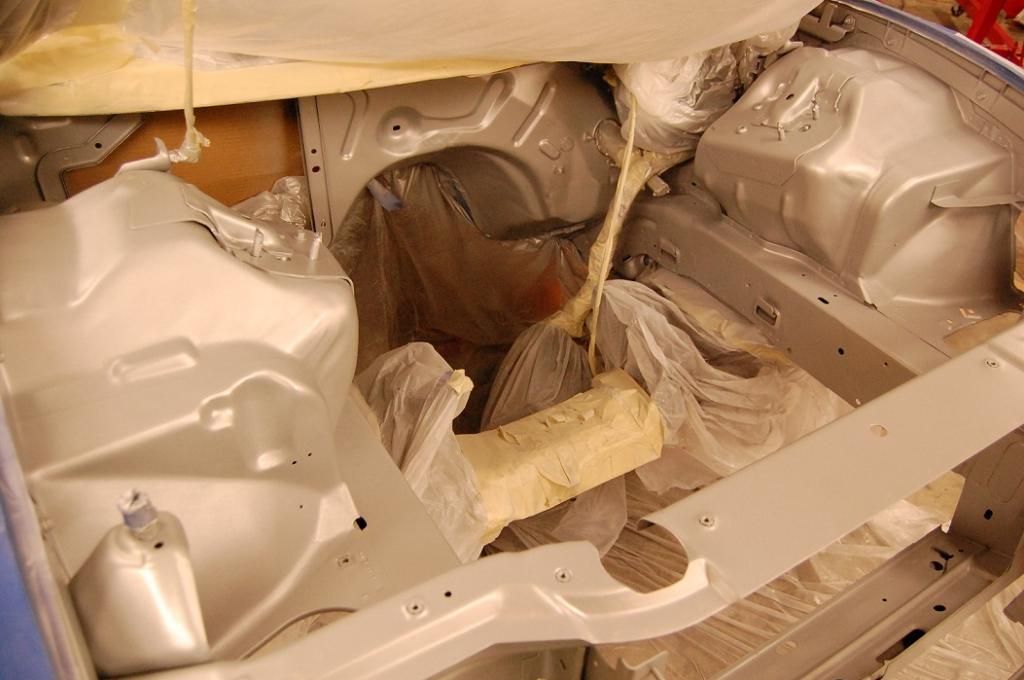
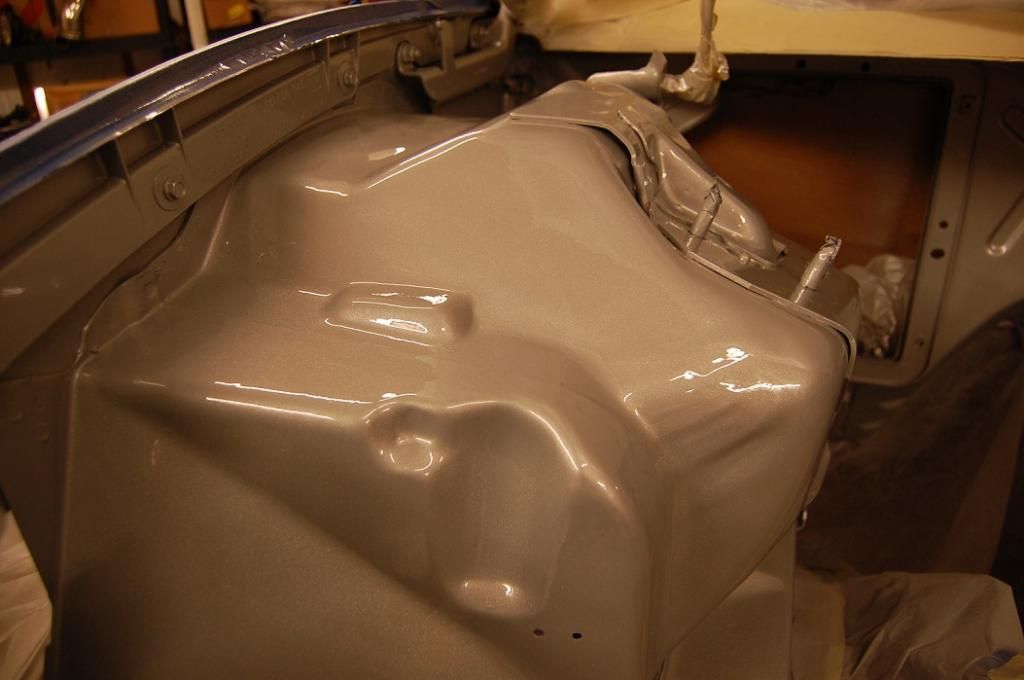
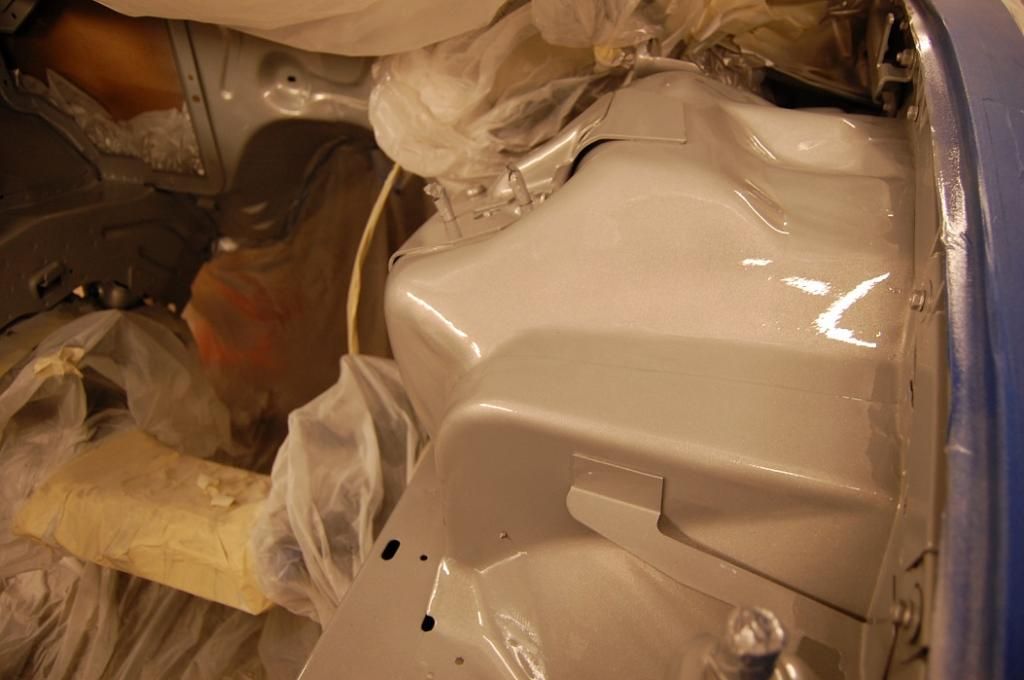
Basecoat
Basecoat clearcoat and various holes filled/smoothed
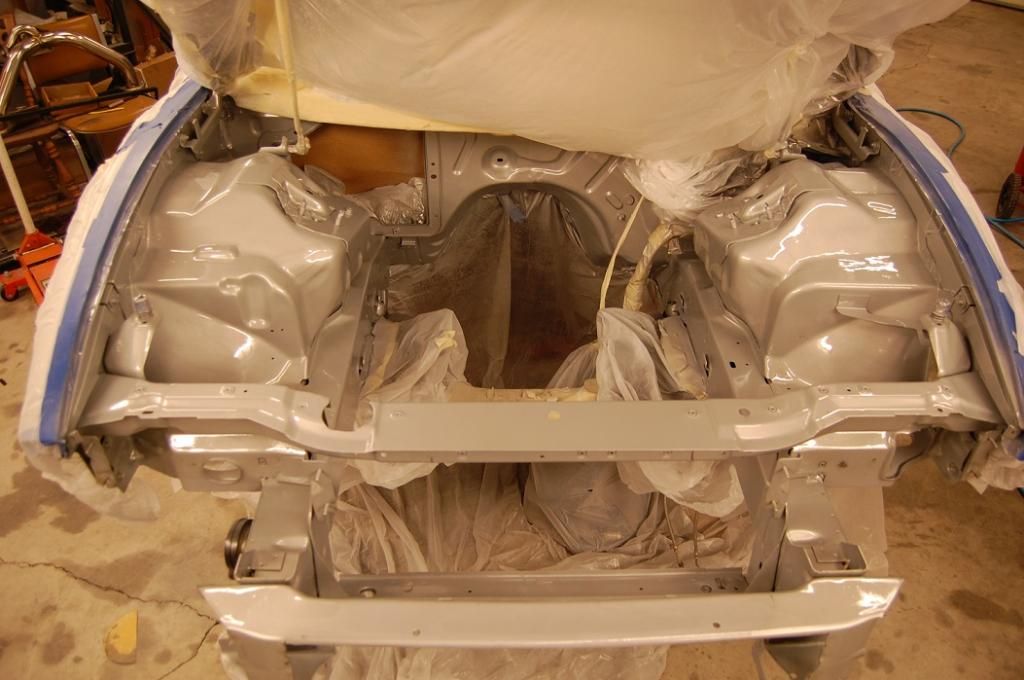
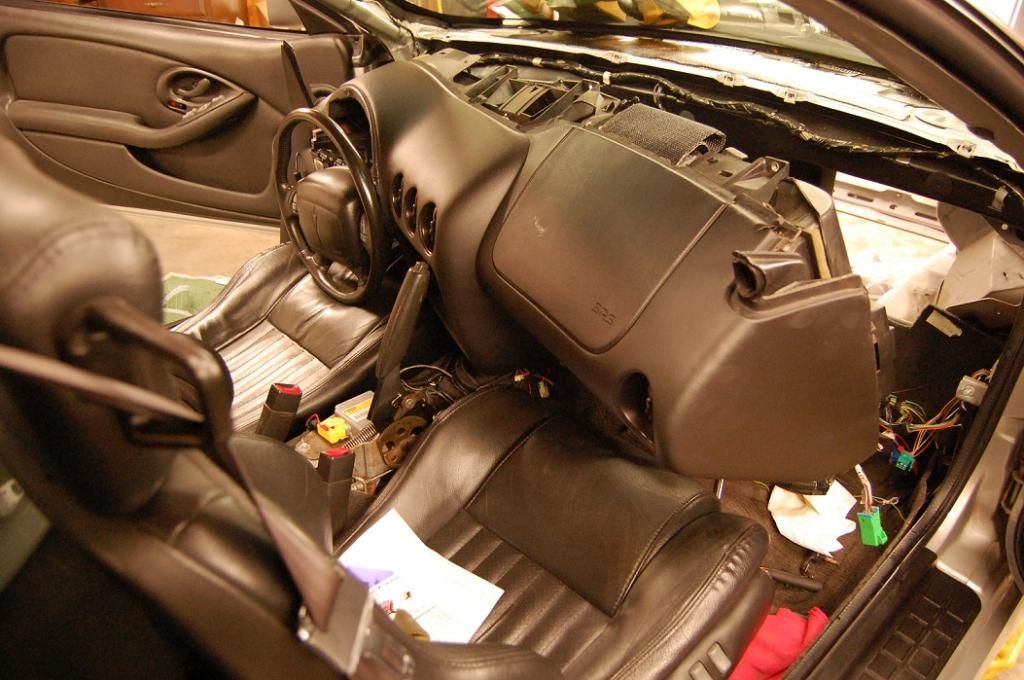
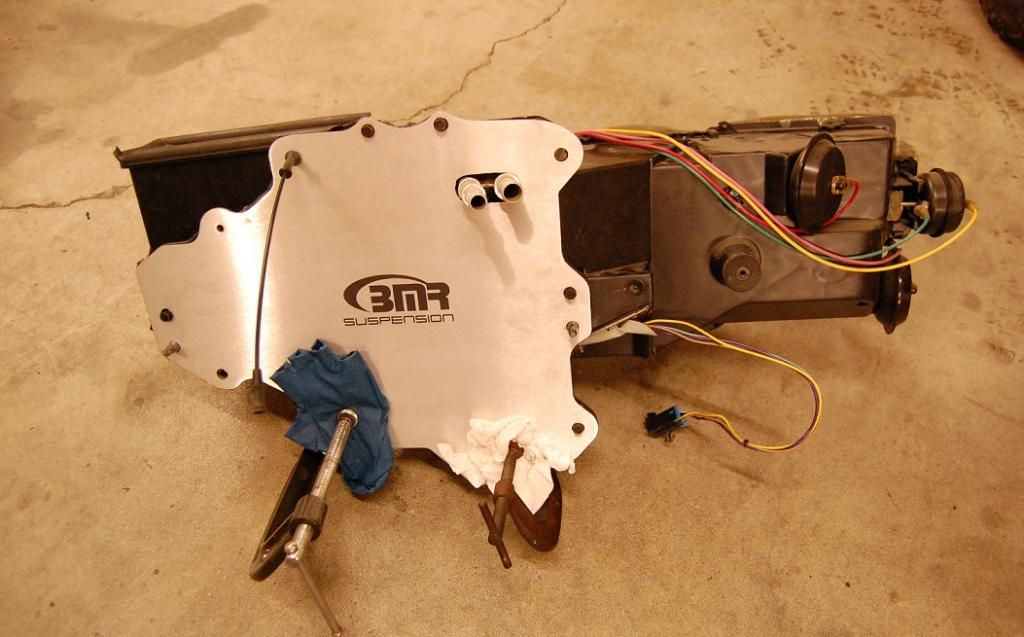
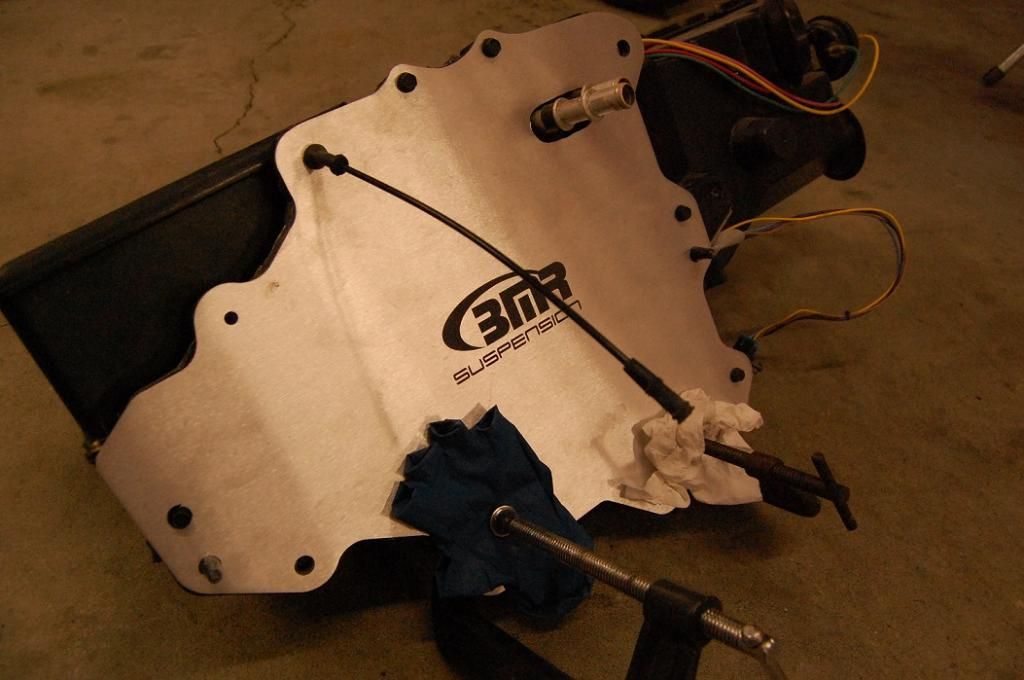
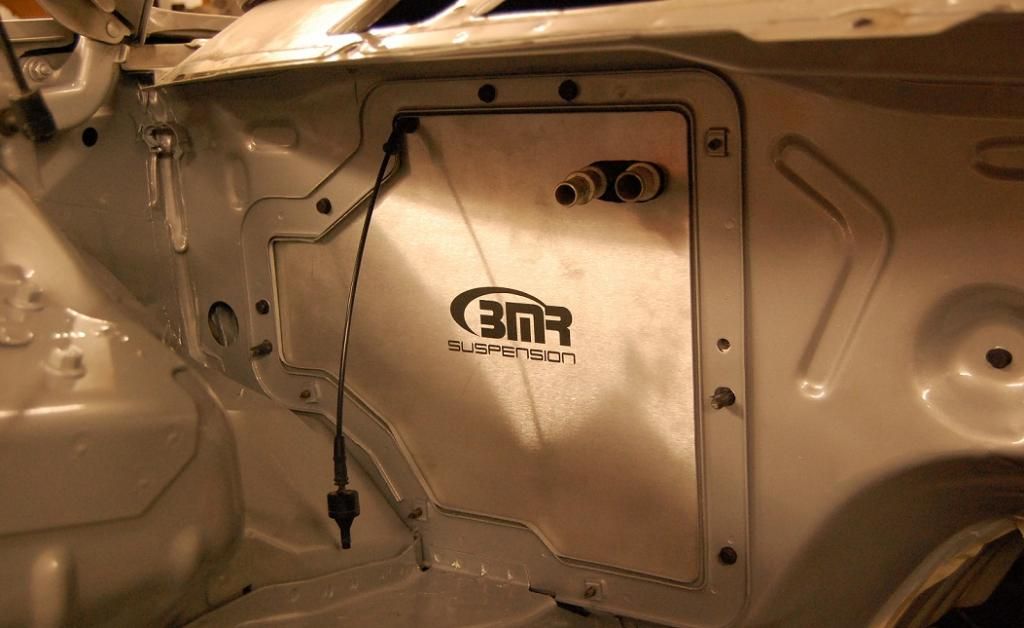
This was an absolute pain in the *** IMO but, well worth it. Decided to remove the HVAC and remove the A/C, keeping the heat.

2000 Trans Am ws6 6 speed street car
Engine/Drivetrain:
2005 Iron block 5.3
BES CNC'd 243 heads with Brian Tooley valvesprings
BES custom spec turbo camshaft
Doubler roller
ARP rod bolts
ARP headstuds
LS9 gaskets
~~~~~~
Stock 6 speed
Monster clutch
Tick master
Moser 9 inch
UMI Suspension
Turbo stuff:
Huron Speed hotside kit
Precision 7675 CEA turbo
-4 feed/-10 drain
Tial 50mm blow off valve
Tial 44mm MVR wastegate
DEI Blanket and wrap
CX Racing 31x12x4 intercooler
3" aluminum pipe w/ 4" charge pipe
Fuel/Cooling:
Twin Racetronix 340 pumps
Racetronix dual harness
Fuel lab fuel regulator
Holley 120lb injectors
-8 feed, -6 return
E85
Griffin radiator -16 AN lines with Derale fans
Most of the pictures were during winter/late winter, sorry some of the pictures are cell phone shots. I have a bad habit of forgetting my camera.
Getting started


Ready for the scrap yard

Engine bay getting prepped

Basecoat

Basecoat clearcoat and various holes filled/smoothed


This was an absolute pain in the *** IMO but, well worth it. Decided to remove the HVAC and remove the A/C, keeping the heat.


Last edited by onesicws6; 08-13-2013 at 08:50 AM.
 06-28-2013, 12:53 AM
#2
Staging Lane
Thread Starter
iTrader: (15)
Join Date: Aug 2006
Location: Cincinnati
Posts: 94
Likes: 0
Received 0 Likes
on
0 Posts
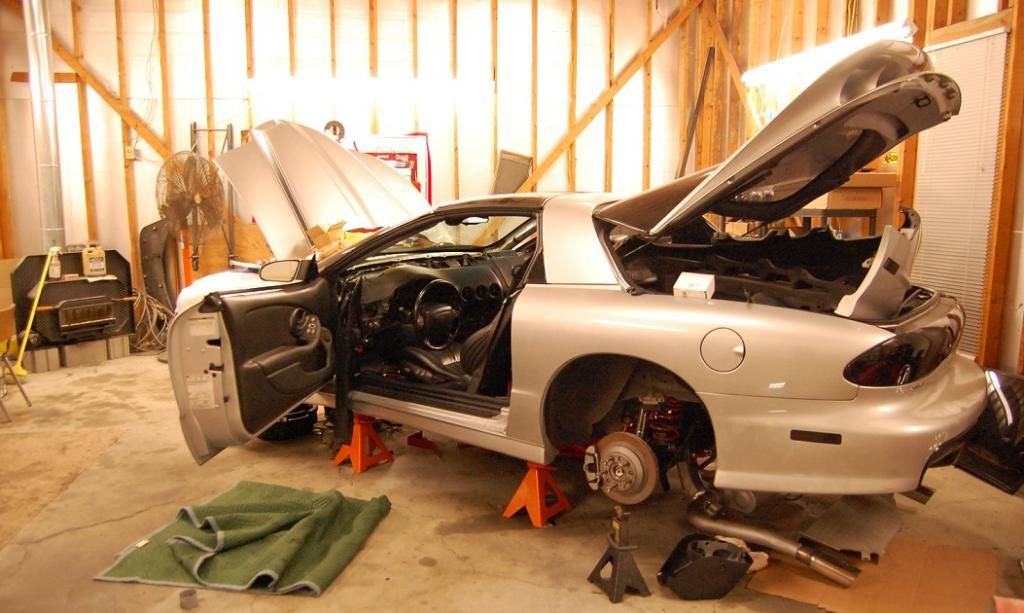
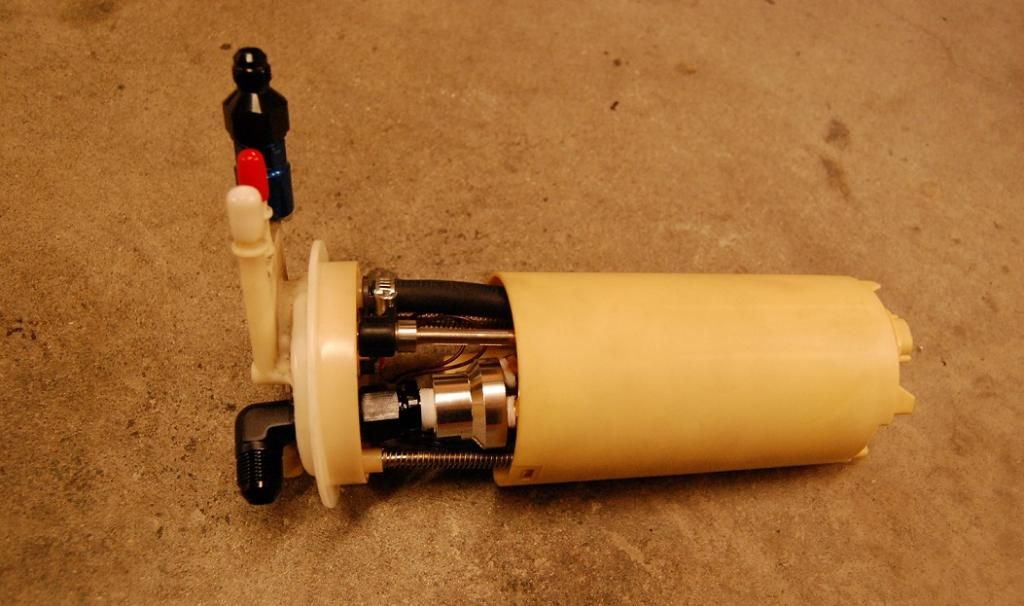
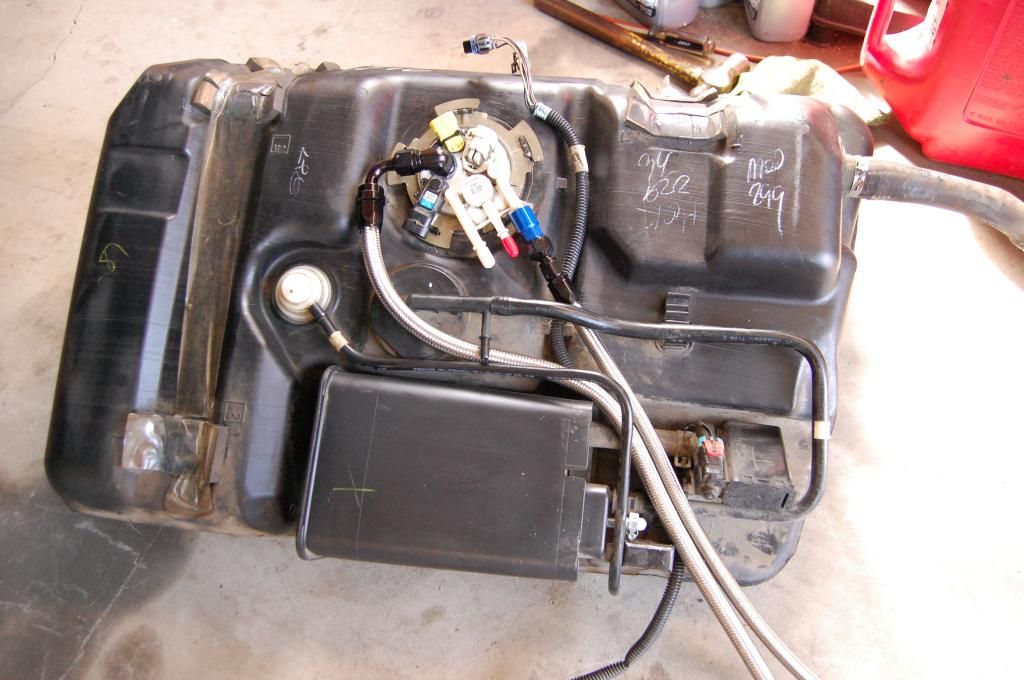
Twin Racetronix pumps in the factory bucket finished and installed, fuel line, regulator and stainless fuel filter also finished. Also all new brake lines were done, along with a line lock and a few other things.
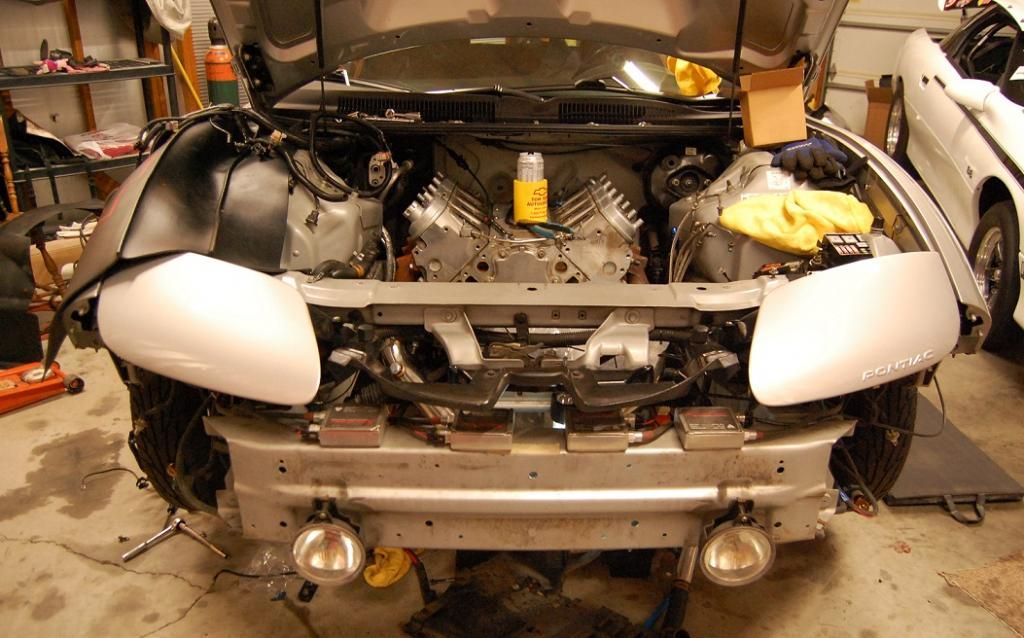
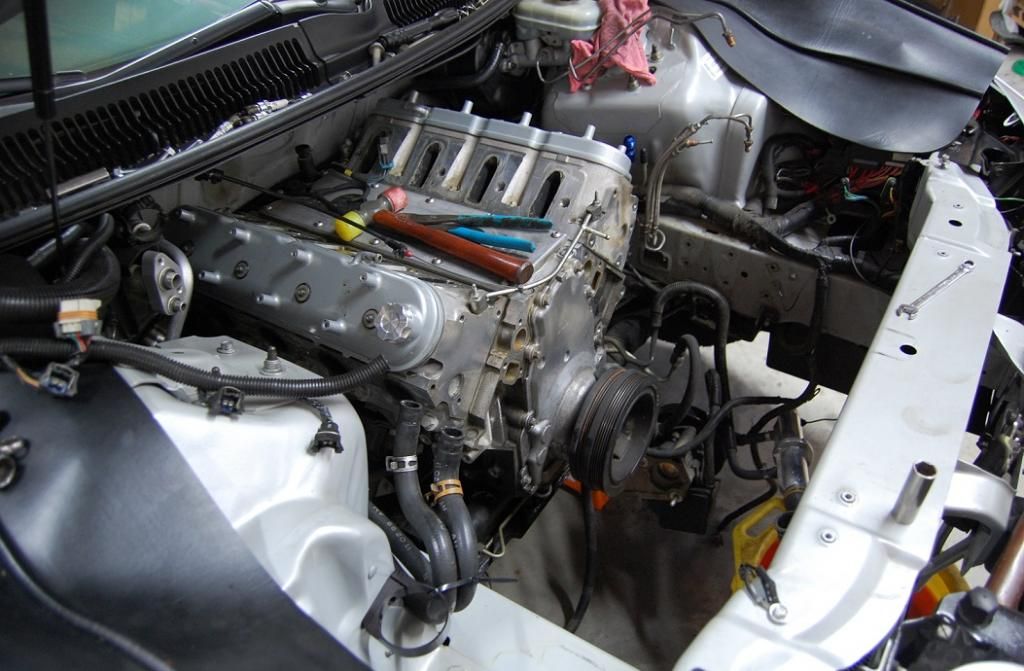
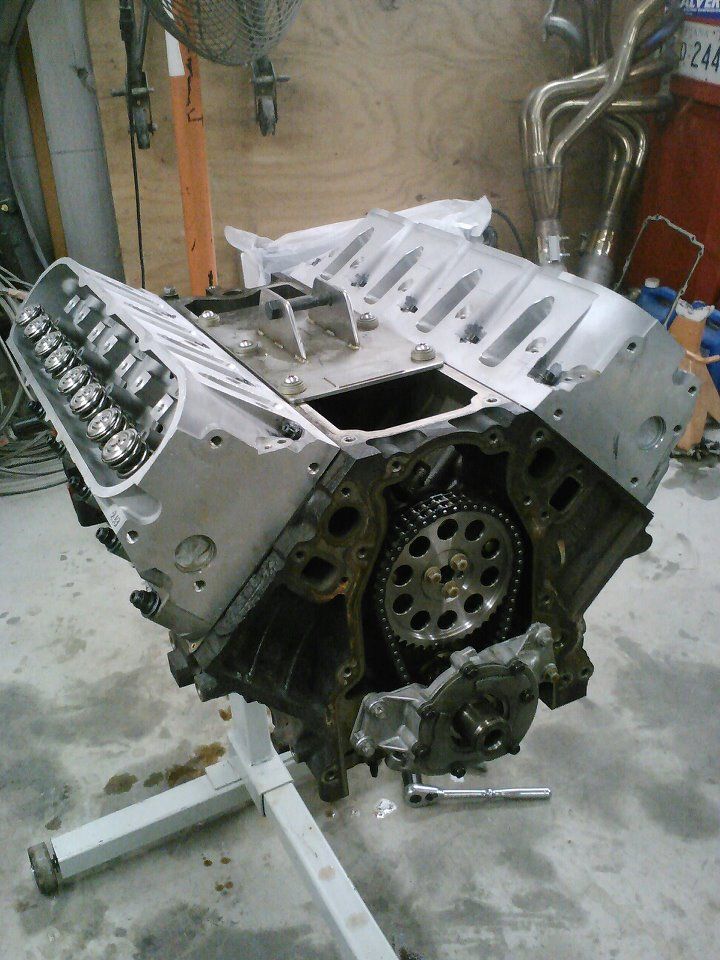
Camshaft in, heads on, pan back on, motor back together.

Engine back in with UMI Performance solid motor mounts
Derale fans mounted
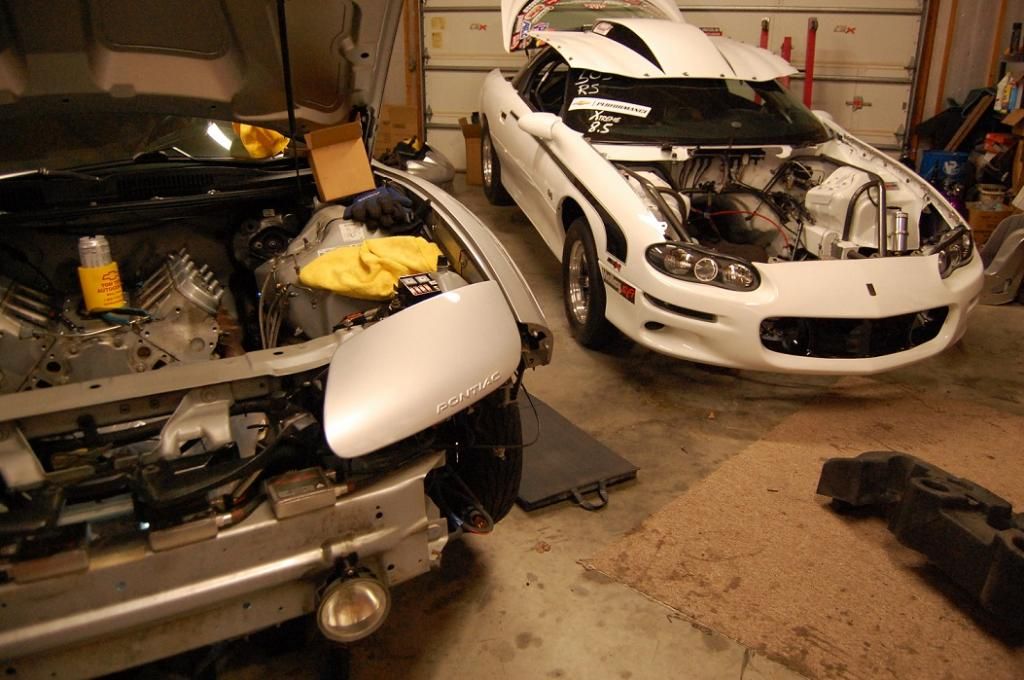
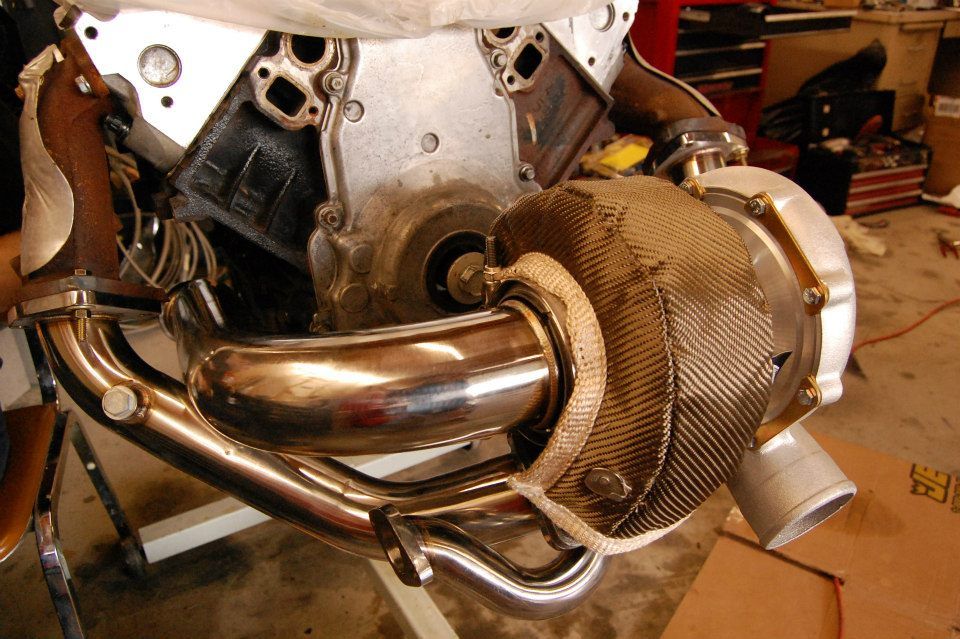
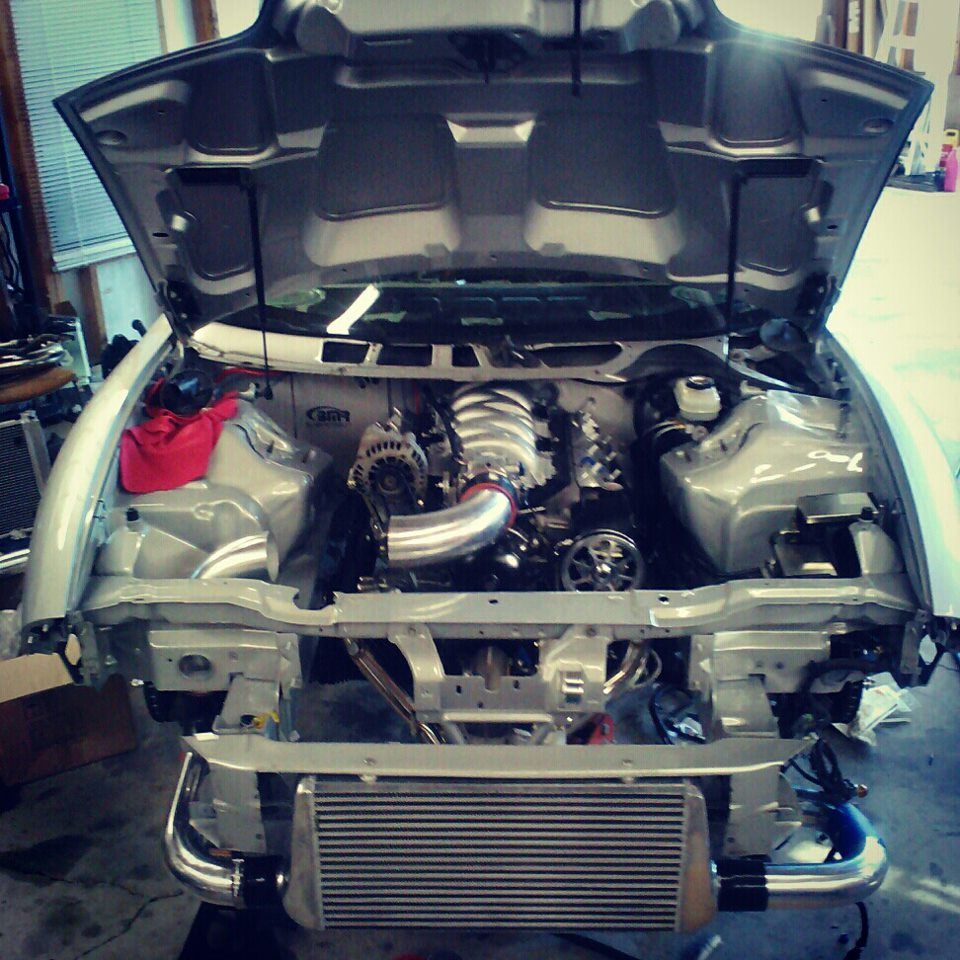
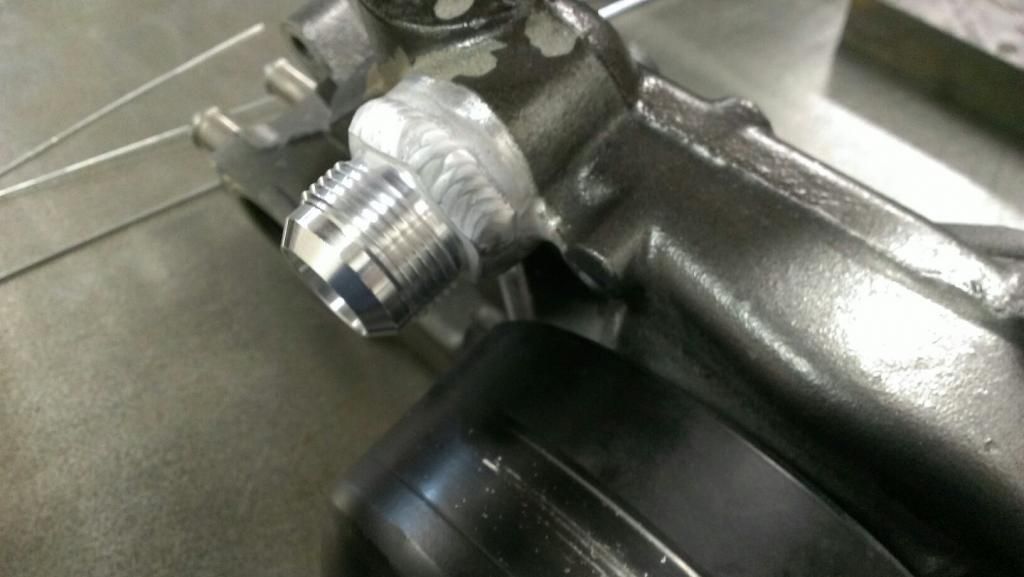
These are the most more up to date pictures (sorry for the cell phone pictures) Should have another update with better pictures in a few days. CBR Performance power steering lines and Wazee billet pulley on, manifolds coated black and currently the coldside is being finished along with an fittings welded and a few other odds and ends.
On the way to get the coldside finished and a few things welded
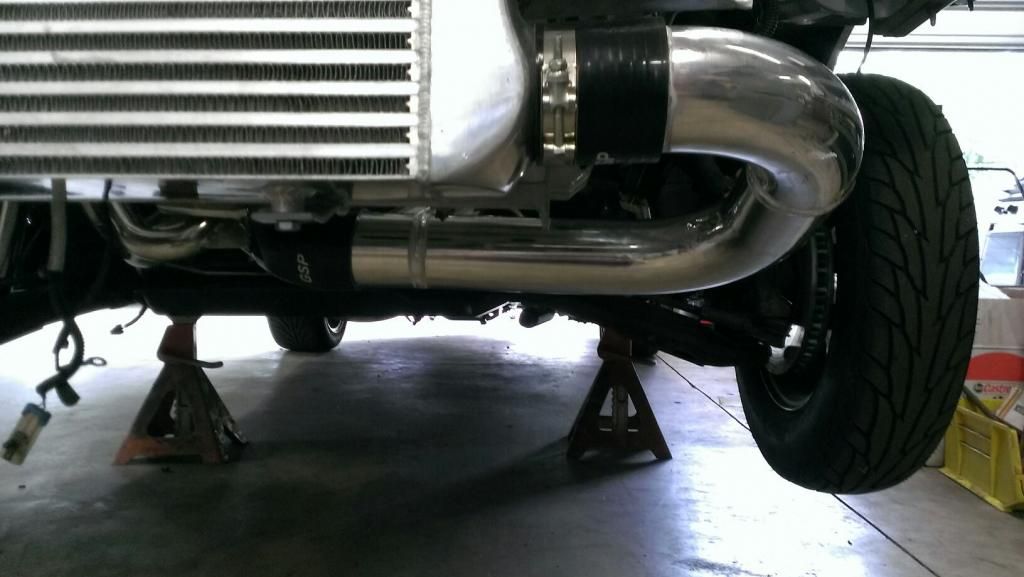
4 inch charge pipe almost finished. New alternator is on it's way to get rid of the ugly dirty one currently.
Turbo to intercooler


Camshaft in, heads on, pan back on, motor back together.


Engine back in with UMI Performance solid motor mounts

Derale fans mounted

These are the most more up to date pictures (sorry for the cell phone pictures) Should have another update with better pictures in a few days. CBR Performance power steering lines and Wazee billet pulley on, manifolds coated black and currently the coldside is being finished along with an fittings welded and a few other odds and ends.

On the way to get the coldside finished and a few things welded


4 inch charge pipe almost finished. New alternator is on it's way to get rid of the ugly dirty one currently.

Turbo to intercooler

 06-28-2013, 06:52 AM
#5
Staging Lane
Thread Starter
iTrader: (15)
Join Date: Aug 2006
Location: Cincinnati
Posts: 94
Likes: 0
Received 0 Likes
on
0 Posts
Thanks Blown!
Engine bay is the same color as the car. For some reason it looks way different in pictures because of the garage lighting and throws the color off. It also doesn't like to pick up the metallic in it and makes it look non silver metallic.
Engine bay is the same color as the car. For some reason it looks way different in pictures because of the garage lighting and throws the color off. It also doesn't like to pick up the metallic in it and makes it look non silver metallic.
Trending Topics


 07-02-2013, 07:34 AM
#12
Staging Lane
Thread Starter
iTrader: (15)
Join Date: Aug 2006
Location: Cincinnati
Posts: 94
Likes: 0
Received 0 Likes
on
0 Posts
Thanks guys Defiantly should be exciting to drive for sure.
I agree, thanks!
As of right now I'd like to see it put down some numbers in the 700/800 range and just be fun to drive. It needs a cage but, wouldn't mind seeing what I can get the car to do at the track.
Defiantly should be exciting to drive for sure.I agree, thanks!
As of right now I'd like to see it put down some numbers in the 700/800 range and just be fun to drive. It needs a cage but, wouldn't mind seeing what I can get the car to do at the track.
Last edited by onesicws6; 07-02-2013 at 02:39 PM.
 07-02-2013, 03:07 PM
#16
TECH Enthusiast
iTrader: (17)
Join Date: Apr 2008
Location: Lehigh Valley ,PA
Posts: 579
Likes: 0
Received 0 Likes
on
0 Posts

Awesome build man!! We have almost the same build as each other. Only difference is your doin a 5.3. I just finished mine up and started the tuning. Hoping the 7675 puts out some good power.
07-08-2013, 11:45 PM
#17
Staging Lane
iTrader: (11)
Join Date: Nov 2009
Location: Brookville, IN
Posts: 71
Likes: 0
Received 0 Likes
on
0 Posts
Bump. Saw the car today in person and it's looking ******* dope! Seems now it's just all final assembly then tuning. Charlie and Shawn are working their asses off for sure.
 07-09-2013, 01:04 PM
#19
12 Second Club
iTrader: (2)
Join Date: Jan 2011
Location: Old Bridge, NJ/Corpus Christi, TX
Posts: 1,216
Likes: 0
Received 1 Like
on
1 Post
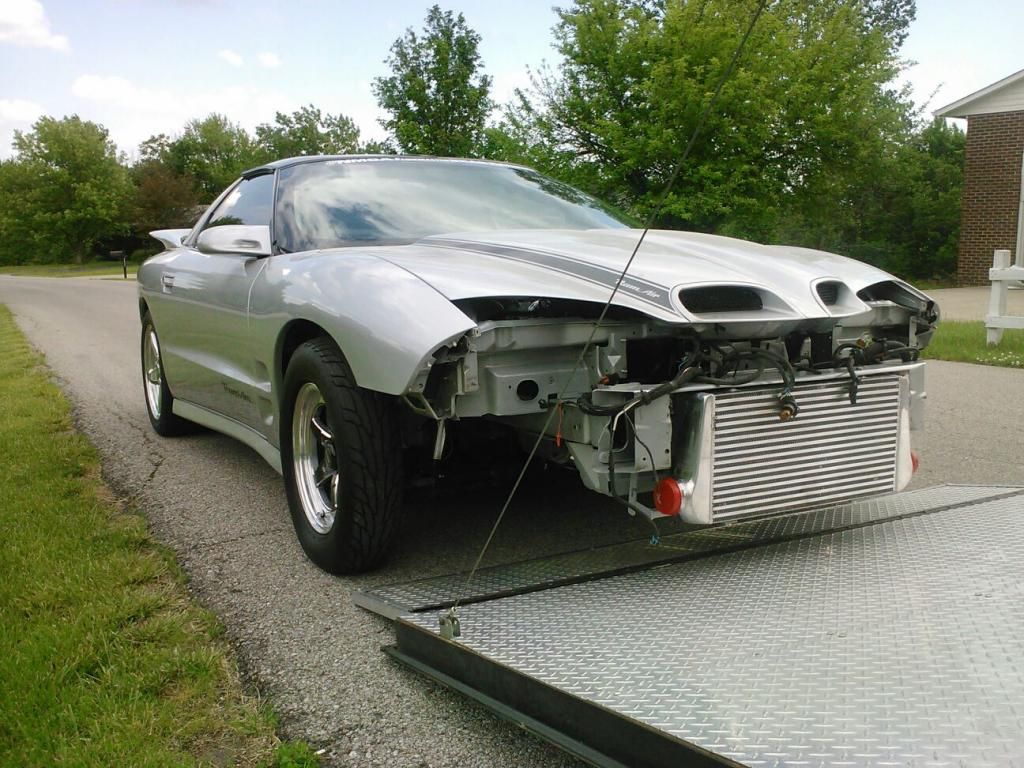
Looking good! Can you post some pics of where you trimmed underneath the rad support to be able to fit it underneath? I have the same rad and am trying to do the same thing...