SOM LAG Project: 394ci, 25.3, Twin PT7675 Gen 2's, PG, E85, 7-second Street Car


 01-17-2016, 05:49 PM
#203
On The Tree
iTrader: (4)

Join Date: Apr 2010
Location: ft rucker
Posts: 185
Likes: 0
Received 0 Likes
on
0 Posts
Wondering how well u can see the holley dash. I am almost done with my car just waiting on the wiring board and the dash will be the last thing to tackle. Your idea looked pretty simple I had some other ways in mind but just wondering how well u could see it.


 02-14-2016, 12:53 AM
#214
Found a free day and decided to do some work on the car. Ended up being a 14 hour day.
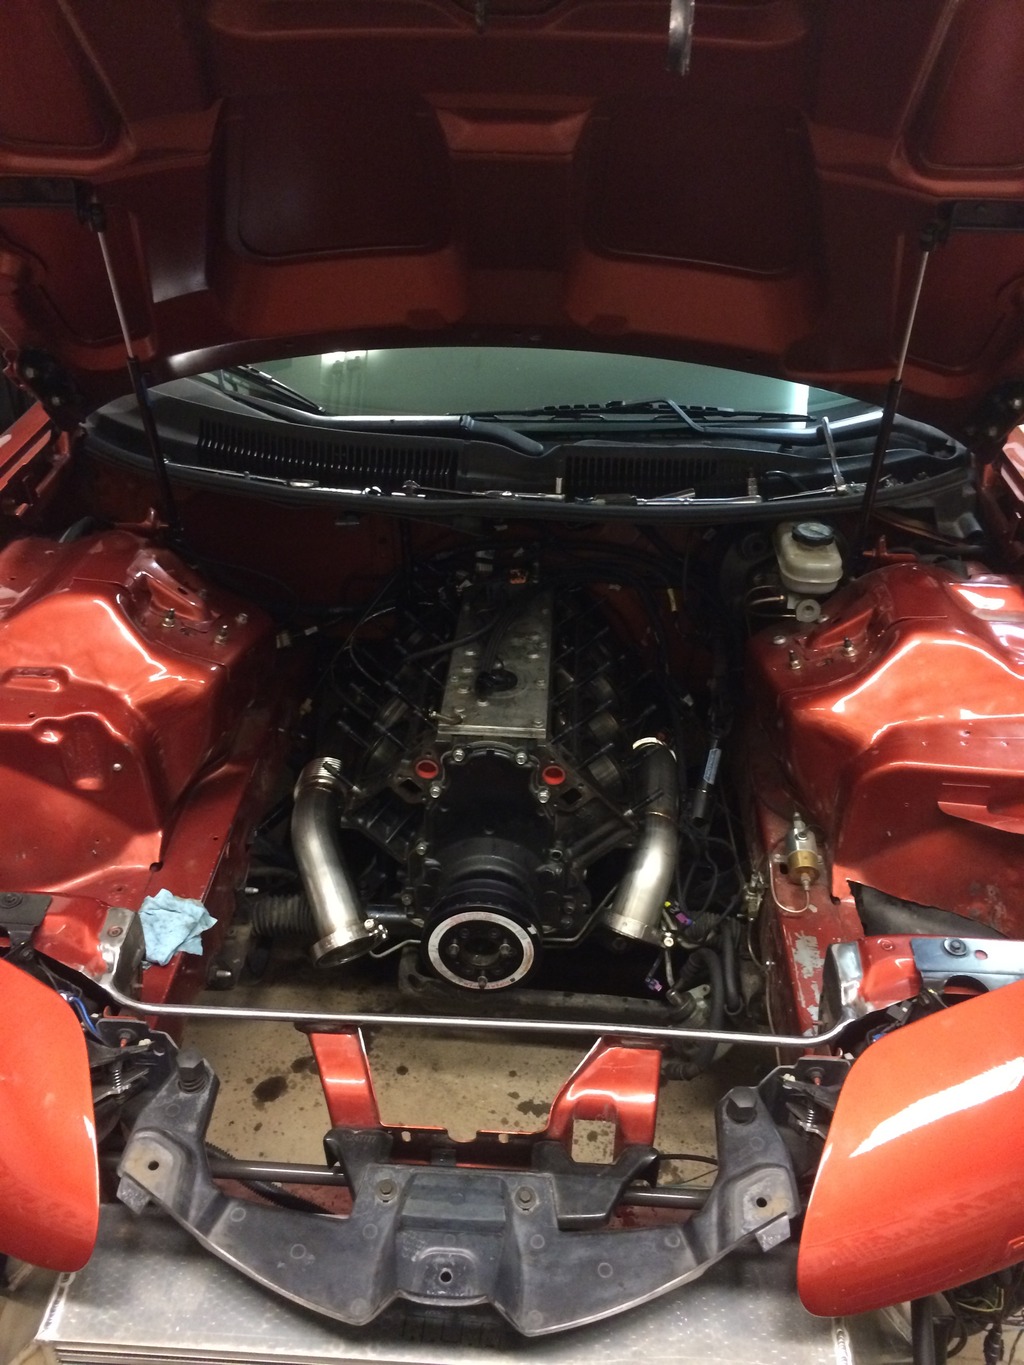
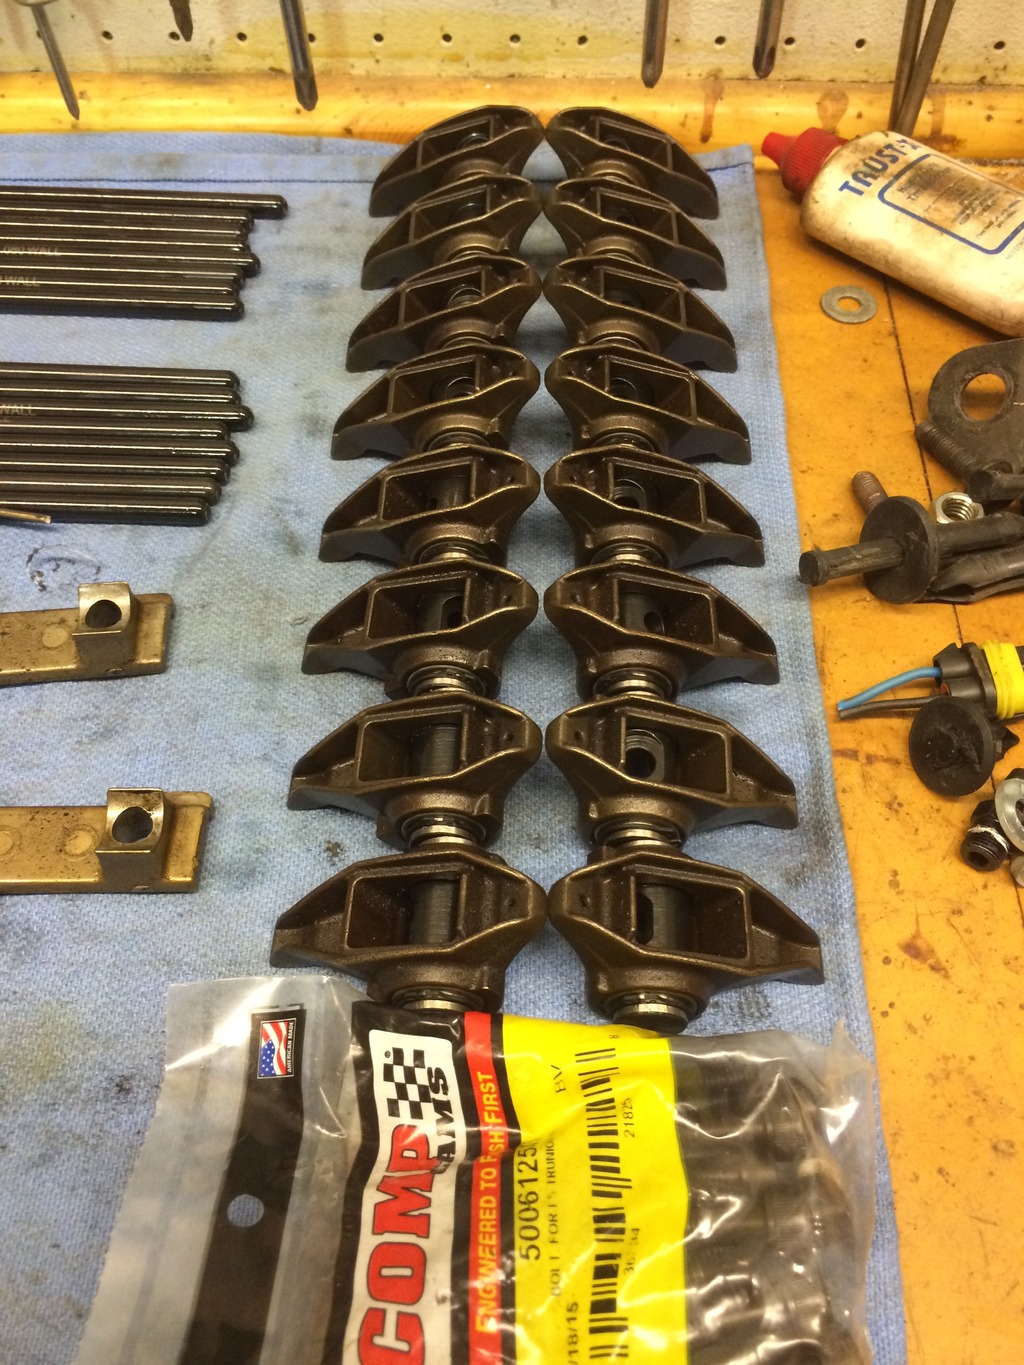
Started by removing the turbo kit and then tearing the engine down. Was able to get it down to a point almost ready for the cam swap and new head gaskets. Also was able to remove the rockers (to hopefully sell) and but the Comp trunion upgrades in the stock rockers.
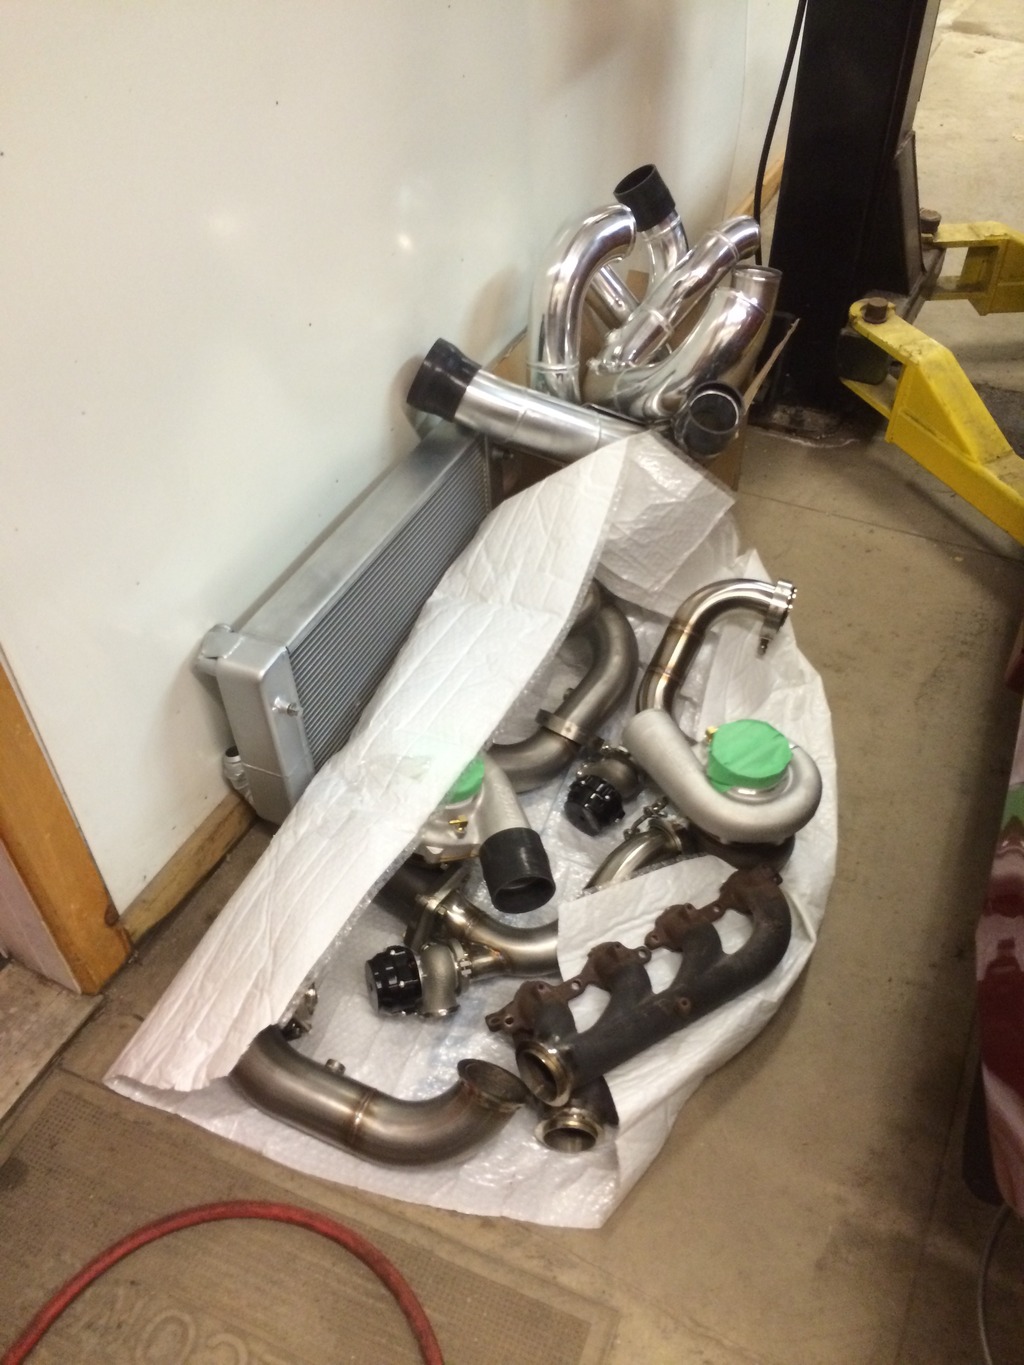
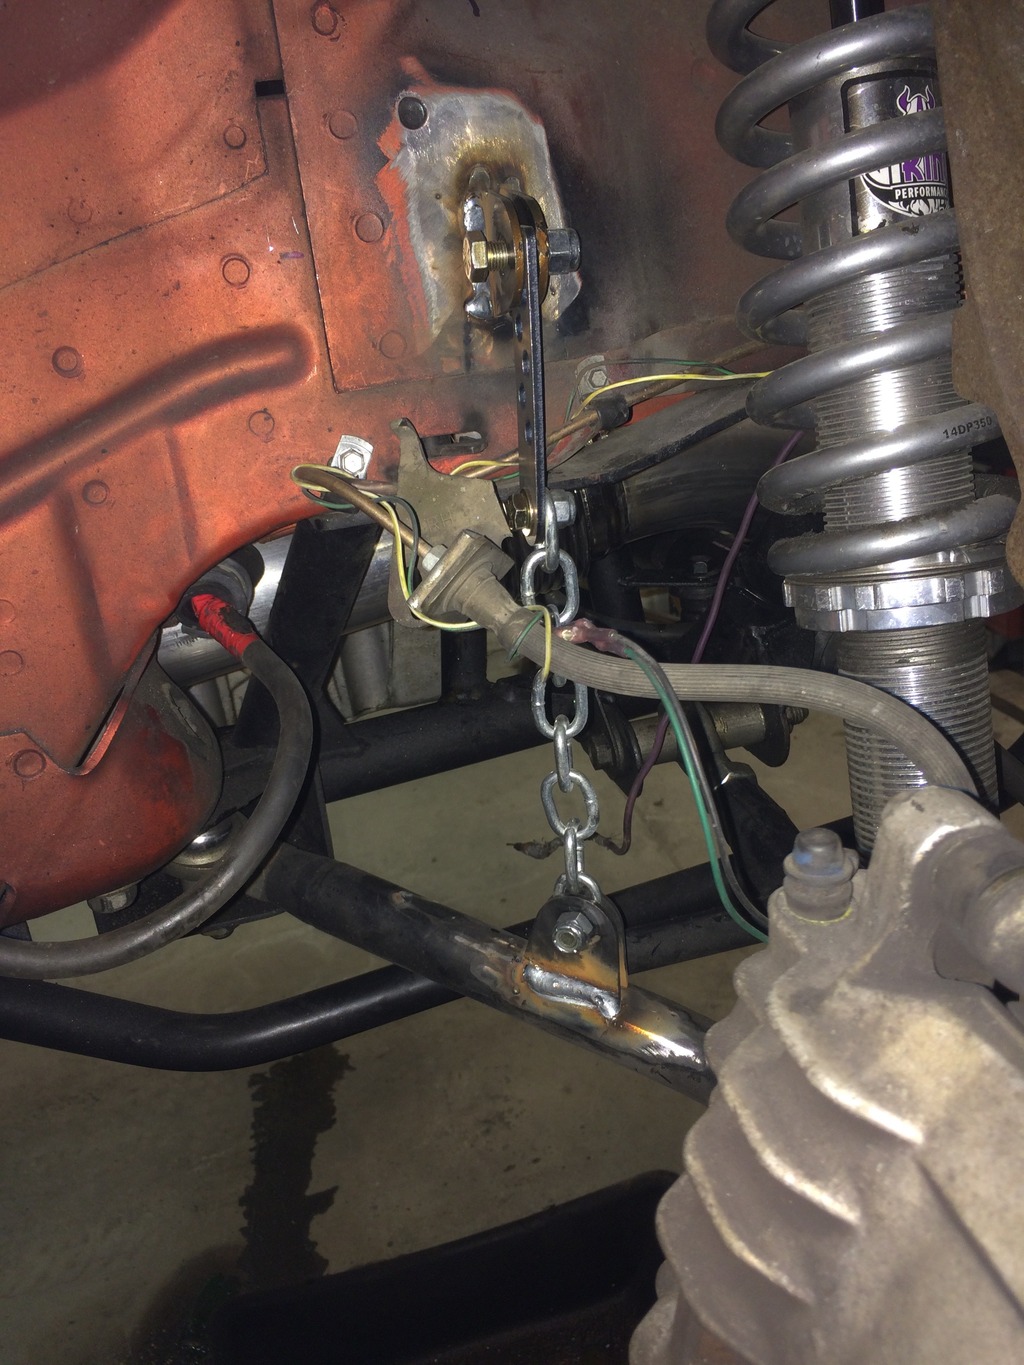
Decided to snap a photo of the MWC travel limiters. This was before painting the brackets today. Also painted the new tow loops (will get photos after installation).
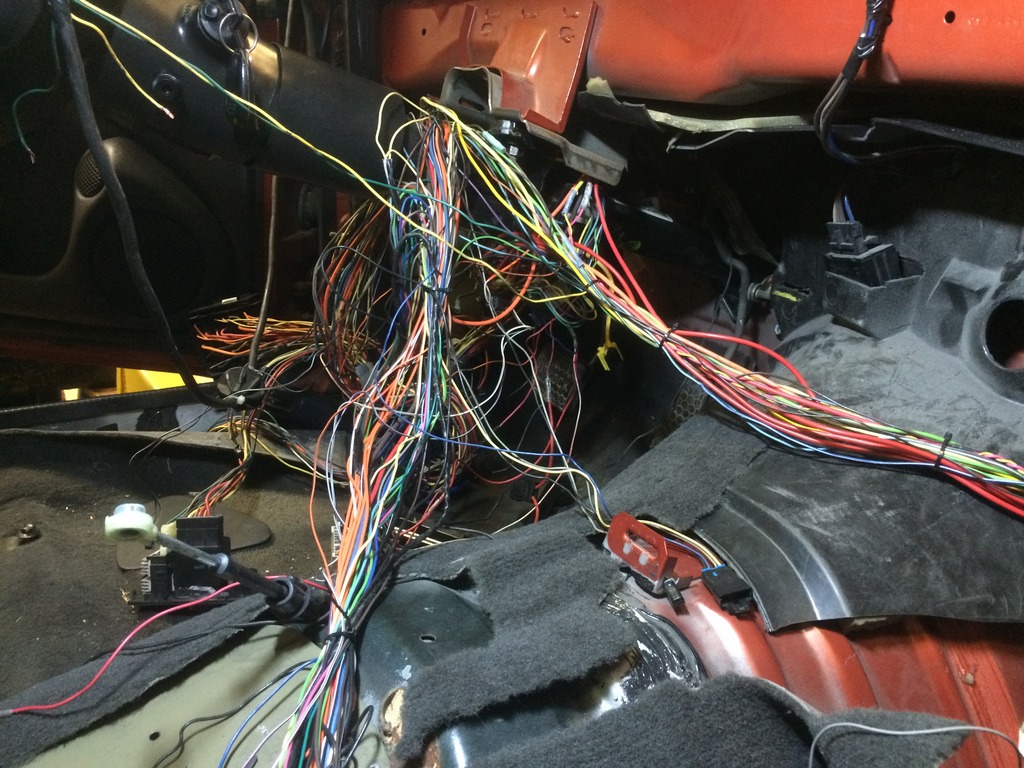
Next we were going to install the TCI shifter. However, it quickly turned into the brilliant idea to clean up wiring. Well, sure enough, here starts the project:
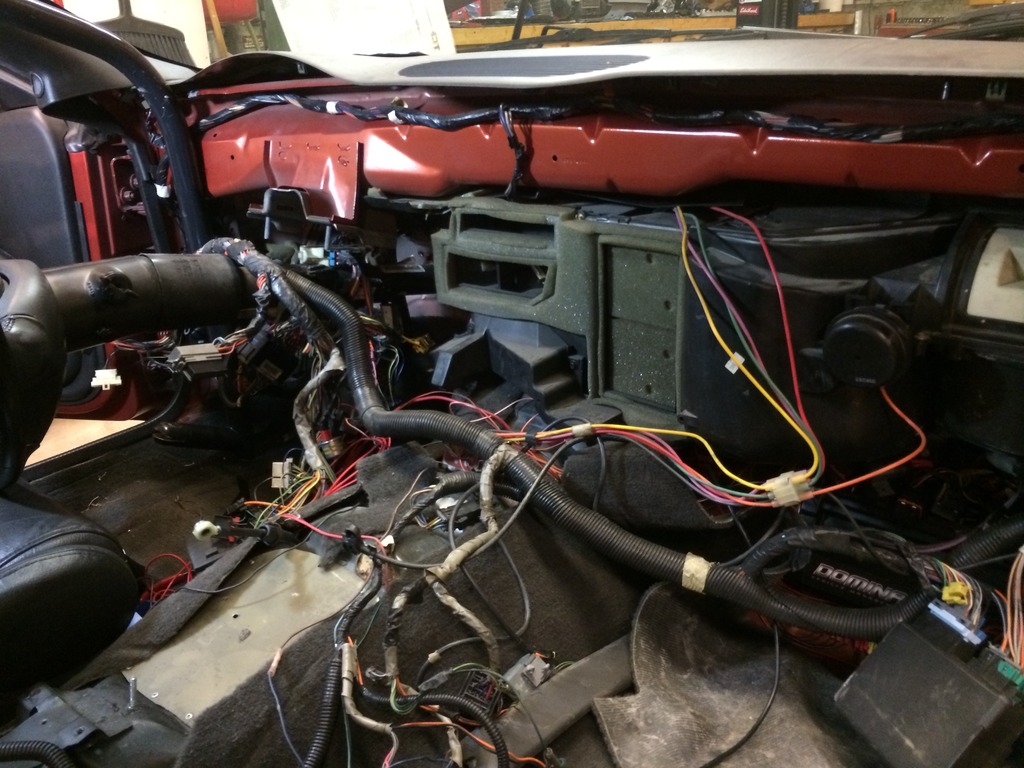
Pulled a good portion of the interior out including the dash to start removing any wire that is not used anymore. Planning to install my Leash Electronics street/strip board that I bought last year and clean up the wiring mess.
02-14-2016, 11:04 PM
#215
We jumped back into the wiring today. Figured it would make sense to start moving everything to the Leash Electronics street/strip board. Took a little bit to sort through the existing wiring, and then started mounting everything.
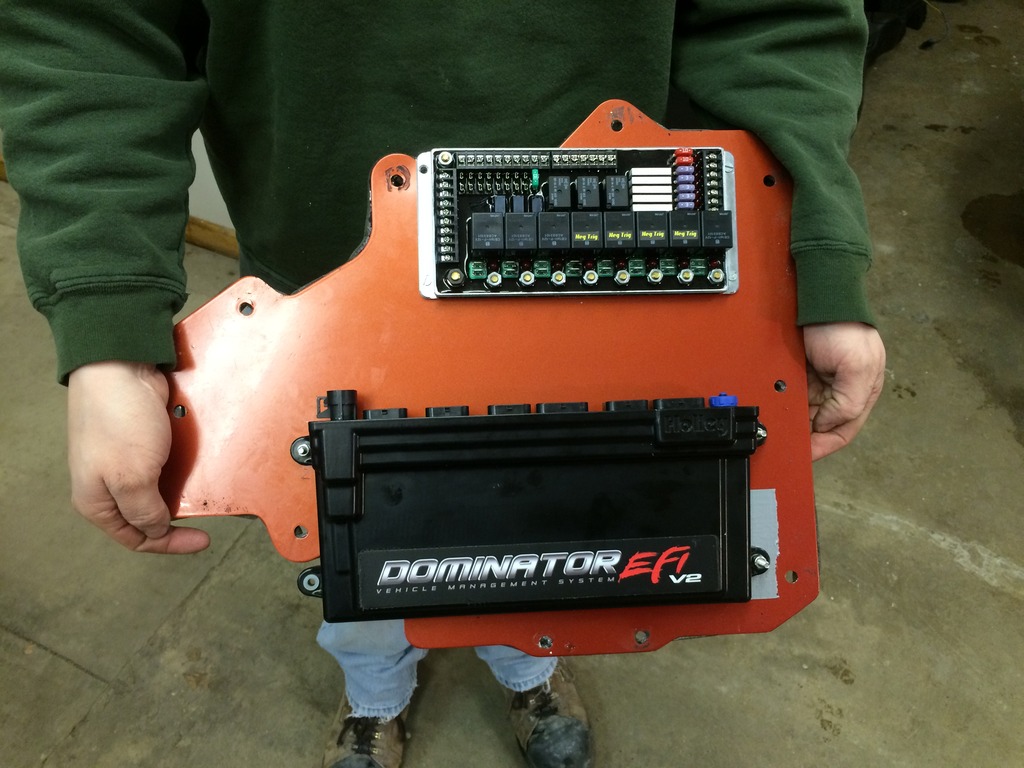
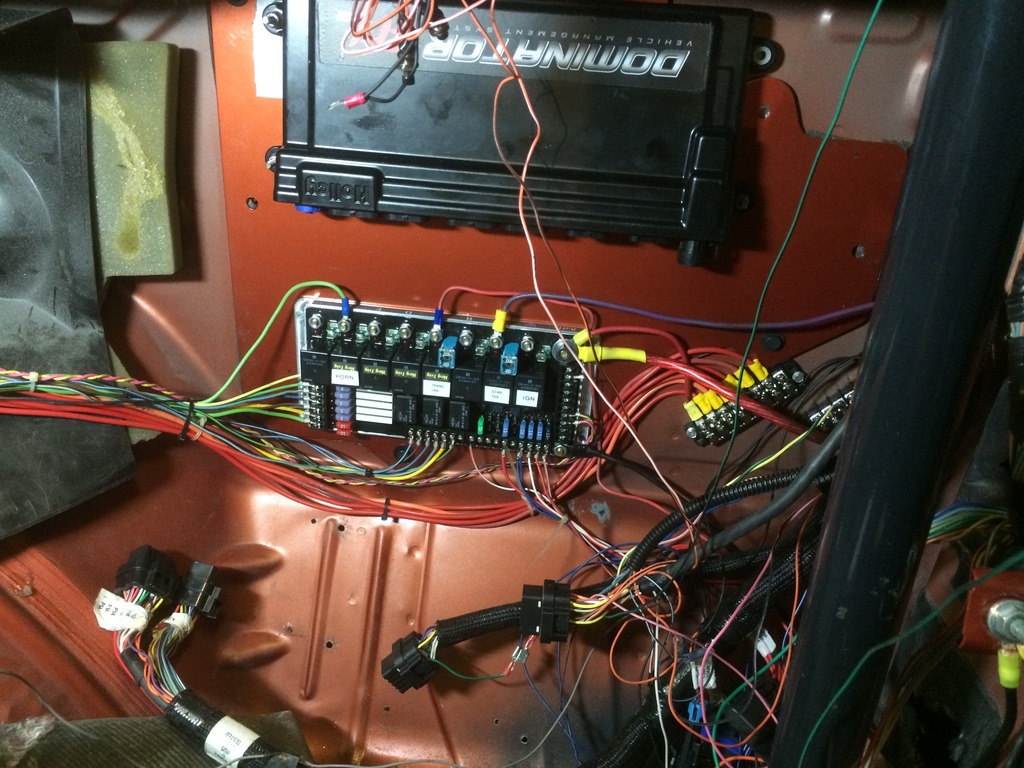
Mounted the ECU and the board on the HVAC delete panel:
We started by tackling the most difficult item, lighting. It took a little bit to trace and verify all of the lighting outputs and triggers. We believe we have everything moved from the factory harness to the new board.
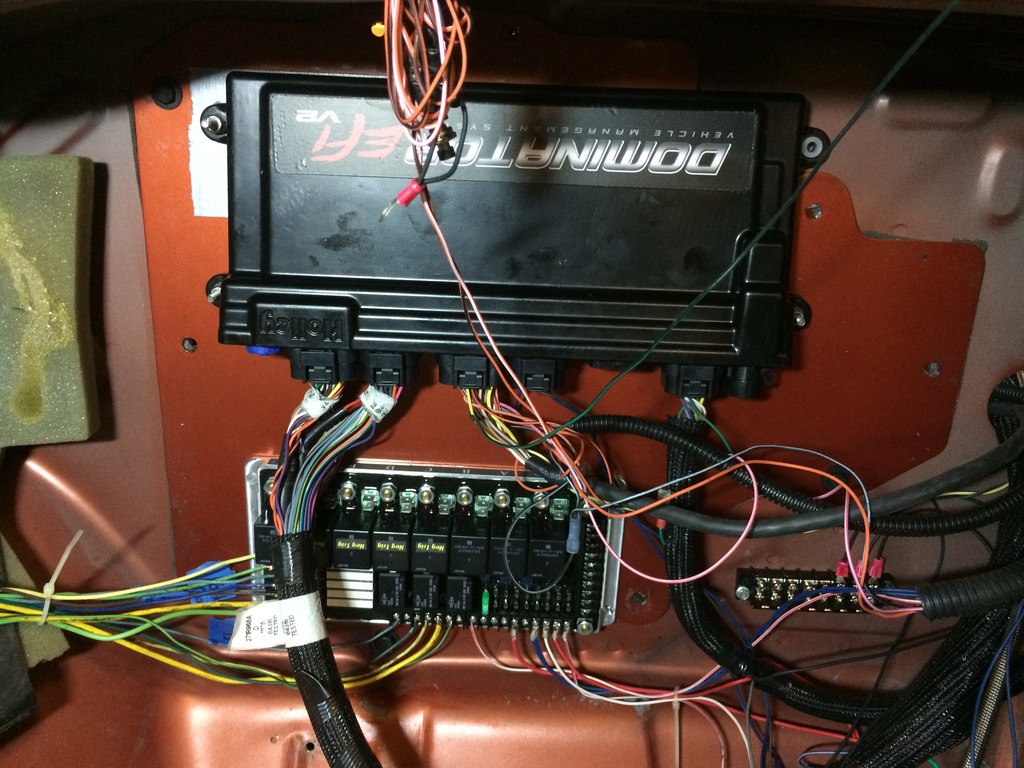
All of the wiring is just temporarily installed. Will be going through and properly shortening the wires, terminating them, and bundling them later after routing all the wires.
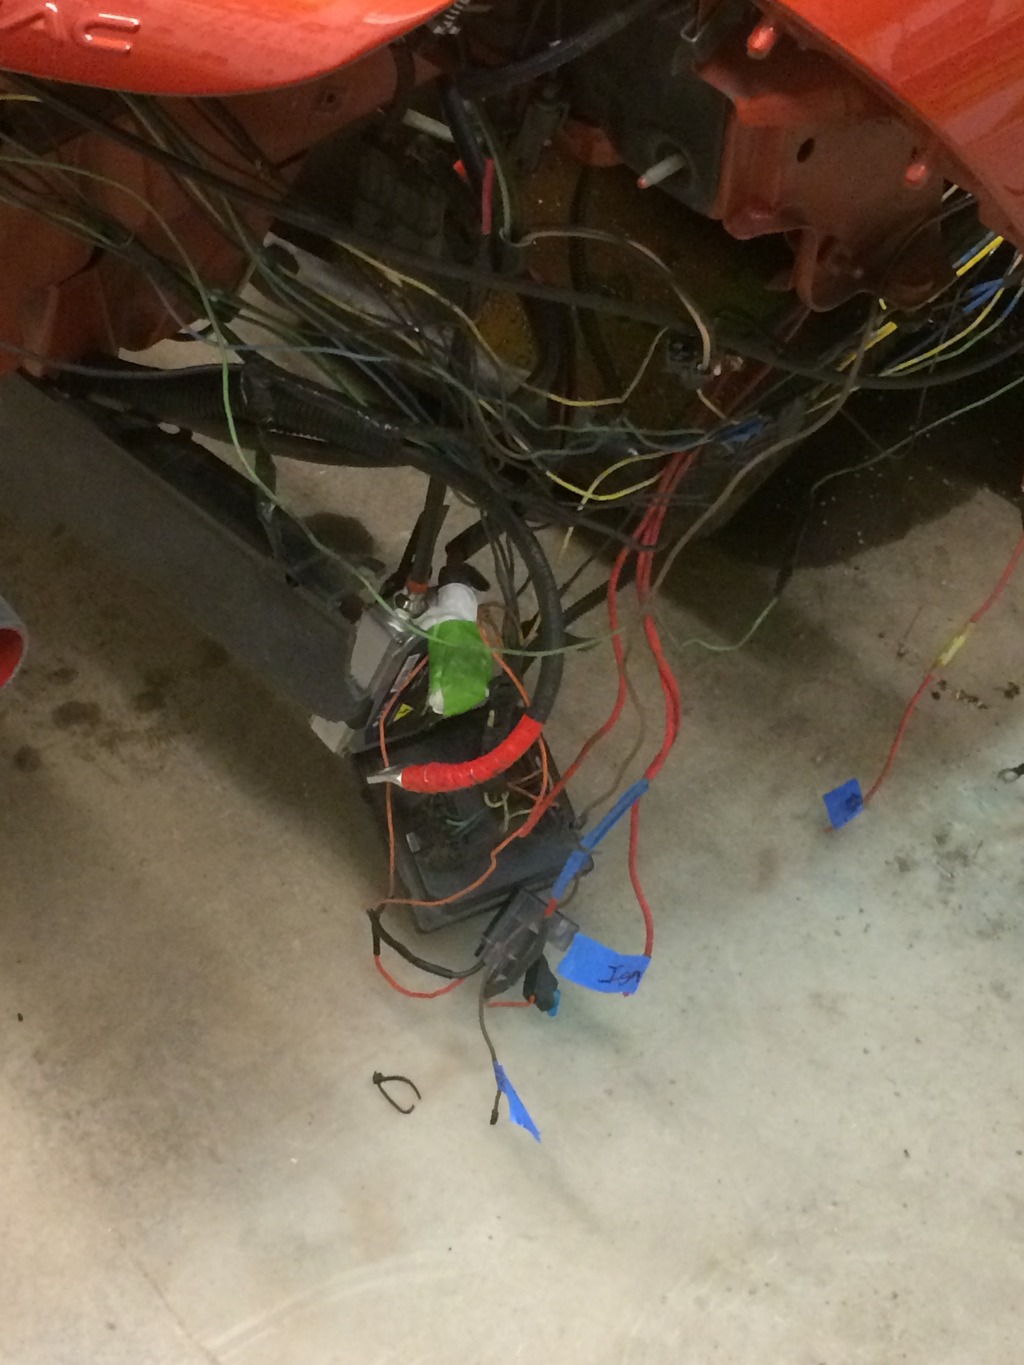
Have been able to clean a big portion of the mess in the front:
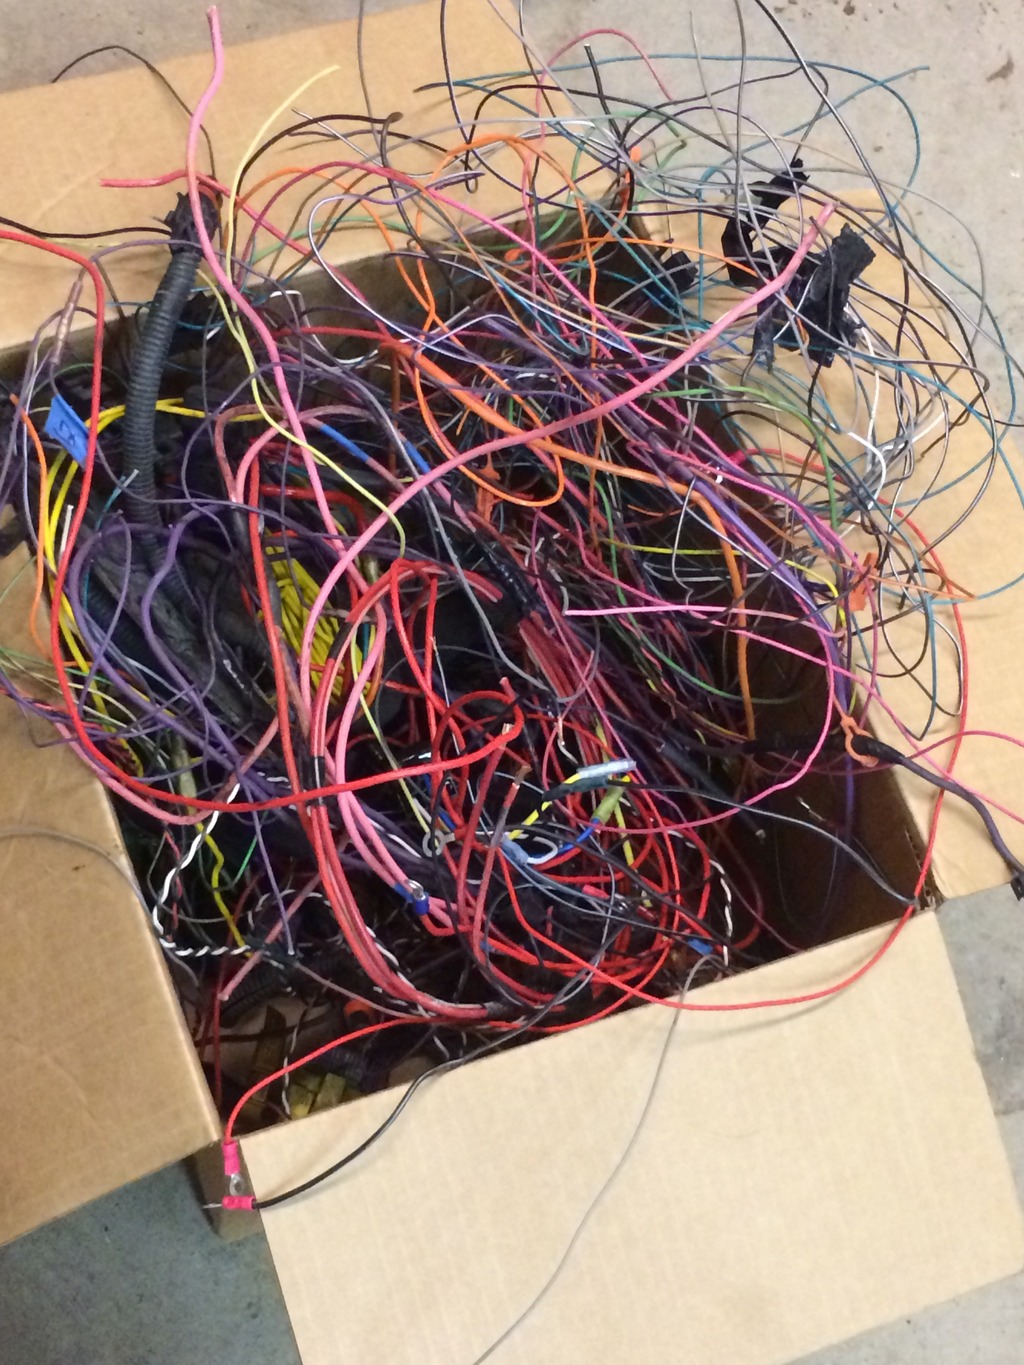
We have a pretty good start of wire that has come out of the car so far:
Mounted the ECU and the board on the HVAC delete panel:

We started by tackling the most difficult item, lighting. It took a little bit to trace and verify all of the lighting outputs and triggers. We believe we have everything moved from the factory harness to the new board.

All of the wiring is just temporarily installed. Will be going through and properly shortening the wires, terminating them, and bundling them later after routing all the wires.
Have been able to clean a big portion of the mess in the front:

We have a pretty good start of wire that has come out of the car so far:

 02-27-2016, 09:34 AM
#217
Removing the heat box really opened things up to allow for the new mounting of the Dominator and Street/Strip board. I have not turned the heat on in the car in years so it was a simple decision to cut the weight out of the car.
I ordered a switch panel from Trick Cable / Racewire Solutions to be installed where the HVAC controls were. This should be quite a bit easier to use and see as compared to the ashtray location in the console. Brian mentioned it should be about 3 weeks before receiving the switch panel due to the etching on the switches.
I wanted to get back to having a fuel gauge and dish indicators for turn signals and brights. I was going to wait for the new I/O harness for the Holley Digital Dash but decided not to. We had gone through most of the lighting wiring and had a good understanding from it as well as it wired into the Leash board. I ordered 10 LED's for mounting in the dash. The green two will be used for turn signals and one blue for brights. Not sure how many others will be installed but will use those as indicators from Holley.
I wanted to avoid some of the fluctuations from just simply inputting the fuel level as an input to Holley. I ordered a Gas signal conditioner from IRQ Engineering to help soften the dampening signal for the fuel level resistance.
Aside from that, I received a few random parts. I decided I am going to put a pressure transducer on the coolant system. I figure this will be a good data point to track and keep an eye on.
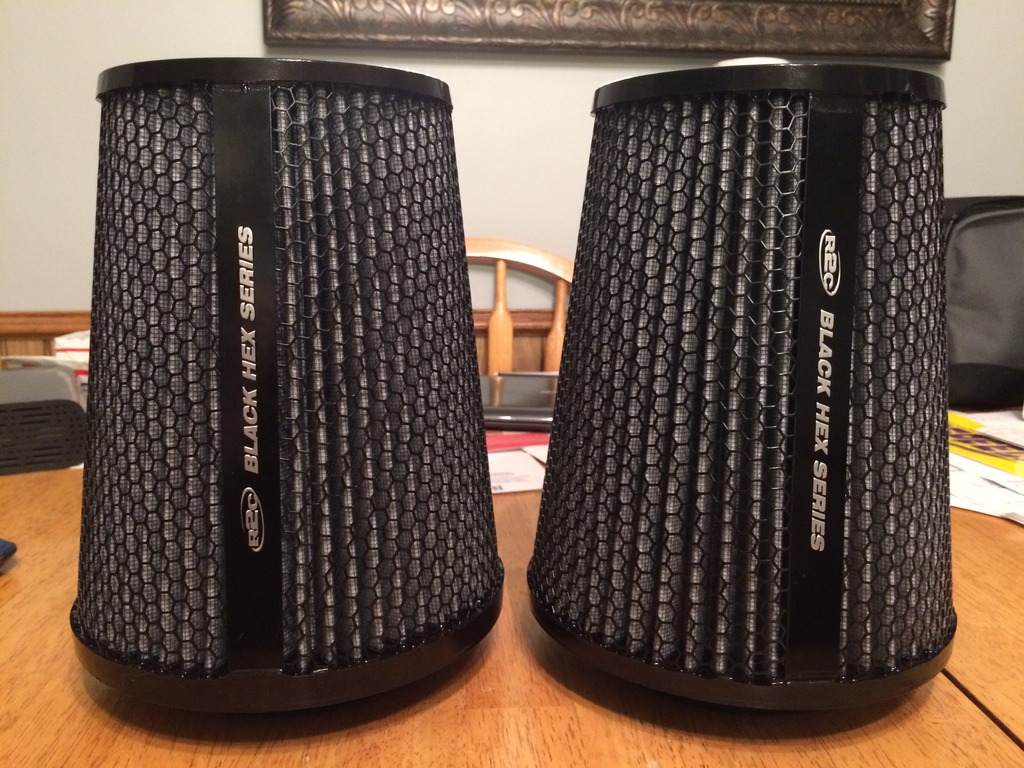
I also received my filters for the turbos. These should look nice under the hood. The black looks pretty damn sweet if you ask me.
We got back to the wiring last night. I can officially say that we have eliminated the two fuse panels from the front left corner of the car and all the wiring associated with that. I need to remove the power feed from the fuse panels back to the termination block. Everything has been rerouted to the Leash board or my terminal blocks near the Leash board. It is unreal how thin the bundling of cables will be routing through the firewall on the drivers side. I believe it is down the 14 cables or something like that.
All of the lights have been terminated on the Leash board for both the inputs and outputs. We have the starter relay wired, transmission fan wired, and Horn wired. Just need to run the wiring for the cooling fans and then modify the triggers from Holley for each of those. Should be able to finish bundling everything together and putting back in loom. Not far off from putting the dash back in.
I ordered a switch panel from Trick Cable / Racewire Solutions to be installed where the HVAC controls were. This should be quite a bit easier to use and see as compared to the ashtray location in the console. Brian mentioned it should be about 3 weeks before receiving the switch panel due to the etching on the switches.
I wanted to get back to having a fuel gauge and dish indicators for turn signals and brights. I was going to wait for the new I/O harness for the Holley Digital Dash but decided not to. We had gone through most of the lighting wiring and had a good understanding from it as well as it wired into the Leash board. I ordered 10 LED's for mounting in the dash. The green two will be used for turn signals and one blue for brights. Not sure how many others will be installed but will use those as indicators from Holley.
I wanted to avoid some of the fluctuations from just simply inputting the fuel level as an input to Holley. I ordered a Gas signal conditioner from IRQ Engineering to help soften the dampening signal for the fuel level resistance.
Aside from that, I received a few random parts. I decided I am going to put a pressure transducer on the coolant system. I figure this will be a good data point to track and keep an eye on.
I also received my filters for the turbos. These should look nice under the hood. The black looks pretty damn sweet if you ask me.

We got back to the wiring last night. I can officially say that we have eliminated the two fuse panels from the front left corner of the car and all the wiring associated with that. I need to remove the power feed from the fuse panels back to the termination block. Everything has been rerouted to the Leash board or my terminal blocks near the Leash board. It is unreal how thin the bundling of cables will be routing through the firewall on the drivers side. I believe it is down the 14 cables or something like that.
All of the lights have been terminated on the Leash board for both the inputs and outputs. We have the starter relay wired, transmission fan wired, and Horn wired. Just need to run the wiring for the cooling fans and then modify the triggers from Holley for each of those. Should be able to finish bundling everything together and putting back in loom. Not far off from putting the dash back in.

 03-04-2016, 11:44 AM
#220
Well, build 3.0 got a little larger.
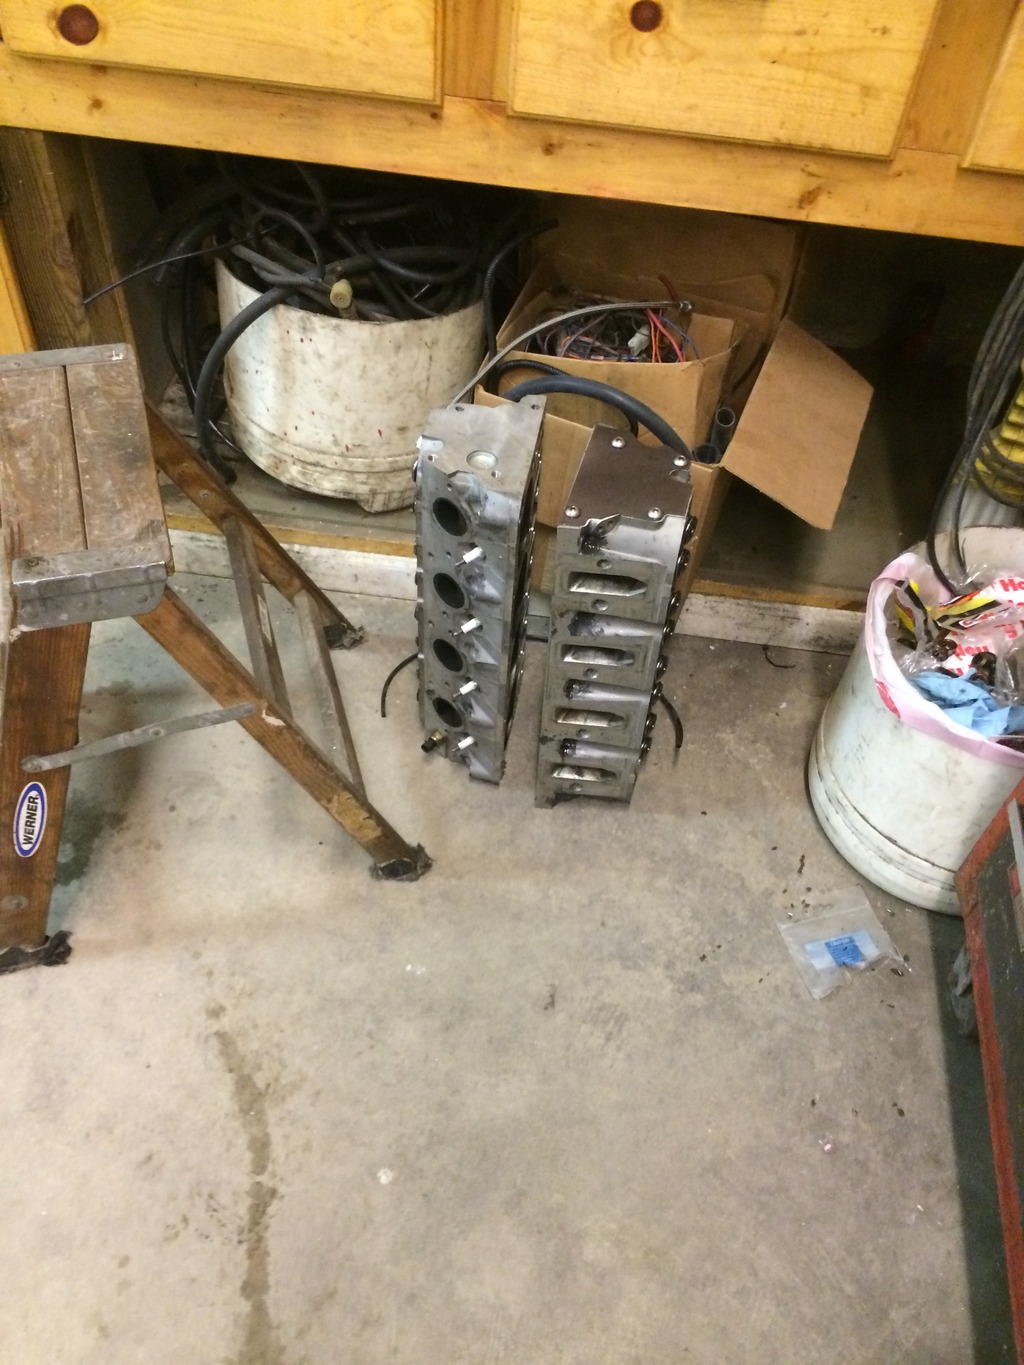
We were swapping cams last night and were getting ready to put the heads back on, when we took a closer look at cylinder #5. It was cracked. It explained the pushing water issues the last outing and the head gaskets looked fine.
So, I decided to step up and get an LSX block. It is ordered and on its way. The plan is to run the same rotating assembly and heads this year, and step up a little bigger in the future.
Will get photos later.