
Battery Hold down issue

 03-14-2013, 03:40 PM
#2

Clayton, I would use a dremel cutting wheel, or some type of cutting wheel, then cut the remainder of that bolt, down flush with the top of the pan. From there, drill through what's left of the welded bolt. (Is there a welded nut underneath that pan?)
Then get a stainless bolt, long enough to slide through the newly created hole (from the bottom), to perform the hold-down function. Put the battery in and place a new stainless nut over the holder-on-er piece.
Then get a stainless bolt, long enough to slide through the newly created hole (from the bottom), to perform the hold-down function. Put the battery in and place a new stainless nut over the holder-on-er piece.
03-14-2013, 03:46 PM
#3
On The Tree
Thread Starter

Join Date: Sep 2010
Location: Virginia Beach, VA
Posts: 114
Likes: 0
Received 0 Likes
on
0 Posts

Clayton, I would use a dremel cutting wheel, or some type of cutting wheel, then cut the remainder of that bolt, down flush with the top of the pan. From there, drill through what's left of the welded bolt. (Is there a welded nut underneath that pan?)
Then get a stainless bolt, long enough to slide through the newly created hole (from the bottom), to perform the hold-down function. Put the battery in and place a new stainless nut over the holder-on-er piece.
Then get a stainless bolt, long enough to slide through the newly created hole (from the bottom), to perform the hold-down function. Put the battery in and place a new stainless nut over the holder-on-er piece.
it took me a while to realize it was welded as part of that metal since it does from both ends just look like a bolt going through
03-14-2013, 07:25 PM
#5
On The Tree
Thread Starter
Join Date: Sep 2010
Location: Virginia Beach, VA
Posts: 114
Likes: 0
Received 0 Likes
on
0 Posts
rarely... ever... haha. probably wont need another battery for at least a year, probably 2. lol. even so, poppin her up on some quick ramps and getting someone to hold a wrench isnt that big a deal to me. it beats spending time finding someone to weld. :/
 03-15-2013, 01:07 AM
#7
TECH Regular
iTrader: (5)
Join Date: Jun 2012
Location: Toronto
Posts: 499
Likes: 0
Received 0 Likes
on
0 Posts
Overbore the piece that the rod goes through (the plastic tray) with a drill so it can fit a coupler nut through it. Buy a coupler nut appropriate for the stud  .
.
Then get an appropriate bolt to thread into the coupler nut to tie down the tray. Cheap and quick.
. Then get an appropriate bolt to thread into the coupler nut to tie down the tray. Cheap and quick.
Trending Topics
03-15-2013, 01:30 PM
#8
On The Tree
Thread Starter
Join Date: Sep 2010
Location: Virginia Beach, VA
Posts: 114
Likes: 0
Received 0 Likes
on
0 Posts
holy... crap... thats genius. I may go with this
03-19-2013, 06:24 AM
#10

I just re-did mine. There was originally a bolt in that hole. It's the upper right one....
Mine stripped the nut insert on the body. It's the left/rusty hole, where your bolt is snapped....
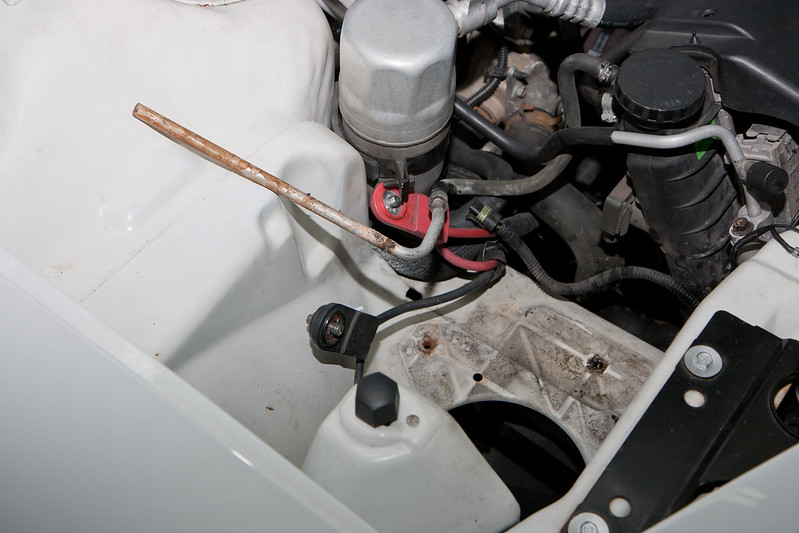
I took a 1/4-20 x 4" bolt, with SAE washer and fed it up from the bottom. The 1/4-20 bolt is skinny enough to fit through the existing hole. You will, obviously, have to get some penetrating lube and vise grips, and remove the remainder of your old bolt.
Then I put a 1/4-20 nut on the bolt and tightened it down. To allow the coolant tank/battery tray to sit flat, I clearanced the bottom of the tray where my new 1/4-20 nut is. Lastly install the tray, add the battery and hold down clamp, and put another SAE washer and 1/4-20 nut on the 'stud/bolt'. Tighten it and you are done! I cut the 4" bolt/stud down some for aesthetics.
I never took pics of the stud/etc. If you can't visualize that, I'll try and draw a sketch or snap some photos later this week. Good luck!
Mine stripped the nut insert on the body. It's the left/rusty hole, where your bolt is snapped....
I took a 1/4-20 x 4" bolt, with SAE washer and fed it up from the bottom. The 1/4-20 bolt is skinny enough to fit through the existing hole. You will, obviously, have to get some penetrating lube and vise grips, and remove the remainder of your old bolt.
Then I put a 1/4-20 nut on the bolt and tightened it down. To allow the coolant tank/battery tray to sit flat, I clearanced the bottom of the tray where my new 1/4-20 nut is. Lastly install the tray, add the battery and hold down clamp, and put another SAE washer and 1/4-20 nut on the 'stud/bolt'. Tighten it and you are done! I cut the 4" bolt/stud down some for aesthetics.
I never took pics of the stud/etc. If you can't visualize that, I'll try and draw a sketch or snap some photos later this week. Good luck!
 04-10-2013, 09:43 AM
#12
On The Tree
Thread Starter
Join Date: Sep 2010
Location: Virginia Beach, VA
Posts: 114
Likes: 0
Received 0 Likes
on
0 Posts
yes, it was welded. Forgot to reply back w results. But since the metal was so old I was able to break off the bolt area and leave a square hole thru the metal. I actually used a really nice construction-level epoxy that I got from my father (chief engineer for hilton hotel, so he usually has some cool stuff haha) and put it inside the hole of the Tray. I then found a long enough bolt and mid-dry of the epoxy, bolted her down into the tray, the epoxy basically turns hard as concrete, so now I have a perfectly threaded area on the tray for the bolt, I can remove it/reinstall the bolt at any time and itll bolt right back in. Pretty nifty actually. I am very pleased and it doesnt require a nut on the bottom (aka someone else holding that sucker as someone up top bolts it in). Passed inspection and Im happy  took me zero dollars.
took me zero dollars.
06-27-2013, 01:46 PM
#13
On The Tree

Join Date: Jul 2004
Posts: 144
Likes: 0
Received 0 Likes
on
0 Posts
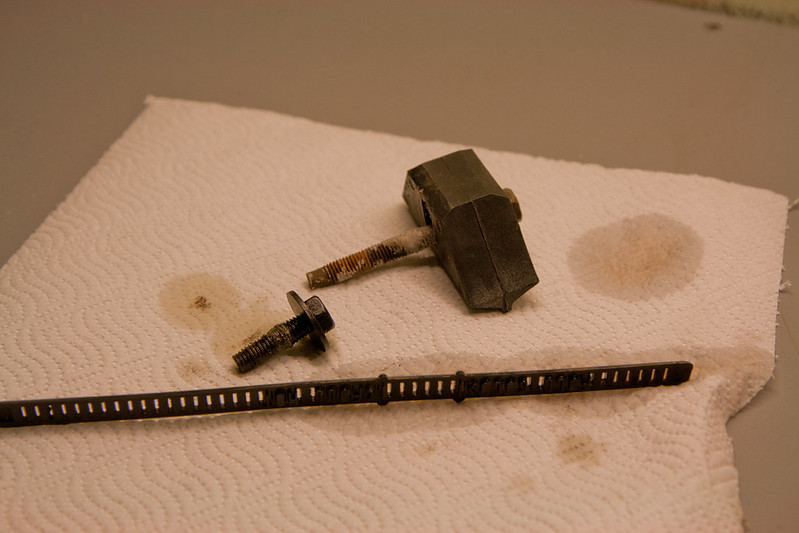
Its just a stuck bolt man not welded. Pb blaster- tap it with a hammer, let it sit, pb it again, tap it medium force while turning with some vise grips on there tight, and go left and right till it loosens then just back it out and put a new ( gm part number 11515984) 8 x 1.25 x 75 bolt.
I had the same problem, I soaked it with pb, whacked it a few times and let it sit over night and it came right out. I had worse corrosion than you do too, sanded it down, masked the engine bay down and re-sprayed the area with primer and duplicolor pewter.
I had the same problem, I soaked it with pb, whacked it a few times and let it sit over night and it came right out. I had worse corrosion than you do too, sanded it down, masked the engine bay down and re-sprayed the area with primer and duplicolor pewter.