
How to properly install and torque ARP Fasteners
 01-12-2010, 02:38 AM
#1

Hey Guys, it seems like there is quite a bit of confusion when it comes time to install your new ARP fasteners. Hopefully somebody can make this a sticky so that everyone will understand how to properly install & torque bolts and studs.
I work very closely with ARP and other high-perf automotive companies, and if you guys have any other questions, feel free to ask. Most of this information can be found on ARP's website.
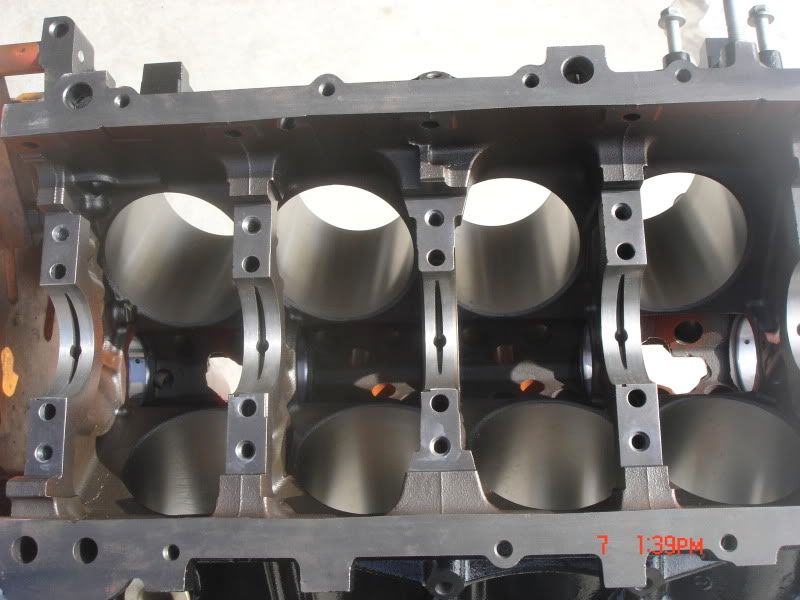
1) CLEAN AND PREP - Clean the bolt holes and threads before installation. Be sure there is no grease, oil, dirt, etc at the base of a hole or this can cause a inconsistent torque reading. Be sure to run a thread chaser through the threads to remove any burrs or galling of the threads.
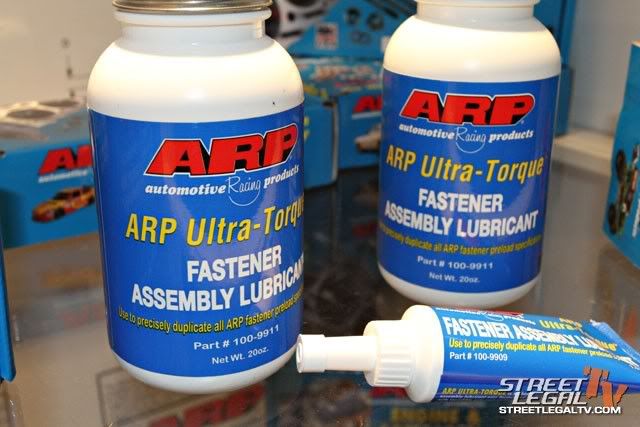
2) LUBRICATION - Although 30wt motor oil can be consistent, it is impossible to insure that all 30wt oil will have the same friction coefficient. ARP has just released the "Ultra-Torque" lubrication which allows them do develop a torque rating which you can consistently duplicate. The Ultra-Torque will also come within 5% of the desired torque reading on the first measurement. This allows for a much more accurate reading, which is critically important in main studs and rod bolts, where over torquing can result in distortion of the bore. Since ultra-torque has a much higher temperature rating than oil, the lubricant will stay on the threads for the life of the engine, allowing removal of the bolt/stud in the future without galling the threads.The lubricant used is the main factor in determining friction, and therefore, the torque for a particular installation. With special lubes, the required torque can be reduced as much as 20 to 30 percent. It is important to keep in mind that the reverse is also true. If the torque value has been specified for a particular fastener on the basis of low friction lube, installing the fastener with motor oil will result in insufficient preload; the torque has to be increased to compensate for the extra friction caused by the motor oil. p.s., you only need a light coat on the threads
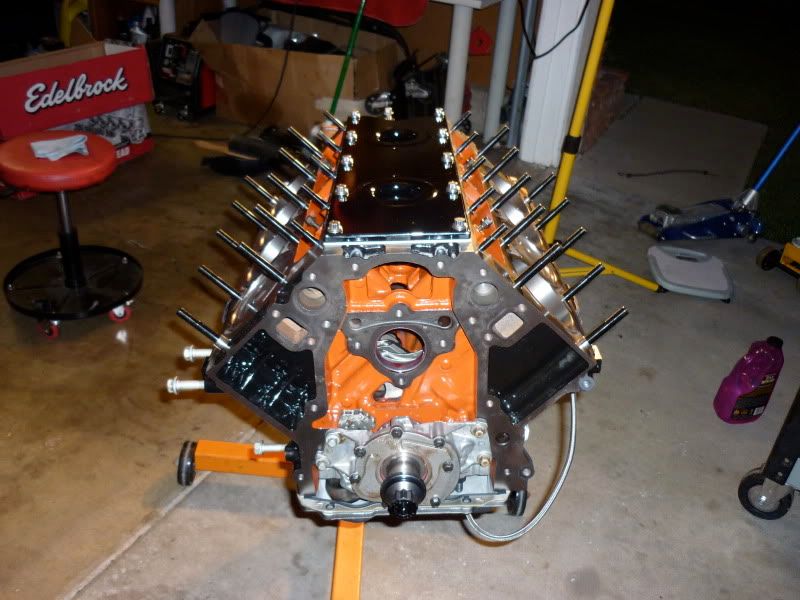
3) INSTALLATION - Studs should be threaded into the block HAND TIGHT ONLY. Any chamfered washer will always be installed with the chamfer facing the head of the bolt/nut. Take care not to nick or damage the threads when installing main caps and heads.
4) TORQUING - Using a stretch gauge is the most accurate way to determine the preload of a fastener, however this method cannot always be used (i.e. main studs, head studs, etc). Friction is an extremely challenging problem because it is so variable and difficult to control. The best way to avoid the pitfalls of friction is by using the stretch method. This way preload is controlled and independent of friction. Each time the bolt is torqued and loosened, the friction factor gets smaller. Eventually the friction levels out and becomes constant for all following repetitions. Therefore, when installing a new bolt where the stretch method cannot be used, the bolt should be tightened and loosened several times before final torque. The number of cycles depends on the lubricant. For ARP recommended lubes, five loosening and tightening cycles is sufficient.
5) TOOLS - First you have to have a good TORQUE WRENCH that is checked for accuracy before use. Most wrenches tested are WAY out of specks. So the wrench is the number one factor in this equasion that is the most important. Also the bolts must be torqued in the proper stages. Most recommend 3 stages on heads ETC. Also according to felpro all bolts must have the storage coatings removed. ARP does not think this is an issue. Also make sure that too much lube is not used. In blind holes if the lube fills the cavity the bolt can hydrolock and pull the threads or snap. The oil can not be compressed and will cause all kind of problems including false readings.
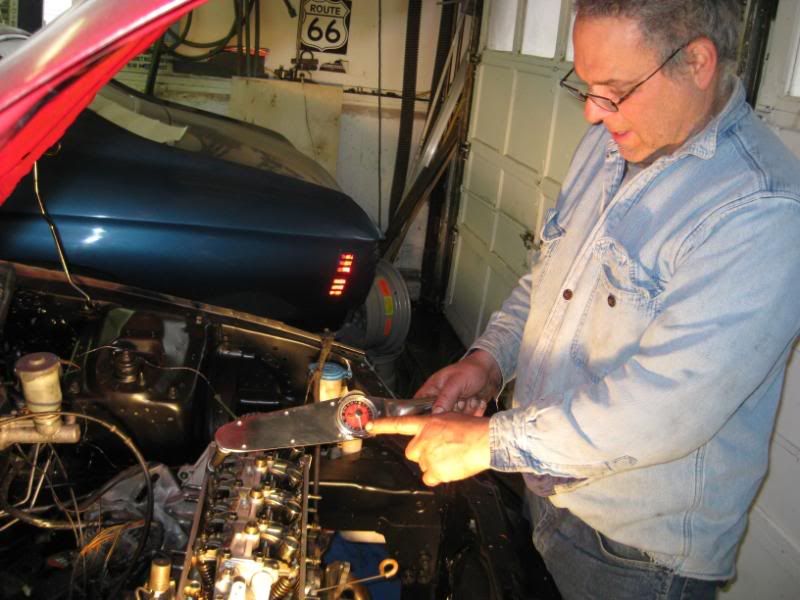
Here is an example of a good torque wrench. This is Tom Falco finishing torquing the head on one of his FORD killer HONDA engines.
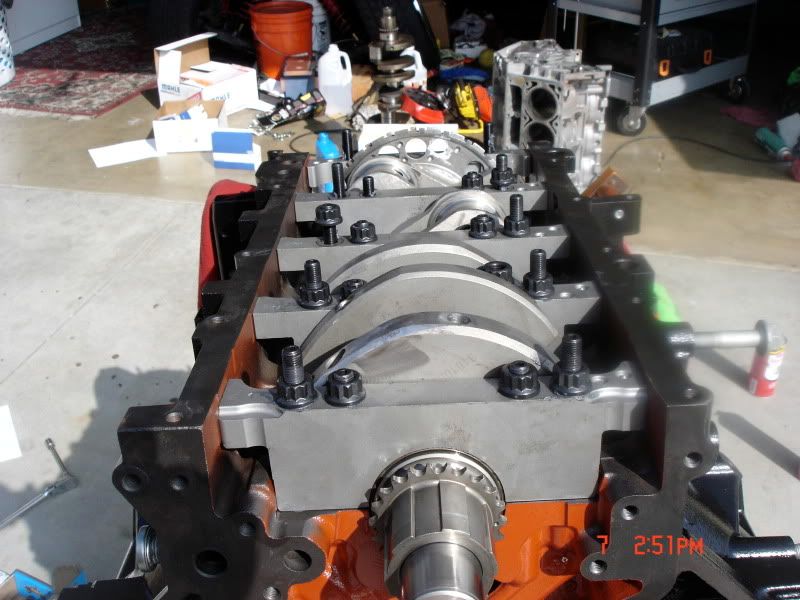
6) TORQUE SEQUENCE - Be sure to always follow the recommended torque sequence. This allows a component to have equal clamping force distributed across it. When installing main caps for the crankshaft, if you fully torque cap #1, then proceed to 2,3,4,& 5, the crank will have a very hard time spinning. Just take my word on it, dont mess up your crank journals trying it
7) OPTIONAL RE-TORQUE - Some of the really meticulous engine builders will re-torque fasteners like heads bolts after the first heat cycle (after running the engine) I list this as optional even though it is a good practice (although the formulation of Ultra-Torque is making this step less critical)
I know its a lot to read, but I think everyone who is installing an ARP product should read this before installation. Just some food for thought - Josh
I work very closely with ARP and other high-perf automotive companies, and if you guys have any other questions, feel free to ask. Most of this information can be found on ARP's website.
1) CLEAN AND PREP - Clean the bolt holes and threads before installation. Be sure there is no grease, oil, dirt, etc at the base of a hole or this can cause a inconsistent torque reading. Be sure to run a thread chaser through the threads to remove any burrs or galling of the threads.
2) LUBRICATION - Although 30wt motor oil can be consistent, it is impossible to insure that all 30wt oil will have the same friction coefficient. ARP has just released the "Ultra-Torque" lubrication which allows them do develop a torque rating which you can consistently duplicate. The Ultra-Torque will also come within 5% of the desired torque reading on the first measurement. This allows for a much more accurate reading, which is critically important in main studs and rod bolts, where over torquing can result in distortion of the bore. Since ultra-torque has a much higher temperature rating than oil, the lubricant will stay on the threads for the life of the engine, allowing removal of the bolt/stud in the future without galling the threads.The lubricant used is the main factor in determining friction, and therefore, the torque for a particular installation. With special lubes, the required torque can be reduced as much as 20 to 30 percent. It is important to keep in mind that the reverse is also true. If the torque value has been specified for a particular fastener on the basis of low friction lube, installing the fastener with motor oil will result in insufficient preload; the torque has to be increased to compensate for the extra friction caused by the motor oil. p.s., you only need a light coat on the threads
3) INSTALLATION - Studs should be threaded into the block HAND TIGHT ONLY. Any chamfered washer will always be installed with the chamfer facing the head of the bolt/nut. Take care not to nick or damage the threads when installing main caps and heads.
4) TORQUING - Using a stretch gauge is the most accurate way to determine the preload of a fastener, however this method cannot always be used (i.e. main studs, head studs, etc). Friction is an extremely challenging problem because it is so variable and difficult to control. The best way to avoid the pitfalls of friction is by using the stretch method. This way preload is controlled and independent of friction. Each time the bolt is torqued and loosened, the friction factor gets smaller. Eventually the friction levels out and becomes constant for all following repetitions. Therefore, when installing a new bolt where the stretch method cannot be used, the bolt should be tightened and loosened several times before final torque. The number of cycles depends on the lubricant. For ARP recommended lubes, five loosening and tightening cycles is sufficient.
5) TOOLS - First you have to have a good TORQUE WRENCH that is checked for accuracy before use. Most wrenches tested are WAY out of specks. So the wrench is the number one factor in this equasion that is the most important. Also the bolts must be torqued in the proper stages. Most recommend 3 stages on heads ETC. Also according to felpro all bolts must have the storage coatings removed. ARP does not think this is an issue. Also make sure that too much lube is not used. In blind holes if the lube fills the cavity the bolt can hydrolock and pull the threads or snap. The oil can not be compressed and will cause all kind of problems including false readings.
Here is an example of a good torque wrench. This is Tom Falco finishing torquing the head on one of his FORD killer HONDA engines.
6) TORQUE SEQUENCE - Be sure to always follow the recommended torque sequence. This allows a component to have equal clamping force distributed across it. When installing main caps for the crankshaft, if you fully torque cap #1, then proceed to 2,3,4,& 5, the crank will have a very hard time spinning. Just take my word on it, dont mess up your crank journals trying it
7) OPTIONAL RE-TORQUE - Some of the really meticulous engine builders will re-torque fasteners like heads bolts after the first heat cycle (after running the engine) I list this as optional even though it is a good practice (although the formulation of Ultra-Torque is making this step less critical)
I know its a lot to read, but I think everyone who is installing an ARP product should read this before installation. Just some food for thought
- Josh Last edited by KILLER-LS1; 01-13-2010 at 01:43 AM.
 01-12-2010, 04:44 AM
#3

Ok you missed a couple of things here. First you have to have a good TORQUE WRENCH that is checked for accuracy before use. Most wrenches we test are WAY out of specks. So the wrench is the number one factor in this equasion that is the most important. Also the bolts must be torqued in the proper stages. Most recommend 3 stages on heads ETC. Also according to felpro all bolts must have the storage coatings removed. ARP does not think this is an issue. Also make shur that to much lube is not used. In blind holes if the lube fills the cavity the bolt can pull the threads or snap. The oil can not be compressed and will cause all kind of problems including false readings. Otherwise your post is GOOD
Here is an example of a good torque wrench. I just finished torquing the head on one of my FORD killer HONDA engines.
Here is an example of a good torque wrench. I just finished torquing the head on one of my FORD killer HONDA engines.
Last edited by tom falco; 01-12-2010 at 04:57 AM.

 01-12-2010, 12:20 PM
#6
I did to your step 5 on my last installation after two heat cycles on the motor. During initial installation some parts like headers were installed with old gaskets as I knew they were coming off again and new gaskets would be used after the nuts were tightened back down again. I backed of each nut 1/8 turn one at a time in sequence and then brought to final torque again. The rotation required to reach final torque is most cases was more then the back off rotation. I think this is a very good thing to do on these motors.
Trending Topics


 01-12-2010, 08:55 PM
#12
Torque wrench testing fixtures or benches. Snap on makes a good one. If you dont have an accurate torque wrench anything you do and all the writeups are a waste of time. In the past i have checked litterly hundreds of wrenches and they do go out of CAL. Also you need a wrench that will measure your GIVEN FINAL torque in the middle of the scale. So lets say you want a final torque of 50 LBS-FT You would use a wrench that has a full scale of 100 LBS-FT. I own about 20 different wrenches to properly torque fastenes. Always buy a wrench that is at least 2% accurate mid scale. If the wrench reads wrong you are wasting your TIME. That is one reason TTY bolts are so widely used today in modern engines. Hope this HELPS TOM
01-13-2010, 04:46 AM
#15
You can also usually find a local commercial facility to calibrate a torque wrench. At work it is required every year and there are strict requirements as to what part of the torque wrench range can be used, i.e., not the upper or lower 20% of the scale. If the value is in these regions a different wrench must be used to place the final value in that range.
A note on the thread chasers, ARP makes metric thread chasers and they are perfect for doing the block. The 10mm one is plenty long to get to the bottom of the holes.
A note on the thread chasers, ARP makes metric thread chasers and they are perfect for doing the block. The 10mm one is plenty long to get to the bottom of the holes.