

LS1 block thread repair - with Time Sert kit
 03-01-2012, 08:52 AM
#1

Last night I finally returned the 2004 Corvette that I have been working on for the past 4 weeks for a friend. He just bought it back in January, bone stock with 34k miles. His friend has a cam'd '97 Corvette and so he wanted the '04 to be competitive with it. I put together an extensive shopping list from Texas Speed and a week later boxes and the Corvette started showing up at my house. He ended up with Texas Speed long tube headers and 3" x-pipe, Magnaflow mufflers (very nice quality), PRC-215 heads, Torquer V3 cam, Yella Terra rockers, 25% underdrive pulley, Vararam cold air intake, Yank 3,000 rpm stall, and new plugs & wires. After driving it a couple days to work out the tune, I was really happy with how the automatic got along with this fairly good size cam. An automatic car is nice for quick acceleration to pass and merge, but for the most part I'm still happy with my 6-speed. This build went fairly smoothly until I started torquing the first cylinder head. The front "short" head bolt pulled the threads out of the block on the first (of two) 90� rotations. And in order to prove it wasn't a fluke, the opposite side pulled a thread in the same bolt hole without even any amount of measurable torque.
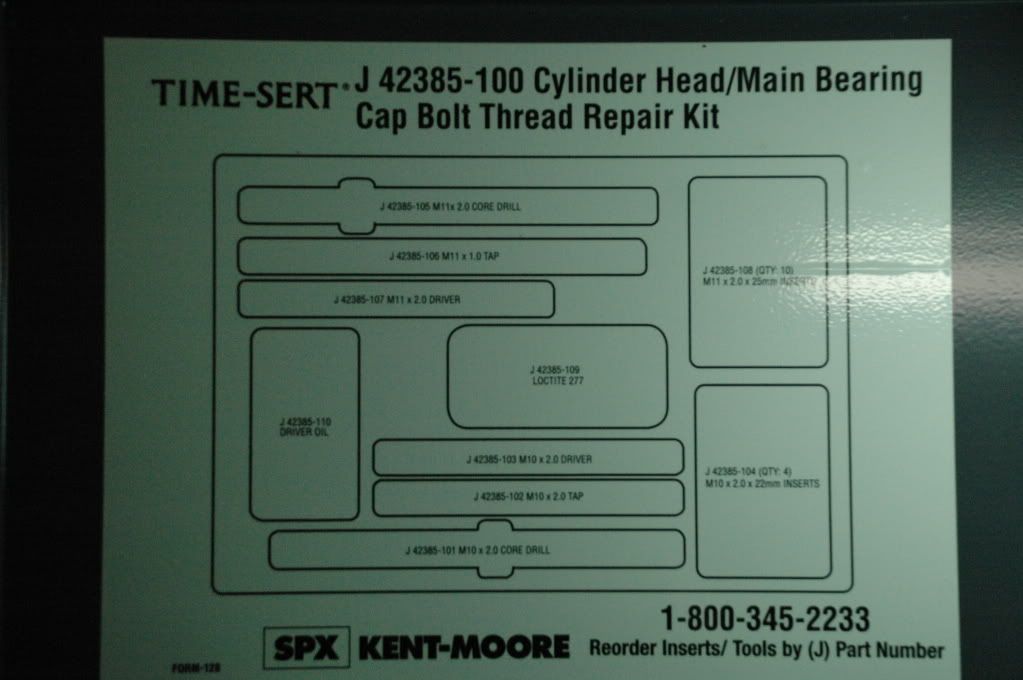
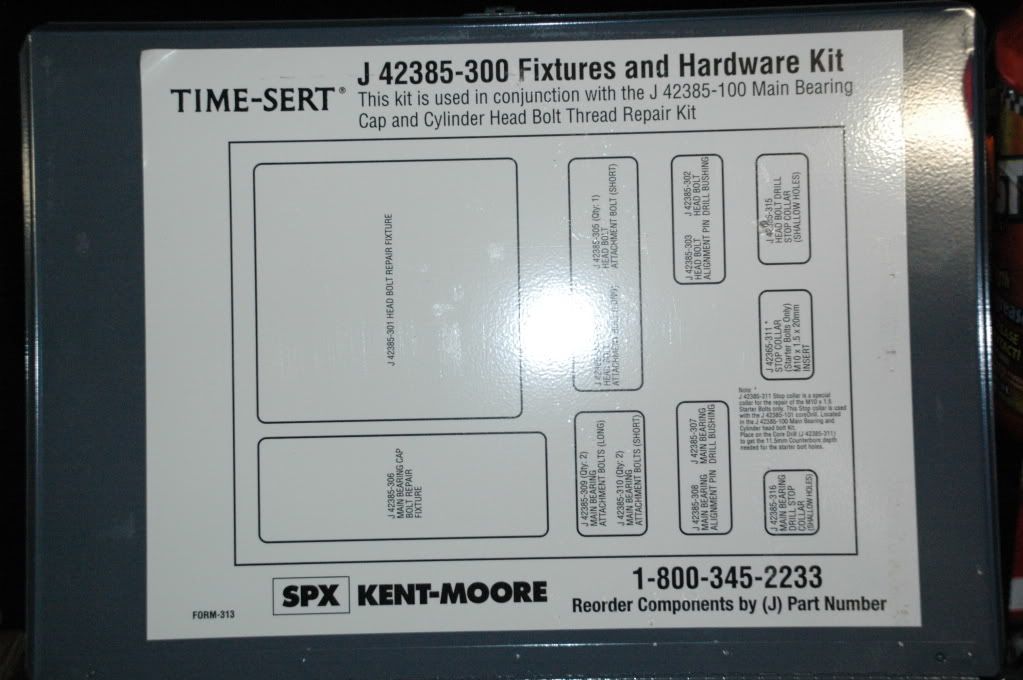
A local friend saved the day by lending me a Time-Sert thread repair kit. The full kit comes in 2 cases - one for the fixtures and one for the drill bit, tap, and insert tool:
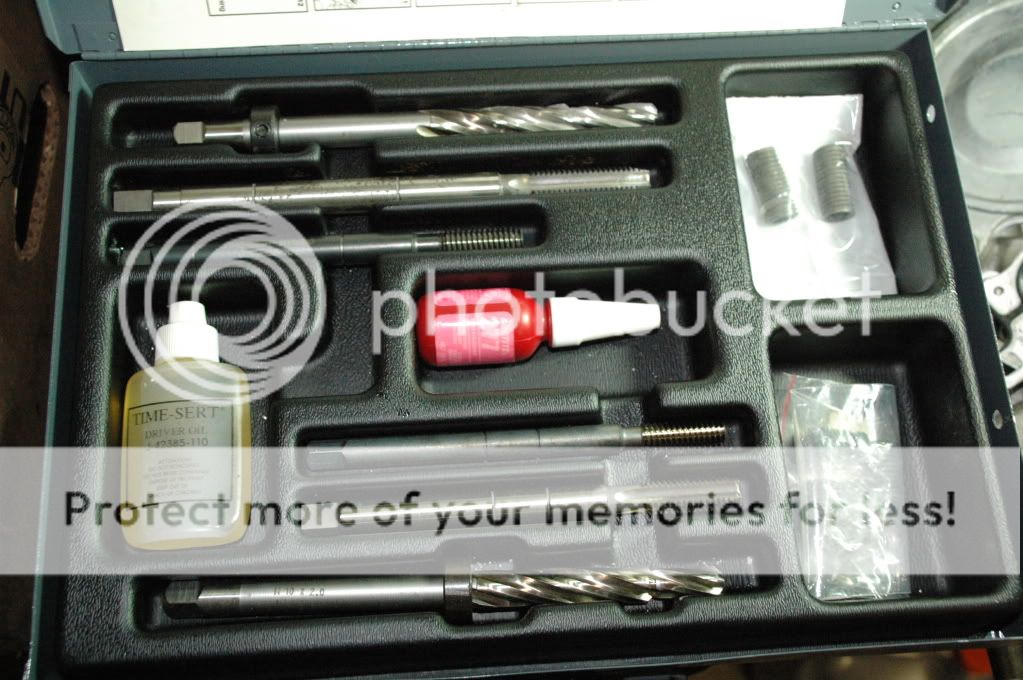
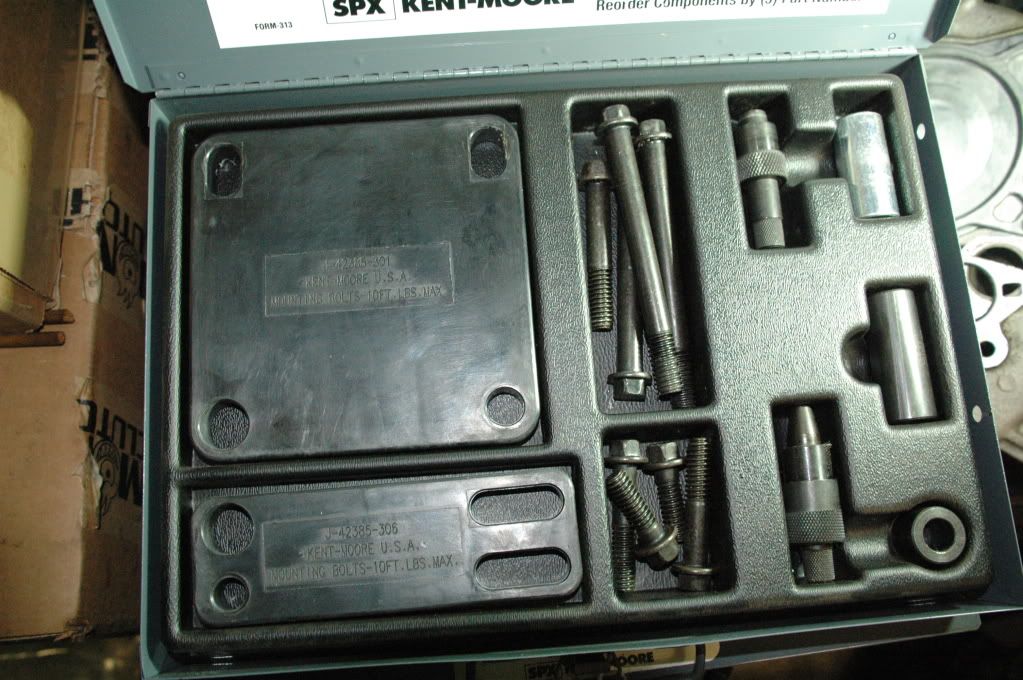
The drill bit is stepped for 2 diameters, allowing the new thread insert to slip down to the smaller diameter where it screws into your new threads.

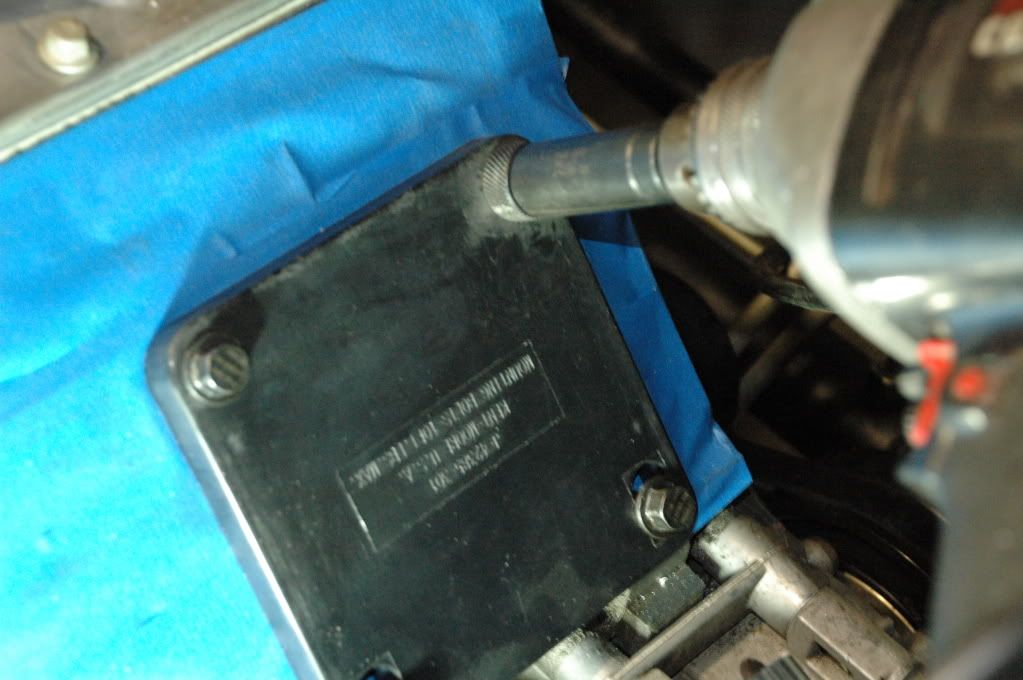
Always a little nerve racking to start drilling on an engine block, but the drill fixture and depth stop makes it pretty straight forward:

After the failed hole is drilled larger, new threads are tapped:

Finally a Time-Sert thread insert is loctite'd into place:
After all the thread repair mess, re-assembly went well... until first fire. I spent all last Saturday trying to trouble shoot why the stupid thing was only running on 4 or 5 cylinders. After leak-down check, pulling intake manifold, swapping injectors, buying more new sparkplugs, testing wiring, multiple startup tunes... I ended up fixing it with a crank position sensor re-learn. I still don't know why, but just glad to have it hitting on all 8.
Here is a quick idle video. I am getting more and more tempted to put a bigger cam in my car...
[youtube]2Dk7mMAak5w&feature=g-upl&context=G26bead9AUAAAAAAAAAA[/youtube]
Now that the garage is cleared and I have a little money to burn I can get back to working on my '69 Nova turbo project...
A local friend saved the day by lending me a Time-Sert thread repair kit. The full kit comes in 2 cases - one for the fixtures and one for the drill bit, tap, and insert tool:
The drill bit is stepped for 2 diameters, allowing the new thread insert to slip down to the smaller diameter where it screws into your new threads.
Always a little nerve racking to start drilling on an engine block, but the drill fixture and depth stop makes it pretty straight forward:
After the failed hole is drilled larger, new threads are tapped:
Finally a Time-Sert thread insert is loctite'd into place:
After all the thread repair mess, re-assembly went well... until first fire. I spent all last Saturday trying to trouble shoot why the stupid thing was only running on 4 or 5 cylinders. After leak-down check, pulling intake manifold, swapping injectors, buying more new sparkplugs, testing wiring, multiple startup tunes... I ended up fixing it with a crank position sensor re-learn. I still don't know why, but just glad to have it hitting on all 8.
Here is a quick idle video. I am getting more and more tempted to put a bigger cam in my car...
[youtube]2Dk7mMAak5w&feature=g-upl&context=G26bead9AUAAAAAAAAAA[/youtube]
Now that the garage is cleared and I have a little money to burn I can get back to working on my '69 Nova turbo project...
Last edited by Chevy406; 03-02-2012 at 09:49 AM.
 03-01-2012, 09:47 AM
#3
TECH Enthusiast
I love the Time-sert product. I have never used it on a head bolt, but have used it on spark plugs/oil pan drain plugs etc. Mainly I have used on motor cycles, and rice cars. I would never put a coil in anything again, after using their product. After seeing how durable the repair is, I feel it is better than new. It makes me wonder why they don't to this to many aluminum threads right from the factory, so we wouldn't have to be doing it as a repair. I have been using them for a few years now, and never had any problem with any of the repairs.
Is this a common problem with head bolts on LS motors? I have heard of people cracking the block by putting the head bolts in dirty/wet holes, but not much on people stripping them out? Anyone else struggle with stripped head bolts?
Is this a common problem with head bolts on LS motors? I have heard of people cracking the block by putting the head bolts in dirty/wet holes, but not much on people stripping them out? Anyone else struggle with stripped head bolts?
 03-01-2012, 11:45 AM
#5
TECH Apprentice
Man I wish I had one of those sets. I have access to one but it's a bit hairy getting it, lots of rules and crap. And you used the template? Man I bet I've drilled 100 Caddy 4.6 blocks and never used the template. lol I'm just messing with ya man, those kits are awesome, I miss having them at the tips of my fingers.
03-01-2012, 12:33 PM
#7
Man I wish I had one of those sets. I have access to one but it's a bit hairy getting it, lots of rules and crap. And you used the template? Man I bet I've drilled 100 Caddy 4.6 blocks and never used the template. lol I'm just messing with ya man, those kits are awesome, I miss having them at the tips of my fingers.
Trending Topics
03-01-2012, 12:59 PM
#8
Scotty, I would say this is actually fairly rare with the LS1 blocks. Certainly the first time I experienced it.
91sonomast - you are correct that the drill fixture isn't necessarily required. It does however make the thread repair pretty fool-proof because you can use the drill stop and marks on the tap to know for sure when you are at the bottom of the hole. Of course you can also just use tape to mark your position on the drill bit. I happened to have the fixture kit, I put it to use, and had zero problems repairing this block. But it can work equally well with just the J-42385-100 insert kit.
03-01-2012, 02:40 PM
#9
TECH Enthusiast
Well, actually... no. You don't drive the insert in, and it isn't mechanically held in place. The thread is repaired by drilling out the original threads, tapping the new hole, and screwing in the thread insert. Loctite is what holds the insert in place.
03-01-2012, 02:49 PM
#10
TECH Enthusiast

Join Date: Feb 2009
Posts: 661
Likes: 0
Received 0 Likes
on
0 Posts
A friend of mine had the exact same thing happen on his block it was a LS2 freshly bored to a 402. Saved his block for sure excellent prdouct. I hope I never have to use one though.
03-01-2012, 03:13 PM
#11
TECH Apprentice
Well, actually... no. You don't drive the insert in, and it isn't mechanically held in place. The thread is repaired by drilling out the original threads, tapping the new hole, and screwing in the thread insert. Loctite is what holds the insert in place.
Scotty, I would say this is actually fairly rare with the LS1 blocks. Certainly the first time I experienced it.
91sonomast - you are correct that the drill fixture isn't necessarily required. It does however make the thread repair pretty fool-proof because you can use the drill stop and marks on the tap to know for sure when you are at the bottom of the hole. Of course you can also just use tape to mark your position on the drill bit. I happened to have the fixture kit, I put it to use, and had zero problems repairing this block. But it can work equally well with just the J-42385-100 insert kit.
As for the serts, there should be a mechanical hold and the loc-tite is a "fail-safe." The sert is designed to flare once it is threaded fully into the hole you keep turning the tool until it bottoms in the sert, just snug it. That expands the sert into the hole pushing it tight into the threads.
Yes, the caddy's should have come with the kit in the trunk, sure wish they would have, I'd have a bunch of those suckers lol
03-01-2012, 03:48 PM
#12
TECH Senior Member
the instructions say to drive the insert in until the insert's top flange seats on the counterbore, and then to keep driving the driver tool a few more turns...
STEP 4
USE INSERT DRIVER OIL (DO NOT USE WD40.)
OIL THE THREADS OF THE INSERT DRIVER. SCREW AN INSERT ONTO THE DRIVER, APPLY A SMALL AMOUNT OF LOCTITE 277 ON THE BOTTOM OUTSIDE THREADS ON THE INSERT AND SCREW THE INSERT INTO THE PREPARED HOLE. WHEN THE HEAD OF THE INSERT IS SEATED THE DRIVER WILL TIGHTEN UP, USE A LITTLE MORE POWER TO SCREW THE DRIVER THROUGH THE INSERT, UNTIL THE APPROPRIATE GROOVE ON THE DRIVER IS LINED UP WITH THE TOP OF THE BLOCK. REMOVE INSERT DRIVER, REPAIR IS COMPLETE.
Also, look at the 4th point here: http://www.timesert.com
o TIME-SERT� is self locking. On installation the bottom internal threads of the insert are cold rolled to expand the mating external threads into the base material locking the insert in place. Locking mechanism is at the bottom of insert.
If you didn't do this (see red portion STEP 4 above) then you didn't install them correctly.
03-02-2012, 07:33 AM
#13
Your point was well made Joe, and the extra documentation provides a lot of good input for this thread. Thanks for taking the time to explain. I mis-understood your terminology of "insert is driven home", but since the instructions call the installation tool a "driver" then it does indeed make sense. A hat-tip to you - someone who has obviously been there, done it, & now sporting the tee-shirt.
03-02-2012, 10:27 AM
#14
TECH Senior Member
Hey no worries 
(and I meant to add a smiley face to my post)
nothing feels as bad as stripped threads, these kits provide the best/easiest repair I've seen.
(and I meant to add a smiley face to my post)
nothing feels as bad as stripped threads, these kits provide the best/easiest repair I've seen.
03-02-2012, 07:20 PM
#15
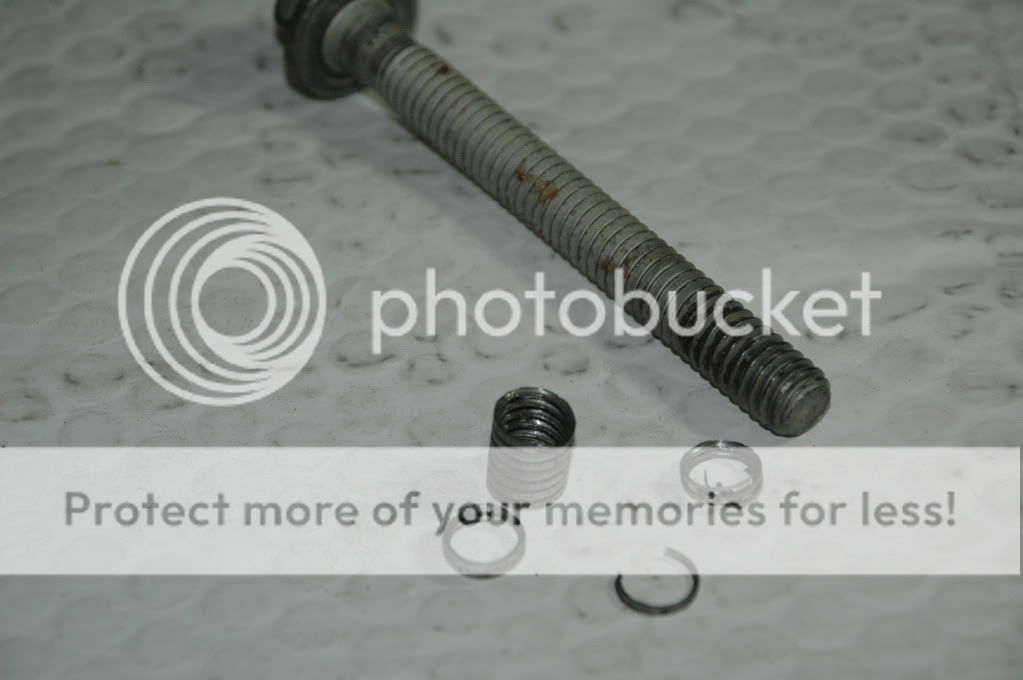
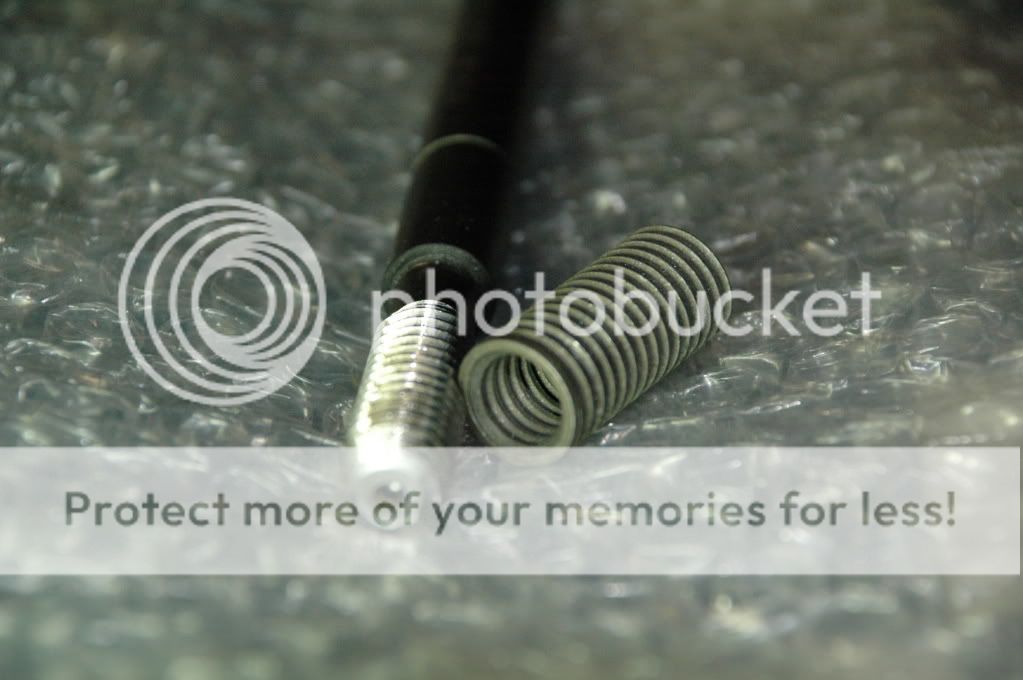
Just curious, is that a factory headbolt? I've never seen any headbolt that's full-length threaded before, they've always had a short threaded portion and a longer, reduced-diameter shank. But then, I've never seen an LS headbolt before as I always use studs...
03-02-2012, 10:38 PM
#16
 03-05-2012, 07:47 AM
#18
 Guess what, sometimes they do come out in one piece. Or possibly I photo-shop'd it? I guess the conspiracy theorists will never know the true story. Maybe if I attached some pictures it would tell a better story.
edit - after my smart @#$ response, you have me wondering if this failed thread might indeed have been a helicoil from GM or from a previous repair? Interesting.
Last edited by Chevy406; 03-05-2012 at 09:22 PM.
03-05-2012, 09:19 PM
#20
The original bolt that I removed was only threaded � of the length of the bolt. The replacement GM bolt (shown in the first picture) was threaded all the way. I then purchased a Fel Pro bolt set from OReilly to replace the GM set that I had already torqued (i.e. when the threads failed). The Fel Pro set also was threaded all the way. I'm not sure when the bolt supplier changed the design, but it seems to be universal to be threaded all the way now. Note - this only applies to the two short M11 bolts, not the 8 long M11 bolts.