
How to: New upholstery for my car
 03-18-2012, 06:04 PM
#1
Well, I hope this serve as a more or less how to about this process. I bought a new set of upholstery (not covers) for my car in a effort of changing and updating my interior. The material is a vinyl that closely imitates good quality leather. My car (1999 Trans am) came with a dark gray leather interior and lumbar support. If you will get a new interior be sure to check your pieces are specifically made for lumbar support cars. In the process of installing it I will show the difference between lumbar and non-lumbar
Once the new set arrived I checked that all the pieces were there. Mine included also pieces for the door panels.
I started with those little seats in the rear. They are only anchored there with one screw located in the front part of the seat. Before taking them out expose your new pieces in the sun so they become more easily flexible at the moment of installing them.
Factory used metal clips to hold the upholstery. I used a Dremel to cut them out. Check their anchoring points because you will use the same points to put your new piece in place. Also check the status of your seat foams. Its more than likely these two rear seats are mint since no one can fit in them! LOL! Once your old seat cover is out it will look like this:
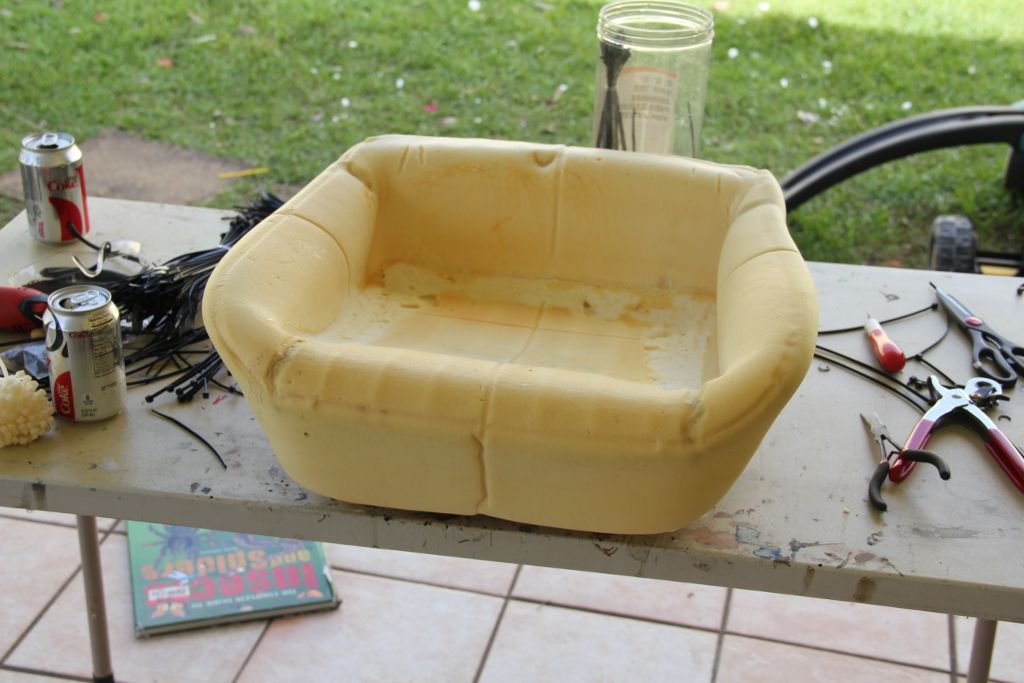
You will find that the seating surface of your seat was glued to the foam by the factory. I considered the same but decided to go ahead with out. After working the new upholstery I was satisfied with the finished product and found no need for any glue. If the front seat end up needing is still yet to be discovered.
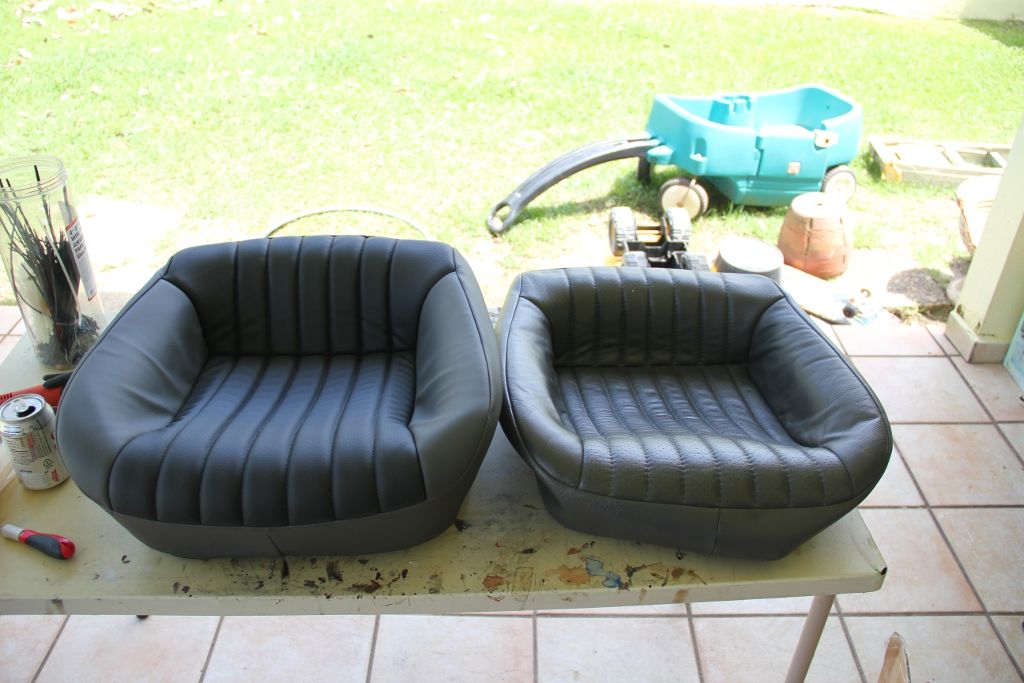
Now, you can use the metal clips but I went with plastic tie wraps and they work like a dream. Here is a pic showing the new piece against the old. The old seat cover is already out and the new is in:
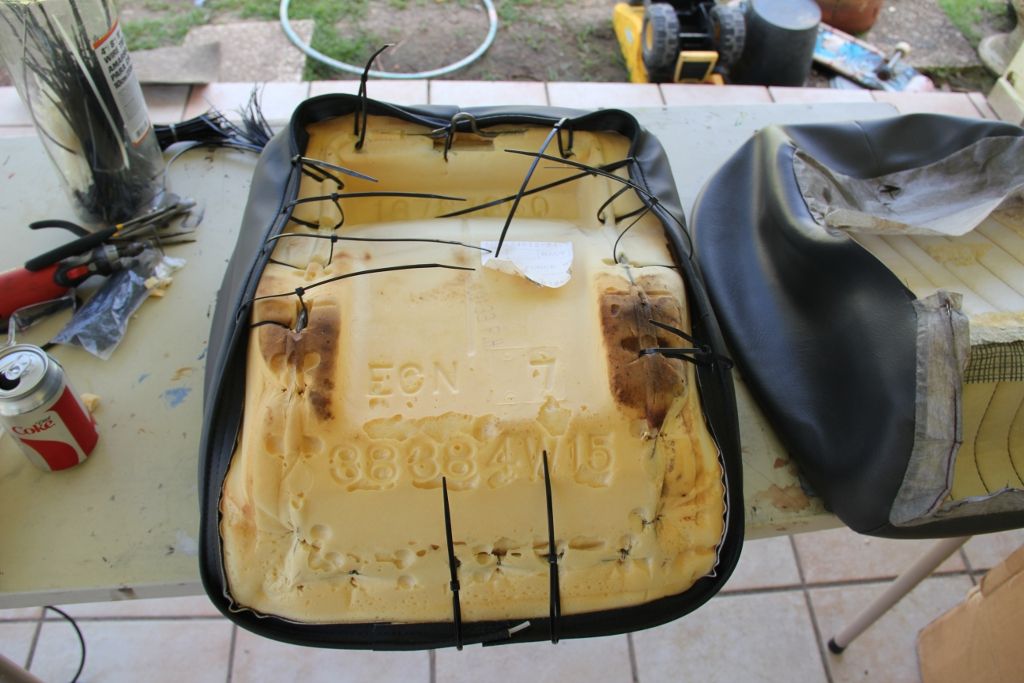
The plastic wraps will need to be installed in a way that they pierce the new upholstery. Just look at the points where the metal clips are in your old seat and use that as a reference. I used a tool to make holes into belts to make the same holes into the new upholstery:

Here is an example of the plastic wraps in place and ready to be tightened:

Following all the anchoring points your new seat will look something like this:
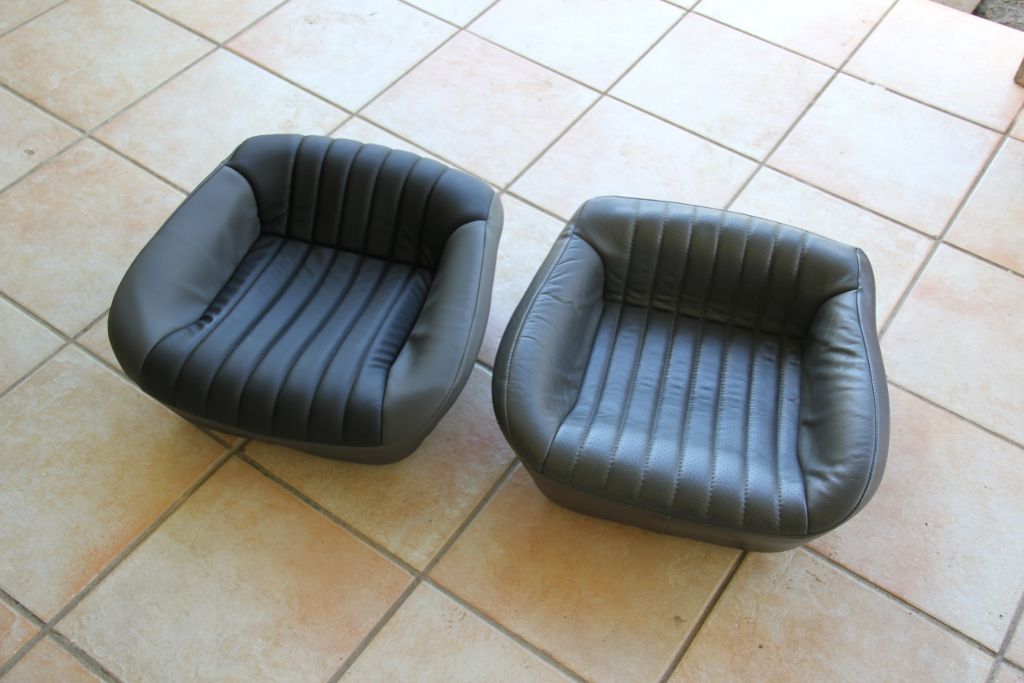
To not tight them all yet! Take your time to adjust your new upholstery over your foam. Be gentle but be strong with it. A firm hand is needed to correctly mate your piece with the foam pad. You can use a hair blow drier to soften the material but be very careful not to burn the seat or your hand! Remember this is vinyl.
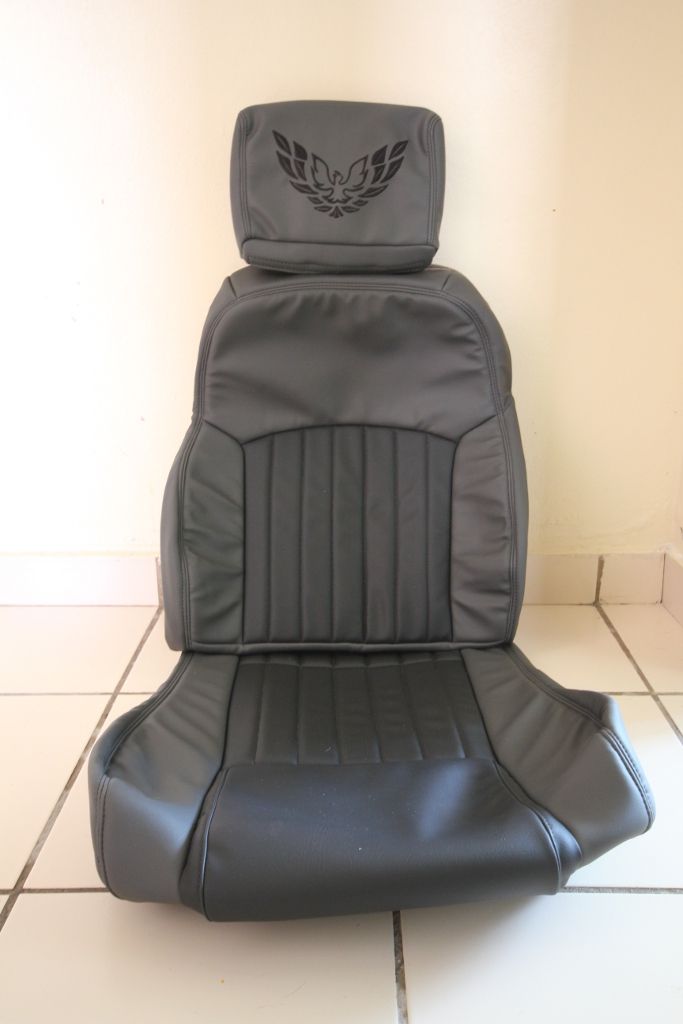
The finished product looks like this. Old against new! Look at that difference:
Repeat the same for the other seat and you are on your way to good things to come! Next the back seat.
Once the new set arrived I checked that all the pieces were there. Mine included also pieces for the door panels.
I started with those little seats in the rear. They are only anchored there with one screw located in the front part of the seat. Before taking them out expose your new pieces in the sun so they become more easily flexible at the moment of installing them.
Factory used metal clips to hold the upholstery. I used a Dremel to cut them out. Check their anchoring points because you will use the same points to put your new piece in place. Also check the status of your seat foams. Its more than likely these two rear seats are mint since no one can fit in them! LOL! Once your old seat cover is out it will look like this:
You will find that the seating surface of your seat was glued to the foam by the factory. I considered the same but decided to go ahead with out. After working the new upholstery I was satisfied with the finished product and found no need for any glue. If the front seat end up needing is still yet to be discovered.
Now, you can use the metal clips but I went with plastic tie wraps and they work like a dream. Here is a pic showing the new piece against the old. The old seat cover is already out and the new is in:
The plastic wraps will need to be installed in a way that they pierce the new upholstery. Just look at the points where the metal clips are in your old seat and use that as a reference. I used a tool to make holes into belts to make the same holes into the new upholstery:
Here is an example of the plastic wraps in place and ready to be tightened:
Following all the anchoring points your new seat will look something like this:
To not tight them all yet! Take your time to adjust your new upholstery over your foam. Be gentle but be strong with it. A firm hand is needed to correctly mate your piece with the foam pad. You can use a hair blow drier to soften the material but be very careful not to burn the seat or your hand! Remember this is vinyl.
The finished product looks like this. Old against new! Look at that difference:
Repeat the same for the other seat and you are on your way to good things to come! Next the back seat.
Last edited by chaman; 03-18-2012 at 06:41 PM.

 03-18-2012, 07:36 PM
#4
On The Tree
Join Date: Jul 2007
Posts: 180
Likes: 0
Received 0 Likes
on
0 Posts
make sure and get the headrests nice and warm....mine where a pain in the ***....i was afraid they were gonna rip...luckly everything worked out....just take your time....pm me if u have any questions.. i will b happy to help

 03-19-2012, 04:23 AM
#10
12 Second Club
iTrader: (6)
Join Date: Jun 2004
Location: Ft. Irwin, California (But Virginia is home)
Posts: 1,501
Likes: 0
Received 7 Likes
on
1 Post

Nice write up. I replaced my interior a few months back. Couple tidbits of info:
1. Don't need to use a Dremel to remove hog-rings. A decent set of wire cutters will cut through them. Easier.
2. Like the zip-tie idea. Innovative. However, it only costs $5 for a bag of 100 hog-rings (which will do at least 2 cars) and another 20 for hog-ring pliers.
3. I used 3M77 spray glue when needed on the foam. It won't soak through the fabric, but sticks like a ****.
Again, great write-up.
03-19-2012, 03:27 PM
#11
Nice write up. I replaced my interior a few months back. Couple tidbits of info:
1. Don't need to use a Dremel to remove hog-rings. A decent set of wire cutters will cut through them. Easier.
2. Like the zip-tie idea. Innovative. However, it only costs $5 for a bag of 100 hog-rings (which will do at least 2 cars) and another 20 for hog-ring pliers.
3. I used 3M77 spray glue when needed on the foam. It won't soak through the fabric, but sticks like a ****.
Again, great write-up.
1. Don't need to use a Dremel to remove hog-rings. A decent set of wire cutters will cut through them. Easier.
2. Like the zip-tie idea. Innovative. However, it only costs $5 for a bag of 100 hog-rings (which will do at least 2 cars) and another 20 for hog-ring pliers.
3. I used 3M77 spray glue when needed on the foam. It won't soak through the fabric, but sticks like a ****.
Again, great write-up.
About the Dremel, it was easier for me because, even at my 40 years old, I suffer from an advanced case of osteoarthrits in my hands. I have enough pain as it is worsened by all the force needed to put the covers over the foams properly. If on top I need to use pliers for those suckers am in for some really painful experience! LOL! The Dremel lets me "rest" my hands a bit in preparation for the next piece.
Thanks for the input again!
 03-19-2012, 04:50 PM
#12

http://6litereaterdesigns.com/store/...roducts_id=255
BTW, looks good, Chaman!
 03-20-2012, 07:44 PM
#15

You know Im watching this thread bro... if you set the seats out in the sun for an afternoon and let them get hot, they will lay down better and wrinkles will smooth out better... you can also warm them before install...
03-20-2012, 07:48 PM
#16
You can go to any upholstery shop and get some foam or a large fabric store.. Hobby lobby maybe, Michaels arts and crafts, JoAnn fabric...
Chaman, if you do have to replace some of your foam and the 3M gets on the foam, cover it with baby powder or any talk... rub it and let it stick to the glue if it seeps out of the foam... it will also help the covers slide better...
 03-20-2012, 08:13 PM
#19
You can go to any upholstery shop and get some foam or a large fabric store.. Hobby lobby maybe, Michaels arts and crafts, JoAnn fabric...
Chaman, if you do have to replace some of your foam and the 3M gets on the foam, cover it with baby powder or any talk... rub it and let it stick to the glue if it seeps out of the foam... it will also help the covers slide better...
Chaman, if you do have to replace some of your foam and the 3M gets on the foam, cover it with baby powder or any talk... rub it and let it stick to the glue if it seeps out of the foam... it will also help the covers slide better...
03-20-2012, 08:19 PM
#20
I used adhesive on the rear seat bottoms and on my head rests (96 style)... the rest of the fabric needs to move around some so I wouldnt recommend gluing it... I used minimal glue because I didnt want to chance it coming through my new material.. Id be especially careful if you have perforated inserts... once glue gets in those holes, thats it...