How long did it take you to paint your engine bay?
 12-26-2012, 09:47 PM
#1
I have the motor and everything out for only a couple more months. I have a friend who is willing to come help me sand/wash it all down before spraying it all down etc. I want to do a really nice job, but dont plan on taking a week of work to do so. Just wondering if 2 days at 4-6 hours a pop for both of us is even reasonable as far as getting this done is concerned.
My plan is to add a few light coats over the existing paint. I am not sure if it will bond well though. my biggest fear is it cracking. I have a guy with a 2000$ gun that will spray for me, and does great work. I figured it would be more even that way vs can.
so far my gameplan is
Wash. Rinse. Scuff it with 220-300-400+ grit------(not sure if a promoter would be needed.
High temp engine--gloss black
High temp clear.
done.
I am going to try to do it with 16-20 man hours. Input on what I am getting into is appreciated. I have read the other threads.
Last edited by I8UR4RD; 12-26-2012 at 10:19 PM.
 12-26-2012, 10:04 PM
#2
TECH Resident
iTrader: (1)
Join Date: Sep 2012
Location: San Diego, California
Posts: 782
Likes: 0
Received 0 Likes
on
0 Posts
If you have motor out already shoudnt be that difficult and take long at all. I would take my time with it though especially because it seems you only have your personal deadline, treat it like it would be looked at everyday, dont just scuff it up, go through all the grits to ensure a wonderful finish.
Last edited by NnOoSsSs; 12-26-2012 at 10:09 PM.
12-26-2012, 10:54 PM
#3
Take your time degreasing, and sanding making it as smooth and as scratch free possible. Doesn't matter how expensive your gun is if the prep work isn't right. Just keep that in mind, take your time and do it right
12-26-2012, 11:07 PM
#4
what they said. I could see it easily taking longer than you have planned though. but I'm sure a lot of it will depend on different things.. your pace, the cars current condition, availability of needed tools, etc. Just take your time
one suggestion- if you are going to take the time to repaint the engine bay to get it all nice and pretty lookin', get any holes you won't be using welded shut and smoothed over. it makes a huge difference. I'd definitely look into getting all of the wires tucked and hidden away.
one suggestion- if you are going to take the time to repaint the engine bay to get it all nice and pretty lookin', get any holes you won't be using welded shut and smoothed over. it makes a huge difference. I'd definitely look into getting all of the wires tucked and hidden away.
12-27-2012, 02:04 PM
#5
TECH Resident
iTrader: (1)
Join Date: Sep 2012
Location: San Diego, California
Posts: 782
Likes: 0
Received 0 Likes
on
0 Posts
what they said. I could see it easily taking longer than you have planned though. but I'm sure a lot of it will depend on different things.. your pace, the cars current condition, availability of needed tools, etc. Just take your time
one suggestion- if you are going to take the time to repaint the engine bay to get it all nice and pretty lookin', get any holes you won't be using welded shut and smoothed over. it makes a huge difference. I'd definitely look into getting all of the wires tucked and hidden away.
one suggestion- if you are going to take the time to repaint the engine bay to get it all nice and pretty lookin', get any holes you won't be using welded shut and smoothed over. it makes a huge difference. I'd definitely look into getting all of the wires tucked and hidden away.
02-26-2013, 11:35 PM
#6
Well, I start on Thursday morning @ 8:30. My engine bay is actually in the top 90% of engine bays out there. I wiped it down and it actually already shines pretty good, but its not THAT good. very flat. clean, but no gloss. it does not POP or shine.
So far my supplies are
Gray Scratch cloth
Red Scratch cloth
180/220 grit.
Simple Green (50/50 mix & Brake cleaner)
Wire wheel, drill (in case I do find any rust)
Primer ( spray those bare metal spots if there are any)
6 Microfiber Towels 12 shop rags
2 rolls of Masking tape
2 rolls of Seran Wrap (fenders, headlights, hoses etc...)
2 Cans of Gloss Black High Temp Engine Paint
2 Cans of High Temp Clear (didnt glaze when I tested it out @ home)
1 roll of Overspray paper
My plan is to spend the entire first day cleaning and prepping the inside. Scuff it up real good.
Day 2 ..... tape it all off........and take my sweet as happy time. 2-3 light coats......one medium coat to finish her off, and clear it.
I am thinking I can do a great job for around 100 bucks.
Wish me luck.
02-27-2013, 02:01 AM
#7
Honestly you only need to clean it, fill holes/weld, scuff it up with 400. Primer only the bare metal areas bigger than dime size, mask stuff off and spray. Base coat is easy. Getting the clear to look nice might be harder. It's not exactly a flat surface to paint ya know.
Trending Topics
02-27-2013, 03:34 PM
#8
11 Second Club
I did over winter few back and spread over 2 months or so but welded up seams and filled tcs area etc. but you get what you put into it if you hurry to get done it will look like you hurried to get done take time and it will show!!! 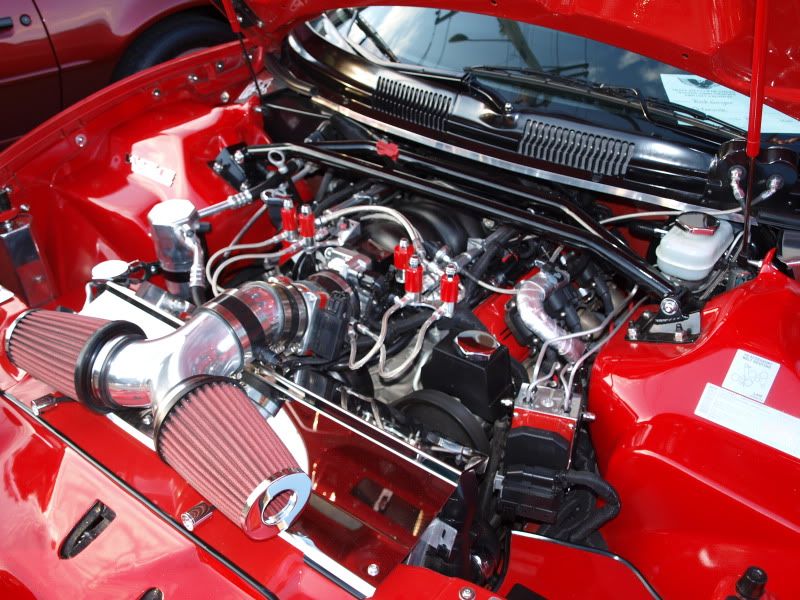
 GOOD LUCK!!!!! I did with engine in so should be easier for you also get soft towels(plastic also if fluids around)to cover up work when you put engine in or work on after.
GOOD LUCK!!!!! I did with engine in so should be easier for you also get soft towels(plastic also if fluids around)to cover up work when you put engine in or work on after. 

 02-28-2013, 10:59 AM
#11
01badbird... said it before, gonna say it everytime I see the car, best t/a engine bay, hands down 
it's not easy, but you can do a lot even with the motor in.. https://ls1tech.com/forums/appearanc...ngine-bay.html (though you can't do things quite as thorough, it gets the job done as far as just trying to spruce things up a bit)
03-01-2013, 06:24 AM
#13
11 Second Club
iTrader: (3)
Join Date: Dec 2006
Location: Alabama
Posts: 879
Likes: 0
Received 0 Likes
on
0 Posts

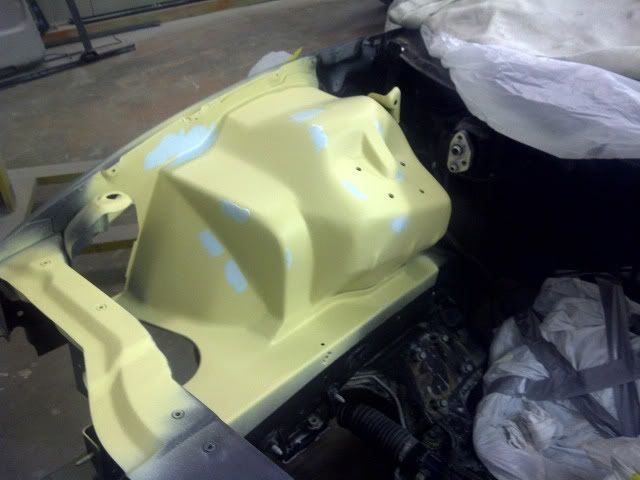
I am going to start on mine today when I get off work. I have alot of the stuff you do. I already degreased and washed everything, I am thinking about scuffing it all down and checking for rust (I haven't seen any in the couple of times I was looking) and coating it all with some etching primer and paint everything from the strut towers back. After I know for sure what all has to be cut and welded on for all of the fab work, then finish painting the whole engine bay. I guess I will see how it pans out this weekend.
 03-01-2013, 12:28 PM
#15
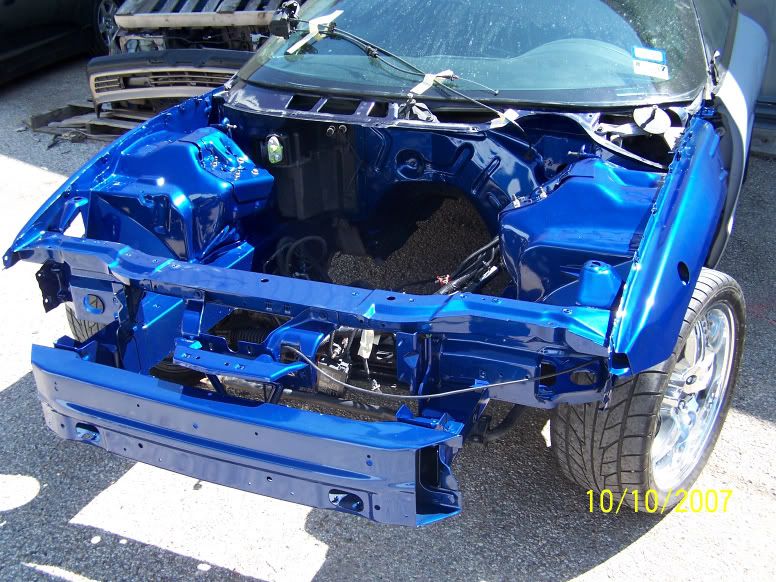
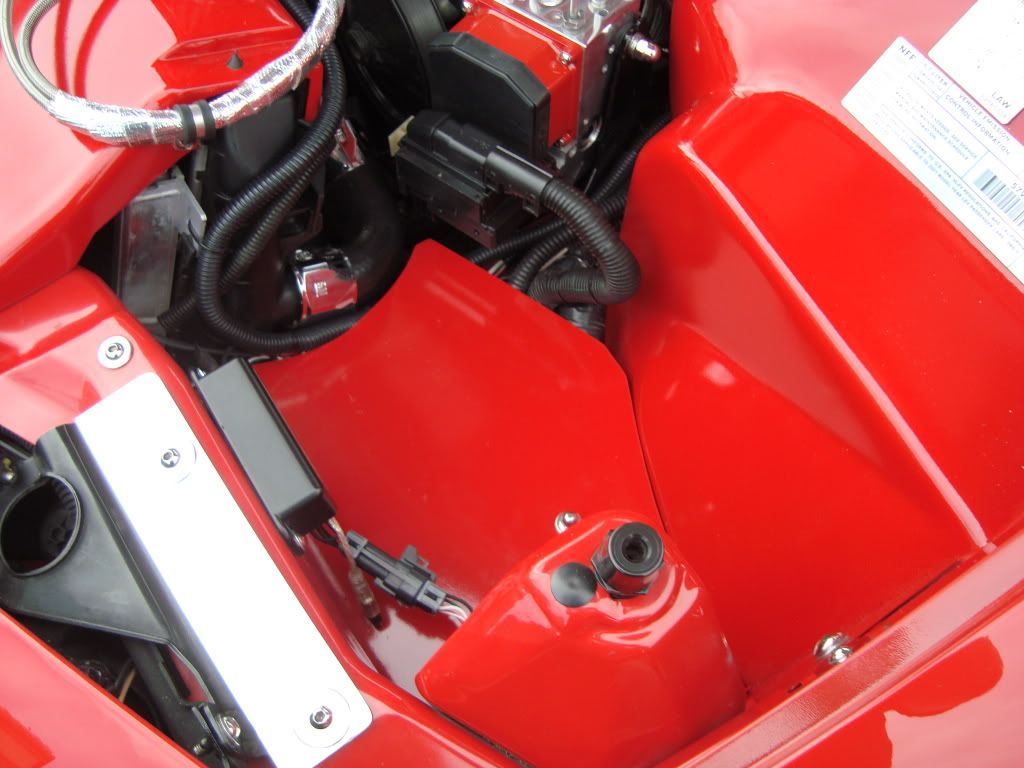
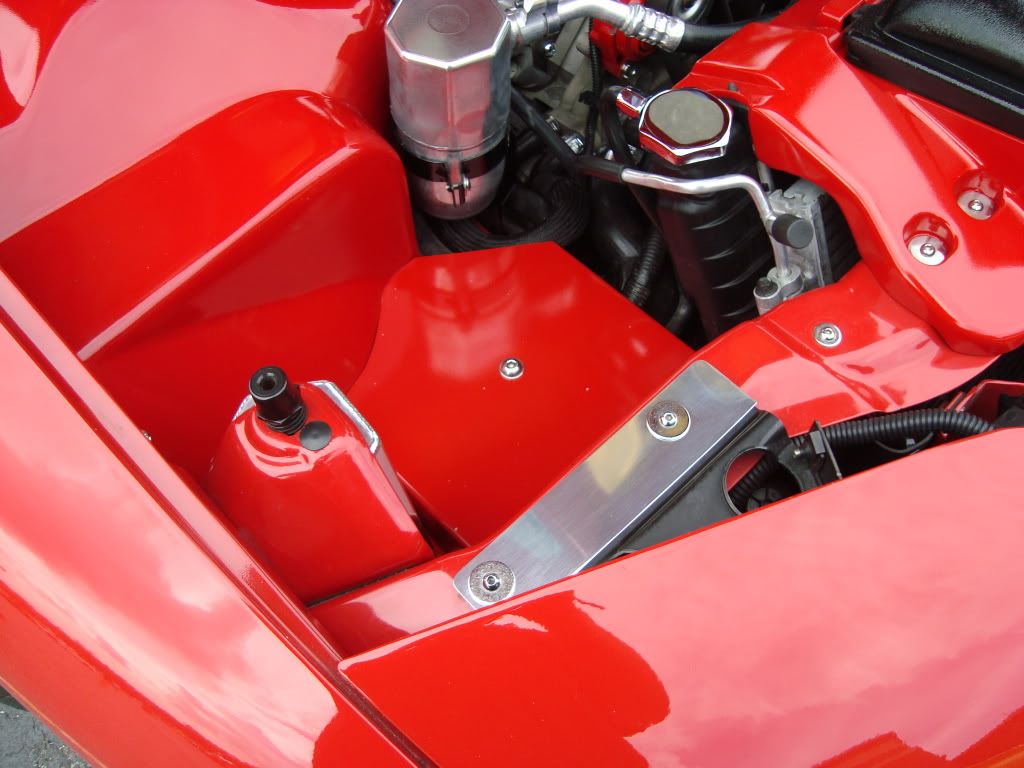
I wanted mine to look better for now and was in a hurry to get the motor in.
I might of had 2 hours invested and 20-25$ total. For the time spent Im very happy with it. Looks better than 95% of engine bays out there and was extremely easy.
Later Im going to weld and smooth everything and do a correct paint job but this is doing its job for now.
I might of had 2 hours invested and 20-25$ total. For the time spent Im very happy with it. Looks better than 95% of engine bays out there and was extremely easy.
Later Im going to weld and smooth everything and do a correct paint job but this is doing its job for now.
03-02-2013, 09:03 PM
#16
Well guys, I spent a good bit of time, cleaning, and scuffing, and cleaning again to say the least. Also got the portion of the HVAC in the rear left of the bay out. Studied quite a while on it, trying to get it out, and could find no real answers other than "take out the dash". I was getting frustrated to say the least.
I was reading this one thread..... and there was a single comment, that read "Sledge hammer, and it was out in 3 minutes".
Well, I can attest to that now. The a/c is already gone on this car to save for weight. It should run as good as it looks. I am hoping to start out somewhere in the mid to low 9's once suspension is dialed in then really focus on the weight.
Anyways:
The roughest part, was getting the harness out of the way. I am actually quite intimidated about putting it back in. I hate that GM put this monster harness in there like that. It is ugly. I am going to try to hide it as good as I can.
That aside:
I was getting ready to spray, when a guy called me back who owns a body shop. He is an F body owner, and also has a TT gen 5.
He told me he'd put it on a rollback and take it to his shop and charge me around $100 to spray and clear it. I figure he will have @ least that in time, materials, and labor.
But I sanded it down real smooth in areas that you will see. the trans tunnel and back firewall, I just left scuffed as it will be covered by the motor etc....
I should have some photos next week. It already looks better now than it did. You could eat off it.
I would dare to venture and say, that it will also be one of the better looking bays on the site. Hopefully top 25.
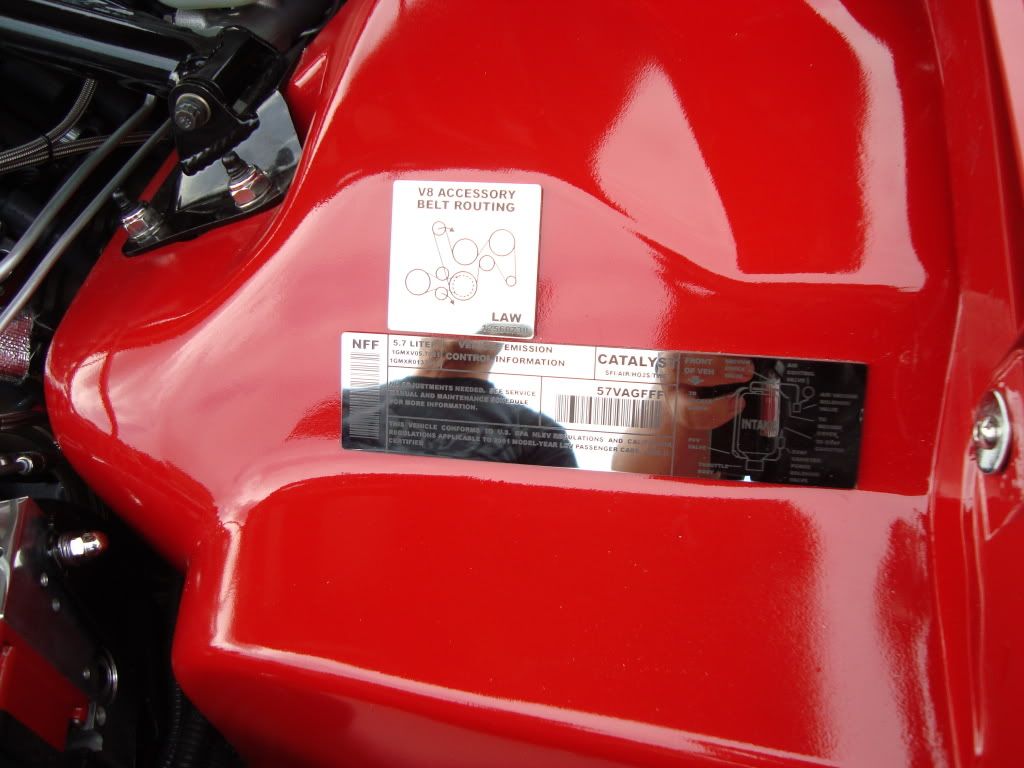
01 bad bird has some serious time in that bay for sure. Its super nice. I am going back on forth on replacing the stickers with the ones from emblem pros....I want some that are anodized black instead or SS. I already have black anodized everything else.
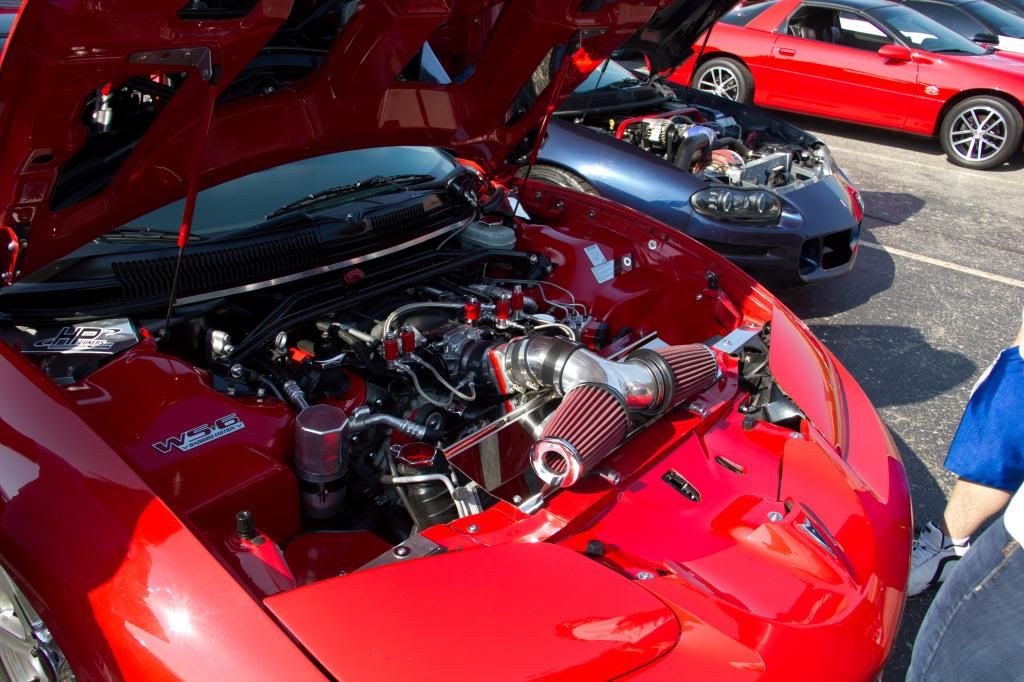
Appearance Items so far :
Custom Painted Fast 102
Stainless 1 7/8 headers (I mean you can see em right?)
Black Anodized Vapor Kit with Painted spacer.
Billet NW 102 TB
Painted Coil Packs
MSD Wires
Brand New Motor--Black
Powder Coated Valve covers
Powder coated Radiator covers
Powdercoated Timing Covers
Anodized Battery Cover & fuse box
SJM Hurst line lock ABS delete kit
Wire Mod (after paint is done)
Polished Supercharger
Anodized Tensioner Pulley
Fast Anodized fuel Rails
Powdercoated Charge Piping
Polished T bolt clamps
New hardware for new parts (screws/bolts/nuts)
MWC HVAC delete plate (painted)
So from here I guess painting is the only thing left to do.
I was reading this one thread..... and there was a single comment, that read "Sledge hammer, and it was out in 3 minutes".
Well, I can attest to that now. The a/c is already gone on this car to save for weight. It should run as good as it looks. I am hoping to start out somewhere in the mid to low 9's once suspension is dialed in then really focus on the weight.
Anyways:
The roughest part, was getting the harness out of the way. I am actually quite intimidated about putting it back in. I hate that GM put this monster harness in there like that. It is ugly. I am going to try to hide it as good as I can.
That aside:
I was getting ready to spray, when a guy called me back who owns a body shop. He is an F body owner, and also has a TT gen 5.
He told me he'd put it on a rollback and take it to his shop and charge me around $100 to spray and clear it. I figure he will have @ least that in time, materials, and labor.
But I sanded it down real smooth in areas that you will see. the trans tunnel and back firewall, I just left scuffed as it will be covered by the motor etc....
I should have some photos next week. It already looks better now than it did. You could eat off it.
I would dare to venture and say, that it will also be one of the better looking bays on the site. Hopefully top 25.
01 bad bird has some serious time in that bay for sure. Its super nice. I am going back on forth on replacing the stickers with the ones from emblem pros....I want some that are anodized black instead or SS. I already have black anodized everything else.
Appearance Items so far :
Custom Painted Fast 102
Stainless 1 7/8 headers (I mean you can see em right?)
Black Anodized Vapor Kit with Painted spacer.
Billet NW 102 TB
Painted Coil Packs
MSD Wires
Brand New Motor--Black
Powder Coated Valve covers
Powder coated Radiator covers
Powdercoated Timing Covers
Anodized Battery Cover & fuse box
SJM Hurst line lock ABS delete kit
Wire Mod (after paint is done)
Polished Supercharger
Anodized Tensioner Pulley
Fast Anodized fuel Rails
Powdercoated Charge Piping
Polished T bolt clamps
New hardware for new parts (screws/bolts/nuts)
MWC HVAC delete plate (painted)
So from here I guess painting is the only thing left to do.
03-02-2013, 10:20 PM
#17
No need for a $2000 gun, and if he really has one, he overspent....
Make sure it's super clean!
What are your plans with the 180 and 220 grit? Way too abrasive! Get everything in ~600 and a red scotchbrite if he isn't sealing it first. If he is sealing it (which I suggest) 320 and a red scotcbrite will be sufficient.
No need for "hightemp" base and clear.
Make sure it's super clean!
What are your plans with the 180 and 220 grit? Way too abrasive! Get everything in ~600 and a red scotchbrite if he isn't sealing it first. If he is sealing it (which I suggest) 320 and a red scotcbrite will be sufficient.
No need for "hightemp" base and clear.
03-03-2013, 06:19 AM
#19
Fill the holes, fill the holes, fill the holes. Going thru the effort in sanding, hiding wires and fresh paint just to have reminders of what used to be seems pointless. You'll be glad you did! I went a little beyond that, but you get the idea