Budget C5 Track Build
 02-18-2014, 11:37 AM
#1
Staging Lane
Thread Starter

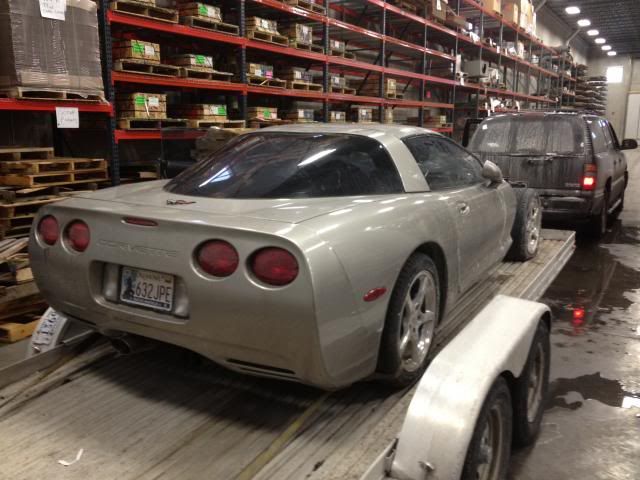
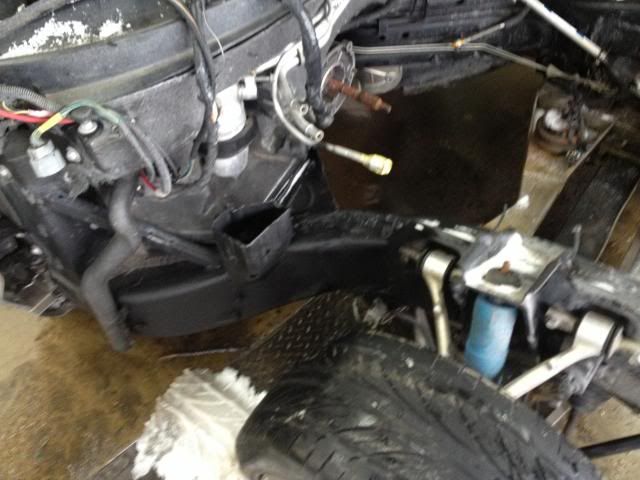
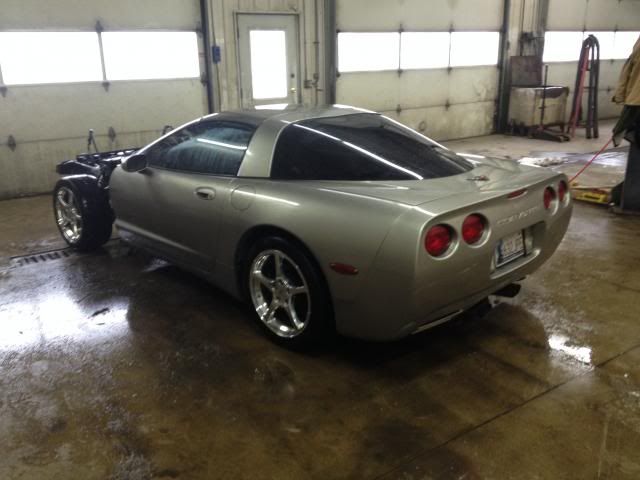
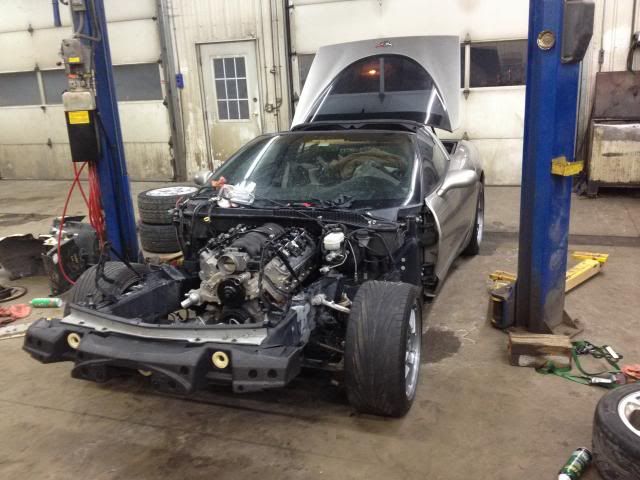
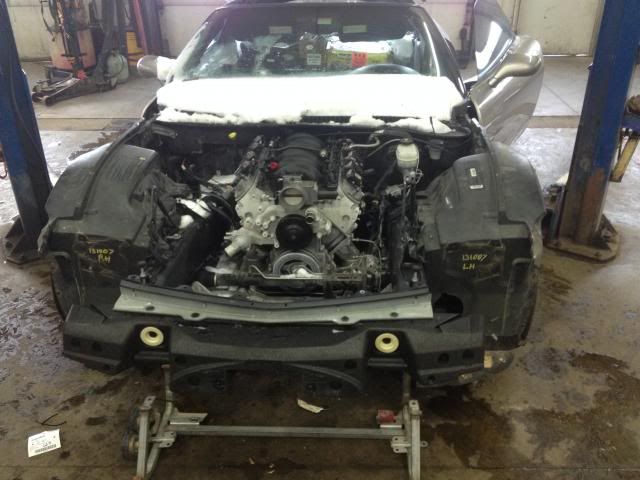
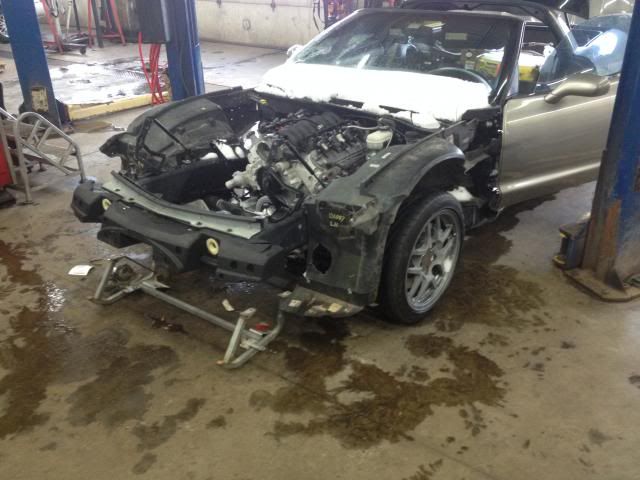
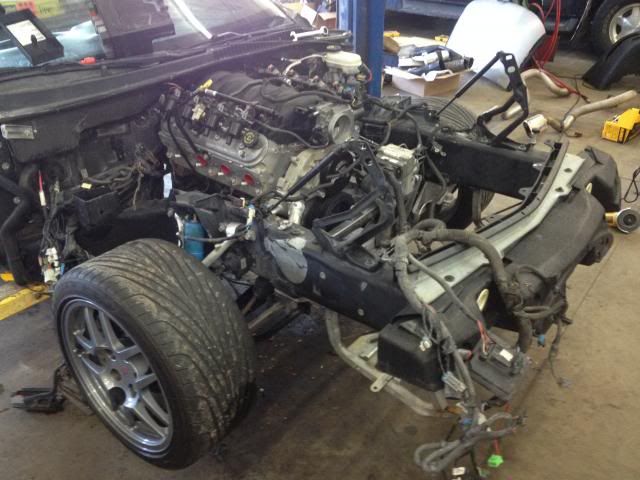
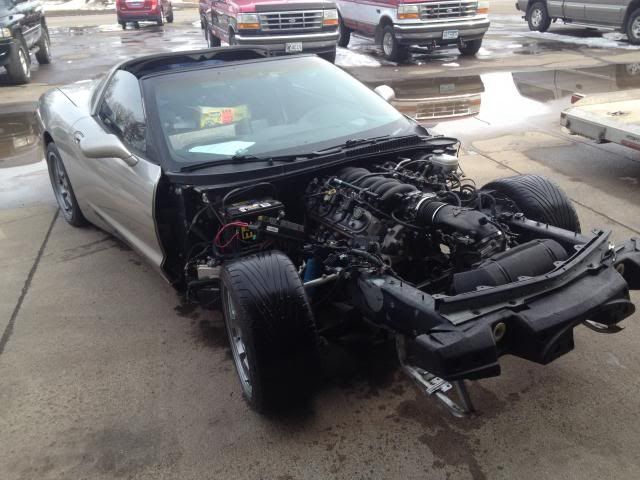
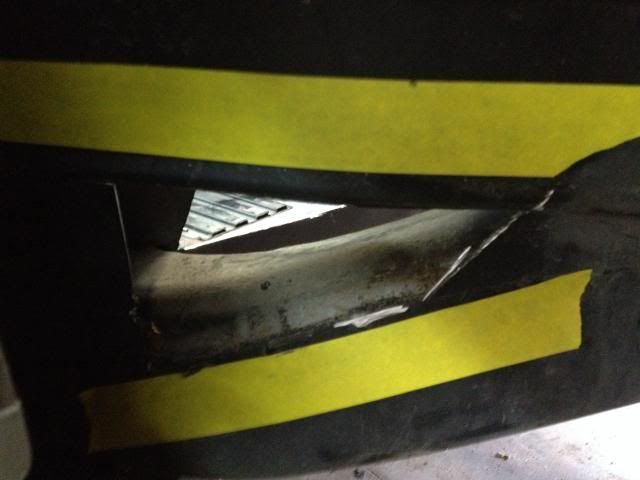
So, I have an 01 Z06 that I love driving, it's a great car with phenomenal performance. That said, I've been involved in racing for a number of years and have always wished I could afford to run a Vette. For cost reasons, I was looking at C4's and came very close to buying one on here for $5500, which is very fair for a prepped track car, my only concern being that C4's don't have nearly the demand of C5's and seem to sit unsold for a long time, something that I didn't want to deal with if I ever have to sell. So, by random chance I found a rebuildable 1999 M6 Coupe in Missouri on Craigslist, it had a tweaked frame in the RF and was missing the motor and a few other things but was otherwise a very solid car for an unbelievable price.
Also, I want to say this right now: If I end up in the poor house or the nut house, I place full blame on Randy Rippie for peer pressuring me into the C5 :*****: :crazy2:
There is a very new series that I plan to run this in, but will be building the cage to be legal for ST1, T1, etc so that it's not obsolete if something happens to this series. With that said, I have some very basic guidelines for this car:
- Reasonable Build Cost without half-assing the important things
- Reliable, there's nothing worse than an unreliable racecar
- Cheap to maintain, this will bring some sacrilege to the project, keep reading
- Safe. I'm not real concerned about dying, but I don't want to be drooling on myself for the rest of my life or disfigured in a fire....
- Legal. I've always heard racers say "Everyone cheats, most just don't get caught." BS, we've won a lot of races without cheating, if people can't win without cheating there's something wrong with the series.
I don't want to have to spend cubic dollars beefing things up, and I don't want to have big money tied up in a fancy race motor build of magic dust and unobtanium, been there done that and I don't miss it. The series I'm looking at has Power-Weight classing, so here's my motor choice: 4.8L Vortec. It makes perfect sense, they're plentiful across the US for $2-300 and stout little motors, perfectly comfortable running 6500-7000 RPM's. Since it has less power than the original motor, the whole drivetrain should stay dead nuts reliable. If I blow it up (which is highly unlikely) I slap my intake and accessories on the spare motor and get back to racing, no waiting on an engine builder or mortgaging my house to pay for it. The only mod that I'll be doing is a rocker trunion upgrade, other than that even the cam will be stock.
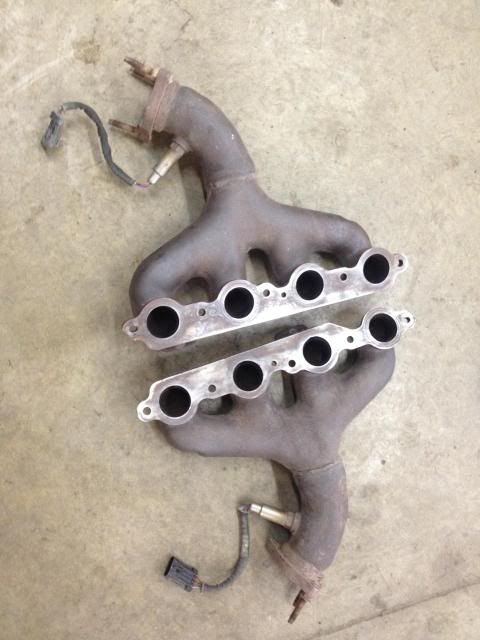
I have already sourced 2 batwing pans, a stock LS1 intake/rails/injectors/TB and have 2 sets of stock exhaust manifolds so I can have a spare motor somewhat mocked up ahead of time.
Beyond that, a rough list of mechanical plans:
- New Slave/TOB
- Rebuilding Prop Shaft
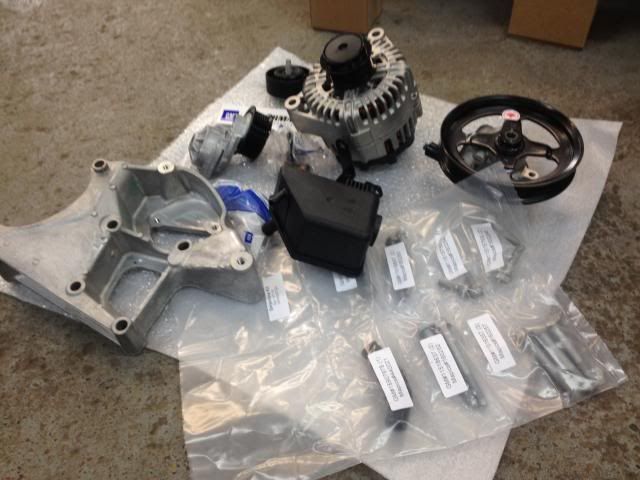
- Brand New LS3 Accy Drive Kit from Pace(GM)
- Steel Shift Forks
- Billet Synchro Keys
- Oil/Trans/Diff Coolers
Suspension:
- Z06 Springs
- Bilstein Shocks Edit: Can't run Bilstein Sports, so Z06 shocks? TBD....
- New bushings - Would love to go spherical but can't justify the cost, will probably make my own from Delrin.
Brakes:
- C6 Front calipers (To hopefully reduce spreading), stock rears
- DRM SS Front pistons
- Raybestos ST43 pads to start out with, supposedly these are the shiznit for long races?
- DRM Braided hoses
- DRM Ducts, LG Spindle Plates or homemade
- Z06 Rear Ducts
Other:
- Full cage with Nascar door bars on both sides, 1.75 x .120 DOM to be legal everywhere and as safe as possible.
- Forward-tilting front-sucking radiator mod with extractor hood
- Splitter - This will probably be plywood, don't laugh until you see it done :yesnod:
- Rear Diffuser - homemade, looking at material options
- Fire System
- Passenger Seat for track days and street use, it WILL remain street legal
- Fixed Headlights for weight, cost, simplicity
- Full containment seat with 6-point harness. Safety.
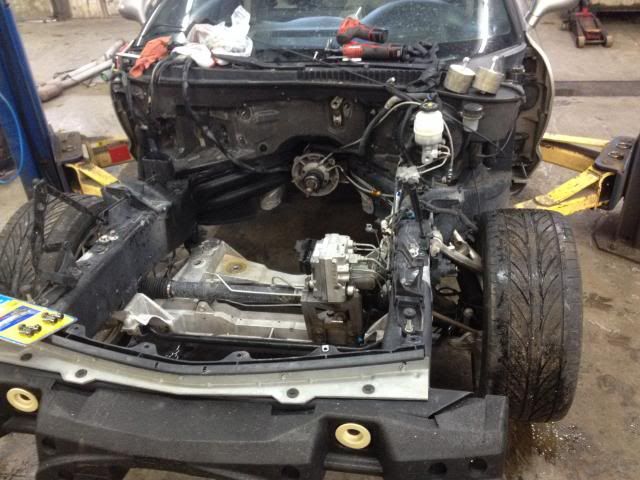
That's all I've got for now, here are a couple pictures from before I rinsed all of the road salt off :ack:
The frame shop called yesterday to say it will be ready soon, hopefully when I get home from SHOT Show on the 20th
Thanks for looking, stay tuned for updates!
Matt
Also, I want to say this right now: If I end up in the poor house or the nut house, I place full blame on Randy Rippie for peer pressuring me into the C5 :*****: :crazy2:
There is a very new series that I plan to run this in, but will be building the cage to be legal for ST1, T1, etc so that it's not obsolete if something happens to this series. With that said, I have some very basic guidelines for this car:
- Reasonable Build Cost without half-assing the important things
- Reliable, there's nothing worse than an unreliable racecar
- Cheap to maintain, this will bring some sacrilege to the project, keep reading
- Safe. I'm not real concerned about dying, but I don't want to be drooling on myself for the rest of my life or disfigured in a fire....
- Legal. I've always heard racers say "Everyone cheats, most just don't get caught." BS, we've won a lot of races without cheating, if people can't win without cheating there's something wrong with the series.
I don't want to have to spend cubic dollars beefing things up, and I don't want to have big money tied up in a fancy race motor build of magic dust and unobtanium, been there done that and I don't miss it. The series I'm looking at has Power-Weight classing, so here's my motor choice: 4.8L Vortec. It makes perfect sense, they're plentiful across the US for $2-300 and stout little motors, perfectly comfortable running 6500-7000 RPM's. Since it has less power than the original motor, the whole drivetrain should stay dead nuts reliable. If I blow it up (which is highly unlikely) I slap my intake and accessories on the spare motor and get back to racing, no waiting on an engine builder or mortgaging my house to pay for it. The only mod that I'll be doing is a rocker trunion upgrade, other than that even the cam will be stock.
I have already sourced 2 batwing pans, a stock LS1 intake/rails/injectors/TB and have 2 sets of stock exhaust manifolds so I can have a spare motor somewhat mocked up ahead of time.
Beyond that, a rough list of mechanical plans:
- New Slave/TOB
- Rebuilding Prop Shaft
- Brand New LS3 Accy Drive Kit from Pace(GM)
- Steel Shift Forks
- Billet Synchro Keys
- Oil/Trans/Diff Coolers
Suspension:
- Z06 Springs
- Bilstein Shocks Edit: Can't run Bilstein Sports, so Z06 shocks? TBD....
- New bushings - Would love to go spherical but can't justify the cost, will probably make my own from Delrin.
Brakes:
- C6 Front calipers (To hopefully reduce spreading), stock rears
- DRM SS Front pistons
- Raybestos ST43 pads to start out with, supposedly these are the shiznit for long races?
- DRM Braided hoses
- DRM Ducts, LG Spindle Plates or homemade
- Z06 Rear Ducts
Other:
- Full cage with Nascar door bars on both sides, 1.75 x .120 DOM to be legal everywhere and as safe as possible.
- Forward-tilting front-sucking radiator mod with extractor hood
- Splitter - This will probably be plywood, don't laugh until you see it done :yesnod:
- Rear Diffuser - homemade, looking at material options
- Fire System
- Passenger Seat for track days and street use, it WILL remain street legal
- Fixed Headlights for weight, cost, simplicity
- Full containment seat with 6-point harness. Safety.
That's all I've got for now, here are a couple pictures from before I rinsed all of the road salt off :ack:


The frame shop called yesterday to say it will be ready soon, hopefully when I get home from SHOT Show on the 20th
Thanks for looking, stay tuned for updates!
Matt
 02-18-2014, 11:37 AM
#2
Staging Lane
Thread Starter
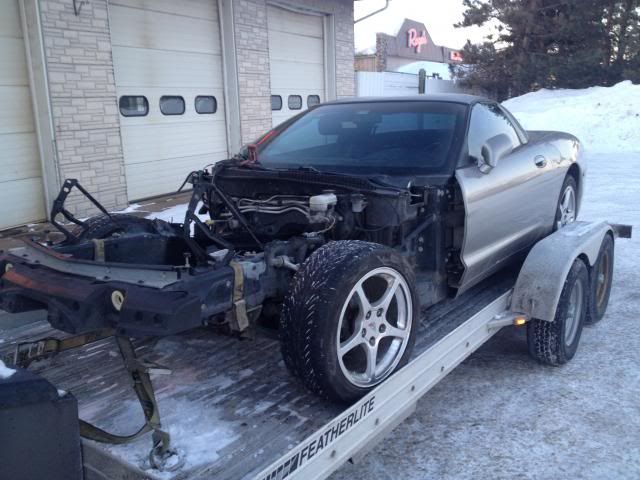
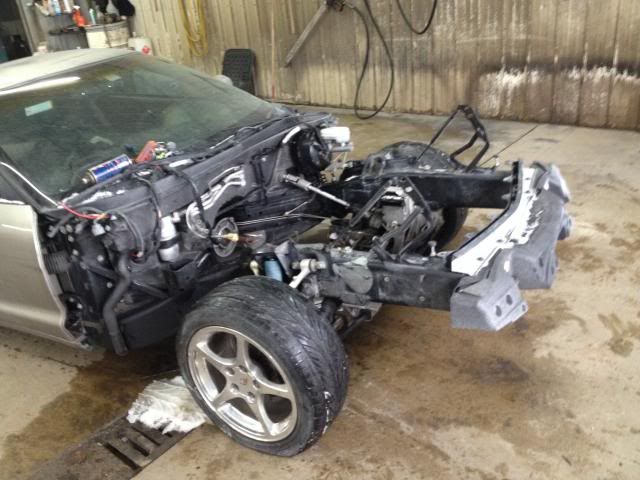
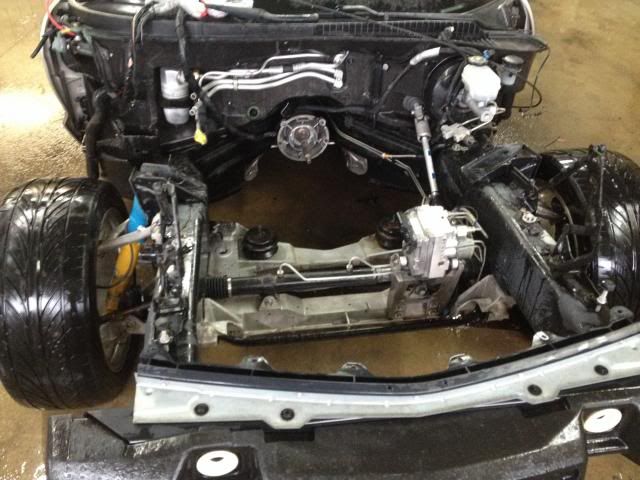
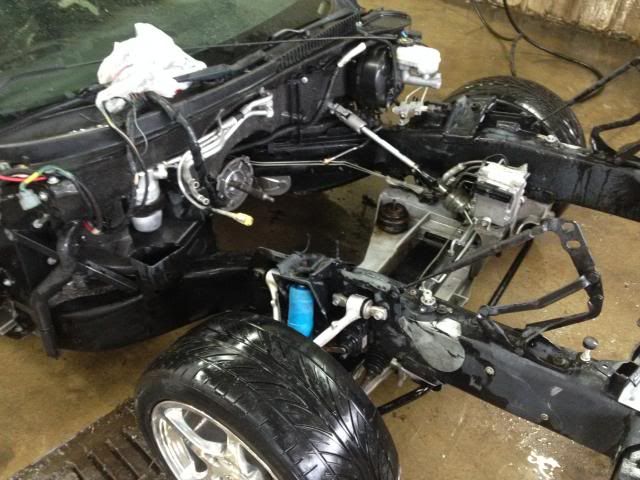
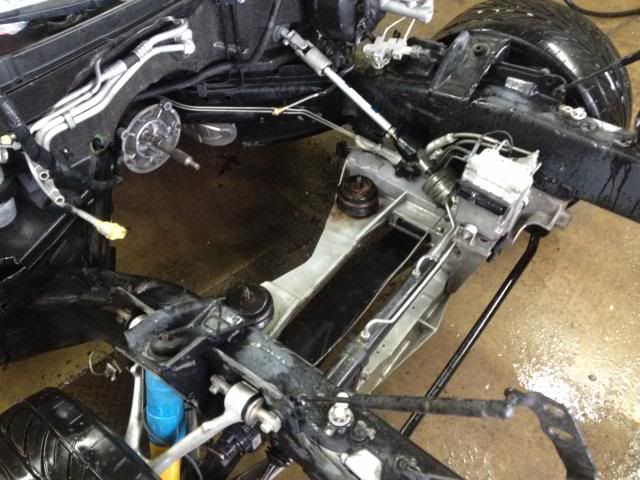
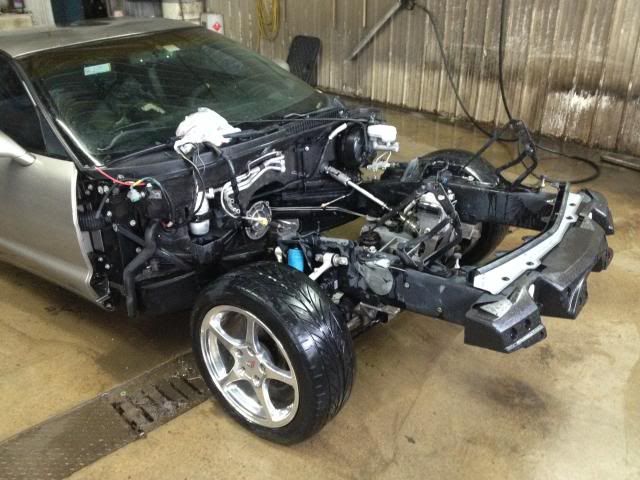
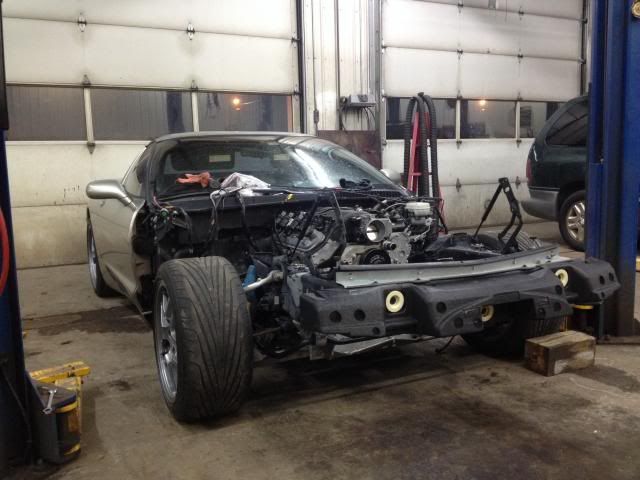
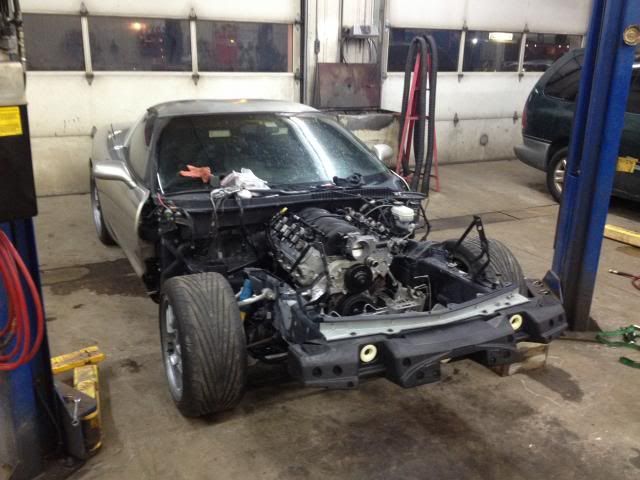
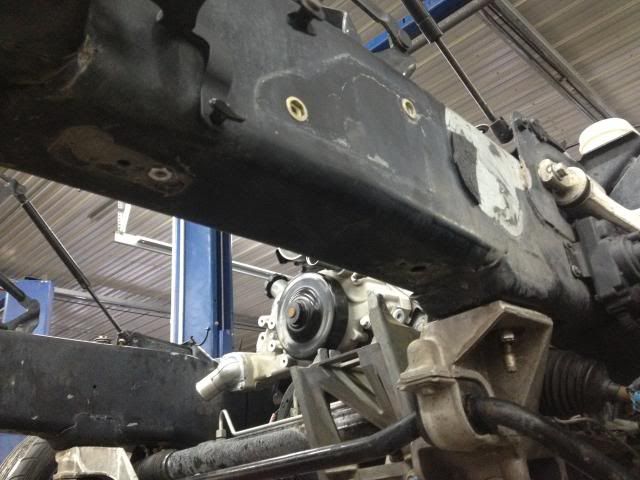
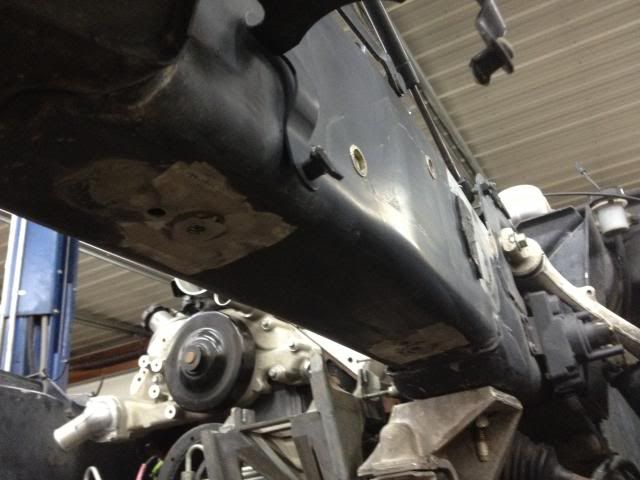
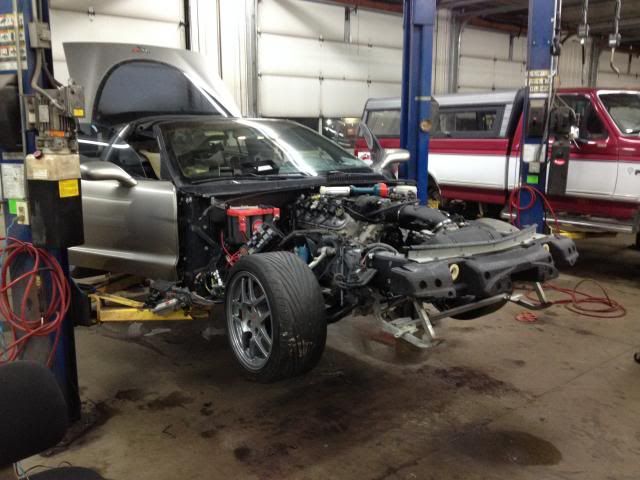
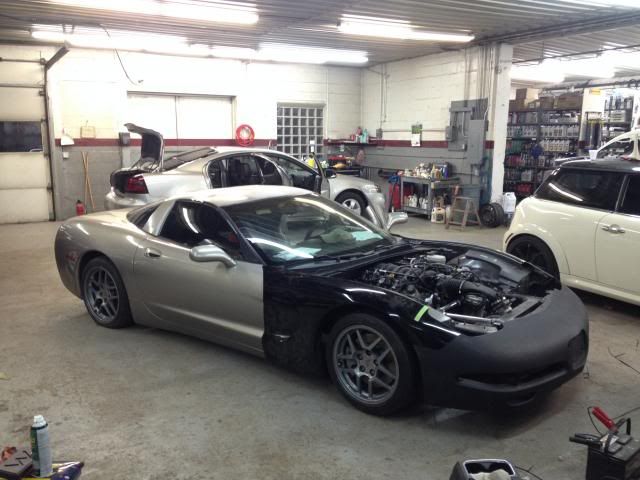
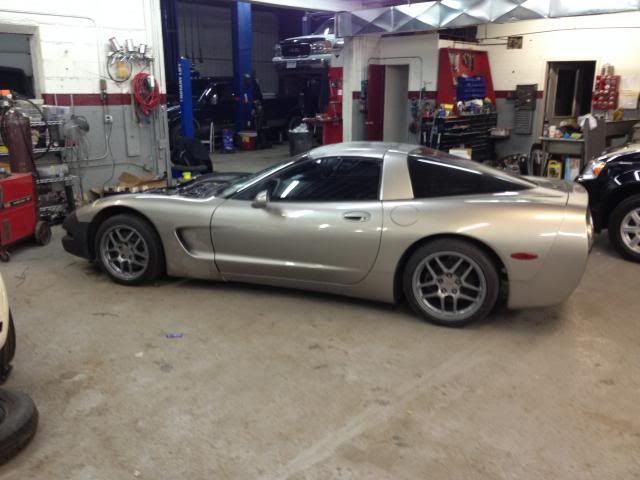
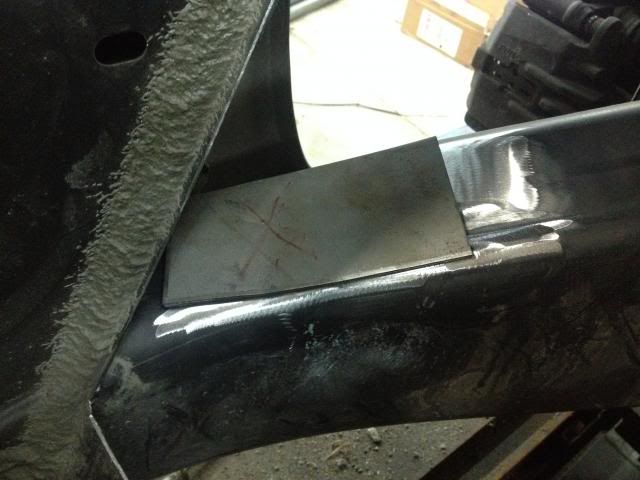
It's back! I picked up the car from the frame shop this week, they did a great job and the price was very fair.
Before:
After:
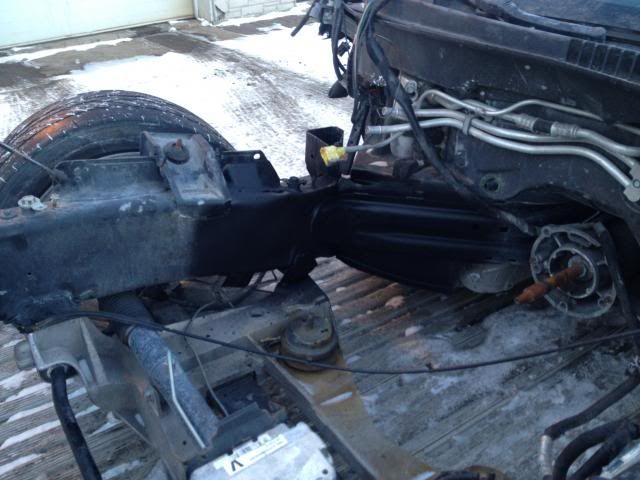
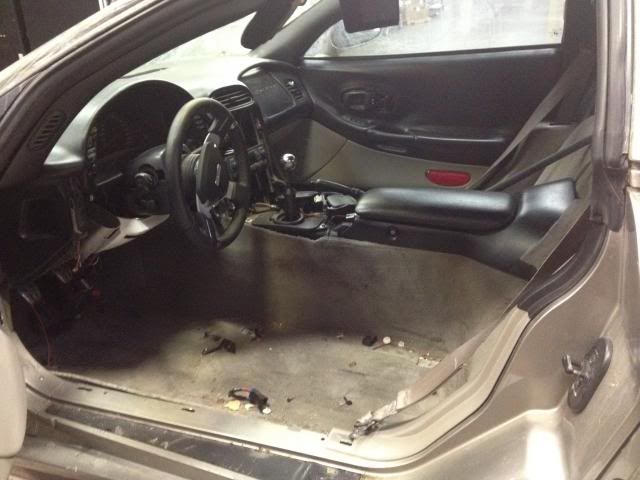
Not the same camera angle, but you get the idea. Everything is squared up nicely, I'll be running a cage tube from the front downbars to a point ahead of this repaired area in order to strengthen it and avoid flex from the weakened section. I need to get everything cleaned off and oiled up, between the prior owner leaving it outside and the long salty ride home, it's pretty nasty...
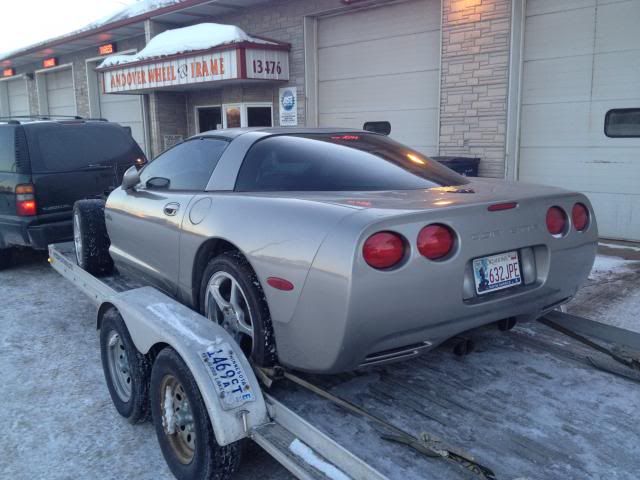
All loaded up
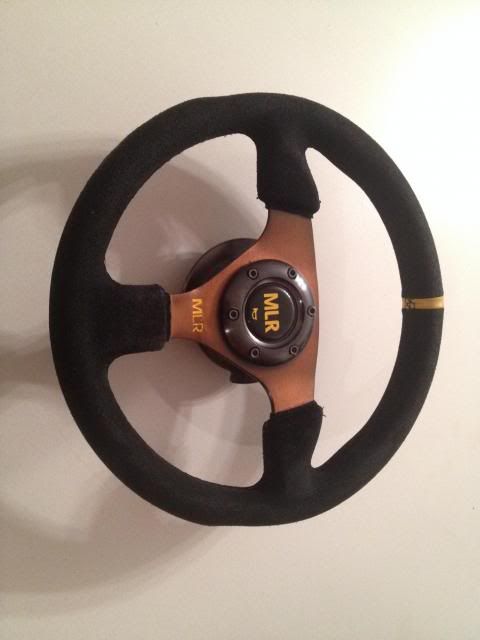
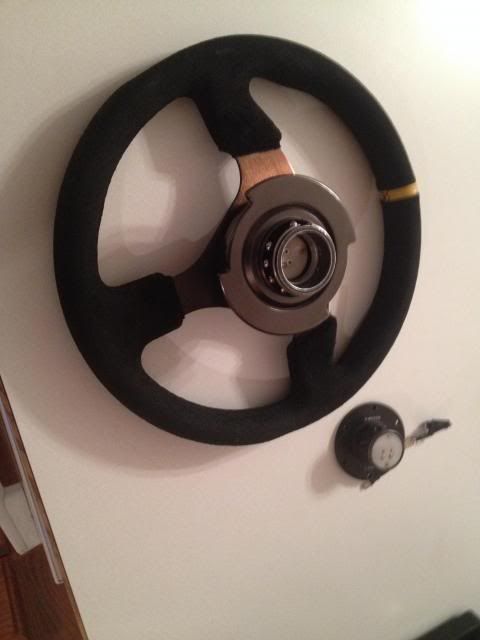
Snagged this steering wheel and NRG release for cheap on the auction site, a little gentle scrubbing with an old toothbrush and some hot water has the suede looking good as new.
Picking up the motor tomorrow in order to keep things moving this weekend, planning to get the 4.8 fitted with C5 pan, intake, exhaust and make some solid mounts this weekend. Hoping to get it set into the car this weekend, possibly fired up this week. This first time going together will basically be a mockup of the car in stock form with the 4.8 in order to get it inspected so that the state can issue a rebuilt title, after that it will come back apart for the cage and other fun stuff.
Next on my list is to buy seats and probably shocks. Word has it that there's also a box of DRM goodies on their way to my front step
Thanks for looking, more coming soon!
Before:

After:

Not the same camera angle, but you get the idea. Everything is squared up nicely, I'll be running a cage tube from the front downbars to a point ahead of this repaired area in order to strengthen it and avoid flex from the weakened section. I need to get everything cleaned off and oiled up, between the prior owner leaving it outside and the long salty ride home, it's pretty nasty...
All loaded up


Snagged this steering wheel and NRG release for cheap on the auction site, a little gentle scrubbing with an old toothbrush and some hot water has the suede looking good as new.


Picking up the motor tomorrow in order to keep things moving this weekend, planning to get the 4.8 fitted with C5 pan, intake, exhaust and make some solid mounts this weekend. Hoping to get it set into the car this weekend, possibly fired up this week. This first time going together will basically be a mockup of the car in stock form with the 4.8 in order to get it inspected so that the state can issue a rebuilt title, after that it will come back apart for the cage and other fun stuff.
Next on my list is to buy seats and probably shocks. Word has it that there's also a box of DRM goodies on their way to my front step
Thanks for looking, more coming soon!
02-18-2014, 11:39 AM
#3
Staging Lane
Thread Starter
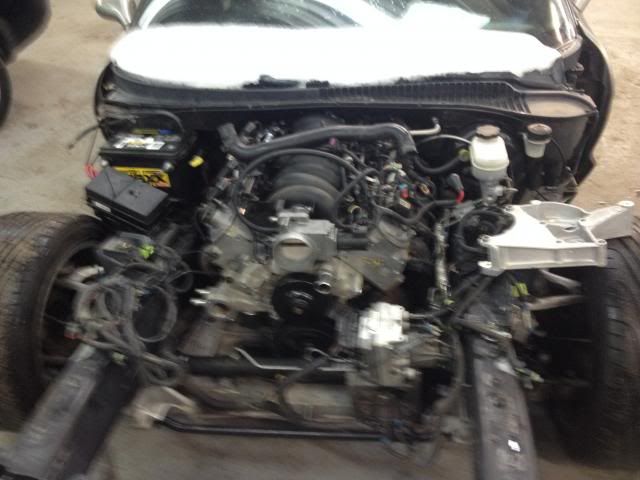
Lots of progress this weekend! Picked up a 4.8 on Friday afternoon, got it cleaned up and dropped in the car this weekend. I had a box of DRM goodness waiting on my doorstep Friday as well, so I managed to get the SS brake pistons installed before I got the calipers on. I also have a solid rack bushing, brake ducts, SS lines, and an oil cooler adapter that will go on as things progress, the parts all look top-notch and Randy got them here in a hurry so that I can get everything installed while it's still easy to get at 
Anyway, I don't have time to caption all of these right at the moment but here are a bunch of pictures showing what we accomplished this weekend, I'll edit in captions sometime this week. Saturday I had other plans so all of the work you see here was done on Sunday-funday 9am-10pm. Hope you enjoy!
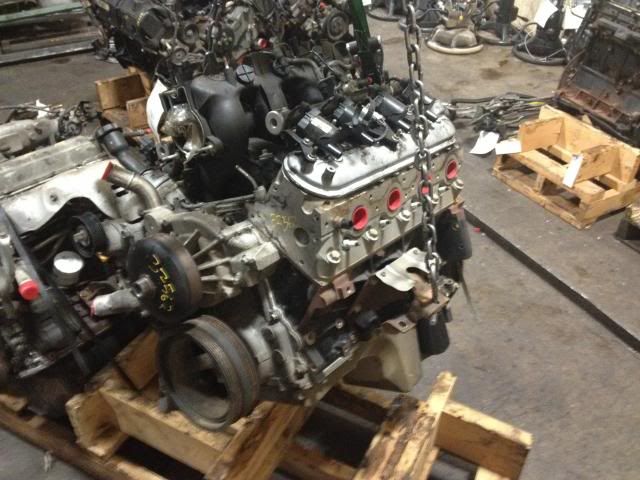
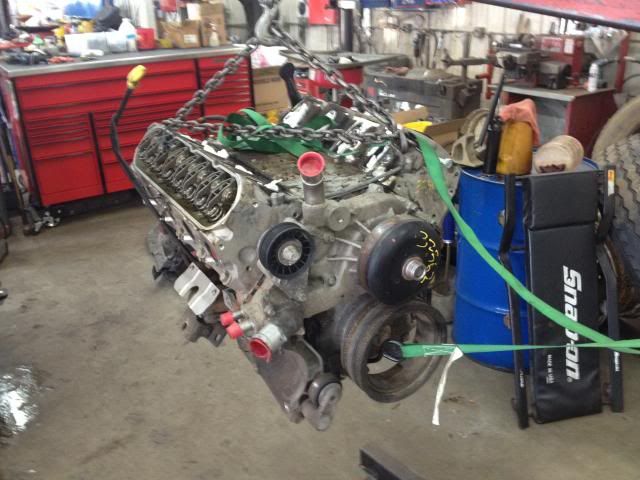
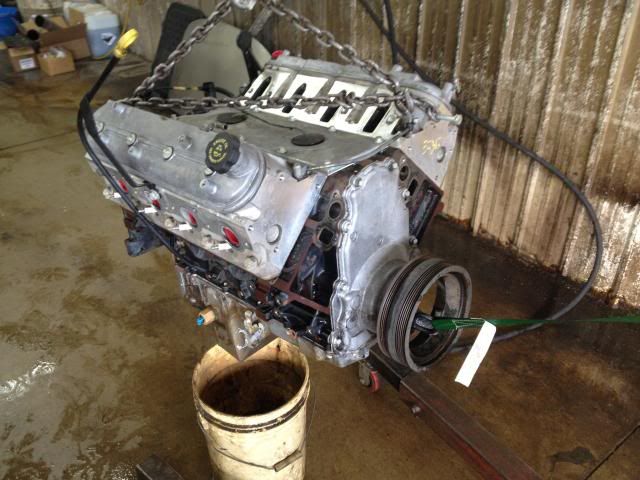
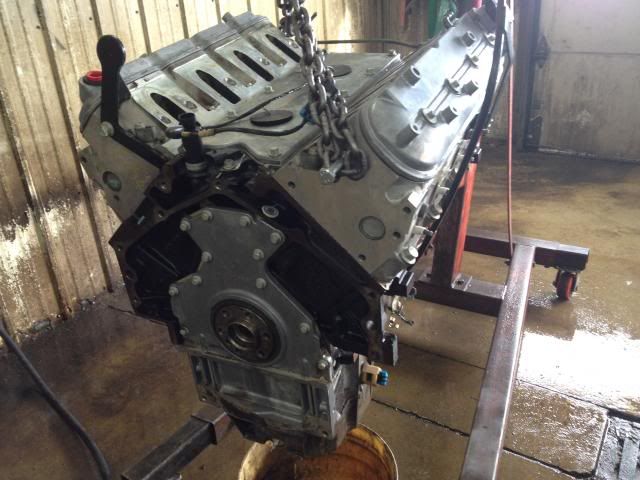
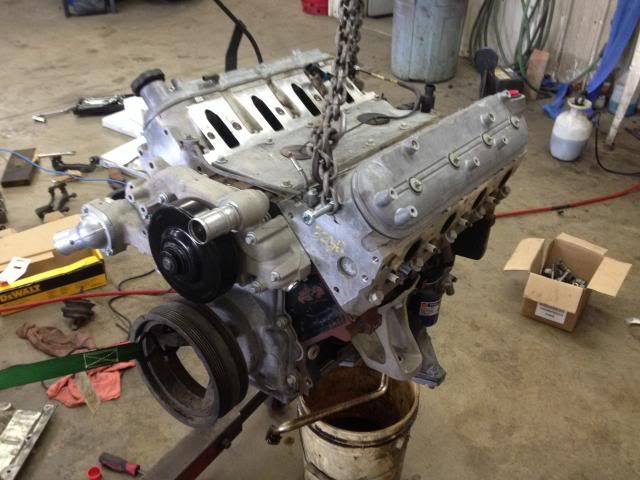
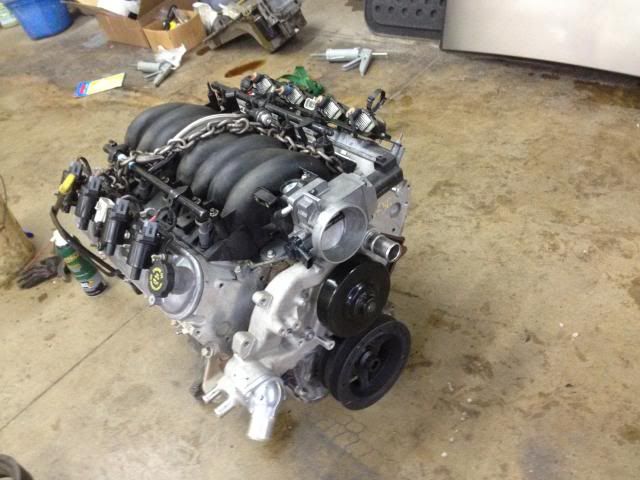
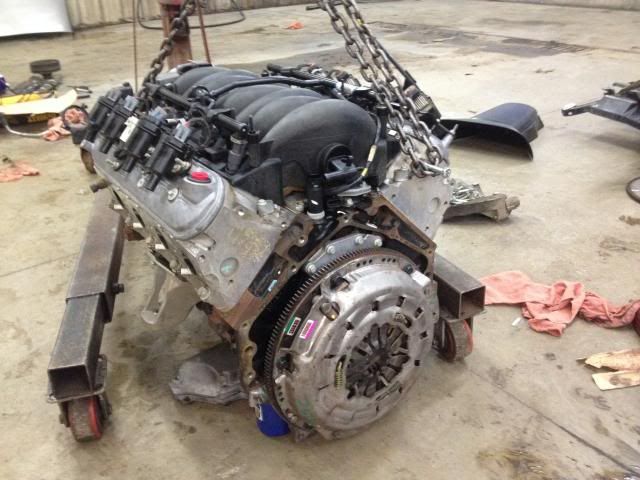
Here's the 4.8 before I got it loaded up at the junkyard
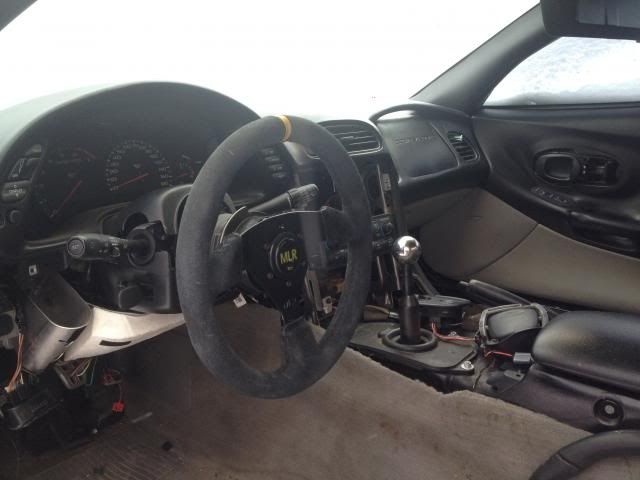
New wheel painted and installed with NRG release

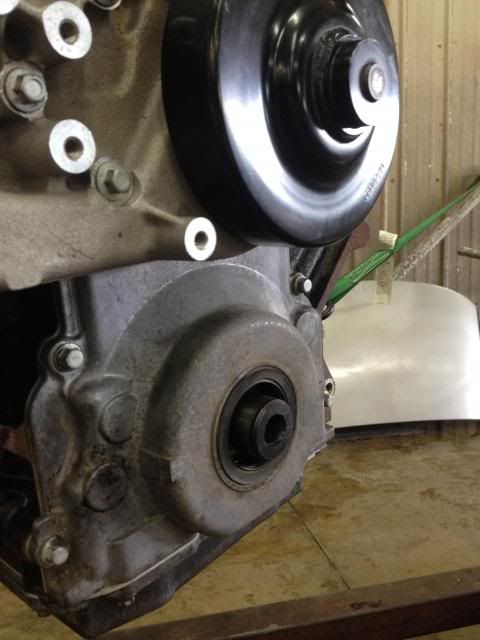
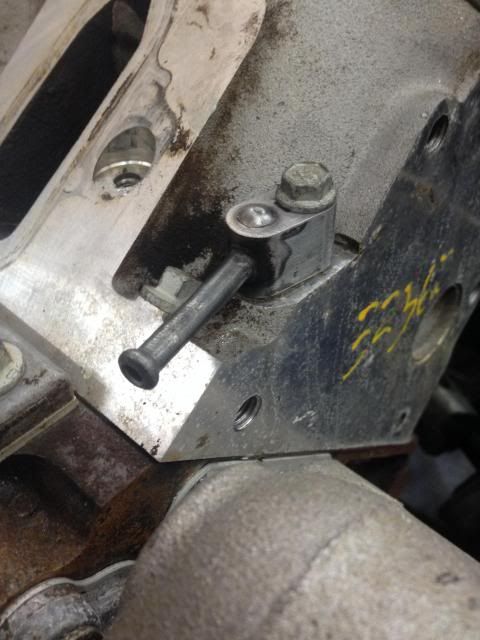
Crappy pic, but here's the input shaft all cleaned up:


All dried up after washing:
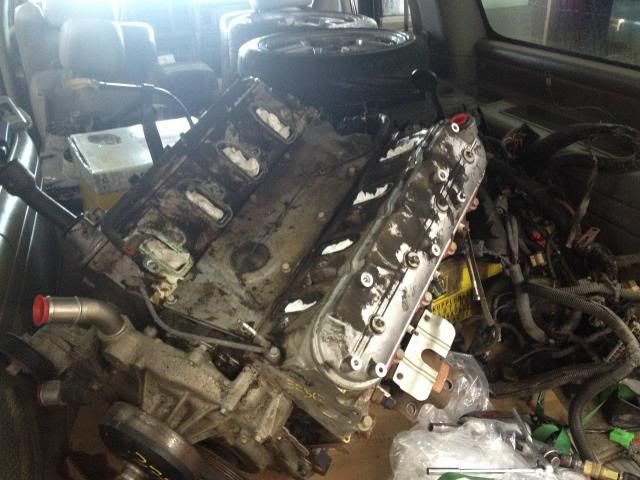
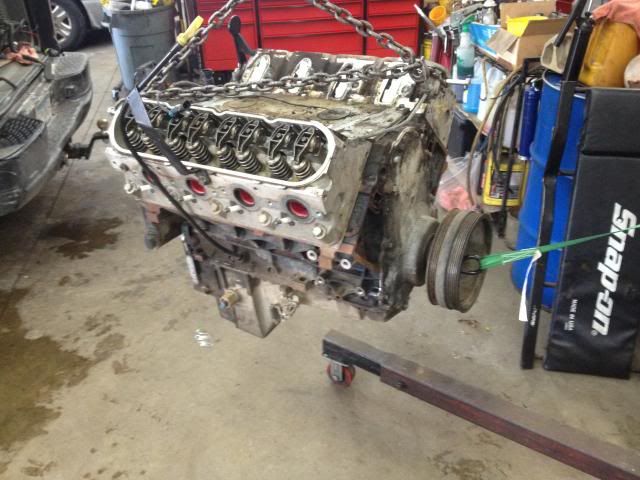
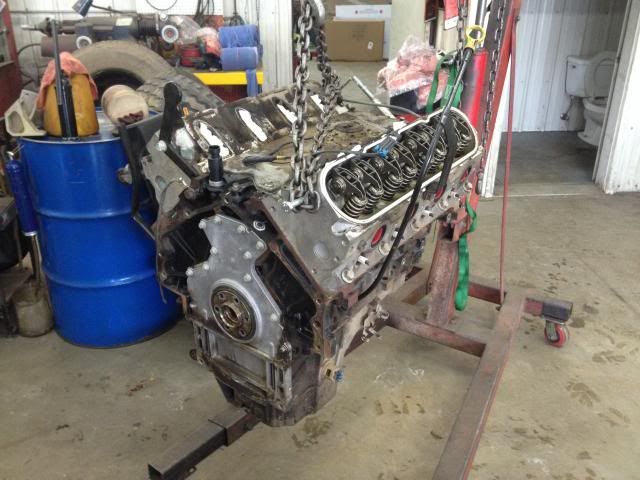
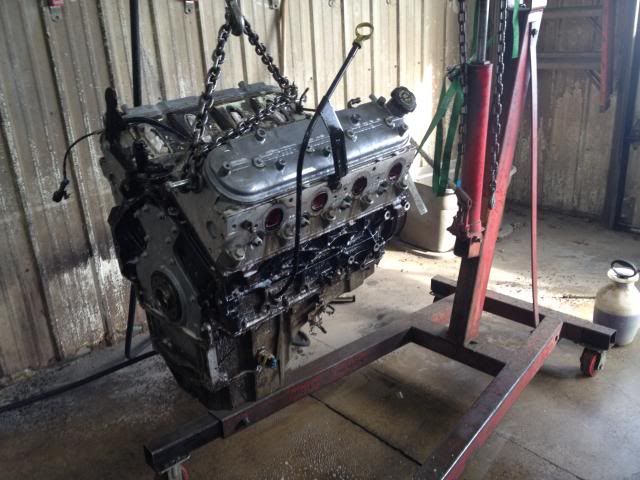
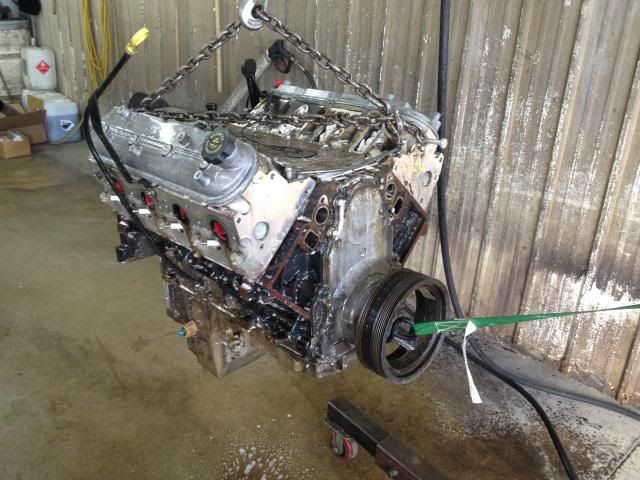
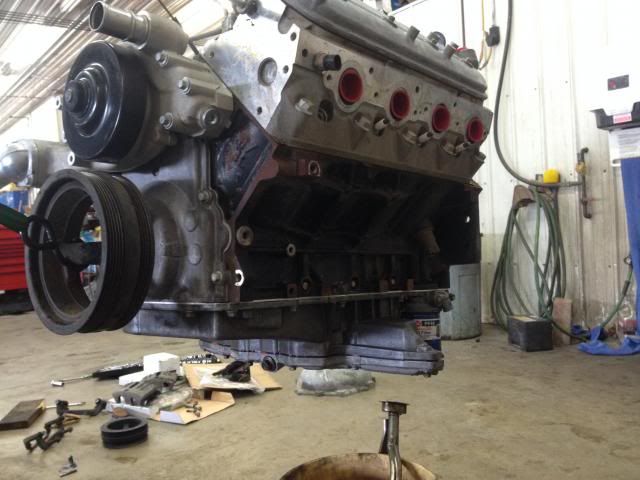
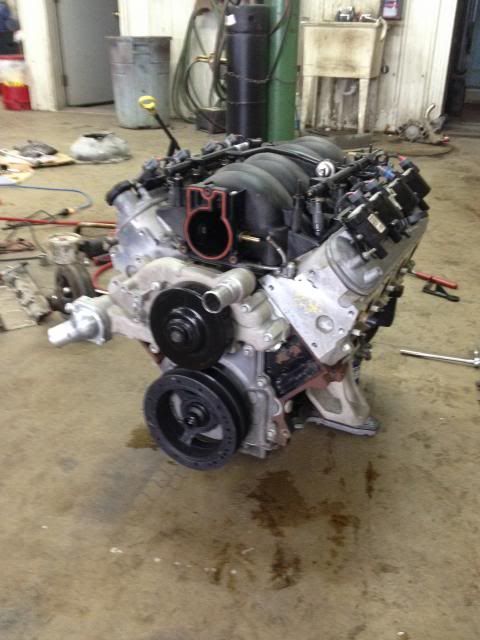
Hauled the motor home in my Denali, here it is after pulling the intake and coil packs...
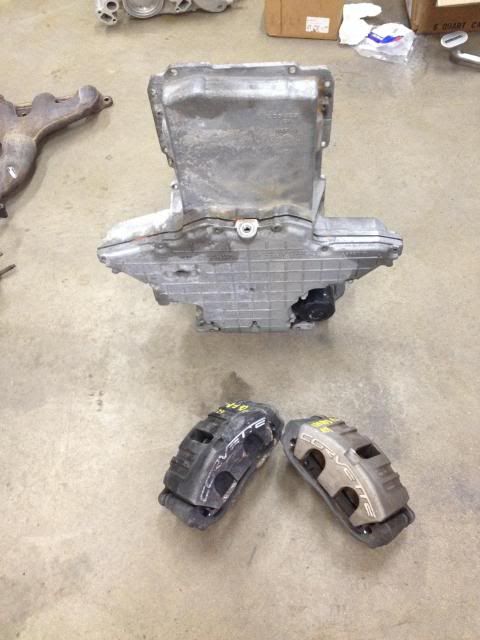
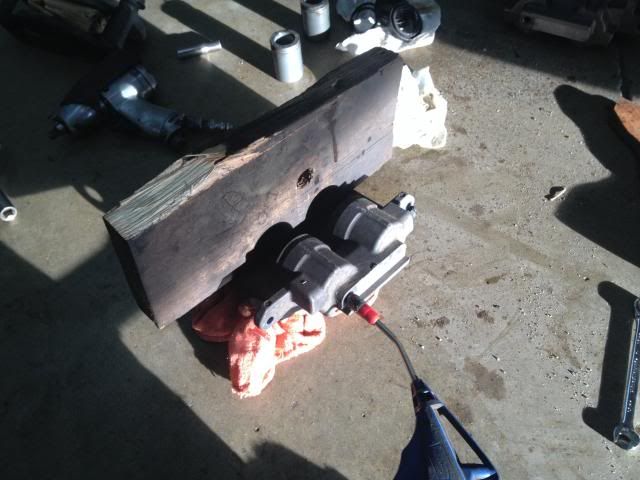
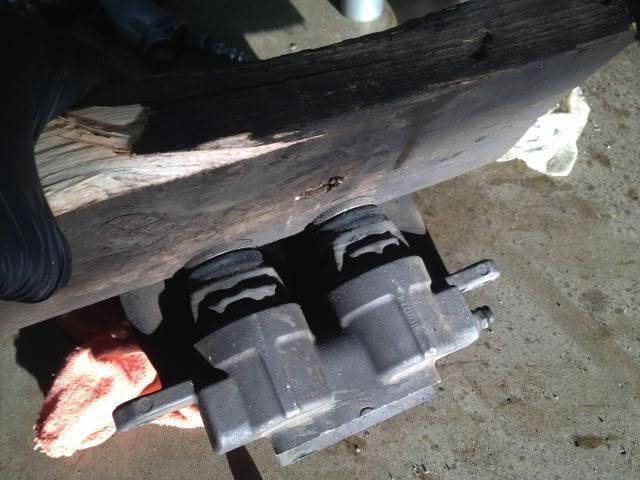
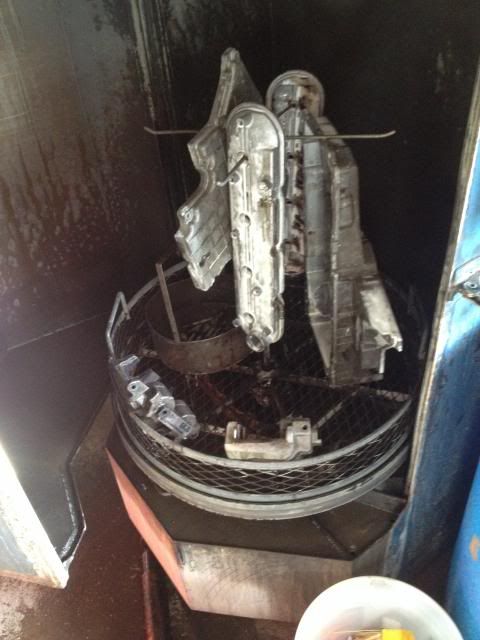
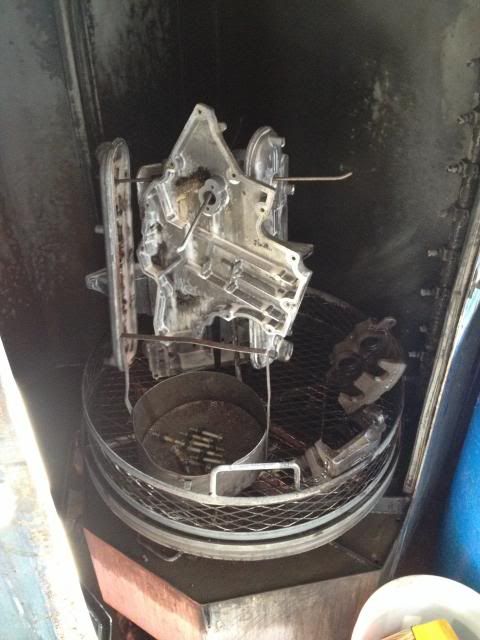
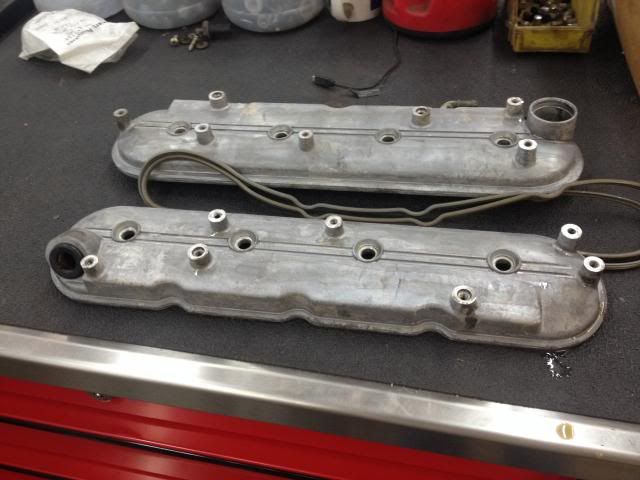
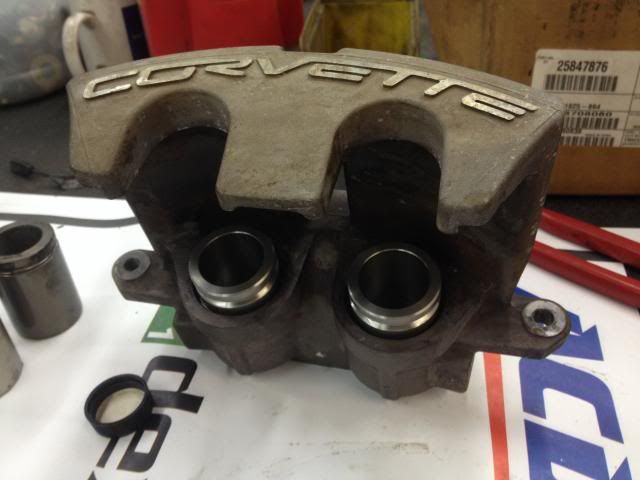
Parts washer: oil pan, valve covers, front caliper bodies:
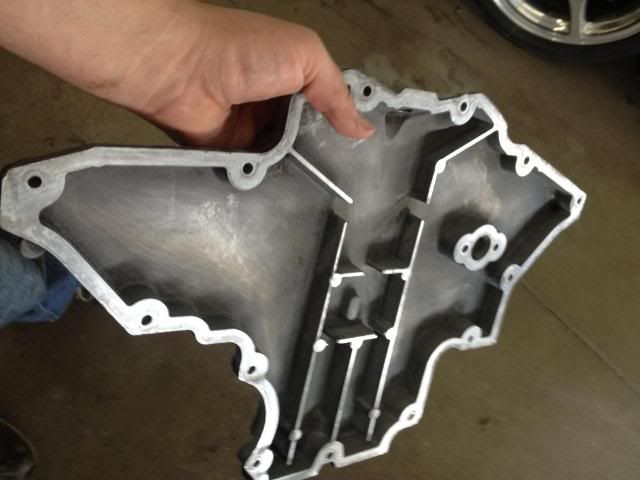
Mmmm clean
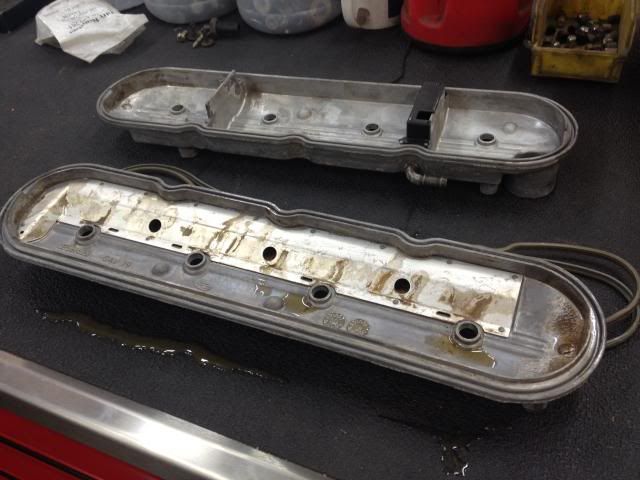
Dirty!
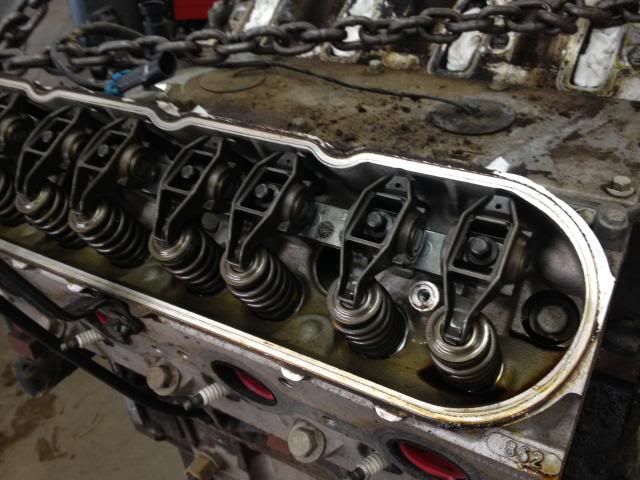
Valvetrain looks good, I'll revisit this to rebuild trunions and valvesprings after we get it fired up.
Anyway, I don't have time to caption all of these right at the moment but here are a bunch of pictures showing what we accomplished this weekend, I'll edit in captions sometime this week. Saturday I had other plans so all of the work you see here was done on Sunday-funday 9am-10pm. Hope you enjoy!
Here's the 4.8 before I got it loaded up at the junkyard

New wheel painted and installed with NRG release


Crappy pic, but here's the input shaft all cleaned up:


All dried up after washing:

Hauled the motor home in my Denali, here it is after pulling the intake and coil packs...

Parts washer: oil pan, valve covers, front caliper bodies:


Mmmm clean

Dirty!


Valvetrain looks good, I'll revisit this to rebuild trunions and valvesprings after we get it fired up.
 02-18-2014, 11:40 AM
#4
Staging Lane
Thread Starter
Valve Covers: Clean
Soaping down with diluted Purple Power
Much better:
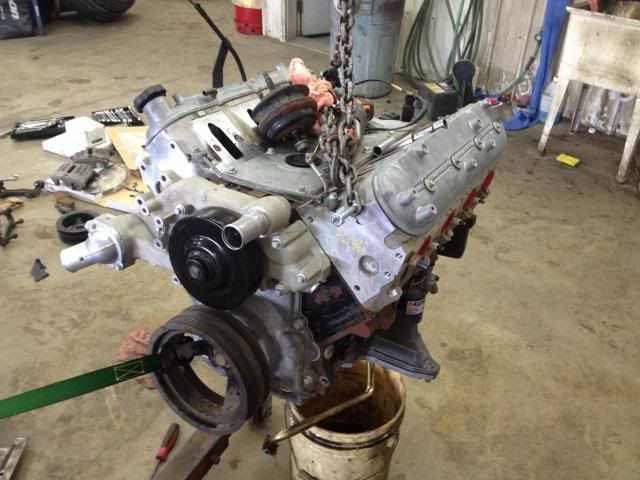
LS3 Crate engine takeoff water pump from the 'bay
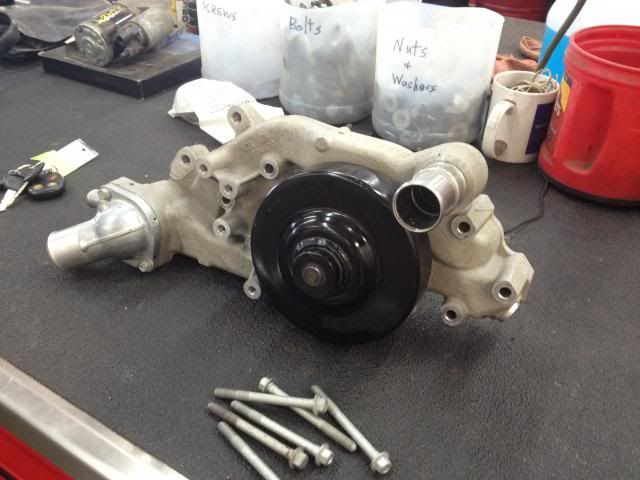
Installed:
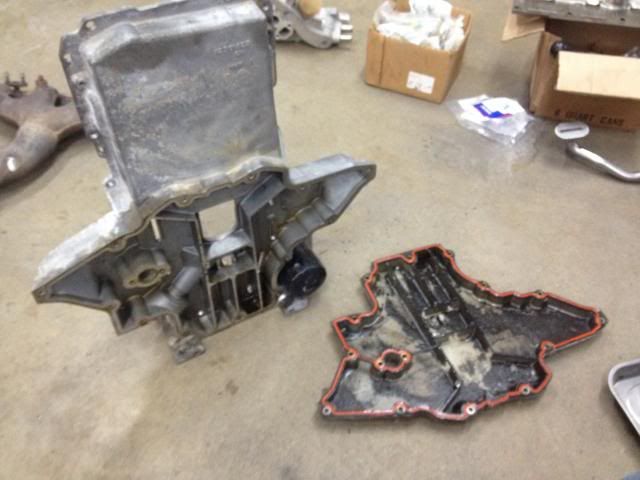
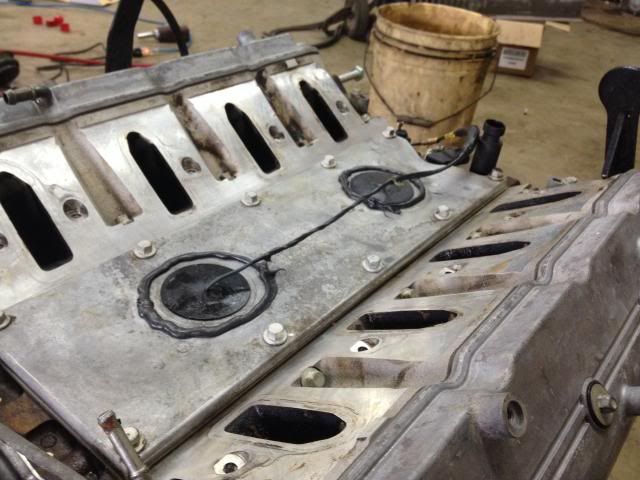
Batwing pan installed with new gasket and pickup tube
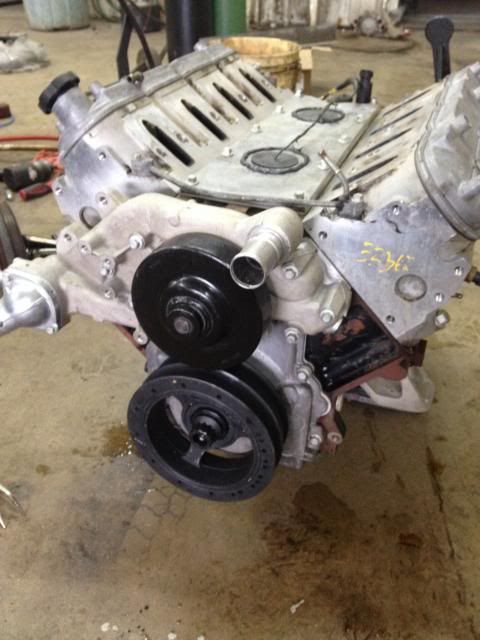
Truck balancer pulled
LS3 Corvette takeoff balancer installed with ARP bolt, it's reusable so that I don't have to buy one if I blow this motor.
Blew the water out from the knock sensor holes and checked for corrosion, everything looked good so I made silicone dams around them before setting on the LS1 intake.

Coil packs from the truck are on as well
Throttle body steam lines need to go
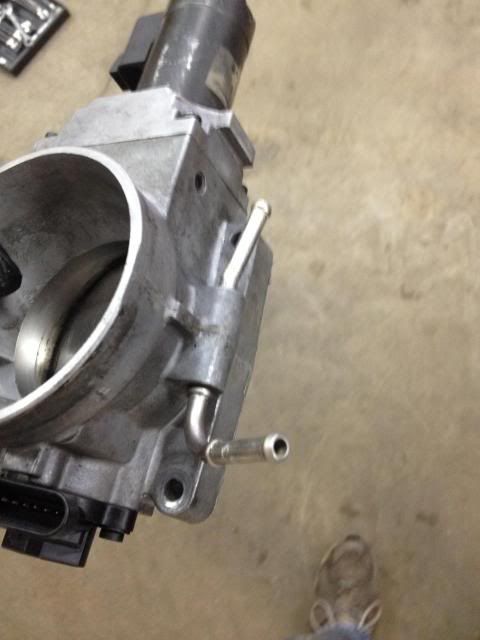
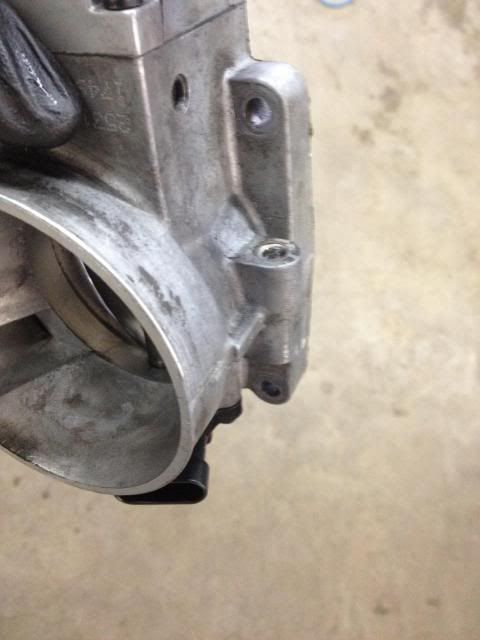
Gone
Manifold EGR ports, need to plug these for EGR delete. Could use a block-off plate, but I wanted something more permanent.
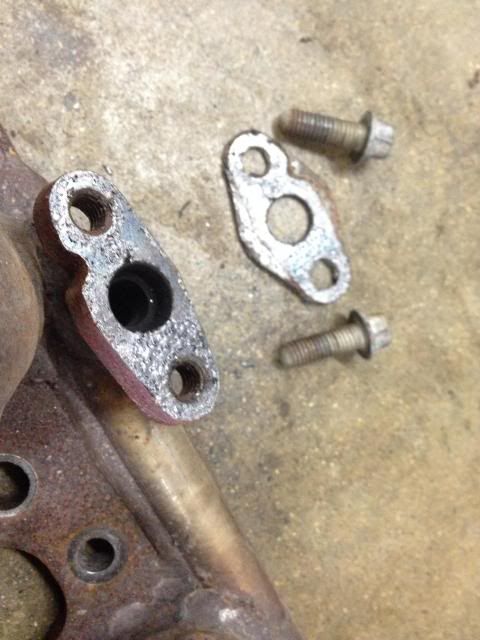
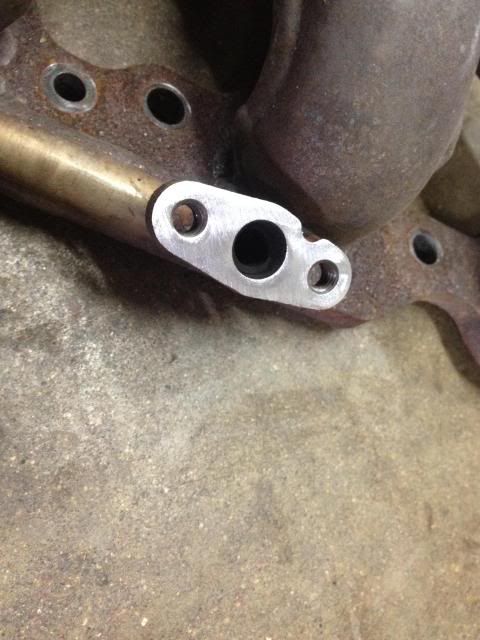
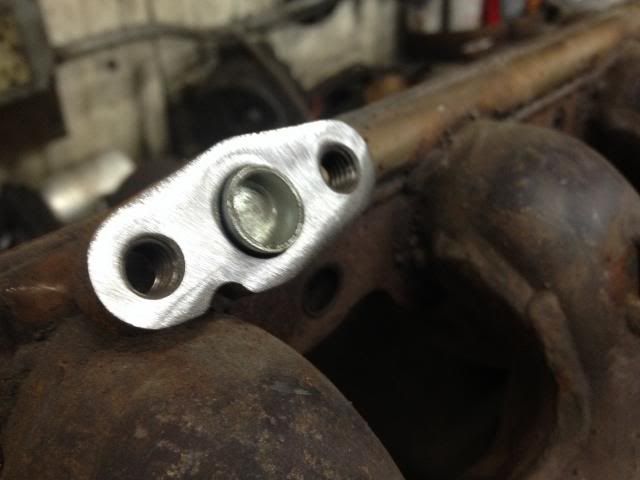
Welded
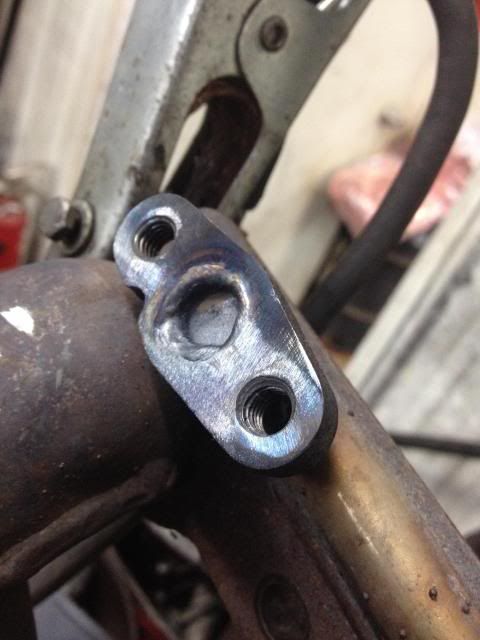
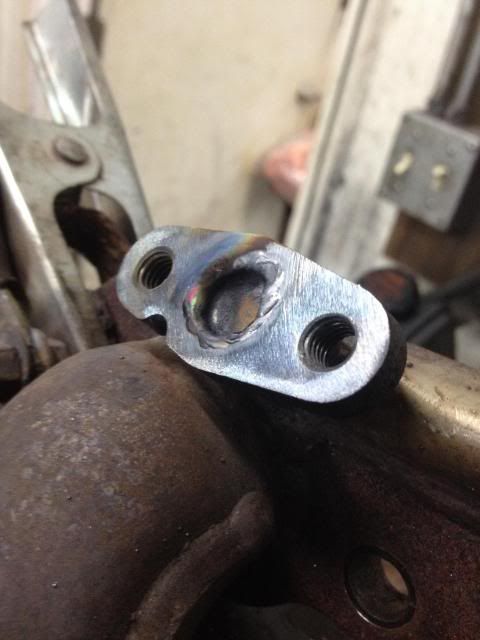
Flanges cleaned up
This is to keep you from getting the impression that I keep my work area tidy :ack:

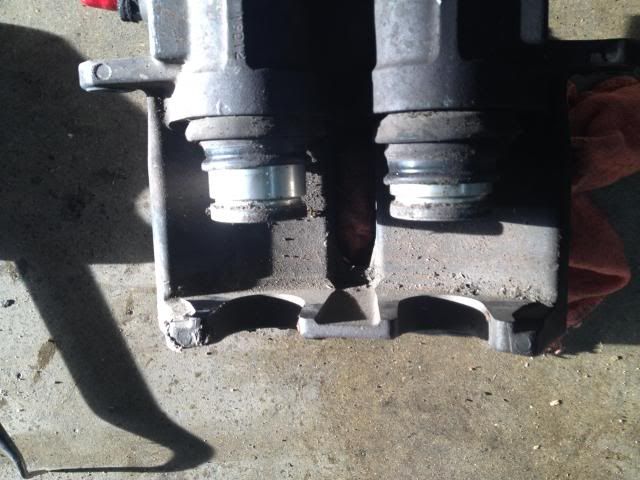
DRM SS Piston Goodness...
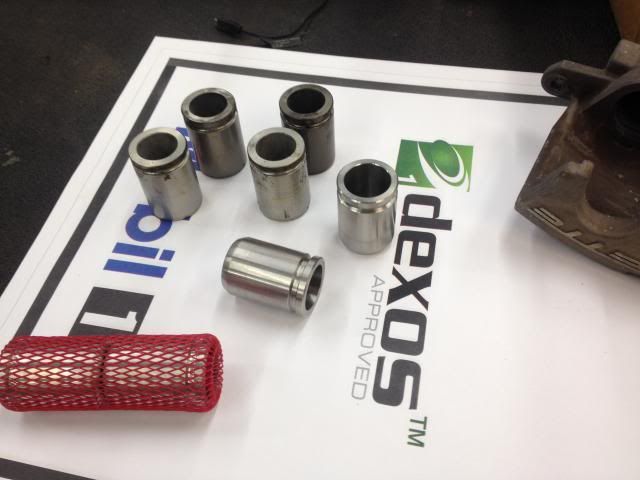
Installed
New GM TOB/Slave installed in preparation for the motor
Throttle Body on
LS6 Flywheel, 8k mile takeoff
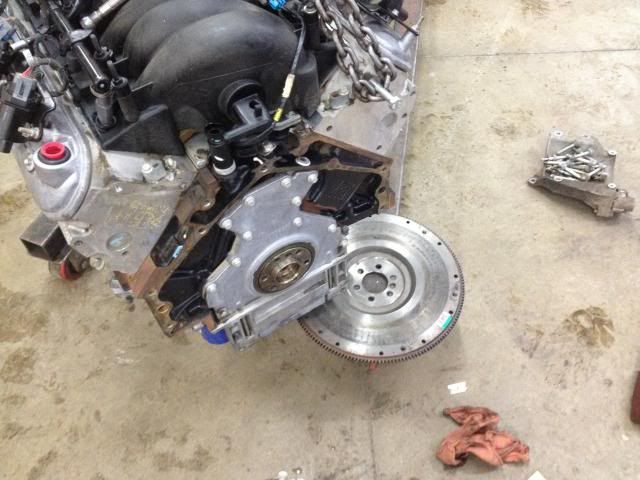
Installed with ARP Bolts for safety
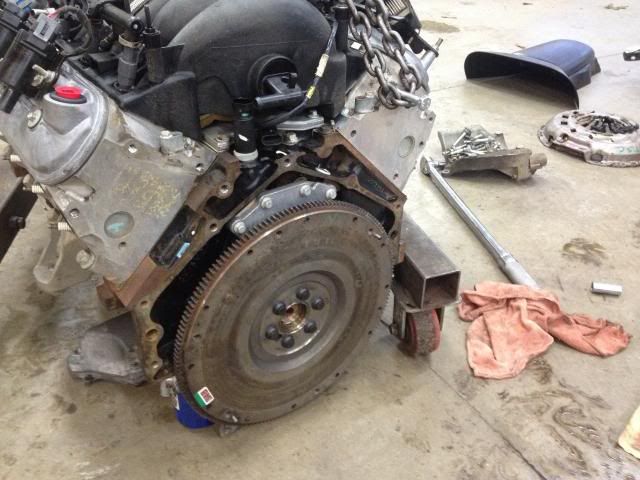
Clutch installed
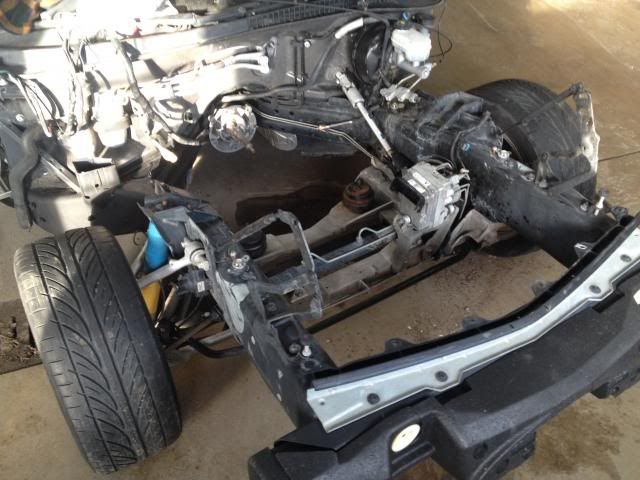
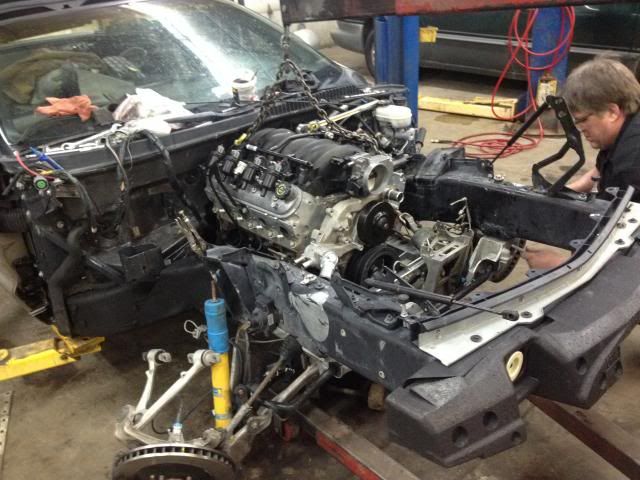
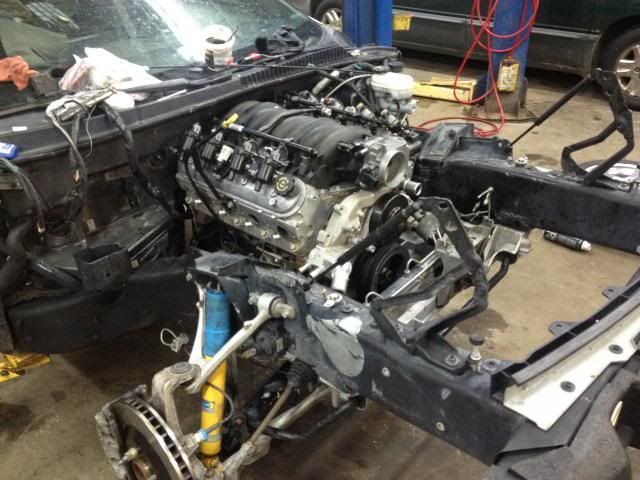
Aaand I skipped a bunch here, but there was cursing, bleeding, more cursing, a little more bleeding, some wrenching, and then bam, it's in place. There's dad reattaching the driver's side Upper Control Arm

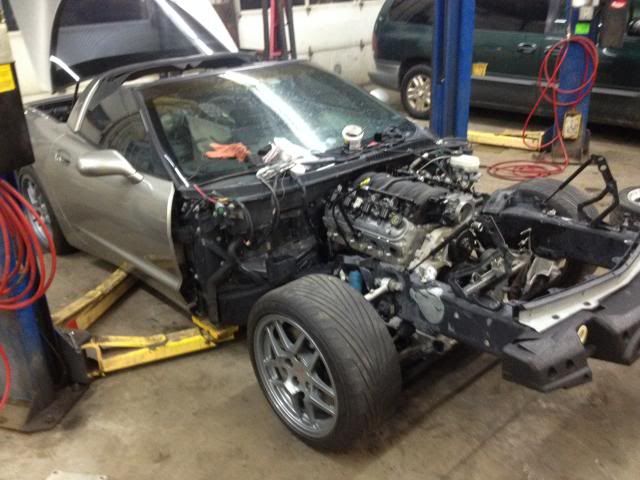
Some Z06 wheels thrown on so that I can sell the thinspokes


Soaping down with diluted Purple Power


Much better:


LS3 Crate engine takeoff water pump from the 'bay

Installed:

Batwing pan installed with new gasket and pickup tube


Truck balancer pulled

LS3 Corvette takeoff balancer installed with ARP bolt, it's reusable so that I don't have to buy one if I blow this motor.

Blew the water out from the knock sensor holes and checked for corrosion, everything looked good so I made silicone dams around them before setting on the LS1 intake.


Coil packs from the truck are on as well

Throttle body steam lines need to go

Gone

Manifold EGR ports, need to plug these for EGR delete. Could use a block-off plate, but I wanted something more permanent.


Welded


Flanges cleaned up

This is to keep you from getting the impression that I keep my work area tidy :ack:

DRM SS Piston Goodness...

Installed

New GM TOB/Slave installed in preparation for the motor

Throttle Body on

LS6 Flywheel, 8k mile takeoff

Installed with ARP Bolts for safety

Clutch installed

Aaand I skipped a bunch here, but there was cursing, bleeding, more cursing, a little more bleeding, some wrenching, and then bam, it's in place. There's dad reattaching the driver's side Upper Control Arm


Some Z06 wheels thrown on so that I can sell the thinspokes


 02-18-2014, 11:40 AM
#5
Staging Lane
Thread Starter

We made solid aluminum motor mounts, you can see a bit of them here


That's all for now, more to come next weekend, hopefully be able to start it by then so stay tuned


 04-03-2014, 11:01 PM
#7
Staging Lane
Thread Starter

I've used plywood on other cars for the splitter, it's not ideal but wrapping it in fiberglass cloth helps. I also have 1/2" Starboard that would work well.
Trending Topics
 05-14-2014, 01:43 PM
#9
Staging Lane
Thread Starter
Sorry for the hiatus, been working on the car but haven't kept the thread updated.
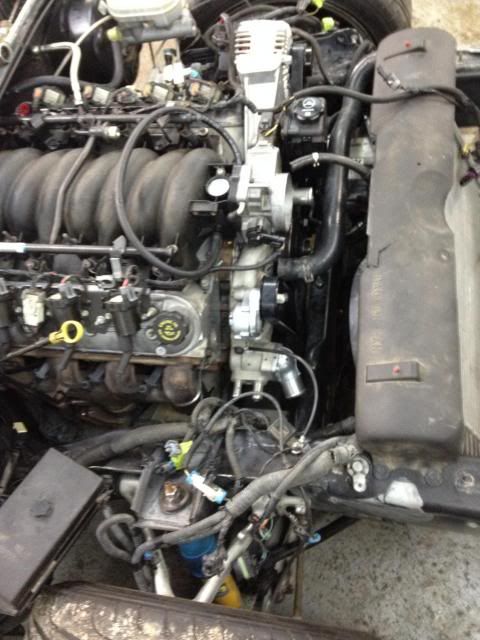
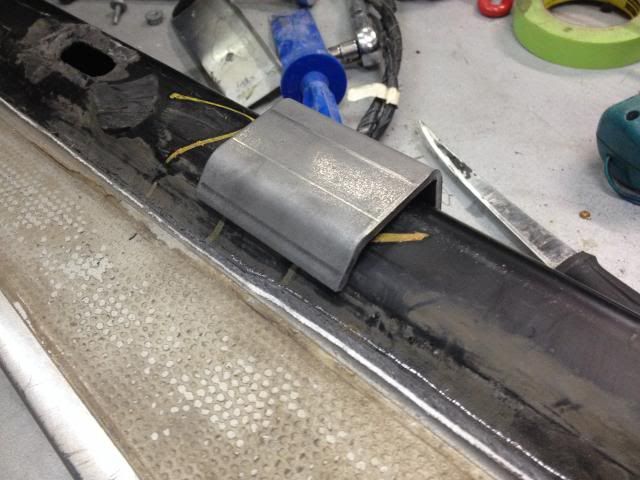
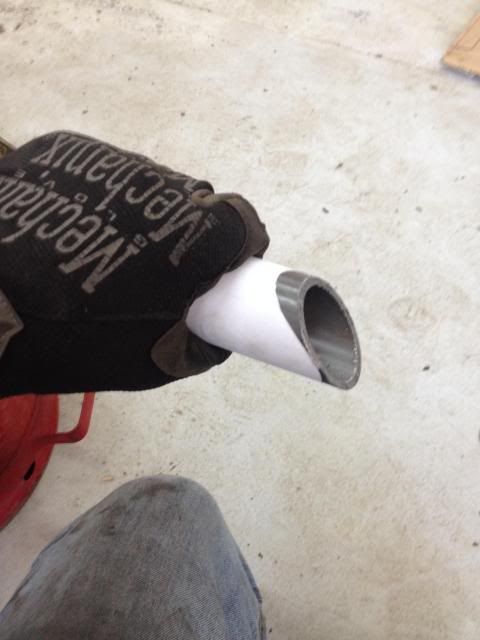
The truck steam line interfered with the LS1 intake, so I cut it apart and created hose ribs with a flaring tool, then cut off and welded the original outlet closed. Having these divorced, I'll just run a rubber hose to each side and combine them before running to the tank. Cheap and easy but still fairly clean.

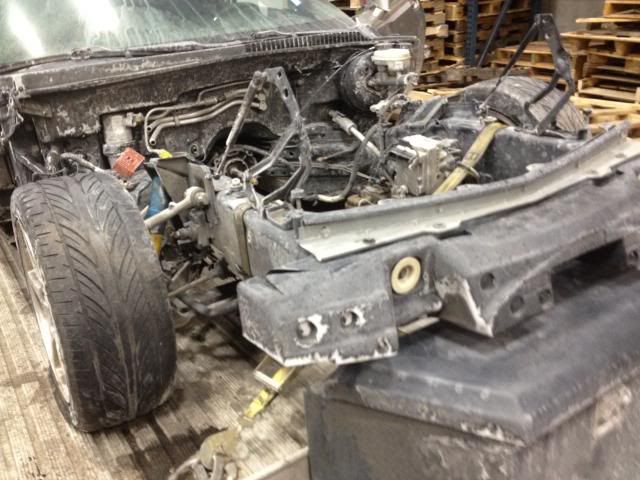
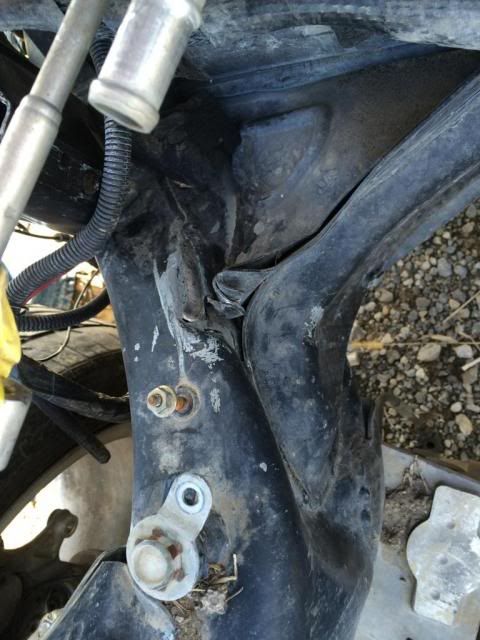
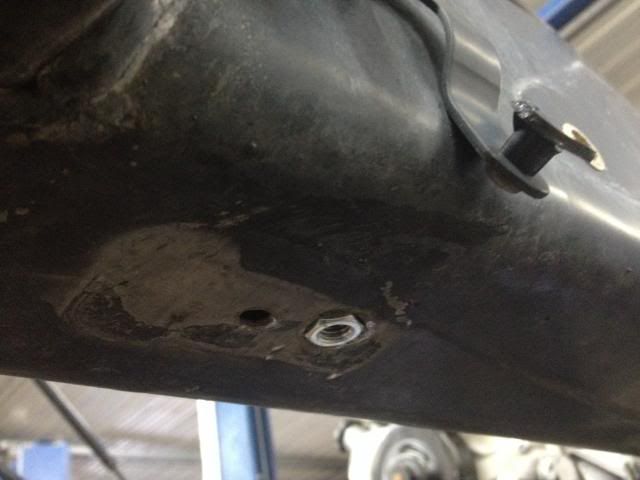
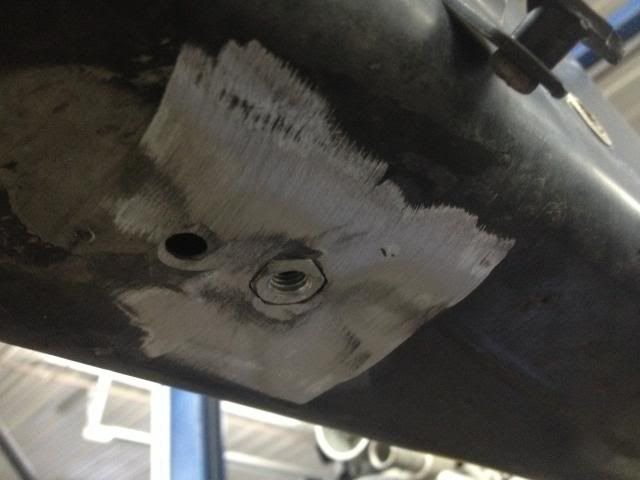
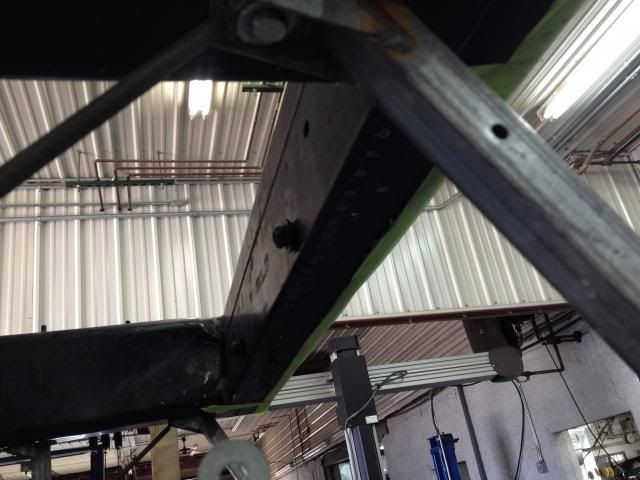
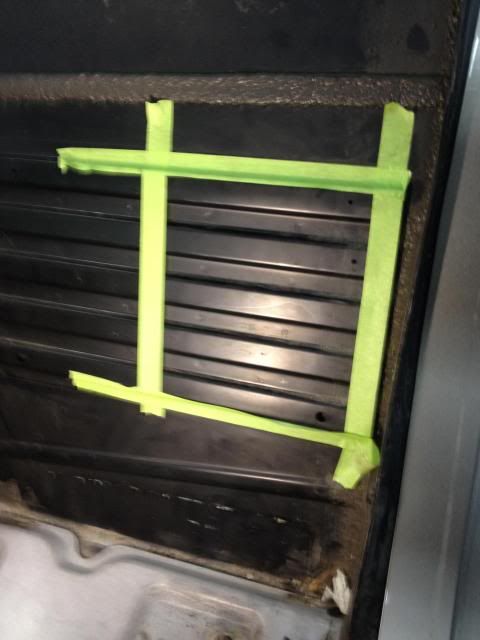
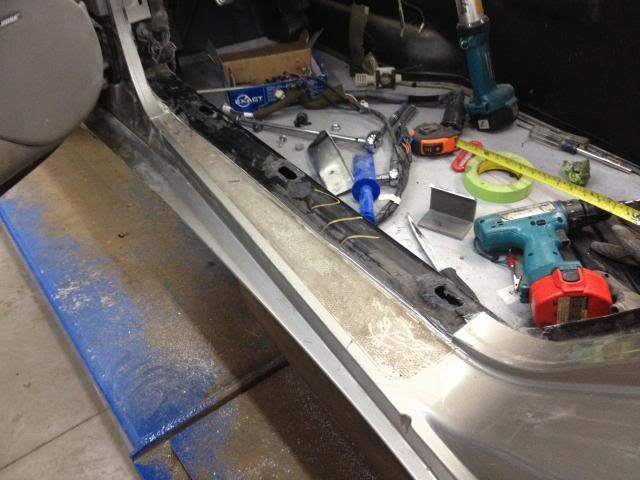
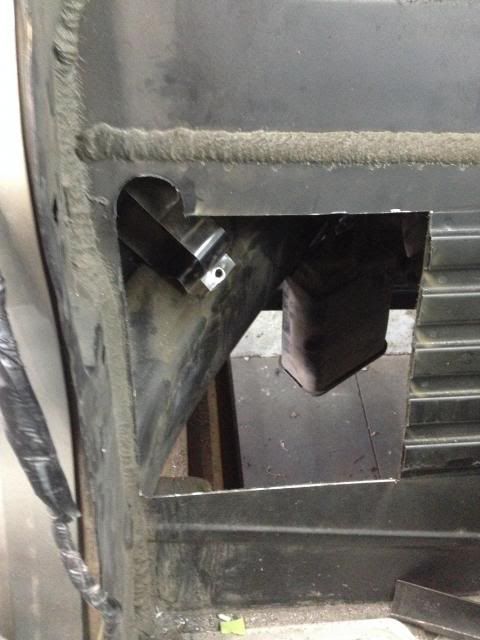
Stuck storing it outside until I get it back to my garage, the MN weather hit it with some snow The radiator cage was pulled from the frame in the wreck, which ripped out 3 of the 4 riv-nuts and tweaked the holes. My solution was to straighten the holes and weld regular nuts into the holes, then grind flush and paint.

I'll paint this cage later, it's going to be modified a bit so I'm just using it to assemble the car in stock form at this point.
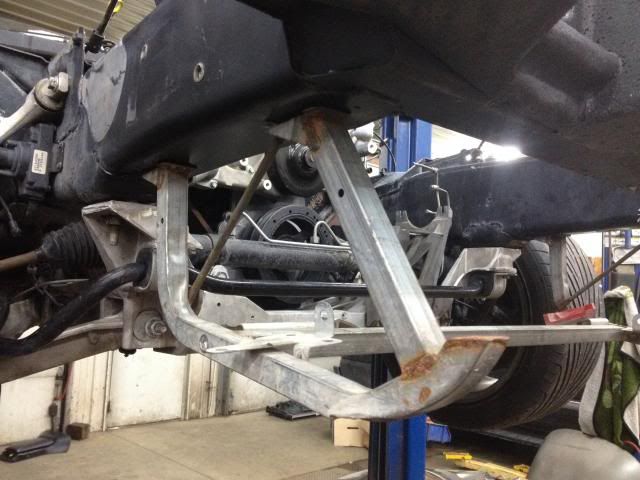
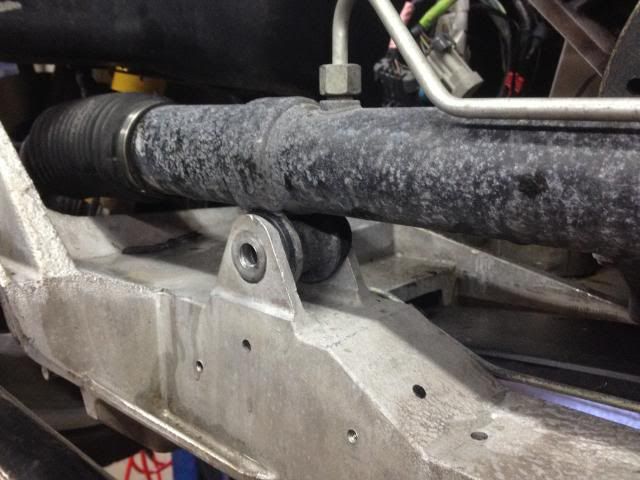
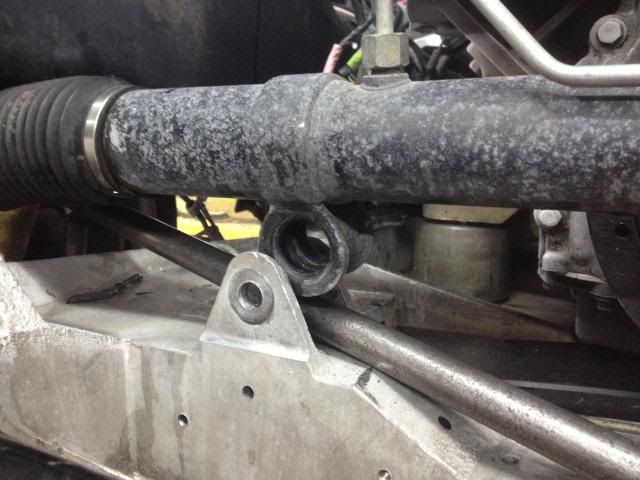
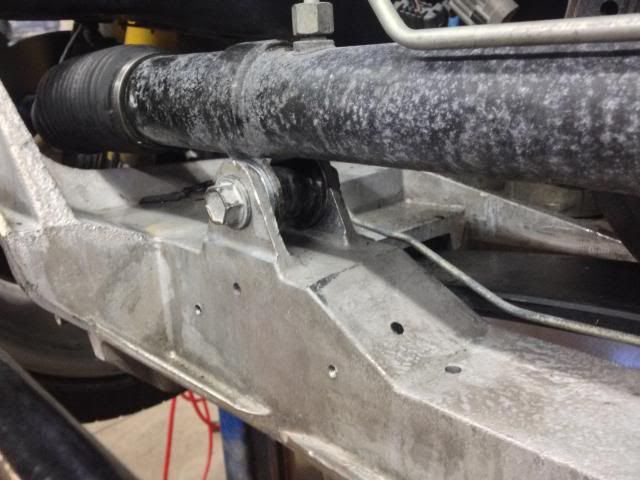
Replaced the stock rubber rack bushing with a solid aluminum one from DRM. It fit perfectly, I just nipped off one side of the flange to make the install easier with the rack still in the car.
Stock:
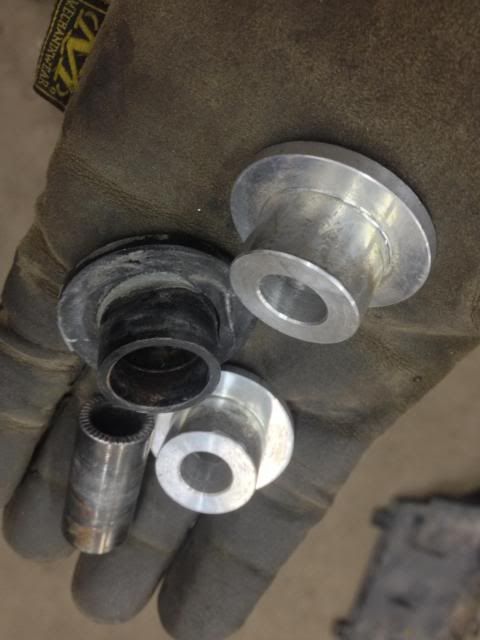
Old vs. New
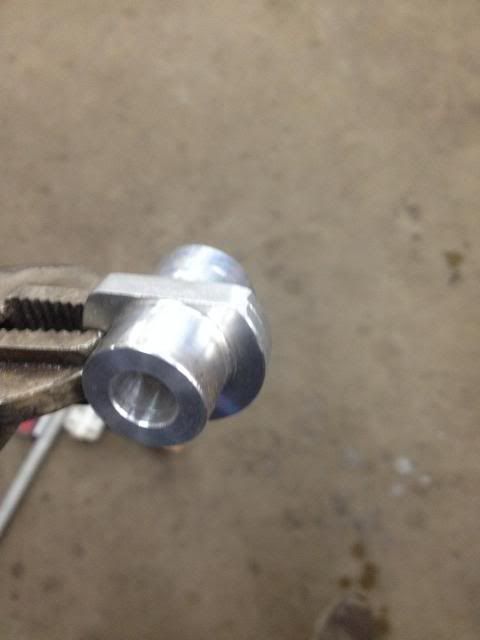
Ground flange for clearance
Stock piece removed
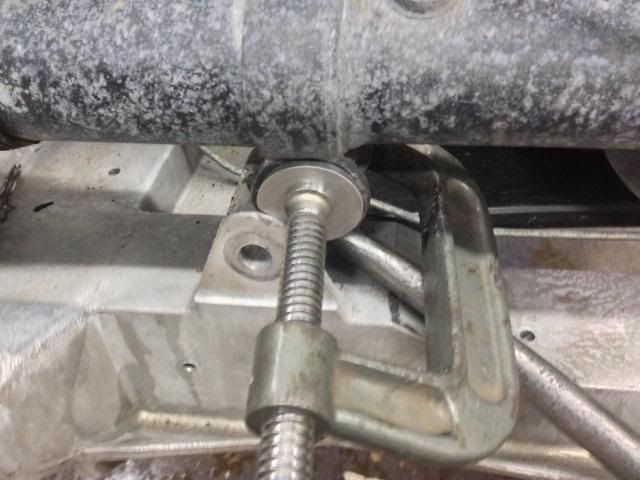
High-tech bushing press tool
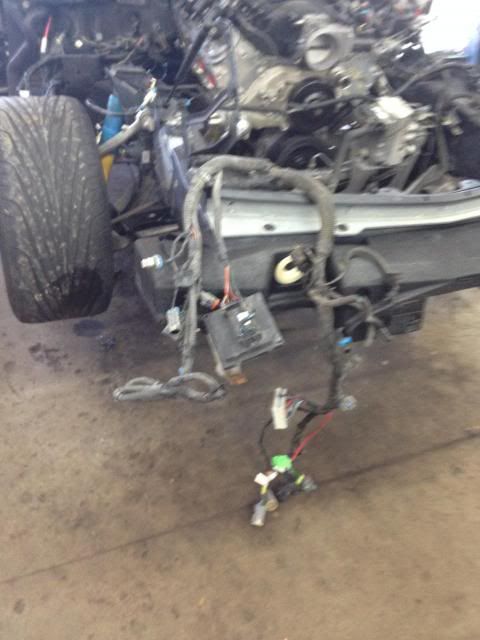
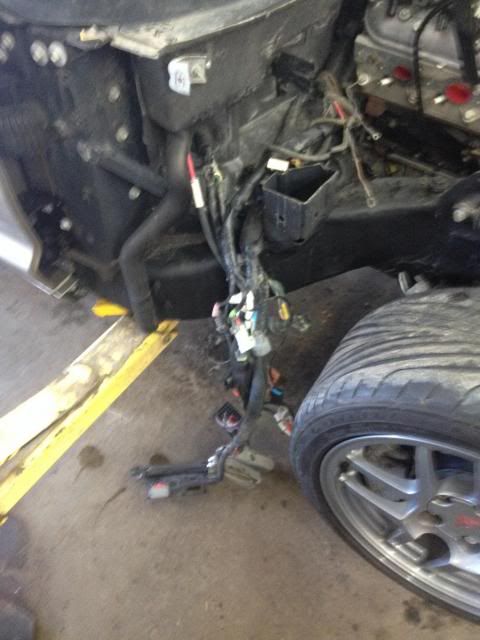
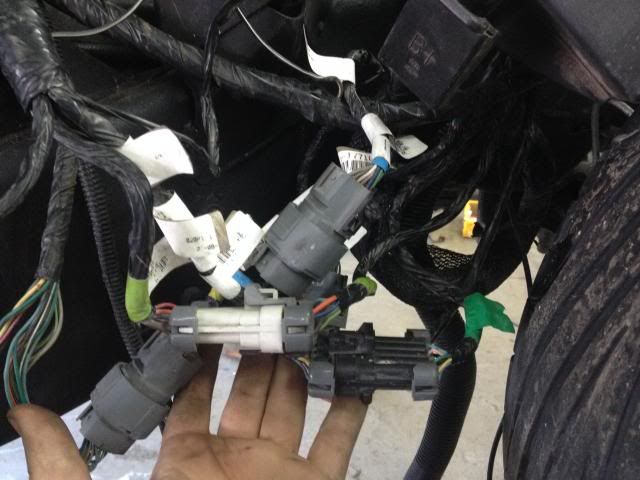
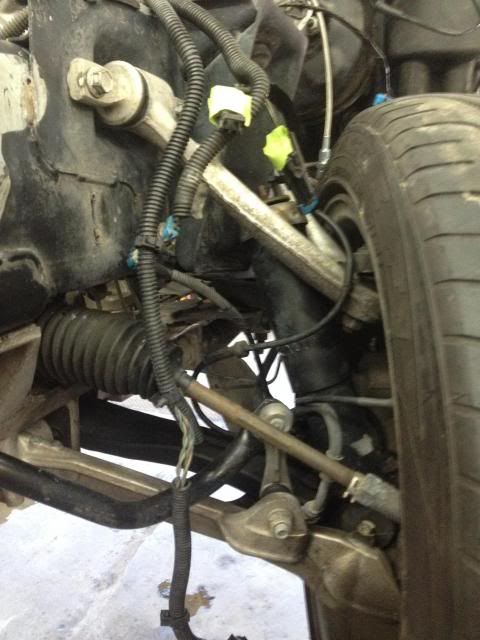
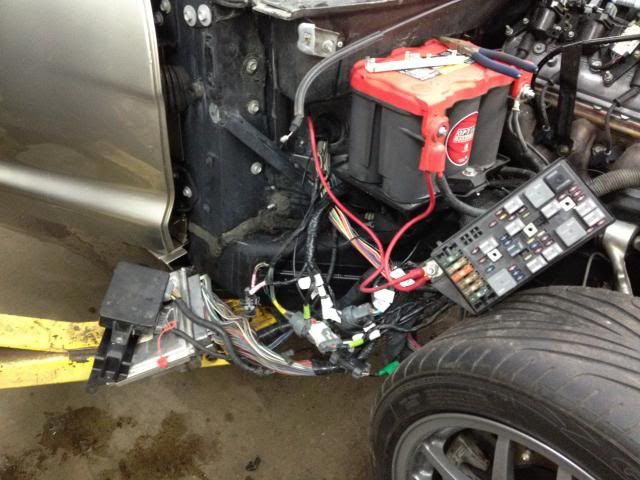
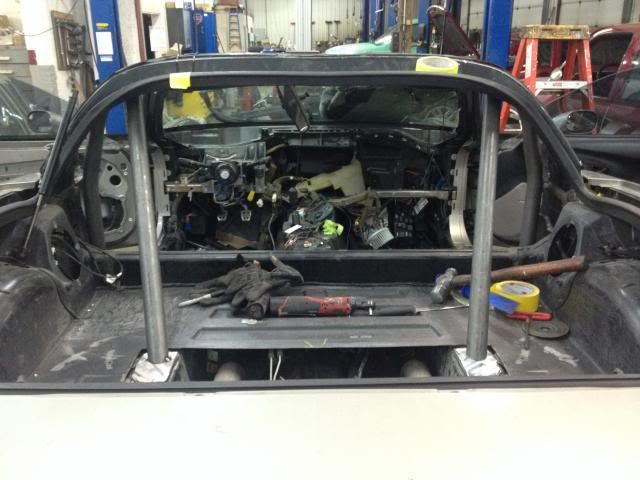
I had to lay out the wiring in order to determine where everything is supposed to run. I've never had one of these cars apart before so this has been a bit of a learning experience but it's really not bad at all.
Headlight wiring, this will get tidied up later.
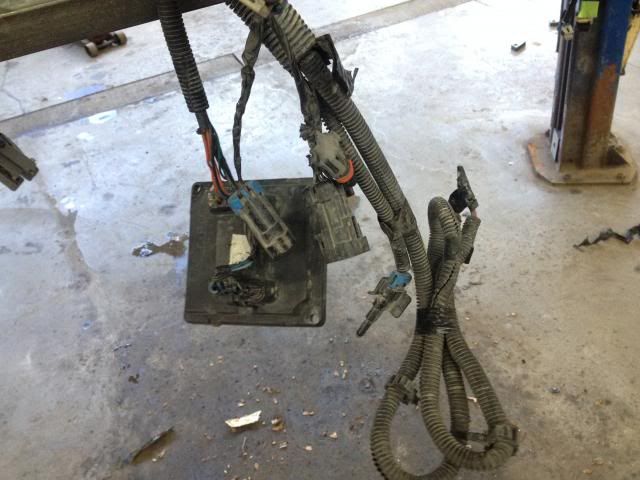
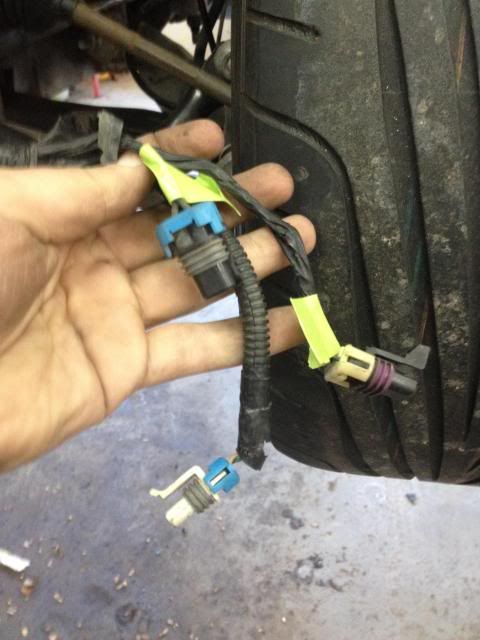
F45 Electronic Shock wiring and ABS speed sensor wiring, the taped up plugs are for the F45 and will be removed as they'll never be used again.
Apparently I missed a bunch of progress pictures so I'll have to take some next weekend. The motor is still missing accessories that I need to order, but it's otherwise ready to run. I fought with NO COMM issues all weekend before realizing that my PCM had been bricked. The wiring is now all in place and I'm almost ready to put the front end back on. I'll be out of town next weekend but I'm hoping to have a productive weekend at the end of March with a lot of new goodies to bolt on.
Thanks for watching!
The truck steam line interfered with the LS1 intake, so I cut it apart and created hose ribs with a flaring tool, then cut off and welded the original outlet closed. Having these divorced, I'll just run a rubber hose to each side and combine them before running to the tank. Cheap and easy but still fairly clean.


Stuck storing it outside until I get it back to my garage, the MN weather hit it with some snow
The radiator cage was pulled from the frame in the wreck, which ripped out 3 of the 4 riv-nuts and tweaked the holes. My solution was to straighten the holes and weld regular nuts into the holes, then grind flush and paint.


I'll paint this cage later, it's going to be modified a bit so I'm just using it to assemble the car in stock form at this point.


Replaced the stock rubber rack bushing with a solid aluminum one from DRM. It fit perfectly, I just nipped off one side of the flange to make the install easier with the rack still in the car.
Stock:

Old vs. New

Ground flange for clearance

Stock piece removed

High-tech bushing press tool


I had to lay out the wiring in order to determine where everything is supposed to run. I've never had one of these cars apart before so this has been a bit of a learning experience but it's really not bad at all.


Headlight wiring, this will get tidied up later.

F45 Electronic Shock wiring and ABS speed sensor wiring, the taped up plugs are for the F45 and will be removed as they'll never be used again.


Apparently I missed a bunch of progress pictures so I'll have to take some next weekend. The motor is still missing accessories that I need to order, but it's otherwise ready to run. I fought with NO COMM issues all weekend before realizing that my PCM had been bricked. The wiring is now all in place and I'm almost ready to put the front end back on. I'll be out of town next weekend but I'm hoping to have a productive weekend at the end of March with a lot of new goodies to bolt on.
Thanks for watching!
05-14-2014, 01:43 PM
#10
Staging Lane
Thread Starter
Sorry for the hiatus, been working on the car but haven't kept the thread updated.
The truck steam line interfered with the LS1 intake, so I cut it apart and created hose ribs with a flaring tool, then cut off and welded the original outlet closed. Having these divorced, I'll just run a rubber hose to each side and combine them before running to the tank. Cheap and easy but still fairly clean.
Stuck storing it outside until I get it back to my garage, the MN weather hit it with some snow The radiator cage was pulled from the frame in the wreck, which ripped out 3 of the 4 riv-nuts and tweaked the holes. My solution was to straighten the holes and weld regular nuts into the holes, then grind flush and paint.
I'll paint this cage later, it's going to be modified a bit so I'm just using it to assemble the car in stock form at this point.
Replaced the stock rubber rack bushing with a solid aluminum one from DRM. It fit perfectly, I just nipped off one side of the flange to make the install easier with the rack still in the car.
Stock:
Old vs. New
Ground flange for clearance
Stock piece removed
High-tech bushing press tool
I had to lay out the wiring in order to determine where everything is supposed to run. I've never had one of these cars apart before so this has been a bit of a learning experience but it's really not bad at all.
Headlight wiring, this will get tidied up later.
F45 Electronic Shock wiring and ABS speed sensor wiring, the taped up plugs are for the F45 and will be removed as they'll never be used again.
Apparently I missed a bunch of progress pictures so I'll have to take some next weekend. The motor is still missing accessories that I need to order, but it's otherwise ready to run. I fought with NO COMM issues all weekend before realizing that my PCM had been bricked. The wiring is now all in place and I'm almost ready to put the front end back on. I'll be out of town next weekend but I'm hoping to have a productive weekend at the end of March with a lot of new goodies to bolt on.
Thanks for watching!
The truck steam line interfered with the LS1 intake, so I cut it apart and created hose ribs with a flaring tool, then cut off and welded the original outlet closed. Having these divorced, I'll just run a rubber hose to each side and combine them before running to the tank. Cheap and easy but still fairly clean.
Stuck storing it outside until I get it back to my garage, the MN weather hit it with some snow
The radiator cage was pulled from the frame in the wreck, which ripped out 3 of the 4 riv-nuts and tweaked the holes. My solution was to straighten the holes and weld regular nuts into the holes, then grind flush and paint.I'll paint this cage later, it's going to be modified a bit so I'm just using it to assemble the car in stock form at this point.
Replaced the stock rubber rack bushing with a solid aluminum one from DRM. It fit perfectly, I just nipped off one side of the flange to make the install easier with the rack still in the car.
Stock:
Old vs. New
Ground flange for clearance
Stock piece removed
High-tech bushing press tool
I had to lay out the wiring in order to determine where everything is supposed to run. I've never had one of these cars apart before so this has been a bit of a learning experience but it's really not bad at all.
Headlight wiring, this will get tidied up later.
F45 Electronic Shock wiring and ABS speed sensor wiring, the taped up plugs are for the F45 and will be removed as they'll never be used again.
Apparently I missed a bunch of progress pictures so I'll have to take some next weekend. The motor is still missing accessories that I need to order, but it's otherwise ready to run. I fought with NO COMM issues all weekend before realizing that my PCM had been bricked. The wiring is now all in place and I'm almost ready to put the front end back on. I'll be out of town next weekend but I'm hoping to have a productive weekend at the end of March with a lot of new goodies to bolt on.
Thanks for watching!
05-14-2014, 01:44 PM
#11
Staging Lane
Thread Starter
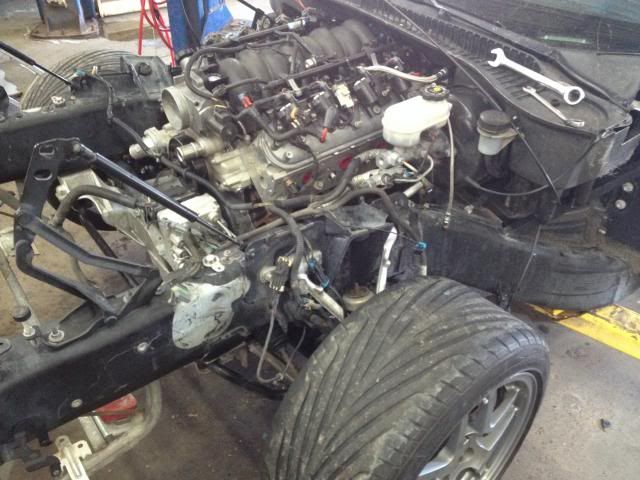
Great news, it runs! Apparently some idiot (namely, yours truly) never hooked up the coil ground when they fitted the harness onto the motor, after some endless diagnostics and testing we found it dangling in the trans tunnel. Hooked it up and Voila, fire and smoke! The car sounds great, my GM Accy Drive kit showed up from Jeg's yesterday so I'll be able to finish off the front of the engine and put the stock radiator in for some basic road testing.
Getting some sun
Rats-nest
It probably won't run now, Rennline Porsche Battery disconnect.

Getting some sun


Rats-nest

It probably won't run now, Rennline Porsche Battery disconnect.


 05-14-2014, 01:44 PM
#13
Staging Lane
Thread Starter
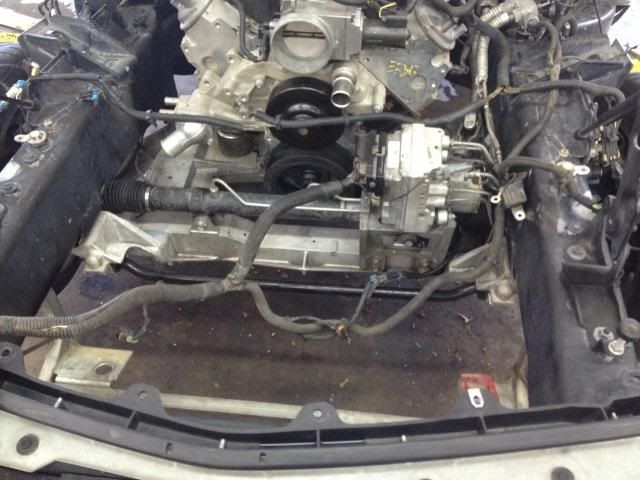
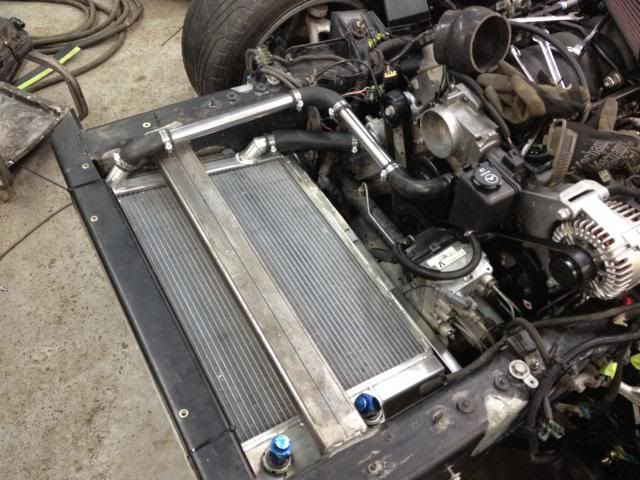
Had a decent weekend on the Corvette, Saturday I was busy with a family even most of the day, but still managed a fair amount of progress in the time I had available. I got the accessory drive installed and managed to get the radiator position mocked up.
Love me some new parts, this accessory drive kit is a fantastic value, for just over $500 shipped there is absolutely no reason to scrounge for used parts.
Blurry, ack.
PS/Alternator bracket in place, tight quarters with the EBCM here.
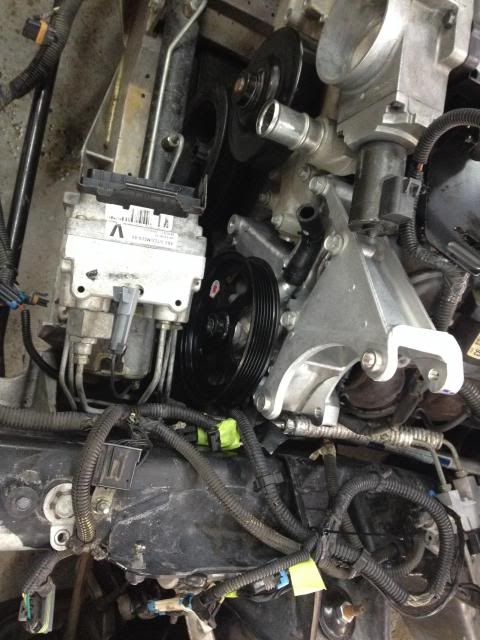
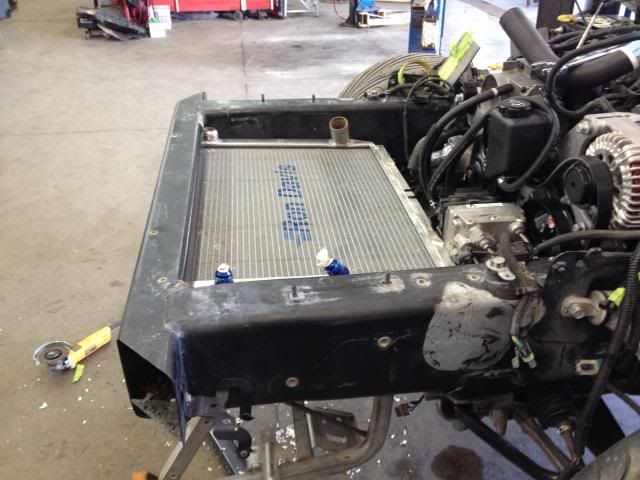
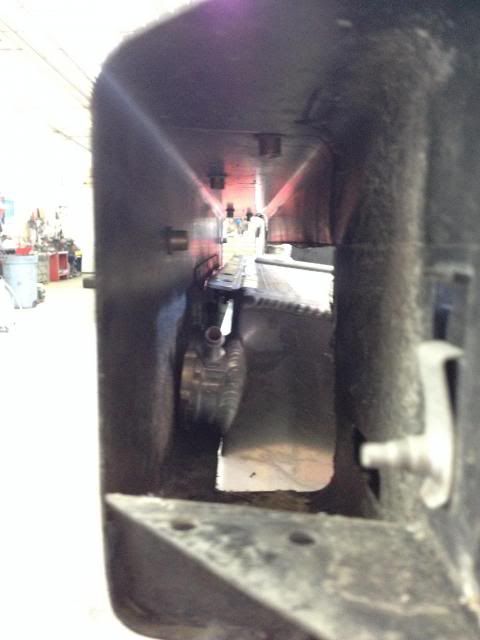
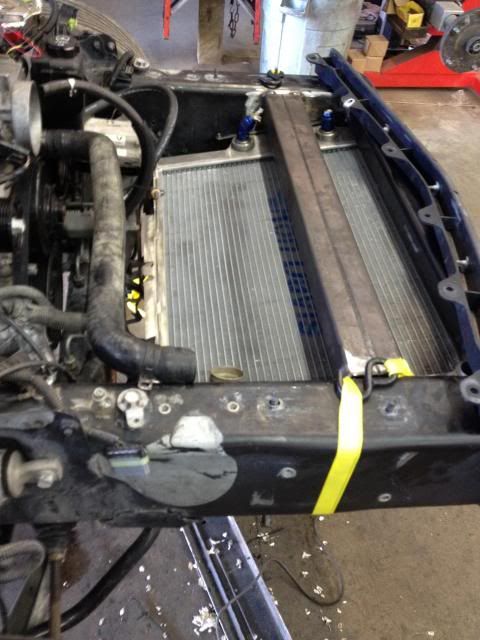
Everything bolted on, my PS pressure hose didn't show up so I had to loop it for now. Radiator in place to check fitment and wire routing, I absolutely hate how tight it is to work in here, GM should have laid it forward from the start. :toetap:
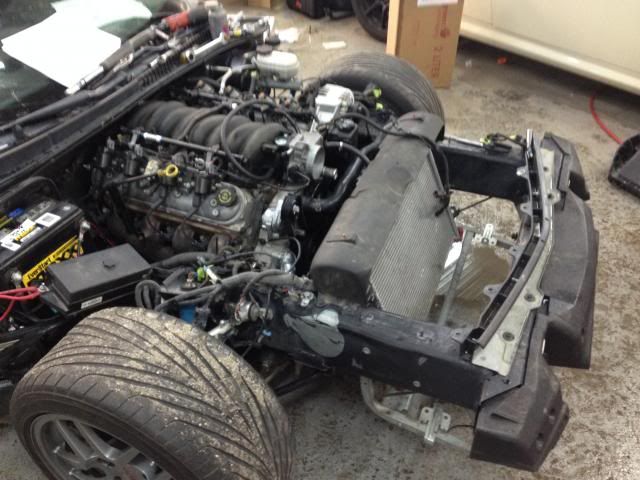
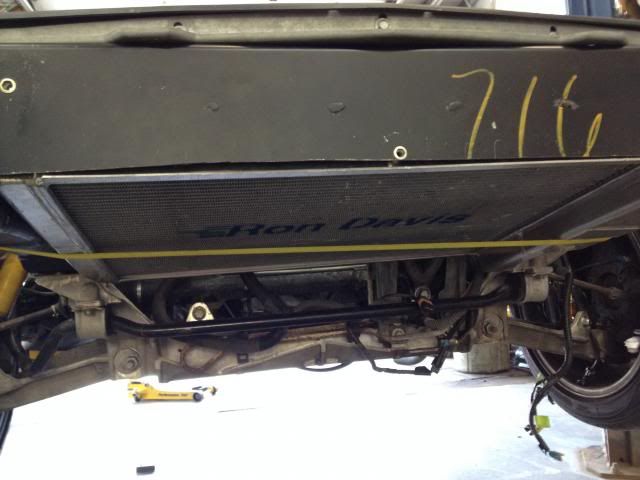
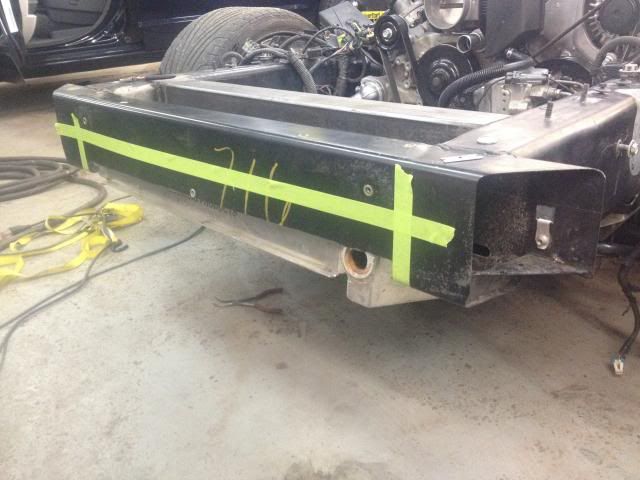
New radiator, unfortunately it's too tall in this position. This is a Ron Davis radiator that Randy found me used from Joe Gibbs. It's a pretty standard size and the oil cooler is huge so the little 4.8 should live a long, happy life.
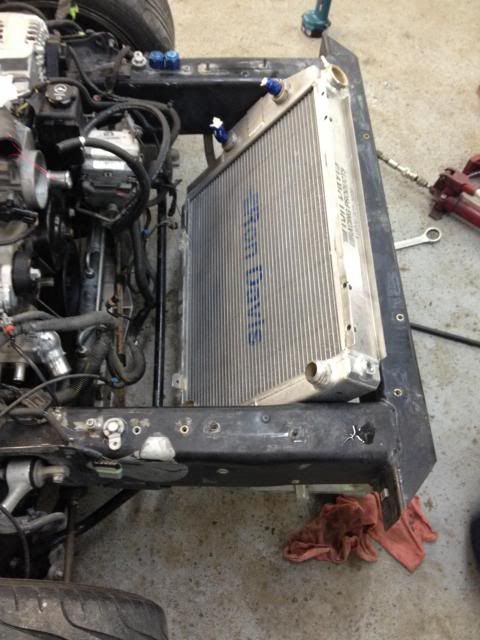
Might work better with some material removed from the crash bar. I'm not cutting into the frame rails at all, the series I'm in doesn't care but I'd like it to be legal for other series later if I sell it.
Peeled open a bit, there's an internal support that needs to be cut.
Gone

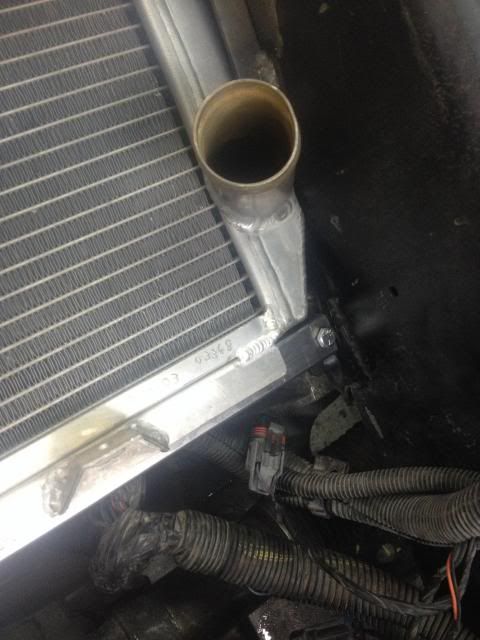
This might work, there will be a front splitter ducted to the radiator and the hood will be ducted to the topside. I'll have to run a different thermostat housing to make the lower hose fit, but the upper hose will be no problem.
Needs more clearance though....
Here too
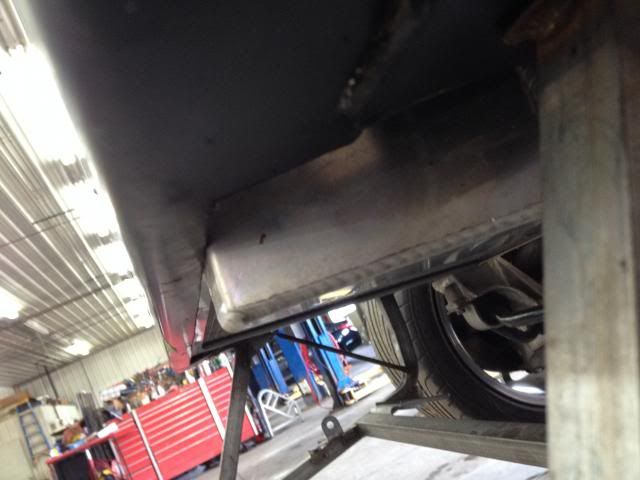
What the hell, we'll make it install from below. The cut in this picture is actually straight, but the material sprung out when I cut it, I'll fix this later.
Filler neck will get cut off and capped.
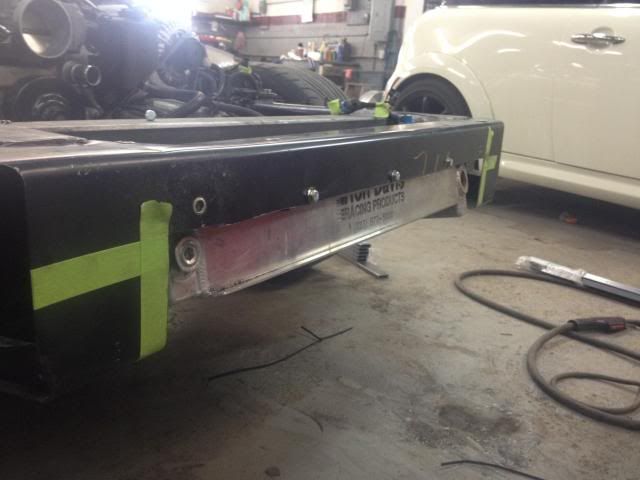
Added a spreader bar back in to restore some strength. I honestly would have cut the front bar out completely but I like having the factory attachment points for the trim pieces in their original place.
That's it for now, I need more material to finish mounting the radiator. It installs from below and will be accessible without removing much of the front body work or splitter.
Love me some new parts, this accessory drive kit is a fantastic value, for just over $500 shipped there is absolutely no reason to scrounge for used parts.

Blurry, ack.

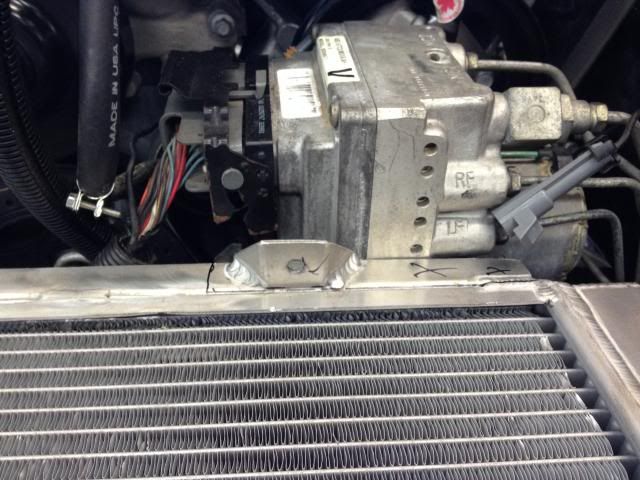
PS/Alternator bracket in place, tight quarters with the EBCM here.

Everything bolted on, my PS pressure hose didn't show up so I had to loop it for now. Radiator in place to check fitment and wire routing, I absolutely hate how tight it is to work in here, GM should have laid it forward from the start. :toetap:


New radiator, unfortunately it's too tall in this position. This is a Ron Davis radiator that Randy found me used from Joe Gibbs. It's a pretty standard size and the oil cooler is huge so the little 4.8 should live a long, happy life.

Might work better with some material removed from the crash bar. I'm not cutting into the frame rails at all, the series I'm in doesn't care but I'd like it to be legal for other series later if I sell it.

Peeled open a bit, there's an internal support that needs to be cut.

Gone


This might work, there will be a front splitter ducted to the radiator and the hood will be ducted to the topside. I'll have to run a different thermostat housing to make the lower hose fit, but the upper hose will be no problem.

Needs more clearance though....

Here too

What the hell, we'll make it install from below. The cut in this picture is actually straight, but the material sprung out when I cut it, I'll fix this later.

Filler neck will get cut off and capped.

Added a spreader bar back in to restore some strength. I honestly would have cut the front bar out completely but I like having the factory attachment points for the trim pieces in their original place.

That's it for now, I need more material to finish mounting the radiator. It installs from below and will be accessible without removing much of the front body work or splitter.
05-14-2014, 01:45 PM
#14
Staging Lane
Thread Starter
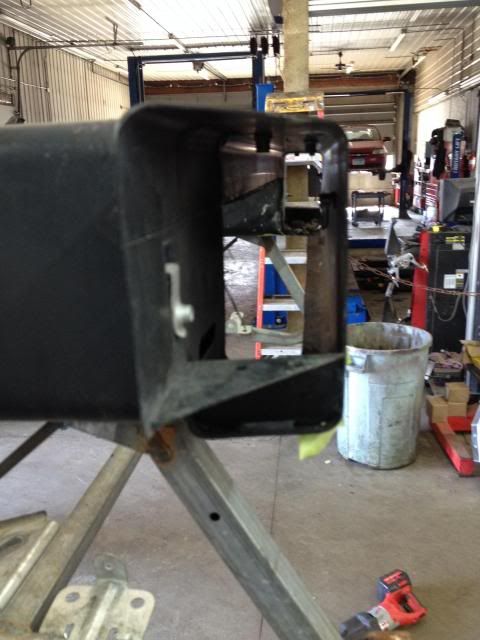
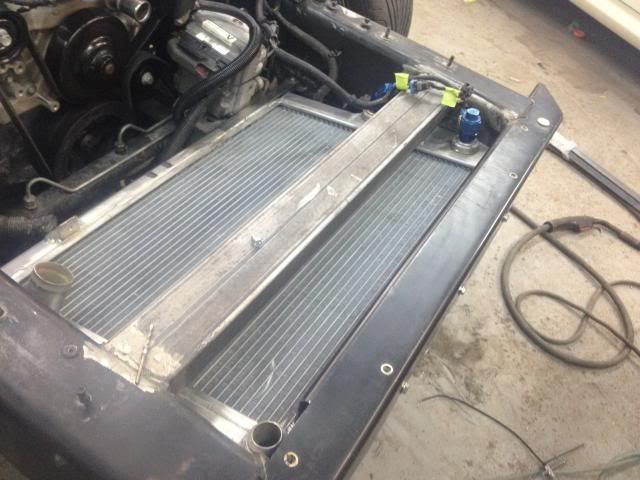
First on my list for the weekend was to finish mounting the radiator. I started by cutting a 1/2x1 16ga tube off to fit between the frame rails, then drilling a hole in each end for bolting. I then made a couple of 1/8" thick tabs that will be welded onto the frame on each side so that this bar can be bolted in. I wanted it removable because it's right in front of the engine and EBCM, so it would be a real PITA if it were welded in place.
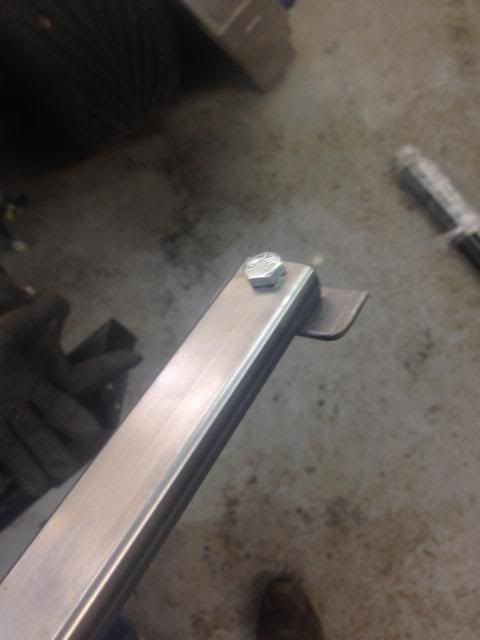
So, I mocked the radiator into position, then slid this bar in to mark its location with a scribe. I measured from these marks to the rest of the frame to make sure it was square and even.
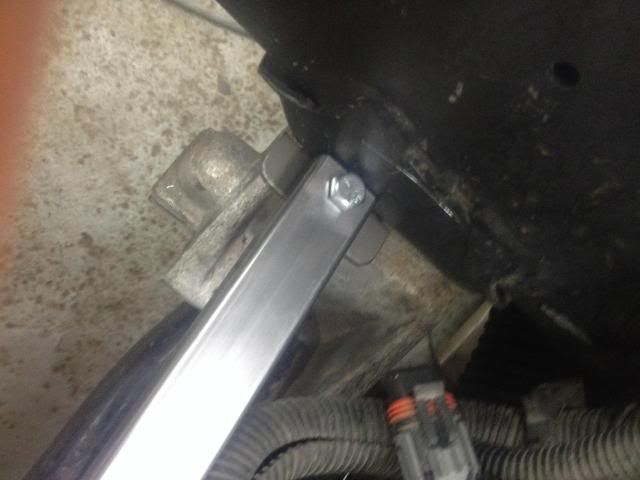
Then I ground the paint off without removing my marks, and welded the tabs into place. The bottom flange of the radiator now sits on this tube like so...
....which made me realize that I needed more clearance up front. Out comes the sawzall.
Much better. This allowed me to capture the top of the radiator by bolting in a 3/4" square tube through the front of the old bumper. The radiator is now secured into place (Will add foam strips later to protect it) without actually fastening through the radiator. I try to avoid bolting to the radiator because chassis flex and vibration can cause it to crack over time.
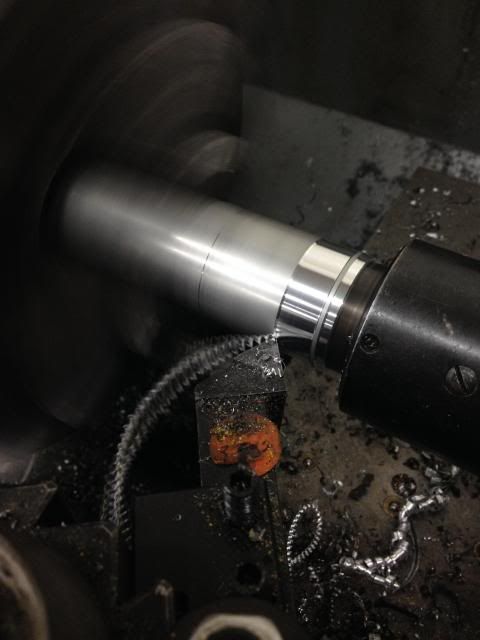
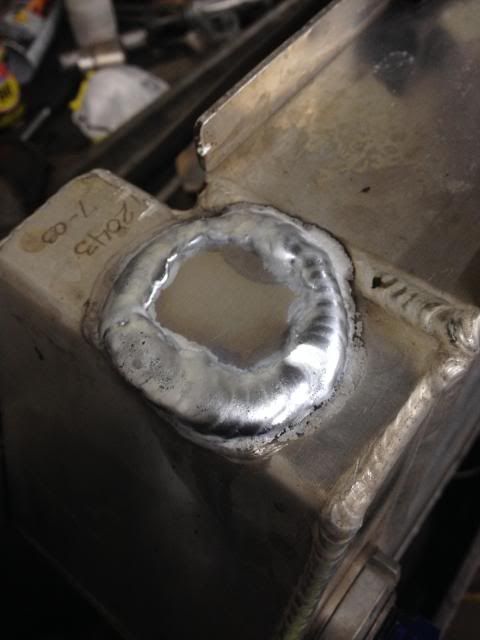
Then it was time to rework the inlet/outlet arrangement, so I started by making a nipple.
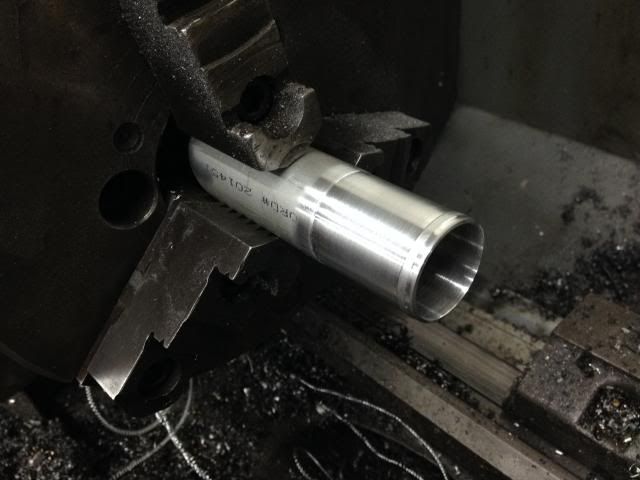
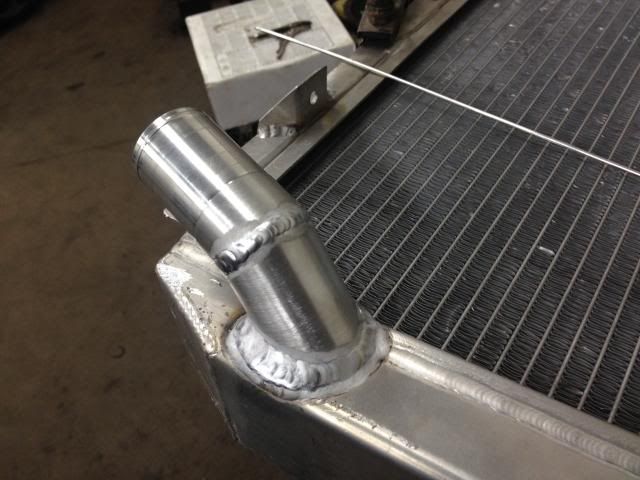
Then I cut it up, turned it, cut it again, and voila, glued it onto the radiator tank. (Please excuse my welding, still practicing my aluminum skills :*****
Then I made a cap for where the radiator cap used to be.
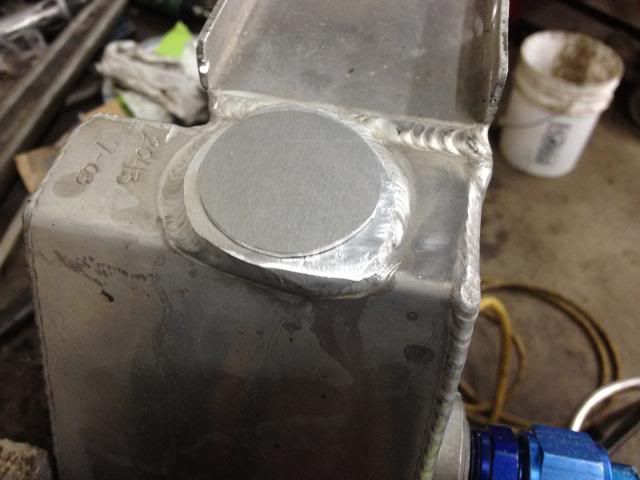
This welding was even worse than the last one by the time I got it sealed up
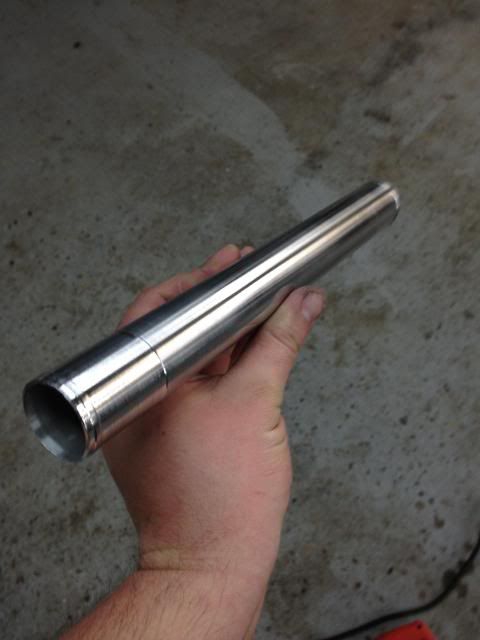
I also made aluminum straights for my upper hose
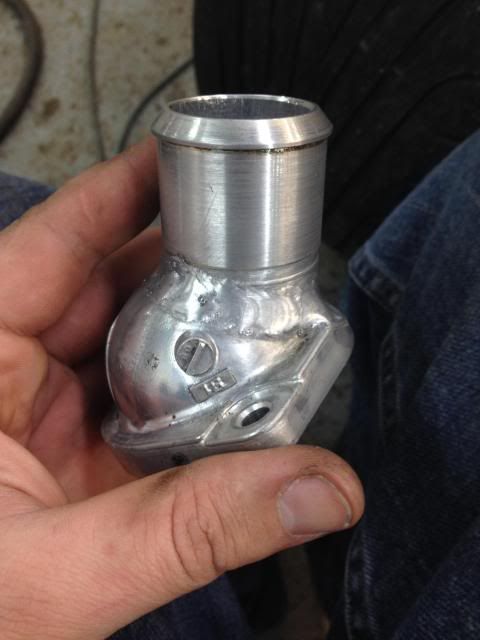
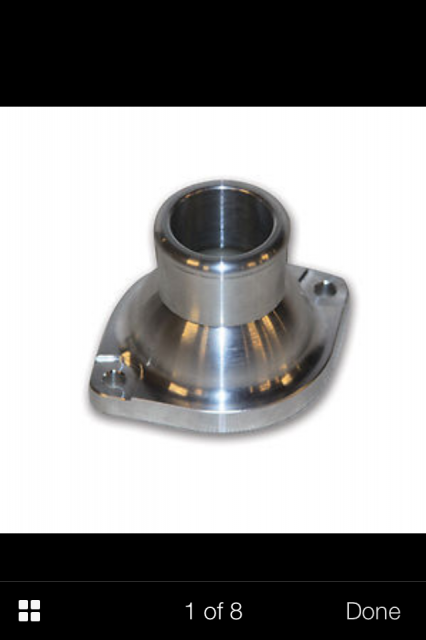
I also doctored up this thermostat housing, but the cast aluminum welded like garbage, so I ordered a billet replacement to put on in its place.
Anywho, this all allowed me to get the hoses in place. I'll still need to come back and add a steam vent line from the opposite end of the radiator to dump into the surge tank. The more I work with this, the for inclined I am to remove the big ugly brace that I welded in before, I'm thinking that I'll either move it to the front of the frame rails or somewhere down below, we'll see.
Then for fun, I mocked up the fenders and bumper cover to check fit. I should be gluing the inner fenders in place this Friday night, can't wait!
Ordered a whooooole bunch of parts this weekend, so next weekend should be pretty fun. :thumbs:

So, I mocked the radiator into position, then slid this bar in to mark its location with a scribe. I measured from these marks to the rest of the frame to make sure it was square and even.

Then I ground the paint off without removing my marks, and welded the tabs into place. The bottom flange of the radiator now sits on this tube like so...

....which made me realize that I needed more clearance up front. Out comes the sawzall.

Much better. This allowed me to capture the top of the radiator by bolting in a 3/4" square tube through the front of the old bumper. The radiator is now secured into place (Will add foam strips later to protect it) without actually fastening through the radiator. I try to avoid bolting to the radiator because chassis flex and vibration can cause it to crack over time.


Then it was time to rework the inlet/outlet arrangement, so I started by making a nipple.


Then I cut it up, turned it, cut it again, and voila, glued it onto the radiator tank. (Please excuse my welding, still practicing my aluminum skills :*****

Then I made a cap for where the radiator cap used to be.

This welding was even worse than the last one by the time I got it sealed up

I also made aluminum straights for my upper hose

I also doctored up this thermostat housing, but the cast aluminum welded like garbage, so I ordered a billet replacement to put on in its place.


Anywho, this all allowed me to get the hoses in place. I'll still need to come back and add a steam vent line from the opposite end of the radiator to dump into the surge tank. The more I work with this, the for inclined I am to remove the big ugly brace that I welded in before, I'm thinking that I'll either move it to the front of the frame rails or somewhere down below, we'll see.

Then for fun, I mocked up the fenders and bumper cover to check fit. I should be gluing the inner fenders in place this Friday night, can't wait!


Ordered a whooooole bunch of parts this weekend, so next weekend should be pretty fun. :thumbs:
05-14-2014, 01:45 PM
#15
Staging Lane
Thread Starter
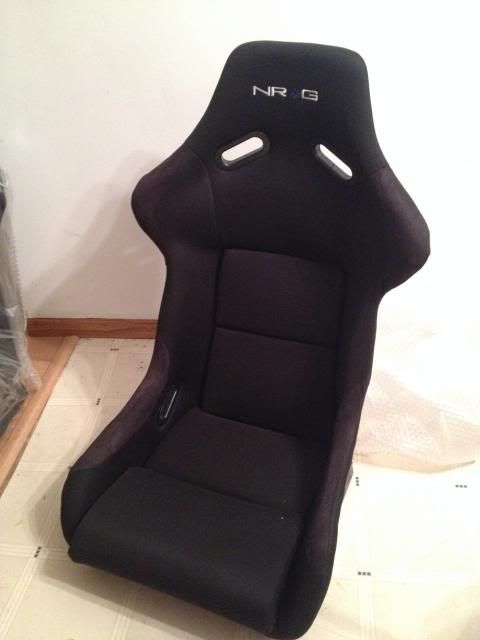
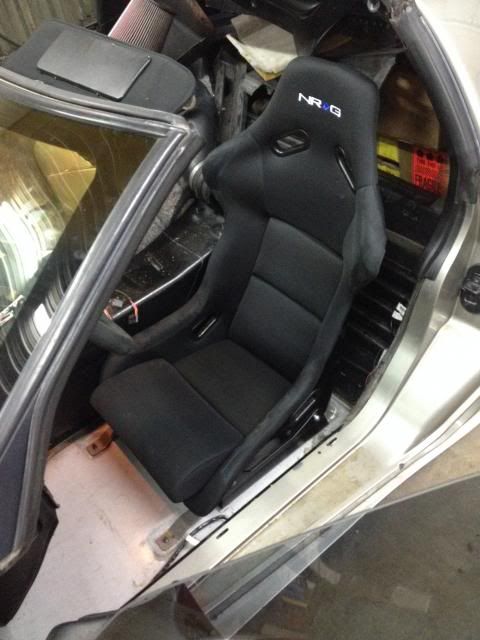
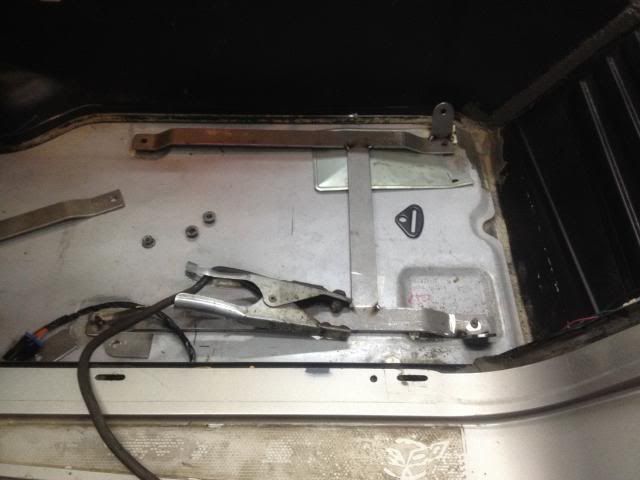
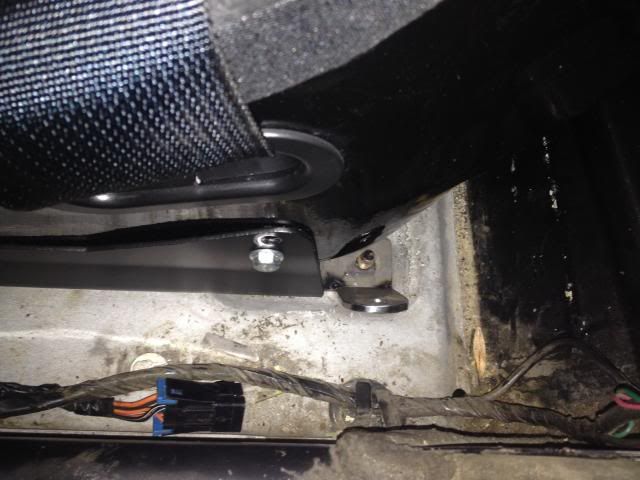
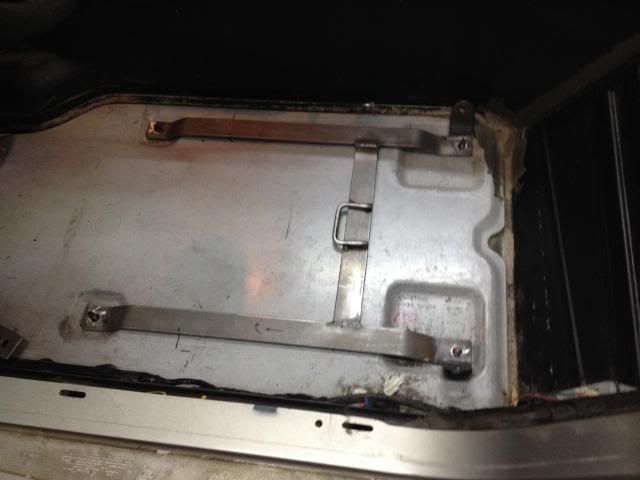
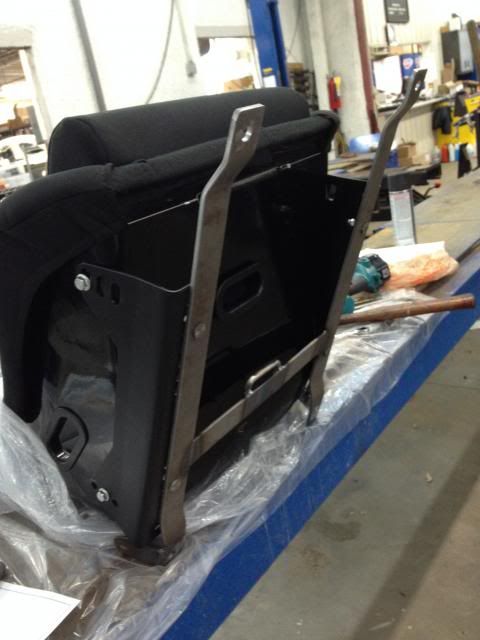
Seats came in this weekend so I fabbed up some mounts to utilize the stock mounting points. These seats are not FIA, so they will also have braces behind them once the cage is in.
Seats are NRG Large Fiberglass buckets. These things are ridiculously cheap @ $250 each, shipped, but the quality is pretty good. I wanted to get Sabelt seats but unfortunately that wasn't in the budget at this point. What I'll probably do is swap these out 1 at a time as money allows in the next year, but for now I'm really happy with what I got for the money.
When they arrived
Test-fitting before removing the stock belt setup

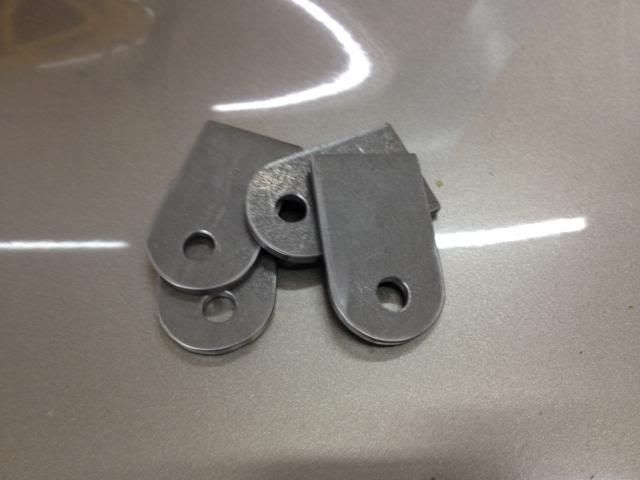
Blank flats to start with

Little bit'o drillin', then some bendin' yields this
Repeat times 3
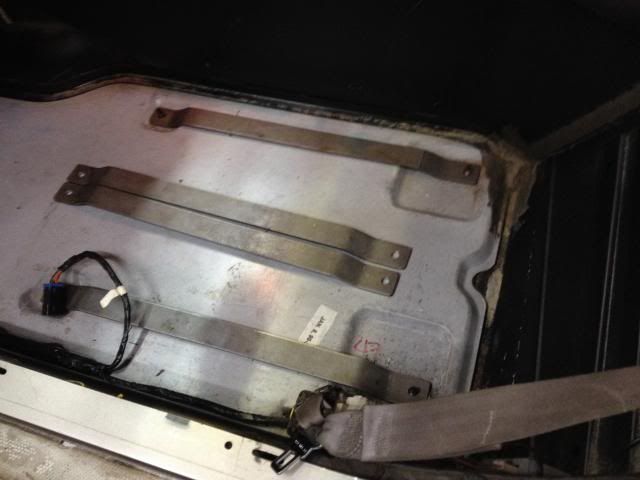
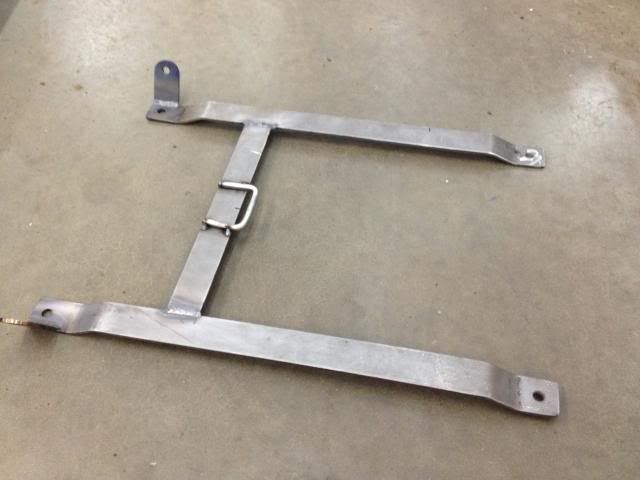
Test-fit rails with seat
Cut a center bar, determine location based on floor markings of where the sub belt cutout was on the seat
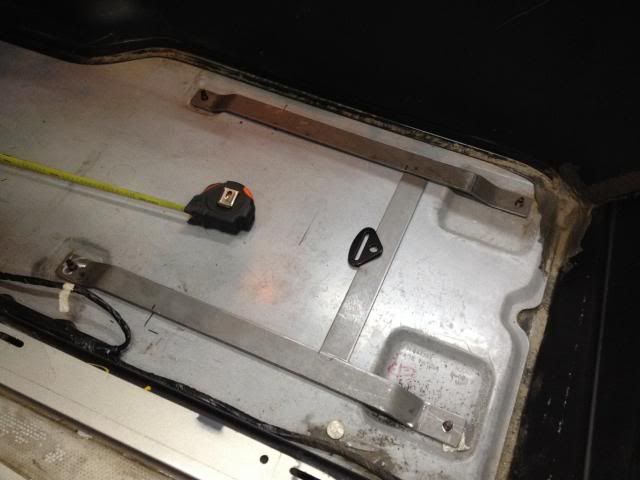
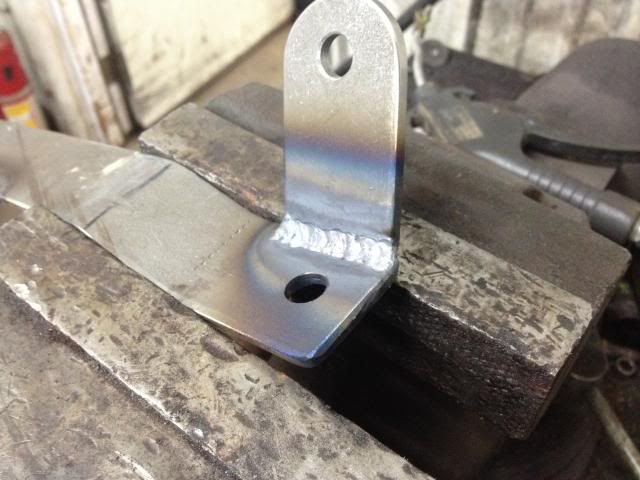
Spend too much time making some harness tabs
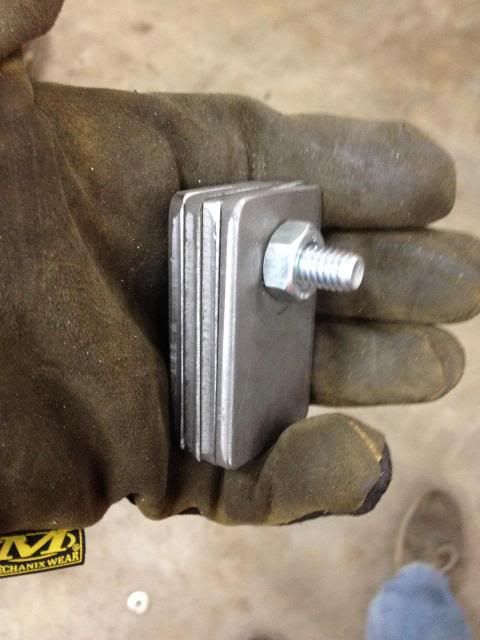
Use an angle grinder cutoff wheel to rough the profile

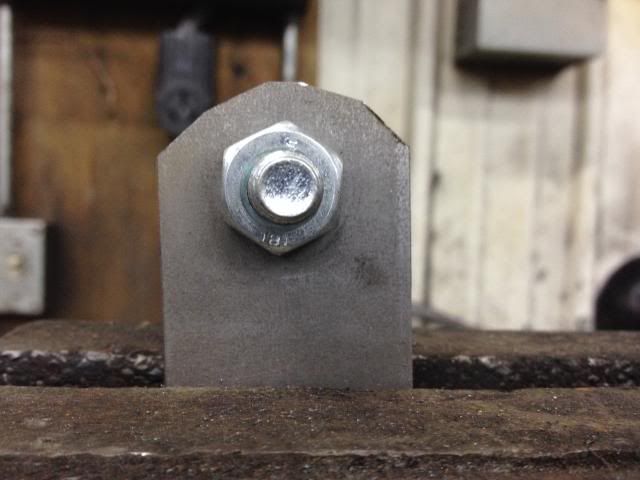
Blend the shape with a flap wheel
Tada! Follow this procedure to put $30 worth of labor into $6 worth of mounting tabs
Tack it all together, using a heatshield to protect the 'glass floor.
Check tab fit with the seats
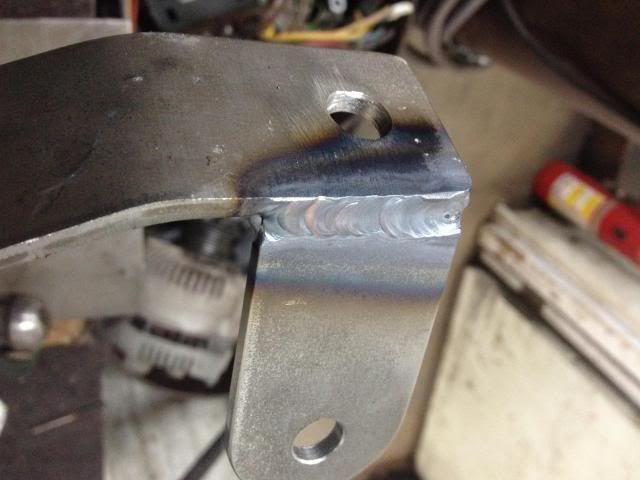
Weld it up...
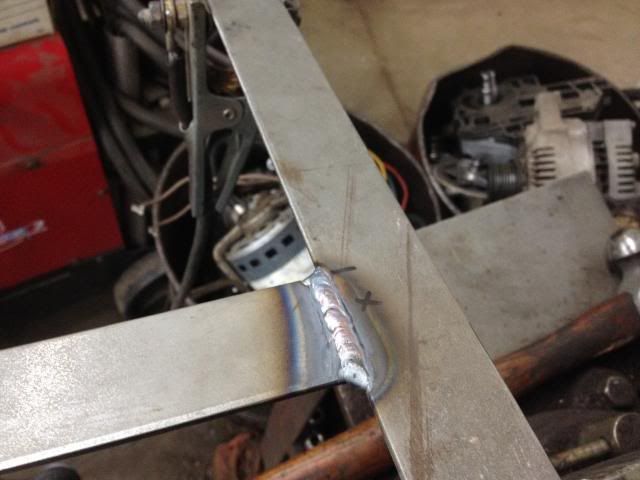
Some undercut here
Bend up sub belt loop, tack in place.
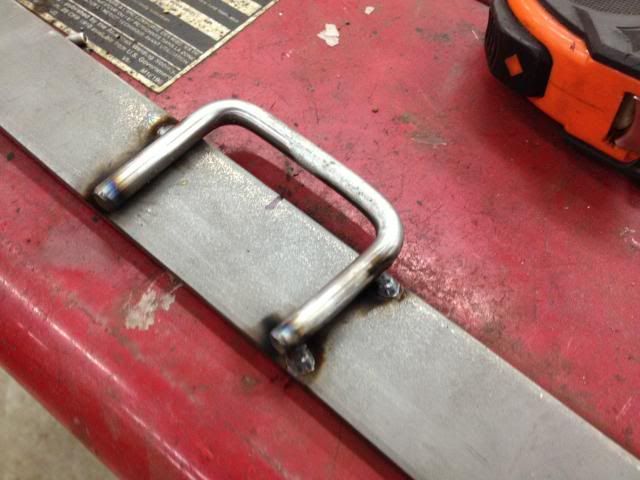
Still need to finish welding that sub loop
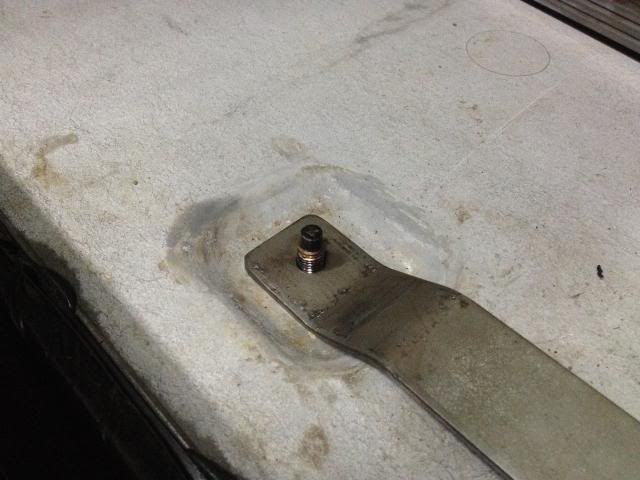
Skipped a few steps in pictures, but located, drilled, and tapped the hole pattern, then took Gr8 bolts and thinned the heads out for floor clearance. With the head in place and threaded holes, these should be as strong or stronger than any weld stud, and are easily replaceable.
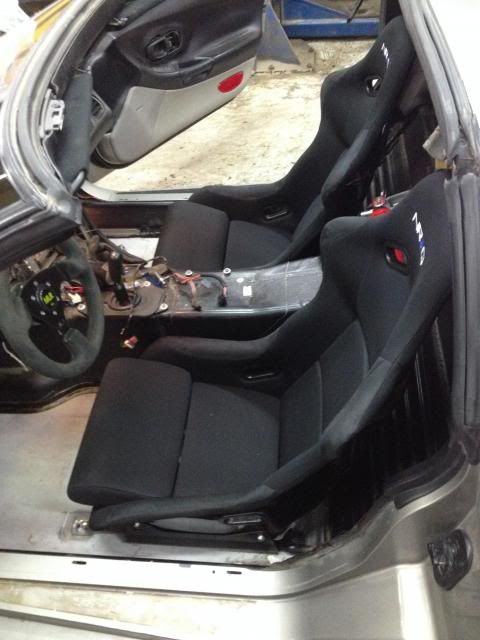
Repeat for passenger side, both seats in place. I'll remove and paint these mounts when the cage is done. I'm also liking the extinguisher being between the seats, it's in a decent location for weight but easily reachable from either side.
Got the Z06 front spring installed too. Here it is with the stocker, this is a bad picture, but the springs look very similar in size and cross-section, the Z spring being a bit flatter as you'd expect with the higher rate.

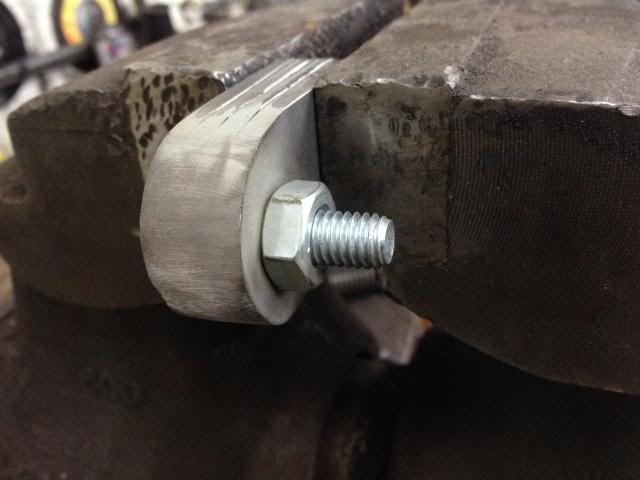
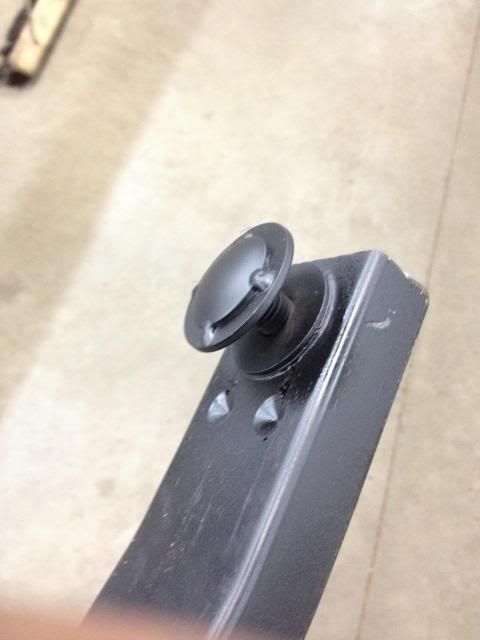
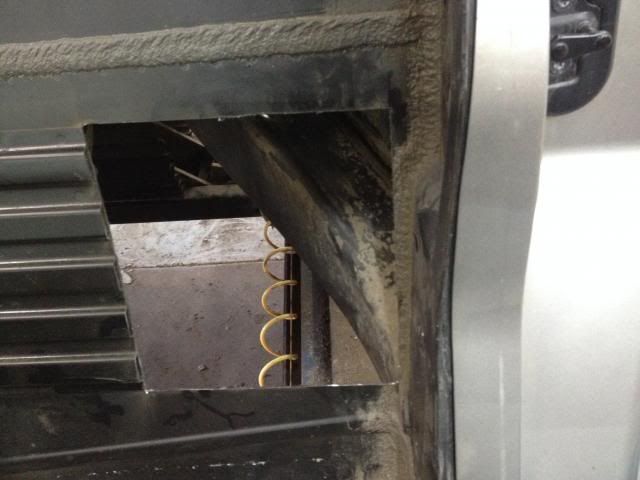
Hacked off the stock rubber adjusters, going to try frost plugs tacked on as a race-only alternative. The domed shape will slide easy on the control arm and provide a single point of contact during suspension travel.
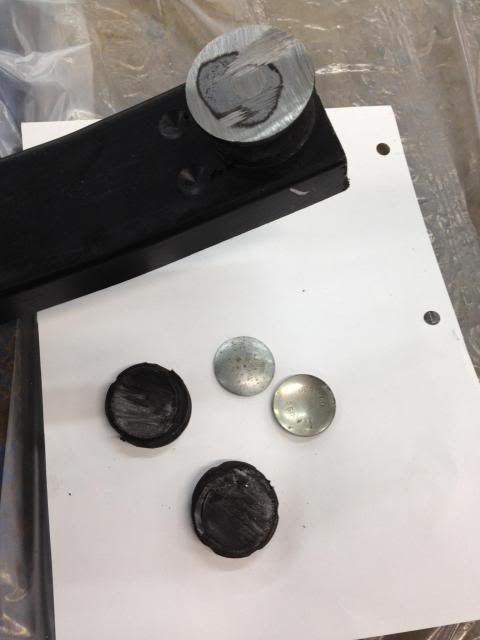
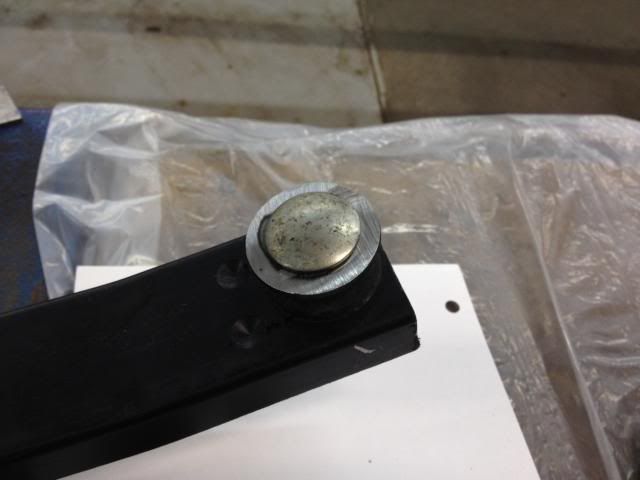
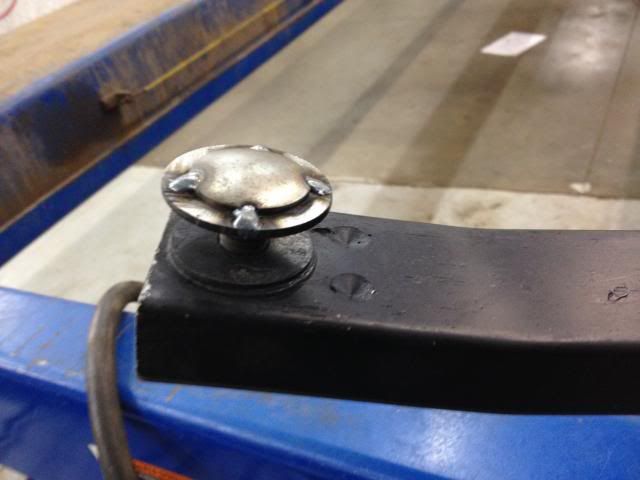
Worked pretty slick, nothing fancy but it should get the job done. I slathered some grease on the control arm for now, but will swap these with delrin later depending on how much wear I see on the arm over time.
Seats are NRG Large Fiberglass buckets. These things are ridiculously cheap @ $250 each, shipped, but the quality is pretty good. I wanted to get Sabelt seats but unfortunately that wasn't in the budget at this point. What I'll probably do is swap these out 1 at a time as money allows in the next year, but for now I'm really happy with what I got for the money.
When they arrived

Test-fitting before removing the stock belt setup

Blank flats to start with

Little bit'o drillin', then some bendin' yields this

Repeat times 3

Test-fit rails with seat

Cut a center bar, determine location based on floor markings of where the sub belt cutout was on the seat

Spend too much time making some harness tabs

Use an angle grinder cutoff wheel to rough the profile


Blend the shape with a flap wheel

Tada! Follow this procedure to put $30 worth of labor into $6 worth of mounting tabs

Tack it all together, using a heatshield to protect the 'glass floor.

Check tab fit with the seats


Weld it up...


Some undercut here

Bend up sub belt loop, tack in place.

Still need to finish welding that sub loop


Skipped a few steps in pictures, but located, drilled, and tapped the hole pattern, then took Gr8 bolts and thinned the heads out for floor clearance. With the head in place and threaded holes, these should be as strong or stronger than any weld stud, and are easily replaceable.

Repeat for passenger side, both seats in place. I'll remove and paint these mounts when the cage is done. I'm also liking the extinguisher being between the seats, it's in a decent location for weight but easily reachable from either side.

Got the Z06 front spring installed too. Here it is with the stocker, this is a bad picture, but the springs look very similar in size and cross-section, the Z spring being a bit flatter as you'd expect with the higher rate.

Hacked off the stock rubber adjusters, going to try frost plugs tacked on as a race-only alternative. The domed shape will slide easy on the control arm and provide a single point of contact during suspension travel.


Worked pretty slick, nothing fancy but it should get the job done. I slathered some grease on the control arm for now, but will swap these with delrin later depending on how much wear I see on the arm over time.
 05-14-2014, 01:45 PM
#16
Staging Lane
Thread Starter
Seats came in this weekend so I fabbed up some mounts to utilize the stock mounting points. These seats are not FIA, so they will also have braces behind them once the cage is in.
Seats are NRG Large Fiberglass buckets. These things are ridiculously cheap @ $250 each, shipped, but the quality is pretty good. I wanted to get Sabelt seats but unfortunately that wasn't in the budget at this point. What I'll probably do is swap these out 1 at a time as money allows in the next year, but for now I'm really happy with what I got for the money.
When they arrived
Test-fitting before removing the stock belt setup
Blank flats to start with
Little bit'o drillin', then some bendin' yields this
Repeat times 3
Test-fit rails with seat
Cut a center bar, determine location based on floor markings of where the sub belt cutout was on the seat
Spend too much time making some harness tabs
Use an angle grinder cutoff wheel to rough the profile
Blend the shape with a flap wheel
Tada! Follow this procedure to put $30 worth of labor into $6 worth of mounting tabs
Tack it all together, using a heatshield to protect the 'glass floor.
Check tab fit with the seats
Weld it up...
Some undercut here
Bend up sub belt loop, tack in place.
Still need to finish welding that sub loop
Skipped a few steps in pictures, but located, drilled, and tapped the hole pattern, then took Gr8 bolts and thinned the heads out for floor clearance. With the head in place and threaded holes, these should be as strong or stronger than any weld stud, and are easily replaceable.
Repeat for passenger side, both seats in place. I'll remove and paint these mounts when the cage is done. I'm also liking the extinguisher being between the seats, it's in a decent location for weight but easily reachable from either side.
Got the Z06 front spring installed too. Here it is with the stocker, this is a bad picture, but the springs look very similar in size and cross-section, the Z spring being a bit flatter as you'd expect with the higher rate.
Hacked off the stock rubber adjusters, going to try frost plugs tacked on as a race-only alternative. The domed shape will slide easy on the control arm and provide a single point of contact during suspension travel.
Worked pretty slick, nothing fancy but it should get the job done. I slathered some grease on the control arm for now, but will swap these with delrin later depending on how much wear I see on the arm over time.
05-14-2014, 01:46 PM
#17
Staging Lane
Thread Starter
Cage tubing showed up, gonna make sparks this weekend I've installed a few cage kits before, and assisted on full chassis builds, but this will be my first full custom cage done on my own. Using 1.75 x .120 wall DOM to ensure it's legal everywhere and as safe as possible.
I've installed a few cage kits before, and assisted on full chassis builds, but this will be my first full custom cage done on my own. Using 1.75 x .120 wall DOM to ensure it's legal everywhere and as safe as possible.
05-14-2014, 01:47 PM
#18
Staging Lane
Thread Starter
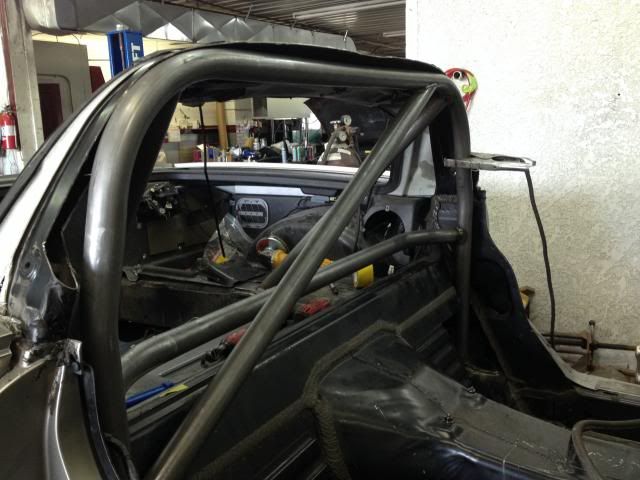
Dad and I made some progress on the cage this weekend

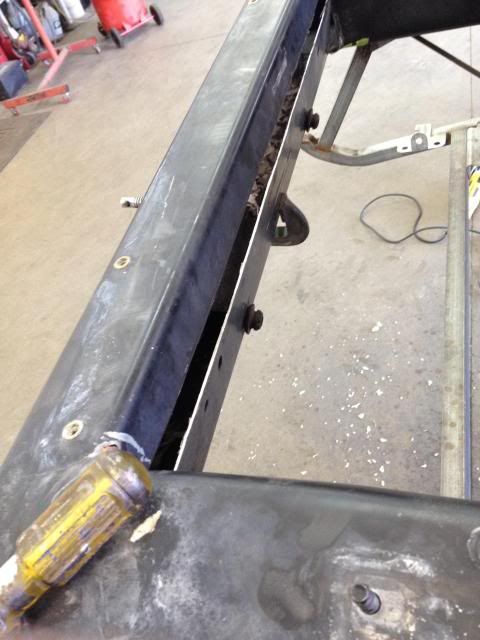
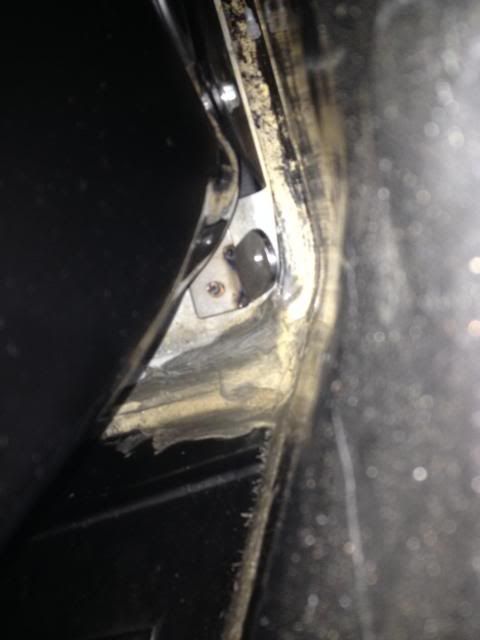
Started by cutting out access holes for mounting the main hoop to the frame.
Trimmed the sill fiberglass for door bar attachment.
Made these plates at work in advance, need to make them wider. I guesstimated based on pictures and measurements off the fiberglass on my Z06, so basically this was a guesstimate :thumbs:
Passenger side, the bar notch up top would eventually be raised a bit higher.
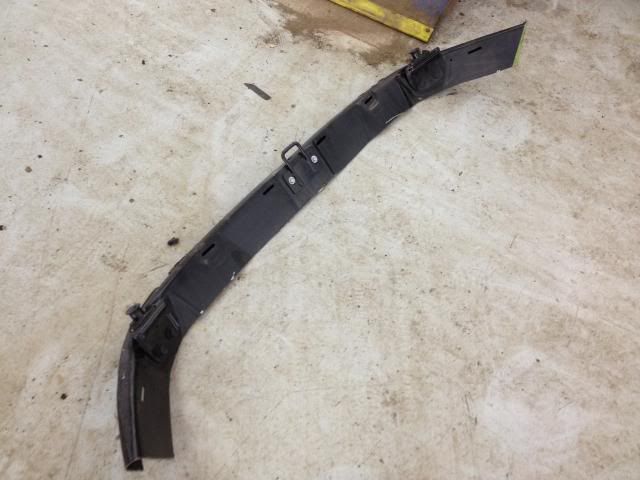
Removed the roof halo and cut back the steel for clearance.
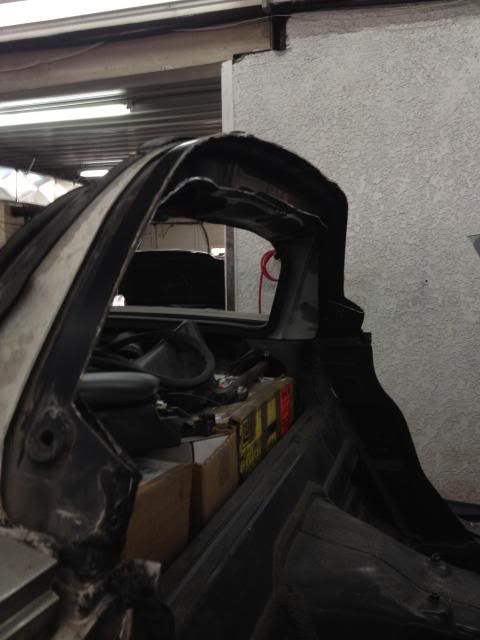
With the cage done, this will be trimmed for clearance and reinstalled, then covered with a new roof halo panel.
Mounting my new bigscreen
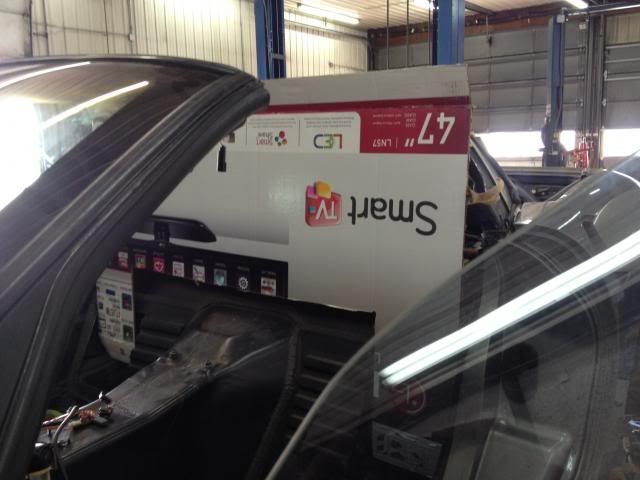
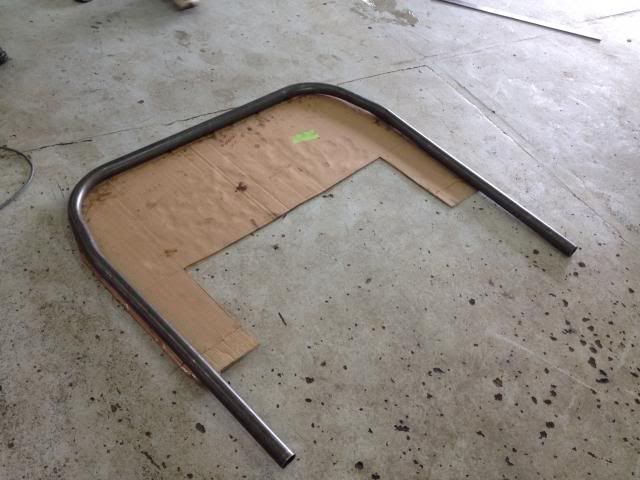
Using the cardboard for a template actually
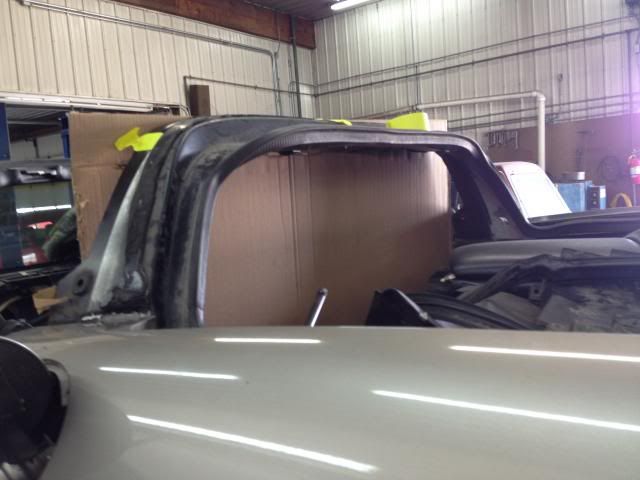
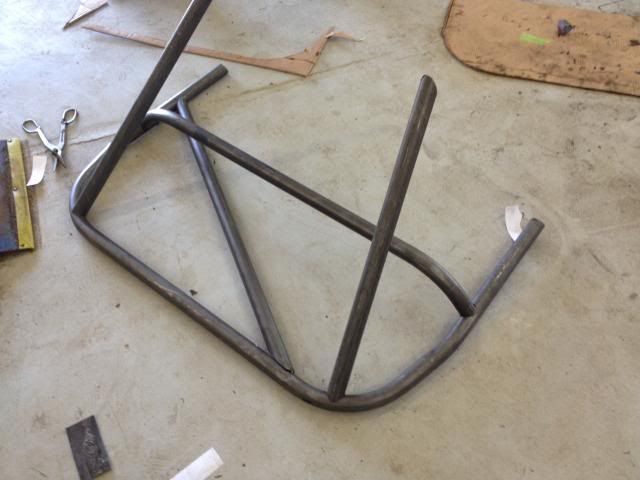
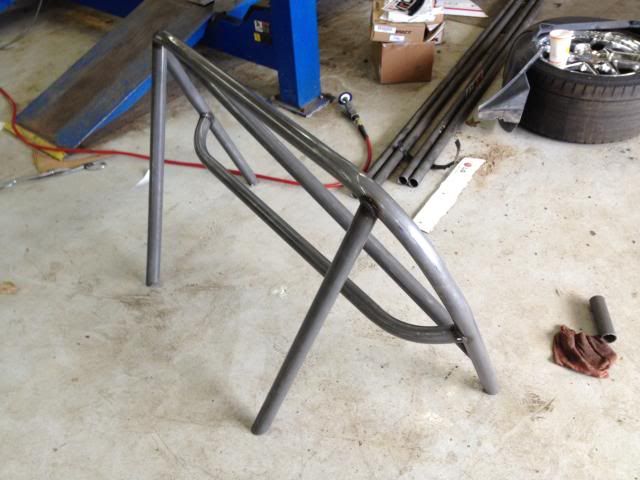
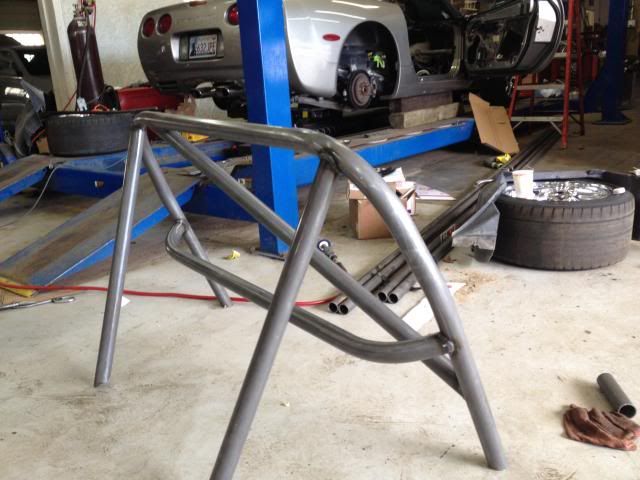
Then, used the template to fit the main hoop outside the car
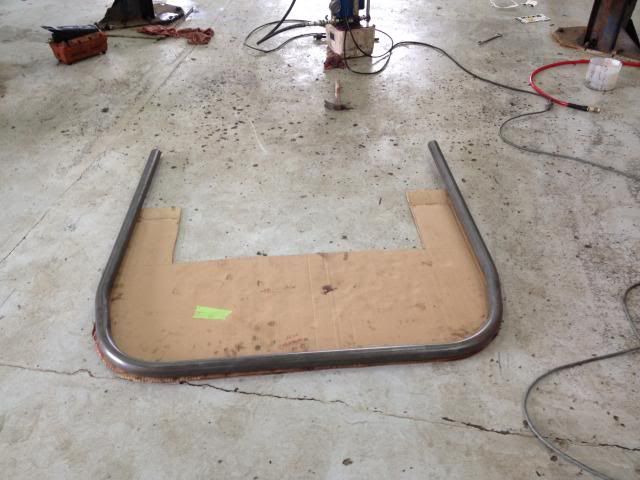
Fits good
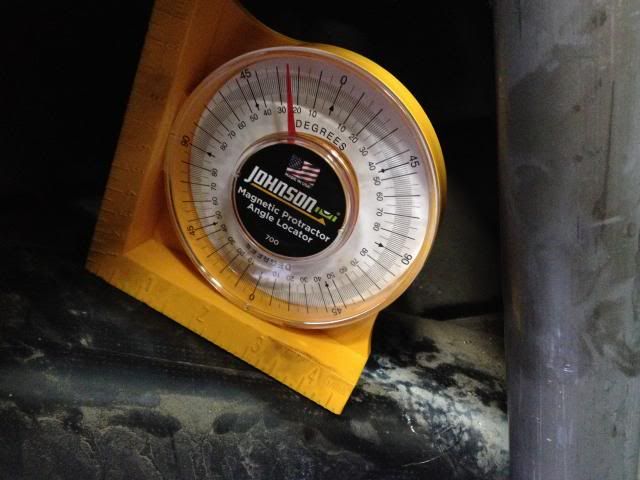
Used the angle finder to determine how the bottom of the hoop would be cut for fitment on the frame.
Frame cleaned up with a flap wheel
More access through the wheelwell
Fitting the mount plates
Rear downbars fitted
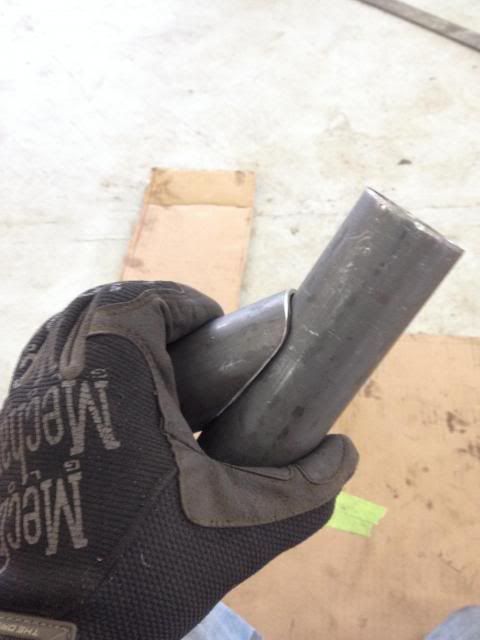
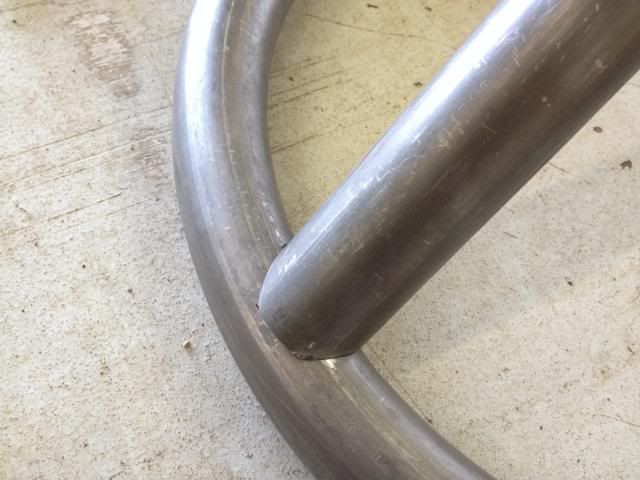
Here's a quick notching tutorial, I use a program called tubemiter.exe, you can find it on the google. It's extremely fast and the templates were perfect.
Wrap the template onto the tube
Trace it out
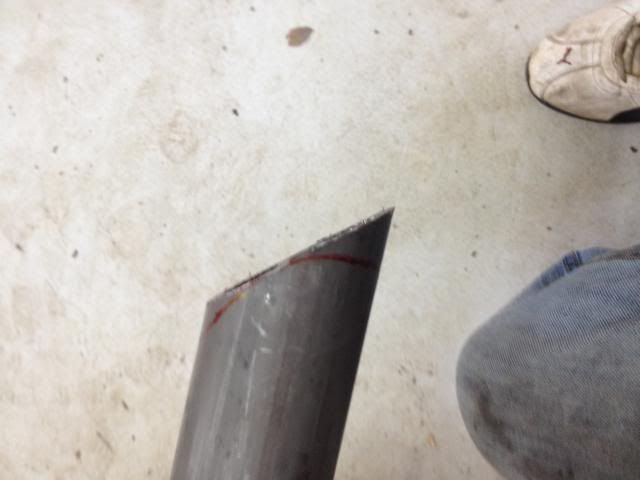
Rough cut with a suicide wheel on the angle grinder
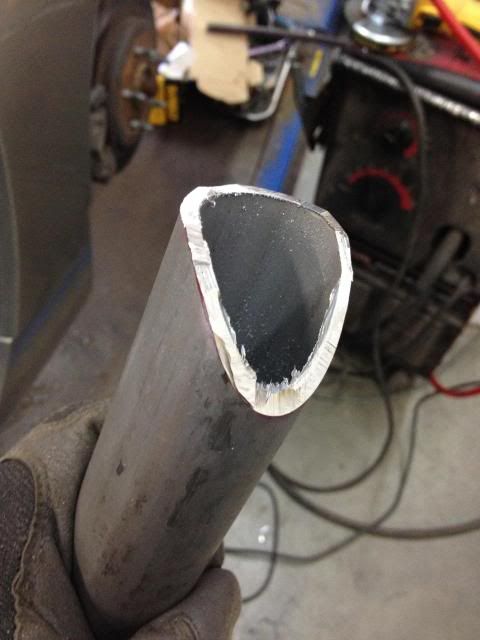
Then clean it up with a flap wheel quick
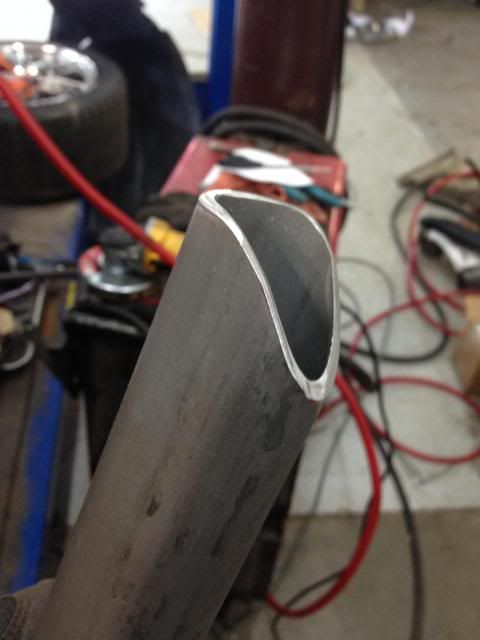
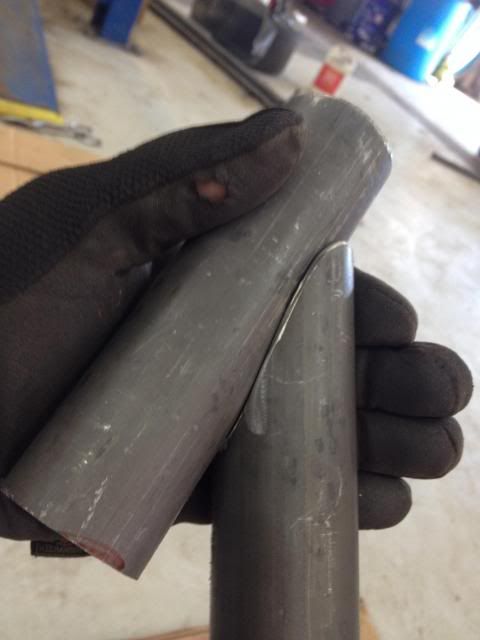
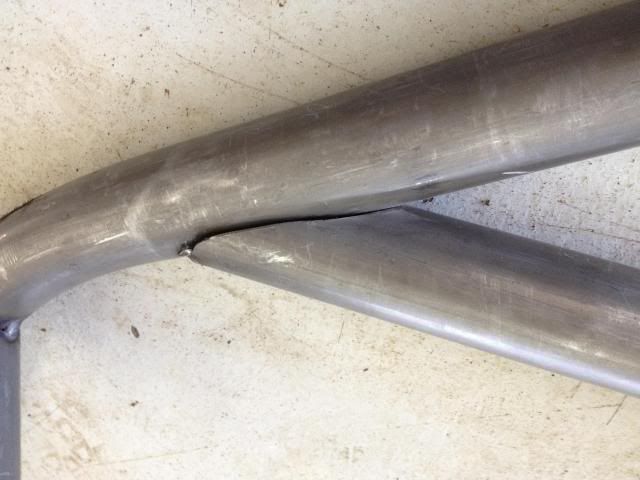
Different joint, same method, fits awesome
Tack the diagonal in place
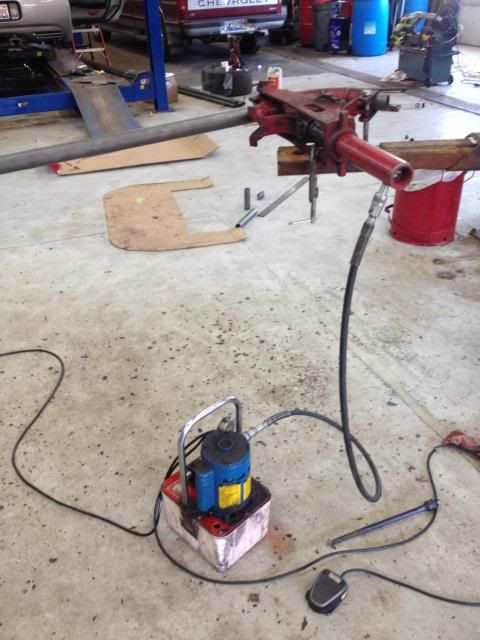
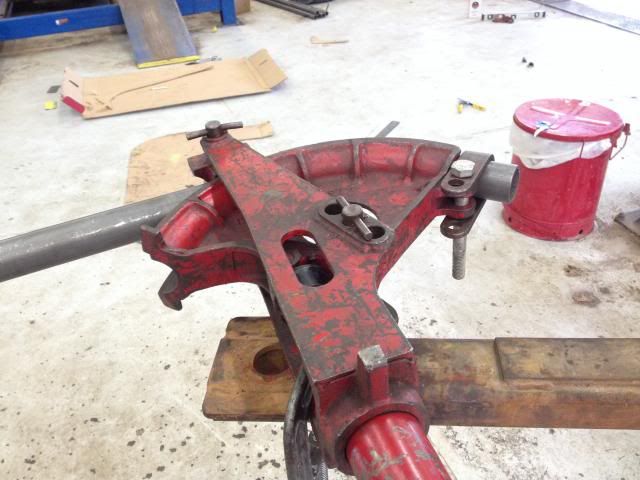
Here's the bender setup we used, good old made in Murica' equipment, the electric pump worked awesome
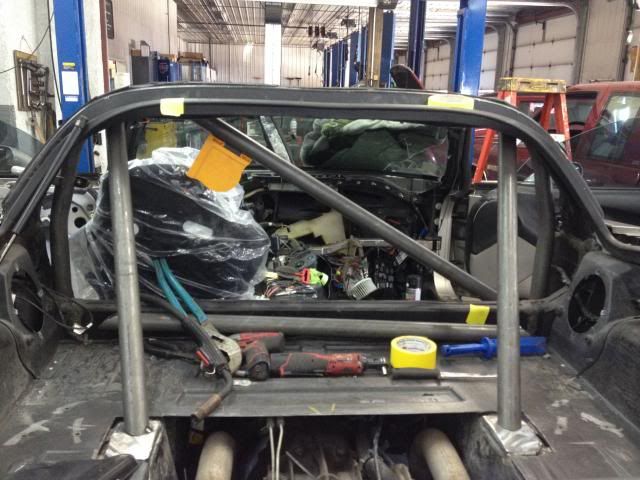
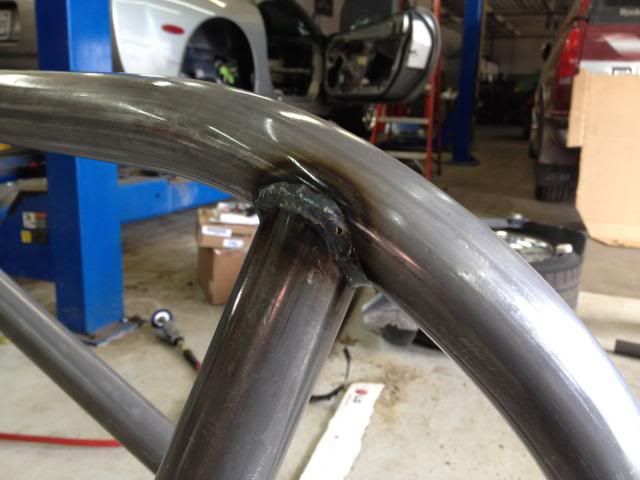
Everything tacked in, there's dad preparing to pop it out for welding
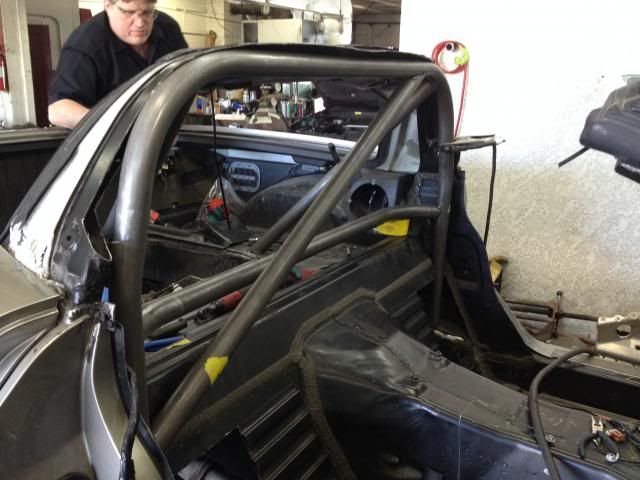
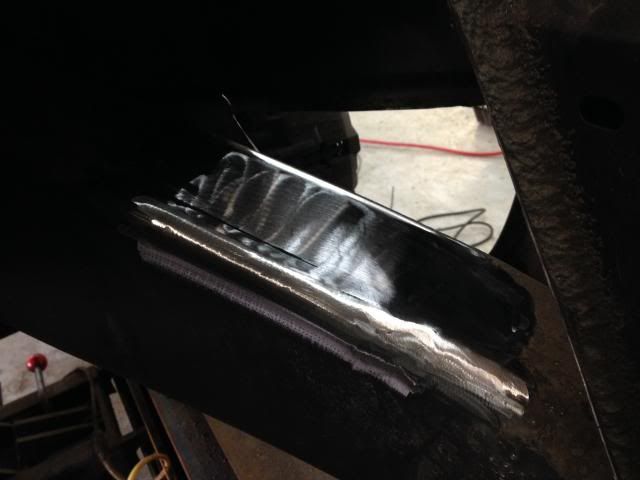
Ready to weld
Not as good as I'd like, but plenty close to wirefeed, TIG would have to be closer.


Started by cutting out access holes for mounting the main hoop to the frame.


Trimmed the sill fiberglass for door bar attachment.

Made these plates at work in advance, need to make them wider. I guesstimated based on pictures and measurements off the fiberglass on my Z06, so basically this was a guesstimate :thumbs:

Passenger side, the bar notch up top would eventually be raised a bit higher.

Removed the roof halo and cut back the steel for clearance.

With the cage done, this will be trimmed for clearance and reinstalled, then covered with a new roof halo panel.

Mounting my new bigscreen

Using the cardboard for a template actually

Then, used the template to fit the main hoop outside the car

Fits good

Used the angle finder to determine how the bottom of the hoop would be cut for fitment on the frame.

Frame cleaned up with a flap wheel

More access through the wheelwell

Fitting the mount plates

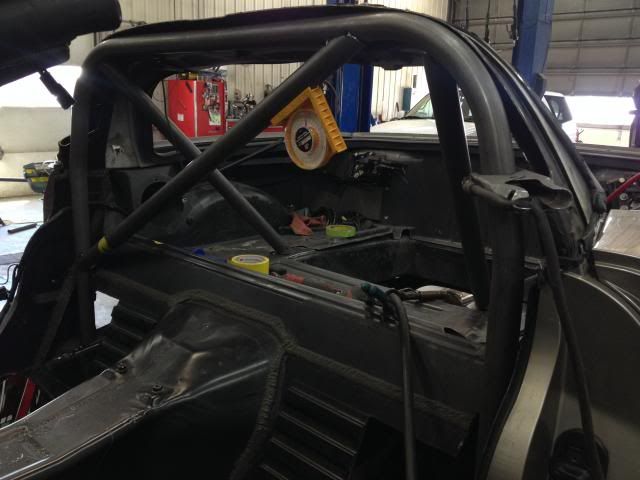
Rear downbars fitted

Here's a quick notching tutorial, I use a program called tubemiter.exe, you can find it on the google. It's extremely fast and the templates were perfect.
Wrap the template onto the tube

Trace it out

Rough cut with a suicide wheel on the angle grinder

Then clean it up with a flap wheel quick

Different joint, same method, fits awesome


Tack the diagonal in place


Here's the bender setup we used, good old made in Murica' equipment, the electric pump worked awesome


Everything tacked in, there's dad preparing to pop it out for welding

Ready to weld


Not as good as I'd like, but plenty close to wirefeed, TIG would have to be closer.


 05-14-2014, 01:48 PM
#19
Staging Lane
Thread Starter
Dad and I made some progress on the cage this weekend
Started by cutting out access holes for mounting the main hoop to the frame.
Trimmed the sill fiberglass for door bar attachment.
Made these plates at work in advance, need to make them wider. I guesstimated based on pictures and measurements off the fiberglass on my Z06, so basically this was a guesstimate :thumbs:
Passenger side, the bar notch up top would eventually be raised a bit higher.
Removed the roof halo and cut back the steel for clearance.
With the cage done, this will be trimmed for clearance and reinstalled, then covered with a new roof halo panel.
Mounting my new bigscreen
Using the cardboard for a template actually
Then, used the template to fit the main hoop outside the car
Fits good
Used the angle finder to determine how the bottom of the hoop would be cut for fitment on the frame.
Frame cleaned up with a flap wheel
More access through the wheelwell
Fitting the mount plates
Rear downbars fitted
Here's a quick notching tutorial, I use a program called tubemiter.exe, you can find it on the google. It's extremely fast and the templates were perfect.
Wrap the template onto the tube
Trace it out
Rough cut with a suicide wheel on the angle grinder
Then clean it up with a flap wheel quick
Different joint, same method, fits awesome
Tack the diagonal in place
Here's the bender setup we used, good old made in Murica' equipment, the electric pump worked awesome
Everything tacked in, there's dad preparing to pop it out for welding
Ready to weld
Not as good as I'd like, but plenty close to wirefeed, TIG would have to be closer.
05-14-2014, 01:48 PM
#20
Staging Lane
Thread Starter
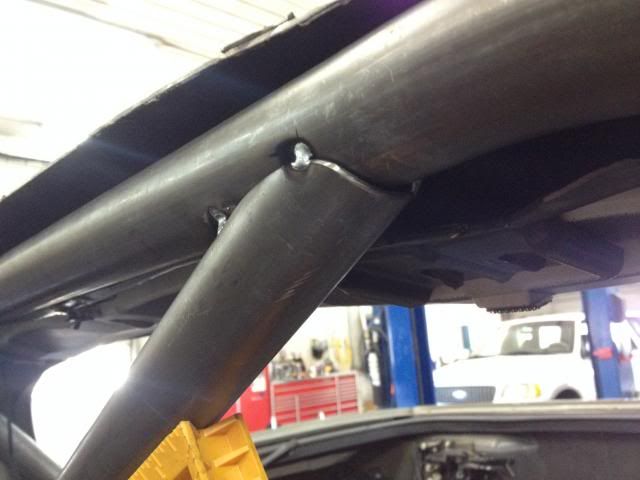
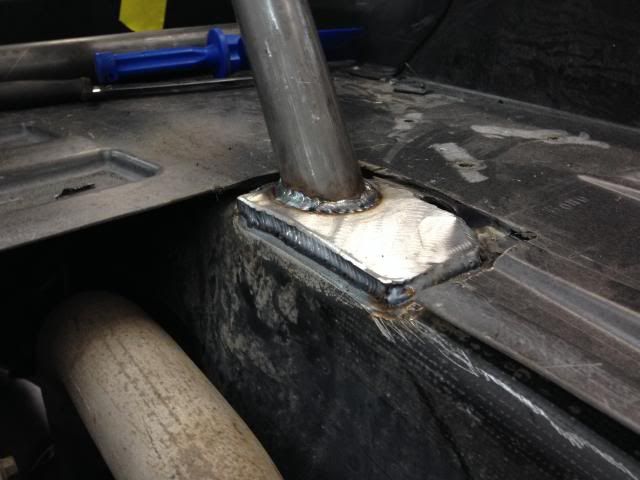
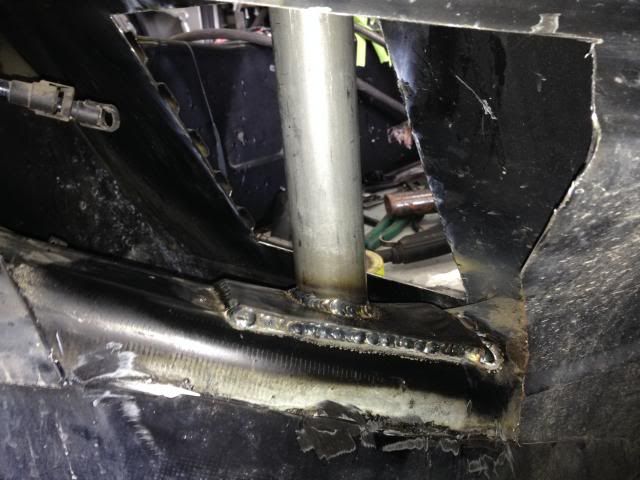
Ugly weld from yours truly :toetap:
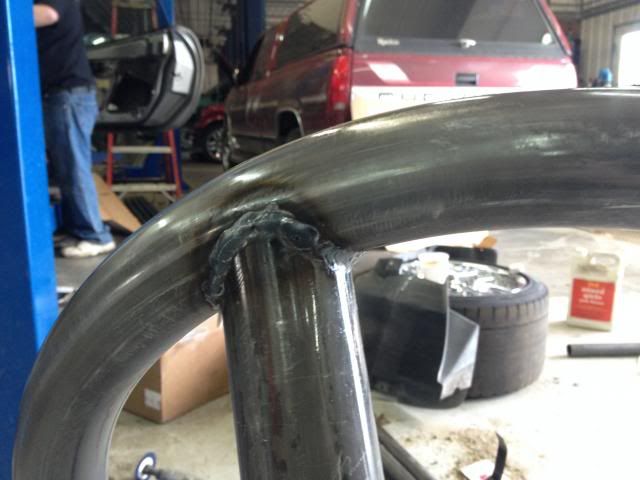
Welded up!
Plates welded in
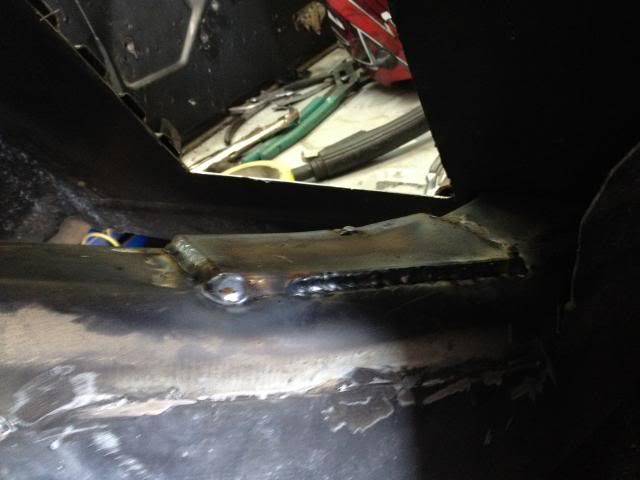
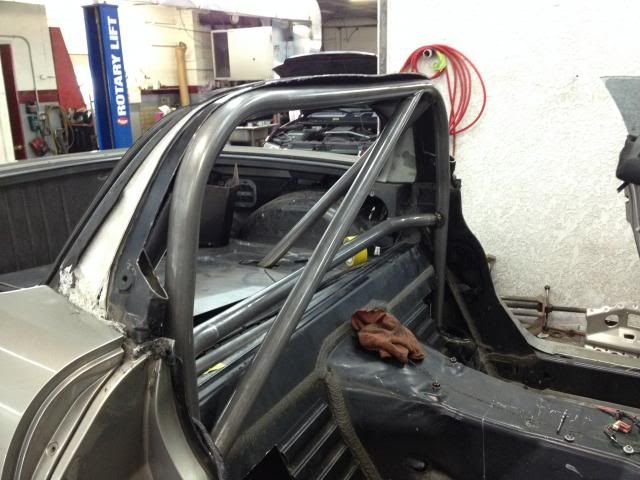
Back in place
Mounting plates back here were a real pain to weld, the body adhesive was burning and off-gassing, which screwed up the front weld. In hindsight, I should have cut larger access holes.
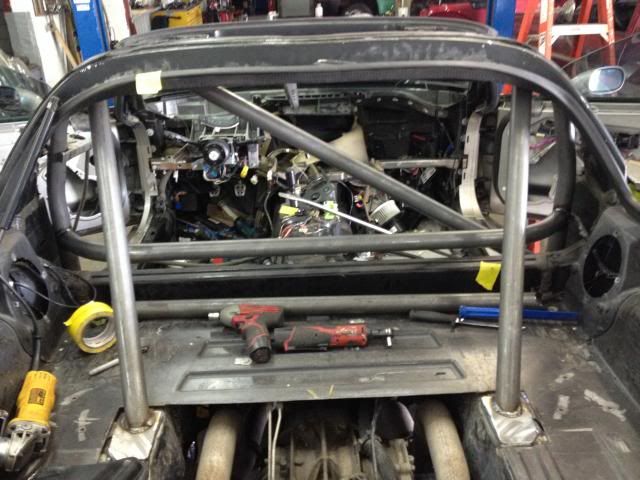
Not bad for a couple amateurs though...

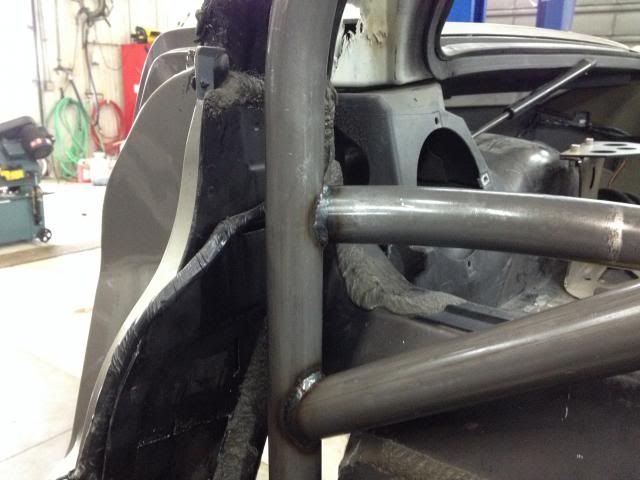
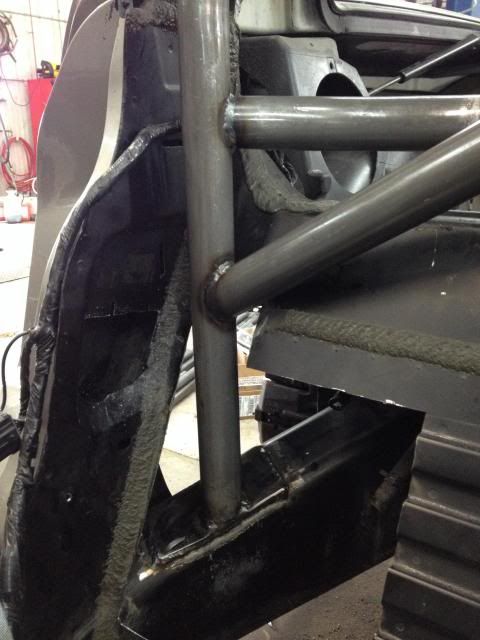
That's all for now, thanks for looking! I've got pics of dash removal to post later :*****:

Welded up!

Plates welded in

Back in place

Mounting plates back here were a real pain to weld, the body adhesive was burning and off-gassing, which screwed up the front weld. In hindsight, I should have cut larger access holes.


Not bad for a couple amateurs though...


That's all for now, thanks for looking! I've got pics of dash removal to post later :*****: