
Hybrid T56 project
 04-22-2013, 12:35 AM
#1


I got my 2000 camaro my freshman year of college and we have been through alot together. 10 years(8 in college)and 170k miles later, outside of a few transmission issues it has been very good to me and now that i have the means to do so Ive decided to treat it well by putting an ls7 in it. Before i do that i need to give it a transmission that handle that. this is a write up of how i decided to go about that. I live in corpus christi and do not know any machine shops around here so i wanted to do this build with ready made parts and put it together in my garage.
starting parts
f-body t56
c5 t56 for donor gear train to support triple double synchro
[IMG]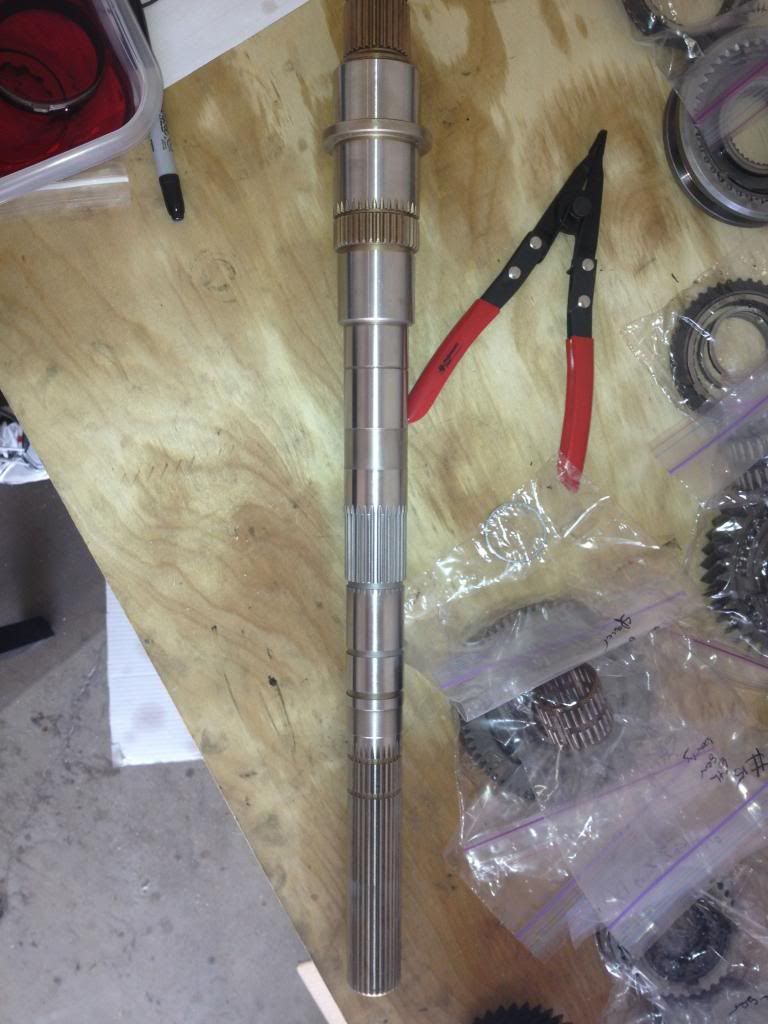 [/IMG]
i started with a new 30 spline main shaft from g-force to fit a f-body or GTO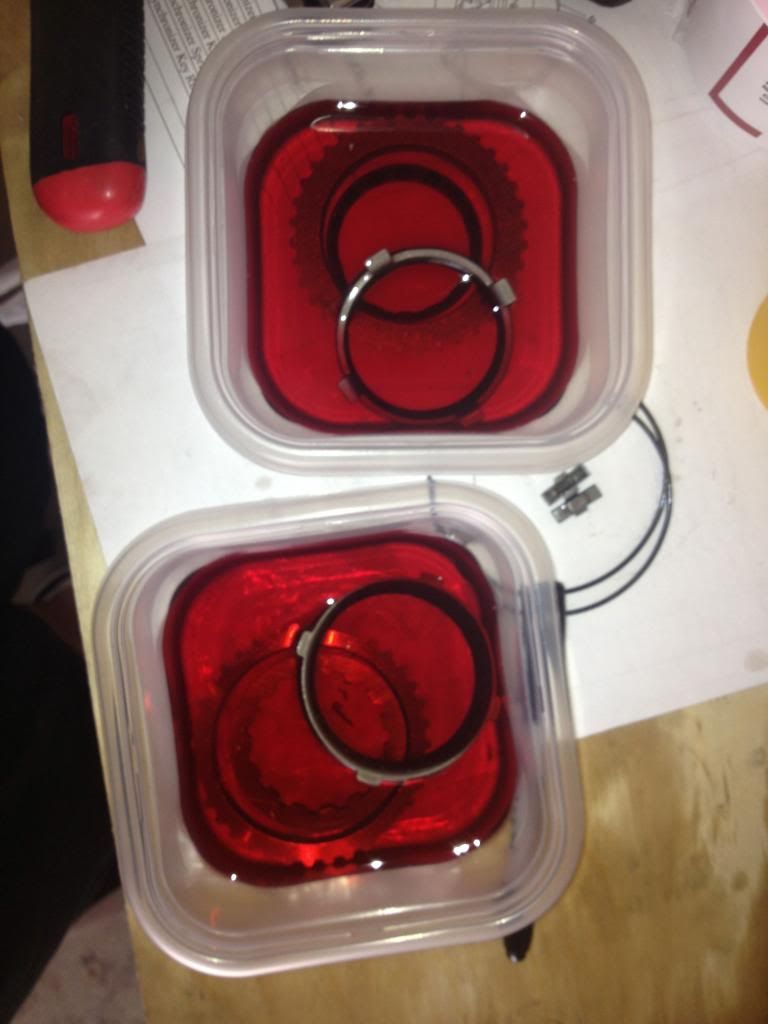
I used a Carbon fiber syncho rebuilt kit from gear box, soaked the rings before install
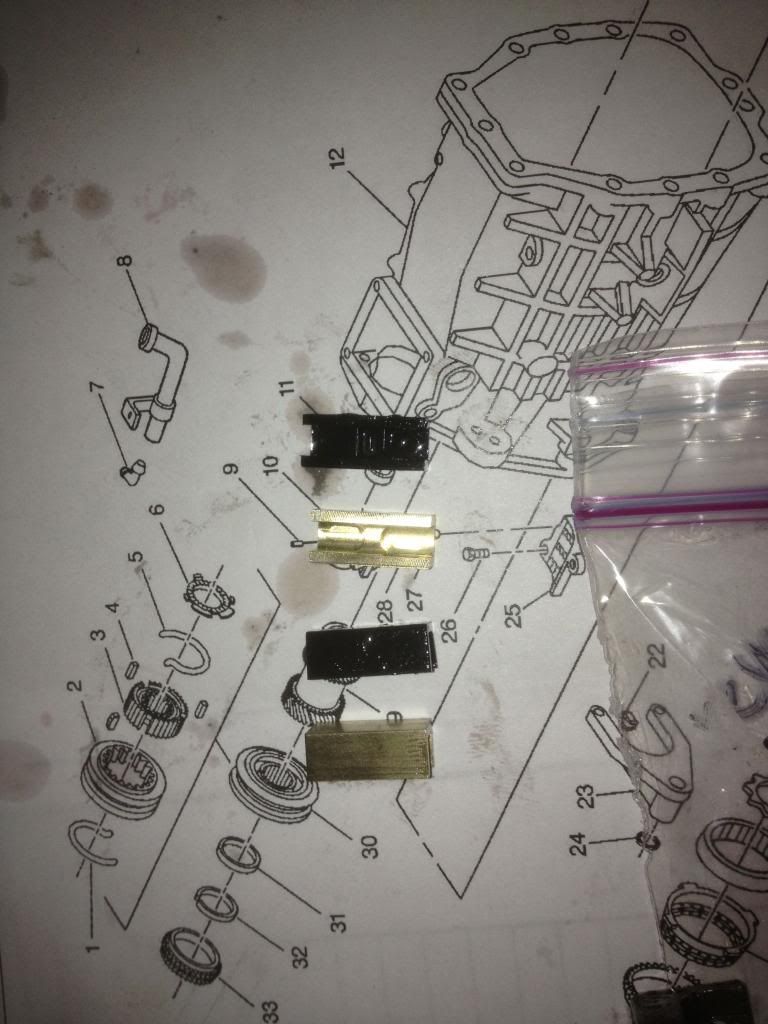
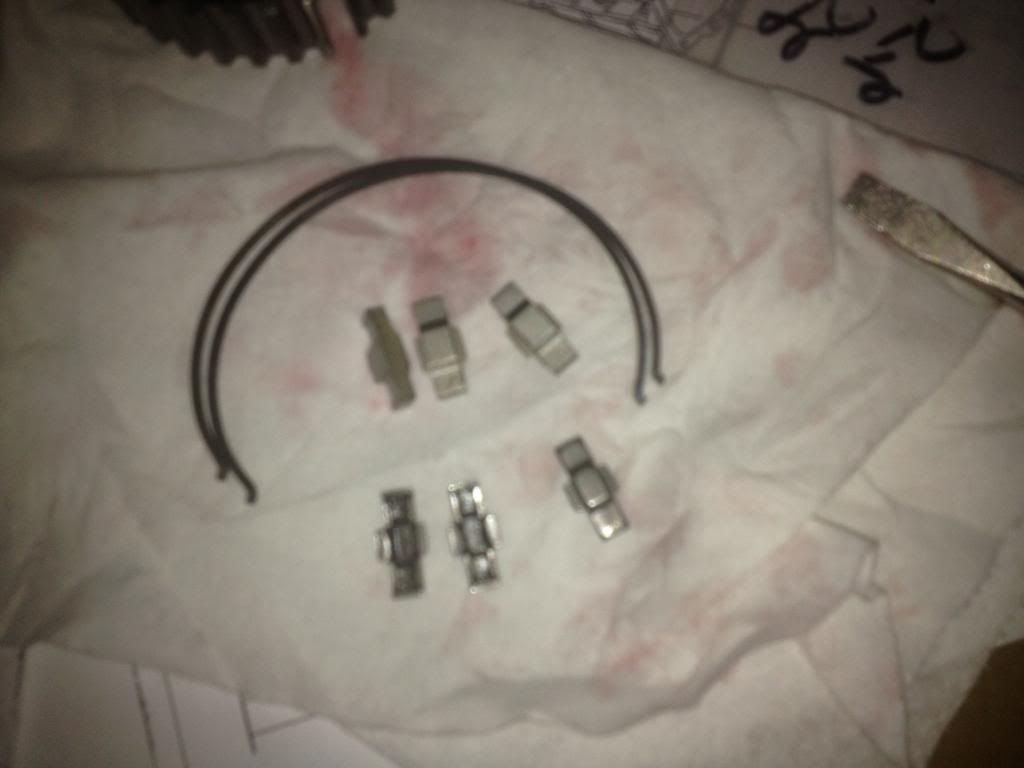
for the 3/4 synchro I also used an upgraded spring and key kit from tick performance, here you can see the difference between the stamped steel keys and upgraded solid ones

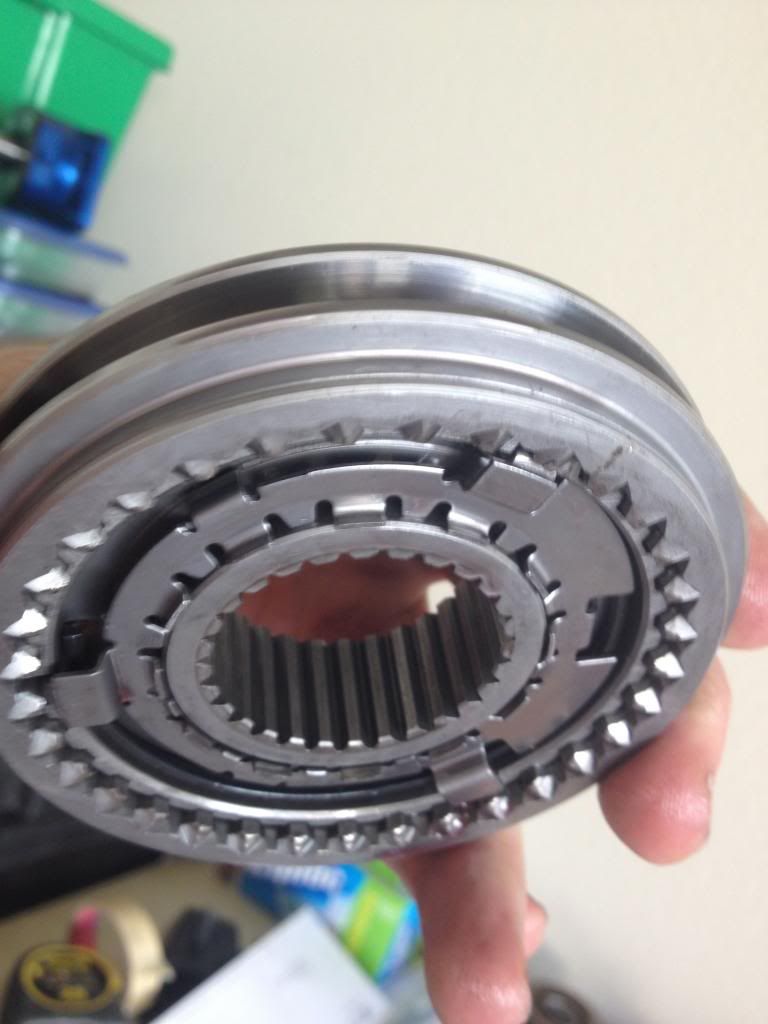
you have to line up the hub with the slots for the keys. Once lined up you can slide the new keys in and then retain then with the springs
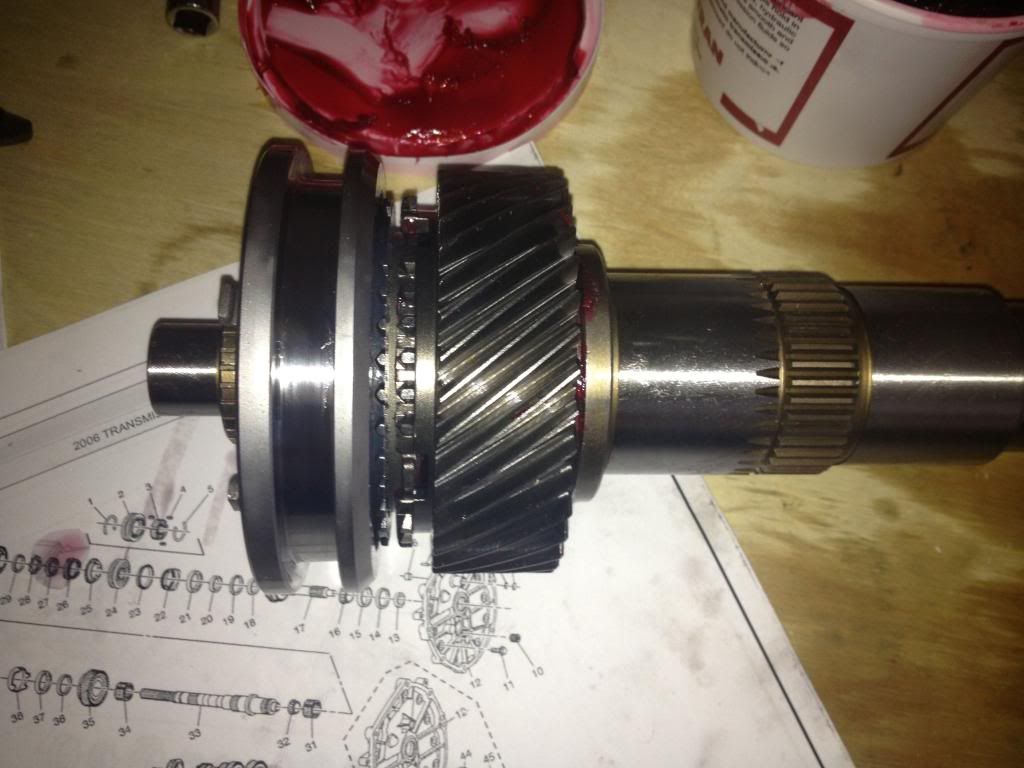
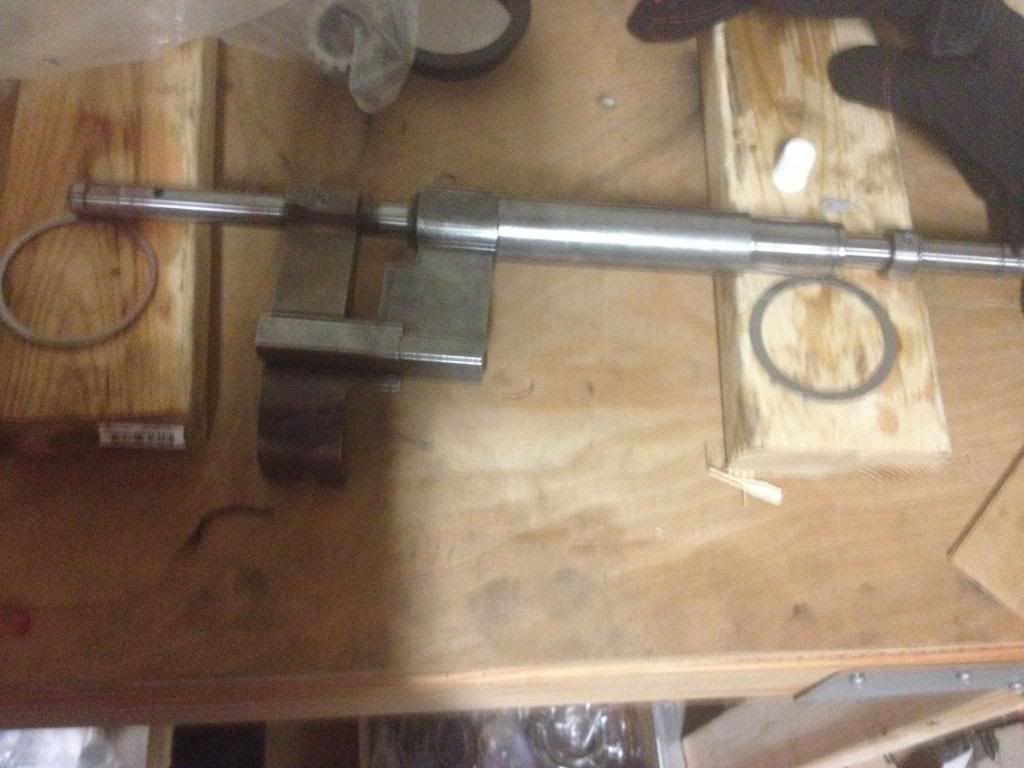
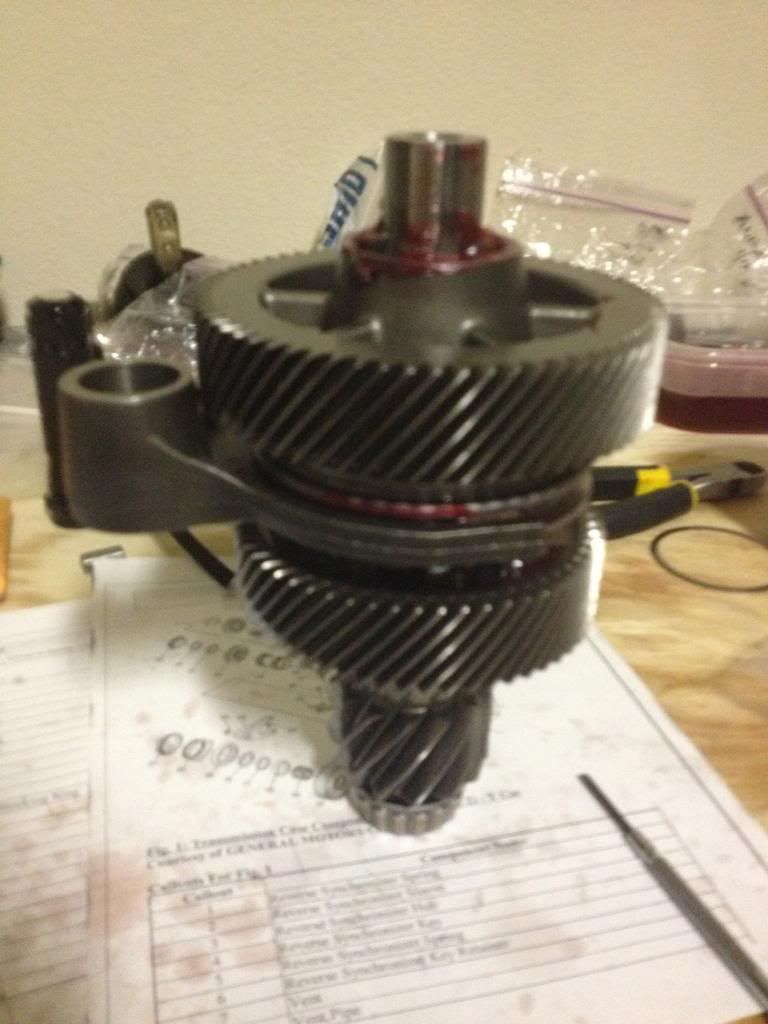
here is the shaft after installing the 3rd gear and the 1/4 synchro on the front of the shaft. I replaced all the gear bearing because even though i was told the c5 transmission i was using as a donor had only 60k miles on it, better play it safe. Also when doing this build you will need to have some way of pressing on a new front bearing because unlike the single friction t56, you can not get the 3/4 assembly on and off with the bearing on
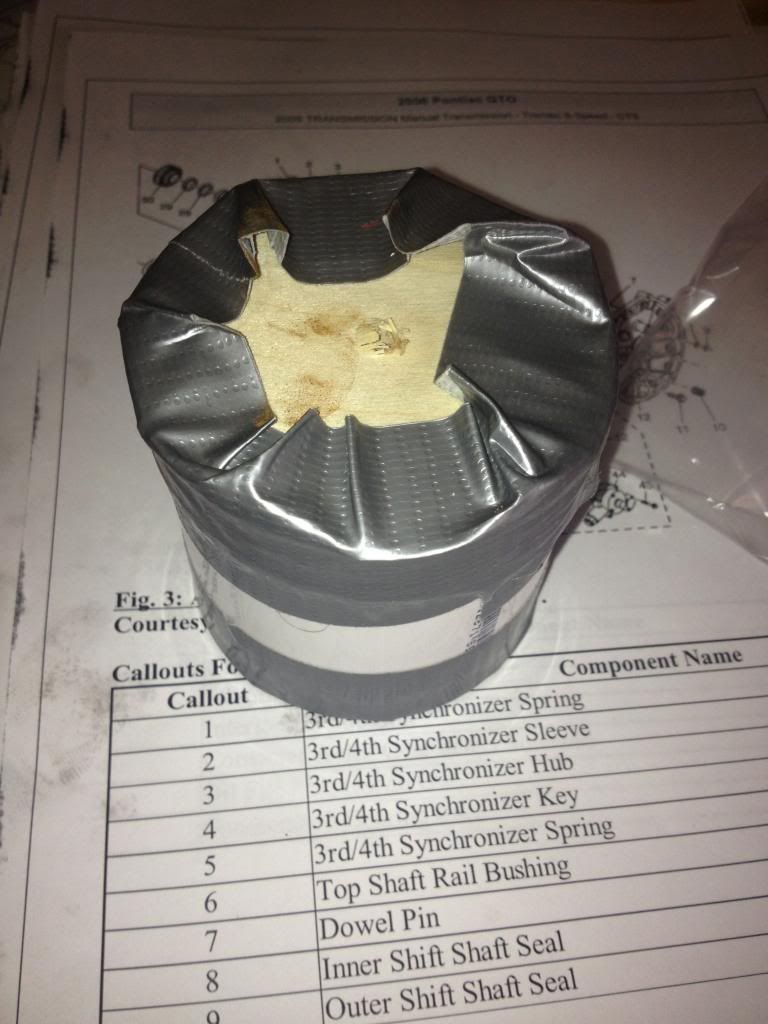
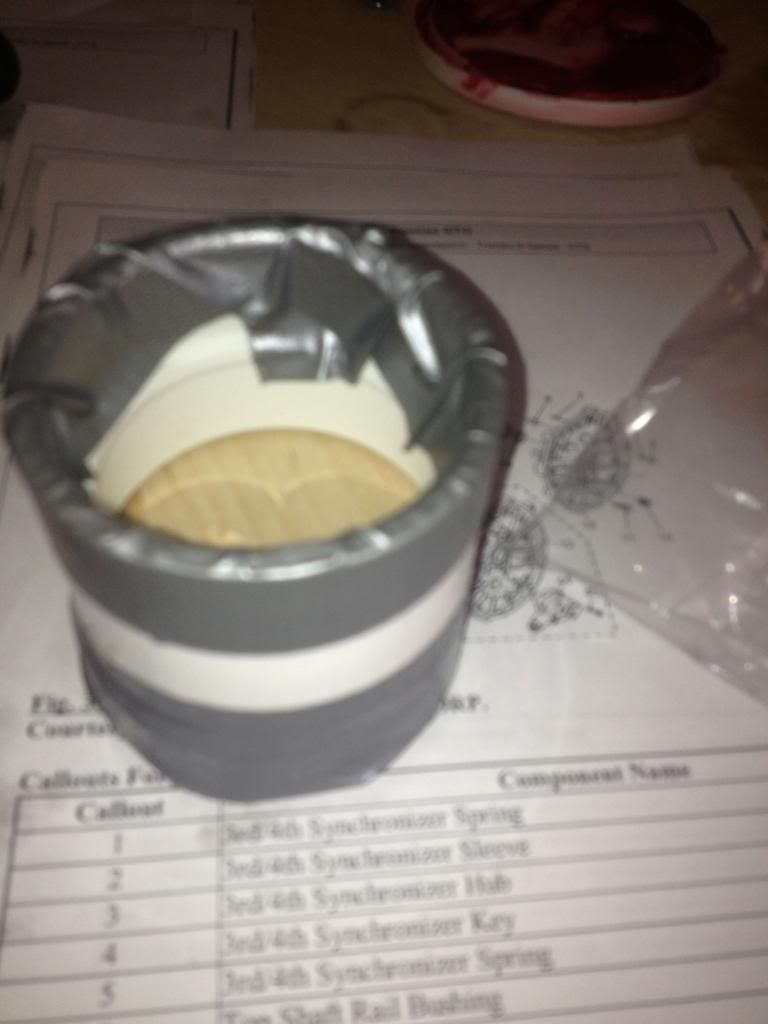
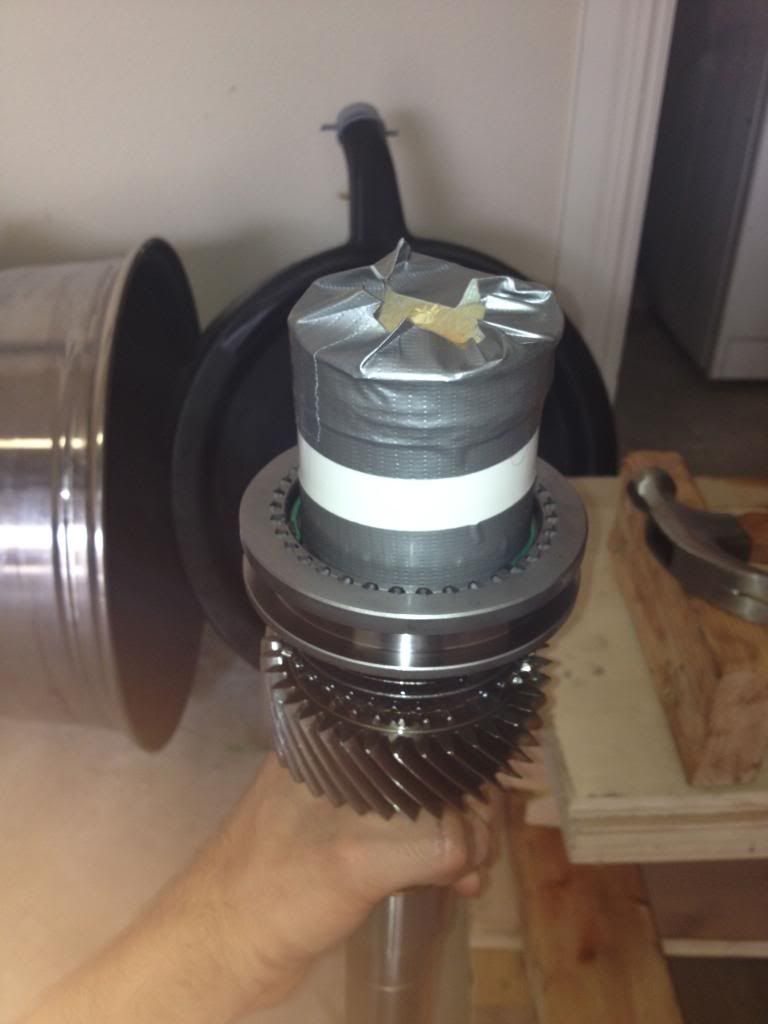
I used plenty of assembly lube but not having access to a press i used a piece on 2 inch PVC pipe with a wooden cap. I added duct tape to hold it together and prevent any pvc pieces from ending up in the synchro when i hammered it onto the shaft.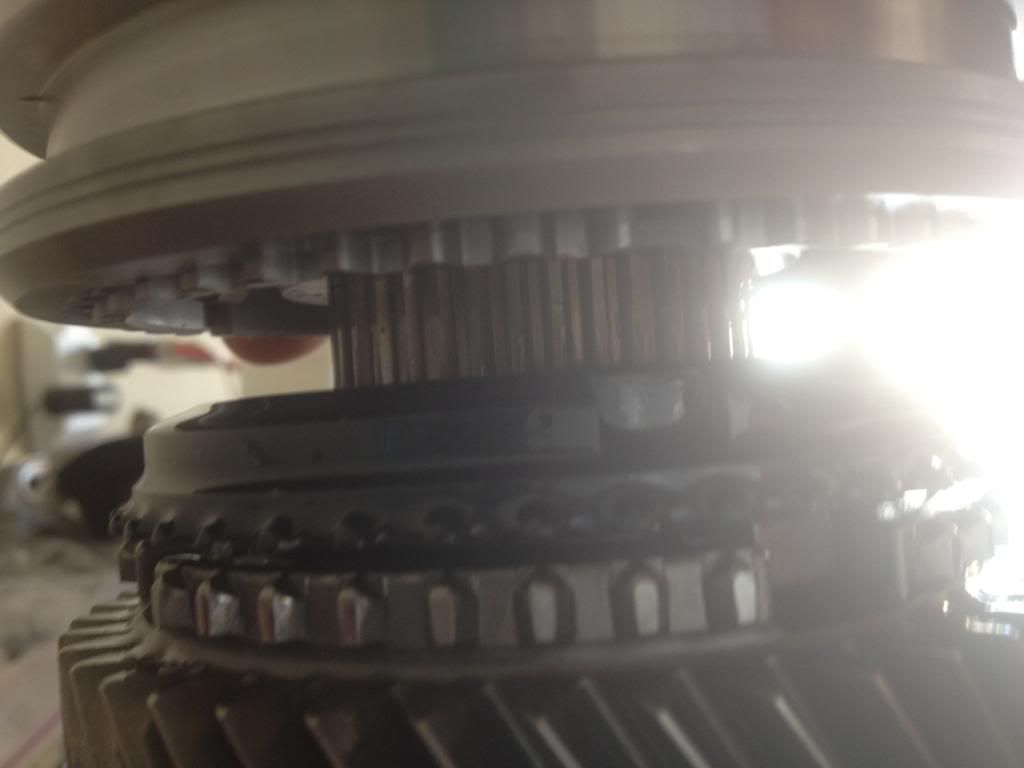
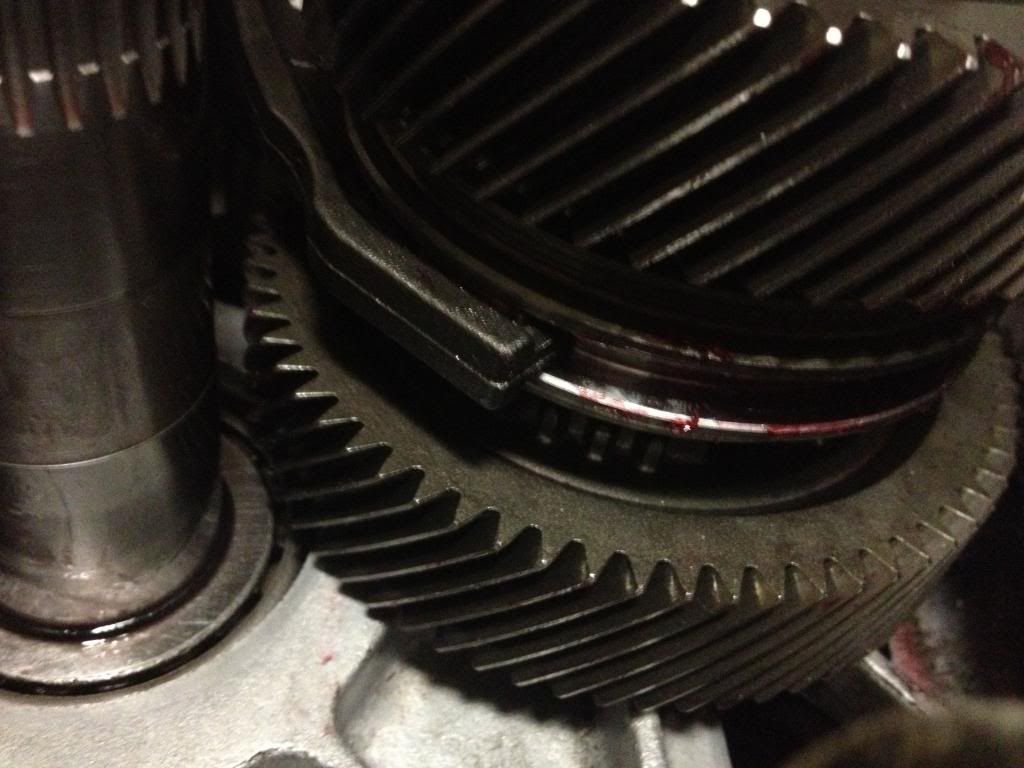
When hammering/pressing the synchro on, always make sure and confirm the keys from the synchros line up with the blocker rings
here is the shaft with the new front bearing already pressed on and i am beginning to put on the 1/2 assembly

To press on the 1/2 synchro i was going to use this PVC pipe the a 12mm rod threaded through it but when it came time do use it, i realized that unlike the OEM shafts this one is not threaded on the end so i was forced to use a hammer and more assembly lube. I also have sure to lather up all the new bearing with it as well.
In addition to the larger strong shaft and carbon fiber rings, i also upgraded to brass fork pads and a steel 3/4 shift fork
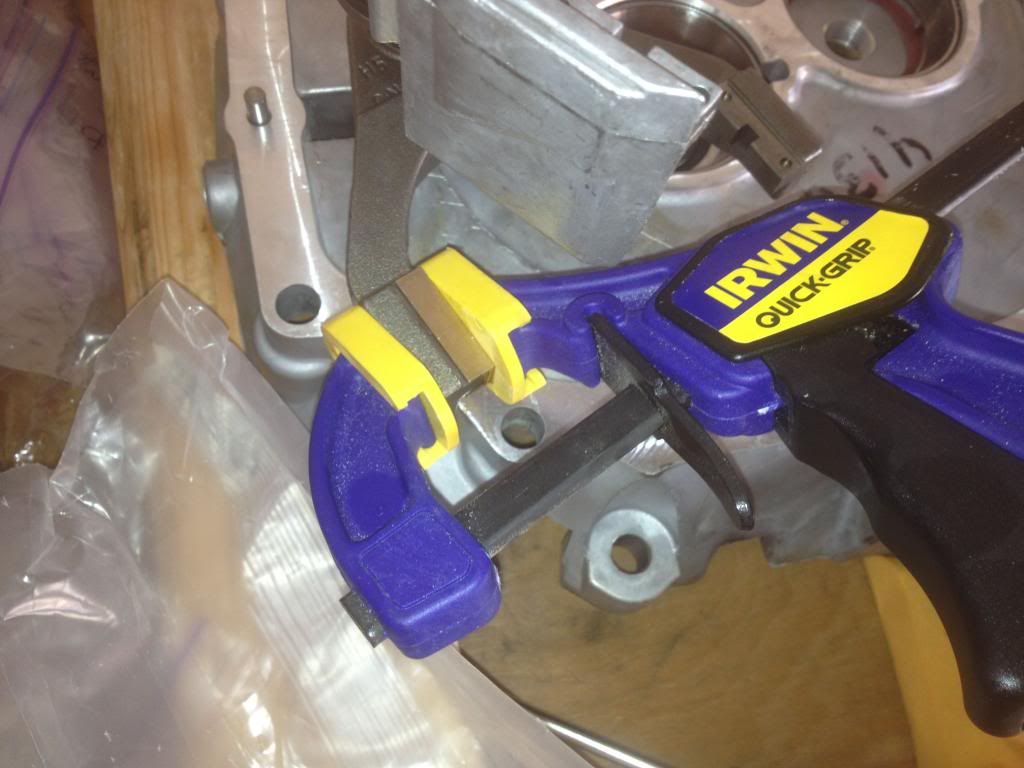
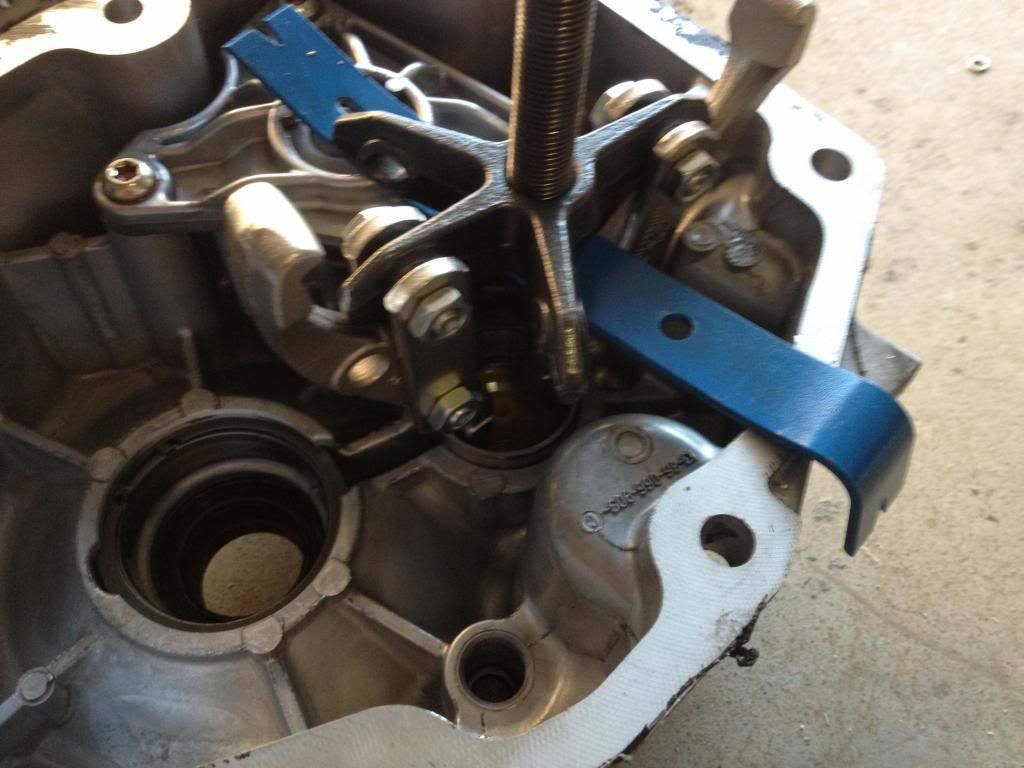
The bronze pads were rather difficult to get on and i had to use this clamp
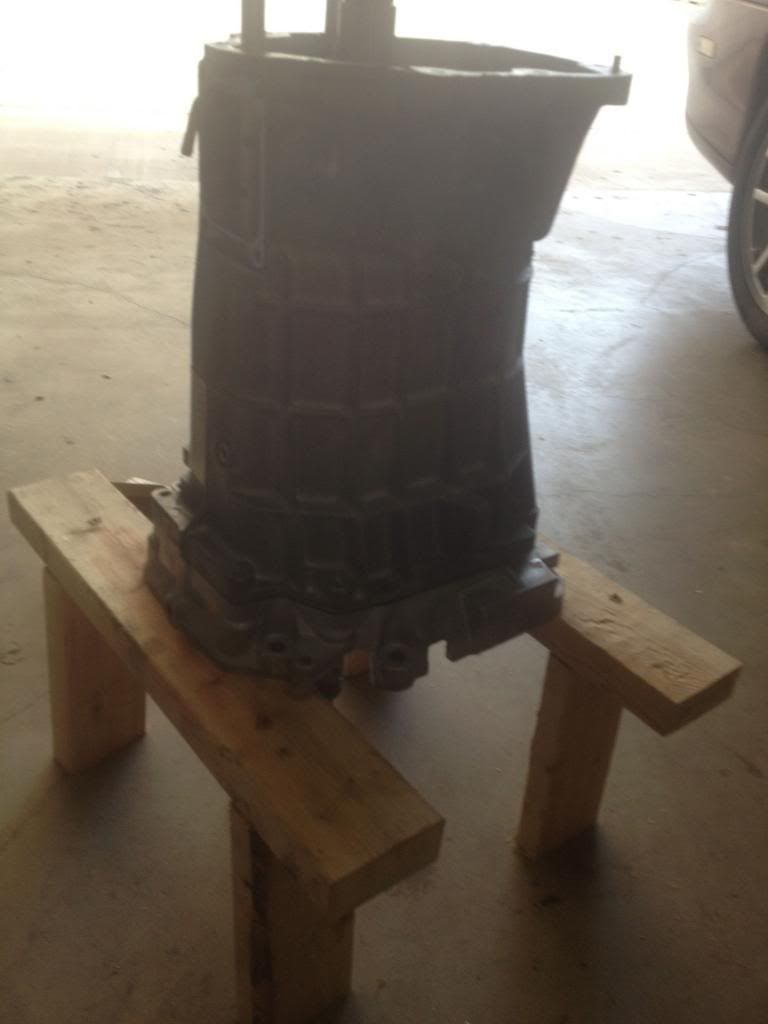
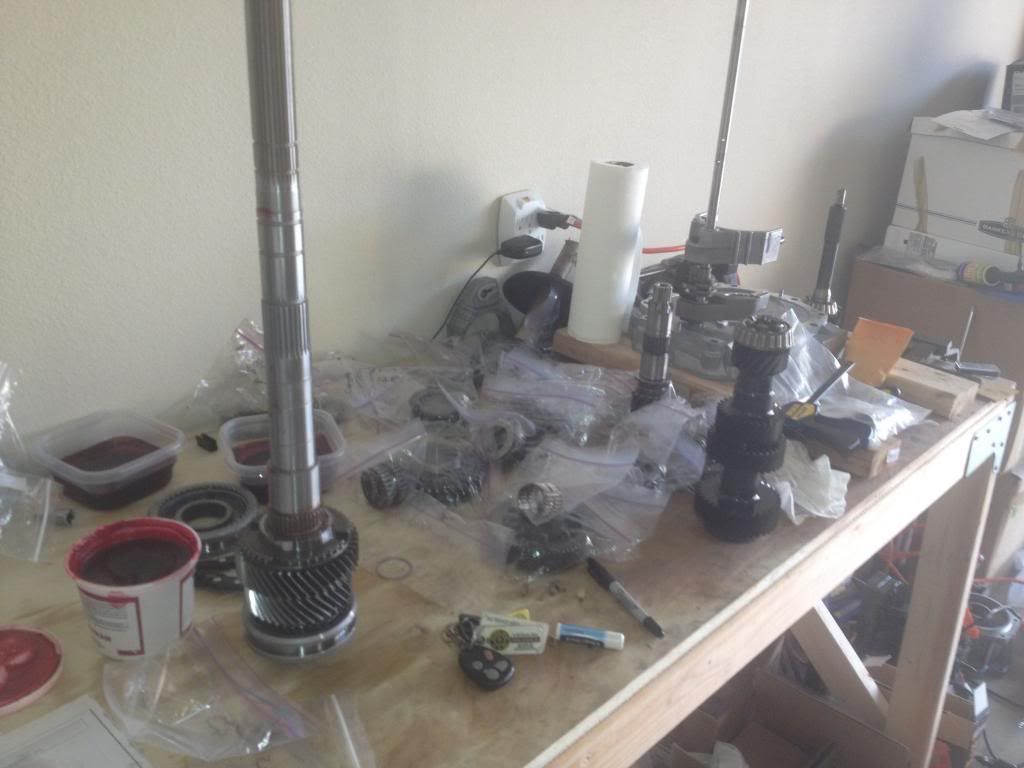
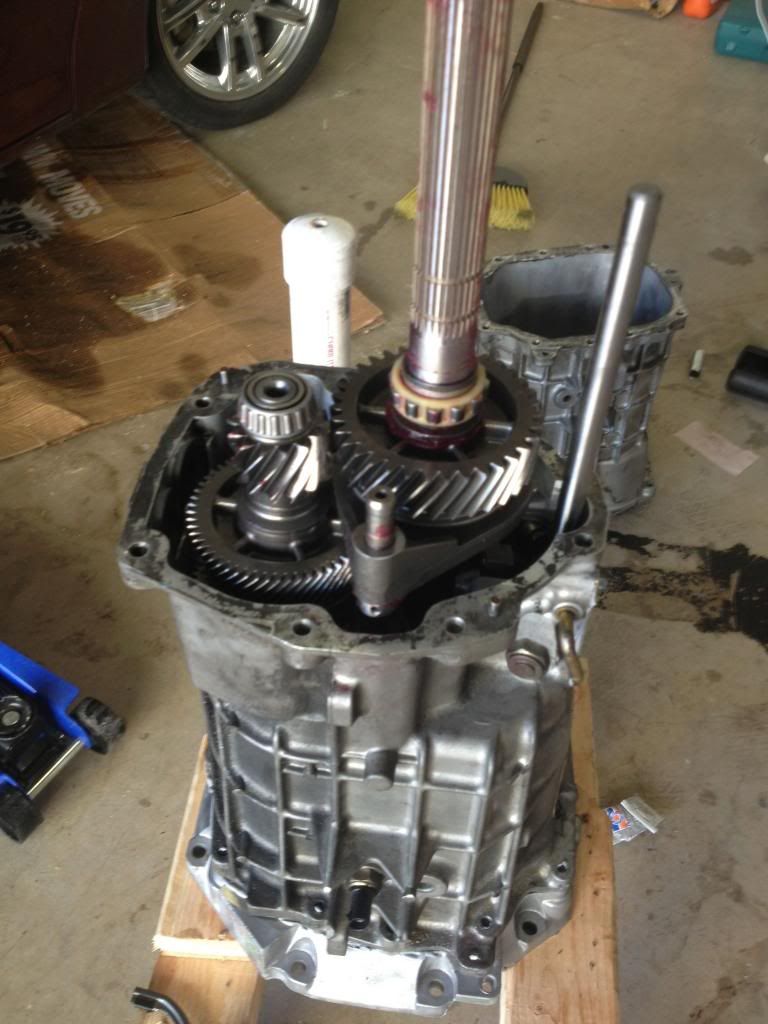
Now that gears 1-4 and the forks are assembled its time to shim the main and counter shaft. this was a tedious process because you must put the input, main, and front of counter shaft in the housing and torque all bolts to 26#. You then check the endplay on the main, unbolt and shim, rebolt and check the counter, unbolt and shim, then apply RTV and rebolt once more. I built this little stand with a few pieces of 2x4 because i liked Mike's idea of using a floor jack to measure endplay and I used his recommendations for shimming
0.002-0.004 preload on countershaft
0.000-0.002 preload on mainshaft
0.000-0.001 end-play on extension shaft
I noticed you need to make sure that when you lay the T56 on its side to put the midplate bolts on. you have to make sure that the 5/6 reverse shift rail is on top so that it stays engages with the assistance of gravity.
Now onto the extension shaft. I again used billit keys and got new springs from gear box.
the extension assembled

there is a gear spacer that goes between the countershaft and the counter shaft extension. the larger one is from my f-body t56 and the smaller one is from the C5
when putting in the counter shaft extension make sure to put it in with the shift fork all as one piece and that its slides all the way down and engages with the counter shaft front piece. I also had to lift up the 5/6 shift rail a little bit to get the snap ring on to hold the fork down

now its time to put the 5/6 driven on. G-force was nice enough to sand blast the gear to fit the new shaft so it went on rather easy with a little assembly lube.

Now to the reverse syncro. I kept the OEM keys on this one and used new springs. To me using billit keys here seemed like a waist
the syncro again needs to be put on with the shift fork or you will be taking it off again later.

finish it up with a new reluctor wheel for g-force.
i pulled the race for the countershaft from the c5 tail housing by turning the gear puller inside out. i quickly learned it is nearly impossible to get the main shaft race out and broke down and bought a new one. All of this goes into the "viper spec" tail housing for f-body that i got from D&D. I later learned when i went to attach the shifter that the hole for the shifter bolt were not tapped? not quite sure if this is normal or not but i guess ill need to do that to finish up the build.
Also as a quick note to gear box and tick, it would be nice to have the part labeled when i received them because it is kind disheartning when you receive a bag of mixed parts. It also makes it kind of difficult to confirm that you recieved everything.
I know that there was many ways i could have done this build and i thought about going with a 32 spline shaft but i had trouble getting certain people to return my calls about a tail housing for it. **cough RS gear cough**
starting parts
f-body t56
c5 t56 for donor gear train to support triple double synchro
[IMG]
 [/IMG]
i started with a new 30 spline main shaft from g-force to fit a f-body or GTO

I used a Carbon fiber syncho rebuilt kit from gear box, soaked the rings before install
for the 3/4 synchro I also used an upgraded spring and key kit from tick performance, here you can see the difference between the stamped steel keys and upgraded solid ones

you have to line up the hub with the slots for the keys. Once lined up you can slide the new keys in and then retain then with the springs

here is the shaft after installing the 3rd gear and the 1/4 synchro on the front of the shaft. I replaced all the gear bearing because even though i was told the c5 transmission i was using as a donor had only 60k miles on it, better play it safe. Also when doing this build you will need to have some way of pressing on a new front bearing because unlike the single friction t56, you can not get the 3/4 assembly on and off with the bearing on


I used plenty of assembly lube but not having access to a press i used a piece on 2 inch PVC pipe with a wooden cap. I added duct tape to hold it together and prevent any pvc pieces from ending up in the synchro when i hammered it onto the shaft.

When hammering/pressing the synchro on, always make sure and confirm the keys from the synchros line up with the blocker rings

here is the shaft with the new front bearing already pressed on and i am beginning to put on the 1/2 assembly

To press on the 1/2 synchro i was going to use this PVC pipe the a 12mm rod threaded through it but when it came time do use it, i realized that unlike the OEM shafts this one is not threaded on the end so i was forced to use a hammer and more assembly lube. I also have sure to lather up all the new bearing with it as well.

In addition to the larger strong shaft and carbon fiber rings, i also upgraded to brass fork pads and a steel 3/4 shift fork

The bronze pads were rather difficult to get on and i had to use this clamp

Now that gears 1-4 and the forks are assembled its time to shim the main and counter shaft. this was a tedious process because you must put the input, main, and front of counter shaft in the housing and torque all bolts to 26#. You then check the endplay on the main, unbolt and shim, rebolt and check the counter, unbolt and shim, then apply RTV and rebolt once more. I built this little stand with a few pieces of 2x4 because i liked Mike's idea of using a floor jack to measure endplay and I used his recommendations for shimming
0.002-0.004 preload on countershaft
0.000-0.002 preload on mainshaft
0.000-0.001 end-play on extension shaft

I noticed you need to make sure that when you lay the T56 on its side to put the midplate bolts on. you have to make sure that the 5/6 reverse shift rail is on top so that it stays engages with the assistance of gravity.

Now onto the extension shaft. I again used billit keys and got new springs from gear box.

the extension assembled

there is a gear spacer that goes between the countershaft and the counter shaft extension. the larger one is from my f-body t56 and the smaller one is from the C5

when putting in the counter shaft extension make sure to put it in with the shift fork all as one piece and that its slides all the way down and engages with the counter shaft front piece. I also had to lift up the 5/6 shift rail a little bit to get the snap ring on to hold the fork down

now its time to put the 5/6 driven on. G-force was nice enough to sand blast the gear to fit the new shaft so it went on rather easy with a little assembly lube.

Now to the reverse syncro. I kept the OEM keys on this one and used new springs. To me using billit keys here seemed like a waist


the syncro again needs to be put on with the shift fork or you will be taking it off again later.

finish it up with a new reluctor wheel for g-force.

i pulled the race for the countershaft from the c5 tail housing by turning the gear puller inside out. i quickly learned it is nearly impossible to get the main shaft race out and broke down and bought a new one. All of this goes into the "viper spec" tail housing for f-body that i got from D&D. I later learned when i went to attach the shifter that the hole for the shifter bolt were not tapped? not quite sure if this is normal or not but i guess ill need to do that to finish up the build.
Also as a quick note to gear box and tick, it would be nice to have the part labeled when i received them because it is kind disheartning when you receive a bag of mixed parts. It also makes it kind of difficult to confirm that you recieved everything.
I know that there was many ways i could have done this build and i thought about going with a 32 spline shaft but i had trouble getting certain people to return my calls about a tail housing for it. **cough RS gear cough**
 04-22-2013, 12:36 AM
#2
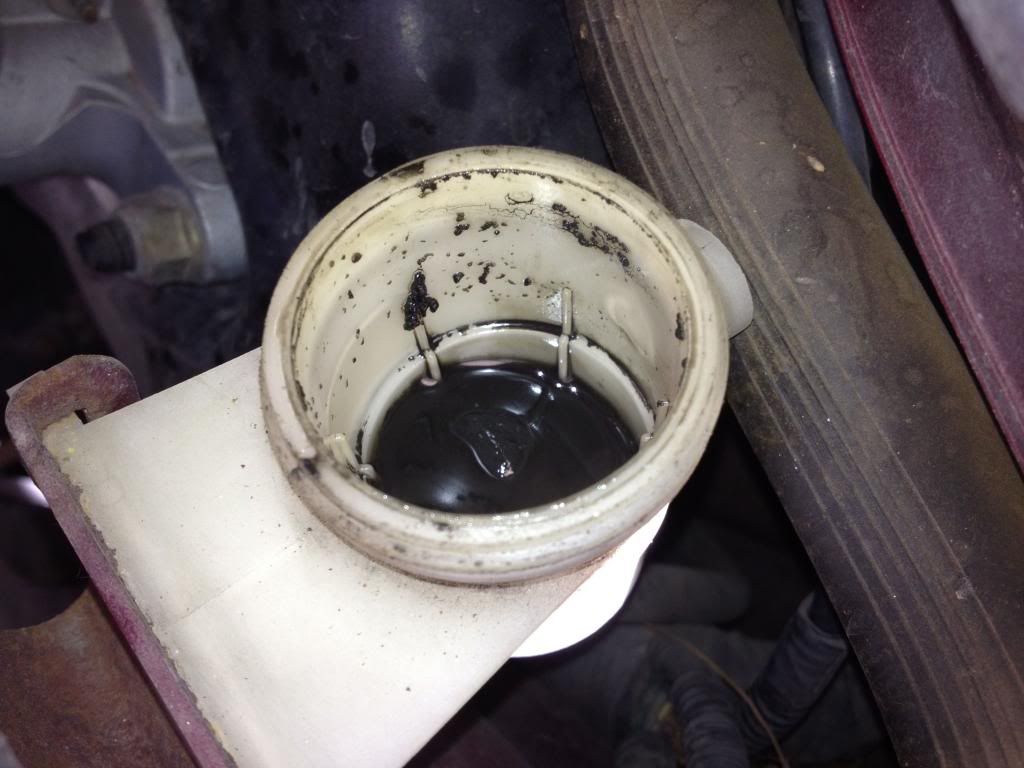
In the end it wasnt a very difficult project and now i need to install it and all new hydraulic because i believe the dealer ship that installed my ls7 clutch used a non-compatible fluid because i was having some trouble shifting into all gears and when i opened my resevoir i found this


 04-24-2013, 08:20 PM
#4
one thing i would like to know is if it is usual for a new build to be hard to turn by had, i used alot of assembly lube on the bearings and its all new syncros so i was thinking they just need to get fluid over them and wear in? all gears seamed to turn fine individually when i put them on and i even re soaked the second friction blocked and that helped some. Just wanted to make sure before i put it in.
