Made a double din bezel
 02-10-2014, 05:51 PM
#1

Ok guys i am making my own bezel and will be updating with pics as i go. So far i have the opening cut out and am gonna be doing the bondo and whatnot tomorrow  ~Cole~
~Cole~
Last edited by Cole Train; 02-12-2014 at 02:09 AM.
 02-10-2014, 06:54 PM
#3
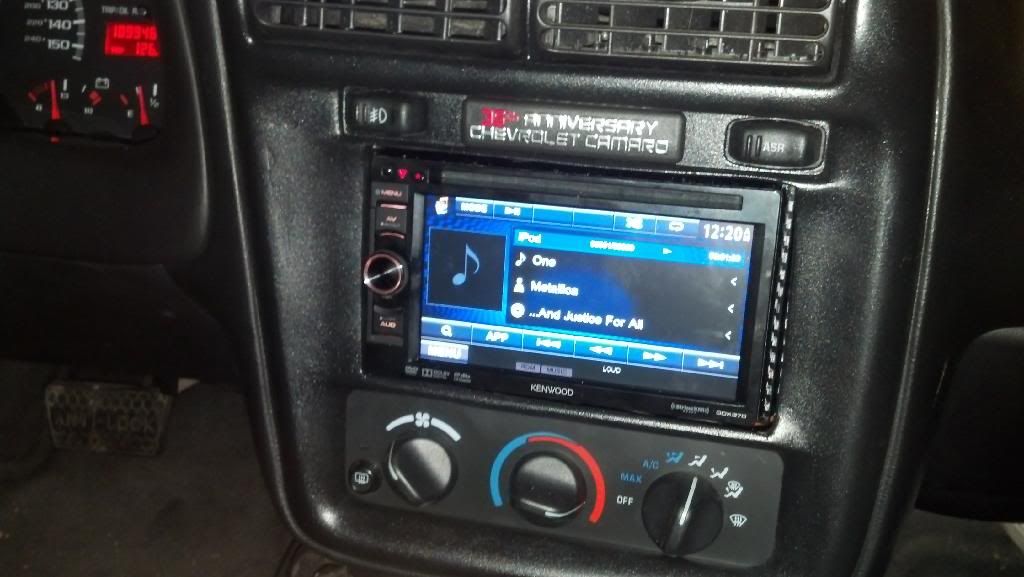
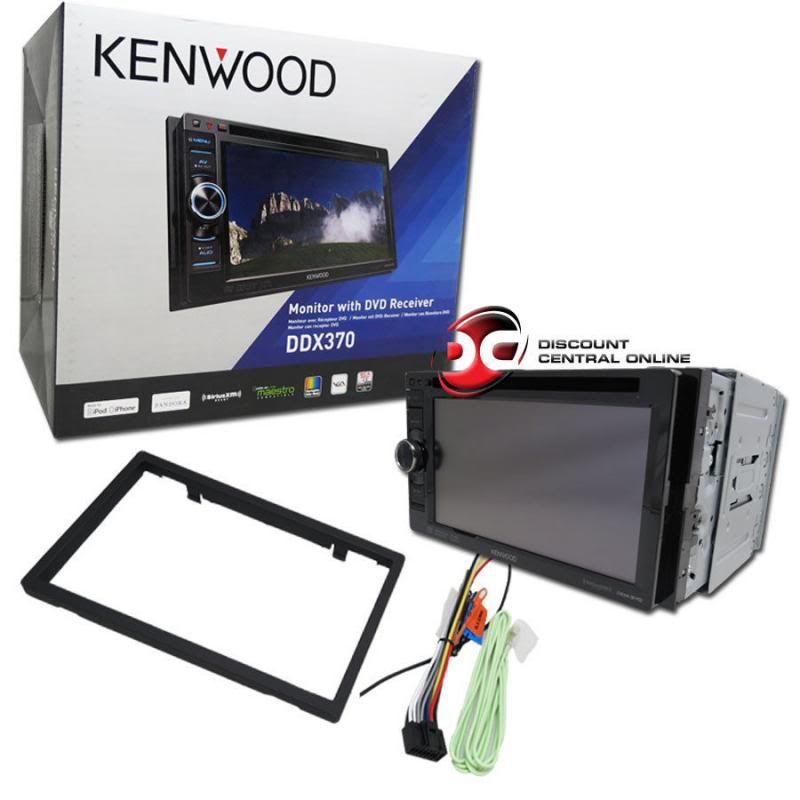
This is the DD i went with. I'm trying to do the whole thing for $300 or less and with this i got it for $222 shipped. Also got an Ipod adapter and steering wheel control interface for it. At $275 right now and i had the bezel(got from a local yard for free with some other stuff i got last summer). The paint was $15 for all stuff. Tools i had already and had Bondo from doing my fuel rail covers. This is gonna be a tight budget at $300 
P.S. i didn't need a Navigation radio because i hardly ever go anywhere that requires it(unlike my trucks Kenwood DD). Wish they'd offer one that doesn't need DVD either but oh well.
P.S. i didn't need a Navigation radio because i hardly ever go anywhere that requires it(unlike my trucks Kenwood DD). Wish they'd offer one that doesn't need DVD either but oh well.
 02-11-2014, 10:10 AM
#4

Nice! I picked up a bezel for $25 shipped to send off to DD. Total price from DD was $100, plus my $12 shipping to get the bezel there.
Really thought about trying to mod it myself, but I figured they are the experts (sure I could do it, but I'd have to rework it a few times due to learning curve), I'd spend a minimum of $20-$30 in supplies, and being that I have a 2.5 year old with another on the way, I'd have no time to actually get it done.
Looking forward to seeing the results!!
02-11-2014, 01:50 PM
#5
I'm fairly handy with bondo and whatnot being that i grew up around my dad that owns and works in a body shop. I just was scared to tackle it, being an interior part. But since i had a really nice condition spare i figured i may as well give it a try. I'm loosely following this How To https://ls1tech.com/forums/stereo-el...din-bezel.html
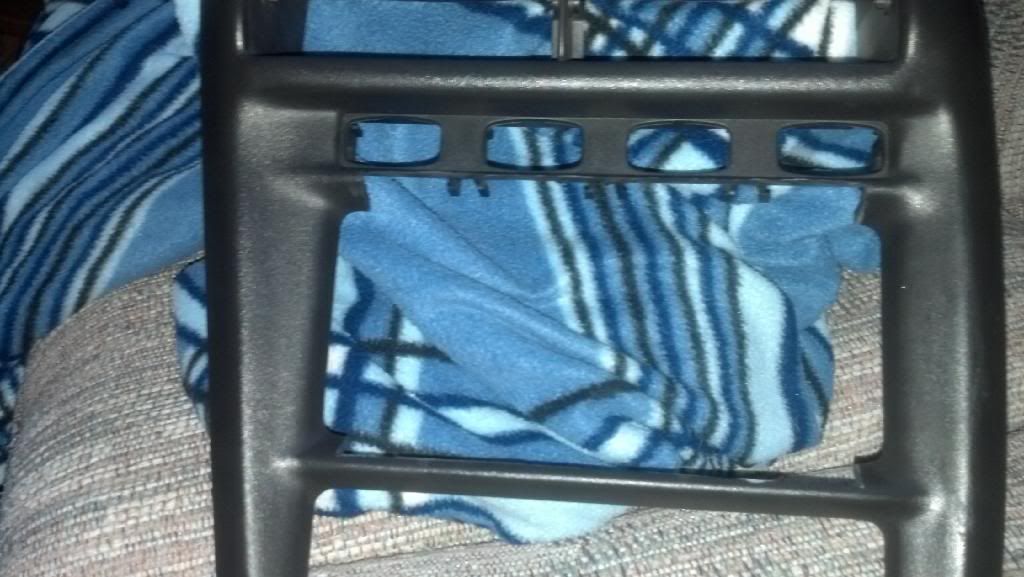
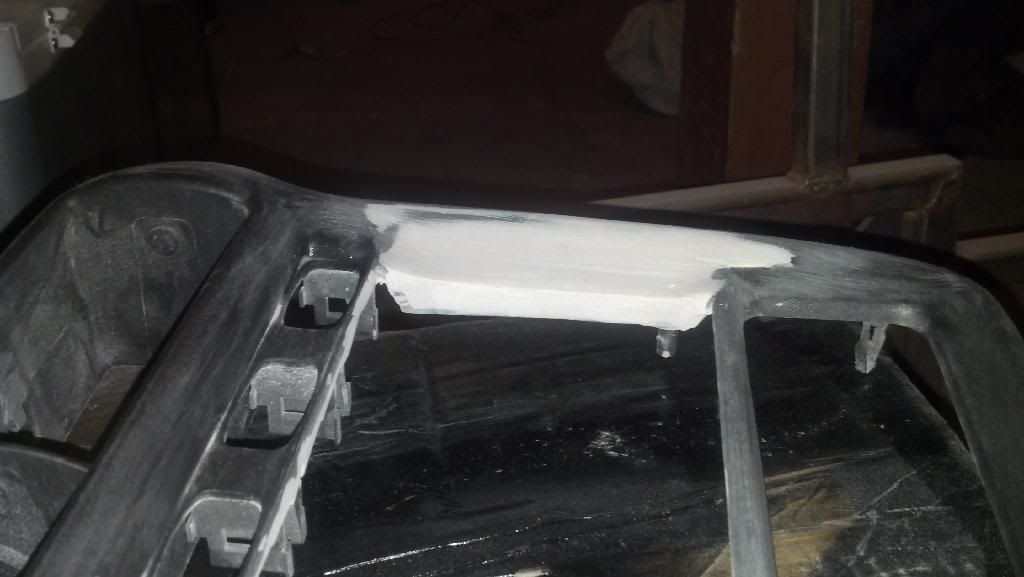
Here's what i accomplished today. Evened out the sides with plastic inserts done with Epoxy. I'm hoping to lay down Bondo today yet as well I was planning to send off to Dennis but i just don't want to wait for the turnaround. If this turns out i won't have to send it. If it doesn't, i'll send my other one to him and just have to wait
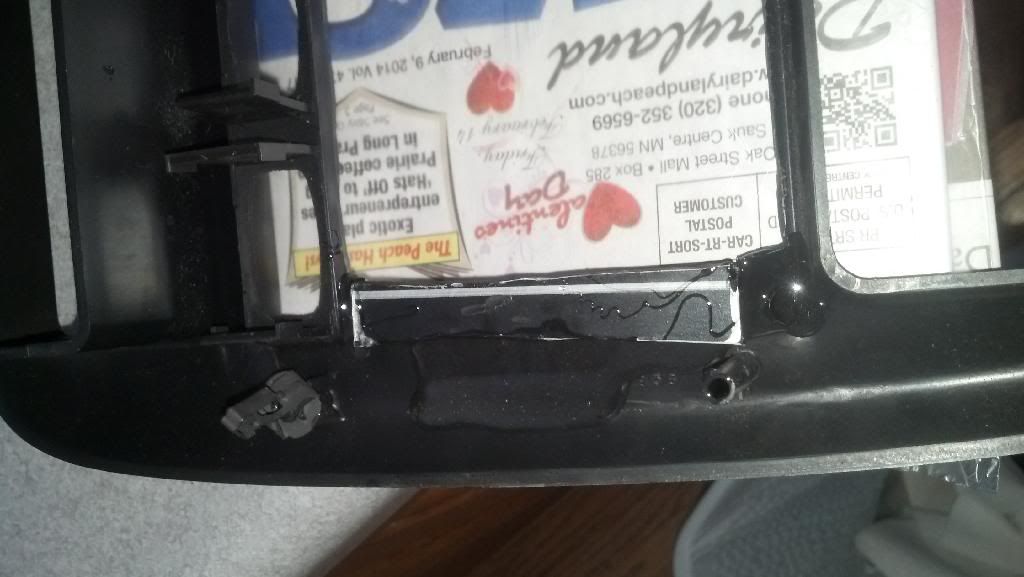
Here's what i accomplished today. Evened out the sides with plastic inserts done with Epoxy. I'm hoping to lay down Bondo today yet as well
I was planning to send off to Dennis but i just don't want to wait for the turnaround. If this turns out i won't have to send it. If it doesn't, i'll send my other one to him and just have to wait

Trending Topics
02-11-2014, 03:14 PM
#8
TECH Enthusiast
iTrader: (1)

Join Date: Oct 2005
Location: St. Cloud, MN
Posts: 587
Likes: 0
Received 0 Likes
on
0 Posts

C'mon now....that's no way to treat the Peach!!!
Looking good man. I was at a stand still after my car was broke into, if I should go the Double Din route, or go back with what I had, a single DIN and the HUMount. I ended up going with the HUMount, so it matches my 6LE dash gauges.


Looking good man. I was at a stand still after my car was broke into, if I should go the Double Din route, or go back with what I had, a single DIN and the HUMount. I ended up going with the HUMount, so it matches my 6LE dash gauges.
02-11-2014, 03:27 PM
#9
The Birds have it easy for doing a double din due to it being such a small bezel. The Camaro has the huge bezel and you have to end up painting the whole thing. The birds you just have the small part to paint. I love the HUMounts but they aren't cheap and for the difference in price between a basic DD and a nice single is marginal. Having the DD updates the look of the inside alot


 02-11-2014, 07:21 PM
#10
TECH Enthusiast
iTrader: (1)
Join Date: Oct 2005
Location: St. Cloud, MN
Posts: 587
Likes: 0
Received 0 Likes
on
0 Posts
The Birds have it easy for doing a double din due to it being such a small bezel. The Camaro has the huge bezel and you have to end up painting the whole thing. The birds you just have the small part to paint. I love the HUMounts but they aren't cheap and for the difference in price between a basic DD and a nice single is marginal. Having the DD updates the look of the inside alot
02-12-2014, 12:26 AM
#11
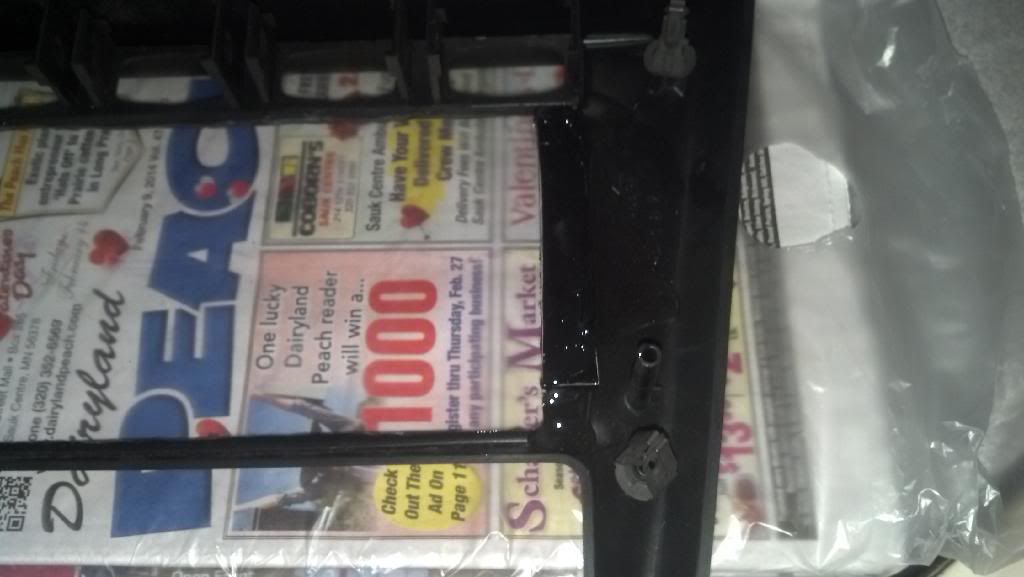
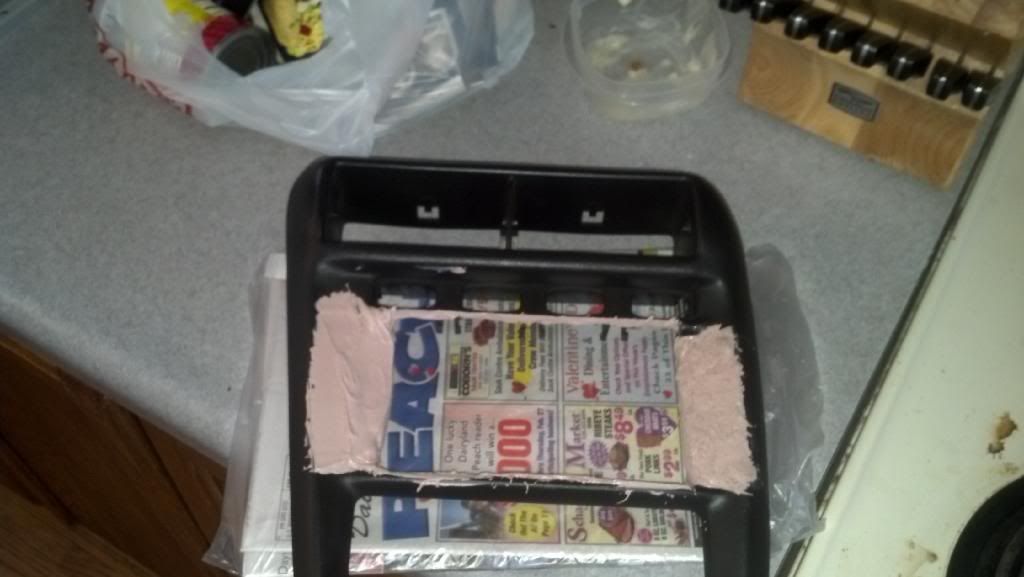
Made more progress this evening Sanded down and formed the bondo and squared up the corners. I wanted it to form somewhat the same as stock curves of the bezel. After sanding it i used some texture stuff i got from one of the local hardware shops in their body work section. It's a sealer and makes a texture to it. I'll be doing a flat black and a flat/matte clear on top of this. The flat is a primer/paint combo. In the one pic you can see the texture spray on it ~Cole~
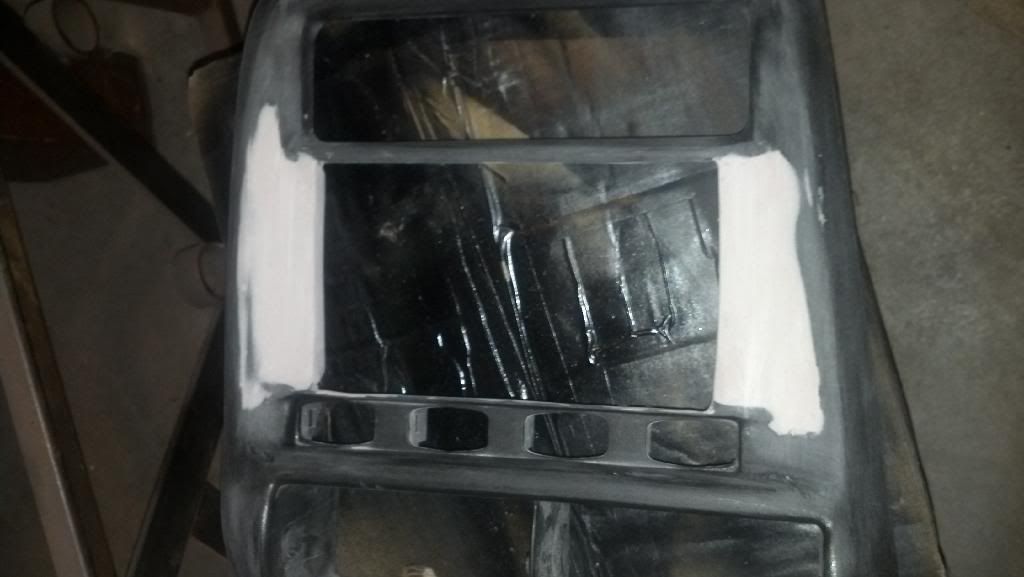

Sanded down and formed the bondo and squared up the corners. I wanted it to form somewhat the same as stock curves of the bezel. After sanding it i used some texture stuff i got from one of the local hardware shops in their body work section. It's a sealer and makes a texture to it. I'll be doing a flat black and a flat/matte clear on top of this. The flat is a primer/paint combo. In the one pic you can see the texture spray on it ~Cole~


 02-12-2014, 02:00 AM
#12
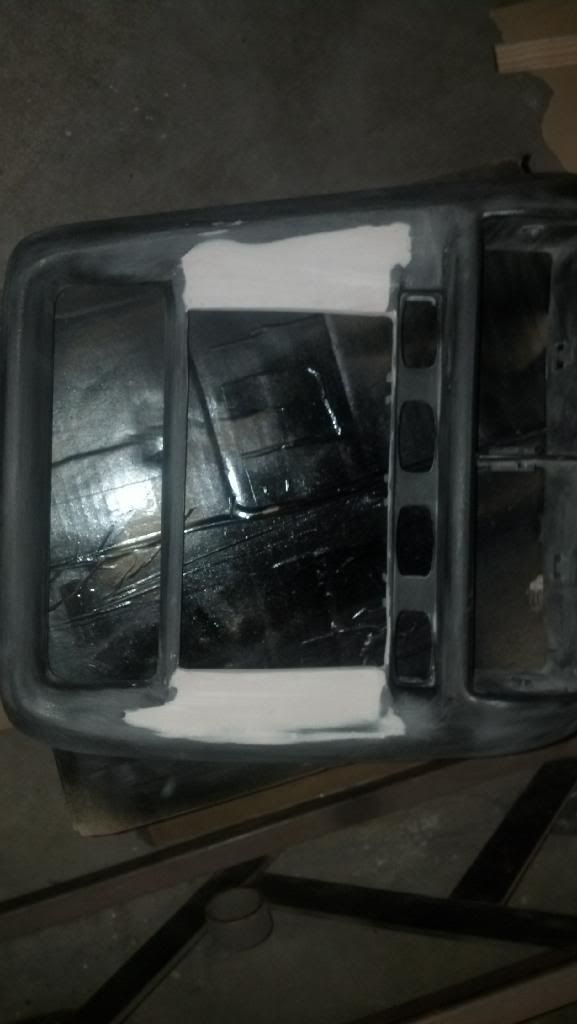
Finished it's a little glossy but i'm guessing it'll dull down as i wipe, clean and use it. Also it's dark in the car(dark tint) most of the time so you won't notice it. If it bugs me enough i'll just scuff it and shoot it in flat black only and not clear it(the clear is what's giving it the gloss look). It's also fresh paint too and the flash makes it look more shiny that it is in person.
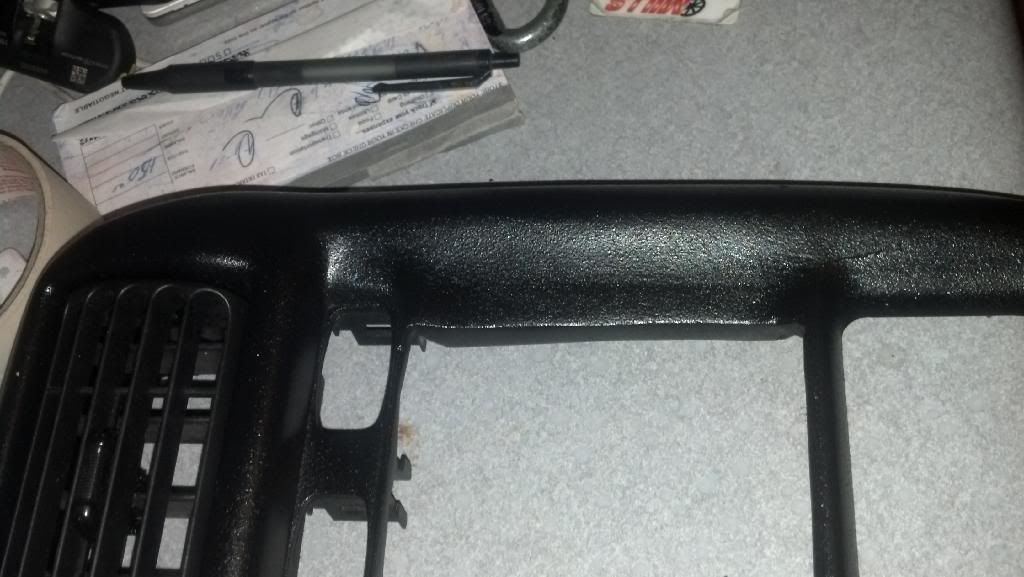

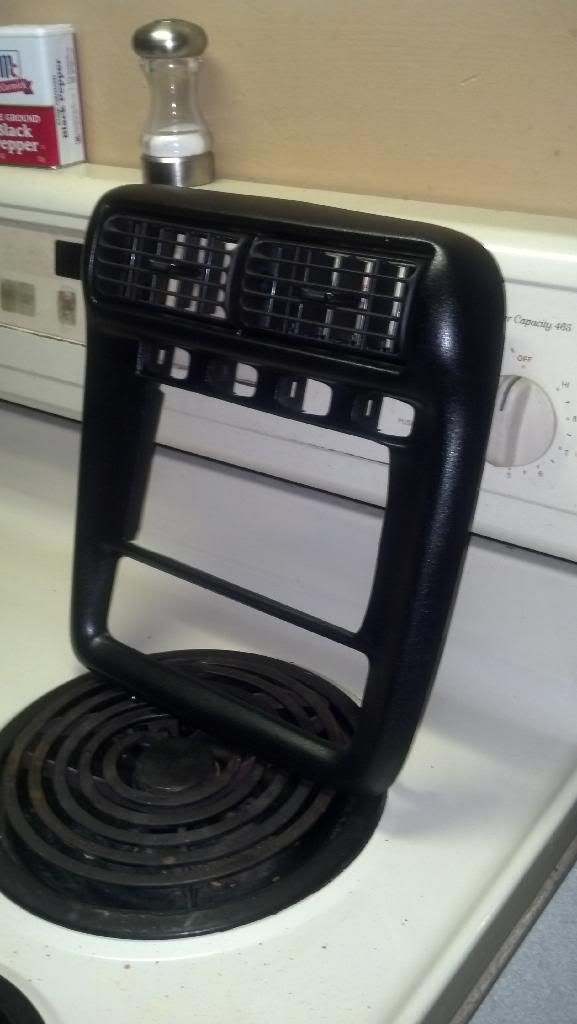
it's a little glossy but i'm guessing it'll dull down as i wipe, clean and use it. Also it's dark in the car(dark tint) most of the time so you won't notice it. If it bugs me enough i'll just scuff it and shoot it in flat black only and not clear it(the clear is what's giving it the gloss look). It's also fresh paint too and the flash makes it look more shiny that it is in person.


 02-12-2014, 02:36 AM
#13
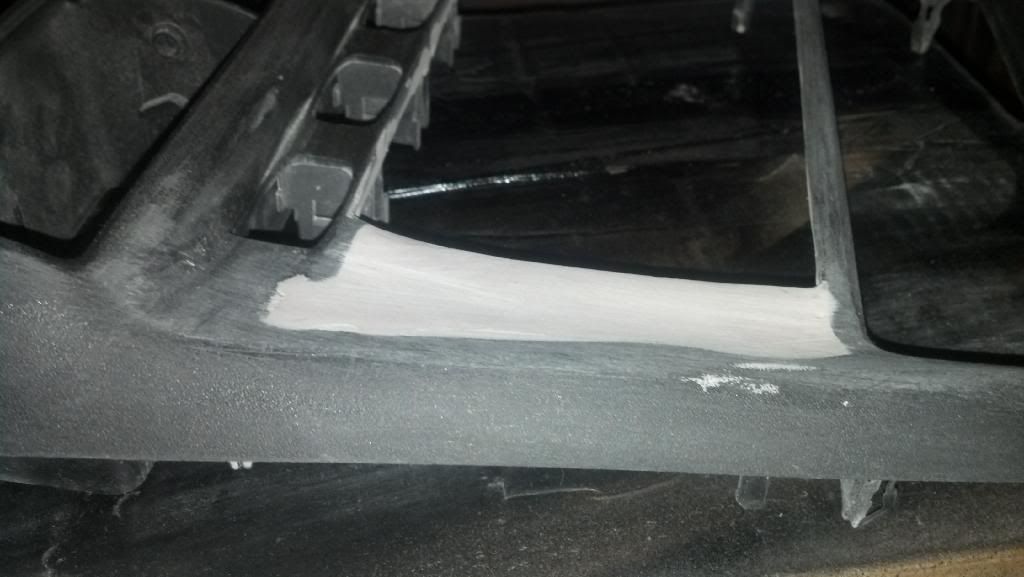
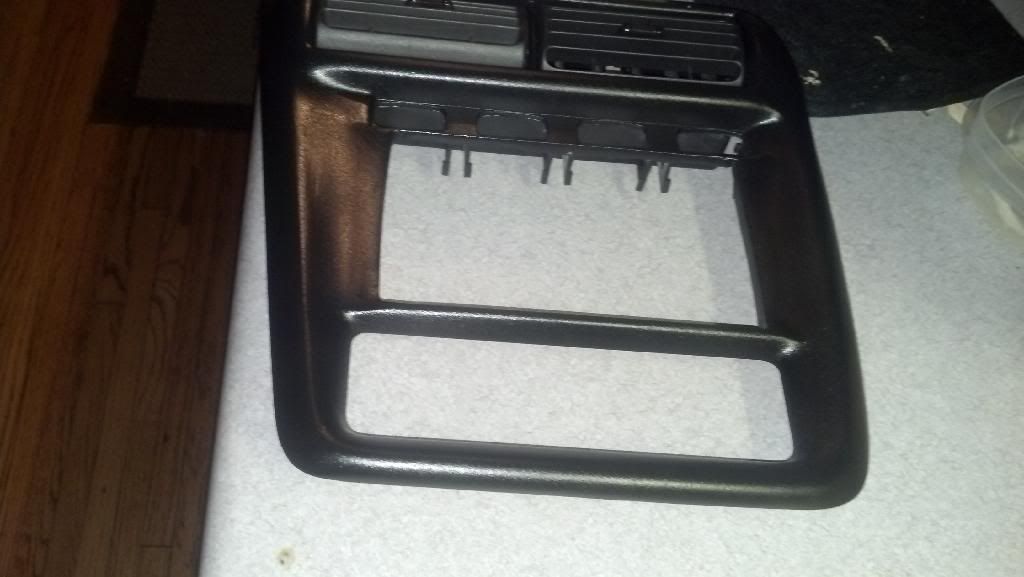
Started this yesterday afternoon and finished this evening. Have about 4.5 hours into it. The hardest part is sanding the bondo and forming it. Plus the wait time between stages. Not bad though and could do one again easily. After I get the stereo in I'll maybe build the other bezel in the car still or sell that one. Its PERFECT.
 02-22-2014, 07:58 PM
#17
Registered User

Join Date: Feb 2014
Location: Wisconsin
Posts: 11
Likes: 0
Received 0 Likes
on
0 Posts
Very well done. I just pulled the bezel of my 35th anniversary...starting the job and haven't selected the radio but leaning heavily towards DD. I didn't realize the width of the DD was narrow. Still learning. Haven't yet removed the radio...haven't figured out how to get behind it yet and taking it real slow.
02-22-2014, 10:42 PM
#18
yeah i guess the OEM radio's are 10mm wider on each side than a standard DD. The programming of the PAC controller sucked but after an hour i figured it out. I now have a spare bezel that i'm gonna be likely selling eventually. Maybe i'll keep it, who knows.