Camaro and Firebird: How to Install Amplifier Power Wire
A power wire is what supplies the big watts that power your subwoofer or speaker amplifier. In this article we'll go over the best practices for running the wire from the positive battery post to the positive terminal of the amplifier.
This article applies to the Camaro and Firebird (1990-2015).
An amplifier can add a lot to the sound system inside your car. If you need to complement the other parts of your upgraded stereo system, an amp is the way to go. However, these amplifiers need a lot of power, which requires them to have a wire run directly to the battery. In this article we will talk about how best to install one safely and professionally.

Materials Needed
- A GM battery post replacement (part # TC5GMS)
- Stubby Phillips head screwdriver
- Razor knife
- 9/32", 10mm socket and ratchet
- Zip ties, split loom, and tape
Step 1 – Disconnect the battery
Disconnect both positive and negative battery terminals. You will be removing the PCM, and so you don't want any power going through it when you unplug it. Battery removal is not necessary; however, you can if you want.
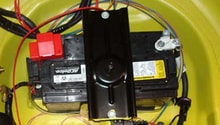
Step 2 – Remove the positive battery terminal
This will take some effort. The factory battery terminal is pushed through a hole in the red rubber shield, and then through a ring terminal around the positive wire. With your thumb on the screw portion, and a pair of pliers on the other side, it should eventually pull out.
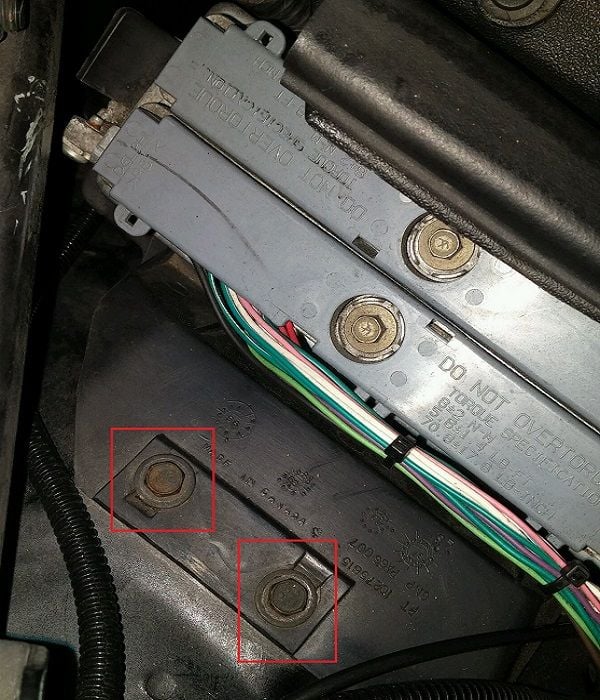
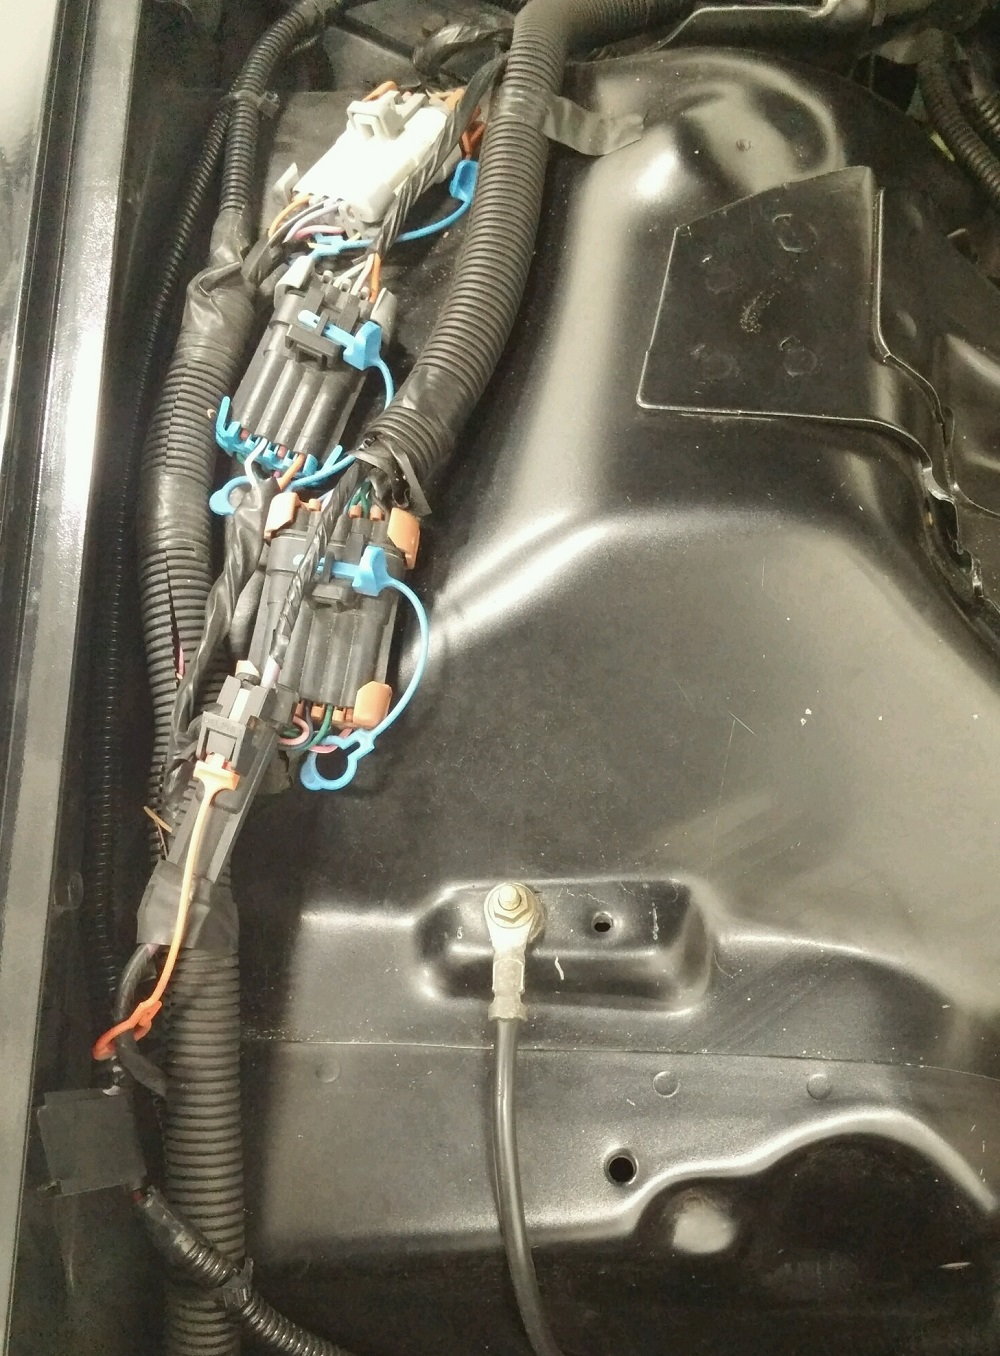
Step 3 – Disconnect the PCM connectors
Using your 9/32" socket, remove the bolt holding the two PCM connectors and carefully lift them up. Notice the orange gaskets around the connectors. Do not lose these!
Step 4 – Remove the PCM
Remove the two 10mm bolts located just in front of the PCM that hold it in place. Depress the two tabs on either side of the PCM and pull it out. Removal does require a bit of finesse, so be patient and careful.
Step 5 – Remove the interior plastics
There are four Phillips head screws that hold the door sill trim in place. Remove these and pull the panel towards the rear of the car. There is a small vertical strip that sits behind part of the A-pillar cover. Pull this out from behind and lift the rear portion of the trim panel. It should come right out. The panel under the glove box also needs to be removed. There are two plastic clips at the bottom of the glove box lid that hold it on, and a metal clip at the rear of the panel.
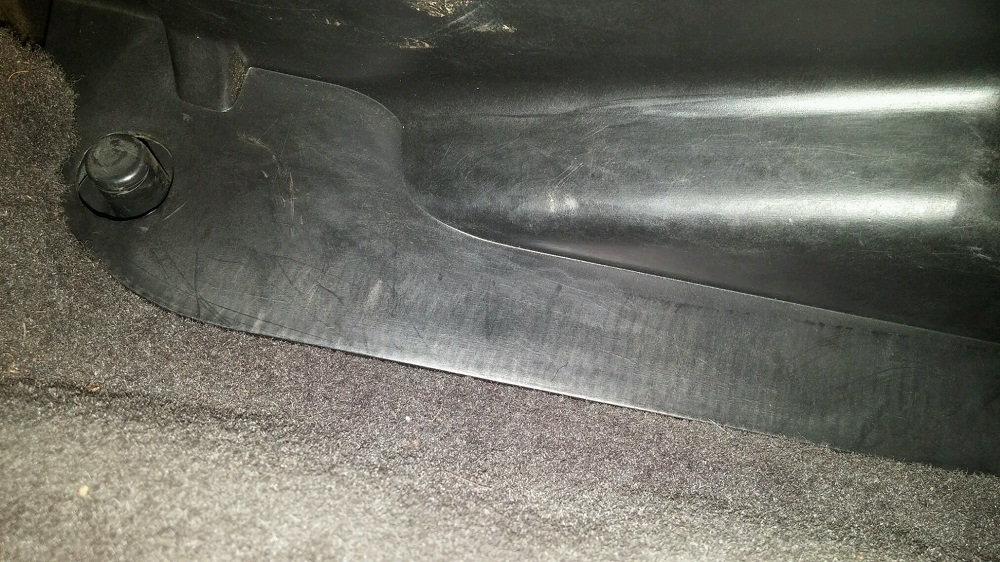
Step 6 – Run the power wire
Using your razor knife, cut a small x-shape in the grommet behind the PCM. Be very careful with this; you do not want to accidentally cut a wire. After the cut is made, take your power wire and push it into the cut. Most wires will be stiff enough to push through the rubber without any issue. If necessary, a lubricant (such as Vaseline) will help run the wire through.
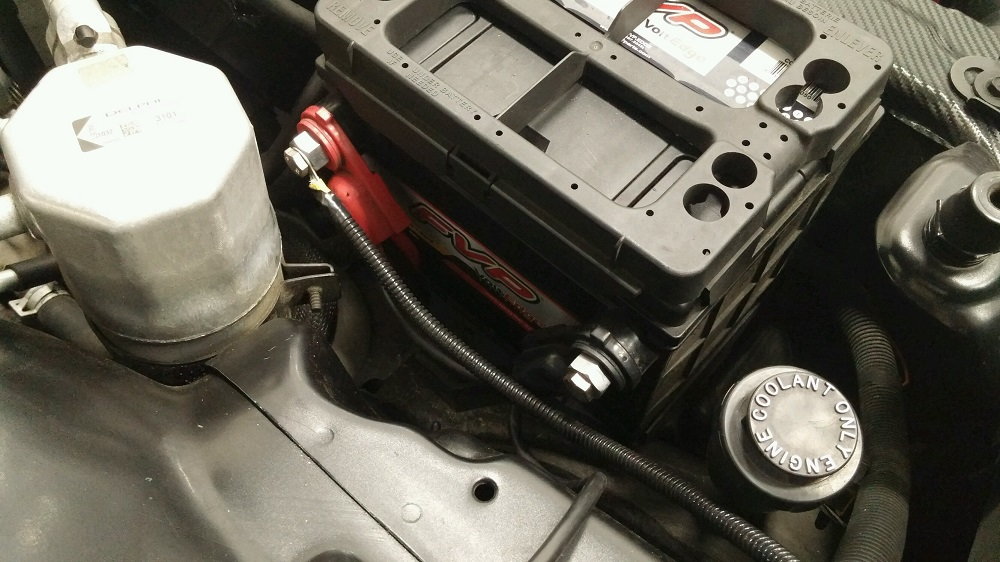
Step 7 – Route your wire in the engine compartment
Take your Metra battery terminal and insert the threaded end through the hole in the positive wire. This will not stay in as easily as the factory, so be careful not to lose it. Unscrew the smaller end and put it through the ring terminal on the positive amplifier wire. Screw this back into the terminal and route the wire inside the engine compartment, following the factory harness on the passenger side. Leave a little bit of slack for any potential movement, and then zip-tie in place.
Step 8 – Route the wire inside the vehicle
Pull the remaining slack through the grommet and into the interior of the vehicle. There isn't much space underneath the sill trim panel, so route the wire underneath the carpet, taking care to keep it free of anything sharp or where it may be stepped on. Run the wire to where you are mounting the amplifier, then cut a small slit in the carpet and poke the wire through, then attach it to the positive terminal of the amp.
Step 9 – Reassemble the vehicle
Reinstall the plastic panels you removed, in order of the lower passenger kick panel first, then the door still trim panel. Back underneath the hood, reinsert the PCM into its mount, then reinstall the two 10mm bolts and any cowl pins you removed. Re-connect the PCM connectors and carefully tighten the bolts (only hand-tight; it does not take much to strip these out). This is optional, but applying split-loom to the amplifier wire under the hood gives it a more factory look.
Lastly, reconnect (and reinstall) the battery doing the positive terminal first, and then the negative.
Related Discussions
- Amp Rack Walkthrough - LS1Tech.com
- Amp Power Wire Routing - LS1Tech.com
- Easiest Place to Route Amp Wire - LS1Tech.com
- How to Connect Amp Wire to Battery - LS1Tech.com
- Best Way to Route Power Wire - LS1Tech.com