Hella 90mm H9 projectors Installed in a 2001 Firebird (plenty of pics)
Thread Starter
Copy & Paste Moderator


Joined: Apr 2002
Posts: 9,764
Likes: 208
From: Eastern MA
UPDATE 2019-09-19
I now have Sinolyn 3" Projectors
https://ls1tech.com/forums/appearanc...rojectors.html
ORIGINAL POST BELOW
This is a bit of a re-post and an update. I wanted to update my install post, but I didn't want to clutter up the Lighting FAQ, so I started a new thread. For those that have seen my install, the first few posts you will recognize, but there is a new post about custom curved cut-off shields that I made which improved output.
---------------------------------------------
EDIT: FULLTHROTTLEV6 MUST HAVE GONE THROUGH AN UPGRADE. ALL THESE LINKS ARE NOW INVALID.
I read through the threads on Full Throttle V6 and got started.
http://www.fullthrottlev6.com/forums...ad.php?t=22874
http://www.fullthrottlev6.com/forums...ad.php?t=23020
http://www.fullthrottlev6.com/forums...ad.php?t=23217
http://www.fullthrottlev6.com/forums...ad.php?t=23289
http://www.fullthrottlev6.com/forums...ad.php?t=23782
---------------------------------------------
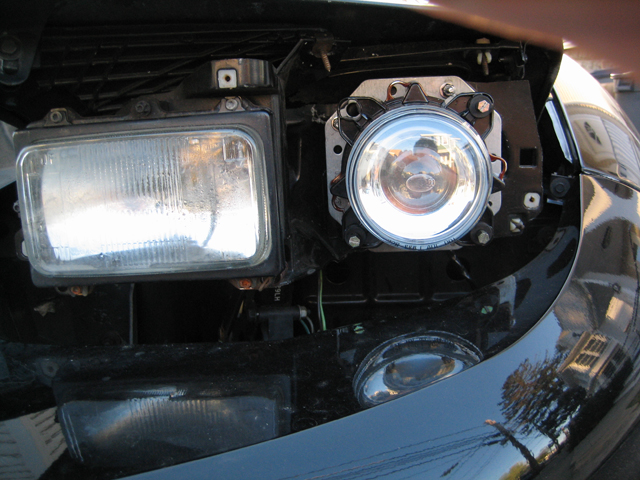
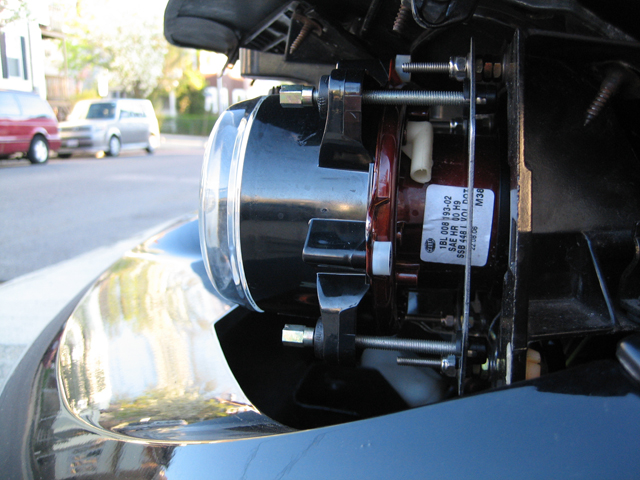
My install was slightly different and involved plenty of fitting, adjustment, and manually raising and lowering the headlights (to facilitate said fitting and adjustment). I tried to avoid removing the headlight lids, but in the end, I had to to gain access the back of the housings. I used 4 #8 1.5" stainless machine screws/bolts and three nuts stacked to space the Hella adapter in front of the headlight frame for each projector. So, in total: 8 bolts, 24 regular nuts (for spacing), 4 nylock nuts to attach the Hella adapter to the bolts that were sticking out like studs. I'm probably not explaining to well and a picture is worth a thousands words. I'll try to take pics later in the day. The head light frame is cast aluminum. It cuts (and cracks) easily. A drill and dremel (I used a Black & Decker RTX) will cut through it fine. I cut mine pretty much like in the pictures, but after all the adjustment, I realized that I didn't need to cut quite so much. I'd say, mount the adapter ring, then the projector in the ring and see where it makes contact and needs to be clearanced before cutting or drilling extra holes. Pull the headlight motor fuse and manually raise and lower the headlights to check for clearance in front and behind the projectors to make sure the glass doesn't hit the bumper and that the bulb connector doesn't hit the frame behind the headlights. Make adjustments to the new mounting assembly and projector adjuster screws as necessary. Its a tight fit, but they do fit.
Here are the pics of my installation (5/4/2007)
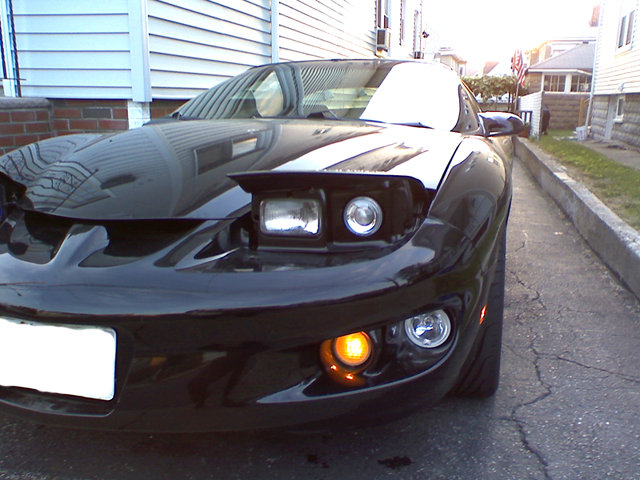
Front Complete
(stock shroud was trimmed.)

800x600
2592x1944
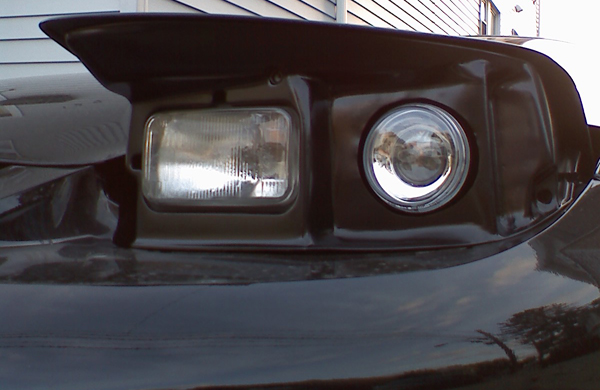
Front Close-up without shroud
800x600
2592x1944
Side of the projector mounted
800x600
2592x1944
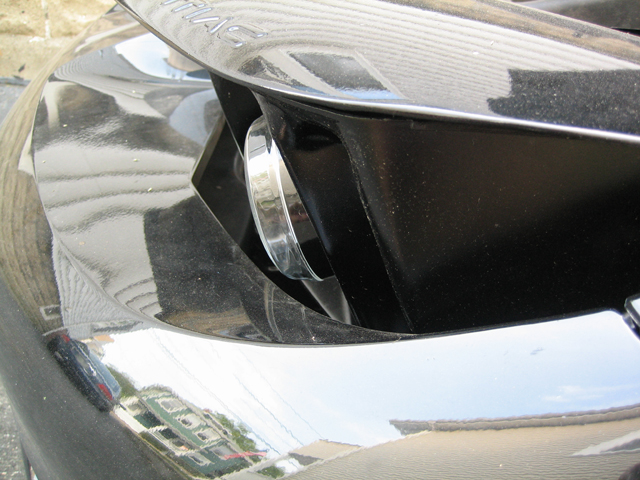
Lights partially lowered manually
(There is about 1/4" clearance between the projector front glass and the bumper.)
800x600
2592x1944
Here are a couple pics of the modified shroud
https://www.fadingarrow.com/images/h...htshroud01.jpg
https://www.fadingarrow.com/images/h...htshroud02.jpg
Those install pics and more are available in this zip
https://www.fadingarrow.com/images/H...-Installed.zip
(Warning: 14.6MB)
--------------------
Here are the night pictures
(BTW, those are the standard Osram H9 bulbs that came with the projectors.)
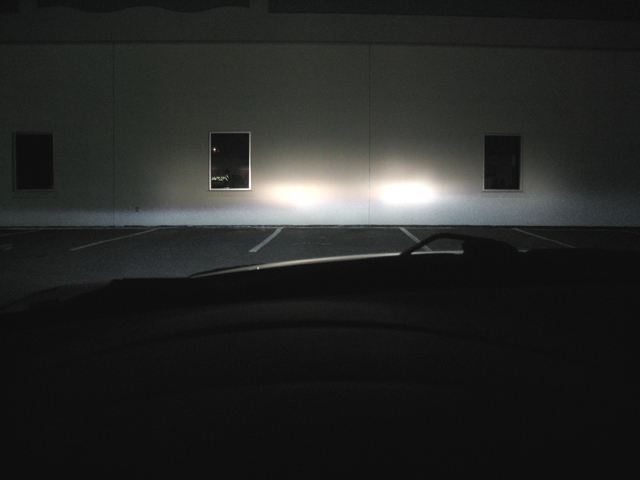
Wall -- Low Beam Only
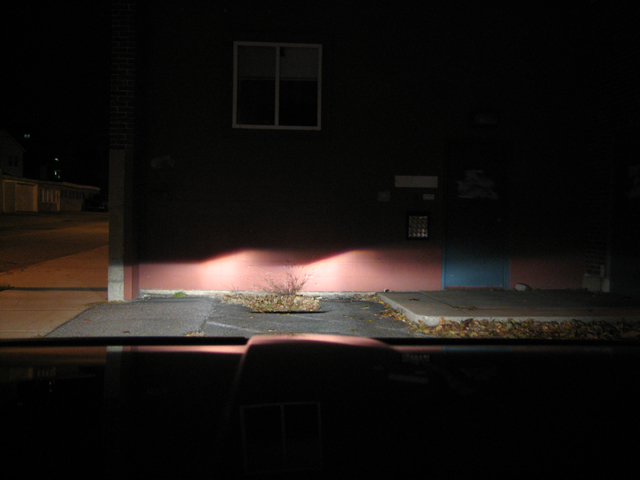
800x600
2592x1944
Wall -- Low Beam and High Beam
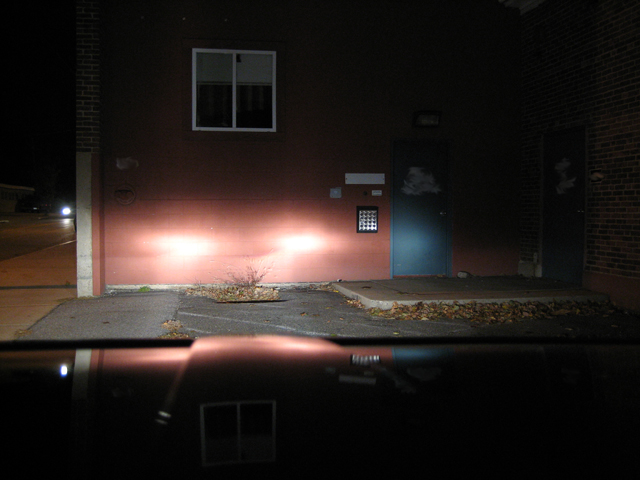
800x600
2592x1944
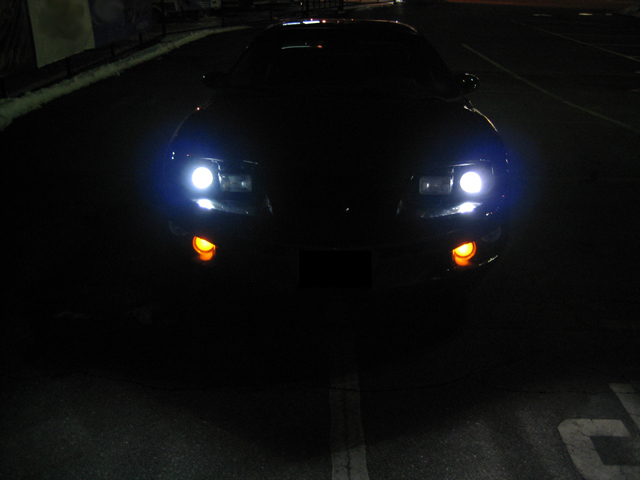
Front -- Low Beam Only
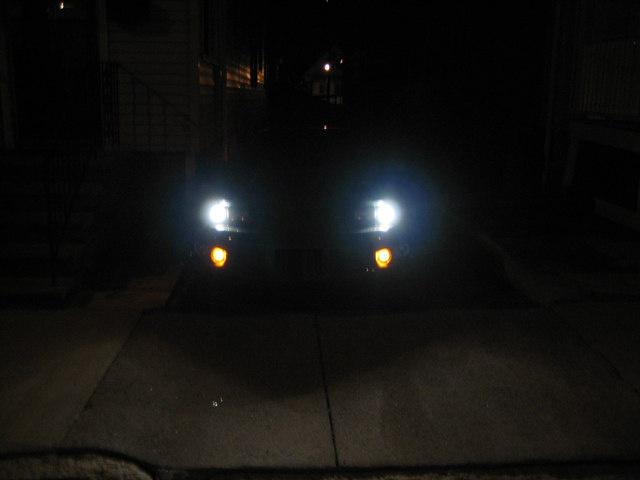
800x600
2592x1944
Front -- Low Beam and Fog Lights
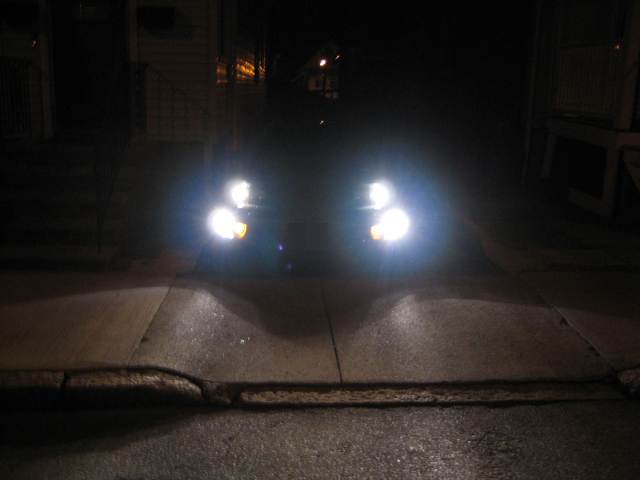
800x600
2592x1944
I usually drive with the fog lights off.
Those night pics and more are available in this zip
https://www.fadingarrow.com/images/H...9--Halogen.zip
(Warning: 14.6MB)
----- EDIT --- 2021-09-25 -----
As noted in the First Post, links to older threads on other sites are broken now and info lost. I'm updating this with what was cut to fit the Hella 90mm projectors I had in there when this thread was created (I have Sinolyn Projectors now and that is what you see in the cut pic below). I just took a couple pics on the car as they appear now.
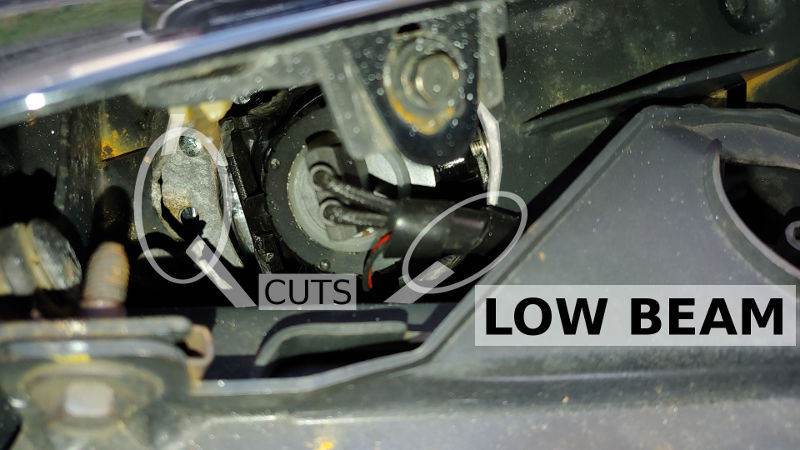
To fit the Hella 90mm Projectors, I had to cut the headlight bucket frame behind the headlight holders. When you remove the headlights and the metal buckets you'll see the frame/bracket that they all attach. There are bumps that they fit against that had to be cut off and the center hole had to be enlarged. I have a spare headlight assembly in storage. I should take it apart and take pics and draw an overlay to show what I mean and put in the thread. I don't know when I'll be able to do that though.
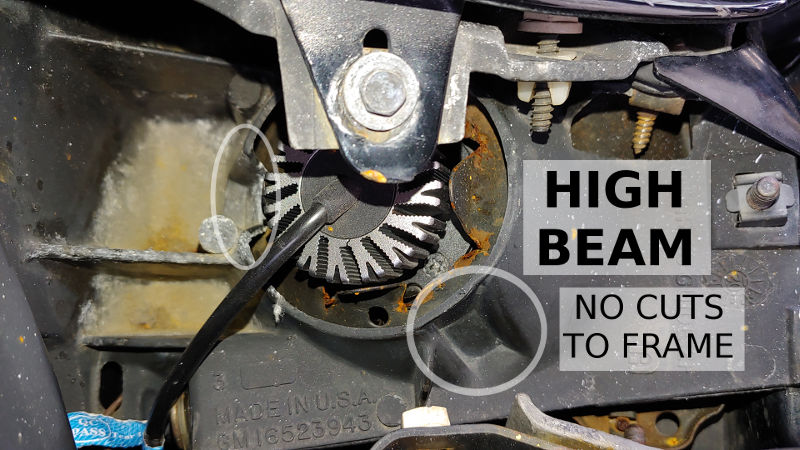
Here is a pic of the Low Beam frame and the High Beam Frame. These are current pics showing the Sinolyn Projectors (not the Hella 90mm that needed these cuts). I highlighted the cuts on the Low Beam frame and showed a pic of the High Beam frame as an example of what the frame looked like before being cut. I think there were 3 or 4 bumps on the Low Beam that I originally cut off. The Low Beam and High beam are different, but these are the closest pics I can take right now. Just use this as an example. If you go with the LMC Truck Housings and LED bulbs, you don't need to cut the frame. Just some small slits and bends in the bucket/holder that I show in the other thread.
https://www.fadingarrow.com/images/S...amCutsBack.jpg
http://www.fadingarrow.net/images/Si...amCutsBack.jpg
https://www.fadingarrow.com/images/S...NoCutsBack.jpg
http://www.fadingarrow.net/images/Si...NoCutsBack.jpg
I now have Sinolyn 3" Projectors
https://ls1tech.com/forums/appearanc...rojectors.html
ORIGINAL POST BELOW
This is a bit of a re-post and an update. I wanted to update my install post, but I didn't want to clutter up the Lighting FAQ, so I started a new thread. For those that have seen my install, the first few posts you will recognize, but there is a new post about custom curved cut-off shields that I made which improved output.
---------------------------------------------
EDIT: FULLTHROTTLEV6 MUST HAVE GONE THROUGH AN UPGRADE. ALL THESE LINKS ARE NOW INVALID.
I read through the threads on Full Throttle V6 and got started.
http://www.fullthrottlev6.com/forums...ad.php?t=22874
http://www.fullthrottlev6.com/forums...ad.php?t=23020
http://www.fullthrottlev6.com/forums...ad.php?t=23217
http://www.fullthrottlev6.com/forums...ad.php?t=23289
http://www.fullthrottlev6.com/forums...ad.php?t=23782
---------------------------------------------
My install was slightly different and involved plenty of fitting, adjustment, and manually raising and lowering the headlights (to facilitate said fitting and adjustment). I tried to avoid removing the headlight lids, but in the end, I had to to gain access the back of the housings. I used 4 #8 1.5" stainless machine screws/bolts and three nuts stacked to space the Hella adapter in front of the headlight frame for each projector. So, in total: 8 bolts, 24 regular nuts (for spacing), 4 nylock nuts to attach the Hella adapter to the bolts that were sticking out like studs. I'm probably not explaining to well and a picture is worth a thousands words. I'll try to take pics later in the day. The head light frame is cast aluminum. It cuts (and cracks) easily. A drill and dremel (I used a Black & Decker RTX) will cut through it fine. I cut mine pretty much like in the pictures, but after all the adjustment, I realized that I didn't need to cut quite so much. I'd say, mount the adapter ring, then the projector in the ring and see where it makes contact and needs to be clearanced before cutting or drilling extra holes. Pull the headlight motor fuse and manually raise and lower the headlights to check for clearance in front and behind the projectors to make sure the glass doesn't hit the bumper and that the bulb connector doesn't hit the frame behind the headlights. Make adjustments to the new mounting assembly and projector adjuster screws as necessary. Its a tight fit, but they do fit.
Here are the pics of my installation (5/4/2007)
Front Complete
(stock shroud was trimmed.)
800x600
2592x1944
Front Close-up without shroud
800x600
2592x1944
Side of the projector mounted
800x600
2592x1944
Lights partially lowered manually
(There is about 1/4" clearance between the projector front glass and the bumper.)
800x600
2592x1944
Here are a couple pics of the modified shroud
https://www.fadingarrow.com/images/h...htshroud01.jpg
https://www.fadingarrow.com/images/h...htshroud02.jpg
Those install pics and more are available in this zip
https://www.fadingarrow.com/images/H...-Installed.zip
(Warning: 14.6MB)
--------------------
Here are the night pictures
(BTW, those are the standard Osram H9 bulbs that came with the projectors.)
Wall -- Low Beam Only
800x600
2592x1944
Wall -- Low Beam and High Beam
800x600
2592x1944
Front -- Low Beam Only
800x600
2592x1944
Front -- Low Beam and Fog Lights
800x600
2592x1944
I usually drive with the fog lights off.
Those night pics and more are available in this zip
https://www.fadingarrow.com/images/H...9--Halogen.zip
(Warning: 14.6MB)
----- EDIT --- 2021-09-25 -----
As noted in the First Post, links to older threads on other sites are broken now and info lost. I'm updating this with what was cut to fit the Hella 90mm projectors I had in there when this thread was created (I have Sinolyn Projectors now and that is what you see in the cut pic below). I just took a couple pics on the car as they appear now.
To fit the Hella 90mm Projectors, I had to cut the headlight bucket frame behind the headlight holders. When you remove the headlights and the metal buckets you'll see the frame/bracket that they all attach. There are bumps that they fit against that had to be cut off and the center hole had to be enlarged. I have a spare headlight assembly in storage. I should take it apart and take pics and draw an overlay to show what I mean and put in the thread. I don't know when I'll be able to do that though.
Here is a pic of the Low Beam frame and the High Beam Frame. These are current pics showing the Sinolyn Projectors (not the Hella 90mm that needed these cuts). I highlighted the cuts on the Low Beam frame and showed a pic of the High Beam frame as an example of what the frame looked like before being cut. I think there were 3 or 4 bumps on the Low Beam that I originally cut off. The Low Beam and High beam are different, but these are the closest pics I can take right now. Just use this as an example. If you go with the LMC Truck Housings and LED bulbs, you don't need to cut the frame. Just some small slits and bends in the bucket/holder that I show in the other thread.
https://www.fadingarrow.com/images/S...amCutsBack.jpg
http://www.fadingarrow.net/images/Si...amCutsBack.jpg
https://www.fadingarrow.com/images/S...NoCutsBack.jpg
http://www.fadingarrow.net/images/Si...NoCutsBack.jpg
Last edited by VIP1; Jan 8, 2022 at 11:14 PM.
Thread Starter
Copy & Paste Moderator
Joined: Apr 2002
Posts: 9,764
Likes: 208
From: Eastern MA
UPDATE (12/22/2007)
My brother and I modified the cut-off.
It still needs adjustment though.
The driver-side is square-stepped and the passenger side is straight.
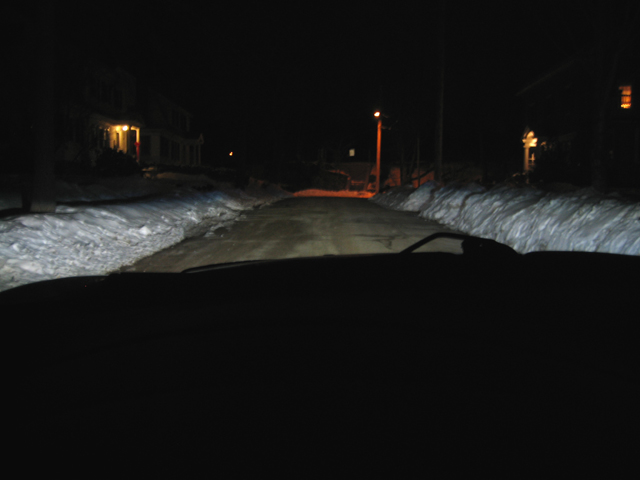
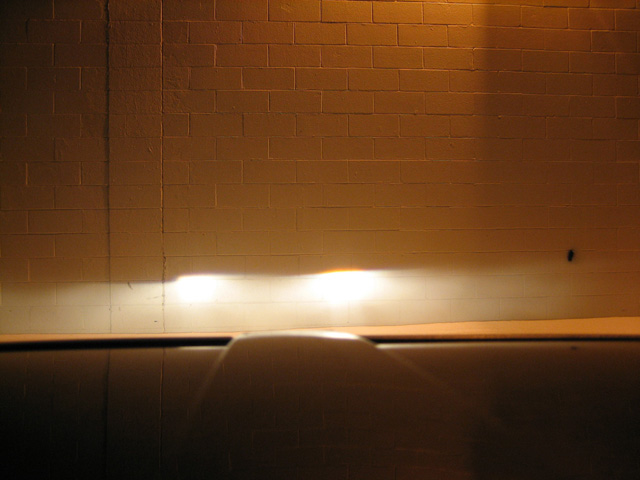
Low Beam Only
(The white stuff on the ground is snow )
)
640x480
1024x768
This picture didn't come out that well and doesn't show how good the output was. The passenger-side can be made sharper (I could have sworn I had it sharper than that before I installed it on the car). I'll have to disassemble it again to adjust. I did test before closing it up, but I guess it moved before I tightened it all down or maybe I hit it. Oh well. Maybe I'll tackle it tomorrow.
Sorry I didn't take pics of the shield itself. Its a moot point now since I've made new curved shields since then (check out post #4).
BTW, the black bit on the wall appears to be a scorch mark.
Those modified cut-off pics with Halogen bulbs and more are available in this zip
https://www.fadingarrow.com/images/H...FlatShield.zip
(Warning: 8.8MB)
My brother and I modified the cut-off.
It still needs adjustment though.
The driver-side is square-stepped and the passenger side is straight.
Low Beam Only
(The white stuff on the ground is snow
)640x480
1024x768
This picture didn't come out that well and doesn't show how good the output was. The passenger-side can be made sharper (I could have sworn I had it sharper than that before I installed it on the car). I'll have to disassemble it again to adjust.
I did test before closing it up, but I guess it moved before I tightened it all down or maybe I hit it. Oh well. Maybe I'll tackle it tomorrow.Sorry I didn't take pics of the shield itself. Its a moot point now since I've made new curved shields since then (check out post #4).
BTW, the black bit on the wall appears to be a scorch mark.
Those modified cut-off pics with Halogen bulbs and more are available in this zip
https://www.fadingarrow.com/images/H...FlatShield.zip
(Warning: 8.8MB)
Last edited by VIP1; Dec 26, 2020 at 09:58 PM.
Thread Starter
Copy & Paste Moderator
Joined: Apr 2002
Posts: 9,764
Likes: 208
From: Eastern MA
UPDATE (01/12/2008)
I installed a 4300K H9 HID kit that I bought from LED Gauges.
Low Beam Only
(The white stuff on the ground is snow)

640x480
800x600
2592x1944
The picture came out a bit blurry because the camera focused on the roof instead of the wall and I didn't realize until I downloaded the pics onto my pc.
Those modified cut-off pics with 4300K HID and more are available in this zip
https://www.fadingarrow.com/images/H...FlatShield.zip
(Warning: 8.8MB)
I installed a 4300K H9 HID kit that I bought from LED Gauges.
Low Beam Only
(The white stuff on the ground is snow
)640x480
800x600
2592x1944
The picture came out a bit blurry because the camera focused on the roof instead of the wall and I didn't realize until I downloaded the pics onto my pc.
Those modified cut-off pics with 4300K HID and more are available in this zip
https://www.fadingarrow.com/images/H...FlatShield.zip
(Warning: 8.8MB)
Last edited by VIP1; Dec 26, 2020 at 09:58 PM.
Thread Starter
Copy & Paste Moderator
Joined: Apr 2002
Posts: 9,764
Likes: 208
From: Eastern MA
UPDATE (12/28/2008)
Tonight, I just made new curved shields and also adjusted them to sit a little higher than stock (the bulb is covered a little more). This widened the beam a little, sharpened the cut-off, and made them more uniform.
For some reason I couldn't get the driver side as sharp as the passenger side, but that projector was always a little fuzzier even stock.
Sorry, I didn't take pics of the process. I'll take pics of the new beam pattern when I get a chance. I still need to do some final aiming.
Basically I made the new shields similar to the stock ones but with a shorter square step to more resemble a HID projector. I also used flashing and cut it using a utility knife and several overlapping cuts (instead of trying to cut through all at once). I also cut the bottom mounting hole as a slot instead of just a hole and didn't cut the side mounting holes.
The overall shape is still a triangle with tabs just like the stock shields, but they are now curved. The center curves towards the bulb and the sides curve away. Its a fairly uniform curve (I think I bet the sides a little more though). The final shape puts the side tabs about a quarter inch or so away from their stock mount. As a result, the side screws are no longer used to secure the sides of the shield. Only the bottom screw is used to secure the shields. Hopefully this is enough. Time will tell. So as not to lose any of the screws, I still installed the side screws in their original location (they just aren't being used to secure anything).
The new flashing shield is thinner than the stock shield so to make up the depth difference for the retaining screw to sit at the proper depth in the hole, I used a washer. So its , screw, washer, shield, housing. The washer went between the screw and shield. The shield still sits directly in contact with the housing.
It was a lot of trial-and-error with cutting and adjusting to get them right. I had to make sure the curve and tilt of the new shield (towards or away from the lens) was just right to produce the best cut-off. I also tried a few different height positions to get the best beam. I also made sure that the resulting cut-off was still parallel in the housing (in other words, not crooked). The step is a smaller square step that starts in the center of the slope of the stock shield. The step is half (probably less) than the height of the original. I didn't measure (its tough to measure that small). I just eye-balled it and used a straight-edge when cutting.
It took me a few hours (including removing them from the car, re-installing them, and doing a quick height aim).
I tested using the stock H9 bulbs (which are in there right now on the vehicle) and a battery pack aimed at a projector screen (about 19ft away) and a (unfortunately) narrower area of wall over 20ft away.
To make sure the shield produced a level line, I used masking tape and a level to make a level line on the wall. Then I sat the projector on a level surface with the front housing attached. Since it doesn't quite sit flat, I made sure I held it with the lower mounting tabs the same height off the level surface. This meant that the housing was level and if the cut-off was also level, then the shield is properly mounted producing a line that parallel to the housing.
Sorry I didn't take pictures while I was working.... I tend to work right through and not think of it.
Hopefully I was descriptive enough. If not, please ask.
If you want more info on curved shields and HID in general (including retrofits), check out http://www.hidplanet.com/forums/. I'm on there with the same screen name.
Here are the pics of the finished product
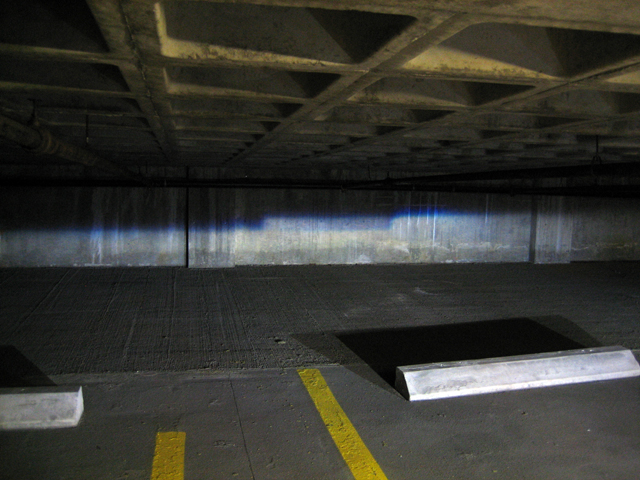
At 20ft in a Garage with a low angled ceiling:
(The ceiling was about 6" taller than my car where I parked it and a fair bit shorter at the front where the lights are aimed.)
Low Beam Only
640x480
800x600
2592x1944
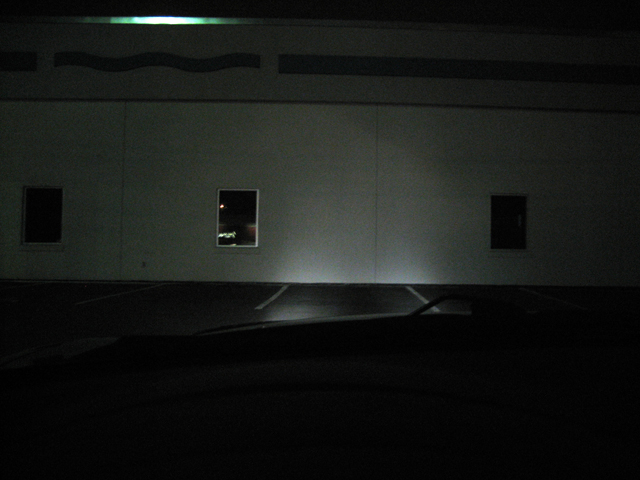
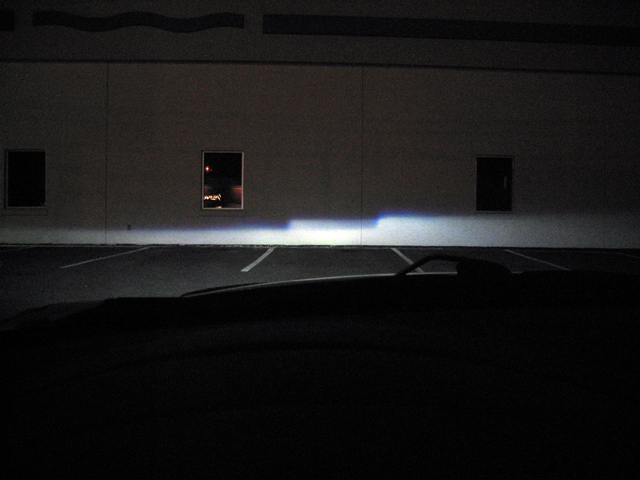
At 40ft outside, against a white wall:
(camera inside car)
Fog Lights Only
640x480
800x600
2592x1944
Low Beam Only
640x480
800x600
2592x1944
Low Beam and High Beam
640x480
800x600
2592x1944
View of the front
640x480
800x600
2592x1944
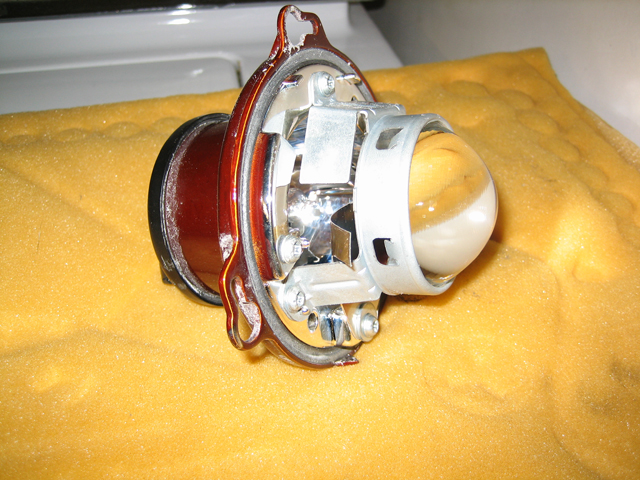
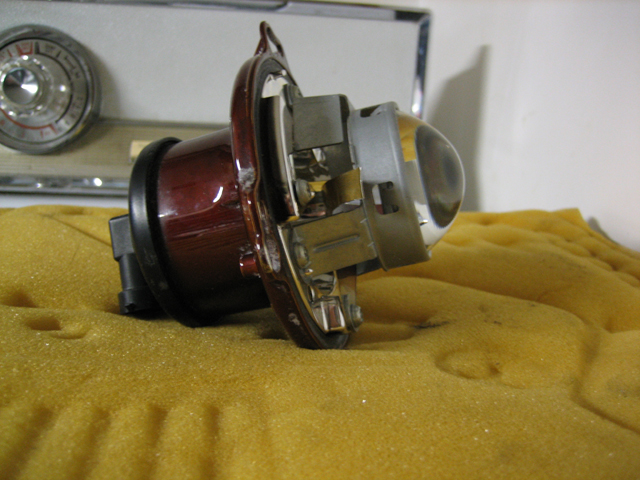
Here are some pics of the opened projector
(I went back and opened the projector)
The shield was an unpainted aluminum when it was installed. Somehow it painted itself to match the projector housing.... odd. Its not melted or damaged. I think the halogen bulb caused the projector body to heat up and the paint to out-gas and redistribute onto the shield. Its a far fetched theory, but that's what it looks like. Its a fairly uniform curve with the edges curved more than the middle. The curve is shallower in the middle. It's not an exact science. There was plenty of trial-and-error involved. The pics above were taken with the 4300K HID kit re-installed. I am also considering high-temp chrome paint for the side of the shield that faces the bulb. It might improve output and protect the shield.
640x480
800x600
2592x1944

640x480
800x600
2592x1944
640x480
800x600
2592x1944
Those modified curved cut-off shield pics with 4300K HID and more are available in this zip
https://www.fadingarrow.com/images/H...rvedShield.zip
(Warning: 28MB)
Tonight, I just made new curved shields and also adjusted them to sit a little higher than stock (the bulb is covered a little more). This widened the beam a little, sharpened the cut-off, and made them more uniform.
For some reason I couldn't get the driver side as sharp as the passenger side, but that projector was always a little fuzzier even stock.
Sorry, I didn't take pics of the process. I'll take pics of the new beam pattern when I get a chance. I still need to do some final aiming.
Basically I made the new shields similar to the stock ones but with a shorter square step to more resemble a HID projector. I also used flashing and cut it using a utility knife and several overlapping cuts (instead of trying to cut through all at once). I also cut the bottom mounting hole as a slot instead of just a hole and didn't cut the side mounting holes.
The overall shape is still a triangle with tabs just like the stock shields, but they are now curved. The center curves towards the bulb and the sides curve away. Its a fairly uniform curve (I think I bet the sides a little more though). The final shape puts the side tabs about a quarter inch or so away from their stock mount. As a result, the side screws are no longer used to secure the sides of the shield. Only the bottom screw is used to secure the shields. Hopefully this is enough. Time will tell. So as not to lose any of the screws, I still installed the side screws in their original location (they just aren't being used to secure anything).
The new flashing shield is thinner than the stock shield so to make up the depth difference for the retaining screw to sit at the proper depth in the hole, I used a washer. So its , screw, washer, shield, housing. The washer went between the screw and shield. The shield still sits directly in contact with the housing.
It was a lot of trial-and-error with cutting and adjusting to get them right. I had to make sure the curve and tilt of the new shield (towards or away from the lens) was just right to produce the best cut-off. I also tried a few different height positions to get the best beam. I also made sure that the resulting cut-off was still parallel in the housing (in other words, not crooked). The step is a smaller square step that starts in the center of the slope of the stock shield. The step is half (probably less) than the height of the original. I didn't measure (its tough to measure that small). I just eye-balled it and used a straight-edge when cutting.
It took me a few hours (including removing them from the car, re-installing them, and doing a quick height aim).
I tested using the stock H9 bulbs (which are in there right now on the vehicle) and a battery pack aimed at a projector screen (about 19ft away) and a (unfortunately) narrower area of wall over 20ft away.
To make sure the shield produced a level line, I used masking tape and a level to make a level line on the wall. Then I sat the projector on a level surface with the front housing attached. Since it doesn't quite sit flat, I made sure I held it with the lower mounting tabs the same height off the level surface. This meant that the housing was level and if the cut-off was also level, then the shield is properly mounted producing a line that parallel to the housing.
Sorry I didn't take pictures while I was working.... I tend to work right through and not think of it.
Hopefully I was descriptive enough. If not, please ask.
If you want more info on curved shields and HID in general (including retrofits), check out http://www.hidplanet.com/forums/. I'm on there with the same screen name.
Here are the pics of the finished product
At 20ft in a Garage with a low angled ceiling:
(The ceiling was about 6" taller than my car where I parked it and a fair bit shorter at the front where the lights are aimed.)
Low Beam Only
640x480
800x600
2592x1944
At 40ft outside, against a white wall:
(camera inside car)
Fog Lights Only
640x480
800x600
2592x1944
Low Beam Only
640x480
800x600
2592x1944
Low Beam and High Beam
640x480
800x600
2592x1944
View of the front
640x480
800x600
2592x1944
Here are some pics of the opened projector
(I went back and opened the projector)
The shield was an unpainted aluminum when it was installed. Somehow it painted itself to match the projector housing.... odd. Its not melted or damaged. I think the halogen bulb caused the projector body to heat up and the paint to out-gas and redistribute onto the shield. Its a far fetched theory, but that's what it looks like. Its a fairly uniform curve with the edges curved more than the middle. The curve is shallower in the middle. It's not an exact science. There was plenty of trial-and-error involved. The pics above were taken with the 4300K HID kit re-installed. I am also considering high-temp chrome paint for the side of the shield that faces the bulb. It might improve output and protect the shield.
640x480
800x600
2592x1944
640x480
800x600
2592x1944
640x480
800x600
2592x1944
Those modified curved cut-off shield pics with 4300K HID and more are available in this zip
https://www.fadingarrow.com/images/H...rvedShield.zip
(Warning: 28MB)
Last edited by VIP1; Dec 26, 2020 at 09:58 PM.
Trending Topics
LS1 Tech Stories
The Best V8 Stories One Small Block at Time

6 Common C5 Corvette Failures and What's Involved In Repairing Them
Pouria Savadkouei
Retro Modern Bandit Pontiac Trans AM Comes With Burt Reynolds' Autograph
Verdad Gallardo
Top 10 Greatest Cadillac V Series Performance Models Ever, Ranked
Pouria Savadkouei
Top 10 Most Powerful Chevy Trucks Ever Made!

Hennessey's New Supercharged Silverado ZR2 Has 700 HP
Verdad Gallardo
Coachbuilt N2A Anteros Is an LS2-Powered C6 Corvette In Italian Clothes
Verdad Gallardo
Awesome K5 Blazer Restomod Comes With C7 Corvette Power
Verdad Gallardo
10 Camaros You Should Never Buy

10 LS Engine Myths That Refuse to Die
Verdad Gallardo Thread Starter
Copy & Paste Moderator
Joined: Apr 2002
Posts: 9,764
Likes: 208
From: Eastern MA
I don't know. What kind of bulb does it use? Looking at the pics, I'm not sure if they are fully sealed/encased like the 90mm. They may be sealed, but the projector lens is unprotected. The 90mm has a glass case in front of the lens. I don't know about the output. I haven't seen any pics. I think they use a 9005 bulb which has a lower output than H9. I'd like to see the output with the original Halogen bulb and a HID kit.
Last edited by VIP1; Feb 4, 2009 at 11:14 PM.

Teching In
Joined: Dec 2004
Posts: 4
Likes: 0
From: Vienna, Austria
Great write up!
I recently got a set of 90mm D2S housings but they are missing the bulb mounting part in the rear which is not available separately. After the detailed pictures showing the various configurations I'll probably end up with a set of the H9 modules and a 4300k kit as well.
Thanks,
Lukas
I recently got a set of 90mm D2S housings but they are missing the bulb mounting part in the rear which is not available separately. After the detailed pictures showing the various configurations I'll probably end up with a set of the H9 modules and a 4300k kit as well.
Thanks,
Lukas
Thread Starter
Copy & Paste Moderator
Joined: Apr 2002
Posts: 9,764
Likes: 208
From: Eastern MA
Originally Posted by Lukas
Great write up!
Originally Posted by Lukas
I recently got a set of 90mm D2S housings but they are missing the bulb mounting part in the rear which is not available separately. After the detailed pictures showing the various configurations I'll probably end up with a set of the H9 modules and a 4300k kit as well.

Thread Starter
Copy & Paste Moderator
Joined: Apr 2002
Posts: 9,764
Likes: 208
From: Eastern MA
My setup is not a kit. Its components from various places that I've assembled and installed.
I bought the...
* Projectors, connectors, mounting plate from Rally Lights (not a sponsor)
* HID from LED Gauges (no longer a sponsor and there are cheaper places now)
* screws, brackets, misc from Home Depot
* additional wires, connectors, etc from Pepboys, AutoZone, etc
I don't remember the full cost, but its something like this
$165 for Projectors, connectors, mounting plate
$50 for additional connectors, wire, loom, etc (still have some left over)
$20 for screws, etc
$250 for HID (you can get sets now for $80 - $140)
------
$485 Total (I probably forgetting something)
If I got a newer cheaper HID kit, the price would drop to roughly $375. If I could get the connectors I wanted instead of breaking bulbs to make them, the cost would drop to roughly $350.
I've spent more than that over the course of the project since I've made some changes, but that's roughly what it would cost to reproduce it as it stands now.
That also doesn't include the cost of rivets, flashing, epoxy, silicon, bondo, etc used in modifying the shrouds. I don't remember how much that cost.
This isn't the first time I've been asked. Actually LED Gauges and I were contemplating it when I started. That didn't go anywhere. Besides, I'm not really looking into going into business doing these, sorry.
Last edited by VIP1; Jan 27, 2009 at 04:25 PM.
Thread Starter
Copy & Paste Moderator
Joined: Apr 2002
Posts: 9,764
Likes: 208
From: Eastern MA
I found a little bit on them over on HID planet:
(I'm on there too with the same screen name)
http://www.hidplanet.com/forums/viewtopic.php?t=43615
http://www.hidplanet.com/forums/viewtopic.php?t=46739
(I'm on there too with the same screen name)
http://www.hidplanet.com/forums/viewtopic.php?t=43615
http://www.hidplanet.com/forums/viewtopic.php?t=46739
Last edited by VIP1; Feb 22, 2009 at 03:01 PM.
Thread Starter
Copy & Paste Moderator
Joined: Apr 2002
Posts: 9,764
Likes: 208
From: Eastern MA