


Dick Harrell Front Bumper Project (tons of pics)
Looks good, maybe make the lip a little thinner. I think that if you left the way it is now it might turn out looking like just a blended GFX lip instead of like the Dick Harrell style bumper.
LS1 Tech Stories
The Best V8 Stories One Small Block at Time

Gas Monkey Built a 6-Wheel Ferrari Testarossa With a Corvette LT4 Engine
Verdad Gallardo
7 Most Reliable High-Performance Engines GM Has Ever Built
Verdad Gallardo
Amazing '71 Camaro Restomod Is Modern Muscle Car Under the Skin
Verdad Gallardo
6 Common C5 Corvette Failures and What's Involved In Repairing Them
Pouria Savadkouei
Retro Modern Bandit Pontiac Trans AM Comes With Burt Reynolds' Autograph
Verdad Gallardo
Top 10 Greatest Cadillac V Series Performance Models Ever, Ranked
Pouria Savadkouei
Top 10 Most Powerful Chevy Trucks Ever Made!

Hennessey's New Supercharged Silverado ZR2 Has 700 HP
Verdad Gallardo
Coachbuilt N2A Anteros Is an LS2-Powered C6 Corvette In Italian Clothes
Verdad Gallardo Lookin' good brotha! That's gotta be a pain in the *** working with the foam, getting those little foam beads all over the place.
Here's the link to the Camaro retro grill: http://www.cardomain.com/ride/2936633
The search DOES work, you just gotta use it the right way
Good luck dude!
Here's the link to the Camaro retro grill: http://www.cardomain.com/ride/2936633
The search DOES work, you just gotta use it the right way
Good luck dude!
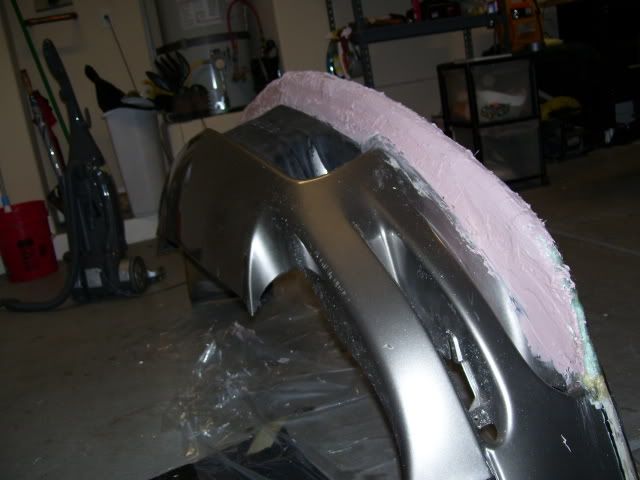
Alright here is the update for tonight. Finished shaping the foam (forgot to take pics) and it came out pretty good i think.
so now for the fun stuff... (not!)
First i decided to fiberglass the bottom, more or less for structural support for all the sanding coming up.
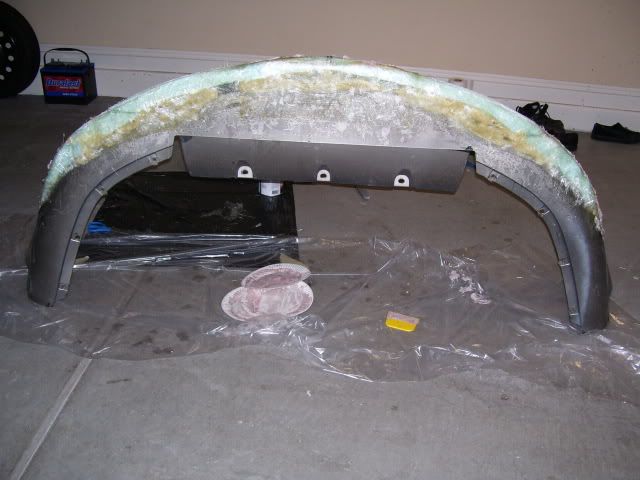
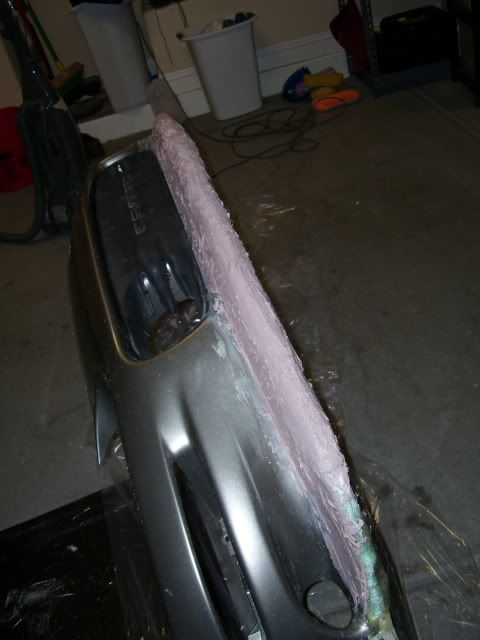
Now i caked on the bondo. And i really went to town on the this stuff.
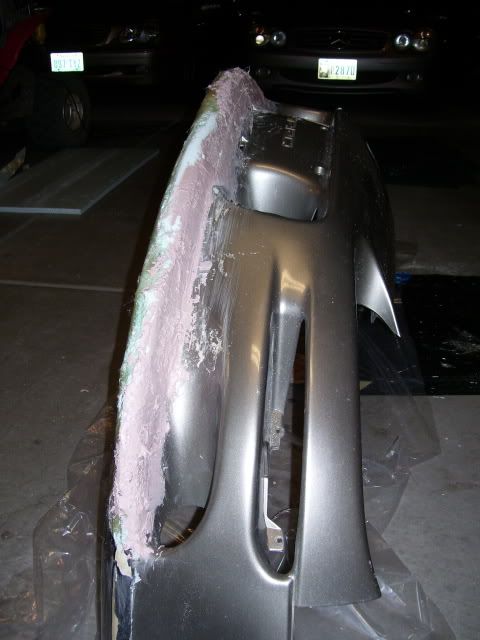
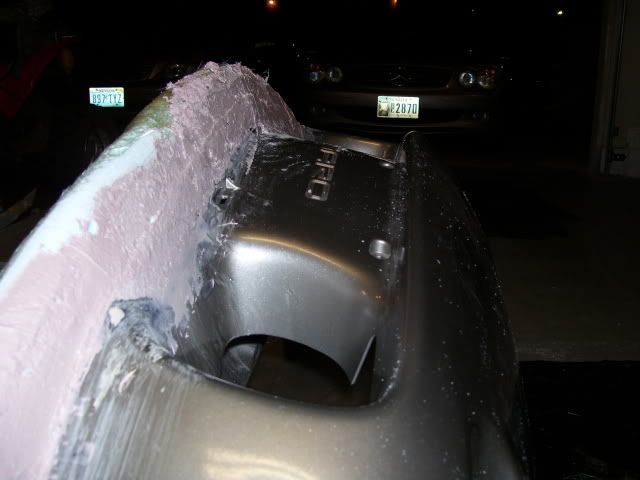
I've studied pictures of the real bumper for a long time and tried to match it as close as possible. It looks really close so far. The thing that was throwing me off was the fact that all the pictures have a grill, so i put on an old stock grill i had laying around and it makes the lip look more into place.
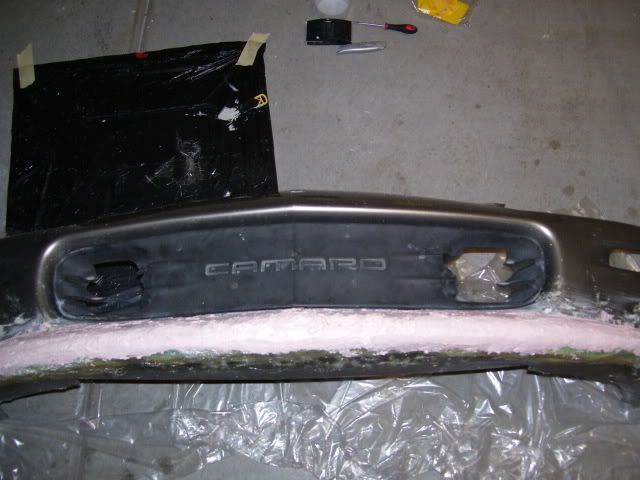
The bowtie grills that come on the real thing stick out a little more, so I think this will look even better when i get one of those.
Tomorrow's agenda:
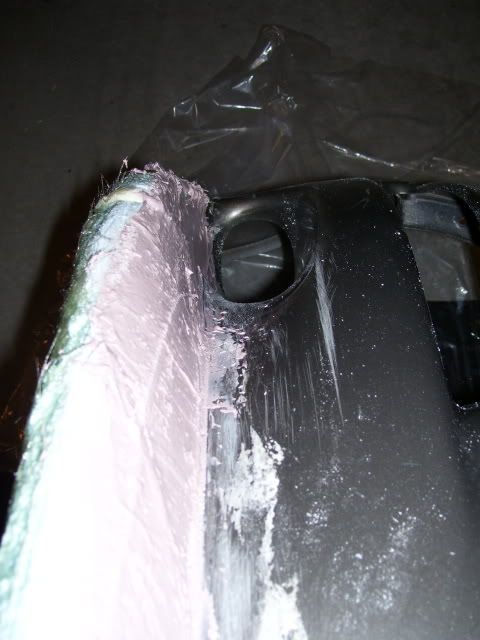
lots and lots of sanding. I made a sanding block in the shape of the curve, so I should be able to cut through the bondo pretty easily. I'll probably end up adding a few more layers and still need to work on shaping the whole thing and especially the fog light holes.
so now for the fun stuff... (not!)
First i decided to fiberglass the bottom, more or less for structural support for all the sanding coming up.
Now i caked on the bondo. And i really went to town on the this stuff.
I've studied pictures of the real bumper for a long time and tried to match it as close as possible. It looks really close so far. The thing that was throwing me off was the fact that all the pictures have a grill, so i put on an old stock grill i had laying around and it makes the lip look more into place.
The bowtie grills that come on the real thing stick out a little more, so I think this will look even better when i get one of those.
Tomorrow's agenda:
lots and lots of sanding. I made a sanding block in the shape of the curve, so I should be able to cut through the bondo pretty easily. I'll probably end up adding a few more layers and still need to work on shaping the whole thing and especially the fog light holes.

so far so good! I'm just wondering how this is gonna hold up in the real world against parking lot curbs, etc.
I agree that the center section should be cut out. Is there a reinforcement behind there that would need to be cut/removed if you wanted to recess the grille?
I agree that the center section should be cut out. Is there a reinforcement behind there that would need to be cut/removed if you wanted to recess the grille?


Excellent work! I was about to start the same thing with one of my splitters next week (finishing the Dual Exhaust Valance and Smooth Valance this week). Plastic weld and extra pieces of urethane (cut from spare bumpers) are your friend for the finished piece (if you aren't just make a new mold of urethane.
If the finished product is nice, and you aren't doing it yourself, we could work out a deal where I reproduce it and sell it. You could probably do a fiberglass one yourself but to mass produce it really needs to be urethane and that can get tricky...
Either way best of luck to you! It is looking great and about damn time someone did this !
!
If the finished product is nice, and you aren't doing it yourself, we could work out a deal where I reproduce it and sell it. You could probably do a fiberglass one yourself but to mass produce it really needs to be urethane and that can get tricky...
Either way best of luck to you! It is looking great and about damn time someone did this
! 
looks good man
but like i said b4 the fiberglass is not going stick 2 the urethane bumper good
once it get in the sun will look like its popping off
u have 2 different materials fiberglass and urethane
one is flexible and the other is ridged
and stay away from BONDO brand
but like i said b4 the fiberglass is not going stick 2 the urethane bumper good
once it get in the sun will look like its popping off
u have 2 different materials fiberglass and urethane
one is flexible and the other is ridged
and stay away from BONDO brand
