
HID TSX retrofit...just the beginning..
 03-20-2009, 10:10 PM
#1
On The Tree
Thread Starter
Join Date: Sep 2002
Location: San Antonio, Texas
Posts: 147
Likes: 0
Received 0 Likes
on
0 Posts
I have ordered a set of TSX projectors off an ebay seller for 150 bucks. Not the cheapest I've seen these for my not the most expensive either.
I've been using the FAQ - Lighting sticky , HIDplanet forums, and a ton of googled information on retrofitting our cars. There are alot of guys with Nissan 240's that have to deal with the pop-up headlights as well and are doing very nice set-ups.
One of the most difficult challenges for our Firebird headlights is enclosing the projectors from getting hit by rocks and debris when up. Been doing alot of research and lots of kids who make Star Wars costumes use vacuforming to mold plastics. Lots of RC guys use this same method to form Lexan body pieces for their cars. So I wanted to give this a shot.
Went to home depot and picked all of what I needed to build a vacuum table. Total cost was about 40 bucks. By the end of the afternoon I had a nice little set-up. So I am strictly doing test runs right now. Getting the temperature to work correctly is difficult. You use your home oven to heat the Lexan and when it is soft enough you remove it and place over your mold. Too hot too quick and you get bubbles in the Lexan, too cool and you just dont get the softness you need. The Lexan I have is .090 thick, it was all the Home Depot here had and can't find Lexan thinner anywhere else locally. This stuff is a little too thick for what I need I think, there is distortion in the lexan and you cannot mold it quick enough to get a nice shape and detail of the mold. I ordered some .030 which i think will work just fine and I'm excited to see how well the vaccum pulls the thinner stuff into place
Lots of people seem to think that a standard upright vacuum will not produce enough suction, but it sure does work. My upright i a 8 year old Hoover 12 amp, definetly gives the suction I need for this application. If you were going for lots of detail you might want a better source.
I have to wait for the new Lexan to arrive and I am off to Florida for a week on vacation. But will keep you guys updated on my progress.
My goal is to actually vacuform a piece of Lexan over my projector setup, not just the headlight mold. We'll see if it works out like planned. Just wanted to share, I was excited my little vacuum table worked!
Here are some pics of the set-up. You can get a full description and what I used to build this from here:
Last edited by LastHawk; 04-01-2009 at 09:41 PM.
 03-20-2009, 10:24 PM
#2
awesome. i didnt know you could build a vacuum table for that cheap. i've been throwing around ideas for making a custom shroud for mine and this was one of them. the hidplanet forums are amazing for advice. definitely keep us updated
03-20-2009, 10:43 PM
#3
On The Tree
Thread Starter
Join Date: Sep 2002
Location: San Antonio, Texas
Posts: 147
Likes: 0
Received 0 Likes
on
0 Posts
If you check that link, they also have a write-up on how to build a better vaccum system very cheap as well. I just dont think I will need it.
The design I used really seems to work very well, I truly believe the Lexan I have is just too thick.
If you are only making a shroud that does not cover the lens, there are other much more vacuum friendly materials out there, such as HIPS and PTEG. Check out this forum, these are the Star Wars geeks and their massive vaccum tables fabbing armor and masks =b But good info on tables and what works. Here is a great link of a guy in action, he is making shrouds for his headlight assembly.This video was my inspiration =)
I start Physician Assistant school in April so I am trying to get all of this done with in the next few weeks. On top of this I'm installing RAAMmat throughout the car, cross-drilled/slotted rotors and brakes, catch can...then the Hawk goes to the shop to have dyno tune, headers and 4.10 gears put in. By mid-April she will be a completely different car =)
Last edited by LastHawk; 03-20-2009 at 10:50 PM.
03-21-2009, 12:32 AM
#4
Copy & Paste Moderator

Good start.
I've added this to the Lighting FAQ:
https://ls1tech.com/forums/appearanc...hting-faq.html
What are you going to do to seal the back?
I've added this to the Lighting FAQ:
https://ls1tech.com/forums/appearanc...hting-faq.html
What are you going to do to seal the back?
03-21-2009, 01:51 AM
#5
TECH Resident
iTrader: (16)
Join Date: Feb 2007
Location: Baytown, Tx
Posts: 802
Likes: 0
Received 0 Likes
on
0 Posts
Why not do away with that square look on the lights all the way. I think thats what i hate the most is the two squares right there when the lights open. I recently purchased two 08' yamaha r1 headlights from a friend for cheap and i want to put one on one side and the other one on the other side. So it can have that new look.
I know you only see them when they open but the squares look gay.lol
I dont know when i will have the guts to to it but i have them here waiting for the install.
I know you only see them when they open but the squares look gay.lol
I dont know when i will have the guts to to it but i have them here waiting for the install.
03-21-2009, 07:44 AM
#6
On The Tree
Thread Starter
Join Date: Sep 2002
Location: San Antonio, Texas
Posts: 147
Likes: 0
Received 0 Likes
on
0 Posts
I think the biggest benefit in using the square housings and frame is it makes mounting the projector to the headlights original mounting points much easier, therefore making fine tune adjustments and aiming easier once mounted. It just overall easier too I think =) Using more stock parts than custom or bought.


Trending Topics
03-21-2009, 12:13 PM
#8
TECH Resident
iTrader: (16)
Join Date: Feb 2007
Location: Baytown, Tx
Posts: 802
Likes: 0
Received 0 Likes
on
0 Posts
I think the biggest benefit in using the square housings and frame is it makes mounting the projector to the headlights original mounting points much easier, therefore making fine tune adjustments and aiming easier once mounted. It just overall easier too I think =) Using more stock parts than custom or bought.
That vid was awesome! I feel a new project coming.
 04-01-2009, 11:00 AM
#11
On The Tree
Thread Starter
Join Date: Sep 2002
Location: San Antonio, Texas
Posts: 147
Likes: 0
Received 0 Likes
on
0 Posts
Stay tuned for some updates shortly. I hope everything goes well this week and I can put a few more hours into this.
Hit a few roadblocks ((wire harness I bought needed some adaptation, window motor fix came undone (replaced plastic gear with bbfranker's metal gear) the epoxy supplied did not stand up to much abuse. I have the housing at home now with plastic epoxy and even welded a few washers to it so the bolts can clamp that bitch down to never move again =), and the back of the D2S bulb connector was rubbing the headlight assembly bracket)). Instead of spacing the projector to stand away from the that, I am going to free the room I need from that bracket. Nothing my dremel or a hacksaw won't take care of.
Yeah, I'm not worried about cutting up a headlight assembly at all =) So far so good, I should have power and mounting done in the next two days.
Once that is finished and I get the beam patterns rotated (if needed) I can seal the projectors and make a custom cover and maybe even a backing for them with a nice dust cover I got off an Acura =) .
It has been a lot of work but worth it.
Last edited by LastHawk; 04-01-2009 at 11:17 AM.
04-01-2009, 09:20 PM
#13
On The Tree
Thread Starter
Join Date: Sep 2002
Location: San Antonio, Texas
Posts: 147
Likes: 0
Received 0 Likes
on
0 Posts
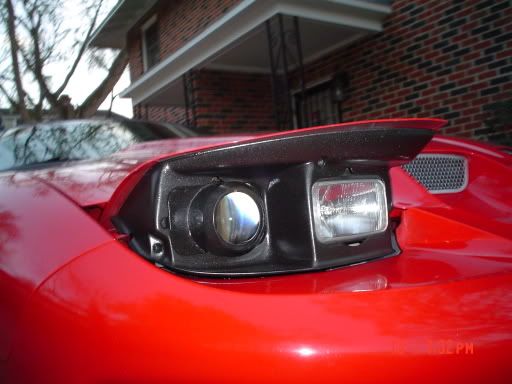
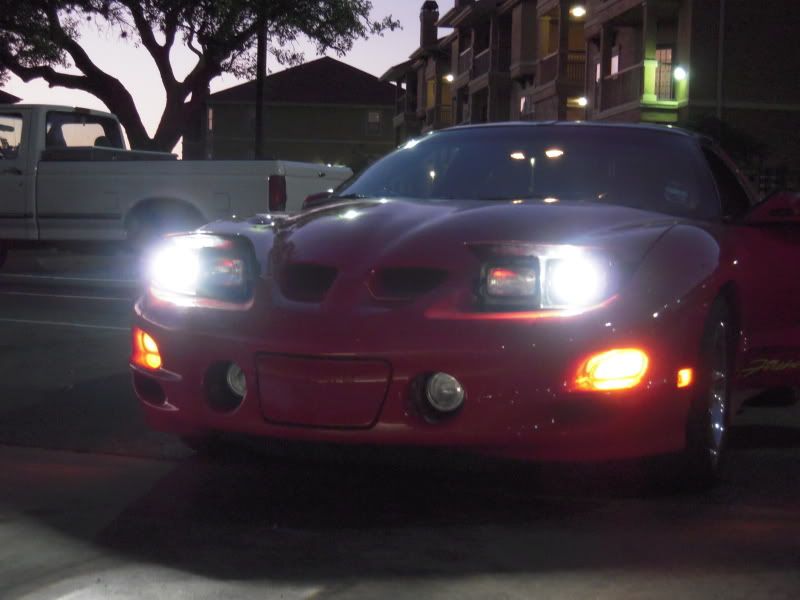
Alright I got my TSX projectors mounted and powered up today.
These are just some preliminary shots, the alignment is off but my adjustments I did make were all horizontal and vertical so I think my rotation is setup right.
Tomorrow I will dial in the beams and futz around with the vacuum table to make some covers for them.
The difference between the HID projectors and stock halogen/sealed beam HIDs is ...... well there is NO comparison . By far the best mod I have ever done.
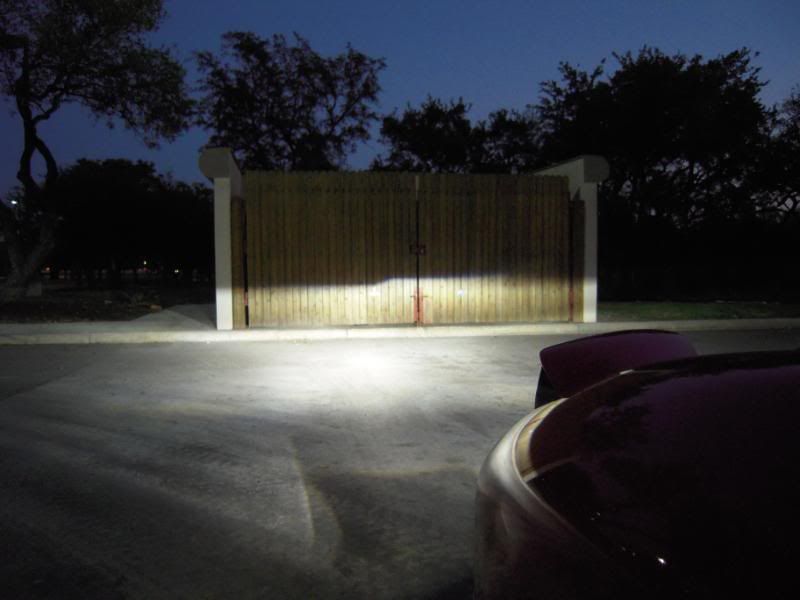
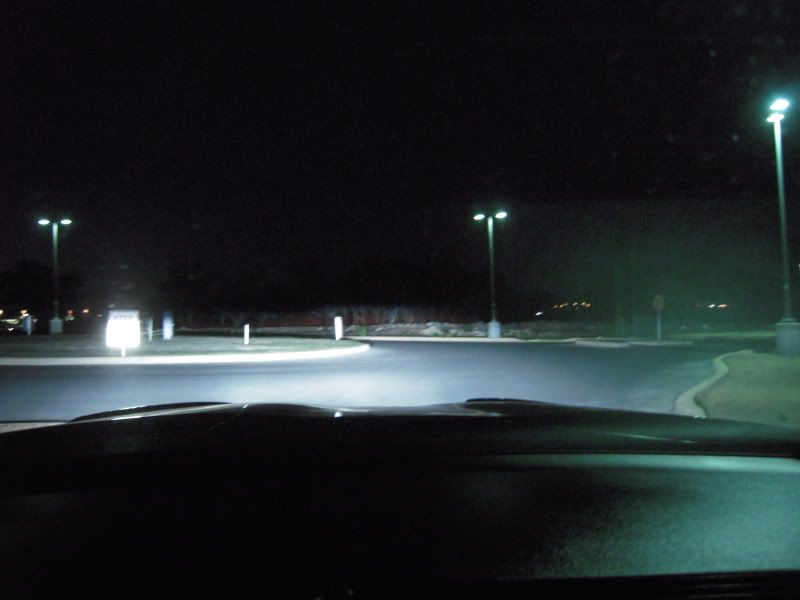
So check 'em out! These are 55w ballast with 5000K bulbs at 25 feet on to the friendly neighborhood dumpster.
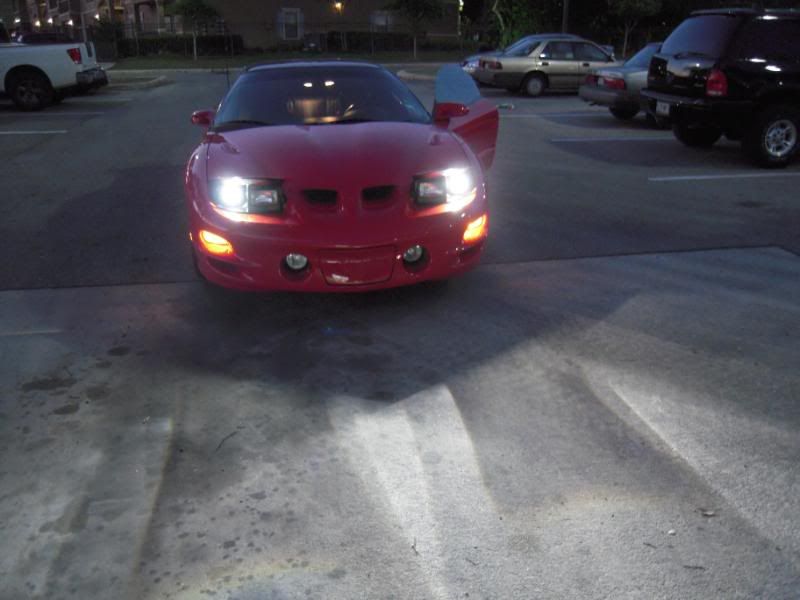

These are just some preliminary shots, the alignment is off but my adjustments I did make were all horizontal and vertical so I think my rotation is setup right.
Tomorrow I will dial in the beams and futz around with the vacuum table to make some covers for them.
The difference between the HID projectors and stock halogen/sealed beam HIDs is ...... well there is NO comparison
. By far the best mod I have ever done. So check 'em out! These are 55w ballast with 5000K bulbs at 25 feet on to the friendly neighborhood dumpster.
Last edited by LastHawk; 04-01-2009 at 09:36 PM.
 04-02-2009, 09:00 PM
#19
That looks oddly familiar...
(from 4 years ago)
but soon you'll tire of the round and square look and up grade.
(sorry, this is the only pic i found of the bi-xenon setup)
Keep up the good work!
(from 4 years ago)
but soon you'll tire of the round and square look and up grade.
(sorry, this is the only pic i found of the bi-xenon setup)
Keep up the good work!
04-02-2009, 09:36 PM
#20
On The Tree
Thread Starter
Join Date: Sep 2002
Location: San Antonio, Texas
Posts: 147
Likes: 0
Received 0 Likes
on
0 Posts
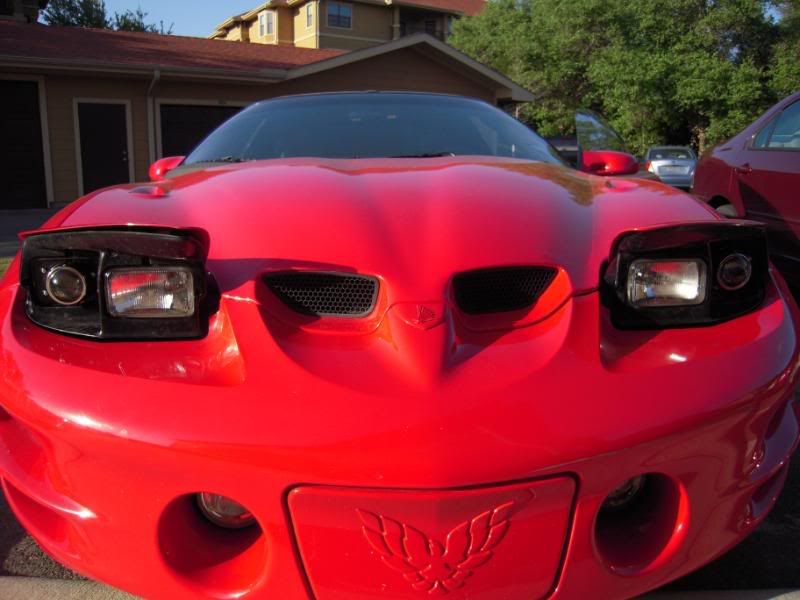
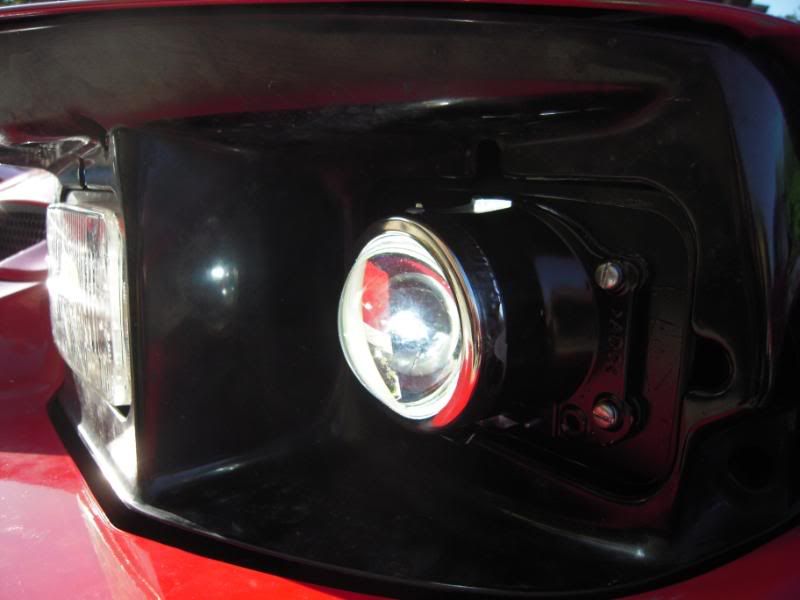
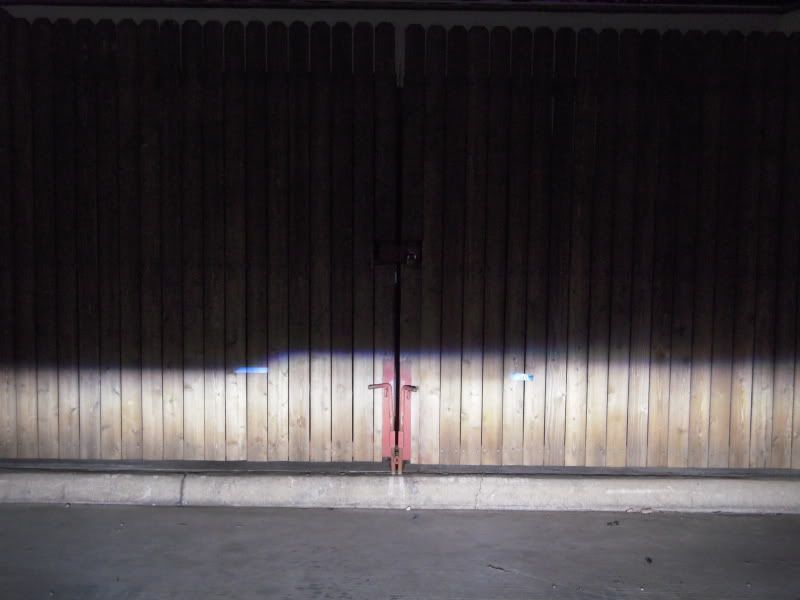
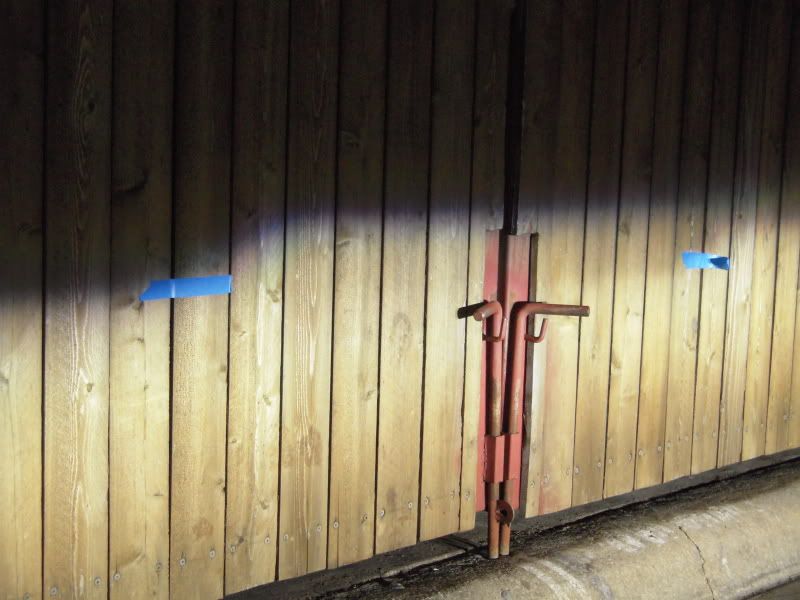
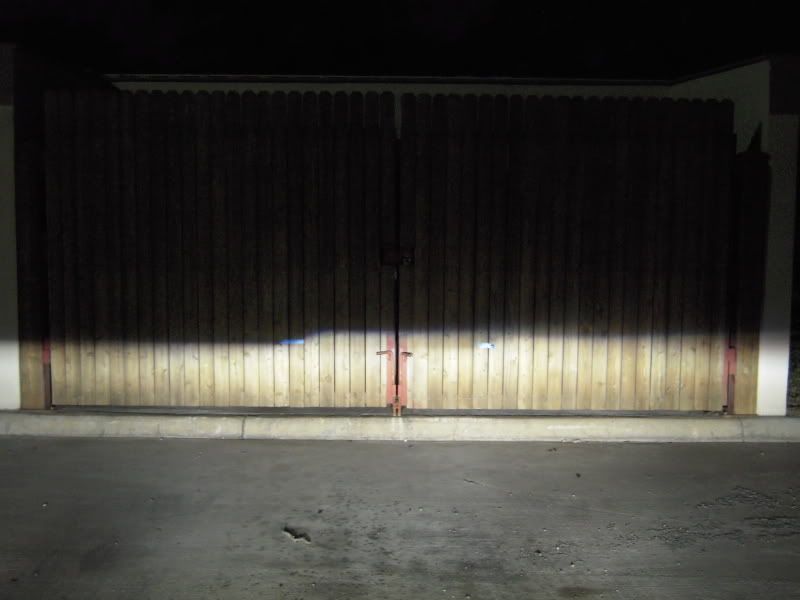
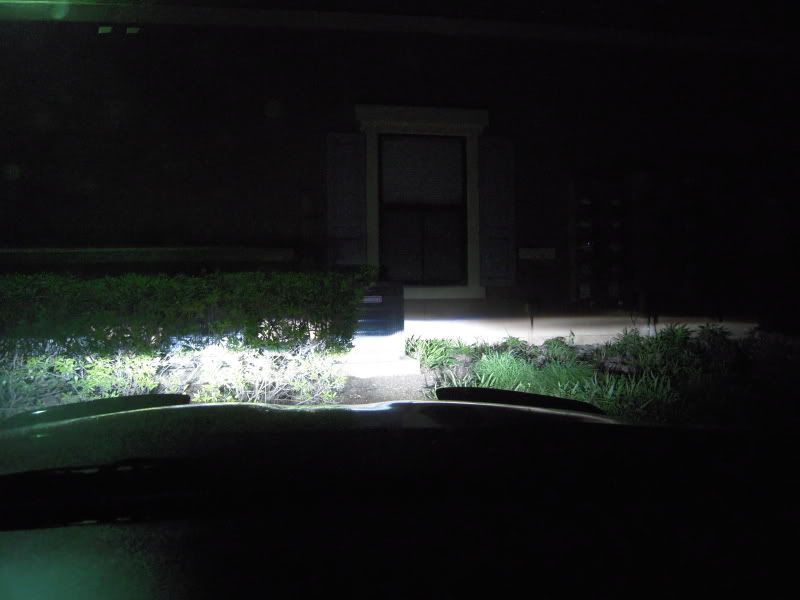
Had a busy day today tweaking things. Mounting and unmounting the lights making small adjustments here and there. I had to add some nylon spacers to the projectors to bring them forward a bit. I was running into clearance issues when aligning them.
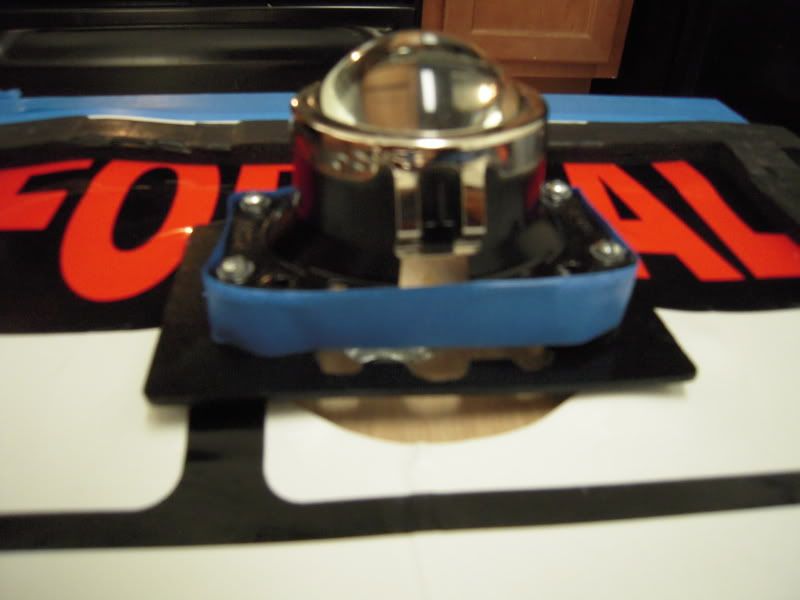
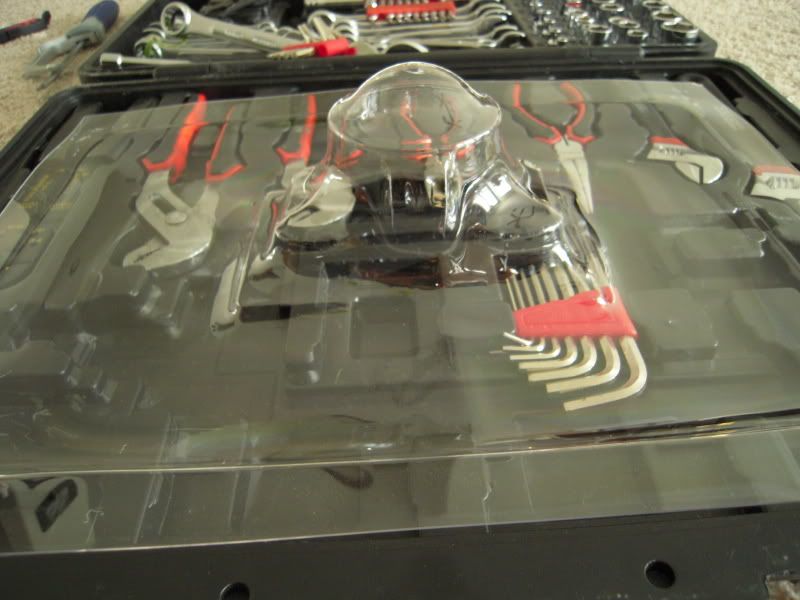
I started my vacuum forming of the covers today. This thinner .030 Lexan is AWESOME and works great with the homemade table. Here are a few pics of the process. All that is left is to tape off the chrome and lens, prep 'em, paint em, install 'em. I will probably do this for the rear of the projectors too to get them as enclosed as possible.

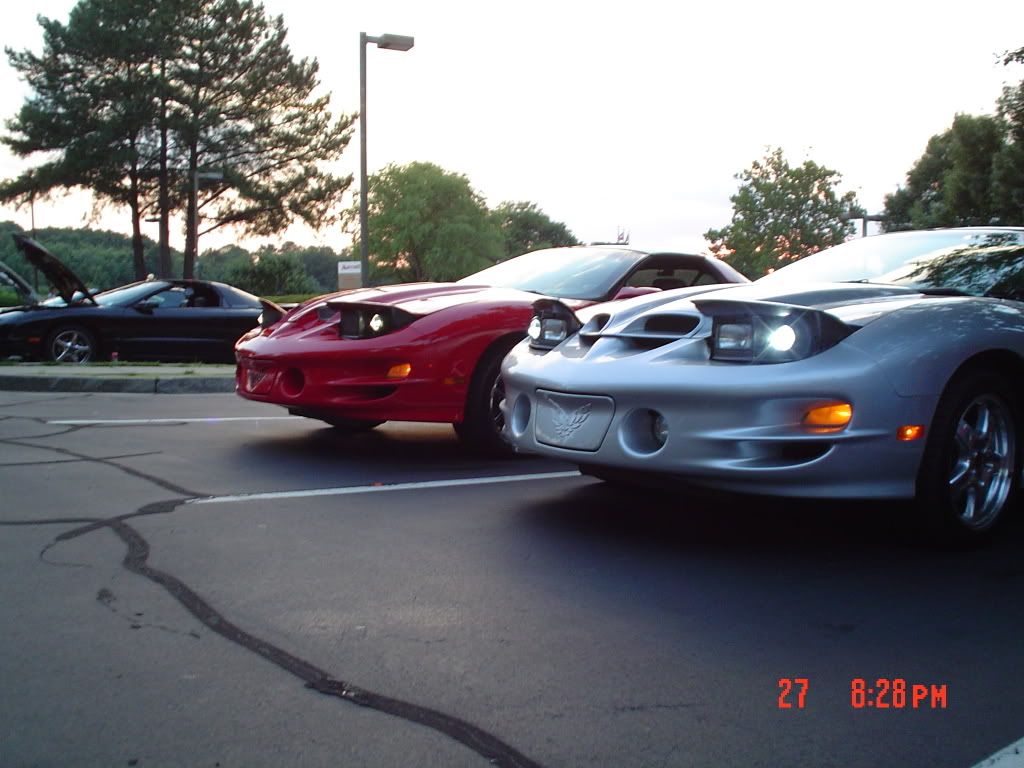
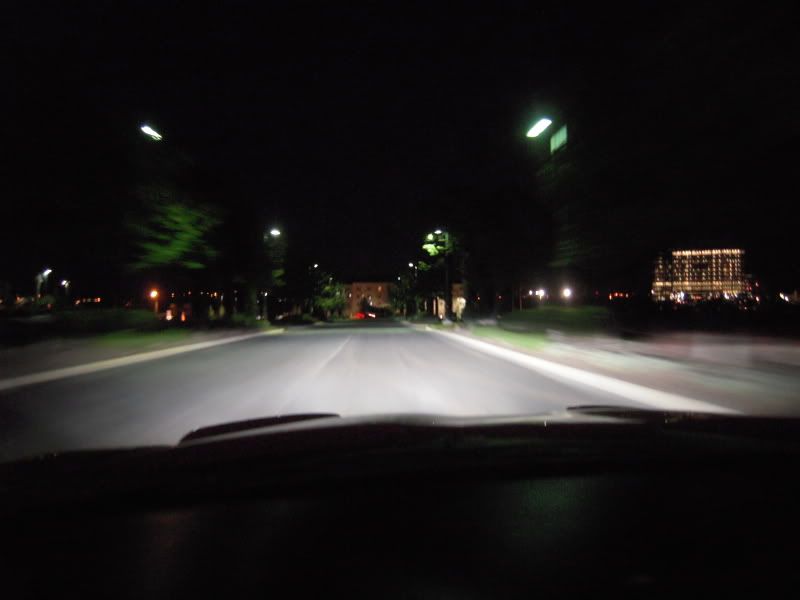
Here are a few shots from finishing up the alignment and driving around a bit. I LOVE THESE LIGHTS. Haha. I wanted to drive until the sun came up

I started my vacuum forming of the covers today. This thinner .030 Lexan is AWESOME and works great with the homemade table. Here are a few pics of the process. All that is left is to tape off the chrome and lens, prep 'em, paint em, install 'em. I will probably do this for the rear of the projectors too to get them as enclosed as possible.
Here are a few shots from finishing up the alignment and driving around a bit. I LOVE THESE LIGHTS. Haha. I wanted to drive until the sun came up