Pics of my powder coated caliper/hangers.

 03-31-2009, 09:55 PM
#26

Sweet, welcome to the "hobby" I do this for a living/full time, but I started out just having fun with it, sure can be addicting, eh?
I see a multitude of things in your pics that could be very much improved upon, and easily, let me know if you want any help. Just one simple step or two you are likely missing in your prep and powder application that's causing the caliper to be covered in all those little pinholes,etc in the powder. I can also tell you how to do the raised letters on those vette calipers in powder, rather than have to paint them. Also, you need to lay a coat of clear over those fronts after putting decals on or they will come off, doesn't looks like they are cleared. As far as coating them without takign them apart, I'm not sure on that, I've never tried it..I just totally take them apart and mask the sensitive areas prior to coating.
I do this for a living/full time, but I started out just having fun with it, sure can be addicting, eh?I see a multitude of things in your pics that could be very much improved upon, and easily, let me know if you want any help. Just one simple step or two you are likely missing in your prep and powder application that's causing the caliper to be covered in all those little pinholes,etc in the powder. I can also tell you how to do the raised letters on those vette calipers in powder, rather than have to paint them. Also, you need to lay a coat of clear over those fronts after putting decals on or they will come off, doesn't looks like they are cleared. As far as coating them without takign them apart, I'm not sure on that, I've never tried it..I just totally take them apart and mask the sensitive areas prior to coating.
 03-31-2009, 10:53 PM
#28
10 Second Club
Thread Starter
iTrader: (38)
Join Date: Mar 2003
Location: Whiteland, Indiana
Posts: 593
Likes: 0
Received 0 Likes
on
0 Posts

Sweet, welcome to the "hobby" I do this for a living/full time, but I started out just having fun with it, sure can be addicting, eh?
I see a multitude of things in your pics that could be very much improved upon, and easily, let me know if you want any help. Just one simple step or two you are likely missing in your prep and powder application that's causing the caliper to be covered in all those little pinholes,etc in the powder. I can also tell you how to do the raised letters on those vette calipers in powder, rather than have to paint them. Also, you need to lay a coat of clear over those fronts after putting decals on or they will come off, doesn't looks like they are cleared. As far as coating them without takign them apart, I'm not sure on that, I've never tried it..I just totally take them apart and mask the sensitive areas prior to coating.
I do this for a living/full time, but I started out just having fun with it, sure can be addicting, eh?I see a multitude of things in your pics that could be very much improved upon, and easily, let me know if you want any help. Just one simple step or two you are likely missing in your prep and powder application that's causing the caliper to be covered in all those little pinholes,etc in the powder. I can also tell you how to do the raised letters on those vette calipers in powder, rather than have to paint them. Also, you need to lay a coat of clear over those fronts after putting decals on or they will come off, doesn't looks like they are cleared. As far as coating them without takign them apart, I'm not sure on that, I've never tried it..I just totally take them apart and mask the sensitive areas prior to coating.
Thank you for the advice. You're right, I didn't clear the front calipers when I put the decals on them. I might be able to easily take them back off, and do that. Of course I'll need to clean them up to make sure there is no grease or dirt on them. I was wondering if there was a way to powder coat the lettering on the "corvette" part of the caliper. It would look pretty good if that was done.
I also noticed the small pin holes, and was confused as to why/how they got there. I used a ton of brake clean, and sandblasted them.. I'm sure you know a better way.. and probably easier! lol
Again.. thank you for the advice.. I really appreciate it!
03-31-2009, 11:28 PM
#29
TECH Fanatic
iTrader: (16)
Join Date: Aug 2006
Location: Missouri
Posts: 1,055
Likes: 0
Received 0 Likes
on
0 Posts
You need to out gas them before you spray them. Make sure all the solvents are burned off before you coat them. I usually media blast my parts then scrub them with soap and water. Then I acetone them and out gas the parts in the oven for about 1 hour. I spray the parts cold unless I have trouble getting the powder to stick.
Just my $.02
Just my $.02
03-31-2009, 11:31 PM
#30
TECH Fanatic
iTrader: (16)
Join Date: Aug 2006
Location: Missouri
Posts: 1,055
Likes: 0
Received 0 Likes
on
0 Posts
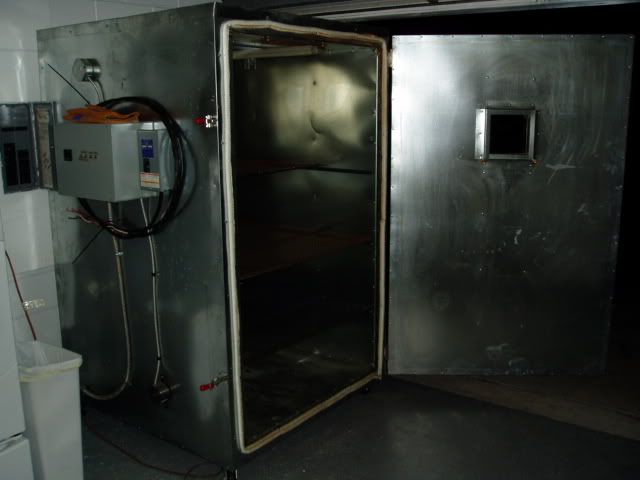
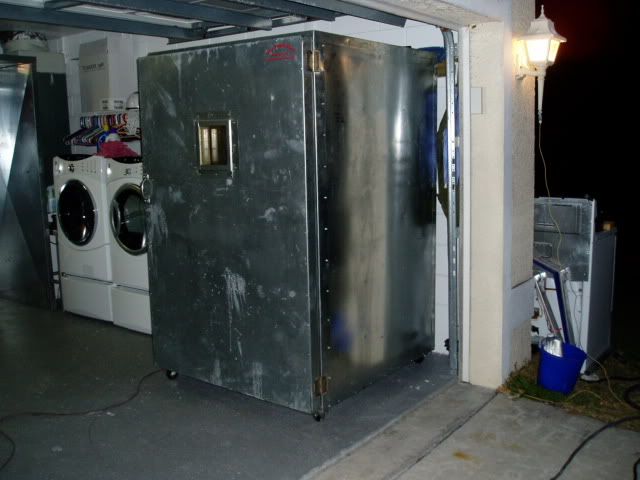
AND yes SILVERGHOST this hobby is addicting!!! I just spent a **** ton of money buying a new compressor, media blasting booth, and building my own oven and spray booth.
03-31-2009, 11:53 PM
#31
10 Second Club
Thread Starter
iTrader: (38)
Join Date: Mar 2003
Location: Whiteland, Indiana
Posts: 593
Likes: 0
Received 0 Likes
on
0 Posts
You need to out gas them before you spray them. Make sure all the solvents are burned off before you coat them. I usually media blast my parts then scrub them with soap and water. Then I acetone them and out gas the parts in the oven for about 1 hour. I spray the parts cold unless I have trouble getting the powder to stick.
Just my $.02
Just my $.02
04-01-2009, 08:39 AM
#32
01 is correct. The pinholes are caused by outgassing most likely. There are air pockets created below the surface of the metal during the casting process, which then proceed to pop during the curing of the powder. Put the parts in the oven for 60-90 minutes at 450 degrees. Some folks do this before blasting, some do it after, I usually do it after blasting personally but its just personal preference on that one. Soap and water should be avoided on anything that's not aluminum IMO, then you have flash rust to deal with potentially. I just blast, blow the parts off well, then wipe down with a microfiber lint free cloth with either acetone or denatured alcohol depending on the substrate i'm working with(i've found that different types of parts work best with certain cleaners)
What media are you blasting with, and what PSI? The metal does not look terribly clean under that powder from what I can tell, its still pretty rough.
On raised lettering its just a two step process. First shoot the color you want on the letters, letting it coat whatever it hits, then cure it. After that you lay down your color you want for the caliper, shooting cold of course and get good coverage including all over the letters you just coated. Then just use your finger, a damp painters sponge, damp q-tips, etc whatever works for you to brush the caliper color powder off the raised letters and cure it again..done.
example, these valve covers

similar process can be done with recessed lettering a well, although it is MUCH harder, took me awhile to do these


What media are you blasting with, and what PSI? The metal does not look terribly clean under that powder from what I can tell, its still pretty rough.
On raised lettering its just a two step process. First shoot the color you want on the letters, letting it coat whatever it hits, then cure it. After that you lay down your color you want for the caliper, shooting cold of course and get good coverage including all over the letters you just coated. Then just use your finger, a damp painters sponge, damp q-tips, etc whatever works for you to brush the caliper color powder off the raised letters and cure it again..done.
example, these valve covers
similar process can be done with recessed lettering a well, although it is MUCH harder, took me awhile to do these