
*****Carbon Fiber berger panel v1.5*****


 10-14-2011, 05:08 PM
#42

i like it exactly as is. having a black car, we don't get much option for a berger panel. I think this looks better than silver or som off gray. I like to so much, that I might have to try it myself. Where did you get the cf? If I do it, I'll use a vacuum bag to squeeze it on.
 10-17-2011, 11:11 PM
#46

I would cut that lower section out then make a new piece out of CF then bond it back into the bumper from the inside. That would be 10x easier then doing a complete wrap.
There was a guy who did his in the vinyl wrap, cant find the picture but it looked pretty good. (Got the idea from him)
Well, you better get to making one then lol
Well, you better get to making one then lol

 10-19-2011, 10:00 PM
#50
TECH Resident
Join Date: Jun 2008
Location: Gainesville, FL
Posts: 755
Likes: 0
Received 0 Likes
on
0 Posts
sorry, that pic isnt of mine. looks similiar though. just thought yall would like to see it. i posted the berger panel pics in that guys thread on svtperformance. just to share ideas.
10-19-2011, 10:51 PM
#53
TECH Regular

The one on the red car is 100% CF, there is a company out there that makes them (can't say a name because they are not a sponsor, and I honestly forgot who), but the owner made a thread on here somewhere and said the build quality wasn't that good. He had to do some modifications to make the tail lights fit back and there were some gap issues as well. I thought about purchasing one but thank god I did a search first haha.
10-19-2011, 10:58 PM
#54
The one on the red car is 100% CF, there is a company out there that makes them (can't say a name because they are not a sponsor, and I honestly forgot who), but the owner made a thread on here somewhere and said the build quality wasn't that good. He had to do some modifications to make the tail lights fit back and there were some gap issues as well. I thought about purchasing one but thank god I did a search first haha.
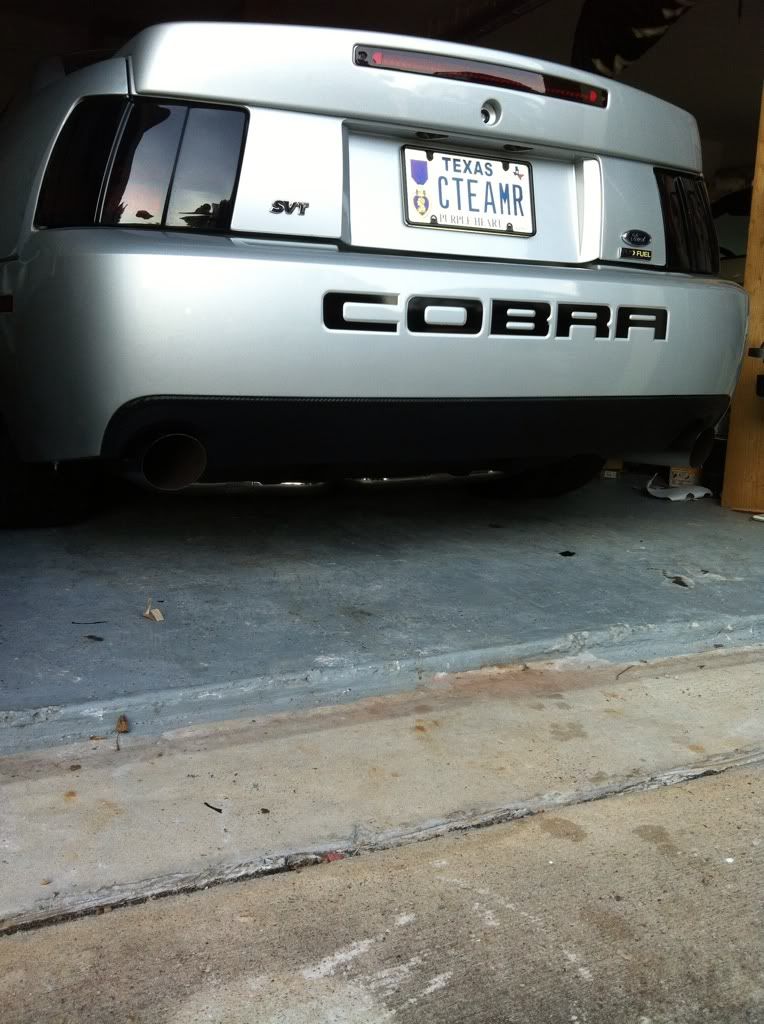
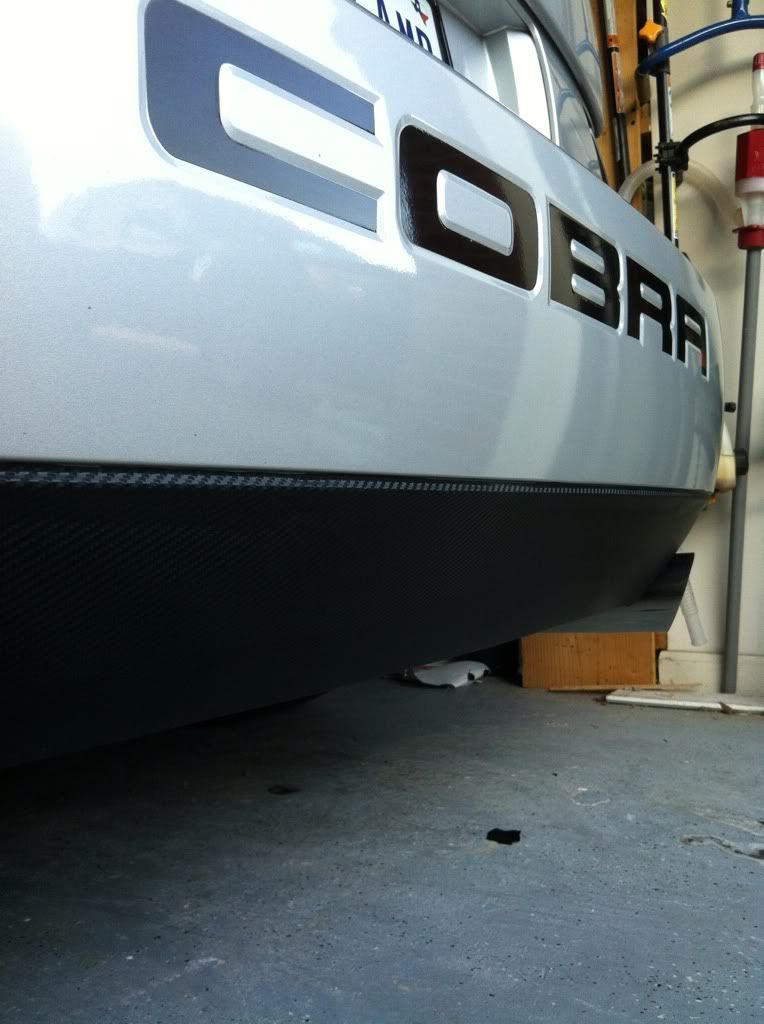
I cleaned up the edges around the hatch and under the lights so you cant see the white basically. Once I get the rear back together ill take some pictures outside.
10-19-2011, 11:34 PM
#55
TECH Resident
Join Date: Jun 2008
Location: Gainesville, FL
Posts: 755
Likes: 0
Received 0 Likes
on
0 Posts
are u talking about vinyl? i was gonna try to find a cheap roll.
i got lucky once and got a huge roll of matte black for $20 shipped. cant remember how many yards but i've already done dual stripes on 5 cars and still have a huge roll left out of it.
should i lay it up against the bumper and cut it while its still on the paper or apply it and then cut it?
i got lucky once and got a huge roll of matte black for $20 shipped. cant remember how many yards but i've already done dual stripes on 5 cars and still have a huge roll left out of it.
should i lay it up against the bumper and cut it while its still on the paper or apply it and then cut it?
10-20-2011, 01:51 AM
#56
are u talking about vinyl? i was gonna try to find a cheap roll.
i got lucky once and got a huge roll of matte black for $20 shipped. cant remember how many yards but i've already done dual stripes on 5 cars and still have a huge roll left out of it.
should i lay it up against the bumper and cut it while its still on the paper or apply it and then cut it?
i got lucky once and got a huge roll of matte black for $20 shipped. cant remember how many yards but i've already done dual stripes on 5 cars and still have a huge roll left out of it.
should i lay it up against the bumper and cut it while its still on the paper or apply it and then cut it?
Follow my old thread on how to do it.
https://ls1tech.com/forums/appearanc...anel-pics.html
10-20-2011, 10:18 PM
#60
Tips when working with CF.
-Always premeasure the sheet before you cut it so you have enough to cover the face and extra to wrap the back side
-I recommend using fabric scissors when cutting (this is a lot tougher to cut then regular fiberglass or cloth)
-Tip I learned on doing a piece this big by myself was lay the cf over your piece and roll each side up til you get to the center (it should look like an old paper scroll that you unroll from both sides) when you have your first layer of resin layed down and are ready to drop the cf, line the rolled up cf so its at the same spot as when you rolled it up and unroll each side one at a time carefully making sure the weave stays the same.
-When you lay your first layer down run a plastic spreader (I used a bondo tool) over the surface to make sure it adheres to your first layer of resin and it soaks through.
-Flip the piece over and tape the extra behind the piece tightly so it doesnt move. Do this along the entire edge.
-Turn it over and ad more layers of resin with a paint brush.
-I did 2 layers of resin then let it cure overnight, sanded it down with 120girt to get the high spots down (not trying to get it completely flat and even)
-After the sanding I added 4 more layers of resin, let it cure for a full 24 hours
-Then started sanding, 120, 220, 320, 400, 600, 800, 1000 in that order (resin is very easy to sand so it didnt take that long at all honestly, maybe 30 minutes total)
-Sprayed 4 coats of UV resistant clear coat (I used rustoleum) then sand with 1500 and 2000 then finish with a polishing compound
Edit: Here is a good video showing the steps (just ignore the base coat he lays down and follow the mixing ratio/cure and tack time on the resin you purchased) Everything else is pretty straight forward.
http://www.youtube.com/watch?v=6rTWaV1imzs
As for parts I bought the cf from ebay, its regular 2x2 twill 6 oz black, nothing special. The resin I got from dads friend but its from UScomposite, I had a gallon and it used maybe 1/3 total for this piece.
Buy plastic cups for mixing the resin, you will need quite a few
Food scale, i already had
Paint brushes you need to stock up on lol
Plastic gloves and respirator
Also, wear a thick long sleeve **** and pants or you will be itchy for days after you sand it all lol
Last edited by whytryz28; 10-20-2011 at 10:24 PM.