Fixed my yellow/cracked headlight today (pics)

 05-12-2005, 10:45 PM
#23
TECH Regular
iTrader: (1)

Join Date: Mar 2004
Location: Tampa, FL
Posts: 451
Likes: 0
Received 0 Likes
on
0 Posts

I just did my lenses, they were a lot worse than yours was but I tried anyway.
I only used 800 grit and then 1500 grit, both wet, then did the 3-2-1 novus.
They are fairly shiny, althought they are still a little foggy. Probably 5x better than what they were though. Well worth the $15
I only used 800 grit and then 1500 grit, both wet, then did the 3-2-1 novus.
They are fairly shiny, althought they are still a little foggy. Probably 5x better than what they were though. Well worth the $15
05-13-2005, 12:20 AM
#24
TECH Fanatic
Thread Starter
iTrader: (11)

Join Date: Nov 2003
Location: Marysville, WA
Posts: 1,781
Likes: 0
Received 0 Likes
on
0 Posts
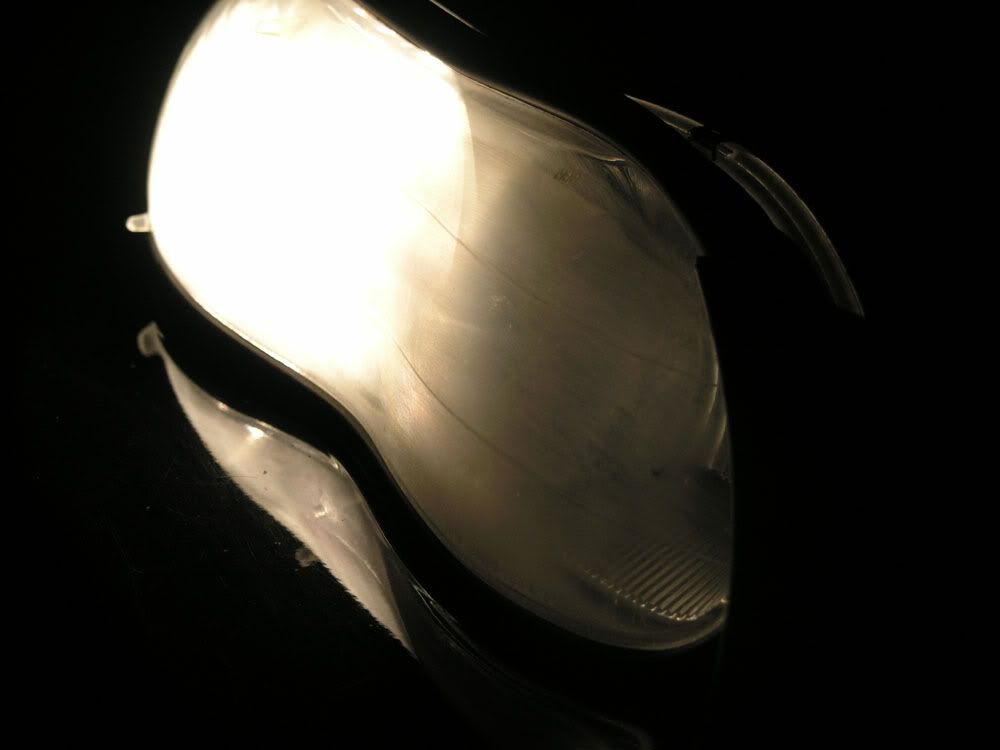
evilbadz, your lenses were worse then mine??? That's pretty bad! How long did you send sanding with the 800 grit? This is the step where you need to remove all of the cracks and oxidization from the plastic. Every step after that is just to remove the sanding scratches left behind and to polish the plastic. Here's a shot of the cracks that I had:

05-22-2005, 03:46 PM
#25
Staging Lane

Join Date: Apr 2005
Posts: 98
Likes: 0
Received 0 Likes
on
0 Posts
I tried with 400, 1000, and 1500 and used Meguiar's Plast-X polish. It looks tons better than it did, but not as good as yours. I think I either needed the 800 grit, needed to sand a bit longer with the 1500 grit, or needed the Novus polish instead of the Meguiars. Or all of the above heh. And yeah, I think my lights look worse than yours too. I need to get a pic. I've got one head light polished and one not lol. Sort of a before/after effect right there on my car.
06-01-2005, 12:53 PM
#26


I was wondering if anyone noticed if there was an outer "skim" layer of plastic as they were sanding? I tried to do this with a Viper headlight and before you got anywhere near deep enough to get the crazing out, you were thru this top plastic layer. The uncovered lower layer was no where near as polishable as the top layer. (I was afraid of this possibility so I only did a small spot on the lens. I quit when I observed a top layer.)
However, photos don't lie! These polished lenses look great! I think this 3 step polishing product must be superior to the 2 step 3M I used.
However, photos don't lie! These polished lenses look great! I think this 3 step polishing product must be superior to the 2 step 3M I used.
06-01-2005, 02:05 PM
#27
TECH Fanatic
Thread Starter
iTrader: (11)
Join Date: Nov 2003
Location: Marysville, WA
Posts: 1,781
Likes: 0
Received 0 Likes
on
0 Posts
Not all headlights are constructed the same... I didn't notice myself sanding through any layers on my lenses, but I do remember reading something about this when I did my research before the project. I can't remember the details about those types of lenses now... 
06-01-2005, 03:20 PM
#28
yeah, I had the same fear. My guess is that outer layer is some kind of hard coat.
Ironically, I'll bet the more expensive lenses use the hard coat and cannot be repaired and end up costing you a fortune to replace.
If true, one case where cheaper is better.
Ironically, I'll bet the more expensive lenses use the hard coat and cannot be repaired and end up costing you a fortune to replace.
If true, one case where cheaper is better.
 06-05-2005, 10:50 PM
#31
I did mine first using 400, then 600, then 1000, then 1500. Then I used the Novas plastic polish. I would say the results were less than spectacular. I managed to get all the orginal spiderwebbing out, but I still have the scratches I put in there myself. Maybe I'll spend some more time sandingwith the 600, 1000, and 1500 later. I would say the passenger side light looks only marginally better than before.
I wish I had found some 800 grit paper, but I went to Home Depot, True Value Hardware, O'Rieliey's, and Hobbytown USA looking for the ones I managed to find.
I wish I had found some 800 grit paper, but I went to Home Depot, True Value Hardware, O'Rieliey's, and Hobbytown USA looking for the ones I managed to find.
06-06-2005, 06:48 AM
#32
TECH Fanatic
Thread Starter
iTrader: (11)
Join Date: Nov 2003
Location: Marysville, WA
Posts: 1,781
Likes: 0
Received 0 Likes
on
0 Posts
The key to getting good results is spending enough time with each grit sandpaper to remove the scratches left by the previous step. This is a time-consuming process, I think I spent about 4 hours on one lens.
06-06-2005, 03:10 PM
#33
TECH Enthusiast

Join Date: Sep 2004
Location: Midland, TX
Posts: 598
Likes: 0
Received 0 Likes
on
0 Posts
Does anyone know if this process also works on mustang headlights. I know someone that is thinking about buying new lights but this would be cheaper. I'm sure that someone out there knows if there is more than 1 layer of plastic. I just don't want to experiment on hers and screw up.
06-08-2005, 07:10 PM
#34
Originally Posted by AronZ28
I did mine first using 400, then 600, then 1000, then 1500. Then I used the Novas plastic polish. I would say the results were less than spectacular. I managed to get all the orginal spiderwebbing out, but I still have the scratches I put in there myself. Maybe I'll spend some more time sandingwith the 600, 1000, and 1500 later. I would say the passenger side light looks only marginally better than before.
I wish I had found some 800 grit paper, but I went to Home Depot, True Value Hardware, O'Rieliey's, and Hobbytown USA looking for the ones I managed to find.
I wish I had found some 800 grit paper, but I went to Home Depot, True Value Hardware, O'Rieliey's, and Hobbytown USA looking for the ones I managed to find.
I actually dry sanded and was clogging up the paper. I had a spray bottle of WD-40 and actually shop a spray of that, not that I recommend it but it did help.
I thought I already had a a drivers side, so I bought a passengers side headlight. When I put them side by side I noticed I had two of the same, so I practiced on this one as the other was in great condition. this one came out so good, Im selling the other untouched light

I found the 800 grit as well as the others at Pepboys.
06-24-2005, 02:17 AM
#36
I polished my lights up too, but i didnt spend too much time but man they look so much better. I just got some water and dishwashing soap and some sand paper and moved up on the grits until i got to a real fine grit i believe 2000 or higher i dont remember too well...but here are some pics
Before

AFTER
Still a little more to do but they will do for now!

Damn shes dirty lol but u can see they are way more clear than before.
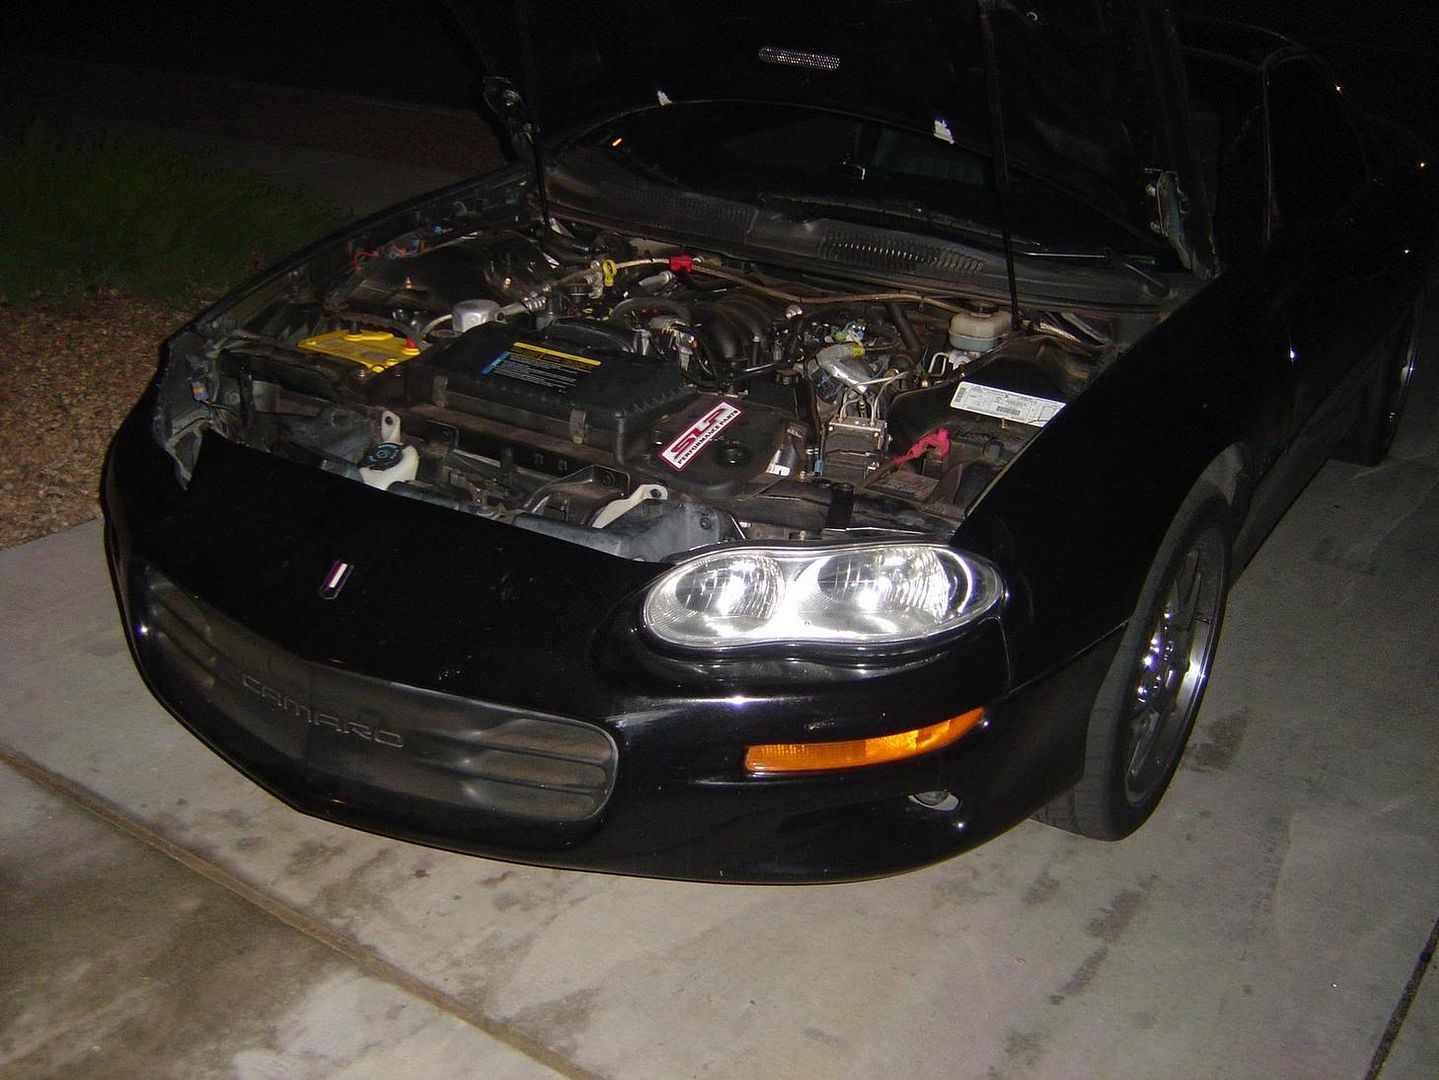
Side by side difference

Before
AFTER
Still a little more to do but they will do for now!
Damn shes dirty lol but u can see they are way more clear than before.
Side by side difference
