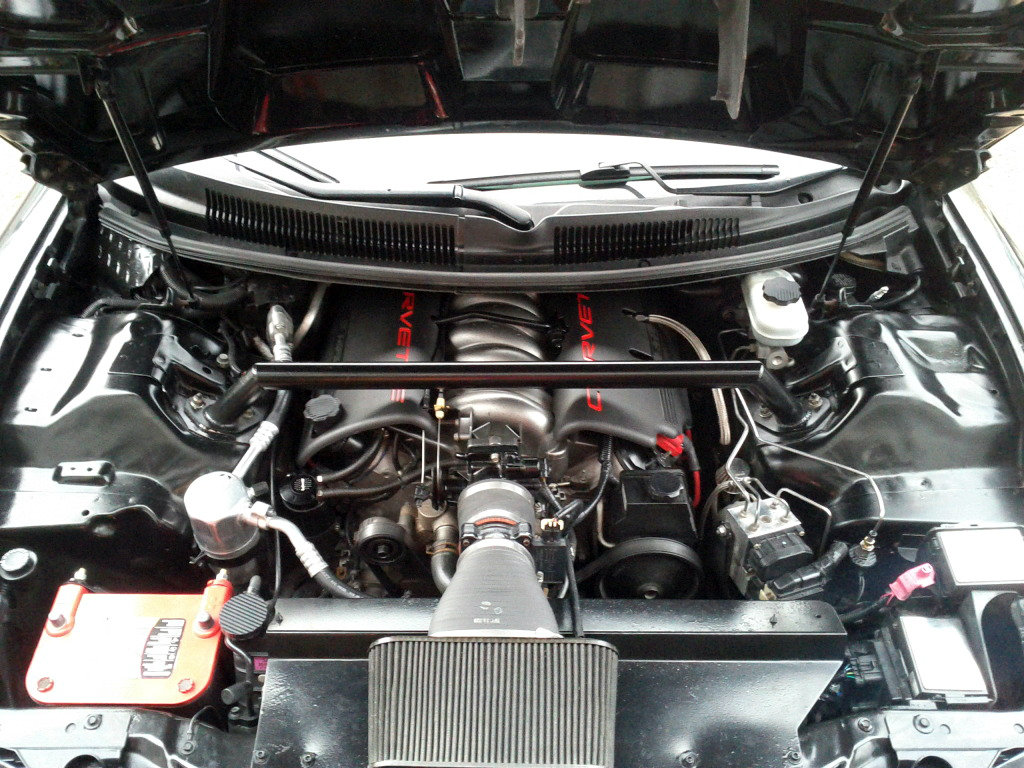
Revamped my Engine Bay
#41
#44
Did you take off the front bumper to get at the windshield cleaner reservoir?
Have you thought about switching over to all these?
Have you thought about switching over to all these?

Last edited by DaRReLL; 12-23-2012 at 02:26 PM.
#50
Thread Starter
TECH Veteran
iTrader: (4)
Joined: Aug 2009
Posts: 4,138
Likes: 7
From: The Bay Area, CA
^thanks!
no, but you will need to remove the 2 bumper support brackets right above it, and the headlights need to come off to be able to get to those.
I'd definitely suggest just painting that windshield washer reservoir black instead of removing it. you still get the cleaned up look, without it being so obvious, and if you use the car as a DD, you never know when you may actually need that. I had removed it the first time I went through and cleaned the engine bay a while back, but I really regretted it a couple times when I was doing 5-6 hour road trips from norcal to socal and needed to be able to clean the bugs off while driving. I haven't had to use it in like forever, but it'll be nice to have when I do need it!
Got a picture of what you're talking about? don't see how it'd be possible with the STB, but I am interested to see how that'd look if it is
#51
#56
It looks great man.
One thing kind of stood out to me though...
Im not trying to talk crap since your engine bay looks a million times better than mine but.. that tape on the fuel like looks kind of red neck.. but since i dont have any better suggestions idk what id replace it with. lol
just my two cents.
One thing kind of stood out to me though...
Im not trying to talk crap since your engine bay looks a million times better than mine but.. that tape on the fuel like looks kind of red neck.. but since i dont have any better suggestions idk what id replace it with. lol
just my two cents.
#60
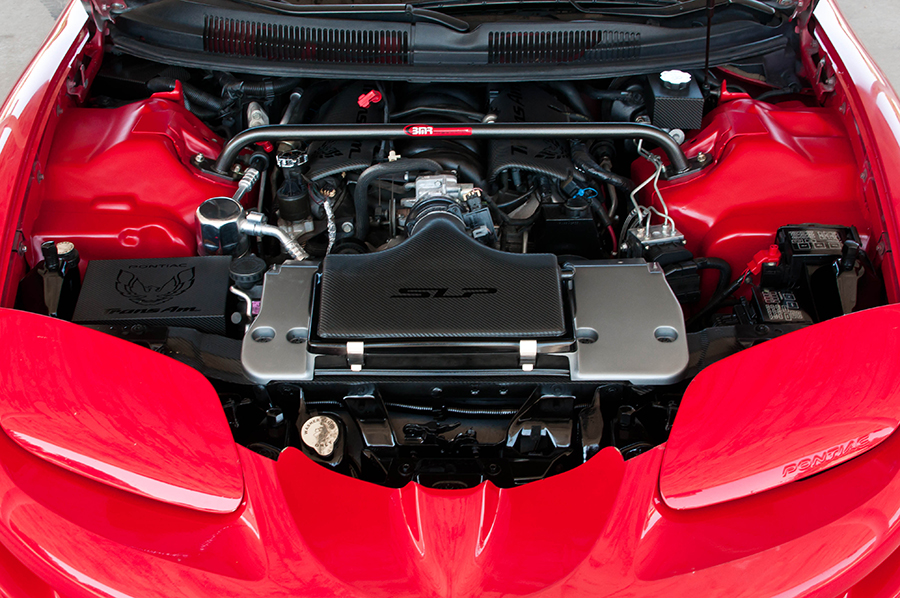
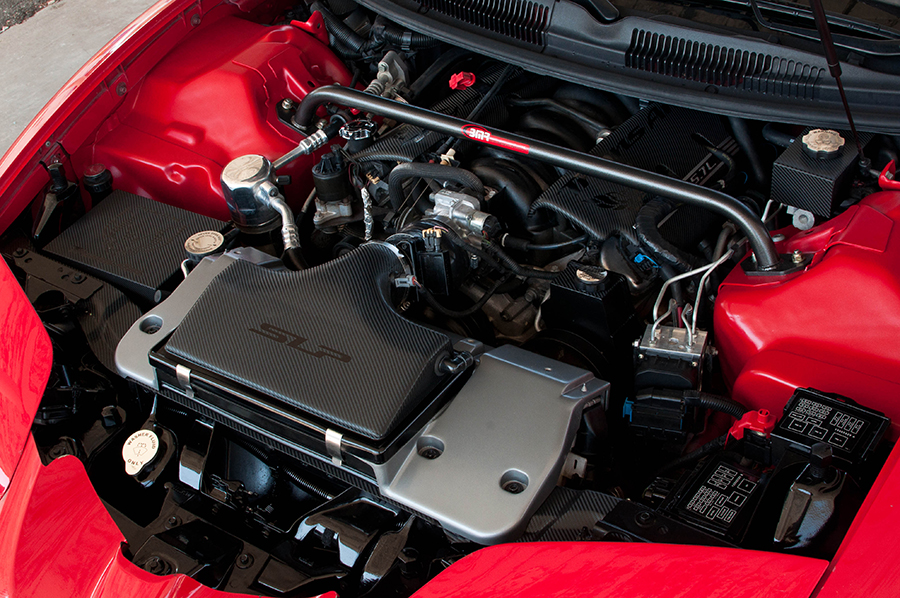
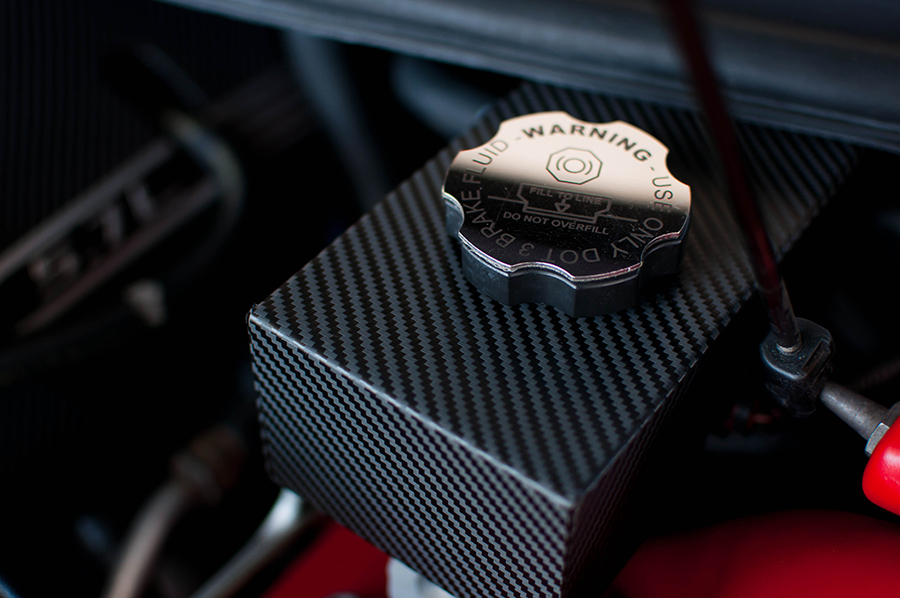
IBeen a little busy lately getting the engine bay cleaned up. Started when I got a huge roll of 3M scotchprint 1080 vinyl (carbon fiber) and had WAAAAYYY more than I needed (I still have a lot left). So I started wrapping a few things here and there, and the project just kept rolling. Only thing left to do is pull the intake when I get an ls6.
Unfortunately, while painting the fenders (last thing I did) I accidentally got some over spray on my wrapped lid and driver's side FRC... both will need to be rewrapped
What's been done:
-passenger and drivers side wire tuck
-relocated grounds
-all holes welded shut/grinded smooth.
Repainted (Dupli-color spray paint: "GM Bright Red")
-fender wells
-oil dipstick, trans/lock dipstick, and positive ground cap
Repainted (Rustoleum: Hammertone Gray)
-air filter box base
Repainted (Gloss Black):
-brackets/supports
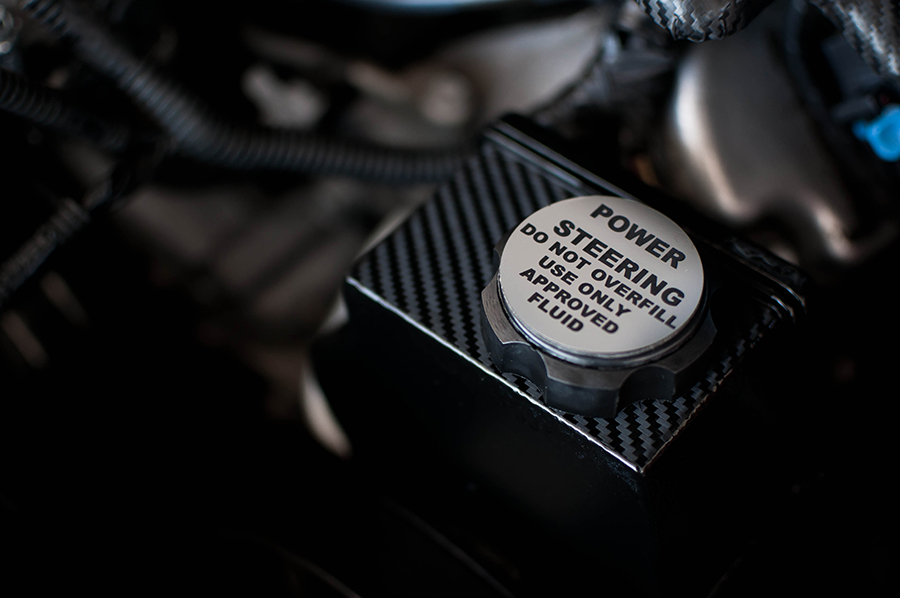
-powers steering reservoir
-battery tray and coolant reservoir
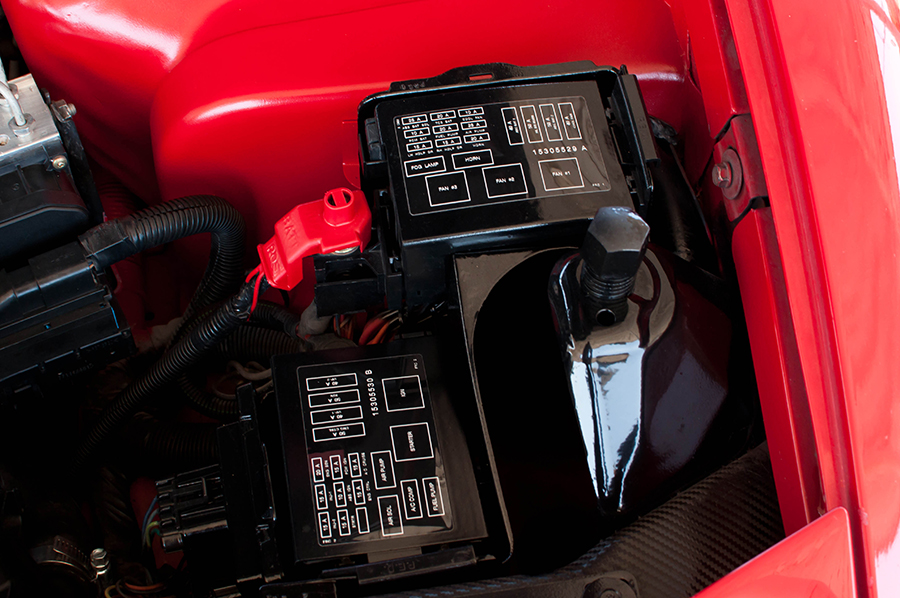
-fuse box tray and lids
-windshield cleaner reservoir
-back of headlights
-green cap on fuel lines
Carbon Wrapped:
-SLP Lid
-Corvette Fuel Rail Covers (FRC's), smoothed first
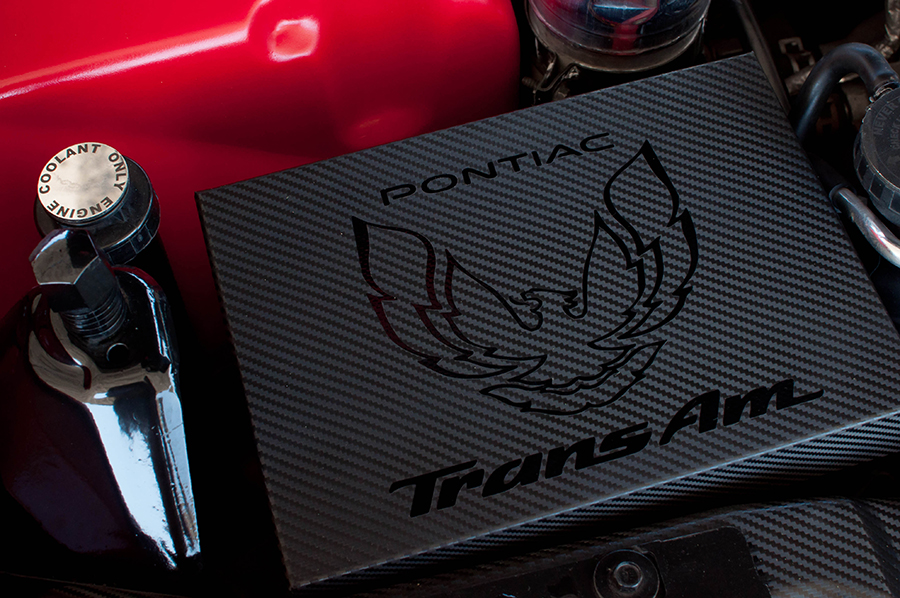
-Emblempros battery cover
-Main front-end readiator support thing (the thing the air box sits on)
-SpecializedStainless PCM cover and Brake Fluid Reservoir cover
-top of power steering resevoir
Graphics
-battery cover and SLP lid: big thanks to board member jlincks, who made these for me, as well as a LOT of other little things I've needed over the past couple years. Excellent works as always!
-FRC's: ebay decal kit, seller thumperzecalz. I used the trans am logos for the doors, and the pillar birds provided http://www.ebay.com/itm/261079026509...84.m1497.l2649
-fuse box covers: www.HawksThirdGenParts.com, their ebay store. user name camarohawk. http://www.ebay.com/itm/380452051137...84.m1497.l2649
Misc
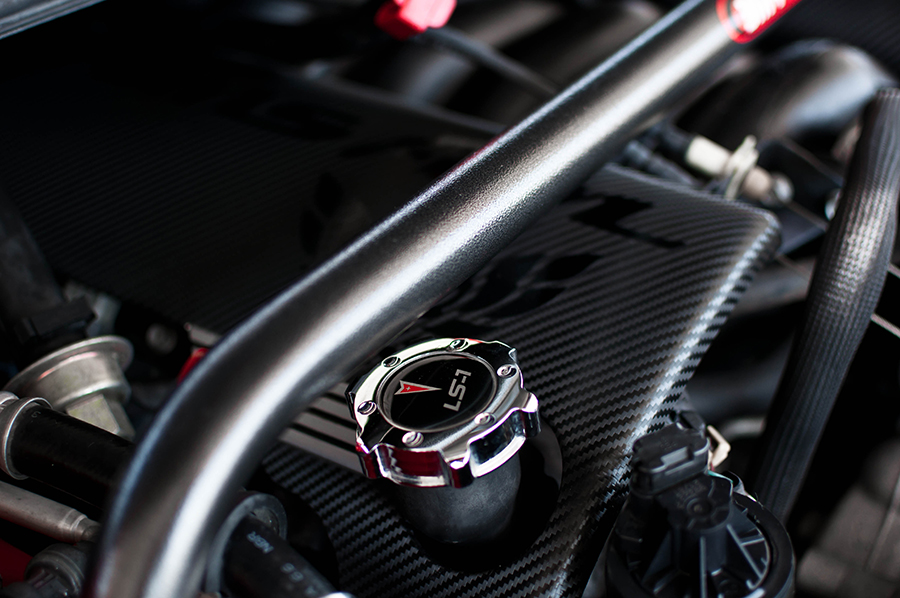
-BMR STB strut tower brace (Hammertone color)
-Pontiac LS1 oil cap
-emblem pros cap set http://emblempros.com/inc/sdetail/1246/598
Polished
-AC accumulator (mirror-like now)
-other misc. things
Mothers Back-to-Black
-hoses, loom, and other black accessories
-windshield wiper cowl plastic
also rewrapped fuel lines in fresh electrical tape.
And of course a good cleaning!!


The car has a few more changes to be done and then I'll be posting more pics shortly. Targa will be done this week, just need to finish the latches (not the full conversion, just the top itself to replace the t-tops), the splitter will be back on, and wider wheels put on the back.. then a shoot!
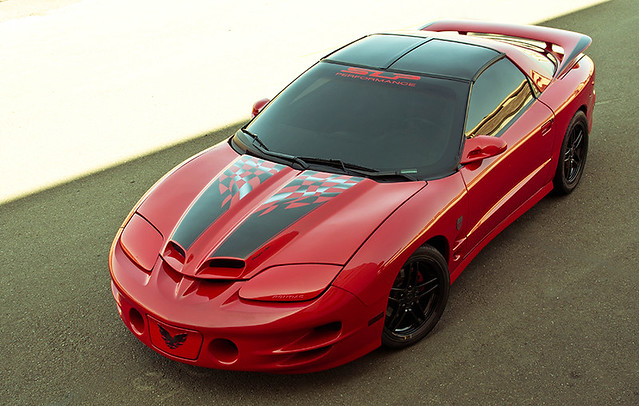
one shot I took while out
Unfortunately, while painting the fenders (last thing I did) I accidentally got some over spray on my wrapped lid and driver's side FRC... both will need to be rewrapped

What's been done:
-passenger and drivers side wire tuck
-relocated grounds
-all holes welded shut/grinded smooth.
Repainted (Dupli-color spray paint: "GM Bright Red")
-fender wells
-oil dipstick, trans/lock dipstick, and positive ground cap
Repainted (Rustoleum: Hammertone Gray)
-air filter box base
Repainted (Gloss Black):
-brackets/supports
-powers steering reservoir
-battery tray and coolant reservoir
-fuse box tray and lids
-windshield cleaner reservoir
-back of headlights
-green cap on fuel lines
Carbon Wrapped:
-SLP Lid
-Corvette Fuel Rail Covers (FRC's), smoothed first
-Emblempros battery cover
-Main front-end readiator support thing (the thing the air box sits on)
-SpecializedStainless PCM cover and Brake Fluid Reservoir cover
-top of power steering resevoir
Graphics
-battery cover and SLP lid: big thanks to board member jlincks, who made these for me, as well as a LOT of other little things I've needed over the past couple years. Excellent works as always!
-FRC's: ebay decal kit, seller thumperzecalz. I used the trans am logos for the doors, and the pillar birds provided http://www.ebay.com/itm/261079026509...84.m1497.l2649
-fuse box covers: www.HawksThirdGenParts.com, their ebay store. user name camarohawk. http://www.ebay.com/itm/380452051137...84.m1497.l2649
Misc
-BMR STB strut tower brace (Hammertone color)
-Pontiac LS1 oil cap
-emblem pros cap set http://emblempros.com/inc/sdetail/1246/598
Polished
-AC accumulator (mirror-like now)
-other misc. things
Mothers Back-to-Black
-hoses, loom, and other black accessories
-windshield wiper cowl plastic
also rewrapped fuel lines in fresh electrical tape.
And of course a good cleaning!!


The car has a few more changes to be done and then I'll be posting more pics shortly. Targa will be done this week, just need to finish the latches (not the full conversion, just the top itself to replace the t-tops), the splitter will be back on, and wider wheels put on the back.. then a shoot!
one shot I took while out

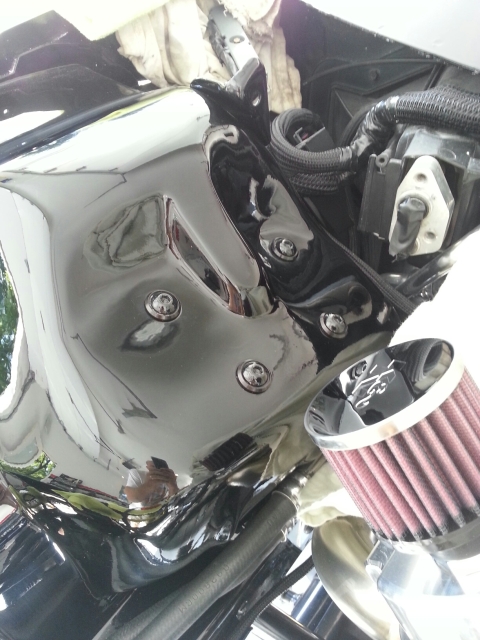
I am wanting to do something similar, I have the K&N FIPK and it already has some carbon fiber on the filter so i am thinking I would like to wrap the front support brace (that the lid bolts down to)
I was hoping you could tell me if you wrapped the support brace all the way down the back or just cut the wrap at the edge?


