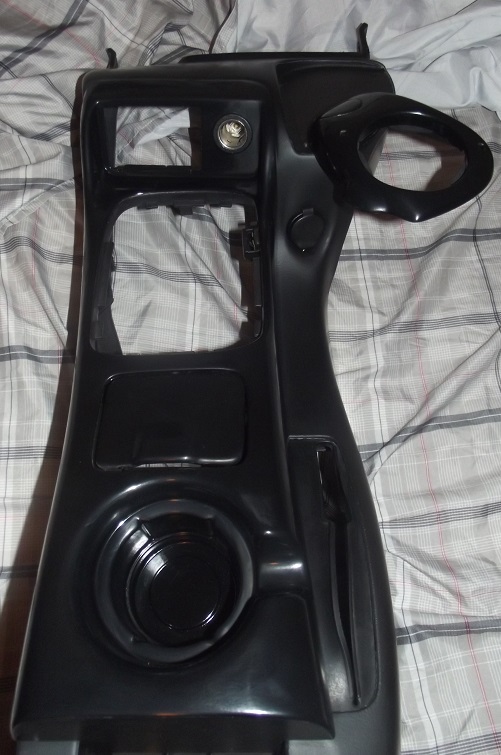
Just want to share some interior work im in the process of doing
#24
TECH Junkie
iTrader: (12)
VERY nice work. I did this on my Z28, factory NBM. Endless sanding, adhesion promoter (very important and too many skip this), primer, multiple coats of color, and multiple coats of clear. Came out looking factory and very good with zero texture. I really like what you've done with yours. So far, very tasteful.
The gloss/reflectiveness was a bit of a shock huh? My gauges seemed twice as bright at night lol.
The gloss/reflectiveness was a bit of a shock huh? My gauges seemed twice as bright at night lol.
#25
VERY nice work. I did this on my Z28, factory NBM. Endless sanding, adhesion promoter (very important and too many skip this), primer, multiple coats of color, and multiple coats of clear. Came out looking factory and very good with zero texture. I really like what you've done with yours. So far, very tasteful.
The gloss/reflectiveness was a bit of a shock huh? My gauges seemed twice as bright at night lol.
The gloss/reflectiveness was a bit of a shock huh? My gauges seemed twice as bright at night lol.
Yea the gloss was surprisingly reflective. Im glad I just did the pieces I did in gloss before I decided to do the whole car gloss.
I would like to ask how you did the main dash body. Did you take the whole dash out or what. And also what did you do with the arm rests on the doors and center console. seems like its gonna chip paint on the armrests because its such a soft plastic. FOr the center console I think I will get a new pad from redline goods but on the doors Im not sure what to do.
#26
10 Second Club
iTrader: (30)
Yea the gloss was surprisingly reflective. Im glad I just did the pieces I did in gloss before I decided to do the whole car gloss.
I would like to ask how you did the main dash body. Did you take the whole dash out or what. And also what did you do with the arm rests on the doors and center console. seems like its gonna chip paint on the armrests because its such a soft plastic. FOr the center console I think I will get a new pad from redline goods but on the doors Im not sure what to do.
I would like to ask how you did the main dash body. Did you take the whole dash out or what. And also what did you do with the arm rests on the doors and center console. seems like its gonna chip paint on the armrests because its such a soft plastic. FOr the center console I think I will get a new pad from redline goods but on the doors Im not sure what to do.

#30
TECH Junkie
iTrader: (12)
Yea the gloss was surprisingly reflective. Im glad I just did the pieces I did in gloss before I decided to do the whole car gloss.
I would like to ask how you did the main dash body. Did you take the whole dash out or what. And also what did you do with the arm rests on the doors and center console. seems like its gonna chip paint on the armrests because its such a soft plastic. FOr the center console I think I will get a new pad from redline goods but on the doors Im not sure what to do.
I would like to ask how you did the main dash body. Did you take the whole dash out or what. And also what did you do with the arm rests on the doors and center console. seems like its gonna chip paint on the armrests because its such a soft plastic. FOr the center console I think I will get a new pad from redline goods but on the doors Im not sure what to do.
#32
So I finished up the center console parts. Like it is stated in my previous posts. The lower center console is satin black and the upper shifter portion and the cup holders are gloss. It came out pretty darn good if I say so myself. The cigarette lighters were a bitch to get out and the tabs snapped off when pulling them out so I had to hot glue them on the back when I put em back in.


#36
Check out the PPG soft feel paint for your dash. I've seen older rods with it. And I plan to use it in my '67.
It will work out pretty good for the dash and possibly panels that are not plastic.
It will work out pretty good for the dash and possibly panels that are not plastic.
#37
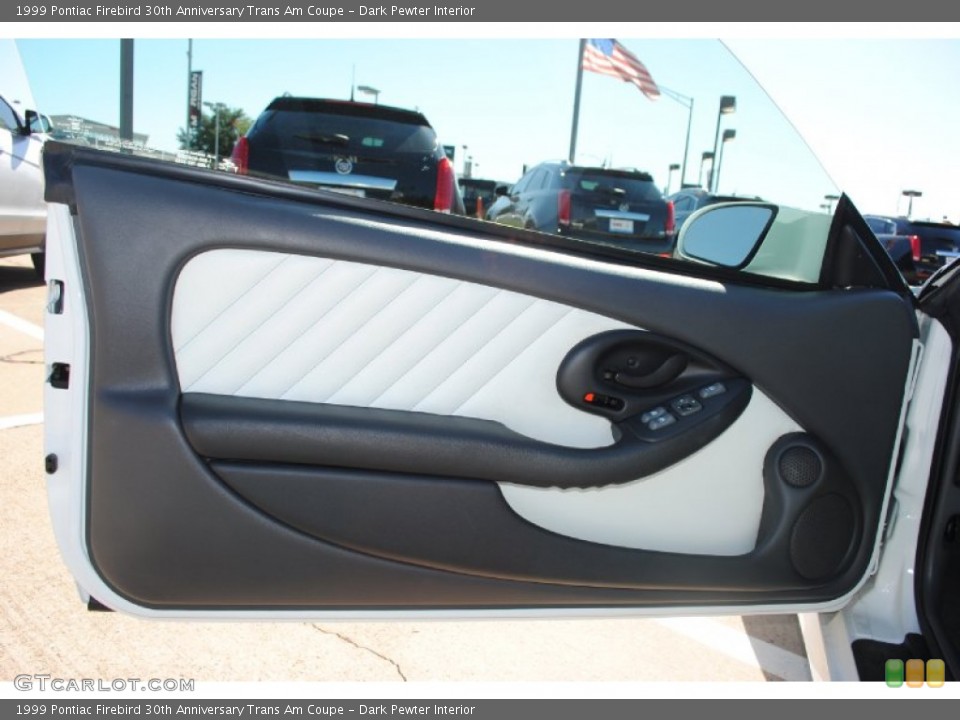
SO I have been thinking more and more about this and I want to give it a try. If I want to transfer in these bird panels what all am I going to need and do all the bolt holes match up perfectly? I assume that its just a grab and swap but I want to make sure if I have to order some out of area. I really like the way the bird panels look and I want to order some panel inserts from reline goods in matching red with a SS logo of some sort embroidered in as well.
#38
TECH Apprentice
iTrader: (3)
As far I have collected it will snap and bolt in like a Camaro door panel. However, you need the window and door controls from a Firebird/TA. I was told somewhere that I would need to rewire somethings as well but I am doing Firebird/TA door panels and dash. With that said as far as the switches I don't know yet if the Camaro harness is plug and play with the TA switches.
This is another fall and winter project that I plan on doing this year. If you get to it before I do please post.
This is another fall and winter project that I plan on doing this year. If you get to it before I do please post.
Last edited by LetsRide; 10-14-2014 at 04:02 PM.
#39
As far I have collected it will snap and bolt in like a Camaro door panel. However, you need the window and door controls from a Firebird/TA. I was told somewhere that I would need to rewire somethings as well but I am doing Firebird/TA door panels and dash. With that said as far as the switches I don't know yet if the Camaro harness is plug and play with the TA switches.
This is another fall and winter project that I plan on doing this year. If you get to it before I do please post.
This is another fall and winter project that I plan on doing this year. If you get to it before I do please post.


