


How to restore plastic trim to factory condition-A quick guide
Thread Starter
On The Tree
Joined: May 2014
Posts: 108
Likes: 1
So I stumbled upon a thread where a few guys were talking about different products and which were best, the answer? none of them. All they do is cover the faded plastic, and will not last forever. The only way to bring plastic back to black, it with heat and elbow grease.
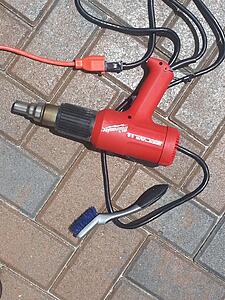
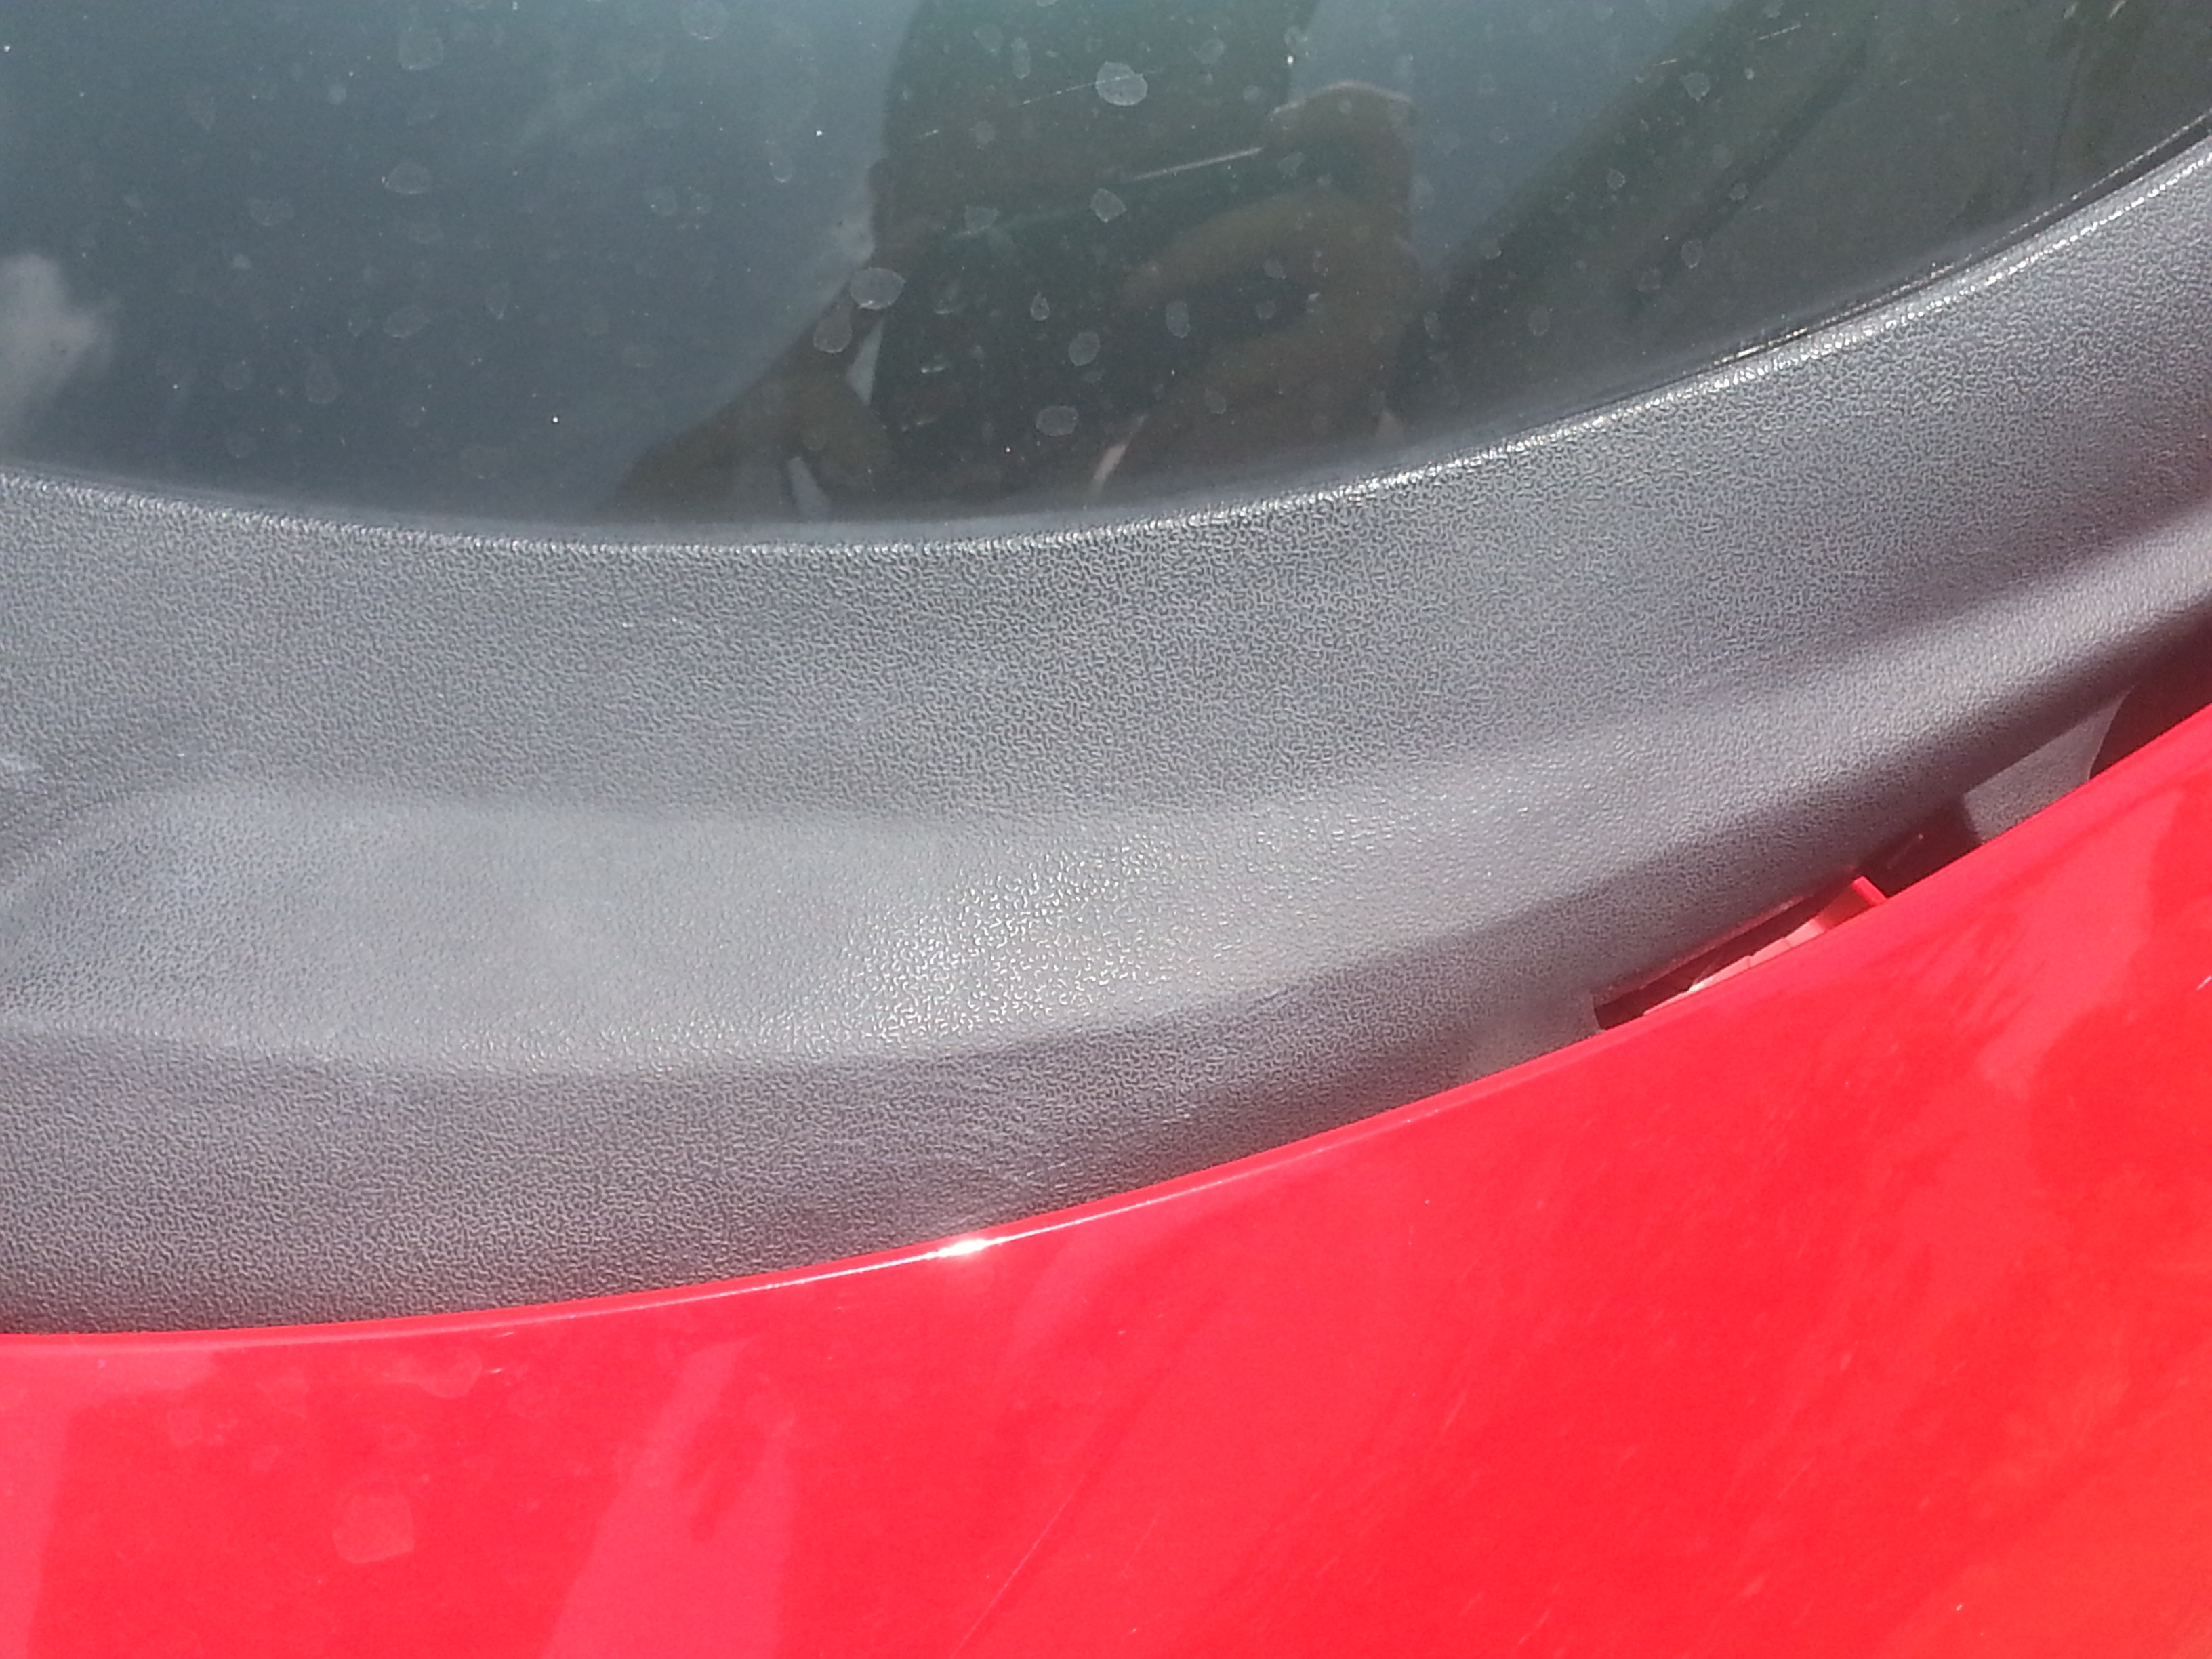
Heat gun and firm plastic brush are needed
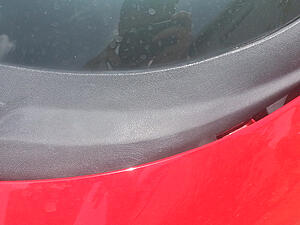
one side before
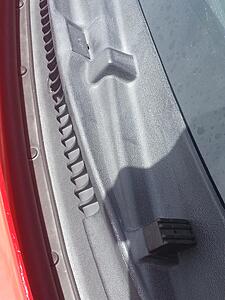
other side after
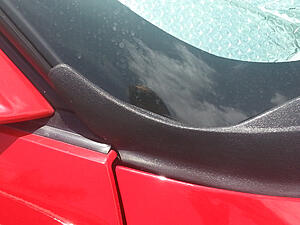
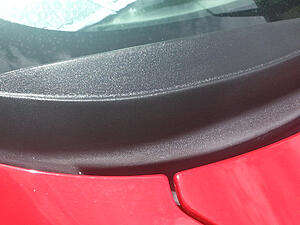
new vs. old

Try to do as much as you can with the brush before you heat it, and make sure the surface is relatively clean. The brush will clean any dried plastic on the surface, and in some situations might be all you need if your plastic isn't in too bad. But if you have faded and worn plastic, you may need both. If that is the case, then the instructions are pretty straight forward: brush, heat, brush, repeat until it is to your liking. Remember not to let the heat sit on an area for too long, treat it the same way you would if you were spray painting, back and forth motion. It may take a while for the plastic to become black (took me about 15-20 mins for that front piece) but if you take your time, it lowers the chance of you melting the plastic, and if done correctly and not rushed, no harm will come to it. BUT if you rush and apply too much heat, you risk burning the plastic. Stay a couple of inches away when you apply heat (2-3 inches). The heat basically brings the pigment back to the surface of the plastic, which will give you a nice black sheen, better than any over the counter cover up.
Hope this helps you guys out, if you have any questions just ask below.
Heat gun and firm plastic brush are needed

one side before

other side after


new vs. old


Try to do as much as you can with the brush before you heat it, and make sure the surface is relatively clean. The brush will clean any dried plastic on the surface, and in some situations might be all you need if your plastic isn't in too bad. But if you have faded and worn plastic, you may need both. If that is the case, then the instructions are pretty straight forward: brush, heat, brush, repeat until it is to your liking. Remember not to let the heat sit on an area for too long, treat it the same way you would if you were spray painting, back and forth motion. It may take a while for the plastic to become black (took me about 15-20 mins for that front piece) but if you take your time, it lowers the chance of you melting the plastic, and if done correctly and not rushed, no harm will come to it. BUT if you rush and apply too much heat, you risk burning the plastic. Stay a couple of inches away when you apply heat (2-3 inches). The heat basically brings the pigment back to the surface of the plastic, which will give you a nice black sheen, better than any over the counter cover up.
Hope this helps you guys out, if you have any questions just ask below.
Looks good.
My friend took all his plastic trim off and paid a paint shop like $50.00 to spray paint it and then clear coat it. It shines black like crazy. I think Im gonna do that same. I think all he did was wet sand it a little bit before he gave it to them to paint.
.
My friend took all his plastic trim off and paid a paint shop like $50.00 to spray paint it and then clear coat it. It shines black like crazy. I think Im gonna do that same. I think all he did was wet sand it a little bit before he gave it to them to paint.
.
Thread Starter
On The Tree
Joined: May 2014
Posts: 108
Likes: 1
Trending Topics
This.^^^ I've sprayed a lot of SEM on bumpers and trim and has lasted for a long time. Gloss plastic trim does not look right to me. Needs to be satin type finish but, hey if it's good for you roll with it. I'm 50-50 on the heat thing, guess I need to try it.
LS1 Tech Stories
The Best V8 Stories One Small Block at Time

Gas Monkey Built a 6-Wheel Ferrari Testarossa With a Corvette LT4 Engine
Verdad Gallardo
7 Most Reliable High-Performance Engines GM Has Ever Built
Verdad Gallardo
Amazing '71 Camaro Restomod Is Modern Muscle Car Under the Skin
Verdad Gallardo
6 Common C5 Corvette Failures and What's Involved In Repairing Them
Pouria Savadkouei
Retro Modern Bandit Pontiac Trans AM Comes With Burt Reynolds' Autograph
Verdad Gallardo
Top 10 Greatest Cadillac V Series Performance Models Ever, Ranked
Pouria Savadkouei
Top 10 Most Powerful Chevy Trucks Ever Made!

Hennessey's New Supercharged Silverado ZR2 Has 700 HP
Verdad Gallardo
Coachbuilt N2A Anteros Is an LS2-Powered C6 Corvette In Italian Clothes
Verdad Gallardo Never used the "Trim Black" code. I guess that's the Aerosol? Always used #1501 Landau Black by the pint or quart. Sprays an extremely nice finish on such parts. Prep before paint is Key!!!!!
TECH Regular
Joined: Feb 2008
Posts: 465
Likes: 0
From: Pearl City, Hawaii
I had a Pathfinder I bought used and the back panels were all scratched up from previous owners dog. I used this technique and brought it back to almost new condition. To make it look right you have to do the whole panel not just were the scratches are or it gets glossy in those areas and you can tell someone tried to repair it. Well worth the effort!
Thread Starter
On The Tree
Joined: May 2014
Posts: 108
Likes: 1
I did this yesterday to a friends bumper that was extremely bad and it looked great despite the poor bumper condition. Also turned the heat to max and let it basically soak in, didn't really do anything to harm the plastic at all and looked great afterwards so I guess you don't need to baby it as much as I said, because I let the heat sit in some spots for longer than I said to. So to anyone who has a heat gun, just try it, it is extremely hard to mess up and the result is a factory new looking plastic piece, no chemicals to cover it up.

I wonder how this will work on my door panel on my vert. It is more faded than the pas side. It is worth trying since the int is tan not the every day black or ebony. I have a heat gun...use it on low or high?
Thread Starter
On The Tree
Joined: May 2014
Posts: 108
Likes: 1
I did this on light gray and black and it worked fine, but didn't try interior panels. On the interior I would try low/medium first then move to high if you feel ok with it. The outside held up fine to max heat, just make sure the gun doesn't make contact with the plastic or else the hot metal will burn your plastic. Post some pics so I can get an idea of how bad it is. The plastic won't melt so don't worry, it will only melt if you just sit in one spot on max for a while, like a minute. You will see the plastic change and then you know not to go over it again unless if you missed a spot.
Thanks been thinking about it. That driver door panel on the top where the rubber seal is where its faded. My concern was for the rubber as well. I don't want to warp it. I may try this out on Monday. I'll take a before shot. Also, I do have the famous crack and don't want to make that worse. I did the staple repair but not sure how it will fair.
That's just a temporary fix.
I like to clean the plastic really well with 1z deep plastic cleaner and then coat it with CarPro Dlux. Restored and protected for up to one year, then just recoat it whenever it starts to fade.
I like to clean the plastic really well with 1z deep plastic cleaner and then coat it with CarPro Dlux. Restored and protected for up to one year, then just recoat it whenever it starts to fade.
Invest in some Mothers Back to Black Heavy Duty Trim Cleaner. It works great and brings back the OEM look. Then follow up with a trim restorer to bring some more life into the plastic as it absorbs the product until it's hydrated. Such as Mothers Back to Black Trim Restorer or Meguiar's Ultimate Black. Turtle wax even makes a trim coating called Jet Black Black Endura Shine Trim Coating. It is a black acrylic coating that works really well at making the trim look black.