
Trans Am LED Fog Light Install (Morimoto Knockoffs)


 05-12-2016, 09:52 AM
#143
I know what you mean about the alignment. Like an idiot, I tapped the lights first, then went back and tapped the bracket (which I could probably drill slightly larger) and they're slightly off. I went ahead and screwed my bolts in all the way, knowing that they're cross-threaded but hoping they'd be OK. And for some reason, they're perfectly fine. However, I'm also a perfectionist and not going to just slap something into the car to say I did it. I don't care how long it takes, but when I'm done they're going to be great. Now if I can just stop drilling holes in the limited surface area, I'll be in good shape lol.
05-12-2016, 01:14 PM
#146
TECH Fanatic
iTrader: (4)
Join Date: Dec 2003
Location: Pennsylvania
Posts: 1,080
Likes: 0
Received 0 Likes
on
0 Posts

Im so mad right now its not even funny. Everything I ended up doing with these I wasn't satisfied enough on how they were placed, I finally got them to fit good and now this? I have a ton of Loctite on those and don't think they are going to budge anytime soon. I wonder how big of a difference it is going to make on the road? I seriously am so frustrated with this! 
EDIT: I cant even get these to budge. They arent coming off. How bad will it be driving, will they still work? I havent had it out yet because of rain up here so i cant even tell yet. Looks like I have two options....1. keep them on the way they are or 2. Spend $220 for two new bracket assy. and $75 again for the lights. Im going to go with option 1 for now. Still mad!
BTW...looking at everyones lights that have posted a pic, we all seem to be getting different looking fogs. Brew, yours look different from mine too. I based the wording DOT SAE to be the top because usually the lettering is up top and not on the bottom where it would be upside down.
Last edited by Smokin00WS6; 05-12-2016 at 07:53 PM.
05-12-2016, 01:18 PM
#147
TECH Fanatic
iTrader: (4)
Join Date: Dec 2003
Location: Pennsylvania
Posts: 1,080
Likes: 0
Received 0 Likes
on
0 Posts
I know what you mean about the alignment. Like an idiot, I tapped the lights first, then went back and tapped the bracket (which I could probably drill slightly larger) and they're slightly off. I went ahead and screwed my bolts in all the way, knowing that they're cross-threaded but hoping they'd be OK. And for some reason, they're perfectly fine. However, I'm also a perfectionist and not going to just slap something into the car to say I did it. I don't care how long it takes, but when I'm done they're going to be great. Now if I can just stop drilling holes in the limited surface area, I'll be in good shape lol.
the spacers were more for a shorter bolt. Its supposed to sit against the bracket and the light.
05-13-2016, 12:41 AM
#148
Sorry to be the bearer of the news. I honestly not sure how bad it'll be. I think it may be counterproductive as the light won't be directly in front of the car as intended. I honestly not sure how bad the glare would be compared to the OEM fogs and headlights. If you can find someone to drive your car and you drive their vehicle, cross paths and see for yourself.
05-13-2016, 01:46 AM
#149
Copy & Paste Moderator
Unfortunately, Upside Down lights are unhelpful to you and are detrimental to other drivers.
Also, it doesn't matter where the DOT wording is located. Different manufacturers can put it in different places. What matters is beam pattern. Before anything any modding/mounting, power them up and check the beam pattern. Since these are fog lights, the top of the beam should be flat across the top and beam should fade down.
Also, it doesn't matter where the DOT wording is located. Different manufacturers can put it in different places. What matters is beam pattern. Before anything any modding/mounting, power them up and check the beam pattern. Since these are fog lights, the top of the beam should be flat across the top and beam should fade down.
 05-13-2016, 08:38 AM
#151
TECH Fanatic
iTrader: (4)
Join Date: Dec 2003
Location: Pennsylvania
Posts: 1,080
Likes: 0
Received 0 Likes
on
0 Posts
Sorry to be the bearer of the news. I honestly not sure how bad it'll be. I think it may be counterproductive as the light won't be directly in front of the car as intended. I honestly not sure how bad the glare would be compared to the OEM fogs and headlights. If you can find someone to drive your car and you drive their vehicle, cross paths and see for yourself.

Unfortunately, Upside Down lights are unhelpful to you and are detrimental to other drivers.
Also, it doesn't matter where the DOT wording is located. Different manufacturers can put it in different places. What matters is beam pattern. Before anything any modding/mounting, power them up and check the beam pattern. Since these are fog lights, the top of the beam should be flat across the top and beam should fade down.
Also, it doesn't matter where the DOT wording is located. Different manufacturers can put it in different places. What matters is beam pattern. Before anything any modding/mounting, power them up and check the beam pattern. Since these are fog lights, the top of the beam should be flat across the top and beam should fade down.
Brew, from that Pic its hard to tell because of the objects in front of the wall. But it looks ok. Like VIP even said...the pattern should have that nice straight line across the top and the bottoms should be half circles in a way. If it isn't like that then flip them.
05-13-2016, 10:22 AM
#152
Yeah that crap is in the way and I'm too close to the wall, too. It's the only pic I snapped while I had them in the car, so I'll have to investigate before moving forward.
Have you considered making your own brackets? It could allow you to use your lights still and not pay for expensive brackets that you'll have to modify anyway. My dad and I are going to work on that this weekend and I hope to have something done soon. He's my guy for fabrication ideas haha.
And I'm with you, these things should show which direction they mount. Looking at it straight on you'd never know there's a difference.
05-13-2016, 10:42 AM
#153
TECH Fanatic
iTrader: (4)
Join Date: Dec 2003
Location: Pennsylvania
Posts: 1,080
Likes: 0
Received 0 Likes
on
0 Posts
Yeah that crap is in the way and I'm too close to the wall, too. It's the only pic I snapped while I had them in the car, so I'll have to investigate before moving forward.
Have you considered making your own brackets? It could allow you to use your lights still and not pay for expensive brackets that you'll have to modify anyway. My dad and I are going to work on that this weekend and I hope to have something done soon. He's my guy for fabrication ideas haha.
And I'm with you, these things should show which direction they mount. Looking at it straight on you'd never know there's a difference.
Have you considered making your own brackets? It could allow you to use your lights still and not pay for expensive brackets that you'll have to modify anyway. My dad and I are going to work on that this weekend and I hope to have something done soon. He's my guy for fabrication ideas haha.
And I'm with you, these things should show which direction they mount. Looking at it straight on you'd never know there's a difference.
I wish they would have....user error on my behalf for not double checking.
05-13-2016, 01:22 PM
#154

Can you guys post the links of where you bought them from if you don't mind?
I just received mine today and plugged them in, they don't power up. At first I hooked one up, no go (I thought one was DOA because China...). Then both, and still nothing.. Glad I checked before hacking them up to mount.
They are also different than pictured, I especially wanted to order a set with longer leads from the lamp instead of the super short ones the OP had in the original post. I ended up getting those exact sames ones (Seemingly), but they don't work! The connectors "fit" but don't exactly fit like factory, I had to bend the prongs a tiny bit but they plug in. Here is the link to the pair I got:
The specs are the same on yours no???
http://www.ebay.com/itm/252088188283?_trksid=p2060353.m2749.l2649&ssPageName=STRK%3AMEBIDX%3AIT
I just received mine today and plugged them in, they don't power up
. At first I hooked one up, no go (I thought one was DOA because China...). Then both, and still nothing.. Glad I checked before hacking them up to mount.They are also different than pictured, I especially wanted to order a set with longer leads from the lamp instead of the super short ones the OP had in the original post. I ended up getting those exact sames ones (Seemingly), but they don't work! The connectors "fit" but don't exactly fit like factory, I had to bend the prongs a tiny bit but they plug in. Here is the link to the pair I got:
The specs are the same on yours no???
http://www.ebay.com/itm/252088188283?_trksid=p2060353.m2749.l2649&ssPageName=STRK%3AMEBIDX%3AIT
05-13-2016, 02:38 PM
#156
TECH Fanatic
iTrader: (4)
Join Date: Dec 2003
Location: Pennsylvania
Posts: 1,080
Likes: 0
Received 0 Likes
on
0 Posts

NitroHead,
I got mine off of amazon. Here they are.
They also look to be the same specs. The back looks different from a few of us, but I think there are multiple co's making the same type.
05-14-2016, 04:20 PM
#159
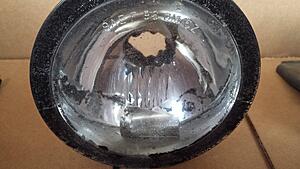
I pulled the stockers out, no wonder the replacement bulb wouldn't fit lol:
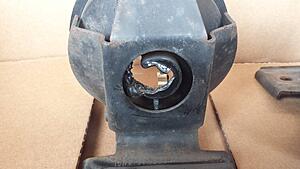
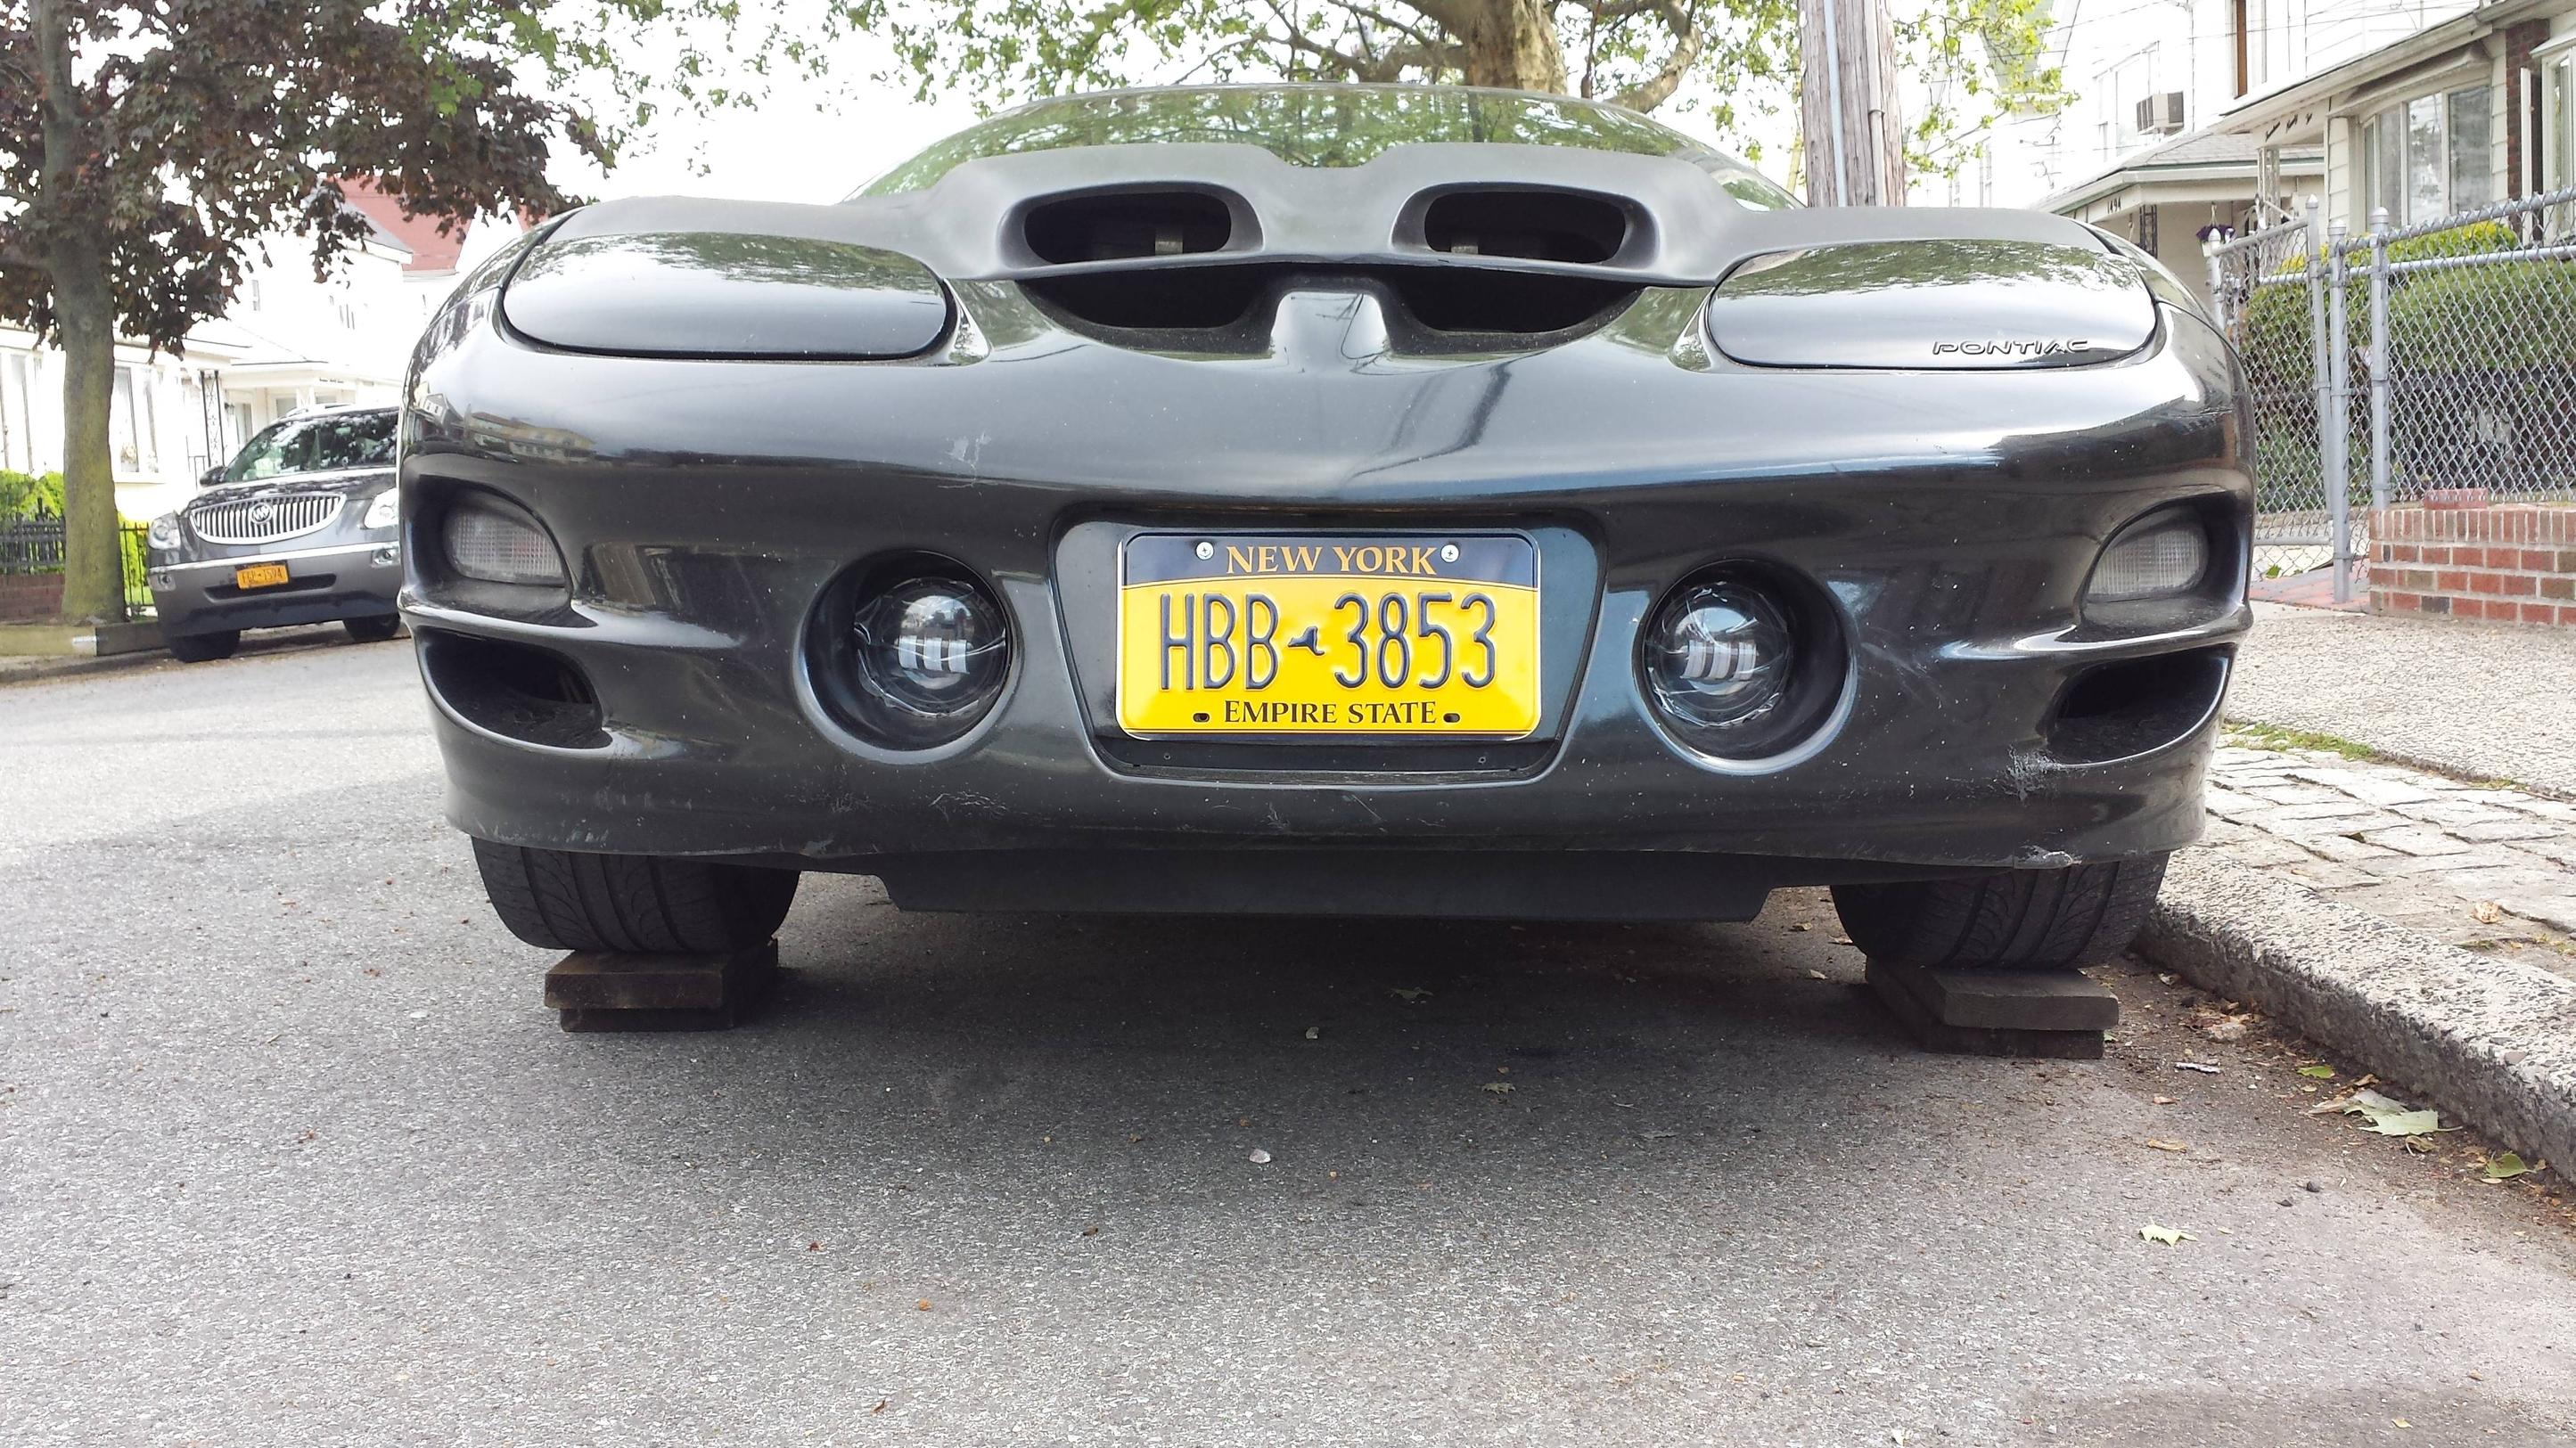
I threw the new ones in there and will wait until its dark to confirm the beam orientation for now, they look pretty good! (Plastic is still on and they're just sitting in the holes before I start hacking up the OEM brackets).
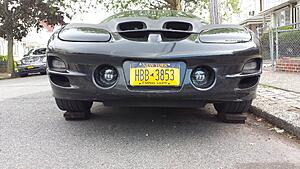
I'm going to attempt to mount these the same way as you guys (Without tapping the heatsink though) and try to make a bracket so I can use the OEM adjuster. It seems like a huge PITA to adjust if you have to snake your arms inside the bumper to make changes.


I threw the new ones in there and will wait until its dark to confirm the beam orientation for now, they look pretty good! (Plastic is still on and they're just sitting in the holes before I start hacking up the OEM brackets).
I'm going to attempt to mount these the same way as you guys (Without tapping the heatsink though) and try to make a bracket so I can use the OEM adjuster. It seems like a huge PITA to adjust if you have to snake your arms inside the bumper to make changes.
05-15-2016, 11:03 AM
#160
TECH Fanatic
iTrader: (4)
Join Date: Dec 2003
Location: Pennsylvania
Posts: 1,080
Likes: 0
Received 0 Likes
on
0 Posts

I pulled the stockers out, no wonder the replacement bulb wouldn't fit lol:
I threw the new ones in there and will wait until its dark to confirm the beam orientation for now, they look pretty good! (Plastic is still on and they're just sitting in the holes before I start hacking up the OEM brackets).
I'm going to attempt to mount these the same way as you guys (Without tapping the heatsink though) and try to make a bracket so I can use the OEM adjuster. It seems like a huge PITA to adjust if you have to snake your arms inside the bumper to make changes.