3rd Brake Light Mod Write up (For Bird Owners)
 02-22-2006, 03:28 PM
#1
Banned
Thread Starter
iTrader: (7)
Join Date: Jun 2005
Location: Longwood/UCF, Fl
Posts: 2,633
Likes: 0
Received 0 Likes
on
0 Posts
edit.......look 2 post down
PM or E-mail me if you want this in a MS Word Format
PM or E-mail me if you want this in a MS Word Format
Last edited by DirtyBird222; 02-22-2006 at 03:34 PM.

 02-22-2006, 03:31 PM
#3
Banned
Thread Starter
iTrader: (7)
Join Date: Jun 2005
Location: Longwood/UCF, Fl
Posts: 2,633
Likes: 0
Received 0 Likes
on
0 Posts
Pontiac Trans Am: 3rd Brake Light Mod:
Step 1 Removal: You�ll want to get a T15 star style screwdriver such as the one pictured. This is required to unscrew the screws holding the 3rd Brake Light in place.

Step 2 Cleaning: You will want to clean the brake lens very well. A) Wipe down with some liquor thinner. B) Clean with hot water and automotive soap (mixed) let dry.
Step 3 Sanding: You do not have to do this step, but it is recommended that you at least scuff up the lens with wet sand using 1000 grit, just so the paint has a somewhat rough surface to stick to. I sanded down all the DOT lettering and numbers to give it a cleaner look. A) Wet sand with 800 grit; clean with hot soapy water, rinse with hot water. B) Wet sand with 1000 grit; clean with hot soapy water, rinse with hot water. Let dry
Step 4 Applying The Decal/lettering/ect.: Put the decal wherever you like, make sure the lens is clean and just a little wet when applying it if it is vinyl!
Step 5 Painting: Once you have sanded and applied the decal you should be all set for painting. I suggest to use a spray gun if you have one of get this painted professionally if not. But if you want use a rattle can. With your color of choice and some clear coat you are all set to start painting. Method I used, with a spray gun and black paint.
A) 3 coats of base. Wait at least 15 minutes between spraying each coat. Make sure you are in a dust free setting.
B) Apply as many coats of clear as you want. I applied 3 coats for an extra nice shine.
C) I let everything dry for a couple days before removing the decal.
D) Remove Decal. And wallllllaaaaH. You should have something similar to this! Hopefully!
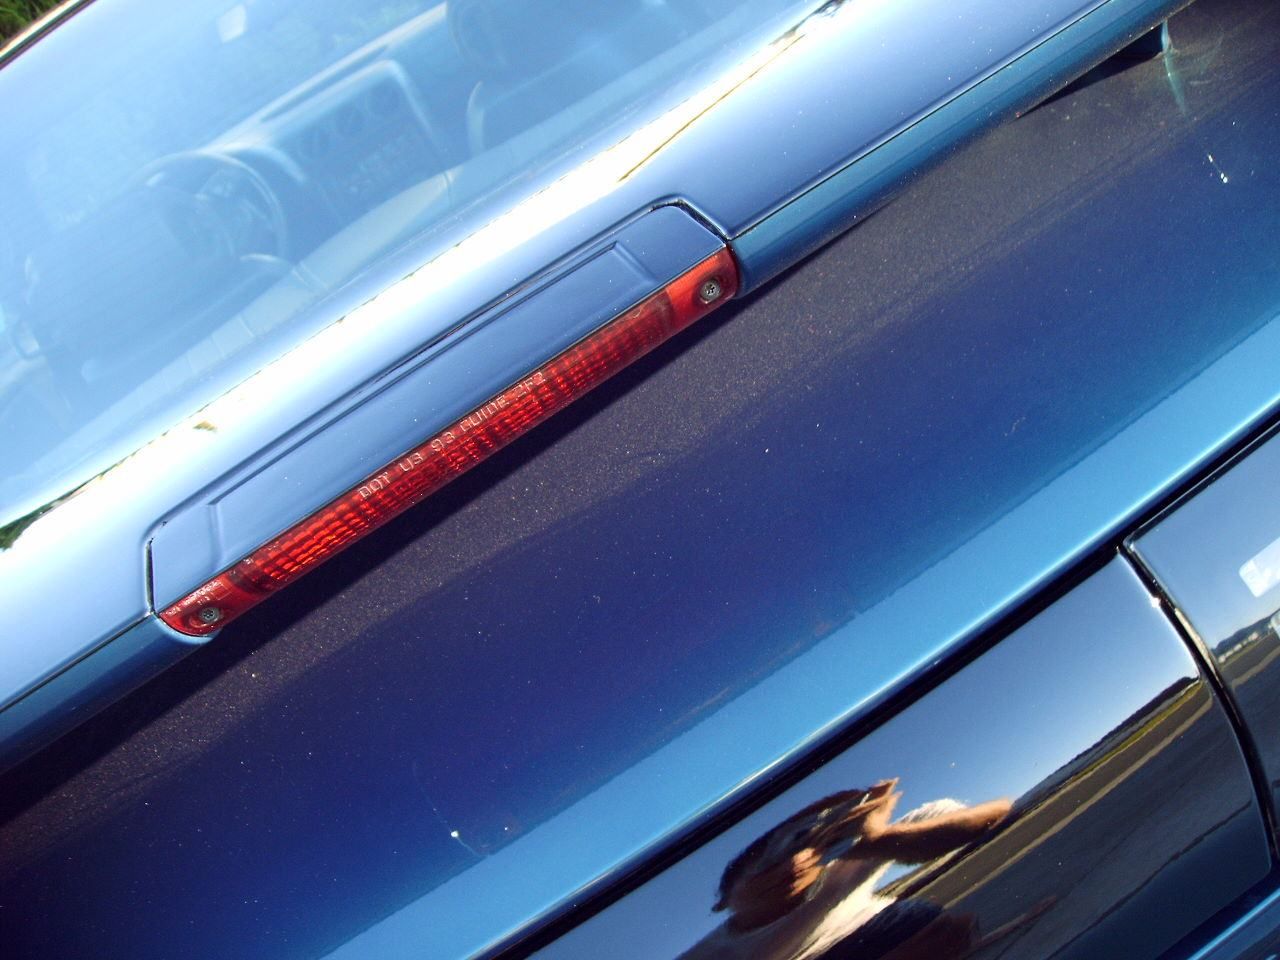
Daytime (sorry for the crappy picture and dirty car. I sprayed a reflective clear coat before the base and before applying the decal. It looks pretty cool when a HID style light hits it. Unfortunately, I�m the only one with a car that is equipped with HID in my household! And I forgot to take pictures when I had this lit up by my HID fogs)

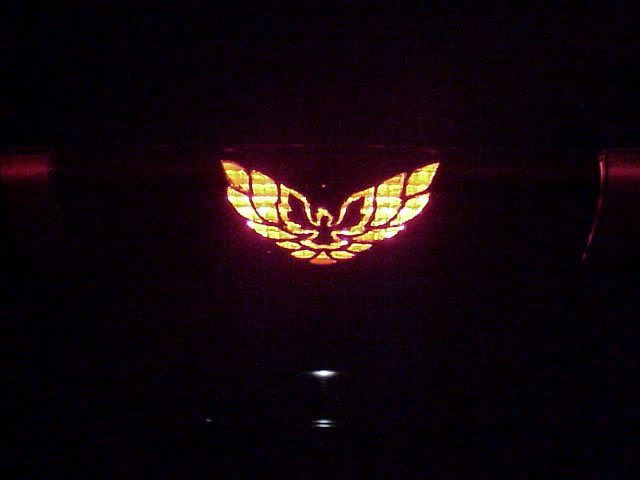
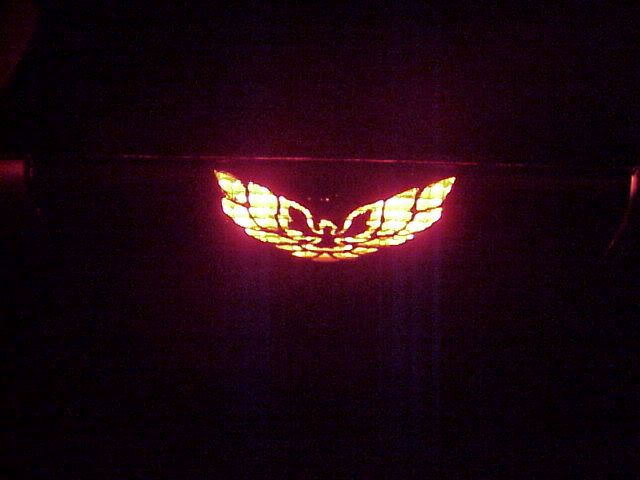
NIGHT TIME


Step 1 Removal: You�ll want to get a T15 star style screwdriver such as the one pictured. This is required to unscrew the screws holding the 3rd Brake Light in place.
Step 2 Cleaning: You will want to clean the brake lens very well. A) Wipe down with some liquor thinner. B) Clean with hot water and automotive soap (mixed) let dry.
Step 3 Sanding: You do not have to do this step, but it is recommended that you at least scuff up the lens with wet sand using 1000 grit, just so the paint has a somewhat rough surface to stick to. I sanded down all the DOT lettering and numbers to give it a cleaner look. A) Wet sand with 800 grit; clean with hot soapy water, rinse with hot water. B) Wet sand with 1000 grit; clean with hot soapy water, rinse with hot water. Let dry
Step 4 Applying The Decal/lettering/ect.: Put the decal wherever you like, make sure the lens is clean and just a little wet when applying it if it is vinyl!
Step 5 Painting: Once you have sanded and applied the decal you should be all set for painting. I suggest to use a spray gun if you have one of get this painted professionally if not. But if you want use a rattle can. With your color of choice and some clear coat you are all set to start painting. Method I used, with a spray gun and black paint.
A) 3 coats of base. Wait at least 15 minutes between spraying each coat. Make sure you are in a dust free setting.
B) Apply as many coats of clear as you want. I applied 3 coats for an extra nice shine.
C) I let everything dry for a couple days before removing the decal.
D) Remove Decal. And wallllllaaaaH. You should have something similar to this! Hopefully!
Daytime (sorry for the crappy picture and dirty car. I sprayed a reflective clear coat before the base and before applying the decal. It looks pretty cool when a HID style light hits it. Unfortunately, I�m the only one with a car that is equipped with HID in my household! And I forgot to take pictures when I had this lit up by my HID fogs)
NIGHT TIME
Trending Topics
02-23-2006, 12:32 PM
#9
TECH Addict
iTrader: (3)
Join Date: Nov 2005
Location: Lincoln, NE
Posts: 2,869
Likes: 0
Received 0 Likes
on
0 Posts
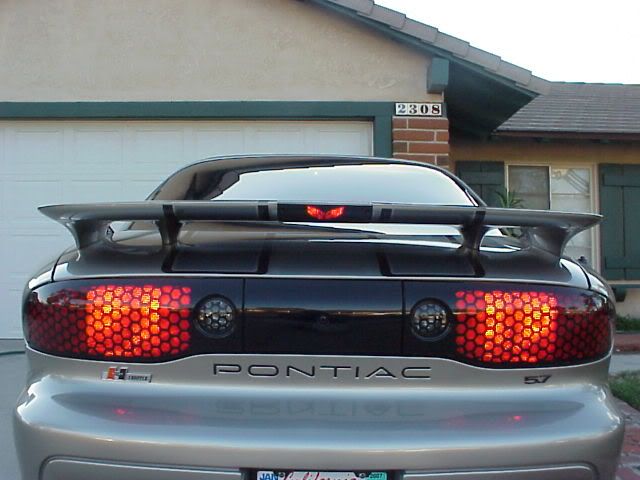
Originally Posted by nhra-trans-am
Here is mine.
http://i24.photobucket.com/albums/c4...m/MVC-395F.jpg
http://i24.photobucket.com/albums/c4...m/MVC-391F.jpg
Thanks again DirtyBird222
http://i24.photobucket.com/albums/c4...m/MVC-395F.jpg
http://i24.photobucket.com/albums/c4...m/MVC-391F.jpg
Thanks again DirtyBird222

I want one!
Last edited by CRAGER; 03-02-2007 at 03:55 AM.

 02-25-2006, 07:54 AM
#20
TECH Fanatic
iTrader: (15)
Join Date: Jan 2004
Location: Ohio
Posts: 1,278
Likes: 0
Received 0 Likes
on
0 Posts

Originally Posted by DirtyBird222
Pontiac Trans Am: 3rd Brake Light Mod:
Step 1 Removal: You�ll want to get a T15 star style screwdriver such as the one pictured. This is required to unscrew the screws holding the 3rd Brake Light in place.
http://www.fuelslut.net/hosting/uploads/starscrew.jpg
Step 2 Cleaning: You will want to clean the brake lens very well. A) Wipe down with some liquor thinner. B) Clean with hot water and automotive soap (mixed) let dry.
Step 3 Sanding: You do not have to do this step, but it is recommended that you at least scuff up the lens with wet sand using 1000 grit, just so the paint has a somewhat rough surface to stick to. I sanded down all the DOT lettering and numbers to give it a cleaner look. A) Wet sand with 800 grit; clean with hot soapy water, rinse with hot water. B) Wet sand with 1000 grit; clean with hot soapy water, rinse with hot water. Let dry
Step 4 Applying The Decal/lettering/ect.: Put the decal wherever you like, make sure the lens is clean and just a little wet when applying it if it is vinyl!
Step 5 Painting: Once you have sanded and applied the decal you should be all set for painting. I suggest to use a spray gun if you have one of get this painted professionally if not. But if you want use a rattle can. With your color of choice and some clear coat you are all set to start painting. Method I used, with a spray gun and black paint.
A) 3 coats of base. Wait at least 15 minutes between spraying each coat. Make sure you are in a dust free setting.
B) Apply as many coats of clear as you want. I applied 3 coats for an extra nice shine.
C) I let everything dry for a couple days before removing the decal.
D) Remove Decal. And wallllllaaaaH. You should have something similar to this! Hopefully!
Daytime (sorry for the crappy picture and dirty car. I sprayed a reflective clear coat before the base and before applying the decal. It looks pretty cool when a HID style light hits it. Unfortunately, I�m the only one with a car that is equipped with HID in my household! And I forgot to take pictures when I had this lit up by my HID fogs)
http://www.fuelslut.net/hosting/uplo...ht daytime.jpg
NIGHT TIME
http://www.fuelslut.net/hosting/uploads/fthis3rd.jpg
http://www.fuelslut.net/hosting/uplo...am3rdlight.jpg
Last edited by CRAGER; 03-02-2007 at 03:56 AM.