ARTICLE: Good Pictures (Technique, Equipment, Etc)
 04-25-2007, 01:04 PM
#21
TECH Apprentice
iTrader: (4)
Join Date: Jul 2005
Location: Austin, TX
Posts: 384
Likes: 0
Received 0 Likes
on
0 Posts
Yea...Ive been taken pics for a while myself, but obvisouly I havent been getting the best out of them. What kind of photoshopping software are you guys using to create all the effects?

 04-26-2007, 07:51 AM
#23
On The Tree
iTrader: (3)
Join Date: Feb 2007
Location: New Orleans, LA
Posts: 110
Likes: 0
Received 0 Likes
on
0 Posts

Originally Posted by bastien
thanks! photoshop + photomatix (for this particular shot)
04-26-2007, 11:13 PM
#24
12 Second Club
iTrader: (1)
Join Date: Jan 2005
Location: Orlando, FL / UCF / Brussels, Belgium
Posts: 1,050
Likes: 0
Received 0 Likes
on
0 Posts
Originally Posted by WhiteRabbit22
I'm guessing you used tone mapping with three different exposures? and then took out the light/electricity poles with photoshop?
04-26-2007, 11:14 PM
#25
Sold The Fun Stuff :(
Thread Starter
iTrader: (1)
Join Date: Nov 2001
Location: Nashville, TN
Posts: 2,371
Likes: 0
Received 0 Likes
on
0 Posts
I was looking for this thread, didn't see that it was a sticky. I feel honored.  Honestly I'm just trying to get a little more information out there for guys to hopefully improve their own pictures because I really enjoying looking at everyone's pictures. Keep an eye out, I'm going to make a "basic photo editing" writeup just like this one to hopefully help you guys get the most out of your pictures regardless of the software but here are a few basics...
Software: Photoshop is king basically, but if you dont have it or access to it download The Gimp. Its freeware and works just as well you just wont be able to find as many tutorials online to help you figure things out. As for the editing I could write up a little something but this is already in a great format with pictures to help you understand so I'll just link to it...
BASIC QUICK AND EASY PHOTO EDITING: http://tutiki.nikoncafe.com/w/index....stments#Step_2
To add a border in photoshop I choose the rectangular selection tool, the hit Ctrl + A to select all, then right click and select Stroke, pick a value for the width and set the color and also whether you want the border on the inside or outside, and BAM! You've got a border.
I'll also add this information into the original text so people can access it after they read the original post.
04-27-2007, 12:12 AM
#27
On The Tree
iTrader: (3)
Join Date: Feb 2007
Location: New Orleans, LA
Posts: 110
Likes: 0
Received 0 Likes
on
0 Posts
I just want you guy's opinion on how well I did. Mind you it only took me a half hour. I'm sure I could get it better with more time.
original
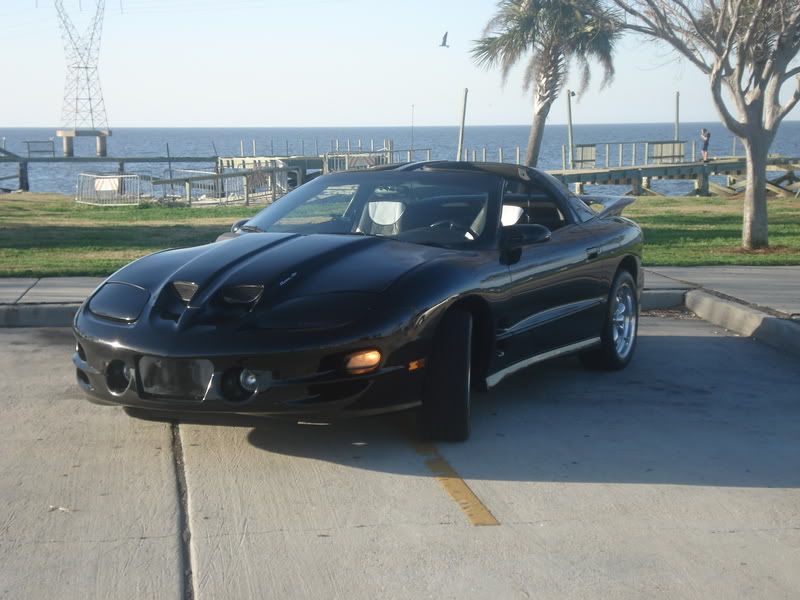
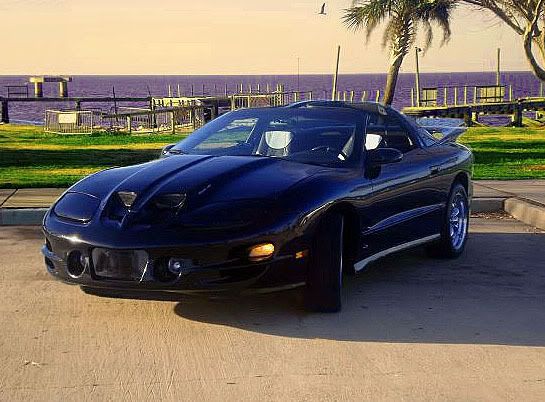
Post Processing
original
Post Processing
04-27-2007, 10:20 AM
#28
12 Second Club
iTrader: (1)
Join Date: Jan 2005
Location: Orlando, FL / UCF / Brussels, Belgium
Posts: 1,050
Likes: 0
Received 0 Likes
on
0 Posts
Originally Posted by WhiteRabbit22
I just want you guy's opinion on how well I did. Mind you it only took me a half hour. I'm sure I could get it better with more time.
original
Post Processing
original
Post Processing
04-27-2007, 03:47 PM
#29
Sold The Fun Stuff :(
Thread Starter
iTrader: (1)
Join Date: Nov 2001
Location: Nashville, TN
Posts: 2,371
Likes: 0
Received 0 Likes
on
0 Posts
Yeah, its definitely a fine balance. You dont want to overprocess the work unless thats the look you're going for (but even then it has too look a certain way to look right). I'd say if you did half of what you do the picture you posted you might be alright. What all did you adjust so we can get a basic idea of how to help?
04-27-2007, 06:59 PM
#30
On The Tree
iTrader: (3)
Join Date: Feb 2007
Location: New Orleans, LA
Posts: 110
Likes: 0
Received 0 Likes
on
0 Posts
Well, I did some level asjustments, sharpening, photofilter for the orange effect (i think that's what made the lake purple.) And I adjusted contrast and lightness a little. Then the usual clone stamp to take out electricity poles, parking lot lines and cement separations.
I think i could tone down the photo filter and make it look a lot better. The color does seem off now that you say so, and I'm looking at it more.
I think i could tone down the photo filter and make it look a lot better. The color does seem off now that you say so, and I'm looking at it more.
04-27-2007, 07:41 PM
#31
12 Second Club
iTrader: (1)
Join Date: Jan 2005
Location: Orlando, FL / UCF / Brussels, Belgium
Posts: 1,050
Likes: 0
Received 0 Likes
on
0 Posts
First of all, you can't post process an ok picture. I know my original picture above is not a good picture, but I got lucky and got it to look decent. In your original picture, you should have taken the picture from the other way so that the shadow is behind the car, not to the right. Your wheels should be turned facing you.. nobody cares about tire thread, a rim looks better. You have a black car, which is a bitch to take pictures of. Trust me, I know.. Most of my keeper shots were taking in overcast weather. Sun + black cars = ****. Also, don't go over board with the post process. It seems like you messed with hue/saturation and turned it on all the way. That's not what you want to do. You should adjust levels/curves, and brightness/contrast. Nothing else. If you're familiar with dodge/burn, you can use that as well. Also, becareful when you clone stuff out, I shouldn't be able to tell you remove that guy from the bridge. The grass in your picture look neon toxic green. In addition, the car looks soft. Don't move when you take pics, use a tripod, or sharpen it in photoshop.
my 0.04 cents
hope that helps
my 0.04 cents
hope that helps
04-28-2007, 09:25 AM
#32
Sold The Fun Stuff :(
Thread Starter
iTrader: (1)
Join Date: Nov 2001
Location: Nashville, TN
Posts: 2,371
Likes: 0
Received 0 Likes
on
0 Posts
Here is my really quick and rough shot at touching up your picture WhiteRabbit (the colors/contrast are fine but I could have spend more time with the clone tool taking out the bird and the larger pole from behind your car but I just wanted to do a quick job to give you an idea) but again you really have to shoot to capture a picture in better light to start with to really get results. In this shot the light is way too harsh and there is also not enough light on the front of the car so when you really try to get at it with editing you lose all the detail on the front end of the car. Also he lighting is such that its hard to edit without introducing noise into the image. This is why its imperative to get the best base shot you can so your post-processing doesn't degrade the quality of the shot to a noticable level. As far as the overall composition goes using the rule of thirds would have helped and it also wouldn't have hurt if the front wheels were cut the other way either. A nice looking TTII is infinitely better looking at tire tread no matter how cool your tire tread is.

Also thats not the Raptor hood, its the SLP H.O. hood. The hood on the red Trans Am in my original post is the Raptor hood. Two totally different animals. Just giving you a heads up in case you bought the car with the hood already on it and didn't know.
Also thats not the Raptor hood, its the SLP H.O. hood. The hood on the red Trans Am in my original post is the Raptor hood. Two totally different animals. Just giving you a heads up in case you bought the car with the hood already on it and didn't know.
04-28-2007, 09:40 AM
#33
On The Tree
iTrader: (3)
Join Date: Feb 2007
Location: New Orleans, LA
Posts: 110
Likes: 0
Received 0 Likes
on
0 Posts
Yeah I bought it with that hood on it and wasn't sure of the difference between them, but now that you point it out, I can see it. Raptor hood kinda looks like the FireHawk hood.
Anyway, I guess I need to take a whole day and just take some pictures, and work on my picture taking. I don't have that good of a camera, and I don't have a tripod or a monopod (I could make one though). Thanks for the help.
Anyway, I guess I need to take a whole day and just take some pictures, and work on my picture taking. I don't have that good of a camera, and I don't have a tripod or a monopod (I could make one though). Thanks for the help.
04-28-2007, 11:15 AM
#34
12 Second Club
iTrader: (1)
Join Date: Jan 2005
Location: Orlando, FL / UCF / Brussels, Belgium
Posts: 1,050
Likes: 0
Received 0 Likes
on
0 Posts
Originally Posted by WhiteRabbit22
Yeah I bought it with that hood on it and wasn't sure of the difference between them, but now that you point it out, I can see it. Raptor hood kinda looks like the FireHawk hood.
Anyway, I guess I need to take a whole day and just take some pictures, and work on my picture taking. I don't have that good of a camera, and I don't have a tripod or a monopod (I could make one though). Thanks for the help.
Anyway, I guess I need to take a whole day and just take some pictures, and work on my picture taking. I don't have that good of a camera, and I don't have a tripod or a monopod (I could make one though). Thanks for the help.
04-28-2007, 01:52 PM
#35
Sold The Fun Stuff :(
Thread Starter
iTrader: (1)
Join Date: Nov 2001
Location: Nashville, TN
Posts: 2,371
Likes: 0
Received 0 Likes
on
0 Posts
Originally Posted by bastien
if it makes you feel better, I usually take around 50 pictures during 1 photoshoot and keep like 5. practice makes perfect.
04-28-2007, 03:31 PM
#36
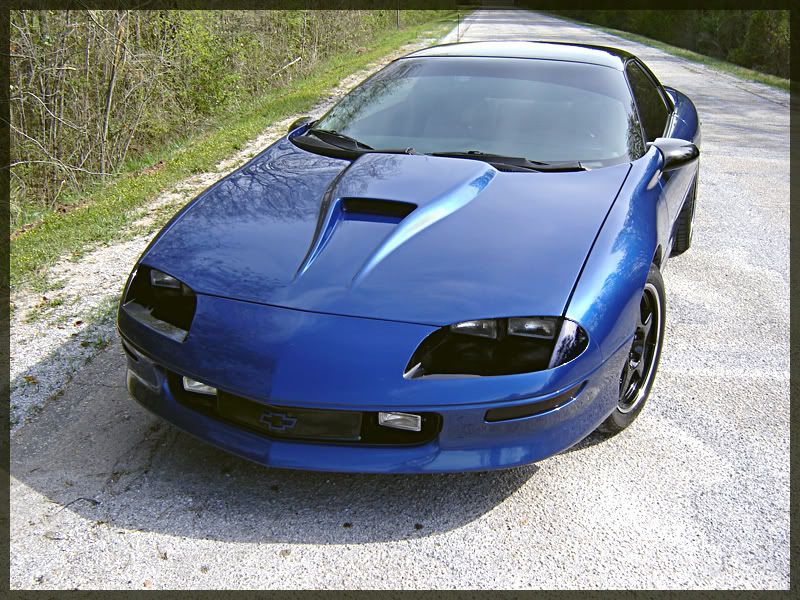
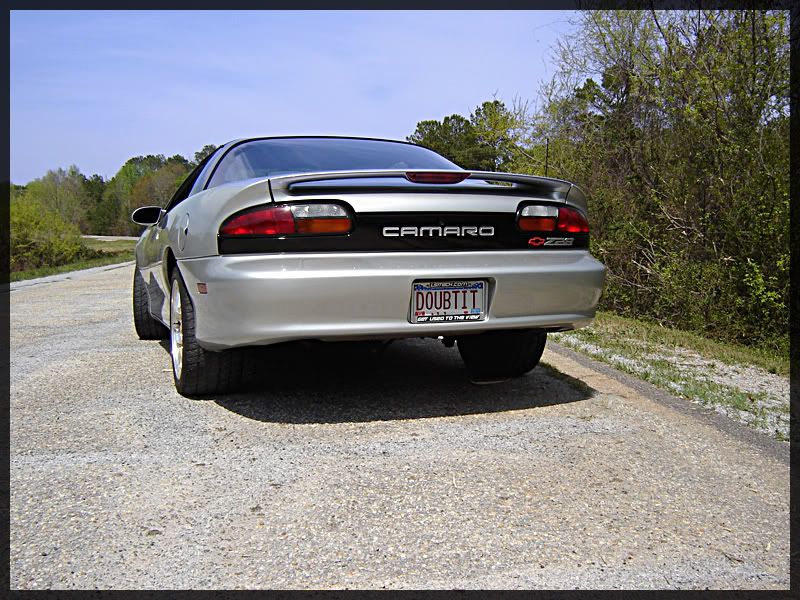
I wanna play. Never really messed with levels before. Never knew that I could get such a difference with just a small bump.
Here are two that I messed with just a little while ago...
Original
Post
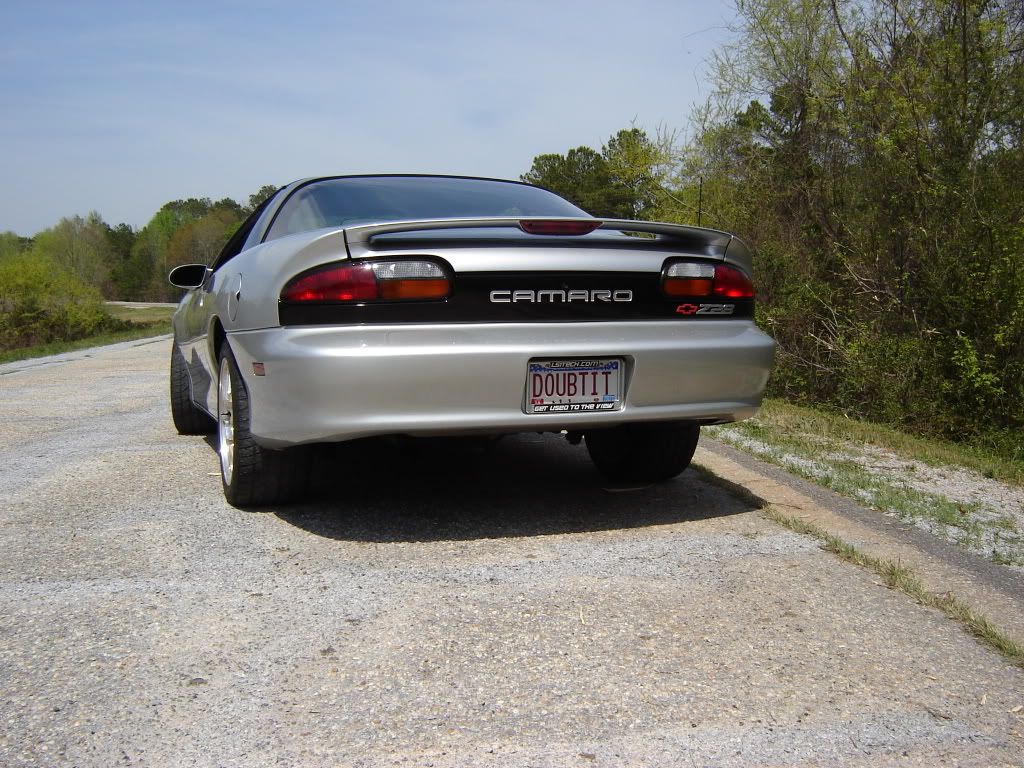
Now Ele-Blue95's car.
Original
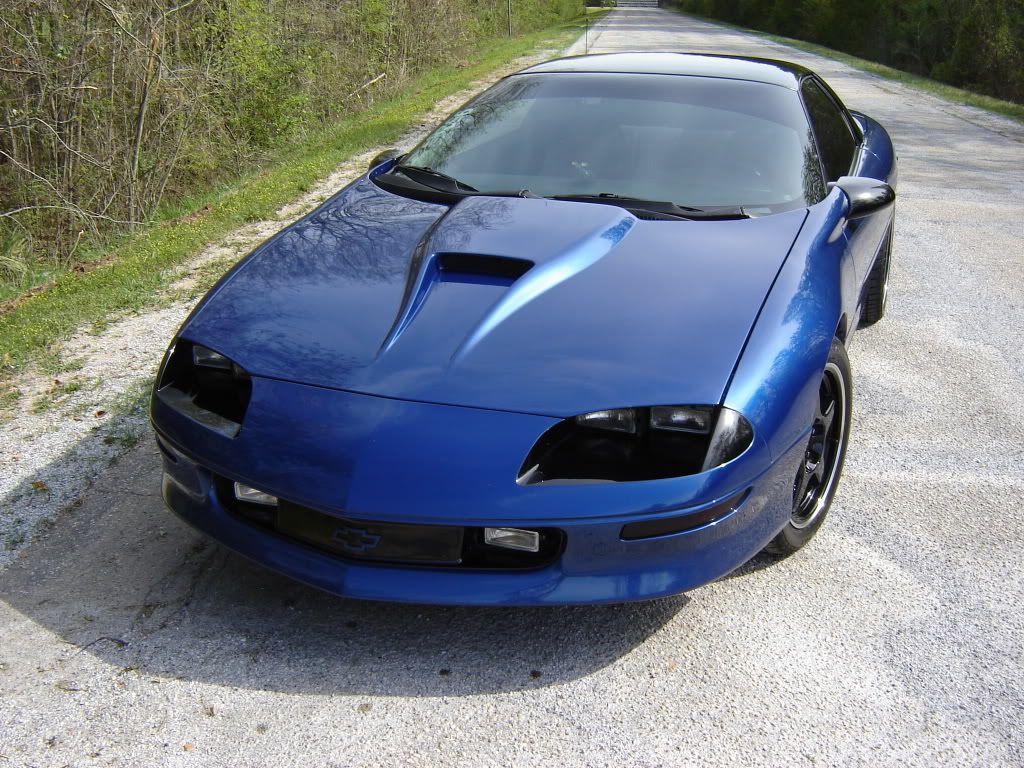
Post

I'm thinking about possibly taking some pics of Ele-Blue95's car for the pic of the month. Whatchoo guys think?
Here are two that I messed with just a little while ago...
Original
Post
Now Ele-Blue95's car.
Original
Post
I'm thinking about possibly taking some pics of Ele-Blue95's car for the pic of the month. Whatchoo guys think?
04-28-2007, 05:05 PM
#38
12 Second Club
iTrader: (1)
Join Date: Jan 2005
Location: Orlando, FL / UCF / Brussels, Belgium
Posts: 1,050
Likes: 0
Received 0 Likes
on
0 Posts
Originally Posted by phantomzer0
The first one turned out good, but the second one you did too much to. It shouldn;t look obvious that work was done.
04-28-2007, 09:43 PM
#39
Thanks for the constructive criticism guys. I always welcome it. I'm still a noob when it comes to using PS. I try to learn a little at a time.
I did think AFTER I posted it that the second one looked a little overdone. I'll try again either tonight or tomorrow and re-post my 2nd effort.
Thanks for the advice on using the burn tool, I didn't even think of that, I do use the dodge tool quite a bit though. For some reason, my camera takes dark pictures sometimes.