ARTICLE: Good Pictures (Technique, Equipment, Etc)
 04-30-2007, 06:56 PM
#61
12 Second Club
iTrader: (1)
Join Date: Jan 2005
Location: Orlando, FL / UCF / Brussels, Belgium
Posts: 1,050
Likes: 0
Received 0 Likes
on
0 Posts

Originally Posted by Louie83
Okay guys, you've motivated me. I know the original shot is awful, but I figured it would cool to get a wet picture, which I took while inside the garage not to get my camera wet. I just got my camera, and just got photoshop after reading this thread. I know it's probably amateurish, but you can be honest with me.
Original:
http://i49.photobucket.com/albums/f2...I/IMG_0064.jpg
1st Ever Photoshop:
http://i49.photobucket.com/albums/f2...tphotoshop.jpg
Original:
http://i49.photobucket.com/albums/f2...I/IMG_0064.jpg
1st Ever Photoshop:
http://i49.photobucket.com/albums/f2...tphotoshop.jpg
here is my attempt:

Last edited by bastien; 04-30-2007 at 07:10 PM.
 04-30-2007, 07:12 PM
#63
12 Second Club
iTrader: (1)
Join Date: Jan 2005
Location: Orlando, FL / UCF / Brussels, Belgium
Posts: 1,050
Likes: 0
Received 0 Likes
on
0 Posts
Originally Posted by BlackHawk T/A
I have yet to play with HDR pics but I want to. I think I spotted an HDR pic in Bastien's sig (am I right?).
04-30-2007, 07:33 PM
#64
TECH Fanatic
iTrader: (3)
Join Date: Jun 2004
Location: Dayton, OH
Posts: 1,844
Likes: 0
Received 0 Likes
on
0 Posts
Question on all of Josh's before and afters:
What photoshop what tools do you use on the car to give it the color a deeper, glassy look to it, that seems to make it jump out of the picture and give it more dimension?
Question on Bastien and Josh's backgrounds:
What tools do you use on the backgrounds to make them less blurry and more crisp?
What photoshop what tools do you use on the car to give it the color a deeper, glassy look to it, that seems to make it jump out of the picture and give it more dimension?
Question on Bastien and Josh's backgrounds:
What tools do you use on the backgrounds to make them less blurry and more crisp?
04-30-2007, 07:42 PM
#65
12 Second Club
iTrader: (1)
Join Date: Jan 2005
Location: Orlando, FL / UCF / Brussels, Belgium
Posts: 1,050
Likes: 0
Received 0 Likes
on
0 Posts
Originally Posted by Louie83
Question on all of Josh's before and afters:
What photoshop what tools do you use on the car to give it the color a deeper, glassy look to it, that seems to make it jump out of the picture and give it more dimension?
Question on Bastien and Josh's backgrounds:
What tools do you use on the backgrounds to make them less blurry and more crisp?
What photoshop what tools do you use on the car to give it the color a deeper, glassy look to it, that seems to make it jump out of the picture and give it more dimension?
Question on Bastien and Josh's backgrounds:
What tools do you use on the backgrounds to make them less blurry and more crisp?
You can use the sharpening tools to make backgrounds look crisp, but in my case, it's straight out of the camera. I love my lenses.

 04-30-2007, 08:53 PM
#67
Teching In

Join Date: Mar 2006
Posts: 12
Likes: 0
Received 0 Likes
on
0 Posts
Originally Posted by LS1BADZ
Here's my post process....whattya think?
----------BEFORE--------
http://i106.photobucket.com/albums/m...z/100_0853.jpg
-----------AFTER------------
http://i106.photobucket.com/albums/m...style2copy.jpg
----------BEFORE--------
http://i106.photobucket.com/albums/m...z/100_0853.jpg
-----------AFTER------------
http://i106.photobucket.com/albums/m...style2copy.jpg
Im nto a picture expert by any means.. It looks good... Other then the shadow still being noticeable. What i mean is where you ethier lassoed or used the magic wand you can see where something was there. Sorry if i didnt explain what i thought correctly! im a bit tired - JJ
04-30-2007, 09:05 PM
#68
TECH Addict
iTrader: (3)
Join Date: Nov 2005
Location: Lincoln, NE
Posts: 2,869
Likes: 0
Received 0 Likes
on
0 Posts
Originally Posted by josh99ta
GO CARLOS!!! Thats what I'm talking about. Great pictures.
I dont know exactly what you're talking about regarding jagged pixels. I dont sharpen too much and I only sharpen on the luminocity channel so its alot easier to sharpen and not have any adverse effects on the quality of the picture. As for resizing I always resize first before any editing. I crop, then resize to 950 pixels wide by whatever the height comes out to be.
I dont know exactly what you're talking about regarding jagged pixels. I dont sharpen too much and I only sharpen on the luminocity channel so its alot easier to sharpen and not have any adverse effects on the quality of the picture. As for resizing I always resize first before any editing. I crop, then resize to 950 pixels wide by whatever the height comes out to be.
Originally Posted by josh99ta
Care to explain smart-sharpening? I never apply an Unsharp Mask to the whole picture, only the luminocity channel. Usually 150-200%, 0.3 pixel radius, 0 threshold. I feel its worked well for me.
04-30-2007, 09:27 PM
#71
Teching In
Join Date: Mar 2006
Posts: 12
Likes: 0
Received 0 Likes
on
0 Posts
Originally Posted by LS1BADZ
Here's my post process....whattya think?
----------BEFORE--------
http://i106.photobucket.com/albums/m...z/100_0853.jpg
------------AFTER------------
http://i106.photobucket.com/albums/m...style2copy.jpg
----------BEFORE--------
http://i106.photobucket.com/albums/m...z/100_0853.jpg
------------AFTER------------
http://i106.photobucket.com/albums/m...style2copy.jpg
The edits i did of your car... Hope you don't mind!
1st one

and

Just a short edit... Don't really know what im doing!
 hope it looks good!
 05-01-2007, 05:27 AM
#73

Blackhawk T/A I have just been following the steps in the tutorial Josh provided and then also tried playing with curves which Bastien advised. I really don't know how to use it so I'm just eyeballing it. Other than those changes I have been cropping the pics and adding the border thing.
http://tutiki.nikoncafe.com/w/index...ustments#Step_2
http://tutiki.nikoncafe.com/w/index...ustments#Step_2
05-01-2007, 08:27 AM
#75
12 Second Club
iTrader: (1)
Join Date: Jan 2005
Location: Orlando, FL / UCF / Brussels, Belgium
Posts: 1,050
Likes: 0
Received 0 Likes
on
0 Posts
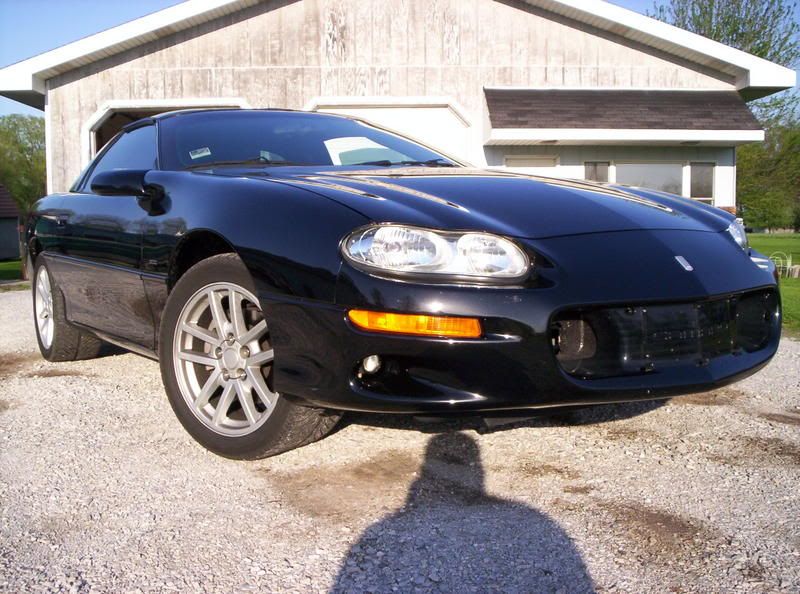
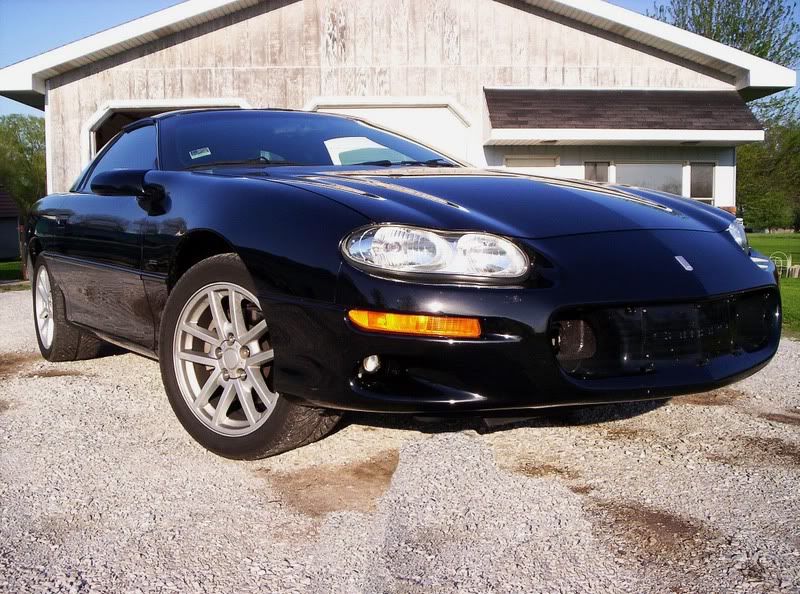
To sharpen your pictures:
1) Image - Mode - Lab Color
2) In the "Channels" menu, select the lightness layer only by clicking on it.
3) Filter - Sharpen - Unsharp Mask --> Settings: Amount: 200-300 Radius: 0.1-0.5 Threshold: 0
4) Image - Mode - RGB Color
this should get you started
e.g:
Pre-sharpening:

Post:

1) Image - Mode - Lab Color
2) In the "Channels" menu, select the lightness layer only by clicking on it.
3) Filter - Sharpen - Unsharp Mask --> Settings: Amount: 200-300 Radius: 0.1-0.5 Threshold: 0
4) Image - Mode - RGB Color
this should get you started
e.g:
Pre-sharpening:
Post:
05-01-2007, 09:55 AM
#76
TECH Enthusiast
iTrader: (6)
Join Date: Jul 2006
Location: Hutchinson, MN
Posts: 571
Likes: 0
Received 0 Likes
on
0 Posts
Awesome Thread! I've learned lots and its given me something to do in the airport tomorrow.
I'm going to go pick up this book, I've heard great things about it.
http://www.photoshopforphotographers...cs2/index2.htm
Book Review: ( Note that the CS3 version isn't out yet.)
http://www.amazon.com/gp/product/pro...039215&sr=11-1
I'm going to go pick up this book, I've heard great things about it.
http://www.photoshopforphotographers...cs2/index2.htm
Book Review: ( Note that the CS3 version isn't out yet.)
http://www.amazon.com/gp/product/pro...039215&sr=11-1
Last edited by -Freak-; 05-01-2007 at 12:12 PM.
05-01-2007, 12:31 PM
#77
Sold The Fun Stuff :(
Thread Starter
iTrader: (1)
Join Date: Nov 2001
Location: Nashville, TN
Posts: 2,371
Likes: 0
Received 0 Likes
on
0 Posts
Sharpening alone can actually make your colors pop that much more even though it doesn't actually effect the colors like other things do. My usual process is...
-Open RAW file in Bridge (open RAW file in CS2 and it automatically imports it to bridge)
-Adjust white balance, exposure, shadows, contrast, etc as needed
-Open in CS2
-Check levels, usually dont need any more adjusting as I fixed it all in Bridge on the RAW file to maintain top quality, if I didn't have Bridge and shoot in RAW this would be my first step
-Check curves, usually dont need any more adjusting as I fixed it all in Bridge on the RAW file to maintain top quality, if I didn't have Bridge and shoot in RAW I'd convert the image to CMYK mode, go into curves, select only the black channel (Ctrl+4), select the black dropper, and select a black portion of the photograph to set as absolute black and everything else pretty much adjusts itself on most of my photos (but some others do need more work especially if I shoot with a point and shoot)
-Shadows/Highlights are checked were I drop shadows to 0% and adjust highlights as needed
-If I couldn't adjust contrast and brightness in Bridge on the RAW file I'd do Brightness/Contrast next, usually bumping contrast +4 to +8 and brightness 0 to +4 depending
-Convert to LAB mode, select luminocity channel (Ctrl+1), apply Unsharp Mask (150-250% for me but usually 200%, 0.3 pixel radius, 0 threshold)
-Convert back to RGB mode, add border and text, and call it a day (unless I add in any graduated or photo filters in which case thats usually the last thing I do here before border and text)
I actually know very little about dodging and burning and dont use either in my editing process. Its something I need to read up on an experiment with. Any tips bastien?
05-01-2007, 02:03 PM
#78
12 Second Club
iTrader: (1)
Join Date: Jan 2005
Location: Orlando, FL / UCF / Brussels, Belgium
Posts: 1,050
Likes: 0
Received 0 Likes
on
0 Posts
Dodge/burn is really a personal thing. There is no set setting. You gotta experience it. I'll try to find a good example and post it.
05-01-2007, 04:26 PM
#79
Originally Posted by josh99ta
Sharpening alone can actually make your colors pop that much more even though it doesn't actually effect the colors like other things do. My usual process is...
-Open RAW file in Bridge (open RAW file in CS2 and it automatically imports it to bridge)
-Adjust white balance, exposure, shadows, contrast, etc as needed
-Open in CS2
-Check levels, usually dont need any more adjusting as I fixed it all in Bridge on the RAW file to maintain top quality, if I didn't have Bridge and shoot in RAW this would be my first step
-Check curves, usually dont need any more adjusting as I fixed it all in Bridge on the RAW file to maintain top quality, if I didn't have Bridge and shoot in RAW I'd convert the image to CMYK mode, go into curves, select only the black channel (Ctrl+4), select the black dropper, and select a black portion of the photograph to set as absolute black and everything else pretty much adjusts itself on most of my photos (but some others do need more work especially if I shoot with a point and shoot)
-Shadows/Highlights are checked were I drop shadows to 0% and adjust highlights as needed
-If I couldn't adjust contrast and brightness in Bridge on the RAW file I'd do Brightness/Contrast next, usually bumping contrast +4 to +8 and brightness 0 to +4 depending
-Convert to LAB mode, select luminocity channel (Ctrl+1), apply Unsharp Mask (150-250% for me but usually 200%, 0.3 pixel radius, 0 threshold)
-Convert back to RGB mode, add border and text, and call it a day (unless I add in any graduated or photo filters in which case thats usually the last thing I do here before border and text)
I actually know very little about dodging and burning and dont use either in my editing process. Its something I need to read up on an experiment with. Any tips bastien?
-Open RAW file in Bridge (open RAW file in CS2 and it automatically imports it to bridge)
-Adjust white balance, exposure, shadows, contrast, etc as needed
-Open in CS2
-Check levels, usually dont need any more adjusting as I fixed it all in Bridge on the RAW file to maintain top quality, if I didn't have Bridge and shoot in RAW this would be my first step
-Check curves, usually dont need any more adjusting as I fixed it all in Bridge on the RAW file to maintain top quality, if I didn't have Bridge and shoot in RAW I'd convert the image to CMYK mode, go into curves, select only the black channel (Ctrl+4), select the black dropper, and select a black portion of the photograph to set as absolute black and everything else pretty much adjusts itself on most of my photos (but some others do need more work especially if I shoot with a point and shoot)
-Shadows/Highlights are checked were I drop shadows to 0% and adjust highlights as needed
-If I couldn't adjust contrast and brightness in Bridge on the RAW file I'd do Brightness/Contrast next, usually bumping contrast +4 to +8 and brightness 0 to +4 depending
-Convert to LAB mode, select luminocity channel (Ctrl+1), apply Unsharp Mask (150-250% for me but usually 200%, 0.3 pixel radius, 0 threshold)
-Convert back to RGB mode, add border and text, and call it a day (unless I add in any graduated or photo filters in which case thats usually the last thing I do here before border and text)
I actually know very little about dodging and burning and dont use either in my editing process. Its something I need to read up on an experiment with. Any tips bastien?
Last edited by zx10r_07; 05-01-2007 at 04:39 PM.
05-01-2007, 04:44 PM
#80
12 Second Club
iTrader: (1)
Join Date: Jan 2005
Location: Orlando, FL / UCF / Brussels, Belgium
Posts: 1,050
Likes: 0
Received 0 Likes
on
0 Posts
Originally Posted by zx10r_07
How do you convert to CMYK, and LAB mode and back to RGB? Also thanks for the write up and for your help in advance.
Image - Mode - Lab Color
Image - Mode - RBG Color