ARTICLE: Good Pictures (Technique, Equipment, Etc)
 05-08-2007, 09:22 PM
#101
12 Second Club
iTrader: (1)
Join Date: Jan 2005
Location: Orlando, FL / UCF / Brussels, Belgium
Posts: 1,050
Likes: 0
Received 0 Likes
on
0 Posts

Originally Posted by BlackHawk T/A
Yeah 9/10 times the wheel well has been the best place for me.
bastien: It doesn't look over-sharpened to me? I stay away from .3 pixel radius because to me that is too much, but .2 looks great.
bastien: It doesn't look over-sharpened to me? I stay away from .3 pixel radius because to me that is too much, but .2 looks great.

look at the edge of the door.
 05-08-2007, 11:48 PM
#102
Sold The Fun Stuff :(
Thread Starter
iTrader: (1)
Join Date: Nov 2001
Location: Nashville, TN
Posts: 2,371
Likes: 0
Received 0 Likes
on
0 Posts
For you guys that want to get more technical, here is a GOOD write-up.
http://ronbigelow.com/articles/sharpen1/sharpen1.htm
I've already started playing with high pass sharpening (info on that on the third installment of that tutorial). Its a little more difficult to select your radius but the article points out some of the glaring flaws with Smart Sharpening and the Unsharp Mask (just as the photo above shows that you can have the majority of the image fine but a section or two oversharpened albeit thats very minimal oversharpening). I think once I nail this down I'm going to be seeing much better results (not to mention I'm working like a madman on studying proper level and curve adjustments and getting the overall exposure and lighting right in post-processing).
Now I just really need to work on cloning/doding/burning. I'm really horrible at that stuff.
Last edited by josh99ta; 05-09-2007 at 12:14 AM.
 05-09-2007, 07:40 PM
#104
TECH Addict
iTrader: (3)
Join Date: Nov 2005
Location: Lincoln, NE
Posts: 2,869
Likes: 0
Received 0 Likes
on
0 Posts
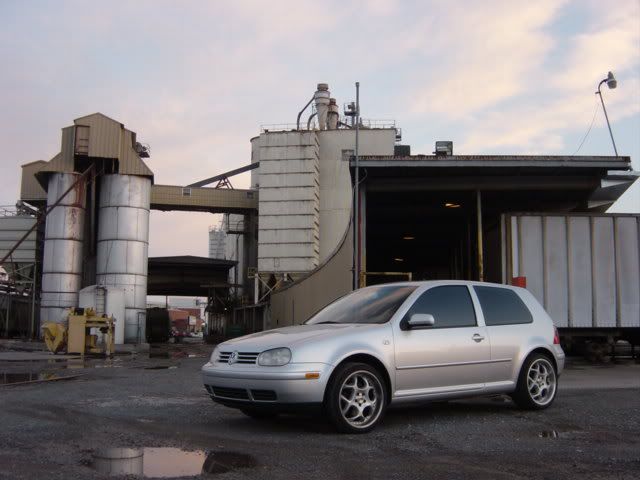
Well it isn't the original so its degraded already but here goes...spent about 2 minutes on it but this one cleaned up REAL good. Even brought back the sky and all the color.

Still has some ugly JPEG artifacts though.
Still has some ugly JPEG artifacts though.
05-09-2007, 09:53 PM
#105
Sold The Fun Stuff :(
Thread Starter
iTrader: (1)
Join Date: Nov 2001
Location: Nashville, TN
Posts: 2,371
Likes: 0
Received 0 Likes
on
0 Posts
How To Take Better Pictures
by: Joshua Gull
Let me preface this write-up by saying if you're looking for a quick and easy way to follow a few instructions step-by-step and think you're going to go out there and create some amazing photographs you can think again. Good pictures dont take themselves. It doesn't matter whether you have a $200 point-and-shoot or a $2,000 digital SLR you can still get solid, quality photographs if you follow some basic guidelines and hone your skills and techniques. This is a very basic guide to get you started down the right road but no write-up will take good pictures for you. You have to experiment with lighting, camera settings, technique, and post-processing to improve your pictures. Practice truly does make perfect when it comes to photography. With that said lets get started.
WHAT TO DO WITH YOUR CAMERA (Settings):
Check your owner's manual for all of these features as they are good basic settings for most any camera...
File Size and Quality: This needs to be addressed first and foremost. Make absolutely sure you're shooting at the absolute highest file size and the absolute highest possible quality. If it doesn't offer you many pictures, get a bigger memory card. This is something alot of people miss and without the quality, no matter what else you do, your pictures will not look good.
Shooting Mode: Aperture Priority. Set the aperture (sometimes refered to as f-stop) to lowest possible numerical value. This creates the in-focus subject and slightly out-of-focus background, or a shallower depth of field (DOF). The camera will automatically adjust shutter speed to properly expose the picture according to the camera's internal light meter from here.
ISO: Set this to the lowest numerical value possible. Anywhere between 50-200 will work well to begin with.
White Balance: Auto is always a safe bet, but playing with this never hurts. Experiment if you'd like and see how it effects the end result. Its always good practice that when you first start shooting in any light to try auto, daylight, and cloudy/shade. When the light changes dramatically or you go to a new location play with the white balance again.
Flash: CUT IT OFF! No camera's built-in flash is adequate enough to evenly and properly light a car no matter the lighting (yes, even if you're using it as a fill-flash in daylight it's still not up to the task). Circumstances where the flash is useful are very few and very far between (I've taken thousands of pictures of cars and I dont think I've ever turned out a picture I was proud of where I used the camera's built-in flash). If its dark enough to need a flash just to light the subject, you need to adjust the exposure accordingly through shooting in fully manual mode, not through a built-in flash.
Exposure Value (EV): Dont adjust this now, but make yourself familiar with it. Once you get out there and start shooting, review the image and if it looks to light or dark this is what you can adjust without touching anything else to make things easier on you. If the picture is too dark, adjust the EV to the positive side a bit and shoot again. If its too bright adjust the EV lower and shoot again. If you get the other basic settings down, then get your white balance set on the first few shots to see which looks best in the light you're shooting in, this will be the only thing you need to adjust as you continue to shoot at a location to try to get the best quality pictures.
WHEN TO SHOOT (Lighting):
Lighting is the most critical element of capturing a good picture. Maybe you didn't catch that the first time so let me repeat myself. Lighting is THE most critical element of capturing a good picture. Its also the one thing we cant really control (without getting strobes, soft boxes, diffusers, and other complicated and expensive photography items). But we can choose what light to shoot in. You never, ever, ever want to shoot in the middle of the day under harsh daylight. For beginners the easiest times to shoot are early in the morning just after sunrise (you get more useable light than before sunset), in a completely shaded area, or preferably on a heavily overcast day when the light is more diffused. The most critical thing is to have the car well lit, so you generally dont want to be shooting at dusk, but without the light being so harsh that it screws with your colors and blows out your highlights.
Everyone loves to spend all morning cleaning up their car then go out and snap pictures. That harsh afternoon light washed out colors, creates harsh shadows, and freaks your camera's internal light meter out completely. When it's that nice out forget the pictures, grab your keys instead of your camera, and go cruising... perhaps to scout out some locations for taking some pictures later when the lighting is better.
WHERE TO SHOOT (Location):
There are places to take picture everywhere. You can find a lot of good locations by driving around the backside of your local Sam's, Home Depot, etc. Just keep your eyes open. You dont want backgrounds that are too busy. Keep things simple. Alot of times if you're just trying to get a good picture of your car find a solid colored brick wall to shoot against. Pay attention to pictures you see in magazines and what backdrops they use.
HOW TO SHOOT (Composition):
Now that you have good camera settings, are working in good light, and at a good location it's time to work on your composition. This is where thinking comes into photography. What you're trying to do with your composition is to create a picture that is visually interesting. Photography is about the artist displaying a point of view that the viewers may not normally be accustom to seeing. This makes pictures interesting. First and foremost lets talk about the position of the car within the frame.
http://digital-photography-school.co...ule-of-thirds/
Now that you understand how to place the vehicle within the frame, its time to position the car where you want it in relation to the backdrop and start snapping. Generally speaking front and rear quarter shots show cars off well. Tire tread isn't interesting so make sure your wheels are straight or turned where the face of the wheel is facing the camera. Lower angles tend to work well also. Try kneeling, squatting, or even laying on the ground to take your shots. If you have a step ladder or can use some of your surroundings to climb on top of to get a higher angle do so. Taking pictures at standing height is boring because thats how we see cars every day. Use your photography to present a more artistic, interesting vantage point.
The most important thing is to pay attention to everything within the frame. Dont use the display to frame your shot. Looking through the camera properly forces you to pay more attention to everything you see within the frame. Make sure your shadow isn't in the picture. Make sure there are no light poles or trees directly behind the car as it detracts from the car and distracts the eye to them instead of your subject. Watch for things laying on the ground around the car. You dont want any distractions. There is no set rule to composing a proper shot, it's something you're going to have to experiment with and refine on your own. Again, pay attention to other pictures you see and like and use them to get ideas from.
The most important thing is to truly think about the pictures you're taking with a goal in mind. Dont just start snapping and hope to get a good shot. You need to think about what you want the end result to look like.
TIPS AND TRICKS:
Keeping the camera steady is key in making sure your pictures are sharp and in focus. Compose your shot, take a deep breathe in, breathe out slowly and smoothly and press the shutter button. If you just cant get a sharp shot pick up a tripod. You can get them cheap online or at your local camera shop. Most people never think to get one because they think they dont need one or that they are too expensive. If your shots are suffering, $20 or $30 for an affordable, quality tripod with a decent level of adjustment is priceless. No matter how steady of a hand you have it'll never be as steady as a stable tripod.
Angles and tilting the camera can help to create more interesting images, but everything in moderation. You dont want people needing a chiropractic alignment after looking at your pictures because they had to tilt their head see what you were taking a picture of.
Filters can do wonders for your photography. Circular polarizers are considered a must when shooting automotive photography in natural light and outside of a studio setting. If you have a dSLR pick up a circular polarizer for it immediately and try adjusting it as you shoot to see how it effects the color of the car and the reflections on the glass. If you're shooting with a point-and-shoot and have a pair of sunglasses with polarized lenses hold one of the lenses over the front of the camera's lens for a similar effect.
Last edited by josh99ta; 05-10-2007 at 12:26 AM.
05-09-2007, 09:53 PM
#106
Sold The Fun Stuff :(
Thread Starter
iTrader: (1)
Join Date: Nov 2001
Location: Nashville, TN
Posts: 2,371
Likes: 0
Received 0 Likes
on
0 Posts
WHAT TO DO WITH YOUR PICTURES (Post-processing):
Just like how cameras dont take good pictures by themselves, good pictures dont "photoshop" themselves either. Work is involved but putting a little in can get a lot out of your already solid photographs. No decent picture in any reputable magazine got put in there straight out of a camera. There is a reason models are airbrushed and there is a reason photographs are edited and touched up. Photography is just like painting cars. A good, solid photograph straight from the camera is a lot like a quality basecoat on a car. You can definitely see that there is quality there, but you wont really see the true "shine" and "gloss" until the clear coat, or in this case the post-processing, it added. So now that you understand that you'll need to do some work after the pictures have been captured lets get started.
Editing Program: Adobe Photoshop is king and if you purchase it or have access to it most of your guides online and most users who you can get input from use it as well so it'll make life easier if you have it. If you dont though there are freeware programs available. Programs like "The GIMP" have all the same tools that Photoshop utilizes, you just go about using those tools in a slightly different manner depending on what you're trying to do. If you dont have Photoshop, go to http://www.gimp.org/ and download the latest version of The GIMP. Now that we have the means to process the pictures lets cover some basic editing processes.
First and foremost you need to decide whether you want to crop the image at all. You want your composition as close as possible out of the camera but this is where you fine tune it. Remember the rule of thirds and pay attention to your overall composition in this step. If your initial composition is solid you may not have to crop at all.
Next, you need to resize the image. You dont want to do any exposure or color management until the image has been resized to its final size because if you do this at the full size then downsize it you run into quality loss. Choose the size you want the picture to be and resize it.
Now that you have your composition and image size set, I could write out some basic adjustments but its easier if you actually see whats going on in each step so go here and read this...
http://tutiki.nikoncafe.com/w/index....to_Adjustments
IMPORTANT NOTE: Sharpening is the absolute last thing you need to do when editing photos as you want the photo to be done before sharpening to avoid your adjustments affecting the image causing it to be oversharpened and/or adding noise (visible as grainy looking areas in pictures). You may also want to play with the Brightness/Contrast adjustment as well. Again, less is more here and you only want to add a little if you do because it degrades the overall quality of the image. Once you have all your basic adjustments taken care of, do your sharpening and you're done. If you want to add a border you can do so at this point.
Adding a basic border in Photoshop: Select the rectangular marquee tool, mouse over the image, and hit Ctrl+A to "Select All." Right click the image, go to Stroke, and set your pixel width and color.
Adding a basic border in The GIMP: Go to Script-Fu, Decor, Add Border. Set your pixel values for the height and width of the border, select your color, and select your value (a value of 1 will make a black border solid black whereas a higher value will make it more transparent).
Now all you need to do is upload and post your pictures. Be aware of your host and if they resize the pictures or not. I'm a big fan of Imageshack as you dont need an account to upload pictures (but you can create one to store the pictures and go back to them later), they offer plenty of bandwidth, and they do not resize the pictures. Photobucket is another popular host but they do resize pictures and it can really kill the quality. No matter the host you choose just make sure they aren't degrading your pictures with any resizing.
So now you have all the tips and tools at your disposal to turn out some very high quality pictures. Get out there and start sharpening your skills and techniques so you can get the most out of your pictures and be sure to post your progress as you start getting better results. While it may seem like a lot of work putting a little extra time and effort into your shots can yield some truly amazing results. I hope this helps some of you guys and I look forward to seeing your progress. Thanks for reading.
Joshua Gull (josh99ta)
USEFUL LINKS:
Another write-up with a little bit more advanced information towards the basics of car photography - http://www.mattwatkinson.com/tutorial/
A great write-up by PHR on car photography - http://www.popularhotrodding.com/fea...phr/index.html
Incredible tutorial page with a ton of good info on a number of topics - http://www.cambridgeincolour.com/tutorials.htm
Understanding photography and why its not just about the camera or "photoshopping" a picture - https://ls1tech.com/forums/showthread.php?t=702260
FORUMS DEALING WITH CAR PHOTOGRAPHY AND PLACES WHERE YOU CAN GET INPUT AND CONSTRUCTIVE CRITICISM ON IMPROVING YOUR PICTURES:
AccessPhoto - http://www.accessphoto.com/forum/index.php?showforum=10
DieselStation - http://forums.dieselstation.com/index.php?showforum=11
BOOKS ON AUTOMOTIVE PHOTOGRAPHY WORTH CHECKING OUT:
http://www.amazon.com/gp/product/076...739904?ie=UTF8
http://www.amazon.com/gp/product/185...739904?ie=UTF8
Last edited by josh99ta; 05-09-2007 at 10:27 PM.
 05-09-2007, 10:28 PM
#109
Sold The Fun Stuff :(
Thread Starter
iTrader: (1)
Join Date: Nov 2001
Location: Nashville, TN
Posts: 2,371
Likes: 0
Received 0 Likes
on
0 Posts
Originally Posted by Brian2006
Spark notes:
Duplicate the layer and create a 50% overlay
Duplicate the layer and create a 50% overlay
05-09-2007, 10:37 PM
#110
TECH Senior Member
iTrader: (42)
Join Date: Dec 2004
Location: Tomball/Nacogdoches TX
Posts: 5,064
Likes: 0
Received 0 Likes
on
0 Posts
Originally Posted by josh99ta
And do what with that 50% overlay duplicate layer? 
I'm just messing with ya. This is just what I do when I'm lazy and takes 5 seconds.


Last edited by Brian2006; 05-09-2007 at 10:46 PM.
05-10-2007, 12:04 AM
#112
Sold The Fun Stuff :(
Thread Starter
iTrader: (1)
Join Date: Nov 2001
Location: Nashville, TN
Posts: 2,371
Likes: 0
Received 0 Likes
on
0 Posts
I see how your two layers combine to get your end result, but what editing are you doing on the duplicate layer? It looks like heavy contrast and some color correction?
Keeping the same frame you're working with Brian here is what I came up with roughly following the guide I've posted...

In addition to what was in the guide here I adjusted Shadows/Highlights (0% Shadows, 37% Highlights) and my Brightness/Contrast settings were (+5/+6 respectively).
Keeping the same frame you're working with Brian here is what I came up with roughly following the guide I've posted...
In addition to what was in the guide here I adjusted Shadows/Highlights (0% Shadows, 37% Highlights) and my Brightness/Contrast settings were (+5/+6 respectively).
05-10-2007, 08:06 AM
#115

Originally Posted by VSGLS1
Sticky!
Any tips for black cars? I always have trouble getting my pictures to look the way I want in PS... Im better with a picture of another car with color, but my black car always comes out funny...
Justin
05-10-2007, 10:25 AM
#116
12 Second Club
iTrader: (1)
Join Date: Jan 2005
Location: Orlando, FL / UCF / Brussels, Belgium
Posts: 1,050
Likes: 0
Received 0 Likes
on
0 Posts
Originally Posted by ghettocruiser
X2!!! As soon as my car is off the stands Im cleanin her up, grabbing the tripod and practicing!!
Any tips for black cars? I always have trouble getting my pictures to look the way I want in PS... Im better with a picture of another car with color, but my black car always comes out funny...
Justin
Any tips for black cars? I always have trouble getting my pictures to look the way I want in PS... Im better with a picture of another car with color, but my black car always comes out funny...
Justin
whatever you do, don't take picture of a black car during daylight.
05-10-2007, 10:36 AM
#117
Damnit Josh, you are giving up all our secrets!
Good info, maybe we can create a clutter-free thread without replies and really make this stuff more simple to figure out. I know plenty of setup tricks, stuff behind the lens. Not everything you see is on the printed photo
Good info, maybe we can create a clutter-free thread without replies and really make this stuff more simple to figure out. I know plenty of setup tricks, stuff behind the lens. Not everything you see is on the printed photo
05-10-2007, 06:53 PM
#118
Sold The Fun Stuff :(
Thread Starter
iTrader: (1)
Join Date: Nov 2001
Location: Nashville, TN
Posts: 2,371
Likes: 0
Received 0 Likes
on
0 Posts
Is there anyway that stuff up above can be spliced into the first few posts of this thread so that its readily available. As it is its buried within this bigger thread. I'm all for decluttering if you mods want to do it.
05-10-2007, 09:05 PM
#119
Originally Posted by bastien
sunset, sunrise, late afternoon, overcast.
whatever you do, don't take picture of a black car during daylight.
whatever you do, don't take picture of a black car during daylight.
In the mean time, I was just messing around and practicing with PS. This pic was broad day light after a wash. Wanted some things removed in the pic. Clone stamp is friggin awesome!!
Orig. Samsung 7mp digital (cheapo).
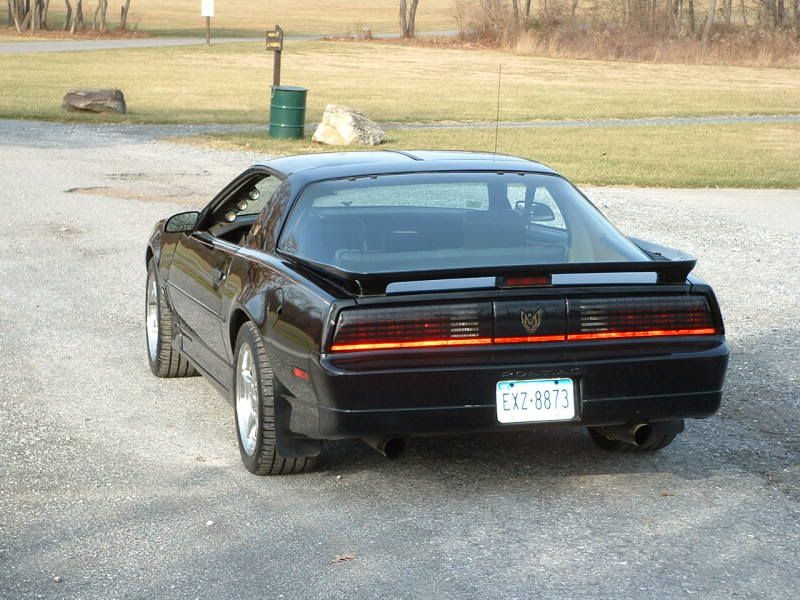
After...
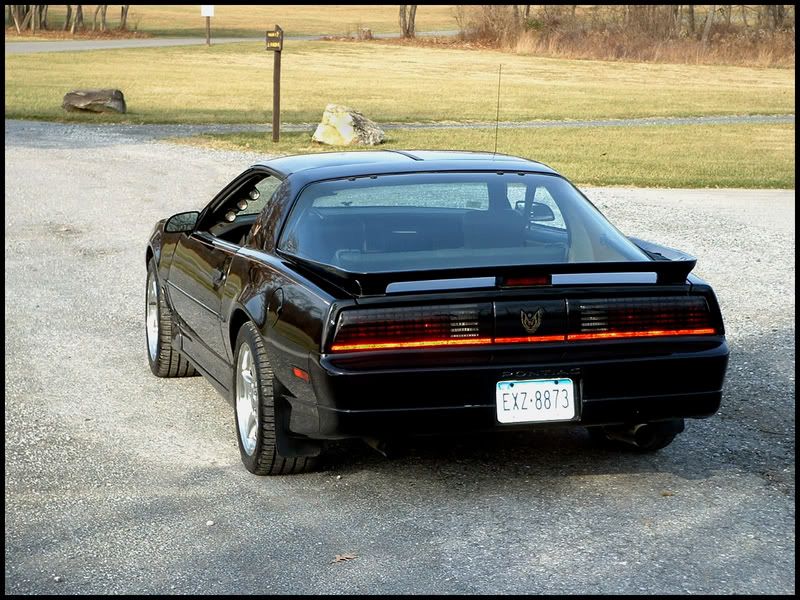
I know it isnt anything spectacular...but I was just happy to learn what I did from this thread. Thanks again for the info!
Justin


