


Interior mod.
Thread Starter
TECH Fanatic


Joined: Jun 2004
Posts: 1,037
Likes: 18
From: Sweden
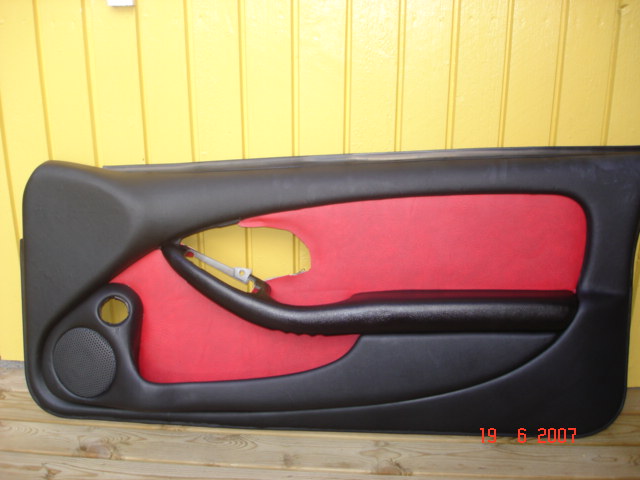
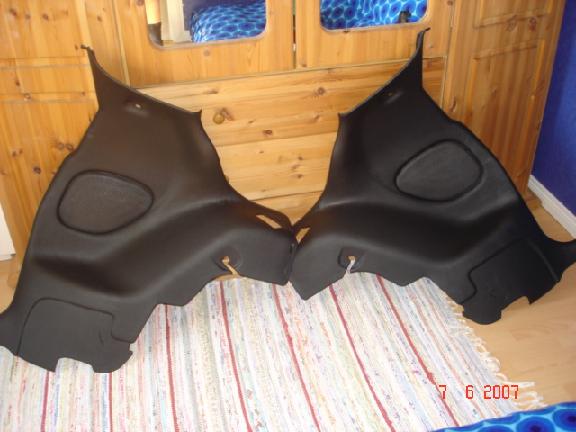
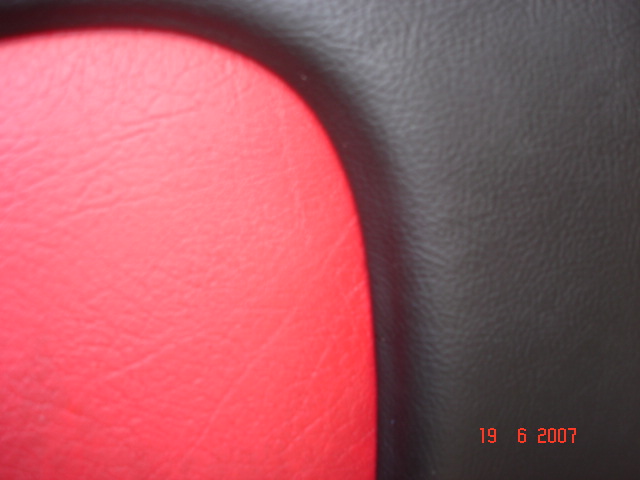
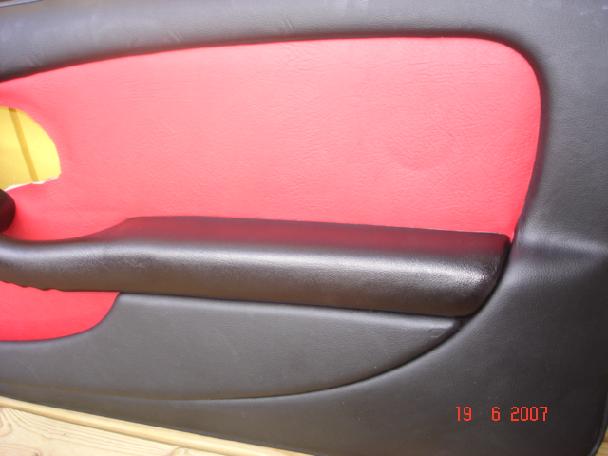
I'm trying to get rid of the cheap plastic feeling our cars have. I have wraped all panels in black vinyl. Doors are also wraped in black with center in red.
One door to go and then the rest of the panels and roof. This is a time consuming work but with some patience the result is great
What do you think?
One door to go and then the rest of the panels and roof. This is a time consuming work but with some patience the result is great
What do you think?
Last edited by vikingramair; Sep 5, 2007 at 12:41 PM.
Well heres a small write up. Because I did it so long ago. This is the way I did it
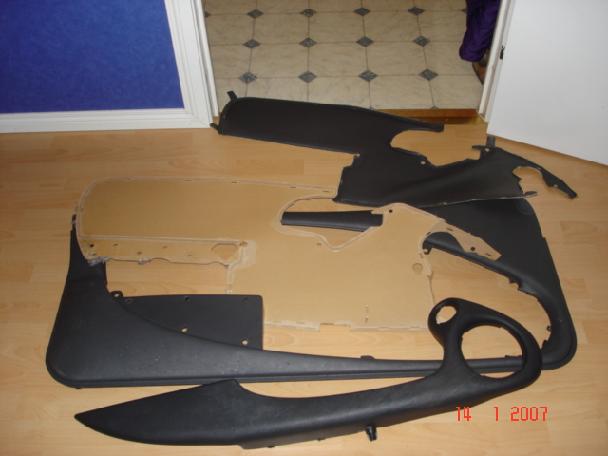
1. I removed the door panel. When you look behind it you will notice all the plastic tabs are melted. This is the first part of the removal process. What I did was took my dremel and gound off the excess plastic. You will end up with four parts. The outter panel,speaker mold/grill,armrest, and the leather/foam/carboard insert.
2. Once that is done you will then be able to remove the leather/foam/carboard.
3. Once that is removed you will seperate the perforated leather from the foam by inserting a razor on the edges and then pulling them a part.
4. Once that is complete you will use that as an template for your new insert(Leather color of your choice)
5. Lay out your leather on the backside. Now laydown your template (OEM Insert). All you have to do now is trace it out.
6. Now just cut it out and place it on the foam/carboard and make sure it fits correctly. Remember it always good to cut a little wide than to cut too short.
7. After you are happy with the placement you will have to put slits into your new insert so the leather/foam/carboard can be inserted to its OEM location.
8. Now that everything is lined up slits are in there correct place its time to glue the leather to the foam/carboard. I only use 3m products. You can purchase the 3m adhesive from the home depot.
9. Lay the leather on its backside and put a thin coat on this glue on the back of it. Let it sit just a bit so it is tacky. Once you feel its tacky enuff lay it on the foam/carboard.
10. Now with the leather on top of the foam/carboard smooth it out with your hand putting a little pressure to make sure it gets a good bond to the foam. I started from the middle and pushed any excess glue outward.
11. Now let it dry and start on the other one
Going back with it.
1. When I started putting it all back together I used industrial strength clear bonding expoxy. Every tab that I ground off I put it on there.
2. Heres were I made a trip to home depot again. I took the armrest and speaker mold so I could fit screws on the backside with washers. Sorry but I totally forgot the sizes. Once you get the correct sizes just put it all back together.
3. Make sure you let everything cure. Mine have been on my f body for 5 years and no problems.
Sorry Im so short on putting it all back together It has been 5 years since I have done this. And Im typing this off the top of my head
  Anyone doing this will understand what I am saying when they are to the point of going back together with it. You dont want to glue your armrests back on. They are sturdy now after I completed this mod. Good luck and happy modding
JMG
1. I removed the door panel. When you look behind it you will notice all the plastic tabs are melted. This is the first part of the removal process. What I did was took my dremel and gound off the excess plastic. You will end up with four parts. The outter panel,speaker mold/grill,armrest, and the leather/foam/carboard insert.
2. Once that is done you will then be able to remove the leather/foam/carboard.
3. Once that is removed you will seperate the perforated leather from the foam by inserting a razor on the edges and then pulling them a part.
4. Once that is complete you will use that as an template for your new insert(Leather color of your choice)
5. Lay out your leather on the backside. Now laydown your template (OEM Insert). All you have to do now is trace it out.
6. Now just cut it out and place it on the foam/carboard and make sure it fits correctly. Remember it always good to cut a little wide than to cut too short.
7. After you are happy with the placement you will have to put slits into your new insert so the leather/foam/carboard can be inserted to its OEM location.
8. Now that everything is lined up slits are in there correct place its time to glue the leather to the foam/carboard. I only use 3m products. You can purchase the 3m adhesive from the home depot.
9. Lay the leather on its backside and put a thin coat on this glue on the back of it. Let it sit just a bit so it is tacky. Once you feel its tacky enuff lay it on the foam/carboard.
10. Now with the leather on top of the foam/carboard smooth it out with your hand putting a little pressure to make sure it gets a good bond to the foam. I started from the middle and pushed any excess glue outward.
11. Now let it dry and start on the other one
Going back with it.
1. When I started putting it all back together I used industrial strength clear bonding expoxy. Every tab that I ground off I put it on there.
2. Heres were I made a trip to home depot again. I took the armrest and speaker mold so I could fit screws on the backside with washers. Sorry but I totally forgot the sizes. Once you get the correct sizes just put it all back together.
3. Make sure you let everything cure. Mine have been on my f body for 5 years and no problems.
Sorry Im so short on putting it all back together
It has been 5 years since I have done this. And Im typing this off the top of my head Anyone doing this will understand what I am saying when they are to the point of going back together with it. You dont want to glue your armrests back on. They are sturdy now after I completed this mod. Good luck and happy moddingJMG
Last edited by JMBLOWNWS6; Jun 19, 2007 at 03:44 AM.
Trending Topics
kick *** man...now to the original poster...how did you do the rest of the pannels? just lay down glue and then press the vinyl onto the pannels? how much vinyl did you use?
what did you do about the dash? when do we get pics of the whole interior put back together?
what did you do about the dash? when do we get pics of the whole interior put back together?
LS1 Tech Stories
The Best V8 Stories One Small Block at Time

Topdon ONE vs. Artidiag 800 BT2: Which is the Diagnostic Tablet For You?
Pouria Savadkouei
Gas Monkey Built a 6-Wheel Ferrari Testarossa With a Corvette LT4 Engine
Verdad Gallardo
7 Most Reliable High-Performance Engines GM Has Ever Built
Verdad Gallardo
Amazing '71 Camaro Restomod Is Modern Muscle Car Under the Skin
Verdad Gallardo
6 Common C5 Corvette Failures and What's Involved In Repairing Them
Pouria Savadkouei
Retro Modern Bandit Pontiac Trans AM Comes With Burt Reynolds' Autograph
Verdad Gallardo
Top 10 Greatest Cadillac V Series Performance Models Ever, Ranked
Pouria Savadkouei
Top 10 Most Powerful Chevy Trucks Ever Made!

Hennessey's New Supercharged Silverado ZR2 Has 700 HP
Verdad Gallardo
Originally Posted by navymitch12
kick *** man...now to the original poster...how did you do the rest of the pannels? just lay down glue and then press the vinyl onto the pannels? how much vinyl did you use?
what did you do about the dash? when do we get pics of the whole interior put back together?
what did you do about the dash? when do we get pics of the whole interior put back together?
Thread Starter
TECH Fanatic
Joined: Jun 2004
Posts: 1,037
Likes: 18
From: Sweden
APOLOGIES FOR MY POOR ENGLISH (since my native tongue is Swedish)
First, i forgot to say the door armrest are actually sprayed with black vinyl paint.
Ok, I’m trying to do a write up for the panels. ( Writeup for the door take a look at JMBLOWNWS6 it's good)
Tools:
Heatgun (hair-dryer),screw clamp atleast 2 , sandpaper, cutting pliers, scalpel or a really sharp knife, something to clean the panel. Glue, 3M fastbond &spray 74 (simply the best.)
Preparation:
Use sandpaper to rough the panel, and then clean it.
Material:
Super stretch vinyl the black one & normal vinyl for the red part. Advantage of using vinyl instead of real leather is that vinyl is much more flexible, it is more easy to form, stretch and work with, the look is the same minus the nice real leather smell L
Cut much larger piece of the vinyl than the actually panel is, just to be on the safety side. I would say 10” more in every direction.
Decide where you want to begin, I prefer to not do the whole panel at once instead I start with one side and work me around.
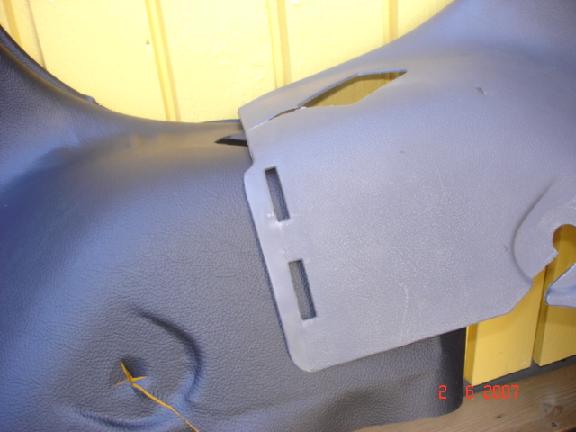
Apply 3M-fastbond glue to both surfaces. Wait for at least 4-5 hour before you start the assembling. Lay down the vinyl over the panel where you have covered it with glue. Heat(caution do not over heat) the vinyl up; it will be soft and very stretchy. Stretch out the vinyl over the panel
And work it out by pressing vinyl to panel. Be very patient and work slowly. You need to work out every hole and deep areas to get the texture. When the front side is completed you need to wrap the vinyl on the opposite side of the panel and fix it. I used the spray glue 3M 74 for this occasion. What you need to have all time is glue & heat.

First, i forgot to say the door armrest are actually sprayed with black vinyl paint.
Ok, I’m trying to do a write up for the panels. ( Writeup for the door take a look at JMBLOWNWS6 it's good)
Tools:
Heatgun (hair-dryer),screw clamp atleast 2 , sandpaper, cutting pliers, scalpel or a really sharp knife, something to clean the panel. Glue, 3M fastbond &spray 74 (simply the best.)
Preparation:
Use sandpaper to rough the panel, and then clean it.
Material:
Super stretch vinyl the black one & normal vinyl for the red part. Advantage of using vinyl instead of real leather is that vinyl is much more flexible, it is more easy to form, stretch and work with, the look is the same minus the nice real leather smell L
Cut much larger piece of the vinyl than the actually panel is, just to be on the safety side. I would say 10” more in every direction.
Decide where you want to begin, I prefer to not do the whole panel at once instead I start with one side and work me around.
Apply 3M-fastbond glue to both surfaces. Wait for at least 4-5 hour before you start the assembling. Lay down the vinyl over the panel where you have covered it with glue. Heat(caution do not over heat) the vinyl up; it will be soft and very stretchy. Stretch out the vinyl over the panel
And work it out by pressing vinyl to panel. Be very patient and work slowly. You need to work out every hole and deep areas to get the texture. When the front side is completed you need to wrap the vinyl on the opposite side of the panel and fix it. I used the spray glue 3M 74 for this occasion. What you need to have all time is glue & heat.
Last edited by vikingramair; Dec 31, 2007 at 04:31 AM.

Copy & Paste Moderator
Joined: Apr 2002
Posts: 9,764
Likes: 208
From: Eastern MA
That Looks Great! 
I have the cloth interior and replaced the black cloth in the door panels with silver stock-like cloth that I got at a fabric store for $5 or $6 a yard. I bought 4 yards (in case of mistakes and to have left over) and only used about half.
Here is the write-up I followed to do the silver inserts in my door panels:
http://www.lastofthebreed.com/Instal.../DoorPanel.htm
Except that instead of re-melting the posts, I used a blob of LockTite Plastic Epoxy on each post and kept some pressure/weight on the panel to hold it together untill the epoxy hardened. I didn't use contact cement for the whole thing either, only the edges that get folded over so that I didn't get any glue bleeding through the cloth. I used some "carpet tape" also around the edge that doesnt get folded over to help hold things in place.
I also covered the center console lid in the same silver cloth.
Sorry, no pictures.
