Got my Hillco bolt kit in the mail

 08-07-2007, 11:47 AM
#22
Originally Posted by Cheetoh
The Hillco Bolts are Very, Very Expensive, I have a Set on My GTX that Has the Pontiac Logo From Hillco, Ended Up being Very Expensive, But it is about the Only lace that You Can Get Bolts with the Pontiac Logo on them.
08-07-2007, 11:49 AM
#23

I mean.. if you are gonna go straight out all show I guess the price is worth it.. I just hate to spend 200-400 dollars on BOLTS. But if it means first place or second place.. I guess it is worth it.
The "last" piece per-say I guess.
The "last" piece per-say I guess.
08-07-2007, 11:58 AM
#24
TECH Addict
iTrader: (61)
Join Date: Mar 2002
Location: USA
Posts: 2,304
Likes: 0
Received 0 Likes
on
0 Posts

But if it means first place or second place.. I guess it is worth it.
All BEFORE the Hillco kit was installed (just last week). Course, like I stated, I already had removed ALL the factory bolts in the engine bay & any you can see on the engine, and had them chromed over the winter years ago. Cost thru my plater was between $1 and $3.50/ea bolt depending on size and whether there was a captive washer involved).
I'll try and get some pics of engine bay with Hillco kit - if they'll come out in the garage since it's raining again...
-Jay-
08-07-2007, 12:02 PM
#25
TECH Addict
iTrader: (61)
Join Date: Mar 2002
Location: USA
Posts: 2,304
Likes: 0
Received 0 Likes
on
0 Posts
SpdFrk1990 - not tryin to throw a wet blanket on your post - just wanted to give ya some insight on how to install.
I'm sure you'll be happy with the outcome - and I just got lucky to pick up a slightly used kit FS from a member for that price
I'm sure you'll be happy with the outcome - and I just got lucky to pick up a slightly used kit FS from a member for that price
08-07-2007, 12:08 PM
#26

No prob I actually stayed up and got them installed last night and it looks amazing. I had that same problem you were talkin about so it took awhile. With no directions you have to lay everything out and figure what goes where. Only time I had a problem was with the hood kit. You dont know where to use what nuts on what bolts and so on but I got it figured out. Pics will come soon I think it made a huge difference...
Edit: Im also very glad I got the billet spacers cause they look perfect with my setup. Only thing I need now are either polished valve covers or painted w/ frc's.
Edit: Im also very glad I got the billet spacers cause they look perfect with my setup. Only thing I need now are either polished valve covers or painted w/ frc's.
Last edited by SpdFrk1990; 08-07-2007 at 12:55 PM.
08-07-2007, 01:10 PM
#27
FormerVendor
iTrader: (15)

Join Date: Jun 2006
Location: Los Angeles, CA
Posts: 2,689
Likes: 0
Received 0 Likes
on
0 Posts
Originally Posted by 1QUIKWS6
I got my complete Hillco Kit with red beauty washers from a member for $60. Nice kit - but the one thing you will find that is a PITA, is that all the insert washers have a hole much bigger than the bolt that is going thru them.
When you install; you have to try and align the beauty washer so that the bolt head is perfectly centered in the washer combo - fairly hard to do since the washer combo wants to spin off center as you tighten the bolt
I would tighten the bolt down just tight enough so the washer was starting to tighten up, tap the washer combo to get it centered under the bolt head, then try and hold it in place with fingers as I gradually tighten the bolt the rest of the way.
Made the install take 2X as long as it should have...
If you just go ahead and tighten the bolt as you would any other - all the washer combos will twist off center and look like ****.
Glad I didn't pay the full price from Hillco, as for that amount of $$ you would think they could use washers that fit the bolt tightly to alleviate this problem.
-Jay-
We ream out every washer in our polished stainless bolt kits to fit snugly around the bolt so you don't have to deal w/ trying to get the bolt centered in the washer (which is a major pain, I know). Our bolt kits also come with easy to install directions and are available for Camaro's and Firebirds.
Camaro bolt kit: http://store.specializedstainless.co...t/Detail?no=80
Firebird bolt kit: http://store.specializedstainless.co...t/Detail?no=82
Not trying to clog up your thread, just trying to give other members an alternative that only costs $100 and looks just as good IMHO
And I never understood why they give the machine head screws for the throttle body & MAF but the rest are button head? Or why they keep the plastic fasteners for the bumper support?
08-07-2007, 01:21 PM
#29
Originally Posted by toofazt
We ream out every washer in our polished stainless bolt kits to fit snugly around the bolt so you don't have to deal w/ trying to get the bolt centered in the washer (which is a major pain, I know).
 I reamed a few out, but that is not an optimal solution with already chrome plated washers. Dealing with the oversized ones is definitely a little annoying.
  08-07-2007, 09:22 PM
#35
Originally Posted by travisnd
Fyi........$646.03
08-07-2007, 09:30 PM
#36
TECH Enthusiast
iTrader: (3)
Join Date: Mar 2004
Location: Berkley, MI
Posts: 577
Likes: 0
Received 0 Likes
on
0 Posts

Originally Posted by SpdFrk1990
Heres a little preview ill get more shots this weekend.
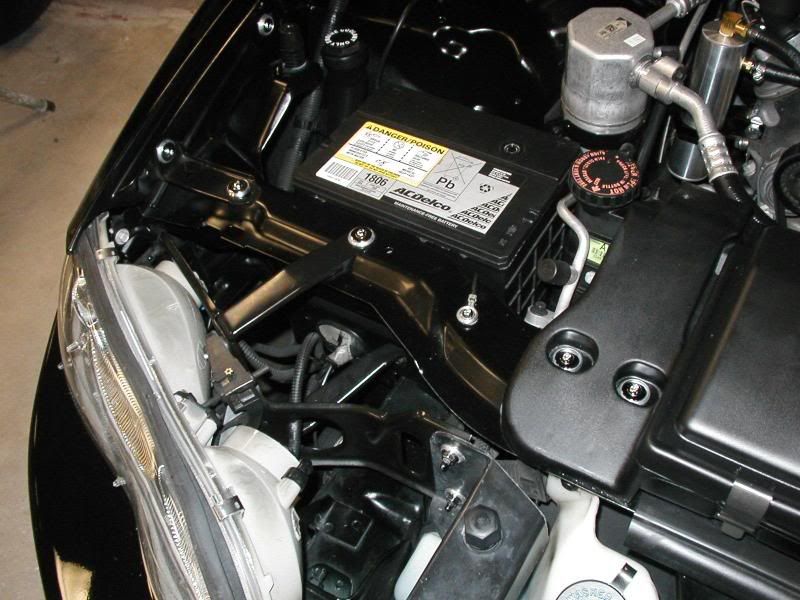
Damn all you guys with your perfect engine bays, I don't even know why I bother looking at these threads, it just ends up pissing me off, lol.
Good job guys, way to keep raising the bar!!
08-07-2007, 09:40 PM
#37
I still got alot of things I want to do but im slowly getting there. Polished caps for the washer bottle, radiator, mc. Polished or painted valve covers, a/c drier, and get all the rest of the bolts plated or polished. Possibly the wire mod too and I think ill be done then. I was so glad to get rid of the crappy looking bolts for the hood the new ones look a ton better.
