
JasonWW's More Unique Mods


 09-05-2008 | 03:11 AM
#45
Thread Starter
TECH Senior Member
iTrader: (2)
Joined: Sep 2004
Posts: 6,814
Likes: 3
From: Hou. TX.
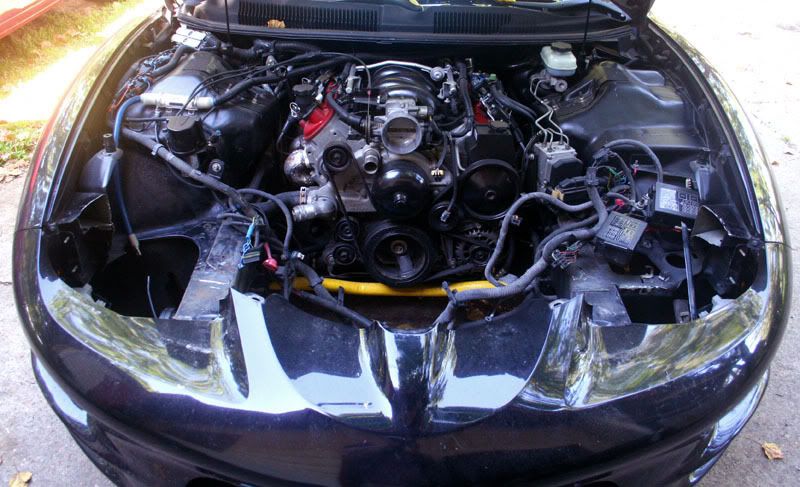
I just did that to make it easier to stand inside the engine bay to change the plugs! 
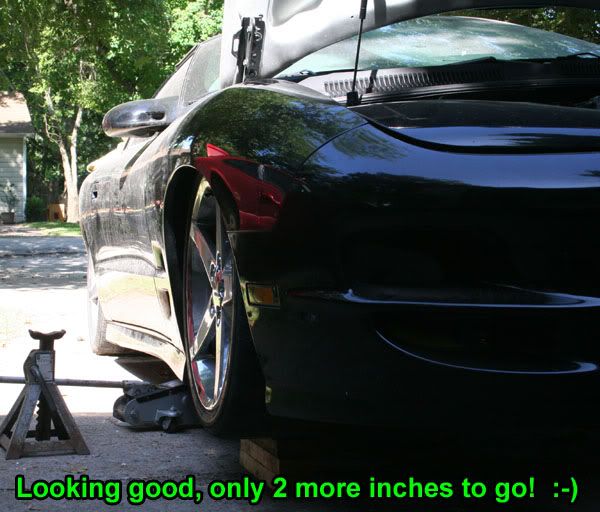
Just kidding. Well, sorta. I'm fabbing a 11x31 3" thick radiator to mount in the nose. The front wheel wells will also be raised and tubbed. This also gives me more depth for my projector headlights.
I may also replace all the front sheet metal and tube it. I've got a lot of ideas. Since I made up my mind about a few of them, I'm updating a few of my older threads. Check them out.
Last edited by JasonWW; 09-05-2008 at 03:22 AM.
09-05-2008 | 03:53 AM
#46

On The Tree
iTrader: (4)
Joined: Feb 2007
Posts: 130
Likes: 0
From: North Ridgeville (suburbs of cleveland) Ohio
cool deal. I bought my Red WS6 with a carputer in it. 7 inch screen with relocated controls and all that. Its sitting in my garage with computer, all the USB cables and what not, and even the screen. Would you want to buy it?
09-05-2008 | 04:01 AM
#47
Thread Starter
TECH Senior Member
iTrader: (2)
Joined: Sep 2004
Posts: 6,814
Likes: 3
From: Hou. TX.
I got an Alpine double DIN touch screen unit. It always works.
Do you know the guy who installed it?
He may be in my F-body thread in my sig.
09-30-2008 | 02:58 AM
#48

Staging Lane
Joined: Jul 2007
Posts: 67
Likes: 0
From: Arizona, for now
how about using a vacuum dashpot to open the cutouts at WOT? if you wanted to, you could wire up a switch to a solenoid, and simply cut vacuum off to the dashpots, instant open. no button holding required. thank me later :p
10-08-2008 | 10:11 AM
#50
Thread Starter
TECH Senior Member
iTrader: (2)
Joined: Sep 2004
Posts: 6,814
Likes: 3
From: Hou. TX.
Another finished mod to toss in here.
Modifying Your Front Upper Shock Mount for more suspension travel, a smoother ride and more cornering grip.
Tucking 285's.
Modifying Your Front Upper Shock Mount for more suspension travel, a smoother ride and more cornering grip.
Tucking 285's.
Last edited by JasonWW; 10-08-2008 at 10:17 AM.
 10-09-2008 | 09:55 AM
#54

so how did you get the headlight switch to light up? All I saw in this thread was that you got it to light up and one other member pm'd you about it. I'd like to do the same to mine!!
 10-09-2008 | 10:42 AM
#56
Thread Starter
TECH Senior Member
iTrader: (2)
Joined: Sep 2004
Posts: 6,814
Likes: 3
From: Hou. TX.
I don't want your money, I just need to sleep more.  I'm tired.
I added links to the write-ups I did for both those mods. Just go pack to page 1. I described how I did it twice now. I forgot I had written it down a few years ago. So I'll just toss this in right here. The part number for the **** is in the AC **** thread. All 4 ***** are the same part number.
I usaully take pictures of the stuff I do, but this was back when I didn't have a camera. I think the hole I drilled was near the bottom. Maybe at 5 o'clock. The big cavity in the **** for the LED to fit in is on the top. I wrapped the wires around the right side of the shaft so that when you turn the switch clockwise they develop slack. When you turn it back off, the slack is gone. The back side of the **** is fairly shallow, so there is room for thin wires to move around. Make sure you use thin, light guage wires.
I'm tired.I added links to the write-ups I did for both those mods. Just go pack to page 1. I described how I did it twice now. I forgot I had written it down a few years ago. So I'll just toss this in right here. The part number for the **** is in the AC **** thread. All 4 ***** are the same part number.
First you have to swap the **** to one that is translucent like the AC ***** I switched to. Then get you a 12v red led (or lower voltage plus a resistor) and wire it to an ignition source. That way it will light up when you crank the car. Then I drilled a hole behind the **** and ran the wiring through. I used some hot glue to hold the led in a cavity in the backside of the ****. The wires move when you turn the ****, but it's ok.
Swaping the **** is the hardest part because you have to shorten the shaft. I removed a section from the middle and superglued it back together.
Swaping the **** is the hardest part because you have to shorten the shaft. I removed a section from the middle and superglued it back together.
Last edited by JasonWW; 10-09-2008 at 10:50 AM.
