
**Specialized Stainless Camaro Build**


Thread Starter
FormerVendor
iTrader: (15)
Joined: Jun 2006
Posts: 2,689
Likes: 0
From: Los Angeles, CA
55LBS... Considering every 100LBS saves you 1/10th second at the track, it isn't even noticeable. Plus the weight is evenly distributed around the car.


Great thread, can you please explain a bit more about the materials you used for sound deadening, and the procedure of installation?
I've been toying with the Idea for a while since I dropped the go fast plan, and this thread is a great encouragement.
Please excuse my ignorance but I have zero experience in this.
I've been toying with the Idea for a while since I dropped the go fast plan, and this thread is a great encouragement.
Please excuse my ignorance but I have zero experience in this.
Like said before, great thread. You know I like these kind of projects. You can learn alot and get tons of new ideas. So far, looks like your going about the project with every detail in mind, I like that. May take some time, but in the end it turns out a winner.
Question for ya, how do you remove the door panels? I need to replace the speakers.
Definetly will be watching your progress. Good luck and keep the pics comming.
So far, looks like your going about the project with every detail in mind, I like that. May take some time, but in the end it turns out a winner.Question for ya, how do you remove the door panels? I need to replace the speakers.
Definetly will be watching your progress. Good luck and keep the pics comming.


Thread Starter
FormerVendor
iTrader: (15)
Joined: Jun 2006
Posts: 2,689
Likes: 0
From: Los Angeles, CA
If I didn't reply, send it again.
Check out post #52, I list and have pics of the materials used. I don't have time for a write up right now... I may be doing a write up for Camaro Performers Magazine so I'll let you know if that goes through...
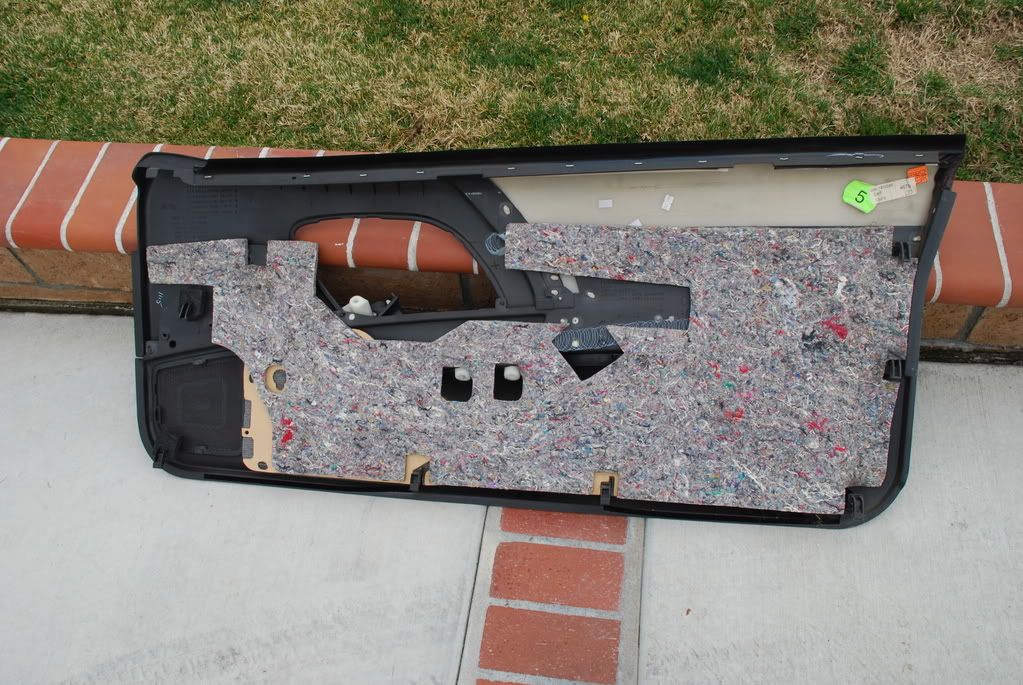
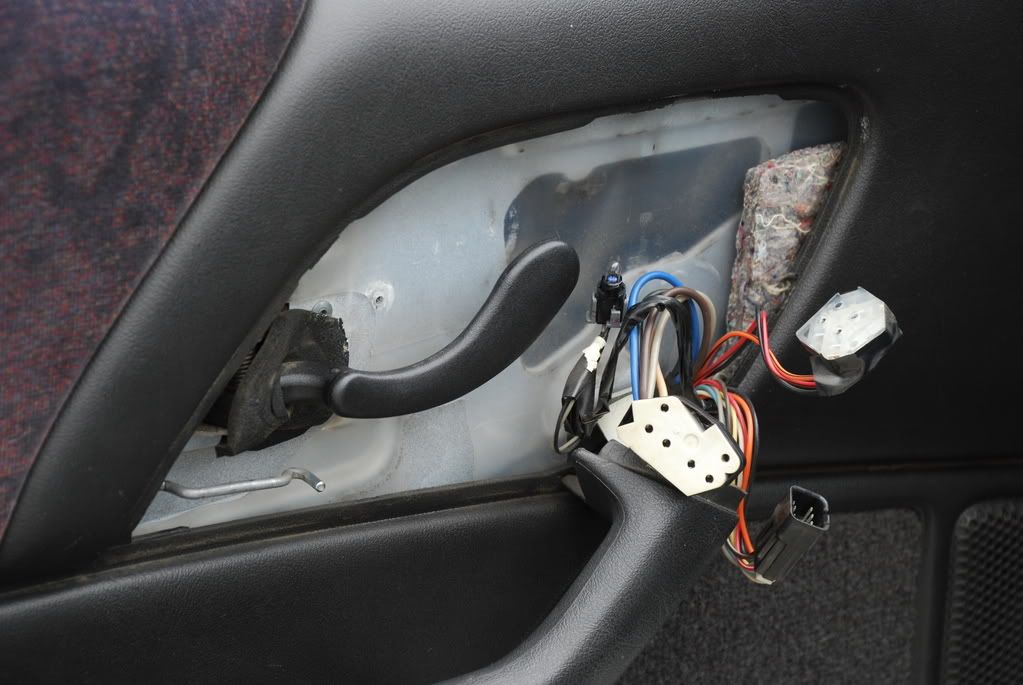
The door panels come off easily. Remove the accessories bezel w/ two screws & unplug the buttons, the light removes by twisting 90� and the plastic lock slide pops off the steel rod. Then remove the 3 screws from the door panel. Lift up on the outside of the door first, then the inside and it will come unhooked. Here's a picture of the backside of the door panel and behind the bezel so you can get a visual:
Great thread, can you please explain a bit more about the materials you used for sound deadening, and the procedure of installation?
I've been toying with the Idea for a while since I dropped the go fast plan, and this thread is a great encouragement.
Please excuse my ignorance but I have zero experience in this.
I've been toying with the Idea for a while since I dropped the go fast plan, and this thread is a great encouragement.
Please excuse my ignorance but I have zero experience in this.
Like said before, great thread. You know I like these kind of projects. You can learn alot and get tons of new ideas. So far, looks like your going about the project with every detail in mind, I like that. May take some time, but in the end it turns out a winner.
Question for ya, how do you remove the door panels? I need to replace the speakers.
Definetly will be watching your progress. Good luck and keep the pics comming.
So far, looks like your going about the project with every detail in mind, I like that. May take some time, but in the end it turns out a winner.Question for ya, how do you remove the door panels? I need to replace the speakers.
Definetly will be watching your progress. Good luck and keep the pics comming.

If I didn't reply, send it again.
Check out post #52, I list and have pics of the materials used. I don't have time for a write up right now... I may be doing a write up for Camaro Performers Magazine so I'll let you know if that goes through...
The door panels come off easily. Remove the accessories bezel w/ two screws & unplug the buttons, the light removes by twisting 90� and the plastic lock slide pops off the steel rod. Then remove the 3 screws from the door panel. Lift up on the outside of the door first, then the inside and it will come unhooked. Here's a picture of the backside of the door panel and behind the bezel so you can get a visual:
Thanks a bunch. Totally different than I expected. Gotta love this site. This section is the best. Thanks again.

Thread Starter
FormerVendor
iTrader: (15)
Joined: Jun 2006
Posts: 2,689
Likes: 0
From: Los Angeles, CA
I'm working on the interior right now... Seats, gauges, shifter, cleaning, etc. Then suspension; lower it 1 to 1.5", stripes, possibly re-paint the hood and front bumper to get rid of rock chips, rims, calipers, tires.... the list goes on, lol
Thread Starter
FormerVendor
iTrader: (15)
Joined: Jun 2006
Posts: 2,689
Likes: 0
From: Los Angeles, CA
I got everything back together and took her for a ride. It did quiet down quite a bit and you can actually tell the difference in the video I took. Problem is, I can't get my computer to recognize the DVD-RAM disc so I can't upload it  Anyone know what the problem might be?
Anyone know what the problem might be? Last edited by SPECIALIZED STAINLESS; Feb 25, 2008 at 10:46 PM.

I got everything back together and took her for a ride. It did quite down quite a bit and you can actually tell the difference in the video I took. Problem is, I can't get my computer to recognize the DVD-RAM disc so I can't upload it Anyone know what the problem might be?
Anyone know what the problem might be?
Teching In
Joined: Dec 2006
Posts: 6
Likes: 0
BTW, You have a hard road ahead to make this one as nice as your former black car. I look forward to seeing the progress.


 .. Cant wait to see it done.
 Thread Starter
FormerVendor
iTrader: (15)
Joined: Jun 2006
Posts: 2,689
Likes: 0
From: Los Angeles, CA
It's a big enough sound decrease to justify the cost but I'm not so sure to the time. It took me about 3 full days...

